
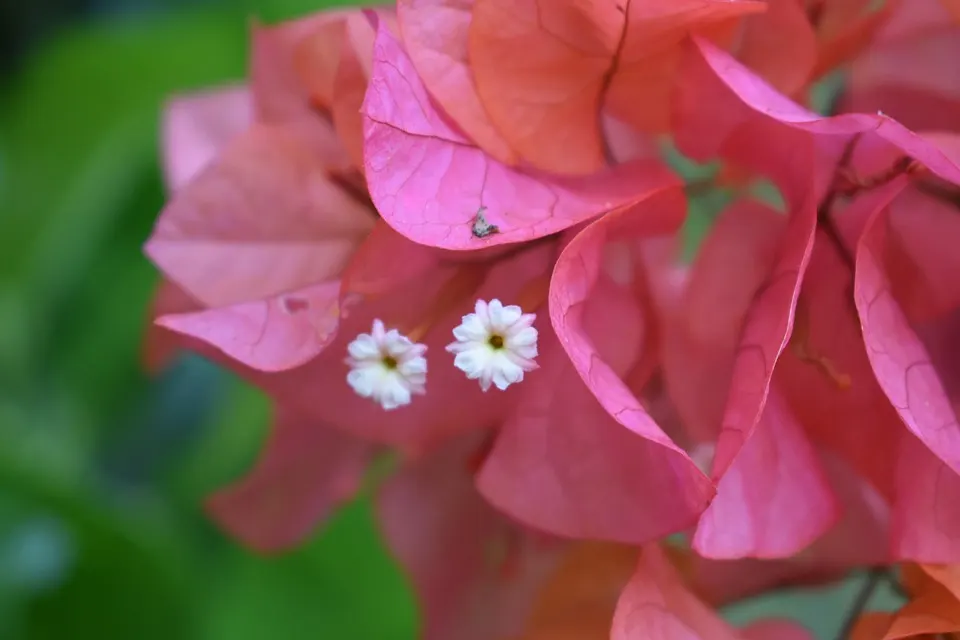
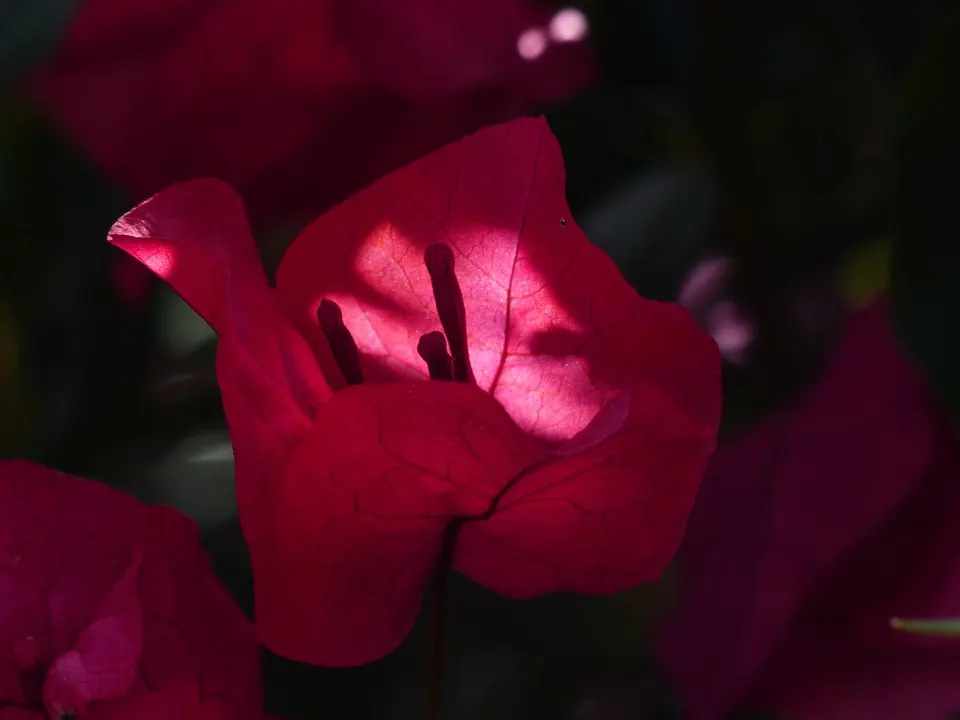
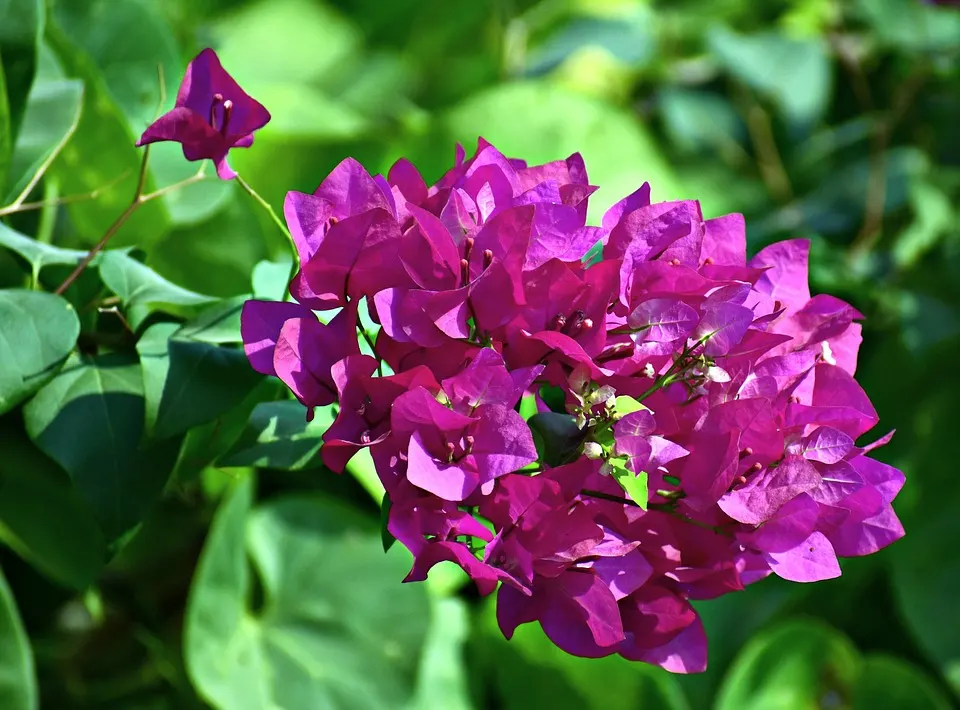
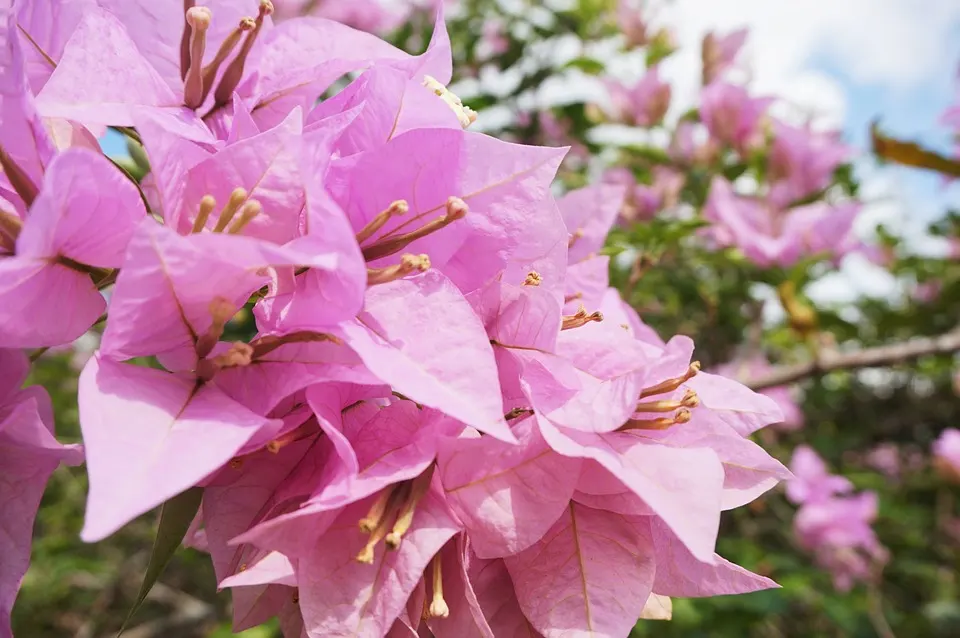
So you have an idea to make a Bougainvillea bonsai, but you have no idea where to start? We don’t blame you. It’s a beautiful tree, and the colorful bracts are stunning to behold. It makes any collection look gorgeous, no matter what time of year it is.
In this guide, we’ll show you how to prepare and make your Bougainvillea bonsai, and we’ll present some aspects you need to consider before embarking on this adventure.
Here are the topics we’ll cover:
Here are the topics we’ll cover:
Preparing for Your Bougainvillea Bonsai
Before you can make your Bougainvillea bonsai, there are some elements you need to prepare first. We also need to gauge at which level you’re at so you can adjust any of the provided steps. For the most part, we’ll deal with an established bush that you want to transform into a small tree. However, we’ll also cover some other approaches.
Propagation or Purchase?
The most significant factor in making a Bougainvillea bonsai is whether you will be purchasing or propagating your tree. If you’re buying it, are you aiming for one that’s already a bonsai or sold as an established bush in a large pot? The latter will be cheaper, but you’ll need to put in loads of time and energy to make it a bonsai. The former will cut down on time but will cost you more.
If you’re propagating a Bougainvillea bonsai, there won’t be any purchasing costs unless you include the pot, soil, and fertilizer. You can easily grow a bonsai tree from softwood cuttings, as long as you follow our detailed guide. Once you have grown some roots on it, you can follow our steps below.
Shapes and Styles
Your next preparation consideration is which style and shape you want. You can look up several resources for inspiration, such as online images, social media posts, or video guides. We also have an extensive guide on which styles will suit your Bougainvillea bonsai.
In summary, the most popular shape is the broom. You’ll grow various branches from the main trunk towards the upper foliage, increasing the ramifications to get a dense outline. The reason you want to many is to show off as many bracts and flowers in the summer. However, many people have also opted for informal upright and jin.
Bonsai Sizes
Next up, you need to decide how large you want to make your Bougainvillea bonsai. There are three main classes, the first of which is Miniature. They’re usually between 1 to 8 inches, but we don’t recommend any of the listed sizes in this category. The tree will want to spread its foliage quickly in the warmer months, so it’s best to let it for gorgeous bracts and flowers.
Next up is Medium, which is between 10 and 36 inches. We recommend the Katade-Mochi sub-class, which is up to 18 inches. You can develop a stunning Bougainvillea bonsai for this size, and it’s easy to shape and maintain. You don’t really need to go larger unless you really want to show off as a large centerpiece.
This brings us to the Large class. With the Omono/Dai, you can go as high as 48 inches, while the Hachi-Uye gives you a creative license up to 60. You can even try the Imperial subclass up to 80 inches if you want to be brave.
The choice of size is yours. Later, we will discuss choosing the right species and cultivar. You can play with various sizes when you make your Bougainvillea bonsai, but keep in mind the maintenance requirements for each one.
Pot and Soil
When you’ve made your mind up regarding the above aspects, it’s time to decide on the container and soil. For the latter, you should aim for a pH level of about 5.5 while ensuring that there are enough macro- and micronutrients for your new bonsai to thrive in the first two years.
Secondly, you need to choose the right pot shape to match the style you decided on earlier. If you’re aiming for a broom style, you can buy an oval container for the round foliage you’ll cultivate in time to come. Try to keep it shallow so the fine roots have a chance to absorb the water and nutrients more readily than with a deeper version.
Location Risk Management
Finally, take a look around the desired location for your Bougainvillea bonsai. You need to ensure that there’s enough sunlight during the day with some afternoon shade. Due to the thorns on the branches, you’ll also need to check that no children or pets can fiddle with the small tree.
Another factor is convenience. It should be easy for you to water and care for your bonsai. If the spot you’ve placed it becomes too much of a mission to get to, you’ll lose the motivation to care for it in the long run. It should be your safe haven, a place to rest from the hustle of life.
Take a walk around the location and make a list of all the potential risks. There may be some you can live with, while others may be more devastating to your bonsai tree. If you see any potential dangers, write some ideas on how you can remove them or change the settings for a safer environment.
How to Make a Bougainvillea Bonsai
Now that you’re ready, we can take a detailed look at how to make a Bougainvillea bonsai. Remember, the steps will depend on your approach as mentioned above, so you need to adjust them to apply to you. These are mostly generic steps:
- Establish the Location: With the spot for your Bougainvillea bonsai determined, it’s time to get it established. You need to make sure it has easy access to water and sunlight, and you should maintain high humidity. Ensure you take precautions against pests and pets.
- Place the Pot and Soil: You can now place the soil in the container. Make room for the roots if the tree is already established, or you can place your cutting directly into the soil with root hormone powder. Check that the substrate holds the bonsai in place securely and that it drains water quickly.
- Plant your Bougainvillea Bonsai: With the soil and pot ready, you can now insert your Bougainvillea bonsai. You’ll need to spend a week or two letting it settle in before you take any further action. It gives your tree a change to breathe from the stress.
- Prune to the Desired Style: When you’re certain the roots have settled in, you can start working on your design. Prune away any dead leaves and shoots, while also styling them as needed. Instead of using wires, you can use the clip-and-grow technique to shape it.
- Caring for your Bougainvillea: The most significant aspect is providing the proper care for your Bougainvillea bonsai. There are many factors you need to check, which are included in our detailed guide in the link. The main points are sunlight, feeding, watering, humidity, soil care, and pests.
Factors to Consider Before Making a Bougainvillea Bonsai
So you’ve seen how to make a Bougainvillea bonsai, and you’re rearing to go. We’d like you to take a moment to meditate on the following aspects before you begin. You may change your mind, depending on how motivated you are for this journey.
Long-Term Committment
Having any bonsai tree is a long-term commitment. It’s not a phase you’re going through, as they need your help to survive in the small pot you planted them in. While growing bonsais isn’t a cruel act, leaving them to die is. Don’t start making a Bougainvillea bonsai if you don’t plan on going all the way.
If you feel at some point that you can’t continue to maintain it, pass it on to family or a friend. There are plenty of eagre people that love Bougainvilleas, and you’ll certainly make someone’s day.
Thorns and Pests
Two aspects of Bougainvillea bonsais that people usually complain about are thorns and pests. The thorns are generally prickly, and they can cause skin conditions, such as irritation, swelling, and itchiness. However, you can easily prevent this situation by wearing the correct protective gear when pruning.
If you don’t take proper care of your Bougainvillea, you’ll see pests and diseases appear. You’ll need to inspect it every day for any signs of them. Should there be any infections, you can purchase an organic fungicide or pesticide to remove them. Some of them you can quickly remove by hand before they become a problem.
Climate and Dormancy
Bougainvilleas enjoy full sunshine in warm climates to mimic the conditions in South America. If you have warmth for most of the year, it will remain evergreen and present new leaves for every season. The best hardiness zones for these bonsais are 9 to 11.
Should you live outside these areas, you probably have colder winters than it’s used to. When the colder seasons arrive, you’ll notice the leaves turn yellow or fall off. It’s normal, as the tree will go into dormancy in these conditions. Only some of the species are frost-resistant, so you’ll need to bring it indoors to protect it.
Maintenance Schedules
Taking the impact of the climate in mind, you should adjust your maintenance schedules accordingly. For instance, a deciduous Bougainvillea needs ample pruning in spring when new growths appear. When it goes dormant in winter, you can work on the structure.
For an evergreen Bougainvillea, it might still go dormant in winter, but you won’t see any leaves drop. However, you may receive a second burst of flowers in late fall. You’ll need to remove any dead flowers for the healthy development of the new ones. Also, design work will be a bit trickier, as you can’t see much of the structure under the foliage.
Various Cultivars and Species
You don’t need to settle for only one species or cultivar. There are plenty of different types you can develop, with various bract colors and leave shapes. Some are more drought and frost-resistant than others, so it’s best to research the specific species you have.
If you’re worried about the thorns, you can try Miss Alice or Singapore Pink. These have no or minimal thorns, and you don’t have to worry about any skin irritations or conditions. They’re also much easier to maintain, and you’ll have an array of colors to display.
Final Thoughts
As you can see, it’s relatively easy making a Bougainvillea bonsai. Caring for it and maintaining the small tree is another matter altogether. You need the commitment, energy, and patience to pull it off. If you succeed, you’ll have a stunning bonsai you can show off to your friends and family, telling them that you designed it by yourself like a master.
Bougainvillea bonsai trees are a stunning addition to any bonsai collection, but they require specific care and techniques to achieve the desired form. Bougainvillea trees have a unique growth pattern, which makes them challenging to train and shape, but with patience and practice, you can create a beautiful bonsai tree. In this guide, we’ll explore the steps involved in making a bougainvillea bonsai tree, including selecting the right tree, pruning, wiring, and shaping.
Selecting Bougainvillea Cutting
When starting the process of creating a bougainvillea bonsai tree, it is important to select a suitable cutting from a healthy plant. Look for softwood, which is a part of the plant that isn’t brand new, but isn’t established and overly woody either. Ideal cuttings are 4 to 5 inches (10-13 cm) long and have four to six nodes on themsource.
Ensure the cutting consists of healthy and strong stems, as well as flexible and easy-to-shape branchessource. Before planting in the bonsai pot, trim the stems back to about 6 inches and remove any leaves from the cuttingsource.
After selecting the appropriate cutting, it’s recommended to use a rooting hormone to promote rapid root development. Prepare a pot with well-draining soil and dip the freshly cut end into the rooting hormone before plantingsource. This will set your bougainvillea cutting on its path to becoming a stunning bonsai tree
Preparing the Plant
Before creating a bougainvillea bonsai, it is essential to properly prepare the plant. This process involves trimming the roots, pruning the foliage, and selecting an appropriate pot. The following sections provide a step-by-step guide on how to perform each task.
Trimming Roots
The first step in preparing a bougainvillea bonsai is trimming the roots. This helps promote healthy root growth and improves the plant’s ability to absorb water and nutrients. To trim the roots, carefully remove the plant from its current container and gently shake off the excess soil. Using sharp, clean scissors or pruning shears, trim away any dead, damaged, or excessively long roots. Make sure to leave enough healthy roots to support the plant’s growth.
Pruning Foliage
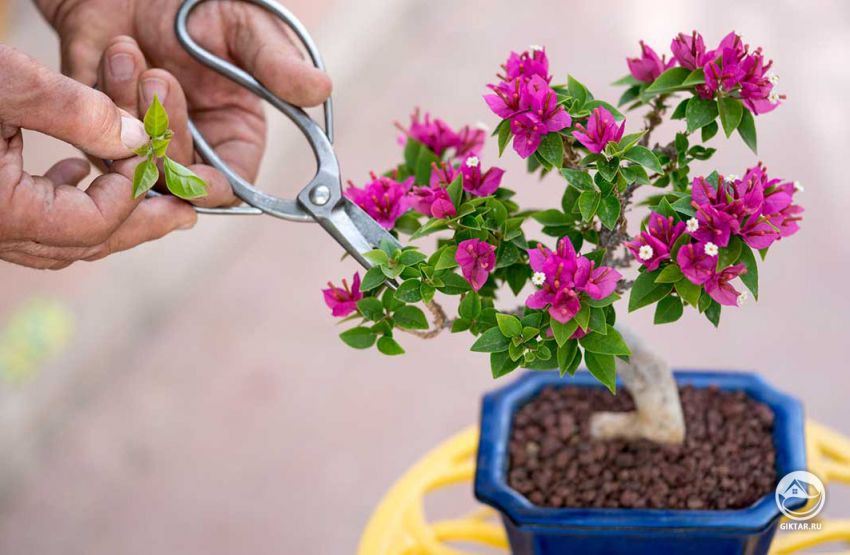
Next, prune the bougainvillea’s foliage to shape the plant and encourage branching. Start by removing any dead, diseased, or damaged branches. Then, focus on creating the desired shape by strategically pruning back branches and leaves. Remember to always use clean, sharp pruning shears to reduce the risk of infection or injury to the plant. This guide can help you understand the basics of shaping a bougainvillea bonsai.
Selecting a Pot
Lastly, choose an appropriate pot for your bougainvillea bonsai. The ideal pot should have adequate drainage holes and be slightly larger than the root ball. This allows the plant’s roots to grow and supports proper drainage. To make sure your pot has the correct dimensions and material, consider the following factors:
- Size: Select a pot that is one-third the height of the plant and slightly wider than the root ball.
- Depth: Choose a pot that is deep enough to comfortably accommodate the trimmed root system.
- Material: Opt for materials like ceramic or clay that offer good insulation and water retention properties.
By following these guidelines, you can ensure that your bougainvillea bonsai thrives in its new container.
Potting the Bougainvillea Bonsai
When potting a Bougainvillea Bonsai tree, there are several important factors to consider. This section will cover the proper soil mixture, pot placement, and wiring techniques to ensure the healthy growth and development of the bonsai.
Soil Mixture
It’s essential to use a light, airy soil mixture with good drainage for your Bougainvillea Bonsai. A possible mix includes equal parts perlite, peat moss, and sand, which provides an excellent balance of moisture retention and drainage (Love for Bonsai). Ensuring the right soil mix is important for maintaining the optimal moisture levels for your tree, preventing it from becoming soggy or drying out completely.
Pot Placement
Proper pot placement is crucial for the growth and flowering of your Bougainvillea Bonsai. These trees thrive in full sun and high temperatures, so it is best to place them outside in a sunny location during the growing season (Bonsai Empire). In autumn, move the tree to a cool room with sufficient light and maintain temperatures between 50°F (10°C) and 59°F (15°C) (Bonsai Empire).
Wiring Techniques
Wiring is an important step in shaping and maintaining the structure of your Bougainvillea Bonsai. After planting the tree and allowing it to settle for a week or two (Bonsai Alchemist), you can use wiring techniques to train the branches into your desired shape. Choose an appropriate gauge of wire for the size of the branch, and carefully wrap it around the branch without cutting into the bark. Gradually adjust the shape of the branch over time by gently bending the wired branch with the growth of the tree.
Bonsai Care and Maintenance
Caring for a bougainvillea bonsai tree requires attention to watering, fertilizing, sunlight, and temperature.
Watering
Irrigation is an essential aspect of bougainvillea bonsai care. Be sure to water the plant only when the top of the soil is dry to the touch, which could be daily during the summer, and twice a week during winter. Maintaining consistent watering habits helps the bonsai tree thrive.
Fertilizing
Fertilizing is crucial to the health and growth of a bougainvillea bonsai tree. Apply a 12-10-10 fertilizer every two weeks during the growing season, and use a 2-10-10 fertilizer during winter (Gardening Know How). By providing the necessary nutrients, the tree will produce vibrant flowers and robust foliage.
Sunlight
Bougainvillea bonsai trees require full sun and high temperatures for optimal growth and flower production. Bonsai Empire recommends placing the tree outside in a sunny spot during the growing season to ensure exposure to natural sunlight, which promotes healthy blooms.
Temperature
The bougainvillea thrives in higher temperatures but needs a cool, well-lit room during the colder months, with temperatures not below 50°F (10°C) and ideally not over 59°F (15°C) (Bonsai Empire). This temperature range encourages the best growth and flowering conditions for the bonsai tree.
Training and Shaping the Bougainvillea Bonsai
Properly training and shaping the Bougainvillea Bonsai is essential for creating an aesthetically pleasing and healthy bonsai tree. There are several techniques that can be used to achieve the desired shape, including wiring practices and pruning techniques.
Wiring Practices
Wiring is a crucial technique in shaping a Bougainvillea Bonsai, and it is advised to do so when the tree is still young, ideally around 1-2 years old. Select either copper or aluminum wire that is 1/3 to 1/2 the thickness of the branch being wired, and apply it during the warmer months when temperatures are above 65 degrees F and humidity levels are at least 50%.
Another wiring method for Bougainvillea tree shaping is known as weighting. In this technique, you tie a small string to the branch where you want it to bend and attach a light clip as a weight. The weight should be enough to encourage the branch to maintain the desired angle without causing damage.
Pruning Techniques
Pruning is another essential aspect of shaping the Bougainvillea Bonsai. Regularly trimming and removing excess growth helps to enhance and maintain the desired shape while also promoting the overall health of the tree. Focus on pruning back long, leggy branches and any dead or unhealthy parts of the plant. Careful pruning will ensure that the tree’s energy and resources are directed towards the most desirable branches, thus supporting their growth and development over time.
Common Problems and Solutions
Pests
Bougainvillea bonsai trees can be affected by pests such as aphids, mealybugs, and whiteflies. To prevent and treat these infestations, consider using insecticidal soap, neem oil or horticultural oil, and maintain good cleanliness around the tree. Ensure proper spacing among plants to improve air circulation, as this helps deter pests.
Disease
One common disease affecting Bougainvillea bonsai trees is root rot, which is caused by over-watering or insufficient drainage. To avoid this issue, ensure that the bonsai pot has proper drainage holes and avoid over-watering the tree. Monitor soil moisture levels and adjust your watering schedule accordingly to keep the roots healthy.
An additional concern for Bougainvillea bonsai trees is leaf spot, often caused by fungal infections. To prevent this, improve air circulation and avoid splashing water onto the leaves when watering. If the infection becomes severe, you may need to treat the plant using a suitable fungicide according to the manufacturer’s instructions.
Helpful Video
My name is Daniel Elrod, and I have been houseplant love ever since I was 17. I love how much joy they bring to any room in the home. I’ve always been amazed at how a few pots of flowing leaves can turn a drab and sterile office into an inviting place where people love to work at.
-
цветовод-любитель
- Сообщения: 929
- Зарегистрирован: 15 ноя 2012, 14:17
- Награды: 12
- Откуда: Калининград
Формирование бугенвиллеи в стиле бонсай
#1
Сообщение
цветовод-любитель »
Формирование бугенвиллеи в стиле бонсай
У меня зацвёл лишь один бонсай. Жалко, отсушил ветки, направленные вниз. Отцветёт, буду по-новому формировать.
Остальные стояли в подвале, перенесла в теплицу, сейчас обрастают после сильной обрезки.
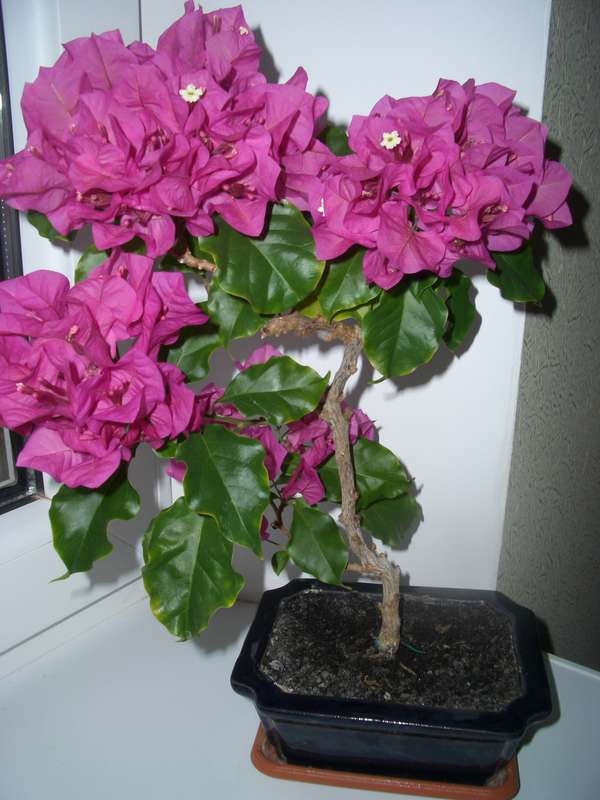
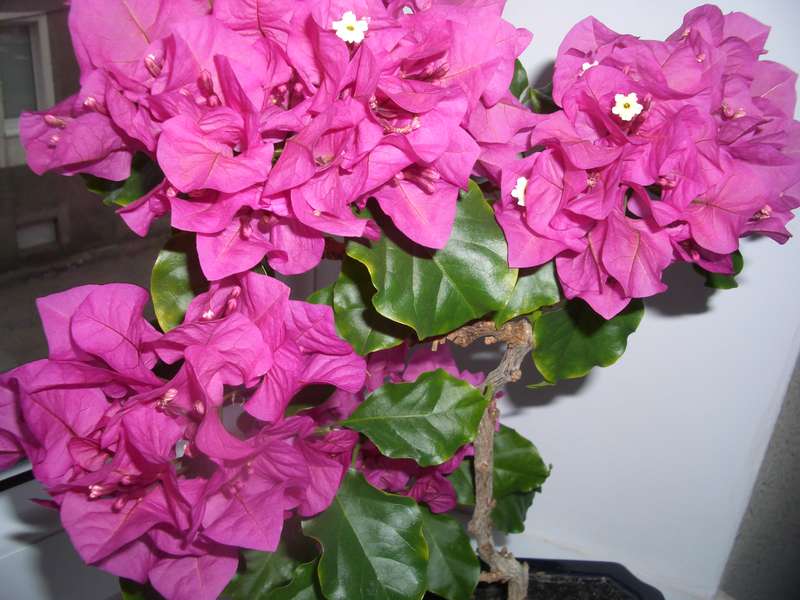
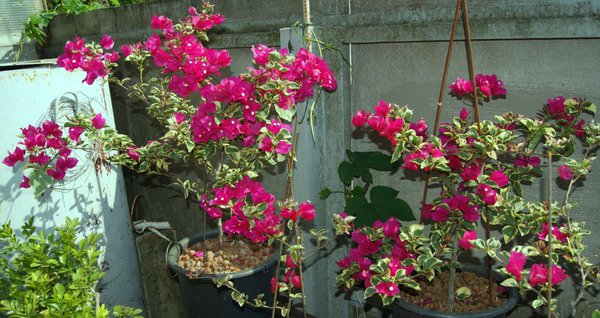
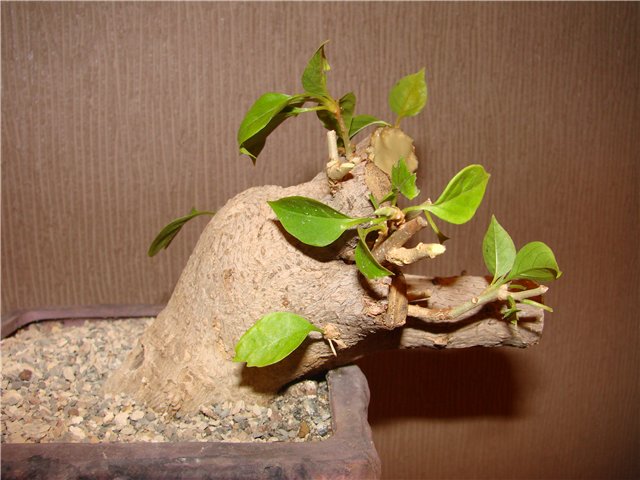
Два растения я выращиваю в виде бонсая. У них неглубокие ёмкости-подносы, земли мало. Формирую, весной использую Атлет, после цветения делаю формирующую обрезку, растения опять цветут. Одному 4 года, другому 5 лет. Штамб у них 15-20 см. Несколько коротких скелетных веток, их рост направлен в стороны и вниз. На них отрастают небольшие цветущие веточки, которые по мере отрастания я пригибаю с помощью проволоки, после цветения их обрезаю почти вплотную к скелетной ветке. При каждой обрезке новый прирост почти полностью удаляю. При цветении растения см на 5 смотрятся выше и попышней.
-
viniti
- Сообщения: 848
- Зарегистрирован: 18 мар 2012, 17:56
- Награды: 14
- Откуда: Украина, Харьков
Формирование бугенвиллеи в стиле бонсай
#5
Сообщение
viniti »
Мурзилка писал(а): ↑
04 дек 2018, 22:39
Кто знает, помогите с ответом.
Прежде чем давать советы, я должна знать, какого размера и возраста ваше растение.
Желательно с фото.
А вообще принципы формировки бонсай из бугенвиллеи ничем не отличаются от общей техники бонсай.
Вам надо зайти на бонсайный сайт и посмотреть, как это делается на первых этапах формировки.
-
viniti
- Сообщения: 848
- Зарегистрирован: 18 мар 2012, 17:56
- Награды: 14
- Откуда: Украина, Харьков
Формирование бугенвиллеи в стиле бонсай
#7
Сообщение
viniti »
У Вас ещё нет растения для формировки, а Вы приготовились ему уже корни обрезать?
Укореняйте черенки, МИНИМУМ два года просто растите и разгоняйте куст. Ни о какой подрезке корней даже не думайте! За это время читаете темы по выращиванию бугенвиллей и темы по основным принципам формировки бонсай. Чтобы понимать, о чём речь.
А потом поговорим.
Бонсай — это ОЧЕНЬ долгая песня, не всем под силу набраться терпения для такого. Это только на картинке красиво — бац! и дерево толстое, причудливое и всё в цветах! В него иногда десятилетия вкладывают труда и заботы.
Удачи!
-
viniti
- Сообщения: 848
- Зарегистрирован: 18 мар 2012, 17:56
- Награды: 14
- Откуда: Украина, Харьков
Формирование бугенвиллеи в стиле бонсай
#8
Сообщение
viniti »
У меня есть несколько бугенвиллей, возраст 5-6 лет. Диаметр ствола 20-25 мм. Горшки — 10 литров, высота 120 см. Так вот, если их обкромсать, то можно через 4-5 лет сформировать что-то ПОХОЖЕЕ на бонсай.
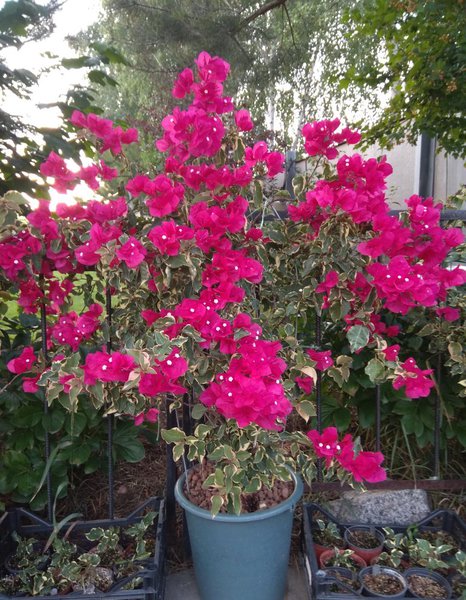


Итого, лет десять (минимум) что бы получить такое

А из вот этих годовалых черенков надо сначала толщину и размер нарастить лет пять.
Потом о формировке думать.


Так, что если я разбила чьи-то радужные мечты быстро получить красоту — ИЗВИНИТЕ! Не люблю врать.
-
viniti
- Сообщения: 848
- Зарегистрирован: 18 мар 2012, 17:56
- Награды: 14
- Откуда: Украина, Харьков
Формирование бугенвиллеи в стиле бонсай
#9
Сообщение
viniti »
Вот так я пробовала раскорячить тоже 5-летнюю вариегатную бугенвиллею. Горшок 3 литра. Думала, через год-два-три обрежу корни и пересажу в плошку (насмотрелась картинок в интернете!)
А 4 её подружки-ровесницы посадила обычным способом в просторные горшки.
Когда настало лето и те 4 штуки массово зацвели, а эта, бедная, вечно пересыхала, была полулысая с тремя цветочками. Я плюнула и тоже её перевалила в обычное большое ведро.
И она попёрла!
Так что я больше не играю в такие игры.


-
Т@тьян@
- Сообщения: 29
- Зарегистрирован: 09 июл 2015, 10:26
- Откуда: Урал
Формирование бугенвиллеи в стиле бонсай
#10
Сообщение
Т@тьян@ »
Бугенвилии есть, которые три вместе в горшке растут. Хотела прививку сделать, но не получилось. Решила сплести им ветки. Так же есть отдельно махровая, ей 3 года. Может ее попробовать формировать в стиле бонсай? Не укоренять другую.

-
viniti
- Сообщения: 848
- Зарегистрирован: 18 мар 2012, 17:56
- Награды: 14
- Откуда: Украина, Харьков
Формирование бугенвиллеи в стиле бонсай
#11
Сообщение
viniti »
Т@тьян@
Да, сплетение — самый лучший и надёжный вариант, если хотите многоцветный куст.
И, да, вполне можно бонсаем сделать уже готовое растение — экономите минимум год-два.
Прежде чем начать формировать, изучите виды (стили) бонсай и решите какой вам нравится больше всего.
Сразу скажу, по природе бугенвиллея — лиана. Ей свойственно стремиться вверх. Поэтому «каскад» не получится. Ветки, направленные вниз, будут засыхать, а вверх будет отбивать мощные «волчки».
Поэтому самые оптимальное — наклонённое на ветру или что-то в этом стиле.
Дальше — сразу сажать в плошку и начинать резать корни не стОит. Растите в том горшке, что есть, просто год-два формируйте крону в выбранном стиле.
Ну и побольше читайте про технику формировки бонсай, тем более, что сайты об этом есть в интернете в большом количестве со всеми подробностями.
Зима — самое прекрасное время для этого!
-
viniti
- Сообщения: 848
- Зарегистрирован: 18 мар 2012, 17:56
- Награды: 14
- Откуда: Украина, Харьков
Формирование бугенвиллеи в стиле бонсай
#13
Сообщение
viniti »
Т@тьян@ писал(а): ↑
07 дек 2018, 15:17
а по весне начну воплощать
В бонсае самое сложное — нарастить ствол потолще, что бы было похоже на ДЕРЕВО.
Вот на это и уходит больше всего времени.
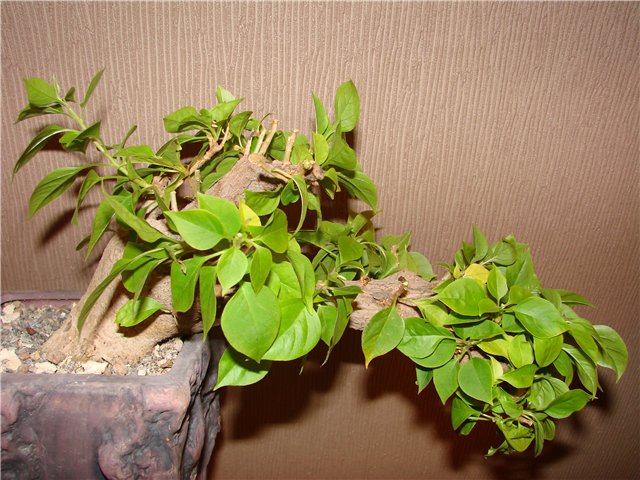
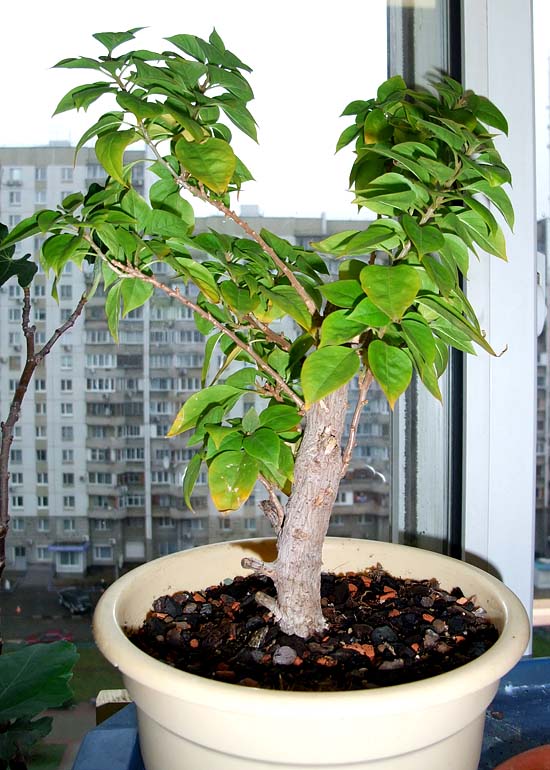
У меня самые взрослые кусты в вёдрах — 5-6 лет. Так вот даже у них самые толстые не больше черенка швабры (даже не лопаты), то есть около 2 см. Если посмотреть на интернетовские бонсай из бугенвиллей, то видно, что они намного толще.
К сожалению не могу для примера выставить интернетовские фото.
Чаще всего такие бонсаи растят по интенсивной технологии — выкапывают из грунта толстый куст, обрубают корни и ствол до нужного места и сажают в горшок. А потом уже за 4-5 лет формируют бонсай и после этого пересаживают в плошку и дальше в ней растят.
Деревья бонсай, уход, фото, семена, как вырастить в домашних условиях
Бонсай из бугенвиллеи пошаговая инструкция

- Найдите в питомнике от одного до пяти галлонов с толстым стволом, который сужается к вершине; не волнуйтесь, если листва бугенвиллеи выглядит неопрятной.
- Решите, какой высоты вы хотите, чтобы дерево было. Как правило это от 15 до 20 дюймов. Затем отрежьте верхушку на этой высоте.
- Делая сплошные срезы, удалите все ветви в нижней трети ствола, чтобы начать превращать куст в миниатюрное дерево.
- Удалите все ветви, которые растут прямо вверх, прямо вниз или те, которые пересекаются или растут в направлении ствола.
- Оставьте несколько длинных, более толстых, чередующихся ветвей ниже на стволе и оставляйте постепенно более короткие и тонкие ветви по мере продвижения вверх по стволу.
- Удалите оставшиеся ветви, чтобы они становились все короче по мере того, как вы работали вверх, чтобы имитировать рост деревьев в природе. Это также позволит свету достигать всех ветвей. Общий ветвь не должна превышать высоту дерева.
- Разместите дерево на открытом воздухе на полном солнце. Приносить только в помещение на короткое время, чтобы защитить ночью ниже 32 градусов.
- Вода глубоко каждые 2 или 3 дня (на линии капельницы идеально). Подкармливайте дерево ежемесячно удобрениями с низким содержанием азота.
- Несколько раз в течение вегетационного периода, после того, как цветение начинает исчезать, резко срезать стебли, чтобы на каждой ветке оставалось только 2 или 3 листа. В противном случае он превратится в запутанный куст.
- Когда дерево достигнет нужной вам формы, купите горшок с бонсай. Идеальным будет неглубокий горшок с “ножками“ глубиной от 2 до 3 дюймов. Лучше всего пересадить весной или летом. Удалите столько корней, сколько нужно, чтобы поместиться в горшок. Наполните горшок хорошо дренируемой смесью для горшков, такой как «смесь кактусов». Используйте мелкий гравий в качестве подкормки и погрузите горшок в воду на 20 минут. Удалите 1/3 корней каждые 3 или 4 года и добавьте хорошо дренирующуюся смесь для горшечных культур.
Повторите шаги с 2 по 10 для жизни растения.
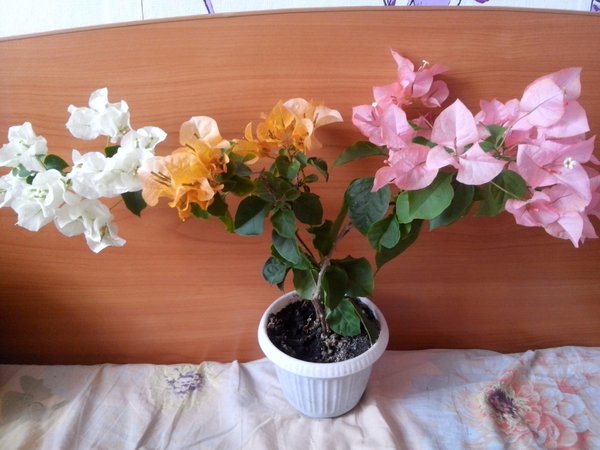
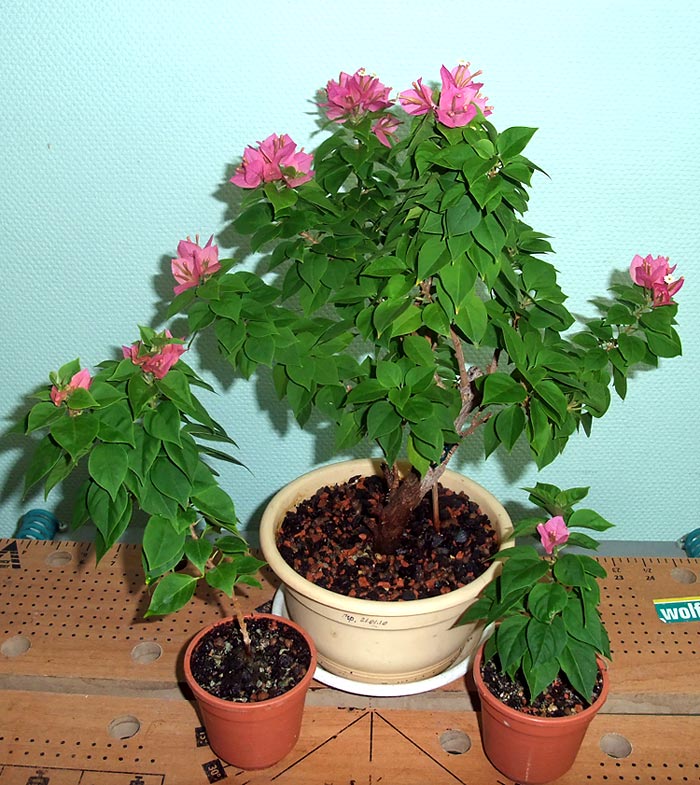
фото: Бугенвиллея
Рекомендуемые сообщения
-
- Поделиться
Ссылка на сообщение
Поделиться на других сайтах
- Автор
-
- Поделиться
Ссылка на сообщение
Поделиться на других сайтах
- 2 месяца спустя…
- Автор
-
- Поделиться
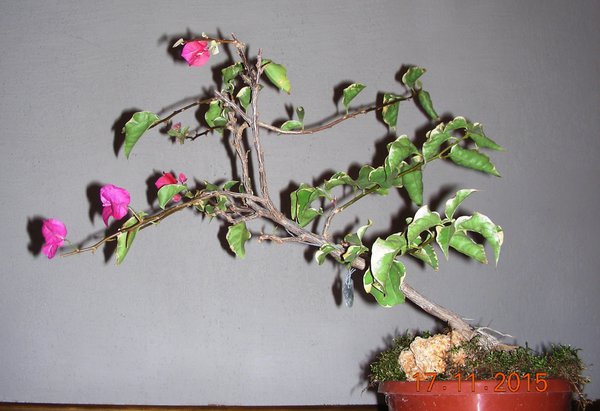
Обрезал бугенвиллию, сильно смущал длинный, прямой ствол. Начну формирование заново.
Ссылка на сообщение
Поделиться на других сайтах
-
- Поделиться
О как!
Надеюсь, поставил укореняться?
Ссылка на сообщение
Поделиться на других сайтах
- Автор
-
- Поделиться
Ссылка на сообщение
Поделиться на других сайтах
-
- Поделиться
И толстенький надо было.
Вот фото неожиданно укоренившейся ветки, отрезанной с твоей бугенвилии на мастер-классе.
Ссылка на сообщение
Поделиться на других сайтах
- Автор
-
- Поделиться
Отлично, очень мне нравится бугенвиллия. И растёт быстро, и лист небольшой.
Ссылка на сообщение
Поделиться на других сайтах
-
- Поделиться
Вот фото неожиданно укоренившейся ветки, отрезанной с твоей бугенвилии на мастер-классе.
Неплохо так… Изначально под пакетом укоренялась или как?
Ссылка на сообщение
Поделиться на других сайтах
-
- Поделиться
Изначально под пакетом укоренялась или как?
Да, в тепличке, но безо всякого внимания с моей стороны, поскольку считал, что это «дохлый номер»
Ссылка на сообщение
Поделиться на других сайтах
-
- Поделиться
‘Юра Блаженкин’
ну теперь её можно и не только каскадом делать , а чем угодно.
Изменено пользователем григорий
Ссылка на сообщение
Поделиться на других сайтах
- Автор
-
- Поделиться
Хочу сделать, как и была, маленьким полукаскадом,
но с более проработанными ярусами.
Ссылка на сообщение
Поделиться на других сайтах
- 11 месяцев спустя…
-
- Поделиться
Немного не в тему — фото цветущей бугенвиллеи, Юра сказал, что и сам посмотрел бы )
Ссылка на сообщение
Поделиться на других сайтах
-
- Поделиться
Здорово. Моя тоже в этом году цвела. Жара на нее подействовала положительно.
Ссылка на сообщение
Поделиться на других сайтах
Создайте аккаунт или авторизуйтесь, чтобы оставить комментарий
Комментарии могут оставлять только зарегистрированные пользователи
Войти
Есть аккаунт? Войти.
Войти