
-
Драйверы
72
-
Руководства по ремонту
2
-
Инструкции по эксплуатации
19
Языки:
Dell Latitude D520 инструкция по эксплуатации
(107 страниц)
- Языки:Русский
-
Тип:
PDF -
Размер:
1.83 MB
Просмотр
Dell Latitude D520 инструкция по эксплуатации
(231 страница)
- Языки:Русский
-
Тип:
ZIP -
Размер:
2.39 MB
Просмотр
Dell Latitude D520 инструкция по эксплуатации
(99 страниц)
- Языки:Английский
-
Тип:
PDF -
Размер:
1.56 MB
Просмотр
Dell Latitude D520 инструкция по эксплуатации
(89 страниц)
- Языки:Японский
-
Тип:
PDF -
Размер:
2.12 MB
Просмотр
Dell Latitude D520 инструкция по эксплуатации
(103 страницы)
- Языки:Португальский
-
Тип:
PDF -
Размер:
1.67 MB
Просмотр
Dell Latitude D520 инструкция по эксплуатации
(99 страниц)
- Языки:Финский
-
Тип:
PDF -
Размер:
1.65 MB
Просмотр
Dell Latitude D520 инструкция по эксплуатации
(103 страницы)
- Языки:Нидерландский
-
Тип:
PDF -
Размер:
1.6 MB
Просмотр
Dell Latitude D520 инструкция по эксплуатации
(102 страницы)
- Языки:Испанский
-
Тип:
PDF -
Размер:
1.63 MB
Просмотр
Dell Latitude D520 инструкция по эксплуатации
(102 страницы)
- Языки:Итальянский
-
Тип:
PDF -
Размер:
1.6 MB
Просмотр
Dell Latitude D520 инструкция по эксплуатации
(103 страницы)
- Языки:Немецкий
-
Тип:
PDF -
Размер:
1.67 MB
Просмотр
Dell Latitude D520 инструкция по эксплуатации
(261 страница)
- Языки:Финский
-
Тип:
ZIP -
Размер:
4.71 MB
Просмотр
Dell Latitude D520 инструкция по эксплуатации
(270 страниц)
- Языки:Французский
-
Тип:
ZIP -
Размер:
2.08 MB
Просмотр
Dell Latitude D520 инструкция по эксплуатации
(124 страницы)
- Языки:Венгерский, Чешский
-
Тип:
PDF -
Размер:
1.38 MB
Просмотр
Dell Latitude D520 инструкция по эксплуатации
(270 страниц)
- Языки:Итальянский
-
Тип:
ZIP -
Размер:
2.03 MB
Просмотр
Dell Latitude D520 инструкция по эксплуатации
(271 страница)
- Языки:Нидерландский
-
Тип:
ZIP -
Размер:
2.03 MB
Просмотр
Dell Latitude D520 инструкция по эксплуатации
(199 страниц)
- Языки:Португальский
-
Тип:
ZIP -
Размер:
1.87 MB
Просмотр
Dell Latitude D520 инструкция по эксплуатации
(206 страниц)
- Языки:Китайский
-
Тип:
ZIP -
Размер:
5.61 MB
Просмотр
Dell Latitude D520 инструкция по эксплуатации
(99 страниц)
- Языки:Арабский
-
Тип:
PDF -
Размер:
1.84 MB
Просмотр
Dell Latitude D520 инструкция по эксплуатации
(103 страницы)
-
Тип:
PDF -
Размер:
1.89 MB
Просмотр
На NoDevice можно скачать инструкцию по эксплуатации для Dell Latitude D520. Руководство пользователя необходимо для ознакомления с правилами установки и эксплуатации Dell Latitude D520. Инструкции по использованию помогут правильно настроить Dell Latitude D520, исправить ошибки и выявить неполадки.
Руководство пользователя Dell™ Latitude™ D520
Сведения о компьютере
Источники информации
Использование аккумулятора
Использование дисплея
Использование клавиатуры и сенсорной панели
Использование мультимедийных устройств
Использование плат
Настройка сети
Защита компьютера
Поиск и устранение неисправностей
Программа настройки системы
Перестановка программного обеспечения
Установка и замена компонентов
Dell™ QuickSet
Обращение с компьютером во время поездок
Получение справки
Технические характеристики
Приложение
Глоссарий
Щелкните ссылки слева для просмотра информации по функциям и работе компьютера
. Информацию о другой документации, прилагаемой к
компьютеру
, смотрите в разделе
Источники информации
.
Примечания
, замечания и предупреждения
Аббревиатуры и сокращения
Полный список сокращений и акронимов смотрите в разделе
Глоссарий
.
В случае приобретения компьютера серии Dell™ n любые ссылки в данном документе на операционные системы
Microsoft
®
Windows
®
не применимы.
Информация
, содержащаяся в этом документе, может быть изменена без уведомления.
© 2006 Dell Inc. Все права защищены
.
Воспроизведение материалов данного руководства в любой форме без письменного разрешения корпорации
Dell Inc. строго запрещено.
Товарные знаки
, использованные в этом документе: Dell, логотип DELL, Inspiron, Dell Precision, Dimension, OptiPlex, Latitude, PowerEdge, PowerVault, PowerApp, ExpressCharge, Dell
TravelLite, Undock & Go и Dell OpenManage являются товарными знаками корпорации Dell; Core является товарным знаком, а Intel, Pentium и Celeronявляются охраняемыми
товарными знаками корпорации
Intel; Microsoft, Outlook и Windows являются охраняемыми товарными знаками корпорации Microsoft; Bluetooth является охраняемым товарным
знаком
, принадлежащим компании Bluetooth SIG, Inc. и используемым корпорацией Dell по лицензии; EMC является охраняемым товарным знаком корпорации EMC; ENERGY
STAR является охраняемым товарным знаком Управления по охране окружающей среды США. Будучи партнером по программе ENERGY STAR, корпорация Dell Inc. заявляет,
что по эффективности использования энергии этот продукт соответствует стандартам
ENERGY STAR.
Остальные товарные знаки и торговые наименования могут использоваться в этом руководстве для обозначения либо фирм
, заявляющих права на такие знаки и
наименования
, либо продукции этих фирм. Копрорация Dell Inc. не претендует ни на какие права собственности в отношении любых товарных знаков и торговых
наименований
, кроме своих собственных.
Модель
PP17L
Ноябрь
2006 года Ред. A01
ПРИМЕЧАНИЕ
.
Содержит важную информацию
, которая помогает более эффективно работать с компьютером.
ЗАМЕЧАНИЕ
.
Указывает на опасность повреждения оборудования или потери данных и объясняет
, как этого избежать.
ПРЕДУПРЕЖДЕНИЕ
.
Указывает на потенциальную опасность повреждения имущества
, получения травмы или угрозу для жизни.

Назад на страницу Содержание
Сведения о компьютере
Руководство пользователя Dell™ Latitude™ D520
Вид спереди
Вид слева
Вид справа
Вид сзади
Вид снизу
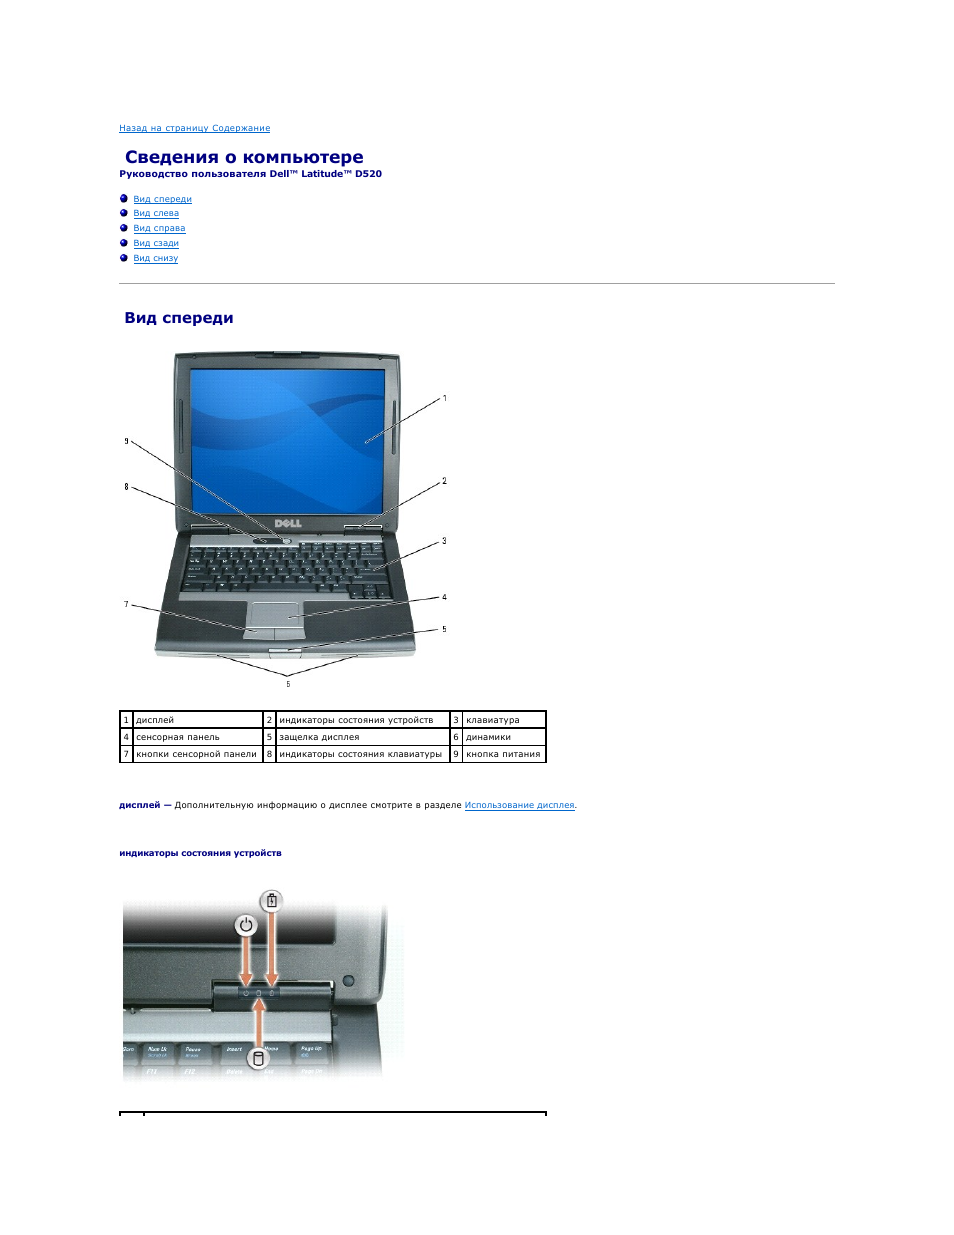
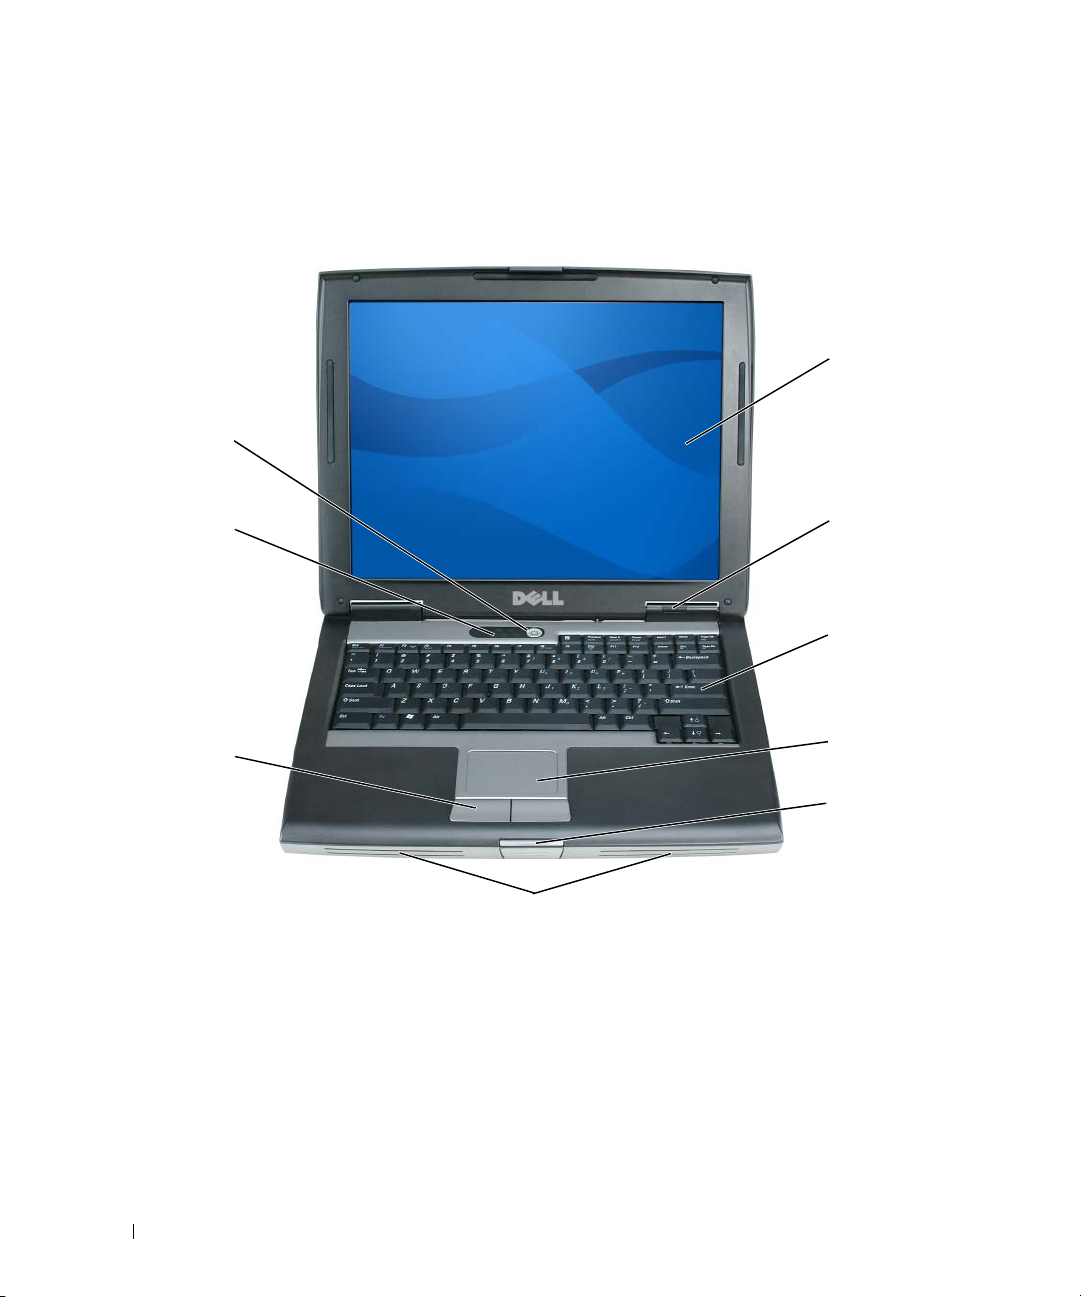
Вид спереди
дисплей —
Дополнительную информацию о дисплее смотрите в разделе
Использование дисплея
.
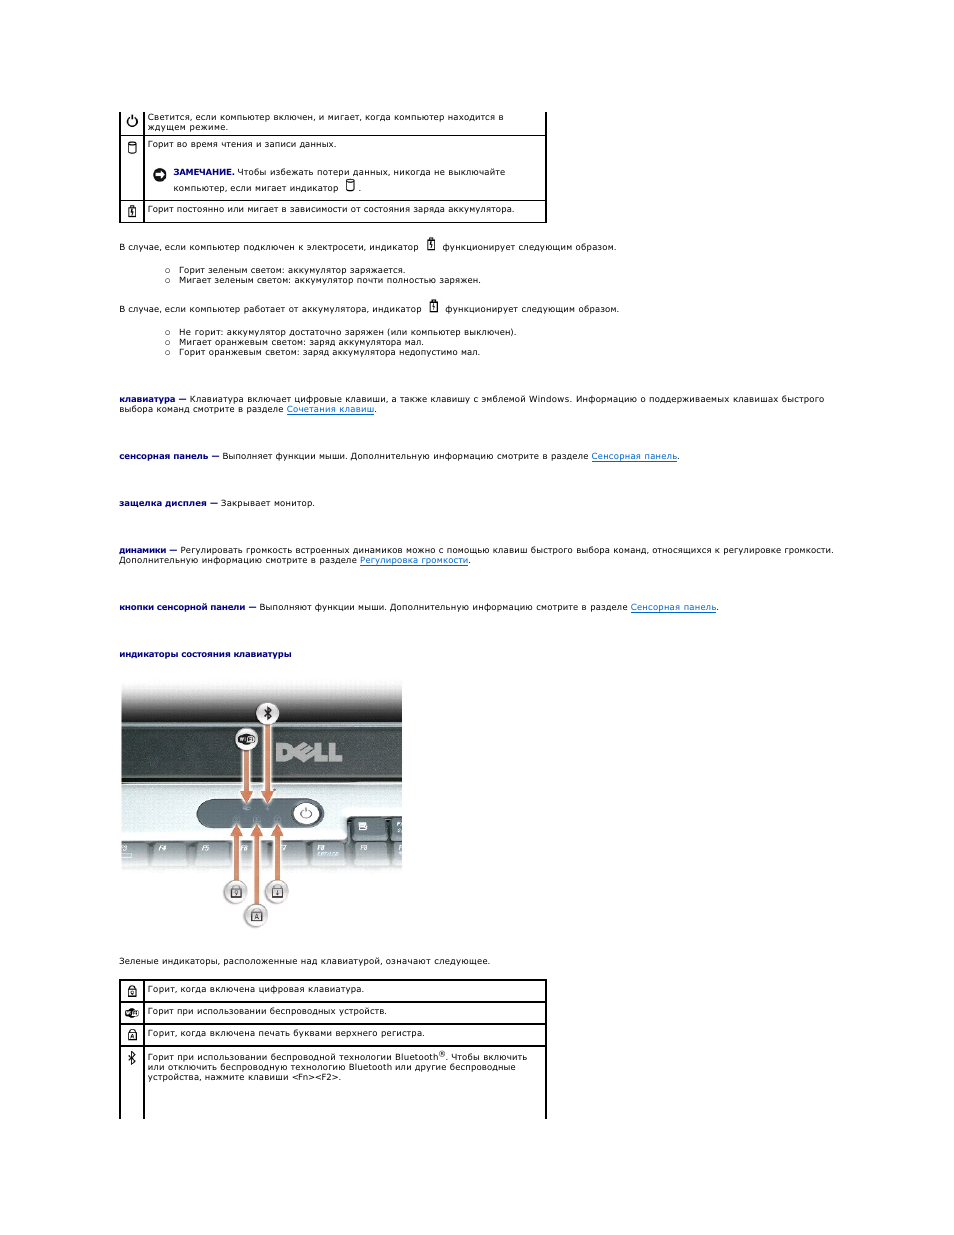
индикаторы состояния устройств
1 дисплей
2 индикаторы состояния устройств
3 клавиатура
4 сенсорная панель
5 защелка дисплея
6 динамики
7 кнопки сенсорной панели 8 индикаторы состояния клавиатуры
9 кнопка питания
В случае
, если компьютер подключен к электросети, индикатор
функционирует следующим образом
.
¡
Горит зеленым светом
: аккумулятор заряжается.
¡
Мигает зеленым светом
: аккумулятор почти полностью заряжен.
В случае
, если компьютер работает от аккумулятора, индикатор
функционирует следующим образом
.
¡
Не горит
: аккумулятор достаточно заряжен (или компьютер выключен).
¡
Мигает оранжевым светом
: заряд аккумулятора мал.
¡
Горит оранжевым светом
: заряд аккумулятора недопустимо мал.
клавиатура —
Клавиатура включает цифровые клавиши
, а также клавишу с эмблемой Windows. Информацию о поддерживаемых клавишах быстрого
выбора команд смотрите в разделе
Сочетания клавиш
.
сенсорная панель —
Выполняет функции мыши
. Дополнительную информацию смотрите в разделе
Сенсорная панель
.
защелка дисплея —
Закрывает монитор
.
динамики —
Регулировать громкость встроенных динамиков можно с помощью клавиш быстрого выбора команд
, относящихся к регулировке громкости.
Дополнительную информацию смотрите в разделе
Регулировка громкости
.
кнопки сенсорной панели —
Выполняют функции мыши
. Дополнительную информацию смотрите в разделе
Сенсорная панель
.
индикаторы состояния клавиатуры
Зеленые индикаторы
, расположенные над клавиатурой, означают следующее.
Светится
, если компьютер включен, и мигает, когда компьютер находится в
ждущем режиме
.
Горит во время чтения и записи данных
.
ЗАМЕЧАНИЕ
.
Чтобы избежать потери данных
, никогда не выключайте
компьютер
, если мигает индикатор
.
Горит постоянно или мигает в зависимости от состояния заряда аккумулятора
.
Горит
, когда включена цифровая клавиатура.
Горит при использовании беспроводных устройств
.
Горит
, когда включена печать буквами верхнего регистра.
Горит при использовании беспроводной технологии
Bluetooth
®
. Чтобы включить
или отключить беспроводную технологию
Bluetooth или другие беспроводные
устройства
, нажмите клавиши <Fn><F2>.
кнопка питания —
Нажмите кнопку питания
, чтобы включить компьютер или выйти из режима управления потреблением энергии (смотрите раздел
Режимы управления потреблением энергии
).
Если компьютер не отвечает
, нажмите и не отпускайте кнопку питания до тех пор, пока компьютер полностью не выключится (это может занять
несколько секунд
).
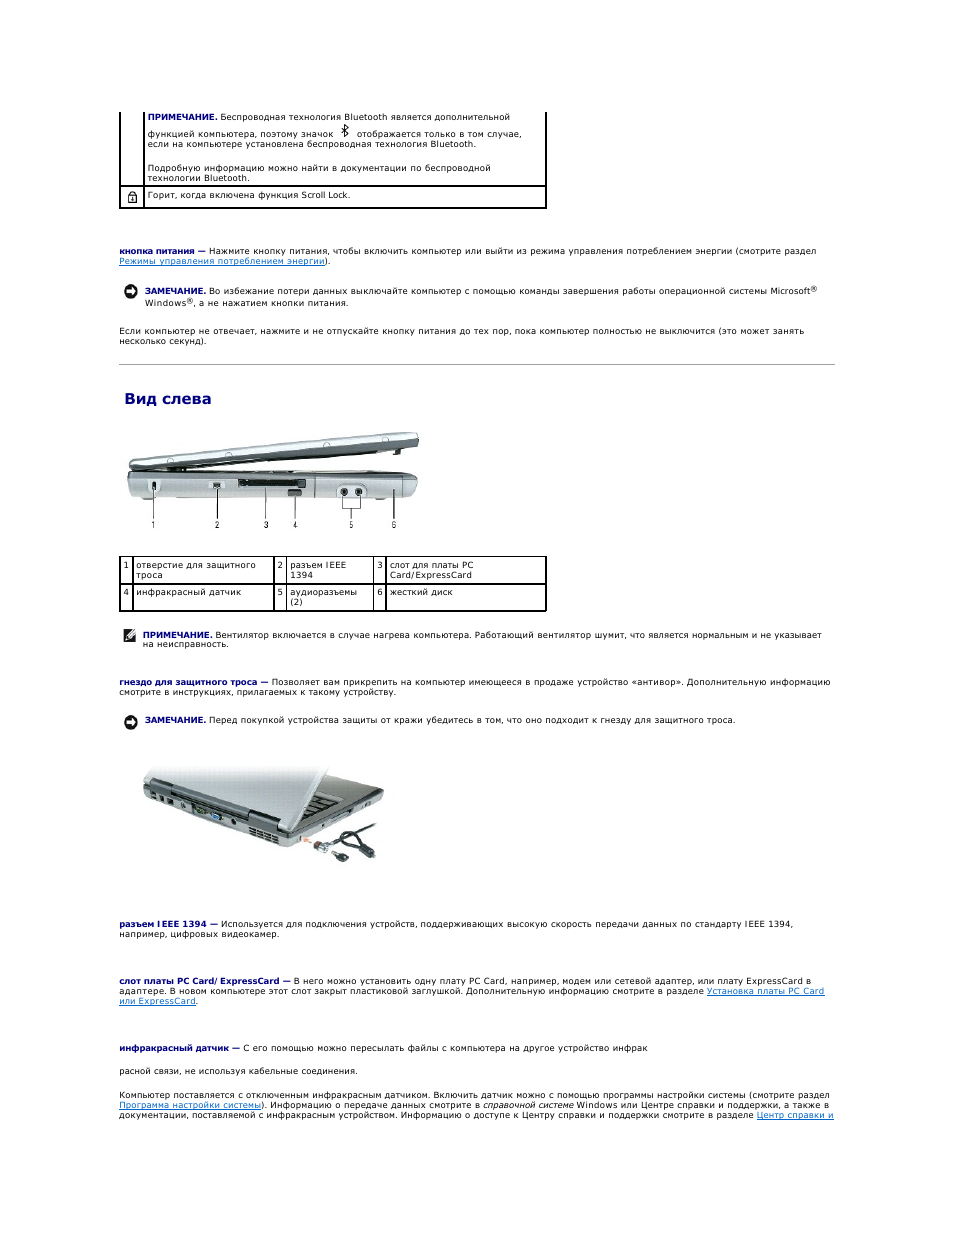
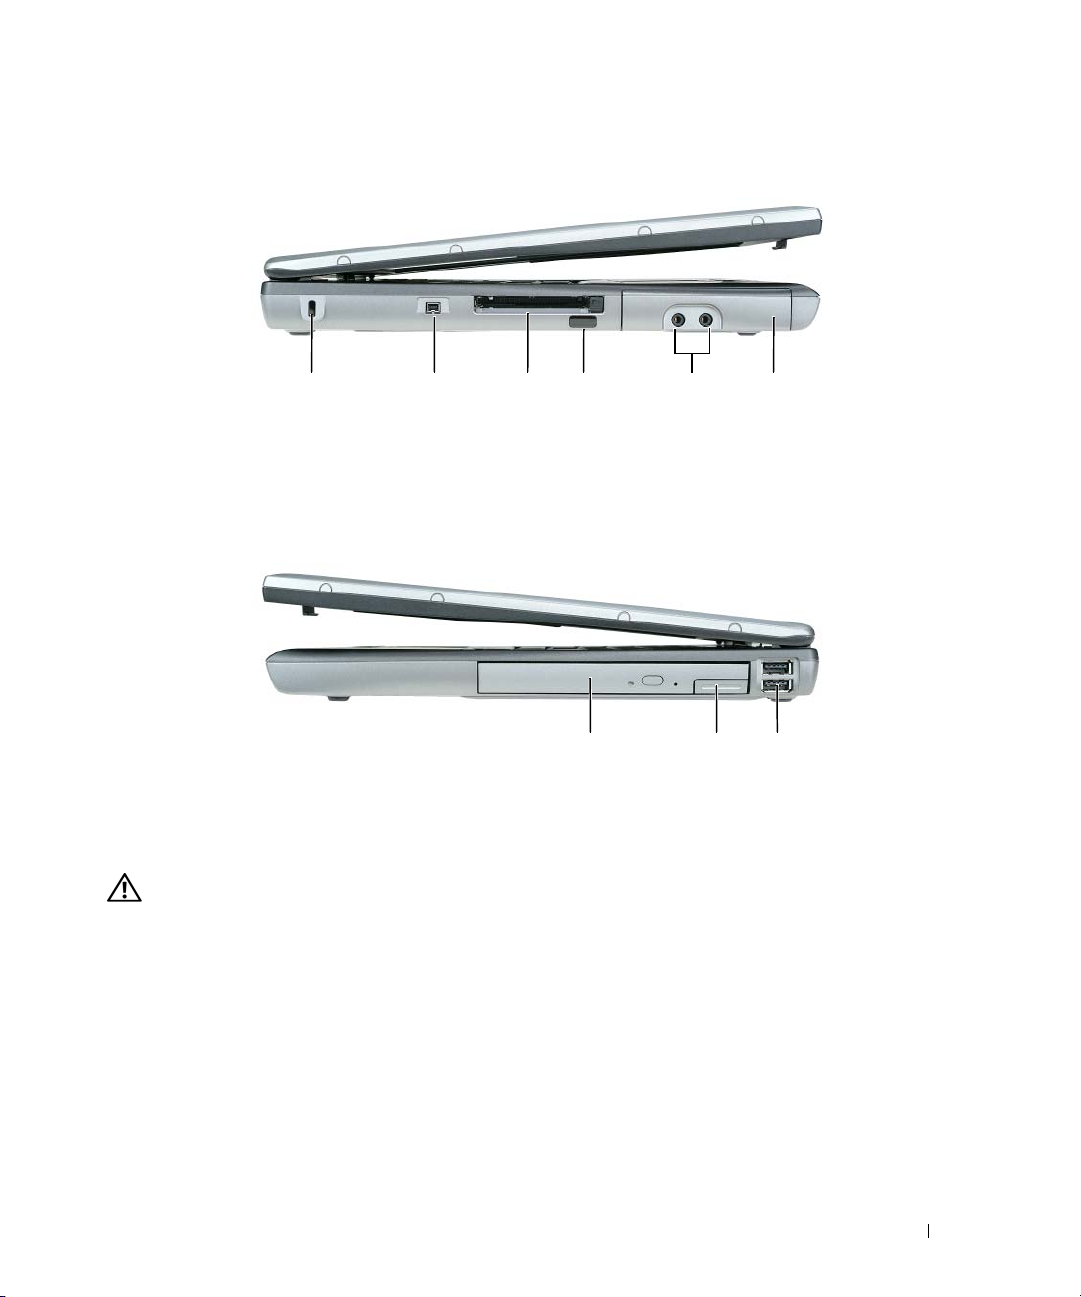
Вид слева
гнездо для защитного троса —
Позволяет вам прикрепить на компьютер имеющееся в продаже устройство «антивор»
. Дополнительную информацию
смотрите в инструкциях
, прилагаемых к такому устройству.
разъем
IEEE 1394 —
Используется для подключения устройств
, поддерживающих высокую скорость передачи данных по стандарту IEEE 1394,
например
, цифровых видеокамер.
слот платы
PC Card/ExpressCard —
В него можно установить одну плату
PC Card, например, модем или сетевой адаптер, или плату ExpressCard в
адаптере
. В новом компьютере этот слот закрыт пластиковой заглушкой. Дополнительную информацию смотрите в разделе
Установка платы
PC Card
или
ExpressCard
.
инфракрасный датчик —
С его помощью можно пересылать файлы с компьютера на другое устройство инфрак
расной связи
, не используя кабельные соединения.
Компьютер поставляется с отключенным инфракрасным датчиком
. Включить датчик можно с помощью программы настройки системы (смотрите раздел
Программа настройки системы
). Информацию о передаче данных смотрите в справочной системе Windows или Центре справки и поддержки, а также в
документации
, поставляемой с инфракрасным устройством. Информацию о доступе к Центру справки и поддержки смотрите в разделе
Центр справки и
ПРИМЕЧАНИЕ
.
Беспроводная технология
Bluetooth является дополнительной
функцией компьютера
, поэтому значок
отображается только в том случае
,
если на компьютере установлена беспроводная технология
Bluetooth.
Подробную информацию можно найти в документации по беспроводной
технологии
Bluetooth.
Горит
, когда включена функция Scroll Lock.
ЗАМЕЧАНИЕ
.
Во избежание потери данных выключайте компьютер с помощью команды завершения работы операционной системы
Microsoft
®
Windows
®
, а не нажатием кнопки питания.
1 отверстие для защитного
троса
2 разъем IEEE
1394
3 слот для платы PC
Card/ExpressCard
4 инфракрасный датчик
5 аудиоpазъемы
(2)
6 жесткий диск
ПРИМЕЧАНИЕ
.
Вентилятор включается в случае нагрева компьютера
. Работающий вентилятор шумит, что является нормальным и не указывает
на неисправность
.
ЗАМЕЧАНИЕ
.
Перед покупкой устройства защиты от кражи убедитесь в том
, что оно подходит к гнезду для защитного троса.
поддержки
Windows
.
аудиоразъемы
жесткий диск —
Хранит программное обеспечение и данные
.
Вид справа
модульный отсек —
В него можно устанавливать такие устройства
, как оптический дисковод, второй аккумулятор или модуль для поездок Dell
TravelLite™. Дополнительную информацию смотрите в разделе
Модульный отсек
.
защелка для отсоединения устройства —
Высвобождает устройство
, установленное в модульный отсек. Инструкции смотрите в разделе
Модульный
отсек
.
pазъемы USB
Вид сзади
Подсоедините наушники или динамики к разъему
.
Подсоедините микрофон к разъему
.
1 модульный отсек
2 защелка для отсоединения устройства
3 pазъемы USB (2)
Служат для подключения
USB-устройств, таких как мышь, клавиатура
или принтер
. К этому разъему также можно подключать
дополнительный дисковод гибких дисков
, используя соответствующий
кабель
.
ПРЕДУПРЕЖДЕНИЕ
.
Не закрывайте вентиляционные отверстия
, не вставляйте в них посторонние предметы и следите, чтобы в них не
накапливалась пыль
. Не держите работающий компьютер в местах с недостаточной вентиляцией, например в закрытом кейсе. Это может
повредить компьютер или привести к пожару
.

pазъемы USB
разъем модема
(RJ-11)
сетевой разъем
(RJ-45)
разъем
S-Video TV-out
разъем последовательного порта
видеоразъем
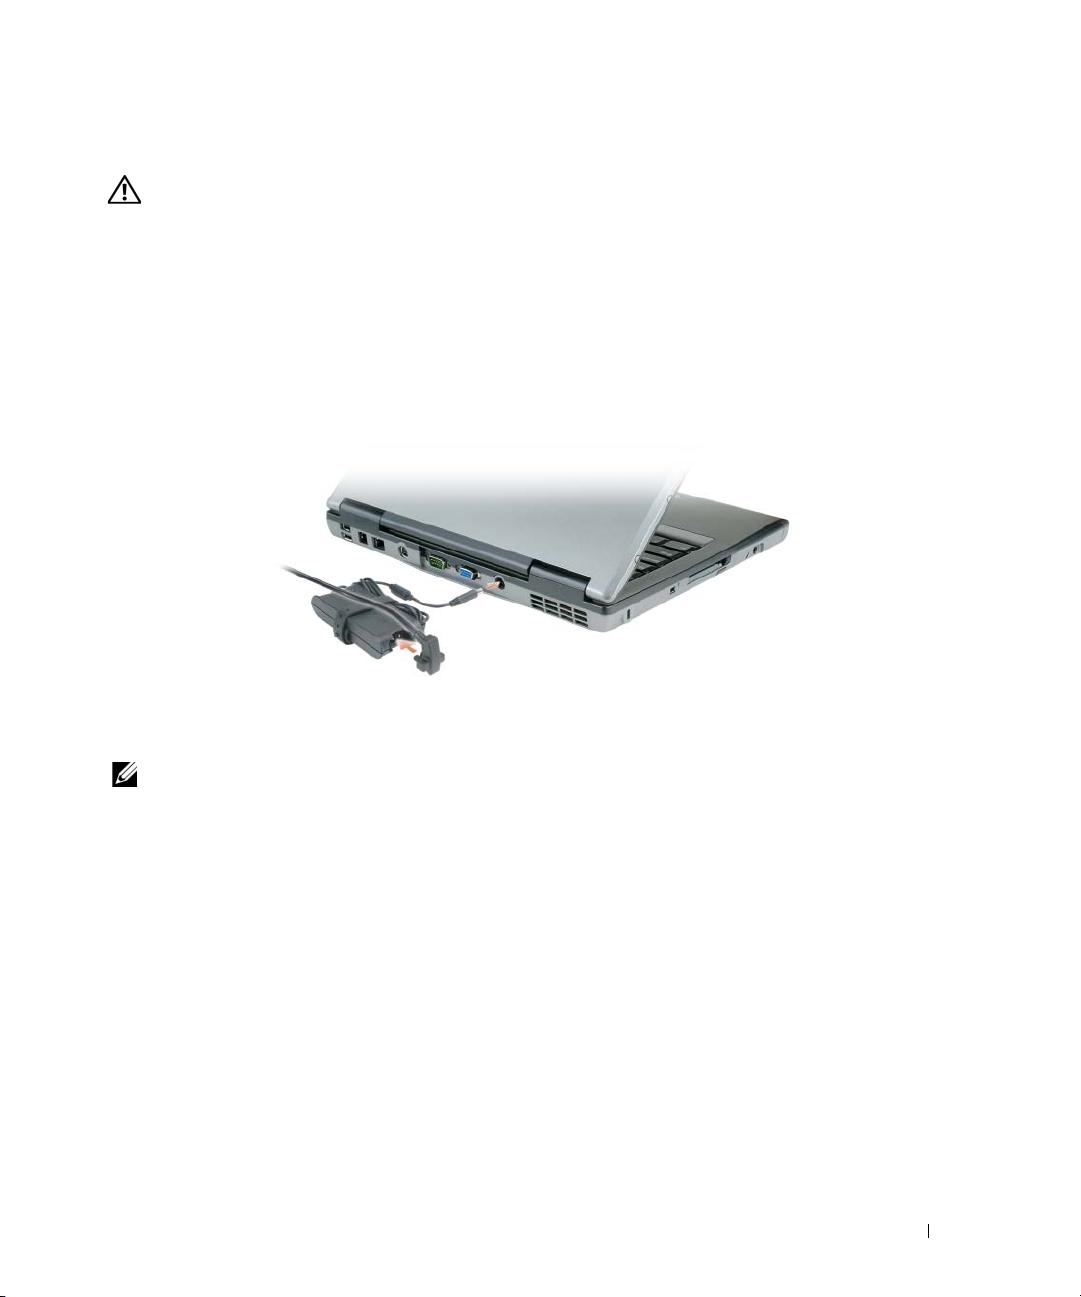
разъем адаптера переменного тока —
Используется для подсоединения адаптера переменного тока к компьютеру
.
1 pазъемы USB (2)
2 разъем модема (RJ-11)
3 сетевой разъем (RJ-
45)
4 разъем S-Video TV-out
5 разъем последовательного
порта
6 видеоразъем
7 разъем адаптера
переменного тока
8 вентиляционные отверстия
Служат для подключения
USB-устройств, таких как мышь, клавиатура
или принтер
. К этому разъему также можно подключать
дополнительный дисковод гибких дисков
, используя соответствующий
кабель
.
Если в компьютере есть дополнительный встроенный модем
,
подключите его к телефонной линии через соответствующий разъем
.
Информацию по использованию модема смотрите в интерактивной
документации по модему
, поставляемой с компьютером. Информацию о
доступе к интерактивным руководствам пользователя смотрите в
разделе
Источники информации
.
ЗАМЕЧАНИЕ
.
Сетевой разъем немного крупнее
, чем разъем модема. Чтобы не повредить компьютер, не включайте телефонный кабель в
сетевой разъем
.
Служит для подключения компьютера к сети
. Два индикатора,
находящиеся рядом с разъемом
, показывают состояние соединения и
процесса передачи информации по проводной сети
.
Более подробную информацию о сетевом адаптере можно найти в
руководстве пользователя по этому устройству
, поставляемом с
компьютером
. Смотрите раздел
Источники информации
.
Служит для подключения компьютера к телевизору
. Дополнительную
информацию смотрите в разделе
Подключение компьютера к
телевизору или аудиоустройству
.
Подключение последовательных устройств
, таких как мышь или
карманное устройство
.
Служит для подключения внешнего монитора
. Дополнительную
информацию смотрите в разделе
Использование дисплея
.

Адаптер преобразует напряжение переменного тока в напряжение постоянного тока
, необходимое для питания компьютера. Адаптер переменного
тока можно подключать как к включенному
, так и к выключенному компьютеру.
вентиляционные отверстия —
Встроенный вентилятор создает поток воздуха
, проходящий через вентиляционные отверстия и предотвращающий
перегрев компьютера
.
Вид снизу
крышка отсека модуля памяти
/модема/платы беспроводной локальной сети Mini-Card/батарейки типа «таблетка» —
Закрывает отсек
, в который
устанавливается один модуль памяти
, модем, плата WLAN Mini-Card и батарея типа «таблетка». Дополнительную информацию смотрите в разделе
Установка и замена компонентов
.
освобождение защелок отсека аккумулятора —
Высвобождает аккумулятор
. Инструкции смотрите в разделе
Использование аккумулятора
.
шкала заряда аккумулятора —
Отображает информацию о заряде аккумулятора
. Дополнительную информацию смотрите в разделе
Использование
аккумулятора
.
ПРЕДУПРЕЖДЕНИЕ
.
Адаптер переменного тока работает с электрическими розетками
, используемыми во всем мире. Тем не менее, в
разных странах используются разные разъемы электропитания и сетевые фильтры
. Использование несовместимого кабеля, а также
неправильное подключение кабеля к сетевому фильтру или электросети может привести к повреждению оборудования или пожару
.
ЗАМЕЧАНИЕ
.
При отсоединении кабеля адаптера переменного тока от компьютера возьмитесь за штекер
, а не за сам кабель, и потяните его с
усилием
, но осторожно, чтобы не повредить кабель.
ПРИМЕЧАНИЕ
.
Вентилятор включается в случае нагрева компьютера
. Работающий вентилятор шумит, что является нормальным и не указывает
на неисправность
.
ПРЕДУПРЕЖДЕНИЕ
.
Не закрывайте вентиляционные отверстия
, не вставляйте в них посторонние предметы и следите, чтобы в них не
накапливалась пыль
. Не держите работающий компьютер в местах с недостаточной вентиляцией, например в закрытом кейсе. Это может
повредить компьютер или привести к пожару
.
1 крышка отсека для модуля
памяти
/модема/платы WLAN Mini-
Card/батареи типа «таблетка»
2 защелка отсека
для аккумулятора
3 шкала заряда
аккумулятора
4 аккумулятор
5 слот стыковочного
устройства
6 вентиляционные
отверстия
7 жесткий диск
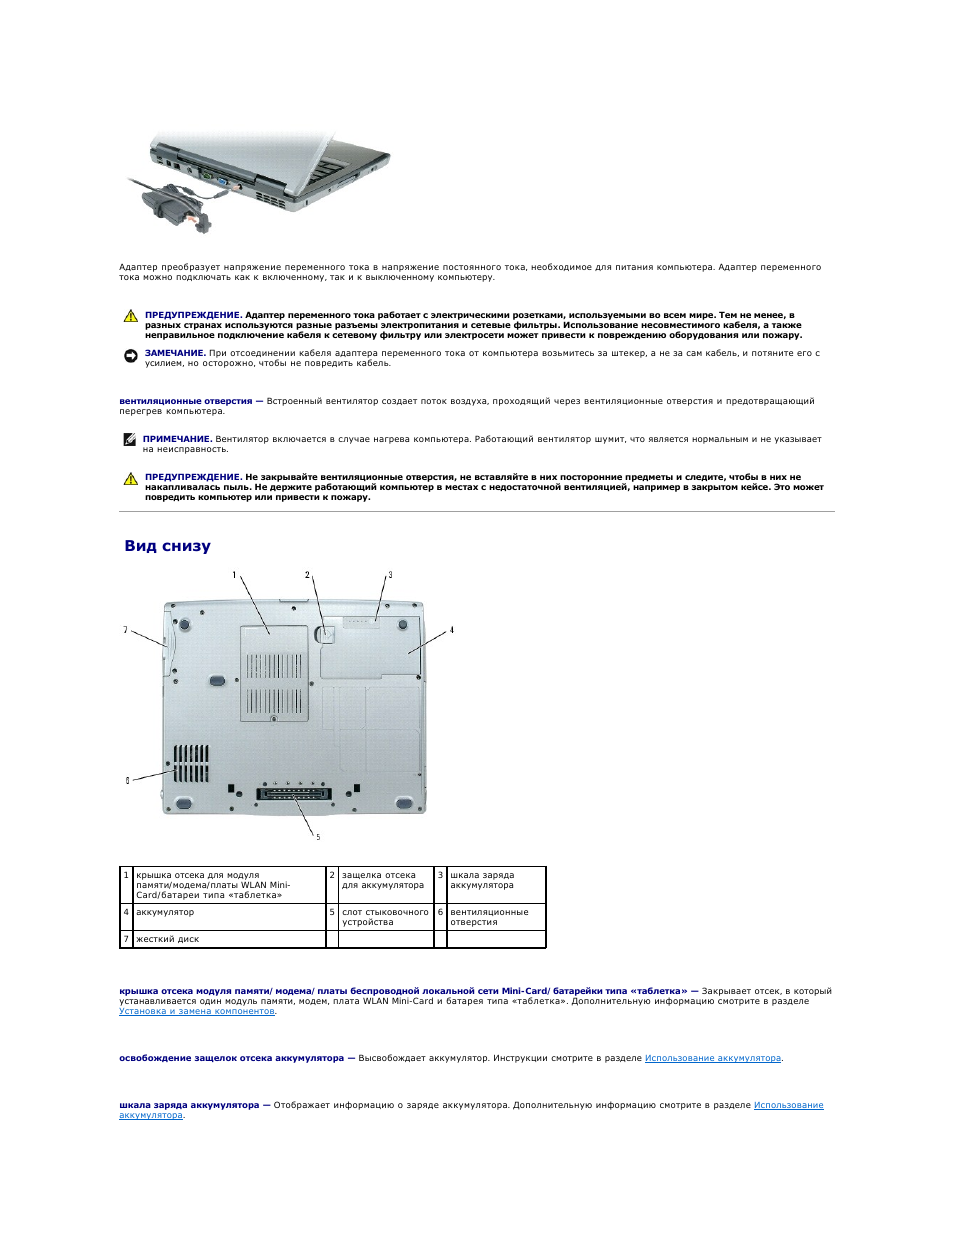
аккумулятор —
После установки аккумулятора вы можете пользоваться компьютером
, не подключая его к электросети. Дополнительную информацию
смотрите в разделе
Использование аккумулятора
.
гнездо для подключения стыковочного устройства —
Позволяет подсоединить компьютер к стыковочному устройству
. Дополнительную информацию
о стыковочном устройстве смотрите в документации
, поставляемой с этим устройством.
вентиляционные отверстия —
Встроенный вентилятор создает поток воздуха
, проходящий через вентиляционные отверстия и предотвращающий
перегрев компьютера
.
жесткий диск —
Хранит программное обеспечение и данные
.
Назад на страницу Содержание
ЗАМЕЧАНИЕ
.
Встроенная технология Undock & Go™ позволяет отстыковывать компьютер без перехода в ждущий режим
. Функция
автоматического перехода компьютера в ждущий режим при отстыковке может отсутствовать
. Поэтому убедитесь, что установки панели
управления Электропитание не препятствуют переходу компьютера в ждущий режим
. Если с помощью параметра Электропитание в панели
управления отключен переход компьютера в ждущий режим
, то аккумулятор будет быстрее разряжаться, а также возможен перегрев
компьютера
.
ПРИМЕЧАНИЕ
.
Вентилятор включается в случае нагрева компьютера
. Работающий вентилятор шумит, что является нормальным и не указывает
на неисправность
.
ПРЕДУПРЕЖДЕНИЕ
.
Не закрывайте вентиляционные отверстия
, не вставляйте в них посторонние предметы и следите, чтобы в них не
накапливалась пыль
. Не держите работающий компьютер в местах с недостаточной вентиляцией, например в закрытом кейсе. Это может
повредить компьютер или привести к пожару
.
Приложение, Уход за компьютером, Компьютер , клавиатура и дисплей
Сенсорная панель, Дисковод гибких дисков, Компакт -диски и диски dvd Чат поддержки
- Изображение
- Текст
Назад на страницу Содержание
Приложение
Руководство пользователя Dell™ Latitude™ D520
Уход за компьютером
Предупреждение в отношении продукта компании
Macrovision
Декларация соответствия правилам
FCC (только для США)
Уход за компьютером
Компьютер
, клавиатура и дисплей
l
Для удаления пыли между клавишами клавиатуры используйте баллончик со сжатым воздухом
.
l
Смочите мягкую неворсистую ткань водой или средством для чистки дисплеев и протрите дисплей
.
l
Смочите водой мягкую неворсистую тряпочку и протрите компьютер и клавиатуру
. Не допускайте попадания воды между сенсорной панелью и
окружающим ее упором для кистей рук
.
Сенсорная панель
1.
Выключите компьютер
.
2.
Отсоедините все внешние устройства от компьютера и от электросети
.
3.
Выньте все установленные аккумуляторы
(смотрите раздел
Замена аккумулятора
).
4.
Смочите водой мягкую неворсистую тряпочку и осторожно протрите поверхность сенсорной панели
. Не допускайте, чтобы вода из тряпочки
просачивалась между сенсорной панелью и окружающим ее упором для кистей рук
.
Дисковод гибких дисков
Чистку дисковода гибких дисков следует выполнять с помощью набора для чистки
, продающегося в магазинах. В этих наборах имеются
предварительно обработанные гибкие диски
, которые используются для удаления любых загрязнений, образующихся во время обычной работы.
Компакт
-диски и диски DVD
Если вы обнаружите неполадки
(например, пропуски участков) при воспроизведении компакт-дисков или дисков DVD, попробуйте почистить диски.
1.
Держите диск за внешнюю кромку
. Можно также касаться внутренней кромки центрального отверстия.
2.
Используя мягкую неворсистую ткань
, аккуратно протрите нижнюю сторону диска (не имеющую оформления) по прямой линии от центра к
краям
.
ПРЕДУПРЕЖДЕНИЕ
.
Перед тем как приступить к выполнению операций данного раздела выполните инструкции по технике безопасности
,
описанные в Информационном руководстве по продуктам
.
ПРЕДУПРЕЖДЕНИЕ
.
Перед тем как чистить компьютер
, отключите его от электросети и выньте все установленные аккумуляторы.
Очистите компьютер мягкой тряпочкой
, смоченной в воде. Не используйте жидкие и аэрозольные очистители, которые могут содержать
огнеопасные вещества
.
ЗАМЕЧАНИЕ
.
Во избежание повреждения компьютера или дисплея не распыляйте чистящий раствор прямо на дисплей
. Используйте только те
средства
, которые специально предназначены для чистки дисплеев, и следуйте прилагаемым к ним инструкциям.
ЗАМЕЧАНИЕ
.
Не разрешается чистить головки дисковода с помощью ватных тампонов
. Вы можете нечаянно сместить головки, что помешает
нормальной работе дисковода
.
ЗАМЕЧАНИЕ
.
Для очистки линзы в дисководе компакт
-дисков/дисков DVD необходимо применять сжатый воздух и следовать инструкциям,
прилагаемым к использующим его изделиям
. Не касайтесь линзы в дисководе.
ЗАМЕЧАНИЕ
.
Во избежание повреждения поверхности не протирайте диск круговыми движениями
.
Предупреждение в отношении продукта компании, Macrovision, Декларация соответствия правилам
Fcc (только для сша), Класс b по классификации fcc Чат поддержки
- Изображение
- Текст
При наличии сильных загрязнений попробуйте использовать воду или разбавленный раствор воды и мыла мягкого действия
. Можно также
приобрести специальные средства
, предназначенные для чистки дисков и обеспечивающие определенную защиту от пыли, отпечатков пальцев
и царапин
. Чистящие средства, предназначенные для компакт-дисков, можно также использовать для чистки дисков DVD.
Предупреждение в отношении продукта компании Macrovision
При изготовлении данного продукта была использована технология защиты авторского права
, защищенная рядом патентов США и прочими правами
на интеллектуальную собственность
. Указанная технология защиты авторских прав может использоваться только с разрешения компании Macrovision и
предназначена только для использования в домашних и прочих условиях с ограниченным количеством пользователей
, если компания Macrovision не
дала иного разрешения
. Инженерный анализ и дизассемблирование запрещены.
Декларация соответствия правилам FCC (только для США)
Класс
B по классификации FCC
Настоящее оборудование генерирует
, использует и может излучать радиоволны, и в случае, если оно установлено и используется не в соответствии с
разработанной производителем инструкцией по эксплуатации
, может создавать помехи на линиях радиосвязи и при приеме телевизионных программ.
Данное оборудование было испытано и признано соответствующим ограничениям для цифровых устройств класса
B согласно части 15 Правил
Федеральной комиссии по связи
(FCC).
Технические характеристики данного устройства соответствуют требованиям
, указанным в части 15 Правил FCC. При работе устройства должны
соблюдаться два следующих условия
:
1.
устройство не должно создавать вредных помех
;
2.
устройство должно выдерживать любые внешние помехи
, включая помехи, которые могут привести к неправильной работе устройства.
Данные ограничения предусмотрены для того
, чтобы обеспечить надлежащую защиту от нежелательных помех при работе оборудования в жилых
помещениях
. Тем не менее, отсутствие помех в каждом конкретном случае установки не гарантируется. Если данное оборудование становится
причиной нежелательных помех в работе радио
— или телеприемников, что можно определить путем выключения и повторного включения
оборудования
, рекомендуется попытаться устранить помехи следующим образом:
l
изменить ориентацию приемной антенны
;
l
переместить систему относительно приемника
;
l
отодвинуть систему от приемника
;
l
подключить систему в другую розетку
, чтобы система и приемник были подключены к разным ответвлениям электросети.
При необходимости обратитесь за дополнительными рекомендациями к представителю корпорации
Dell или к опытному специалисту по радио- и
телевизионной технике
.
В соответствии с нормативными документами
FCC для рассматриваемого в данном документе устройства (устройств) указываются следующие сведения.
Назад на страницу Содержание
ЗАМЕЧАНИЕ
.
В соответствии с нормативными документами
FCC, внесение изменений и модификаций, не утвержденных корпорацией Dell, может
лишить вас права пользования этим оборудованием
.
Наименование изделия
: Портативный компьютер Dell™ Latitude™ D520
Номер модели
:
PP17L
Название компании
:
Dell Inc.
Worldwide Regulatory Compliance & Environmental Affairs
One Dell Way
Round Rock, TX 78682 USA
512-338-4400
15:15
Desmontando Notebook Dell Latitude D520
10:19
Замена матрицы ноутбука DELL Latitude D520 (PP17L).
05:21
Dell Latitude D520 Laptop Review
02:40
Dell Latitude D520 Review
06:52
Infolaptop — Upgrade Laptop Vechi RAM-HDD-SSD Dell Latitude D520 D530 D620 D630 D820 D830
45:44
Dell Latitude D520 Review And Motherboard Replacement!
14:08
Como trocar a memória RAM do notebook Dell Latitude D520
Нажмите на кнопку для помощи

Dell™ Latitude™ D520
Quick Reference Guide
Model PP17L
www.dell.com | support.dell.com
Notes, Notices, and Cautions
NOTE: A NOTE indicates important information that helps you make better use of your computer.
NOTICE: A NOTICE indicates either potential damage to hardware or loss of data and tells you how to avoid the
problem.
CAUTION: A CAUTION indicates a potential for property damage, personal injury, or death.
Abbreviations and Acronyms
For a complete list of abbreviations and acronyms, see the Glossary in your
If you purchased a Dell™ n Series computer, any references in this document to Microsoft
User’s Guide
.
®
Windows®
operating systems are not applicable.
NOTE: Some features or media may be optional and may not ship with your computer. Some features or media may not
be available in certain countries.
____________________
Information in this document is subject to change without notice.
© 2006 Dell Inc. All rights reserved.
Reproduction in any manner whatsoever without the written permission of Dell Inc. is strictly forbidden.
Trademarks used in this text: Dell, the DELL logo, Latitude, and ExpressCharge are trademarks of Dell Inc.; Intel is a registered trademark of
Intel Corporation; Microsoft, Outlook, and Windows are registered trademarks of Microsoft Corporation.
Other trademarks and trade names may be used in this document to refer to either the entities claiming the marks and names or their products.
Dell Inc. disclaims any proprietary interest in trademarks and trade names other than its own.
Model PP17L
February 2006 P/N NF161 Rev. A00

Contents
Finding Information . . . . . . . . . . . . . . . . . . . . . . . . . . . . . . . . 5
Setting Up Your Computer
About Your Computer
Front View
. . . . . . . . . . . . . . . . . . . . . . . . . . . . . . . . . . 10
Left Side View
Right Side View
Back View
. . . . . . . . . . . . . . . . . . . . . . . . . . . . . . . . . . 11
Bottom View
Using a Battery
. . . . . . . . . . . . . . . . . . . . . . . . . . . . . . . . . . 13
Battery Performance
Checking the Battery Charge
Charging the Battery
Removing the Battery
Storing a Battery
Troubleshooting
. . . . . . . . . . . . . . . . . . . . . . . . . . . . . . . . . 17
Lockups and Software Problems
Dell Diagnostics
. . . . . . . . . . . . . . . . . . . . . . . . . . . . . 9
. . . . . . . . . . . . . . . . . . . . . . . . . . . . . . . 10
. . . . . . . . . . . . . . . . . . . . . . . . . . . . . . . . 11
. . . . . . . . . . . . . . . . . . . . . . . . . . . . . . . 11
. . . . . . . . . . . . . . . . . . . . . . . . . . . . . . . . 12
. . . . . . . . . . . . . . . . . . . . . . . . . . . . 13
. . . . . . . . . . . . . . . . . . . . . . . . 14
. . . . . . . . . . . . . . . . . . . . . . . . . . . . 15
. . . . . . . . . . . . . . . . . . . . . . . . . . . . 15
. . . . . . . . . . . . . . . . . . . . . . . . . . . . . . 16
. . . . . . . . . . . . . . . . . . . . . . 17
. . . . . . . . . . . . . . . . . . . . . . . . . . . . . . . 18
Index . . . . . . . . . . . . . . . . . . . . . . . . . . . . . . . . . . . . . . . . . 23
Contents 3

4 Contents
Finding Information
NOTE: Some features or media may be optional and may not ship with your computer. Some features or media may
not be available in certain countries.
NOTE: Additional information may ship with your computer.
What Are You Looking For? Find It Here
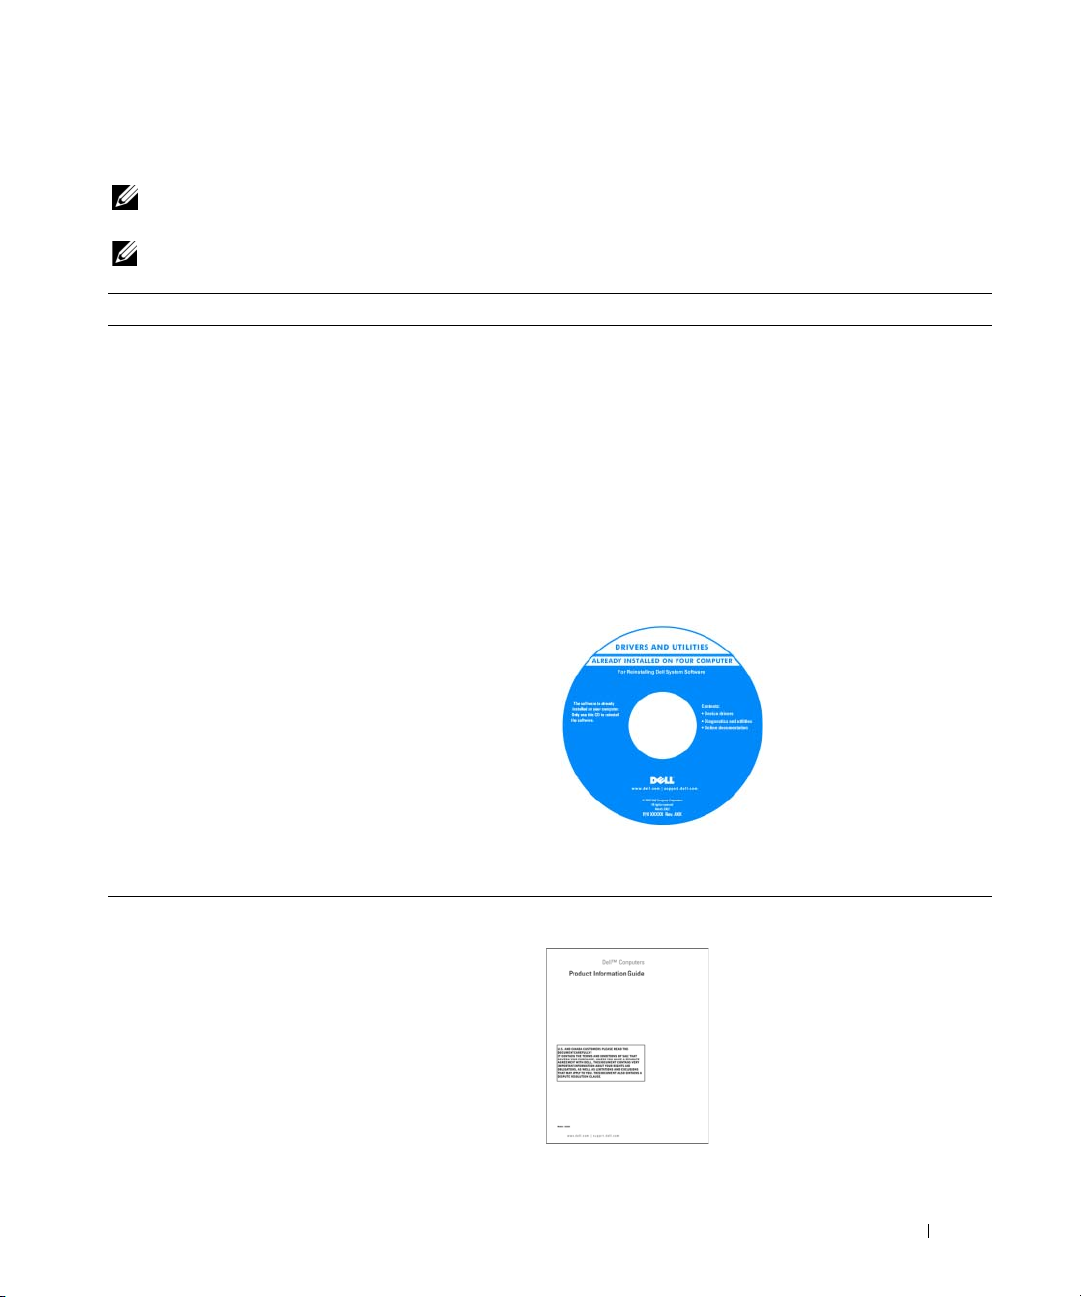
• A diagnostic program for my computer
• Drivers for my computer
• My device documentation
• Notebook System Software (NSS)
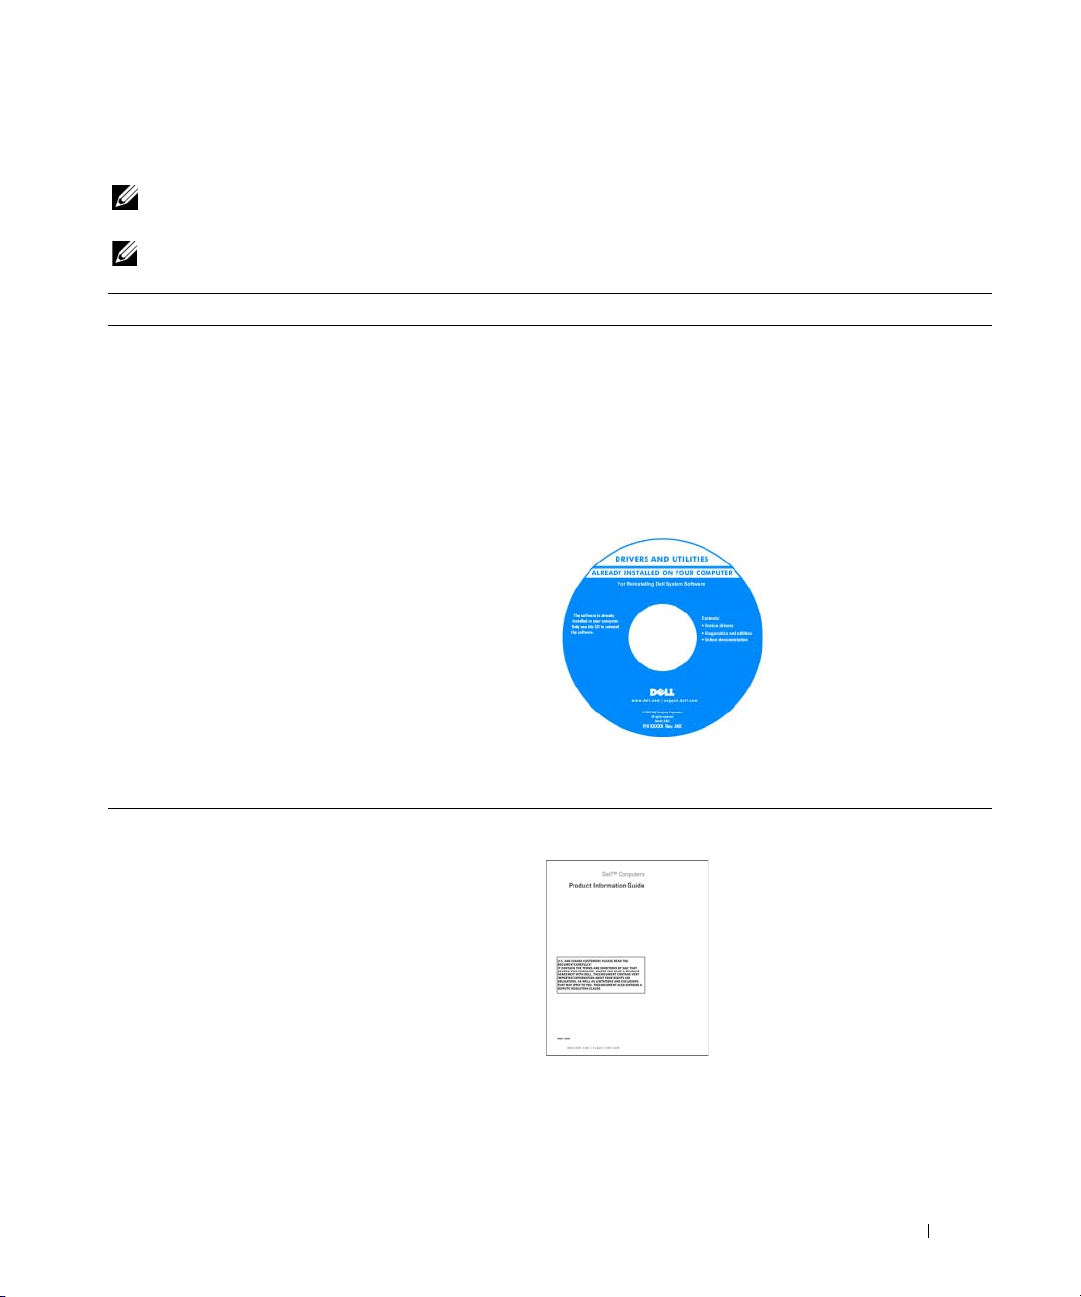
Drivers and Utilities CD (also known as ResourceCD)
NOTE: The Drivers and Utilities CD may be optional and may
not ship with your computer.
Documentation and drivers are already installed on your
computer. You can use the CD to reinstall drivers (see
«Reinstalling Drivers and Utilities» in your User’s Guide) or
to run the Dell Diagnostics (see «Dell Diagnostics» on
page 18).
Readme files may be
included on your CD to
provide last-minute
updates about technical
changes to your computer
or advanced technicalreference material for
technicians or experienced
users.
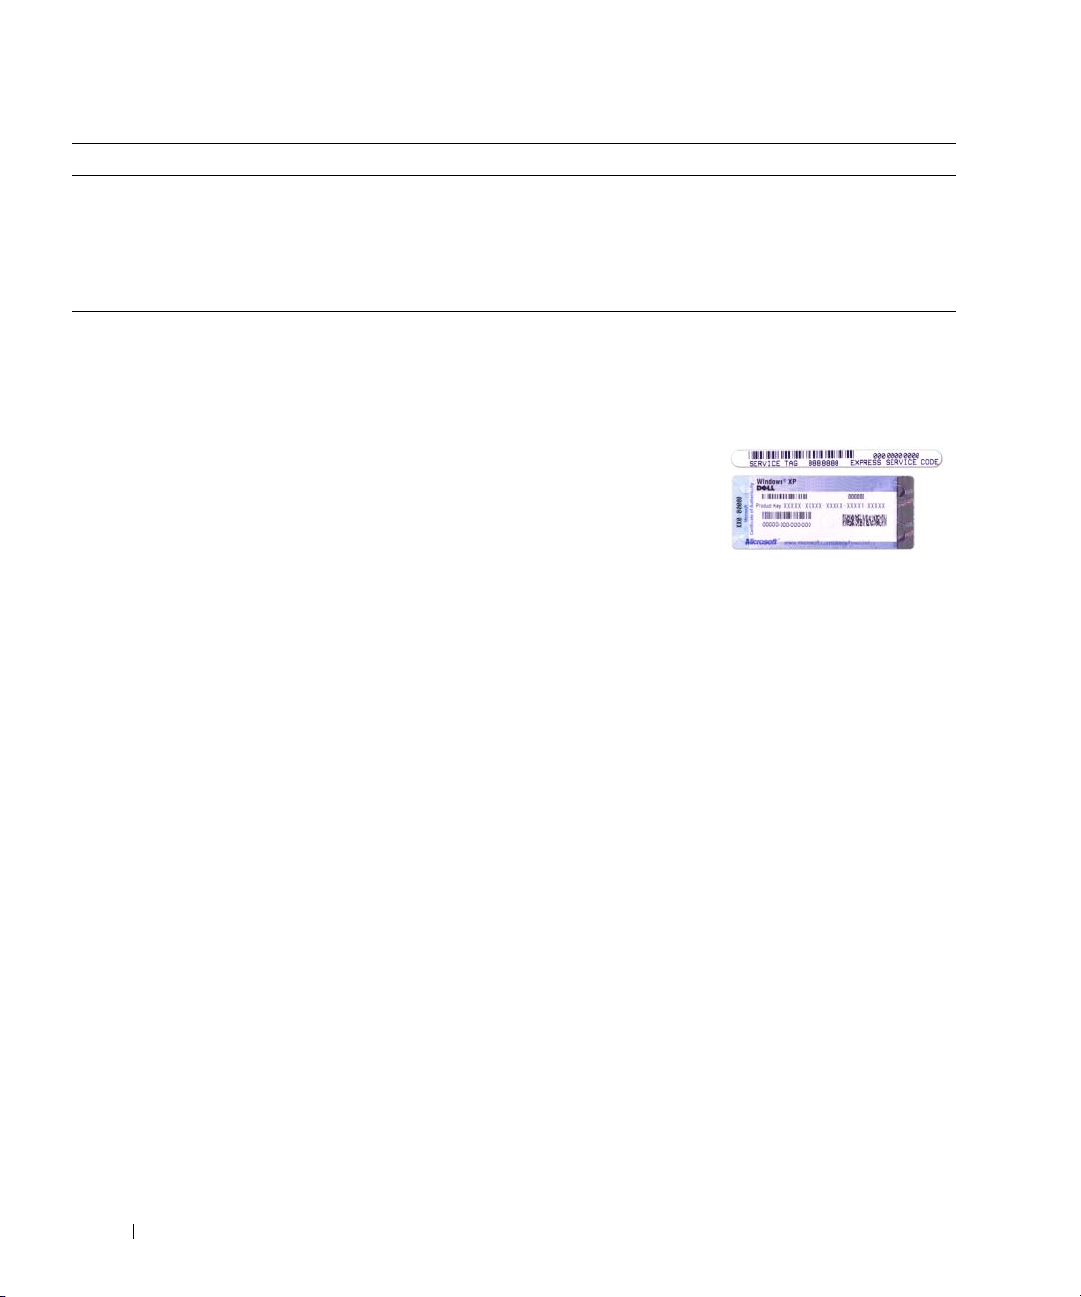
• Warranty information
• Terms and Conditions (U.S. only)
• Safety instructions
• Regulatory information
• Ergonomics information
• End User License Agreement
NOTE: Drivers and documentation updates can be found at
support.dell.com.
Dell™ Product Information Guide
Quick Reference Guide 5
What Are You Looking For? Find It Here
• How to remove and replace parts
•Specifications
• How to configure system settings
• How to troubleshoot and solve problems
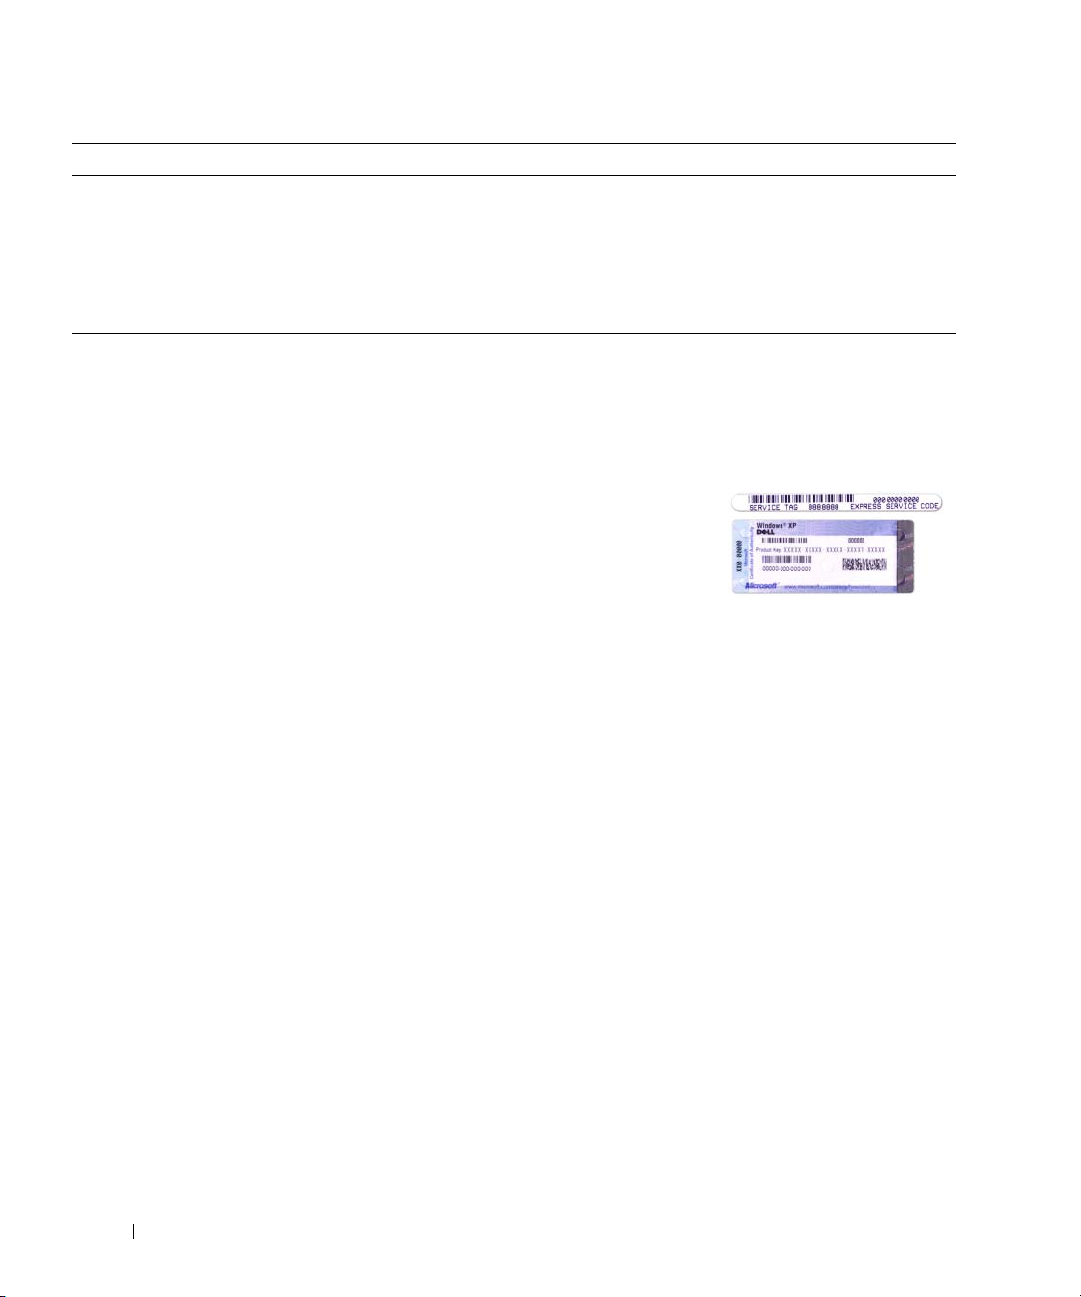
• Service Tag and Express Service Code
• Microsoft Windows License Label
Dell Latitude™ User’s Guide
Microsoft Windows XP Help and Support Center
1
Click
Start→
Guides
2
Click the
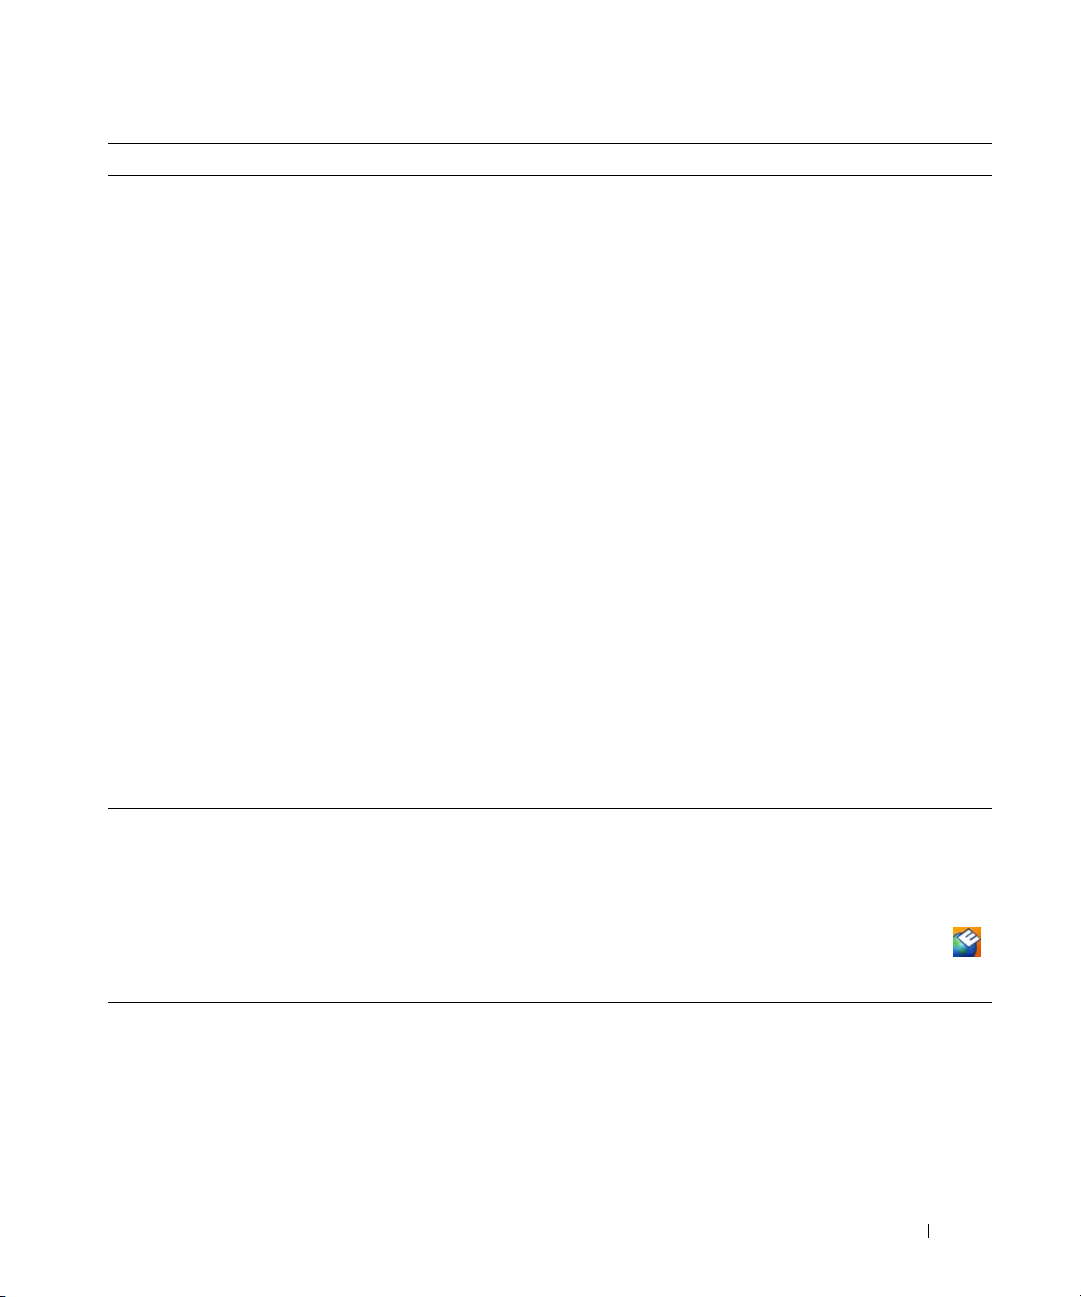
Service Tag and Microsoft® Windows® License
These labels are located on your computer.
• Use the Service Tag to identify your computer when you
use
support.dell.com
• Enter the Express
Service Code to direct
your call when
contacting support.
Help and Support→ Dell User and System
→
System Guides
User’s Guide
.
for your computer.
or contact support.
6 Quick Reference Guide
What Are You Looking For? Find It Here
• Solutions — Troubleshooting hints and tips, articles
from technicians, online courses, and frequently asked
questions
Dell Support Website — support.dell.com
NOTE: Select your region or business segment to view the
appropriate support site.
• Community — Online discussion with other Dell
customers
• Upgrades — Upgrade information for components, such
as memory, the hard drive, and the operating system
• Customer Care — Contact information, service call and
order status, warranty, and repair information
• Service and support — Service call status and support
history, service contract, online discussions with
technical support
• Reference — Computer documentation, details on my
computer configuration, product specifications, and
white papers
• Downloads — Certified drivers, patches, and software
updates
• Notebook System Software (NSS)— If you reinstall the
operating system for your computer, you should also
reinstall the NSS utility. NSS provides critical updates
for your operating system and support for Dell™
3.5-inch USB floppy drives, Intel
®
processors, optical
drives, and USB devices. NSS is necessary for correct
operation of your Dell computer. The software
automatically detects your computer and operating
system and installs the updates appropriate for your
To download Notebook System Software:
1
Go to
support.dell.com
segment, and enter your Service Tag.
2
Select
3
Click your operating system and search for the keyword
Notebook System Software
NOTE: The support.dell.com user interface may vary
depending on your selections.
configuration.
• Software upgrades and troubleshooting hints —
Frequently asked questions, hot topics, and general
health of your computing environment
Dell Support Utility
The Dell Support Utility is an automated upgrade and
notification system installed on your computer. This
support provides real-time health scans of your computing
environment, software updates, and relevant self-support
information. Access the Dell Support Utility from the
icon in the taskbar. For more information, see «Dell Support
Utility» in your
• How to use Windows XP
• How to work with programs and files
• How to personalize my desktop
Windows Help and Support Center
1
Click
Start→
2
Type a word or phrase that describes your problem and
click the arrow icon.
3
Click the topic that describes your problem.
4
Follow the instructions on the screen.
, select your region or business
Drivers & Downloads
.
User’s Guide
.
Help and Support
and click Go.
.
Quick Reference Guide 7
What Are You Looking For? Find It Here
• Information on network activity, the Power Management
Wizard, hotkeys, and other items controlled by Dell
QuickSet.
Dell QuickSet Help
To view
Dell QuickSet Help, right-click the icon
in the Microsoft
For more information on Dell QuickSet, see «Dell™
QuickSet» in your User’s Guide.
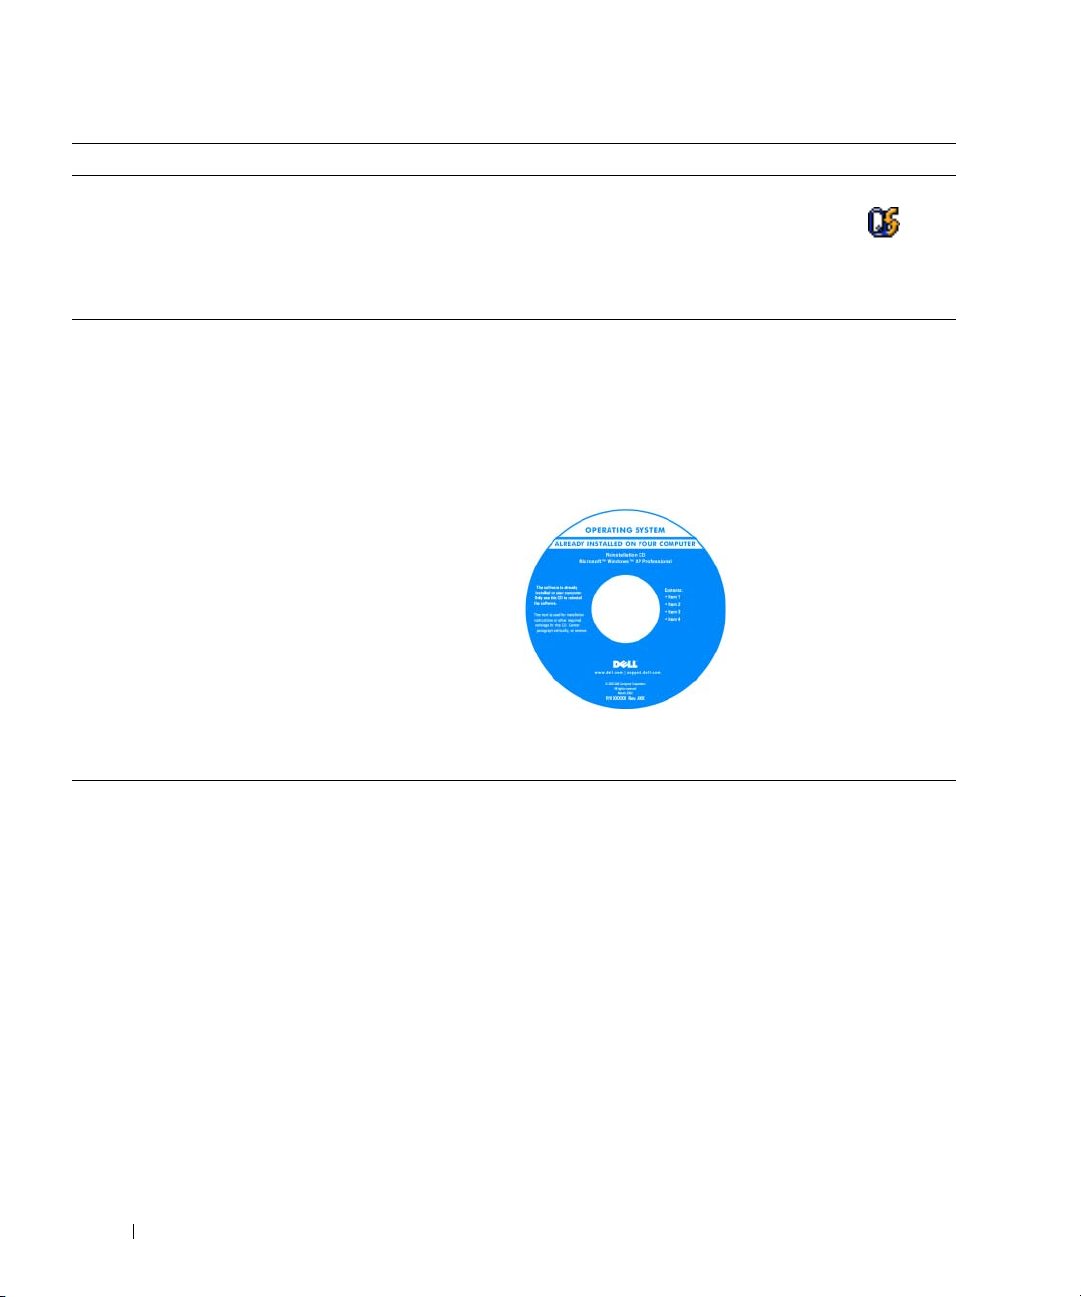
• How to reinstall my operating system
Operating System CD
NOTE: The Operating System CD may be optional and may
not ship with your computer.
The operating system is already installed on your computer.
To reinstall your operating system, use the Operating
System CD. See «Reinstalling Microsoft
in your User’s Guide.
NOTE: The color of your CD varies based on the operating
system you ordered.
®
Windows® taskbar.
After you reinstall your
operating system, use the
optional Drivers and
Utilities CD (ResourceCD)
to reinstall drivers for the
devices that came with
your computer.
Your operating system
product key label is located
on your computer.
®
Windows® XP»
8 Quick Reference Guide
Setting Up Your Computer
CAUTION: Before you begin any of the procedures in this section, follow the safety instructions in the
Information Guide
1
Unpack the accessories box.
2
Set aside the contents of the accessories box, which you will need to complete the setup of your
computer.
The accessories box also contains user documentation and any software or additional hardware (such
as PC Cards, drives, or batteries) that you have ordered.
3
Connect the AC adapter to the AC adapter connector on the computer and to the electrical outlet.
4
Open the computer display and press the power button to turn on the computer (see «Front View» on
page 10).
NOTE: It is recommended that you turn on and shut down your computer at least once before you install any cards
or connect the computer to a docking device or other external device, such as a printer.
.
Product
Quick Reference Guide 9
About Your Computer
Front View
9
1
8
7
6
1 display 2 device status lights 3 keyboard
4 touch pad 5 display latch 6 speakers
7 touch pad buttons 8 keyboard status lights 9 power button
2
3
4
5
10 Quick Reference Guide
Left Side View
352 41 6
1 security cable slot 2 IEEE 1394 connector 3 PC Card/ExpressCard slot
4 infrared sensor 5 audio connectors (2) 6 hard drive
Right Side View
1 23
1 media bay 2 device latch release 3 USB connectors (2)
Back View
CAUTION: Do not block, push objects into, or allow dust to accumulate in the air vents. Do not store your
computer in a low-airflow environment, such as a closed briefcase, while it is running. Restricting the airflow
can damage the computer or cause a fire.
Quick Reference Guide 11

8123 4 5 6 7
1 USB connectors (2) 2 modem connector (RJ-11) 3 network connector (RJ-45)
4 S-video TV-out connector 5 serial connector 6 video connector
7 AC adapter connector 8 air vents
Bottom View
1
7
6
1 memory module/modem/WLAN
Mini-Card/coin-cell battery cover
4 battery 5 docking device slot 6 air vents
7 hard drive
2 battery-bay latch release 3 battery charge gauge
2
5
3
4
12 Quick Reference Guide
Using a Battery
Battery Performance
NOTE: For information about the Dell warranty for your computer, see the Product Information Guide or separate
paper warranty document that shipped with your computer.
For optimal computer performance and to help preserve BIOS settings, operate your Dell™ portable
computer with the main battery installed at all times. One battery is supplied as standard equipment in
the battery bay.
NOTE: Because the battery may not be fully charged, use the AC adapter to connect your new computer to an
electrical outlet the first time you use the computer. For best results, operate the computer with the AC adapter
until the battery is fully charged. To view battery charge status, click Start→ Settings→ Control Panel→ Power
Options→ Power Meter.
NOTE: Battery operating time (the time the battery can hold a charge) decreases over time. Depending on how
often the battery is used and the conditions under which it is used, you may need to purchase a new battery during
the life of your computer.
Battery operating time varies depending on operating conditions. You can install an optional second
battery in the media bay to significantly increase operating time.
Operating time is significantly reduced when you perform operations including, but not limited to, the
following:
•Using optical drives
• Using wireless communications devices, PC Cards, ExpressCards, media memory cards, or USB
devices
• Using high-brightness display settings, 3D screen savers, or other power-intensive programs such as
complex 3D graphics applications
• Running the computer in maximum performance mode (see «Configuring Power Management
Settings» in your
User’s Guide
).
NOTE: It is recommended that you connect your computer to an electrical outlet when writing to a CD or DVD.
You can check the battery charge before you insert the battery into the computer (see «Checking the
Battery Charge» on page 14). You can also set power management options to alert you when the battery
charge is low
CAUTION: Using an incompatible battery may increase the risk of fire or explosion. Replace the battery only
with a compatible battery purchased from Dell. The lithium-ion battery is designed to work with your Dell
computer. Do not use a battery from other computers with your computer.
CAUTION: Do not dispose of batteries with household waste. When your battery no longer holds a charge, call
your local waste disposal or environmental agency for advice on disposing of a lithium-ion battery. See «Battery
Disposal» in the
(see «Configuring Power Management Settings» in your
Product Information Guide
.
User’s Guide
Quick Reference Guide 13
).
CAUTION: Misuse of the battery may increase the risk of fire or chemical burn. Do not puncture, incinerate,
disassemble, or expose the battery to temperatures above 60°C (140°F). Keep the battery away from children.
Handle damaged or leaking batteries with extreme care. Damaged batteries may leak and cause personal injury
or equipment damage.
Checking the Battery Charge
The Dell QuickSet Battery Meter, the Microsoft Windows Power Meter window and icon, the
battery charge gauge and health gauge, and the low-battery warning provide information on the battery
charge.
Dell™ QuickSet Battery Meter
If Dell QuickSet is installed, press <Fn><F3> to display the QuickSet Battery Meter. The Battery
Meter displays status, battery health, charge level, and charge completion time for the battery in your
computer.
For more information about QuickSet, right-click the icon in the taskbar, and click Help.
Microsoft® Windows® Power Meter
The Windows Power Meter indicates the remaining battery charge. To check the Power Meter, doubleclick the icon on the taskbar.
If the computer is connected to an electrical outlet, a icon appears.
Charge Gauge
By either pressing once or pressing and holding the status button on the charge gauge on the battery, you
can check:
• Battery charge (check by pressing and
• Battery health (check by pressing and
The battery operating time is largely determined by the number of times it is charged. After hundreds of
charge and discharge cycles, batteries lose some charge capacity—or battery health. That is, a battery can
show a status of «charged» but maintain a reduced charge capacity (health).
releasing
holding
the status button)
the status button)
Check the Battery Charge
To check the battery charge, press and release the status button on the battery charge gauge to illuminate
the charge-level lights. Each light represents approximately 20 percent of the total battery charge. For
example, if the battery has 80 percent of its charge remaining, four of the lights are on. If no lights
appear, the battery has no charge.
Check the Battery Health
NOTE: You can check battery health in one of two ways: by using the charge gauge on the battery as described
below and by using the Battery Meter in Dell QuickSet. For information about QuickSet, right-click the icon in
the taskbar, and click Help.
14 Quick Reference Guide
To check the battery health using the charge gauge, press and hold the status button on the battery
charge gauge for at least 3 seconds. If no lights appear, the battery is in good condition, and more than
80 percent of its original charge capacity remains. Each light represents incremental degradation. If five
lights appear, less than 60 percent of the charge capacity remains, and you should consider replacing the
battery. See «Specifications» in your User’s Guide for more information about the battery operating time.
Low-Battery Warning
NOTICE: To avoid losing or corrupting data, save your work immediately after a low-battery warning. Then
connect the computer to an electrical outlet. If the battery runs completely out of power, hibernate mode begins
automatically.
By default, a pop-up window warns you when the battery charge is approximately 90 percent depleted.
You can change the settings for the battery alarms in QuickSet or the Power Options Properties window.
See
«Configuring Power Management Settings» in your
User’s Guide
for information about accessing
QuickSet or the Power Options Properties window.
Charging the Battery
NOTE: With Dell™ ExpressCharge™, when the computer is turned off, the AC adapter charges a completely
discharged battery to 80 percent in about 1 hour and to 100 percent in approximately 2 hours. Charge time is longer
with the computer turned on. You can leave the battery in the computer for as long as you like. The battery’s internal
circuitry prevents the battery from overcharging.
When you connect the computer to an electrical outlet or install a battery while the computer is
connected to an electrical outlet, the computer checks the battery charge and temperature. If necessary,
the AC adapter then charges the battery and maintains the battery charge.
If the battery is hot from being used in your computer or being in a hot environment, the battery may
not charge when you connect the computer to an electrical outlet.
The battery is too hot to start charging if the light flashes alternately green and orange. Disconnect
the computer from the electrical outlet and allow the computer and the battery to cool to room
temperature. Then connect the computer to an electrical outlet to continue charging the battery.
For more information about resolving problems with a battery, see «Power Problems» in your User’s
Guide.
Removing the Battery
CAUTION: Before performing these procedures, turn off the computer, disconnect the AC adapter from the
electrical outlet and the computer, disconnect the modem from the wall connector and computer, and remove any
other external cables from the computer.
CAUTION: Using an incompatible battery may increase the risk of fire or explosion. Replace the battery only
with a compatible battery purchased from Dell. The battery is designed to work with your Dell™ computer. Do not
use a battery from other computers with your computer.
Quick Reference Guide 15
NOTICE: You must remove all external cables from the computer to avoid possible connector damage.For
information about replacing the second battery, which is located in the media bay, see «Using Multimedia» in your
User’s Guide.
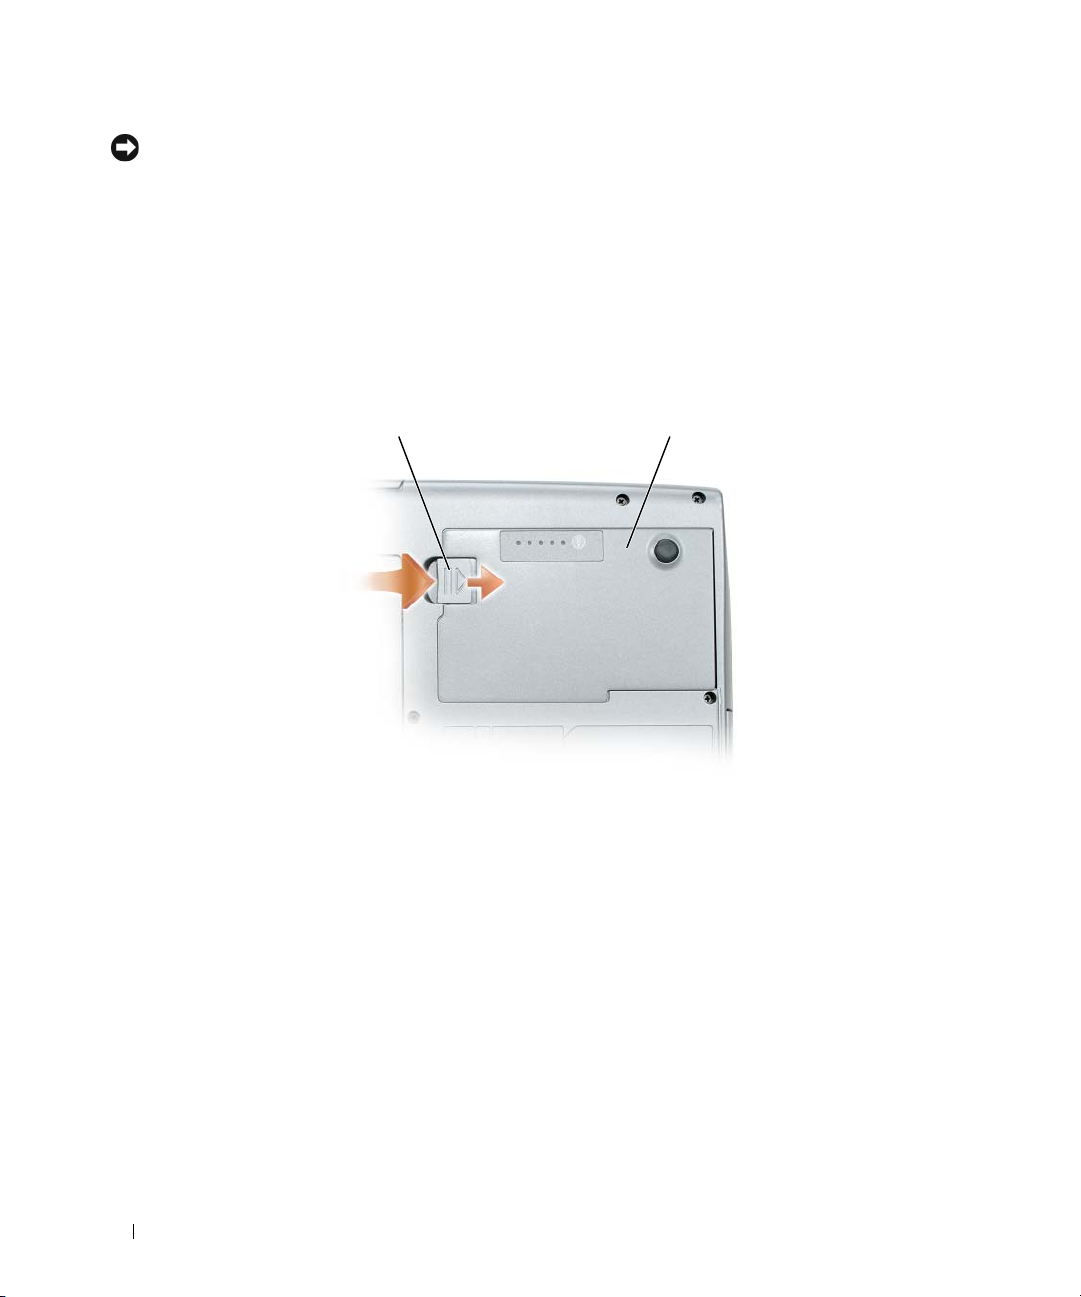
To remove the battery:
If the computer is connected to a docking device (docked), undock it. See the documentation that
1
came with your docking device for instructions.
2
Ensure that the computer is turned off.
3
Slide and hold the battery-bay latch release on the bottom of the computer.
4
Lift the battery out of the battery bay.
1 2
1 battery-bay latch release 2 battery
To replace the battery, place the battery in the bay and press down until the battery-bay latch release
clicks.
Storing a Battery
Remove the battery when you store your computer for an extended period of time. A battery discharges
during prolonged storage. After a long storage period, recharge the battery fully before you use it (see
«Charging the Battery» on page 15).
16 Quick Reference Guide
Troubleshooting
Lockups and Software Problems
CAUTION: Before you begin any of the procedures in this section, follow the safety instructions in the
Information Guide
The computer does not start up
ENSURE THAT THE AC ADAPTER IS FIRMLY CONNECTED TO THE COMPUTER AND TO THE ELECTRICAL OUTLET.
The computer stops responding
NOTICE: You might lose data if you are unable to perform an operating system shutdown.
URN THE COMPUTER OFF — If you are unable to get a response by pressing a key on your keyboard or
T
.
Product
moving your mouse, press and hold the power button for at least 8 to 10 seconds until the computer
turns off. Then restart your computer.
A program stops responding or crashes repeatedly
NOTE: Software usually includes installation instructions in its documentation or on a floppy disk or CD.
E
ND THE PROGRAM —
1
Press <Ctrl><Shift><Esc> simultaneously.
2
Click
Tas k Ma n a g e r
3
Click the program that is no longer responding.
4
Click
End Task
CHECK THE SOFTWARE DOCUMENTATION — If necessary, uninstall and then reinstall the program.
A program is designed for an earlier Microsoft® Windows® operating system
RUN THE PROGRAM COMPATIBILITY WIZARD — The Program Compatibility Wizard configures a program
.
.
so that it runs in an environment similar to non-Windows XP operating system environments.
1
Click
Start→
2
Follow the instructions on the screen.
All Programs→ Accessories→
Program Compatibility Wizard→ Next
.
A solid blue screen appears
TURN THE COMPUTER OFF — If you are unable to get a response by pressing a key on your keyboard or
moving your mouse, press and hold the power button for at least 8 to 10 seconds until the computer
turns off. Then restart your computer.
Quick Reference Guide 17
Other software problems
CHECK THE SOFTWARE DOCUMENTATION OR CONTACT THE SOFTWARE MANUFACTURER FOR TROUBLESHOOTING
INFORMATION —
• Ensure that the program is compatible with the operating system installed on your computer.
• Ensure that your computer meets the minimum hardware requirements needed to run the software.
See the software documentation for information.
• Ensure that the program is installed and configured properly.
• Verify that the device drivers do not conflict with the program.
• If necessary, uninstall and then reinstall the program.
BACK UP YOUR FILES IMMEDIATELY.
SE A VIRUS—SCANNING PROGRAM TO CHECK THE HARD DRIVE, FLOPPY DISKS, OR CDS.
U
AVE AND CLOSE ANY OPEN FILES OR PROGRAMS AND SHUT DOWN YOUR COMPUTER THROUGH THE Start MENU.
S
S
CAN THE COMPUTER FOR SPYWARE —If you are experiencing slow computer performance, you
frequently receive pop-up advertisements, or you are having problems connecting to the Internet, your
computer might be infected with spyware. Use an anti-virus program that includes anti-spyware
protection (your program may require an upgrade) to scan the computer and remove spyware. For more
information, go to support.dell.com and search for the keyword spyware.
RUN THE DELL DIAGNOSTICS — See «Dell Diagnostics» on page 18. If all tests run successfully, the error
condition is related to a software problem.
Dell Diagnostics
CAUTION: Before you begin any of the procedures in this section, follow the safety instructions in the
Information Guide
.
Product
When to Use the Dell Diagnostics
If you experience a problem with your computer, perform the checks in «Lockups and Software Problems»
on page 17 and run the Dell Diagnostics before you contact Dell for technical assistance.
It is recommended that you print these procedures before you begin.
NOTICE: The Dell Diagnostics works only on Dell™ computers.
NOTE: The Drivers and Utilities CD is optional and may not ship with your computer.
Start the Dell Diagnostics from either your hard drive or from the Drivers and Utilities CD (also known
as the ResourceCD).
18 Quick Reference Guide

Starting the Dell Diagnostics From Your Hard Drive
The Dell Diagnostics is located on a hidden diagnostic utility partition on your hard drive.
NOTE: If your computer cannot display a screen image, contact Dell (see «Contacting Dell» in your User’s Guide).
1
Shut down the computer.
2
If the computer is connected to a docking device (docked), undock it. See the documentation that
came with your docking device for instructions.
3
Connect the computer to an electrical outlet.
4
Diagnostics can be invoked in one of two ways:
a
Turn on the computer. When the DELL™ logo appears, press <F12> immediately. Select
Diagnostics from the boot menu and press <Enter>.
NOTE: If you wait too long and the operating system logo appears, continue to wait until you see the
Microsoft
Press and hold the <Fn> key while powering the computer on.
b
NOTE: If you see a message stating that no diagnostics utility partition has been found, run the Dell
Diagnostics from the Drivers and Utilities CD.
®
Windows® desktop. Then shut down your computer and try again.
The computer runs the Pre-boot System Assessment, a series of initial tests of your system board,
keyboard, hard drive, and display.
• During the assessment, answer any questions that appear.
• If a failure is detected, the computer stops and beeps. To stop the assessment and restart the
computer, press <Esc>; to continue to the next test, press <y>; to retest the component that
failed, press <r>.
• If failures are detected during the Pre-boot System Assessment, write down the error code(s) and
contact Dell (see «Contacting Dell» in your
If the Pre-boot System Assessment completes successfully, you receive the message
Diagnostic Utility Partition. Press any key to continue
5
Press any key to start the Dell Diagnostics from the diagnostics utility partition on your hard drive.
Starting the Dell Diagnostics From the Drivers and Utilities CD
1
Insert the
2
Shut down and restart the computer.
Drivers and Utilities
CD.
User’s Guide
).
Booting Dell
.
When the DELL logo appears, press <F12> immediately.
If you wait too long and the Windows logo appears, continue to wait until you see the Windows
desktop. Then shut down your computer and try again.
NOTE: The next steps change the boot sequence for one time only. On the next start-up, the computer boots
according to the devices specified in the system setup program.
Quick Reference Guide 19

3
When the boot device list appears, highlight
4
Select the
5
Ty p e 1 to start the menu and press <Enter> to proceed.
6
Select
Boot from CD-ROM
option from the menu that appears and press <Enter>.
Run the 32 Bit Dell Diagnostics
CD/DVD/CD-RW Drive
from the numbered list. If multiple versions are listed, select
the version appropriate for your computer.
7
When the Dell Diagnostics
Dell Diagnostics Main Menu
1
After the Dell Diagnostics loads and the
Main Menu
appears, select the test you want to run.
Main Menu
screen appears, click the button for the option
you want.
Option Function
Express Test Performs a quick test of devices. This test typically takes
10 to 20 minutes and requires no interaction on your
part. Run Express Test first to increase the possibility of
tracing the problem quickly.
Extended Test Performs a thorough check of devices. This test typically
takes 1 hour or more and requires you to answer
questions periodically.
Custom Test Tests a specific device. You can customize the tests you
want to run.
Symptom Tree Lists the most common symptoms encountered and
allows you to select a test based on the symptom of the
problem you are having.
and press <Enter>.
2
If a problem is encountered during a test, a message appears with an error code and a description of the
problem. Write down the error code and problem description, and follow the instructions on the
screen.
If you cannot resolve the error condition, contact Dell (see «Contacting Dell» in your
NOTE: The Service Tag for your computer is located at the top of each test screen. If you contact Dell, the
technical support representative will ask you for your Service Tag.
3
If you run a test from the
Custom Test
or
Symptom Tree
option, click the applicable tab described in
the following table for more information.
Tab Function
Results Displays the results of the test and any error conditions
encountered.
Errors Displays error conditions encountered, error codes, and
the problem description.
20 Quick Reference Guide
User’s Guide
).

Tab Function
Help Describes the test and may indicate requirements for
running the test.
Configuration Displays your hardware configuration for the selected
device.
The Dell Diagnostics obtains configuration information
for all devices from the system setup program, memory,
and various internal tests, and it displays the information
in the device list in the left pane of the screen. The
device list may not display the names of all the
components installed on your computer or all devices
attached to your computer.
Parameters Allows you to customize the test by changing the test
settings.
4
When the tests are completed, if you are running the Dell Diagnostics from the
CD, remove the CD.
5
When the tests are complete, close the test screen to return to the
Diagnostics and restart the computer, close the
Main Menu
Main Menu
screen.
Drivers and Utilities
screen. To exit the Dell
Quick Reference Guide 21

22 Quick Reference Guide

Index
A
anti-virus software, 18
B
battery
charge gauge, 14
charging, 15
checking the charge, 14
performance, 13
power meter, 14
removing, 15
storing, 16
C
CDs
Drivers and Utilities, 5
operating system, 8
computer
crashes, 17
slow performance, 18
stops responding, 17
D
Dell Diagnostics
about, 18
starting from the Drivers and
Utilities CD, 19
starting from the hard
drive, 19
using, 18
Dell support site, 7
diagnostics
Dell, 18
documentation
End User License
Agreement, 5
ergonomics, 5
online, 7
Product Information Guide, 5
regulatory, 5
safety, 5
User’s Guide, 6
warranty, 5
Drivers and Utilities CD, 5
E
End User License
Agreement, 5
ergonomics information, 5
H
hardware
Dell Diagnostics, 18
Help and Support Center, 7
help file
Windows Help and Support
Center, 7
L
labels
Microsoft Windows, 6
Service Tag, 6
O
operating system
CD, 8
reinstalling, 8
P
problems
blue screen, 17
computer crashes, 17
computer does not start up, 17
computer stops responding, 17
Dell Diagnostics, 18
lockups, 17
program crashes, 17
program stops responding, 17
programs and Windows
compatibility, 17
slow computer
performance, 18
software, 17-18
spyware, 18
Product Information Guide, 5
Index 23

Q
U
QuickSet Help, 8
R
regulatory information, 5
ResourceCD
Dell Diagnostics, 18
S
safety instructions, 5
Service Tag, 6
software
problems, 17-18
spyware, 18
support website, 7
system views
back, 11
bottom, 11-12
front, 10
left side, 11
right side, 11
User’s Guide, 6
W
warranty information, 5
Windows XP
Help and Support Center, 7
Program Compatibility
Wizard, 17
reinstalling, 8
wizards
Program Compatibility
Wizard, 17
T
troubleshooting
Dell Diagnostics, 18
Help and Support Center, 7
lockups and software
problems, 17
24 Index

Dell™ Latitude™ D520
Snelle referentiegids
Model PP17L
www.dell.com | support.dell.com
Opmerkingen, kennisgevingen en waarschuwingen
OPMERKING: Een OPMERKING duidt belangrijke informatie aan voor een beter gebruik van de computer.
KENNISGEVING: Een KENNISGEVING duidt potentiële schade aan hardware of potentieel gegevensverlies aan en
vertelt u hoe het probleem kan worden vermeden.
WAARSCHUWING: Een WAARSCHUWING duidt het risico op schade aan eigendommen, lichamelijk letsel of
overlijden aan.
Afkortingen en acroniemen
Een volledige lijst met afkortingen en acroniemen vindt u in de woordenlijst in de
Als u een Dell™ n Series-computer hebt gekocht, zijn alle referenties in dit document naar Microsoft
Gebruikershandleiding
®
.
Windows®-besturingsystemen niet van toepassing.
OPMERKING: Sommige kenmerken of media kunnen optioneel zijn en niet zijn meegeleverd met uw computer.
Sommige kenmerken of media zijn wellicht niet beschikbaar in bepaalde landen.
____________________
De informatie in dit document kan zonder voorafgaande kennisgeving worden gewijzigd.
© 2006 Dell Inc. Alle rechten voorbehouden.
Verveelvoudiging van dit materiaal, op welke wijze dan ook, is alleen toegestaan na uitdrukkelijke schriftelijke toestemming van Dell Inc.
Handelsmerken in dit document: Dell, het DELL-logo, Latitude en ExpressCharge zijn handelsmerken van Dell Inc.; Intel is een geregistreerd
handelsmerk van Intel Corporation; Microsoft, Outlook en Windows zijn geregistreerde handelsmerken van Microsoft Corporation.
Overige handelsmerken en handelsnamen kunnen in dit document gebruikt om te verwijzen naar entiteiten die het eigendomsrecht op de merken
claimen dan wel de namen van hun producten. Dell Inc. claimt op geen enkele wijze enig eigendomsrecht ten aanzien van andere merken of
handelsnamen dan haar eigen merken en handelsnamen.
Model PP17L
Februari 2006 P/N NF161 Rev. A00

Inhoudsopgave
Informatie zoeken . . . . . . . . . . . . . . . . . . . . . . . . . . . . . . . . 29
De computer instellen
Over de computer
Vooraanzicht
Linkeraanzicht
Rechteraanzicht
Achteraanzicht
Onderaanzicht
Batterijen gebruiken
Batterijprestaties
De batterijlading controleren
De batterij opladen
De batterij verwijderen
Een batterij opslaan
Foutopsporing
. . . . . . . . . . . . . . . . . . . . . . . . . . . . . . . . . . 41
Vastlopen en softwareproblemen
Dell Diagnostics (Dell-diagnoseprogramma)
. . . . . . . . . . . . . . . . . . . . . . . . . . . . . . 33
. . . . . . . . . . . . . . . . . . . . . . . . . . . . . . . . 34
. . . . . . . . . . . . . . . . . . . . . . . . . . . . . . . . 34
. . . . . . . . . . . . . . . . . . . . . . . . . . . . . . . 35
. . . . . . . . . . . . . . . . . . . . . . . . . . . . . . 35
. . . . . . . . . . . . . . . . . . . . . . . . . . . . . . . 35
. . . . . . . . . . . . . . . . . . . . . . . . . . . . . . . 36
. . . . . . . . . . . . . . . . . . . . . . . . . . . . . . . 37
. . . . . . . . . . . . . . . . . . . . . . . . . . . . . . 37
. . . . . . . . . . . . . . . . . . . . . . . . 38
. . . . . . . . . . . . . . . . . . . . . . . . . . . . . 39
. . . . . . . . . . . . . . . . . . . . . . . . . . . 40
. . . . . . . . . . . . . . . . . . . . . . . . . . . . . 41
. . . . . . . . . . . . . . . . . . . . . 41
. . . . . . . . . . . . . . . . 42
Index . . . . . . . . . . . . . . . . . . . . . . . . . . . . . . . . . . . . . . . . . 47
Inhoudsopgave 27

28 Inhoudsopgave
Informatie zoeken
OPMERKING: Sommige kenmerken of media kunnen optioneel zijn en niet zijn meegeleverd met uw computer.
Sommige kenmerken of media zijn wellicht niet beschikbaar in bepaalde landen.
OPMERKING: Mogelijk is er bij uw computer aanvullende informatie geleverd.
Waarnaar zoekt u? Hier kunt u het vinden
• Een diagnoseprogramma voor de computer
• Stuurprogramma’s voor de computer
• Documentatie voor mijn toestel
• Notebook System Software (NSS)
De cd Drivers and Utilities (Stuur- en hulpprogramma’s, ook
bekend als de ResourceCD)
OPMERKING: De cd Drivers and Utilities (Stuur- en
hulpprogramma’s) is optioneel en is mogelijk niet met uw
computer meegeleverd.
De documentatie en stuurprogramma’s zijn reeds op de
computer geïnstalleerd. U kunt de cd gebruiken om de
stuurprogramma’s opnieuw te installeren (zie «Stuur- en
hulpprogramma’s opnieuw installeren» in de
Gebruikershandleiding) of om het Delldiagnoseprogramma te gebruiken (zie «Dell Diagnostics
(Dell-diagnoseprogramma)» op pagina 42).
Mogelijk bevat de cd
leesmij-bestanden met
de laatst beschikbare
informatie over technische
wijzigingen aan de
computer of geavanceerd
technisch naslagmateriaal
voor technici en
gevorderde gebruikers.
• Garantie-informatie
• Algemene voorwaarden (alleen Verenigde Staten)
• Veiligheidsinstructies
• Informatie over regelgeving
• Ergonomische informatie
• Licentieovereenkomst voor eindgebruikers
OPMERKING: Updates van de stuurprogramma’s en
documentatie vindt u op support.dell.com.
Dell™ Productinformatiegids
Snelle referentiegids 29
Waarnaar zoekt u? Hier kunt u het vinden
• Onderdelen verwijderen en vervangen
•Specificaties
• Systeeminstellingen configureren
• Problemen vaststellen en oplossen
• Servicelabel en expresse-servicecode
• Microsoft Windows-licentielabel
Dell Latitude™ Gebruikershandleiding
Help en ondersteuning van Microsoft Windows XP
1
Klik op
Start→
Help and ondersteuning→ Dell User and
System Guides
System Guides
2
Klik op de
(Gebruiks- en systeemhandleidingen)→
(Systeemhandleidingen).
Gebruikershandleiding
Servicelabel en Microsoft® Windows®-licentielabel
Deze labels bevinden zich op de computer.
• Gebruik het servicelabel om de computer te identificeren
als u gebruikmaakt van
opneemt met de technische ondersteuning.
• Voer de expresseservicecode in zodat uw
telefonische verzoek
naar de juiste
medewerker van de
ondersteuningsdienst
wordt doorgeleid.
van uw computer.
support.dell.com
of contact
30 Snelle referentiegids
Loading…
- About
- Blog
- Projects
- Help
-
Donate
Donate icon
An illustration of a heart shape - Contact
- Jobs
- Volunteer
- People
Bookreader Item Preview
texts
Dell: Latitude D520 Service Manual
- Topics
- remove, display, connector, computer, processor, assembly, module, removing, contents, system, safety instructions, main battery, working inside, hinge cover, system board, service manual, palm rest, hard drive, prevent damage, wrist grounding
- Collection
- service-manual-dell; laptopmanuals; manuals; computermanuals; additional_collections
- Language
- English
- Item Size
- 19.4M
- Addeddate
- 2012-10-28 11:01:06
- Identifier
- dell-manual-latitude-d520service-manual
- Identifier-ark
- ark:/13960/t0ks7zq14
- Ocr
- ABBYY FineReader 8.0
- Ppi
- 600
comment
Reviews
There are no reviews yet. Be the first one to
write a review.
1,252
Views
1
Favorite
DOWNLOAD OPTIONS
Temporarily Unavailable
DAISY
For users with print-disabilities
Temporarily Unavailable
EPUB
Uploaded by
The Manual Librarian
on
SIMILAR ITEMS (based on metadata)

Dell™ Latitude™ D520 User’s Guide
About Your Computer
Finding Information
Using a Battery
Using the Display
Using the Keyboard and Touch Pad
Using Multimedia
Using Cards
Setting Up a Network
Securing Your Computer
Troubleshooting
System Setup Program
Reinstalling Software
Adding and Replacing Parts
Dell™ QuickSet
Traveling With Your Computer
Getting Help
Specifications
Appendix
Glossary
Click the links to the left for information on the features and operation of your computer. For information on other documentation included with your computer,
see
Finding Information
.
Notes, Notices, and Cautions
Abbreviations and Acronyms
For a complete list of abbreviations and acronyms, see
Glossary
.
If you purchased a Dell™ n Series computer, any references in this document to Microsoft®
Windows® operating systems are not applicable.
Information in this document is subject to change without notice.
© 2006 Dell Inc. All rights reserved.
Reproduction in any manner whatsoever without the written permission of Dell Inc. is strictly forbidden.
Trademarks used in this text: Dell, the DELL logo, Inspiron, Dell Precision, Dimension, OptiPlex, Latitude, PowerEdge, PowerVault, PowerApp, ExpressCharge, Dell TravelLite, Undock & Go,
and Dell OpenManage are trademarks of Dell Inc.; Core is a trademark and Intel, Pentium, and Celeron are registered trademarks of Intel Corporation; Microsoft, Outlook, and Windows
are registered trademarks of Microsoft Corporation; Bluetooth is a registered trademark owned by Bluetooth SIG, Inc. and is used by Dell under license; EMC is a registered
trademark of EMC Corporation; ENERGY STAR is a registered trademark of the U.S. Environmental Protection Agency. As an ENERGY STAR partner, Dell Inc. has determined that this
product meets the ENERGY STAR guidelines for energy efficiency.
Other trademarks and trade names may be used in this document to refer to either the entities claiming the marks and names or their products. Dell Inc. disclaims any
proprietary interest in trademarks and trade names other than its own.
Model PP17L
November 2006 Rev. A01
NOTE:
A NOTE indicates important information that helps you make better use of your computer.
NOTICE:
A NOTICE indicates either potential damage to hardware or loss of data and tells you how to avoid the problem.
CAUTION:
A CAUTION indicates a potential for property damage, personal injury, or death.