
- May 15, 2024
- Wurkkos
Table of Contents
- Wurkkos TS21 Rechargeable EDC Flashlight
- Product Information
- Technical Parameters
- Battery Specifications
- Integrated Charger
- Operation Instructions
- Troubleshooting and Maintenance
- References
- Read User Manual Online (PDF format)
- Download This Manual (PDF format)
Wurkkos TS21 Rechargeable EDC Flashlight

- Modes: Variable settings between Moonlight and Turbo (see manual)
- Luminous Flux: 1 – 3500 lm
- Runtime: 21700
- Beam Distance: 11900 m / 3.28 ft.
- Peak Intensity: 1m / 3.28 ft.
- Impact Resistance: IPX-8 (up to 2m underwater)
- Water Resistance: Water resistance i.a.w. IPX-8
- Charging Specification: USB-C port, input/output 3A
Product Information
The Wurkkos TS21 is an extremely bright, powerful, and versatile EDC
flashlight is designed for various uses including home, professional, and
outdoor activities like camping, hiking, or fishing. It is powered by a single
21700 Li-ion rechargeable battery and features USB-C rechargeability for
convenience.
Features:
- Manufactured to hard-anodized military-grade specification type III
- Anti-abrasive finish for a solid-built body
- Anti-crash geometry and better heat exchange
- Mode Memory: memorizes the last brightness level used
- Low Voltage Protection: automatic step down to avoid over-discharge
Battery Type:
Rechargeable Li-ion battery – 21700 x 1
Safety Precautions:
- Proper installation of the battery is crucial to avoid short circuits
- Handle lithium-ion batteries with care and dispose of damaged ones properly
- Recharge when low voltage indication is given
- Avoid pointing directly at living beings or using Strobe mode on sensitive individuals
Usage Instructions:
Quick Start:
- Unscrew the tail cap
- Insert one 21700 battery with the anode side (+) towards the head
- Screw the tail cap back on (do not over-tighten)
Battery Installation:
Ensure the negative end of the battery is visible before tightening the tail
cap to prevent short circuits.
Battery Safety:
Handle batteries carefully to avoid hazardous conditions due to short-
circuiting or damage.
Charging:
Connect the USB-C charging cable to a USB charger when low voltage indication
is given. Monitor battery voltage using theBattCheck feature.
Flashlight Care:
Avoid hitting or dropping the flashlight, especially at high brightness
levels. Be cautious with maximum brightness settings to prevent burns.
FAQ
- Q: Can I use a different type of battery with the TS21 flashlight?
- A : No, the TS21 is compatible only with a rechargeable Li-ion battery – 21700 x 1.
- Q: What should I do if the flashlight does not turn on?
- A : Check the battery installation, ensure it is fully charged, and contact customer support if issues persist.
User Manual
Wurkkos TS21 is an extremely bright, powerful, and versatile EDC flashlight,
designed for home and professional use as well as outdoor activities like
camping, hiking or fishing. It is powered by a single 21700 Li-ion
rechargeable battery. For ultimate convenience, it can be recharged via USB-C.
TS21 delivers a maximum output of up to 3500 lumens (when in 6500K, the lower
the color temperature value, the lower the brightness value)with a maximum
range of 217 meters. Its side switch controls all functions: power
on/off, battery indicator, output level, and change of mode groups. The
sophisticated Andúril 2.0 provides a both user-friendly and highly flexible
interaction as well as simple one-hand operation.
Technical Parameters

Specifications
- Emitter : 3x SST20
- Operating voltage : 2.8V – 4.2V
- Battery options: 1x 21700
- Dimension : 113.4mm (length) x28mm (head diameter)
- Weight : 79 grams (without battery)
- Flashlight body : Aerospace grade 6061 grade aluminum alloy, CNC manufactured to hard-anodized to military grade specification type III, anti-abrasive finish to get solid built body, anti-crash geometry and better heat exchange.
- Water resistance i.a.w. IPX-8
- Mode Memory : memorizes the last brightness level used in the general modes (except Strobe)
- Low Voltage Protection : If the battery’s voltage is lower than 2.8V, TS21 steps down automatically to avoid battery damage by over discharge. At 2.7V the flashlight will turn off automatically.

- Advanced Temperature Regulation (ATR) technology: By default ATR will reduce the brightness level automatically when the driver temperature reaches 45°C to prevent overheating. You can set a different temperature threshold by following the thermal configuration guideline.
- Firmware : TS21 uses open source software called Andúril 2.0, distributed under the terms of the GPL v3. The source code is available from http://tiny.cc/TKAnduril
Battery Specifications
Safety Precautions
- Pay close attention to the proper installation of the battery. Incorrect installation could result in short circuit when the tailcap is tightened, risking fire and causing damage to TS21. Always check at least three times that the negative end of the battery is visible at the tube’s end before screwing the tailcap back on.
- Due to the high energy density of lithium-ion batteries hazardous conditions are created when a cell is short-circuited or damaged. Always treat batteries carefully and properly dispose of any damaged batteries.
- Connect the included USB-C charging cable to a USB charger and recharge TS21 when the low voltage indication is given. This indication is an uncommanded drop in the light’s brightness, or a mode change and a low output level. Eventually the light output will extinguish. The battery voltage may be measured using the BattCheck feature.
- TS21 is a very high-intensity flashlight. Never point it directly at a person, animal, or moving vehicles Please do not allow children to play with it. Strobe mode may cause seizure in persons with photosensitive epilepsy.
- When running at higher output levels the head of the flashlight will heat up quickly. This is normal. In warmer ambient conditions this temperature may easily exceed 45°C depending on your settings, so please take the necessary precautions when handling TS21.
- Avoid hitting or dropping the flashlight. Be careful when using maximum brightness at high custom temperature settings in order to avoid burning your hands.
Quick Start
- Unscrew the tailcap to insert one 21700 battery with the anode side (+) towards the head, then screw the tailcap back on. Do not over-tighten the tailcap. When you change the battery the flashlight always starts at the regulated level (1×7135).
- All functions are controlled using the electronic side switch. Basic usage is very simple. Click for on/off, hold to change brightness. Release the button and hold again to change brightness in the other direction.
- In this manual, click is press the switch and release, while hold is press the switch until you get the desired result, then release. Often the last of a series of button presses is a hold, so click, click, hold, is to depress the switch and release twice, and depress a third time until the desired result. This would be the same as 3H in the User Interface diagram. For multiple clicks, they need to be within a couple tenths of a second. Not lighting fast, but fairly quick.
- From OFF, hold the button to turn it on in the lowest level. TS21’s output will ramp up from a very low level to maximum output. Release the button when the desired light output level is reached. The full ramp takes about 3s. Use a single-click at any time to turn TS21 OFF. The Operation Instructions section of this manual describes all the features of TS21.
- While ramping TS21 blinks to indicate the lowest brightness level (subsequently called FLOOR in this manual) and highest brightness level (subsequently called CEILING in this manual).
- TURBO is meant for short bursts, only. After around a minute you may notice it dims slowly down. Use it only for short periods instead of relying on thermal regulation to prevent heat damage. Full turbo is powerful enough to start fires in just a few seconds, especially when aimed at dark-colored materials.
Integrated Charger
TS21 uses an integrated USB-C charging port for convenient recharging of its
battery. Please connect it with a quality USB-C cable and use a USB power
adapter with 5V 3A. While charging the LED power indicator flashes blue. Once
finished the indicator will turn blue to indicate a full battery.
Operation Instructions
m

Simple UI (default)
By default, the light uses a simple UI. This is useful if you lend the light
to someone else, or if you just don’t want to bother with any crazy disco
modes.
Simple UI has all the basic functions needed to work as a flashlight, but the
minimum and maximum brightness are limited to make it safer, and any complex
or advanced functions are blocked.
Functions available in Simple UI include:
- 1C : On / off
- 1H : Ramp up (or down, if the button was released less than a second ago)
- 2H : If the light is on: ramp down
- If the light is off: momentary high mode
- 2C : Double-click to go to/from the highest safe level
- 3C : Toggle between SMOOTH RAMPING and STEPPED RAMPING (while light is on)
- 4C : Lockout mode.
Some other modes and functions are available too. When the light is off, these
are the options:
- 3C : Battery check mode. (displays voltage once, then turns off)
- 4C : Lockout mode.
- 10H : Switch to Advanced UI.
- 15C or more : Version check.
In Lockout mode with Simple UI, there are a few functions:
- 1H : Momentary moon
- 2H : Momentary low
- 4C : Unlock and turn on
- 4H : Unlock and turn on at low level
- 5C : Unlock and turn on at high level
To change between Simple UI and Advanced UI, turn the light off and then do
one of these:
In Simple UI:
- 10H : Go to Advanced UI. In Advanced UI:
- 10C : Go to Simple UI.
- 10H : Configure Simple UI.
If you get lost, or if you want to auto-calibrate the temperature sensor,
do a Factory Reset. The process for this is:
- Loosen body tube
- Hold button
- Tighten body tube
- Keep holding button for about 4s
The light should flicker while getting brighter, then briefly burst to full
power. Hold until it reaches full power to do a reset, or let go of the button
early to abort.

Advanced UI
- Default UI : Smooth ramping
- This UI provides smooth dimming of the light output between FLOOR (lowest level) and CEILING (highest level), with an easily accessible 100% TURBO mode.
- Switch to STEPPED RAMP : click 3 times while the light is on( If you use 3 clicks from OFF you engage battery check)
- Turn the light ON : single-click the button, and the TS21 turns ON using the previously used light output level (MEM)
- Ramp up down : hold the button to make it brighter, release the button briefly, and hold it again to make it dimmer.
- Turbo : no matter whether the light is on or off, double click activate Turbo for max brightness.
- MOON : press & hold the switch, it turns on at the moonlight(FLOOR level), it makes a subtle “blink” to provide a timing hint if you want to stay there. If you keep holding, it ramps up
- Battery check : while the light is OFF, triple-click it to show the voltage of the battery (3 blinks, a short pause, then 8 blinks would indicate 3.8 V)
- Turn OFF : single-click
UI: Stepped ramping
Using this UI the output does not ramp, it steps from one mode to the next
using hold. The firmware tries to optimize these steps as equally spaced on a
cube-root curve (considered an ideal mode-spacing by many).
All operations are the same as in smooth ramping Switch to SMOOTH RAMP: when
the flashlight is ON, Three clicks switch it. (Hint: If you use 3 clicks from
OFF you engage battery check)
UI: Momentary mode
5 clicks from OFF to enter Momentary mode
To exit this mode, physically disconnect the power (unscrew the light). This
mode locks the flashlight into a single-mode interface where the LEDs are only
on when the button is held down. It is intended for Morse code and other
signaling tasks. Brightness is the last-ramped level, so adjust that before
entering momentary mode.
UI : Electronic Lockout
4 clicks form OFF to disable the light, same to re-enable the flashlight.
Lockout makes the light safe to carry in a pocket or a bag or anywhere else it
might be pressed by accident. Lockout doubles also as a momentary moonlight
mode, so the user can do quick tasks without having to unlock the light. It
uses the FLOOR of the current ramp.
Blinkies & Strobes
Two groups worth of blinkies are included. To reach Blinkies, do “click click
click” from OFF. To reach Strobes, do “click click hold” from OFF. To change
to the next blink use a double-click. These include:
Blinky: (starts always at batt-check) from OFF: “click click click” to
BattCheck: Shows the remaining charge in volts and tenths.E.g. 4 blinks, then
pause, 1 blink are 4.1 Volt. A “zero” is represented by a very quick blink.
Sunset : Starts at a low level, then slowly dims down to the moon for an
hour, then shuts off. It is intended for use when going to bed.
Beacon : Beacon mode uses the last ramped level for its brightness. You
must adjust the brightness before you turn the beacon on. It blinks at a slow
speed: Once every N seconds at the last-ramped level. N is configurable in
beacon config mode: Click 4 times to enter beacon config mode, wait for the
light to stutter, then click to enter the number of seconds per blink. For
example, to do a 10-second alpine beacon, click 10 times. (Hint: If you want
faster blinks per second use party strobe mode and set it to three blinks per
second or more)
TempCheck : Blinks out the current temperature in degrees C. and
optionally configures settings for thermal regulation. E.g. 3 blinks, then
pause, 4 blinks are 34 degrees Celsius. A “zero” is represented by a very
quick blink. This number should be pretty close to what a real thermometer
says. If not, it would be a good idea to click 4 times to enter thermal config
mode and calibrate the sensor.
Strobes:
(remembers the last-used mode) from OFF: “click click hold” which means click
three times, but hold the third click for a moment. To change to the next
strobe use a double-click.
To set adjustments you can use:
- Hold : Increase brightness, or strobe faster. (except lightning)
- Click, hold : Reduces brightness, or strobe slower. (except lightning) Candle mode:
Simulates a flickering candle or fireplace, until you switch it OFF. Or you
add a timer for 30min: Each triple click adds 30 min including a burn-down
simulation at the end. The candle mode timer can go for up to 4.5 hours. If
you buy a diffuser of TS21 separately, you can turn the light into a candle.
Bike flasher:
Steady output with a “stutter” once per second. Designed to be more visible
than a normal ramping mode, but otherwise works mostly the same. Adjustable
brightness.
Party strobe:
Motion-freezing strobe. Can be used to freeze spinning fans and falling water.
Adjustable speed.
Tactical strobe:
Bright, disorienting strobe light. Can be used to irritate people. Adjustable
speed and the duty cycle is always 33%.
Lightning storm mode:
Flashes at random brightness and random speed to simulate lightning strikes
during a busy lightning storm. Do not look directly at the flashlight when
this mode is running, because it may suddenly go to full power without
warning.
Thermal configuration
Look at a thermometer to check the current room temperature. Let us assume it
says 21 Celsius.
Turn the light off and wait for its temperature to settle to room temperature.
Go to TempCheck (from OFF: “Click Click Click” Ascend with double-clicks three
times) When you are in TempCheck, then click 4 times to enter thermal config
mode, and calibrate the sensor.
Thermal config mode has two settings:
- Current temperature Calibration(blinking once and flashing). Click once per degree C to calibrate the sensor. For our example, the ambient temperature is 21 C = click 21 times.
- Temperature limit(blinking twice and flashing). This sets the maximum temperature the light can reach before it starts doing thermal regulation to keep itself from overheating. Click once per degree C above 30. For example, to set the limit to 50 C, click 20 times. The default is 45 C (15 clicks).
Hint : If you don’t click, the flashlight will leave the value unchanged.
The lowest value the user can set is 31 C, by clicking once.
Switch LED
The switch LED can be configured to do different things while the main
emitters are off. There is one mode for the regular OFF mode and another mode
for LOCKOUT mode. This allows the user to see at a glance whether the light is
locked.
Switch LED modes typically include: Off – Low – High – Blinking
To configure the LEDs, go to the mode you want to configure and then click
the button a few times:
- While the flashlight is OFF, 7 clicks to change the switch led from Low-High-Blinking-OFF
- While the flashlight is LOCKOUT, 3 clicks to change the switch led from Blinking-OFF-Low-High.
The switch LED stays on while the flashlight is on, the switch LED goes to
High while the flashlight goes to higher lumens, the switch LED goes to Low
while the flashlight goes to lower lumens.
Protection Features
Some features that aren’t visible on the diagram: Andúril includes low voltage
protection (LVP) and thermal regulation. LVP makes the light step down to a
lower level when the battery is low, and if the light is already at the lowest
level, it shuts itself off.
This activates at 2.8V. LVP adjustments happen suddenly, in large steps.
Thermal regulation attempts to keep the light from overheating and otherwise
adjusts output to stay as close as possible to the user-configured temperature
limit. Thermal adjustments happen gradually, in steps so small they are
difficult for humans to perceive. It ramps smoothly across 512 internal steps
(from 1×7135 to full power) to adjust output while it searches for the highest
level it can maintain without overheating.
FAQs
You tried to configure your flashlight and now it is only working if you press
the button.
When you press 4x from OFF you lock out TS21. Press four times again to
unlock. When you want to configure TS21 it must be ON, then click four times.
If I turn on using the moon shortcut, it won’t memorize the moon.
In short : the TS21 has only memory if you ramp to a value.
It doesn’t memorize the floor, ceiling, or turbo levels when they’re reached
by a shortcut. This is on purpose because people didn’t like losing their
memorization level after using the moon or turbo. To make it remember the
moon, the user must ramp to it… typically, by ramping up a little then back
down. Basically, it behaves that way because that’s what people asked for.
Troubleshooting and Maintenance
- Disassembling the sealed head can damage the flashlight and void the warranty.
- Wurkkos Ltd. recommends using high-quality brand batteries. Damage by defective batteries voids the warranty.
- Remove the battery if the flashlight will not be used for an extended period of time.
- To prevent self-discharge or accidental activation during storage or transportation, unscrew the tail cap by half a turn or remove the battery.
- Every 6 months threads should be wiped with a clean cloth followed by a thin layer of silicone grease.
- To maintain a proper level of waterproofness, replace worn-out o-rings with an approved spare (2 pieces are shipped with the initial order). Troubleshooting: Clean battery contacts regularly as dirty contacts may impair the performance of the flashlight. If you experience problems (flicker, shine intermittently or failure to turn on) the following root causes and solutions should be tried:
- Reason A : The battery needs replacement (Battery voltage is below 2.7V). Solution: Replace the battery with an approved type of fully charged battery.
- Reason B : Threads, PCB board contact or other contacts are dirty. Solutions: Please clean the contact points with a cotton swab soaked in rubbing alcohol.
- Reason C : The flashlight will not turn on upon first use.
- Solution : Please do not forget to remove the insulation sticker from the battery on first use.
Please contact us if you have any questions. If your product is defective
please contact us for a refund or replacement within the warranty period.
References
- ~toykeeper/flashlight-firmware/fsm : files for revision 492
- WURKKOS FLASHLIGHT
Read User Manual Online (PDF format)
Read User Manual Online (PDF format) >>
Download This Manual (PDF format)
Download this manual >>
1lumen selects and reviews products personally. We may earn affiliate commissions through our links, which help support our testing.
Wurkkos TS21 Specifications
| Brand/model | Wurkkos TS21 |
|---|---|
| LED | 3*SST20 |
| Lumens | 3,500 lm |
| Beam intensity | 11,900 cd |
| Battery config. | 1*21700 |
| Material | Aluminum |
| Modes | Many (Anduril firmware) |
| Blinkies | Many (Anduril firmware) |
| Reflector | TIR optics |
| Waterproof | IPX8 |
| Review date | August 2021 |
Review intro:
Wurkkos has a couple of very interesting flashlights in their lineup. Nick recently reviewed the Wurkkos DL70, a diving light with 10,000 lumens, and this review is about the TS21, a 3500-lumen EDC flashlight. It is using the popular Anduril firmware that many manufacturers are using these days.
But this is my first Wurkkos as far as I remember, so I’m quite interested in testing it. And since I focus reviews based on their ‘factory’ settings, I’m curious how good/bad Anduril works with the TS21.
Package quality.
The flashlight arrived in a simple orange cardboard box with the following;
- The Wurkkos TS21
- Lanyard
- USB-C cable
- 2-way pocket clip
- 2 spare o-rings
I missed a manual, especially considering it is using Anduril UI, and most people will get confused using the UI. I’m not sure if they forgot to add one, or this was on purpose since it’s a review sample.
Flashlight in use, Build Quality, and Warranty
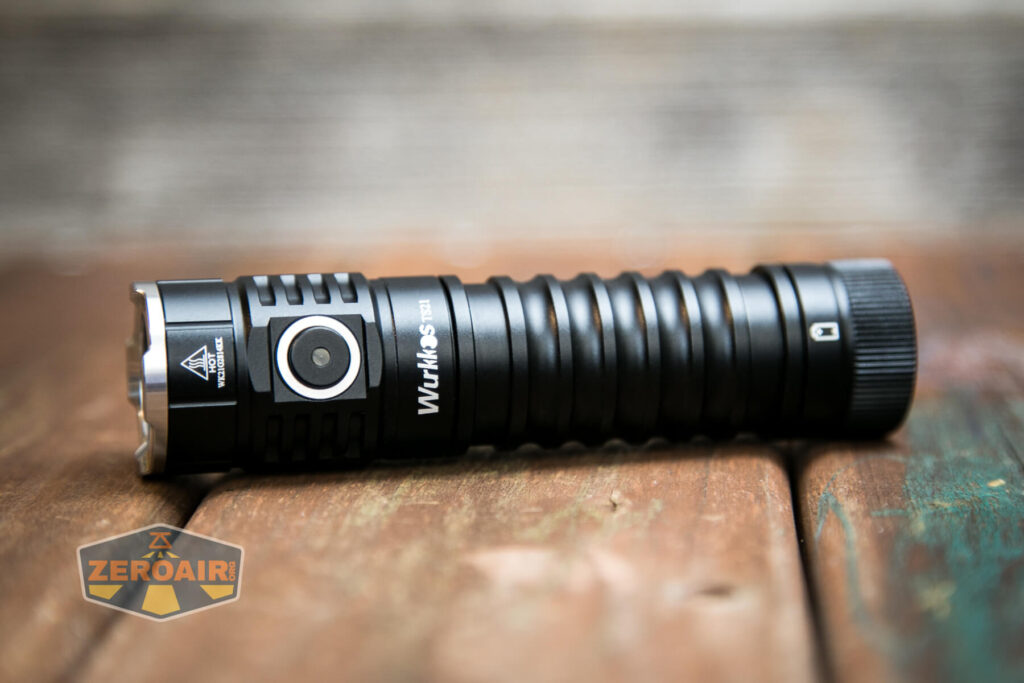
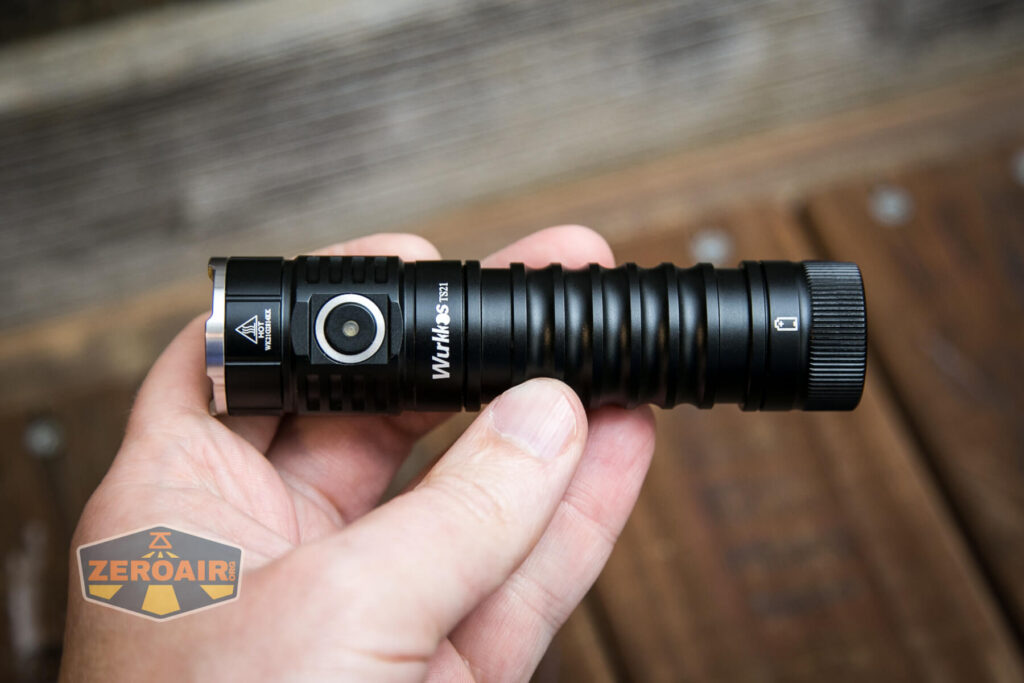
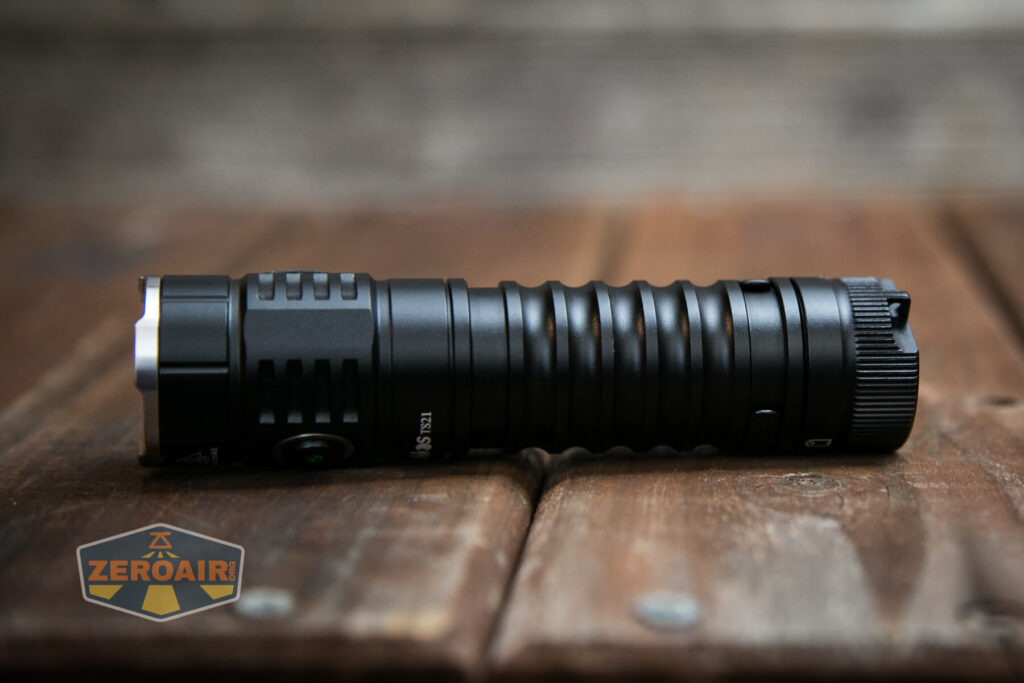
The TS21 is a 21700 style EDC flashlight. It’s pretty compact in the sense that it’s small enough to carry in your jeans.
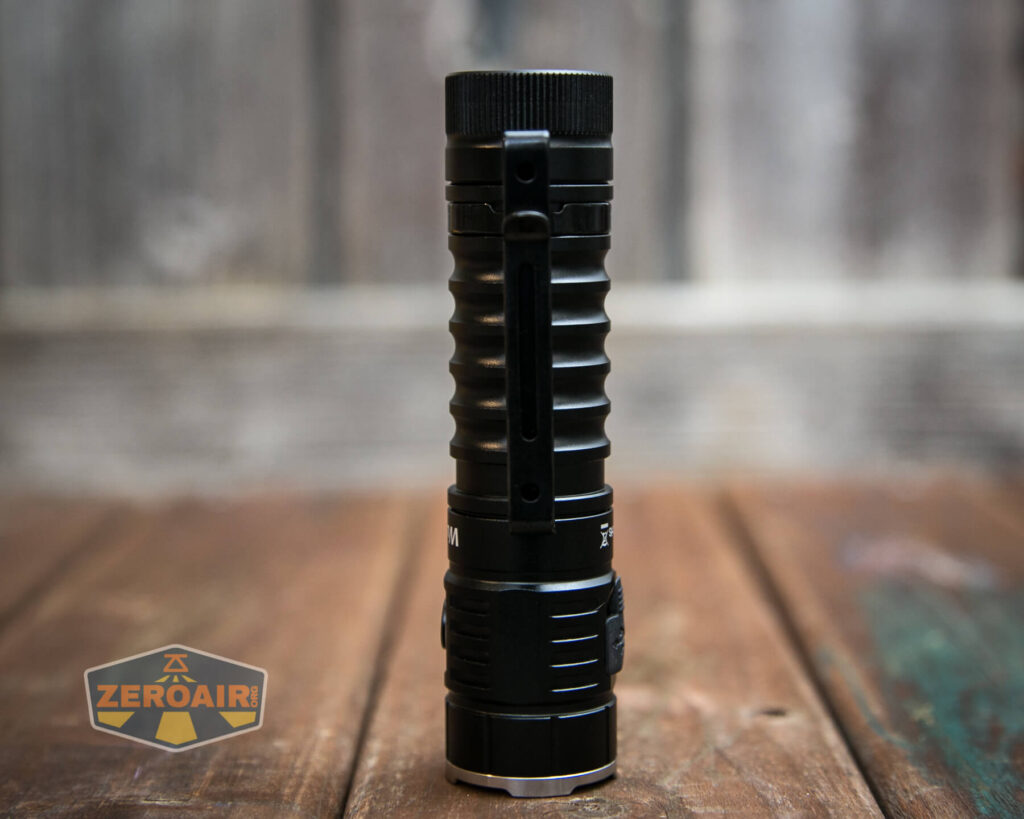
There’s a 2-way pocket clip already attached. This means, that you can use the clip in both directions (upward and downward). And 1 thing that I really like about the TS21 is the 2 attachment points for the clip. 1 near the tailcap, and 1 near the head. That way, you can balance it even more perfect. These kinds of pocket clips have become more popular in the past several years. If you don’t like using the clip, you can easily remove it.
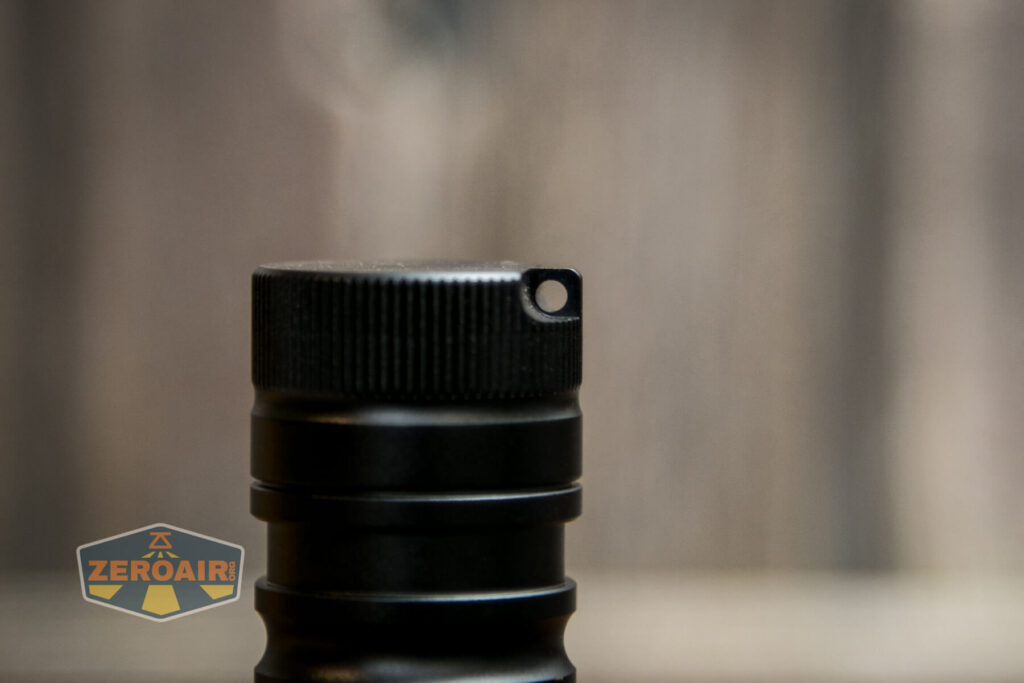
If you like using lanyards, you are lucky. There’s a lanyard included in the box, and can be attached at the tailcap.
And last, but not least, there’s a magnet built into the tailcap, so you can stick it to
The TS21 can be used single-handedly since there is only 1 switch. The switch is used for power and mode switching. And although the body doesn’t have any of the traditional knurlings, it doesn’t feel too slippery. Using the pocket clip helps as well.
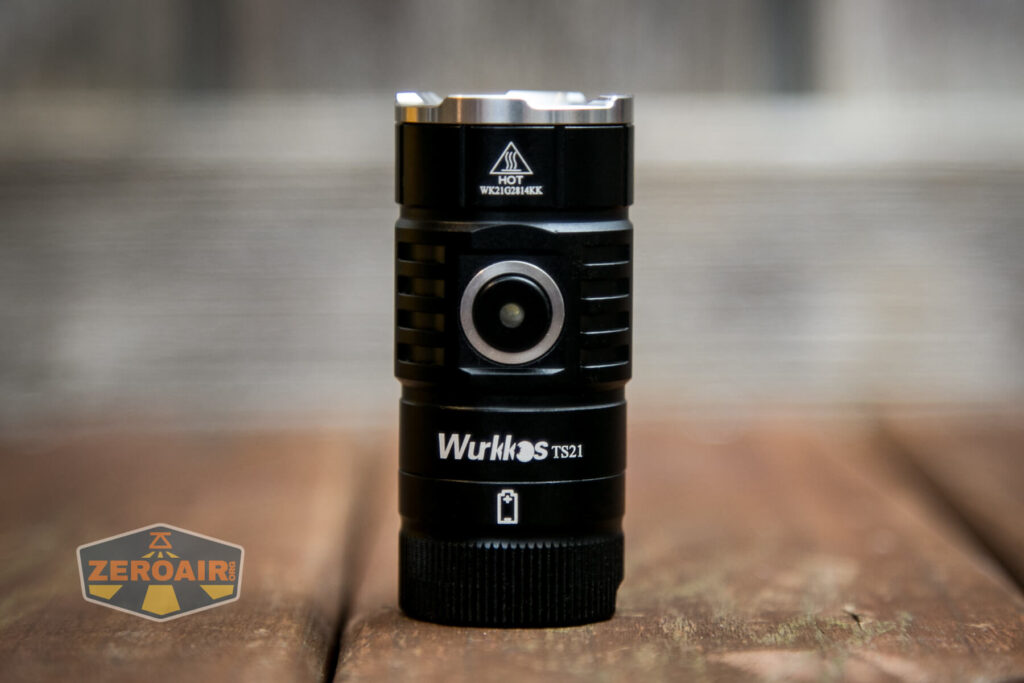
Finding the switch in the dark shouldn’t be too difficult, because the switch is located on the opposite of the USB port. There’s a protruding rubber cover, covering the USB-C port, so even if you’re not sure what you feel, just push the flashlight on both sides and it should turn on.
Wurkkos isn’t a premium brand, so you shouldn’t expect a high-end flashlight for $35. The TS21 is a $47 flashlight that is often on sale for prices below $35 (excluding a battery).
The anodization seems to be a little too shiny for me, but that doesn’t have to be a problem. BTW the threads near the tailcap are also anodized, so a half-turn and the light is locked-out.
Talking about the threads; they are very smooth with lots of lubrication. There’s a single black o-ring to keep water out. If you want to make sure really no water is sipping in from the back, there is another slot for a o-ring.
When unscrewing and removing the tailcap, you will automatically pull the battery out, because there’s a magnet inside the tailcap. And because of the strength of the magnet, it’s easy to horizontally (or vertically) stick it to a metal object.
Again, this may not have the highest build quality, but for the price, it’s not bad at all.
Warranty: unfortunately, I have no idea what Wurkkos warranty looks like. Their websites doesn’t mention anything about it.
LED/LEP/HID, Lens, Bezel, Reflector, and Beam
When ordering the TS21 you get to choose the beam color (CCT). As far as I am aware, all 3 choise are with the Luminus SST20 LEDs. The 3 choices include 4000K, 5000K, and 6500K.
I’m not sure what color they sent us. Wurkkos should mention that on the box or on a piece of paper or something. I don’t really know for sure, so I have to guess.
There are 3 LEDs behind TIR optics, and they make a pretty smooth and even flood beam. The TIR optics seem to be protected by an extra glass lens, and of course a stainless steel bezel.
Dimensions and its competition
- Length: 113.3 mm / 4.46 ”
- Head diameter: 28 mm / 1.1 ”
- Tailcap diameter: 26.86 mm / 1.06 ”
Weight:
- Empty: 86.2 g / 3.04 oz
- With battery: 155.5 g / 5.49 ozl
EDC Flashlight comparison
Size compared to other EDC flashlights
Image 1, from left to right: Olight M2R PRO warrior, Acebeam E70 SS, Fenix E35, Lumintop X1L, Wurkkos TS21, Zebralight SC700d, Amutorch E3H
UI : User interface and driver
The Wurkkos TS21 is using the very popular Anduril firmware. The good thing about this is that the manufacturers don’t have to come up with their own firmware. The con however is that it probably makes them lazy. Anduril lights are not calibrated, so you always have to check the temperature configuration before you do any testing. Mine was only off by 2 degrees, so that wasn’t too bad. I assume the Max Temp is set at 45 degrees by default.
Since I like to review flashlights as close to default settings as possible, I only set the room/ambient temperature and didn’t touch the Max Temp settings.
I tried to read the firmware version, and I’m not 100% sure if I noted them correctly. I saw: 2 blinks, short blink, 2 blinks, short blink, short blink, 3 blinks, short blink, 8 blinks.
I thought this was 2020 0308 But it might be that the last short blink is actually a 1, instead of a zero. Then the version is 2020 – 03- 18.
This is the image of the UI, but forget about the bottom part, because this particular light has no AUX LEDs.
From OFF:
- Single-click: ON
- Double click: High (Top of ramp, to get to Turbo, you need to do another double click)
- 3 clicks: Access the blinky/utility modes.
Enter Special/Fun modes from OFF:
- 2 clicks + hold: Strobe modes
- 4 clicks: Lock Out mode
- 5 clicks: Momentary on
- 6 clicks: Muggle mode
From ON:
- Single-click: Off
- Double click: Turbo
- 3 clicks: change ramping mode.. Instead of a smooth increase, it has 6 little steps between Lowest and Max.
- 4 clicks: change to ramping configuration mode
- Press and hold: brightness ramps up.. release and press and hold again to ramp down.
INTERESTING, SPECIAL, AND FUN MODES:
Please read the manual carefully to know how to access or customize these modes. Also see the firmware picture, above.
- Blinky Utility mode:
- Battery check
- Sunset Mode
- Beacon mode
- Temperature check
Strobe / Mood modes:
When in the strobes mode, double-click to rotate between them – all modes except party strobe are brightness, changed the same way as a normal ramp. In party strobe mode, ramping up and down will increase and decrease the frequency of the strobe, for incredible effects.
- Candle
- Bike flasher
- Party strobe
- Tactical Strobe
- Lightning mode
- Lockout mode (can’t use the light)
- Lockout mode is available by clicking four times from off – while in lockout mode, click-and-hold will light up at bottom of the ramp, and a double-click-and-hold will light up somewhat brighter. This is to give you a way to quickly use the light if necessary, but if it activates in your pocket, it will only be at very low modes, and only for as long as the button is pressed. No more holes in pants!
- Momentary mode (signaling/ morse coding)
- Muggle mode: (safer for children)
- Configuration mode
- Ramp config mode
Firmware / UI Conclusion:
There seems to be something a little strange. When you hold the switch pressed, it will ramp up, wait a few seconds, and then ramps down.. when you continue pressing the switch and release it, it will be locked. This is actually a safety feature, and is really helpful. Imagine you accidentally press the switch continuously, it won’t stop at Turbo, but will run down to Low, and turn off when you release the switch again. Great feature!
After the runtime tests, the battery was down to 2.87V, 2.89V, and 2.9 V, before I stopped the runtime. The light would continue running at a low output though.
Charging and batteries
My sample didn’t come with a battery, but you can add a battery to your order at Wurkkos, for an extra $3-$4, which is insanely cheap. I didn’t have it, so I tested it with a Samsung 5000mAh 21700 50G battery. I try to use this as my default battery for 21700 reviews.
Long 21700 batteries with USB port, don’t fit! You need unprotected batteries. Button tops and flat tops are both fine, at least my batteries fit.
The built-in charger uses a USB C port and charges at a current of 1.6-1.7 Amps, which is pretty good. Charging takes about 4 hours with a 5000mmAh battery. Unfortunately, I don’t have a USB-C to USB-C cable nor adapter to test it. But the included USB-A to USB-C works just fine.
After charging I measured the battery at 4.18V.
Performance test
Lumen measurements
How Lumens are Measured: Understanding ANSI FL1 Standards
How Lumens are Measured: Understanding ANSI FL1 Standards: The ANSI FL1 standards specify that output in lumens should be measured 30 seconds after turning on, as this is the standardized time for measuring brightness according to the industry standard. This is why we focus on this part in our measurements. The ANSI FL1 standards require an ambient temperature of 22 ± 3°C. We record the ambient the ambient temperature to identify potential reasons for any observed discrepancies.
All output numbers are relative to my homemade Integrating Sphere. It is set up with an Extech SDL400 Lux Meter for measurements including a Kenko PRO1D ND-16 filter. The base measurement is done with a Convoy S2+ that is tested at 255 lumens.
All of my readings were taken with a fully charged Samsung INR21700-50G.
| Mode | Amps | 10 min | 30 sec | start |
|---|---|---|---|---|
| 1 | 0.02A | – | 7.07 | 7.07 |
| 2 | 0.08A | – | 34.75 | 34.75 |
| 3 | 0.20A | – | 92 | 94 |
| 4 | 0.47A | 202 | 206 | 210 |
| 5 | 0.68A | 444 | 488 | 498 |
| 6 | 1.17A | 368 | 945 | 978 |
| 7 | 2.35A | 270 | 1514 | 1655 |
| Turbo | 6.60A** | 290 lm | 942 lm | 3316 lm |
Specs say 3500 lumens, and that’s not really correct. Anduril is one of the worst firmwares (by default) to use with high-power flashlights and ANSI FL1 testing. When the flashlight gets hot, the output drops like a rock. Check out the runtime graphs below to understand what I mean.
** this was measured with a Fluke 77III. I finally bought a clamp meter, and it shows above 10Amps with the clamp meter.
Parasitic drain:
- 95uA = 0.095mA
- That seems to be pretty good. I read other lights like the FC11 have a higher parasitic drain.
Runtime:
The runtime test was done with a 50cm integrating sphere, including the Kenko Pro1D ND-16 filter and Extech SDL400 data logging Lux Meter.
There doesn’t need to be much explanation about the runtimes, because they are pathetic for a 3,500 lumen flashlight in default settings.
In order to get some kind of normal output and runtime, up the temp to 60+ degrees.
The first 12 minutes of the default temp vs the upgraded temp at 60 degrees can be seen below. It doesn’t pathetically drop to about 150 lumens within 1 minute, which is just stupid. The higher max temp has a much nicer drop, and stays at around 440 lumens after 7 minutes.
Throw Measurement
Measurements were taken indoors aat 5 meters with a professional Hagner E4-X Lux Meter.
| Mode | Candela | Meters | Yards |
|---|---|---|---|
| Turbo | 13,175 cd | 230 | 251.06 |
| Mode 7 | 7,050 cd | 168 | 183.65 |
| Mode 6 | 4,200 cd | 130 | 141.75 |
| Mode 5 | 2,125 cd | 92 | 100.83 |
| Mode 4 | 900 cd | 60 | 65.62 |
According to specs, it’s supposed to throw 11,900 cd, which it easily delivers. Anything below mode 3 isn’t really useful to mention.
Beamshots
For the following beamshots I used a Canon EOS 5D Mk2 and a 50mm lens. manual settings: ISO1600, 1/4sec , F4, 5000K
The shed is about 65 meters / 71 yards away.
Disclaimer: This flashlight was sent to me for review at no cost by Wurkkos. I have not been paid to review, nor have I been holding back on problems or defects.
Final Verdict
Pros
Very affordable flashlight
Extremely versatile with Anduril firmware
Cons
Anduril: Needs tweaking to get it perform well
No manual was included (not sure if this was on purpose)
Explanation on star ratings:
1: Avoid: my phone flashlight would be a better choice – 2: Poor: significant defect or issues; almost unusable – 3: Average: some defects or issues; but still usable 4: Good: recommended (minor issues) – 5: Great: highly recommended
4 stars: ★★★★
While our star rating provides a reliable indicator, we encourage you to read the full review to make an informed decision based on your own needs and preferences.
For about $35, I could recommend it to people who love Anduril firmware and know the pros and cons of this firmware. I usually don’t recommend Anduril flashlights to beginners, unless there are strong requirements, without there being any alternatives.
Performance is what you can expect from this size flashlight with 3 emitters in combination with Anduril. Output drops rapidly and continues at a very low output for a very long time. Bump up the Max Temp to have a higher sustained output. I’ll give it 3.5-4 stars.
Discontinued: check alternatives
1lumen selects and reviews products personally. We may earn affiliate commissions through our links, which help support our testing.
The Wurkkos TS21 is a 21700 cell flashlight using the Andúril interface. The indicating switch and triple Luminus SST-20 make it great!
Official Specs and Features
Here’s a link to the Wurkkos TS21 Andúril flashlight product page.
There’s also a newer version than Wurkkos sent me… Here’s a link to the Wurkkos TS21 Flashlight with Andúril 2!
Versions
There seems to be only one version, but it’s available as a kit (with or without 21700 cell). Actually, three colors are available: Champagne, Metal Gray, and Black. Three emitter temperature options exist too: 4000K (seen here), 5000K, and 6500K.
Price
As seen here (with Anduril), these sell for $32.99 without a 21700 and $35.99 with a 21700.
The Andúril 2 version is $2 more, at $35.99. And the 21700 cell as seen here adds $4. For $4, it’d be silly to skip the 21700!
Short Review
TS21 using Andúril makes for a great bigger EDC flashlight. Mine has 4000K and in the Luminus SST-20, 4000K is just fantastic. All in all, this is a wonderful deal of a flashlight! I’d probably pick the Andúril 2 version. I would also love to see more accurate specifications from the manufacturer, and specifications per emitter temperature.
Long Review
The Big Table
| Wurkkos TS21 Andúril Flashlight | |
|---|---|
| Emitter: | Luminus SST-20 (4000K (Triple)) |
| Price in USD at publication time: | $32.99 |
| Cell: | 1×21700 |
| Turbo Runtime Graph | High Runtime Graph |
| LVP? | Yes |
| Switch Type: | E-Switch |
| Quiescent Current (mA): | 0.07 |
| On-Board Charging? | Yes |
| Charge Port Type: | USB-C |
| Charge Graph | |
| Power off Charge Port | with cell: all modes without cell: 5 or 6 lower modes without body: 5 or 6 lower modes |
| Claimed Lumens (lm) | 3500 |
| Measured Lumens (at 30s) | 1091 (31.2% of claim)^ |
| Candela per Lumen | 4.5 |
| Claimed Throw (m) | 217 |
| Candela (Calculated) in cd (at 30s) | 98lux @ 4.54m = 2020cd |
| Throw (Calculated) (m) | 89.9 (41.4% of claim)^ |
| Item provided for review by: | Wurkkos |
| All my Wurkkos reviews! |
^ Measurement disclaimer: Testing flashlights is my hobby. I use hobbyist-level equipment for testing, including some I made myself. Try not to get buried in the details of manufacturer specifications versus measurements recorded here; A certain amount of difference (say, 10 or 15%) is perfectly reasonable.
What’s Included

- Wurkkos TS21 Andúril Flashlight
- Wurkkos 5000mAh 21700
- Charging cable (USB to USB-C)
- Spare o-rings (2)
- Lanyard
- Pocket clip
- Manual etc
Package and Manual


Build Quality and Disassembly
The build quality here is great. Really not much more to say about it than that – The whole product is a high-quality package.

Threads, as you can see below, are square cut, anodized, and lubed.

The tailcap has a spring.

On the head end are the same threads – in fact, the cell tube is reversible.

Only a button is here on the head though. No spring.

Size and Comps
Dimension: 113.4mm (length) x 28mm (head diameter)
Weight: 78 grams (without battery)
If the flashlight will headstand, I’ll show it here (usually the third photo). If the flashlight will tailstand, I’ll show that here, too (usually the fourth photo).
Here’s the test light with the venerable Convoy S2+. Mine’s a custom “baked” edition Nichia 219b triple. A very nice 18650 light.


And here’s the light beside my custom engraved TorchLAB BOSS 35, an 18350 light. I reviewed the aluminum version of that light in both 35 and 70 formats.

Super shorty TS21! (Not really, of course; the parts don’t even screw together like this.)
Retention and Carry
Wurkkos includes a pocket clip. It’s a friction-fit two-way clip and connects in the grooves of the TS21. It’ll go on the mid-body part, and also can go on the tail end, too.

This pocket clip is just like the one seen on the HD20 headlamp. In fact, these two have many things in common!

Clip hug!
That clip will go on the tail end (as above) or in the middle section (as below).

Also included is a lanyard, which attaches through this hole in the tailcap.


You can see that the pocket clip has a hole where the lanyard could attach, too.

Not pictured here, but there’s a magnet in the tailcap, too. It holds the Wurkkos TS21 Andúril flashlight securely, even on horizontal surfaces (like a file cabinet).
Power and Runtime
A single lithium-ion cell powers the TS21. The proper size is 21700, and one can be included with your purchase if you opt for that package. The cell is a 5000mAh 21700, and is not special or proprietary, or customized in any way (except the nice Wurkkos wrapper).

This does mean that other 21700 cells can be (fully) used in the TS21. They’ll power the light and they can be charged in the light.
As depicted on the tailcap cell orientation image, the cell goes into the light in the “normal” way – positive end toward the head.


Below are a few runtime graphs. The claim of 3500 lumens is almost certainly for the 6500K emitter version, but even for the 6500K version, 3500 lumens seems a bit far-fetched. I’m recording at 30 seconds, which is well after the stepdown. Even the initial output is only around 2000 lumens, well under what I might expect when allowing for “lower output from the warmer emitter.” I’ll add (in text, since it’s not searchable on the photo) that I did calibrate the thermal settings on this light before the tests.


Low voltage protection is observed at least in some of the runs. The light didn’t always shut off, but the switch indicated in every case that the voltage was low. The switch will also indicate the power level for around 5 seconds after the light is turned on. Indications are as follows:
Green: >30% power
Red: <30% power
Flashing Red: Low power
Charging
Another feature of the TS21 is built-in charging. There’s a USB-C port in the head, which has a press-in cover. This cover is quite thick, and when installed properly, very secure. It has a thick edge and must be deliberately pushed into the opening.


An appropriate charge cable is included. It’s USB to USB-C.

Here’s a charge graph with the USB to USB-C setup. It’s fairly normal, and charges at around 2A. The cell should handle that easily – it’s under 0.5C for a cell of that capacity.

And here’s a single graph of C to C charging. I am not sure what those blips are during the CC phase. I believe it’s a logging issue though, and not a charging issue.

Modes and Currents
| Mode | Mode Claimed Output (lm) | Claimed Runtime | Measured Lumens | Tailcap Amps |
|---|---|---|---|---|
| Turbo (Double Click from on) | 3500 (likely claim for 6500K emitter option; this is 4000K) | – | 1091 (after stepdown!) | 7.75 |
| Highest Stepped | – | – | 1081 | 2.75 |
| – | – | 622 | 1.56 | |
| – | – | 0.73 | ||
| – | – | 0.43 | ||
| – | – | 0.18 | ||
| – | – | 0.06 | ||
| Lowest Stepped | – | – | 15.6mA | |
| Lowest Ramped | – | – | 2.02mA |
Pulse Width Modulation
There is PWM on all modes except Turbo. On all but the lowest output level, it’s not PWM that I can call “noticeable.” It’s plenty fast PWM.
Here you can see a “baseline” – a chart with almost no light hitting the sensor.
Then there’s the Ultrafire WF-602C flashlight, which has some of the worst PWM I’ve seen. It’s so bad that I used a post about it to explain PWM! Here are multiple timescales (10ms, 5ms, 2ms, 1ms, 0.5ms, 0.2ms) to make comparing this “worst” PWM light to the test light easier. That post also explains why I didn’t test the WF-602C at the usual 50us scale.
User Interface and Operation
The switch seen on the Wurkkos TS21 Andúril flashlight is an indicating e-switch. It is a hard and proud switch with a translucent center that shows one indicating emitter.

This switch is much more like Sofirn’s switch covers than other covers we’ve seen from Wurkkos. That’s good – I prefer these harder switches.


You can see below that the indicating feature is nice and bright.


The UI here is ToyKeeper’s Anduril, which at this point is very well covered. I’ve reviewed other lights with it, too. Here’s ToyKeeper’s UI graphic:

Here’s a UI table anyway!
| State | Action | Result |
|---|---|---|
| Off | Hold | On (Low) |
| Off | Click | On (Mode Memory) |
| Off | Click 2x | Highest Hybrid Mode |
| Off | Click 3x | Blinkie Mode Group |
| Off | Click 4x | Lockout |
| Off | Click 5x | Momentary |
| Off | Click 6x | Muggle |
| Off | Click, Click, Hold | Strobe Group (Mode Memory Strobe) |
| Strobe Group | Click 2x | Strobe Cycle (Candle > Bike Flasher > Party Strobe > Tactical Strobe > Lightning Storm) |
| Blinkie Mode Group | Click 2x | Blinke Cycle (Sunset > Beacon > TempCheck > BattCheck) |
| On | Click 3x | Switch between Stepped and Smooth Ramp |
| On | Click 4x | Ramp Configuration |
| TempCheck | Click 4x | Thermal Configuration |
| Beacon | Click 4x | Beacon Configuration |
| Lockout | Click 4x | Off |
| Strobe Group | Click | Off |
| (Basically) On | Click | Off |
| Candle | Click 3x | 30-minute timer to off |
| Strobe Group | Hold | Heighten selected mode (Make faster or brighter) |
| Strobe Group | Click, Hold | Lessen selected mode (Make slower or dimmer) |
| On | Click 2x | FET Turbo |
| Ramp Configuration | [Wait for Single flash] Click N time for level N. | Selection of the “Low” you like best by clicking 1, 2, 3, etc. where 1, 2, 3, etc are different levels of low. |
| Ramp Configuration | [Wait for Second flash] Click N time for 1+Turbo-N. | Selection of the “Ceiling” you like best by clicking 1, 2, 3, etc. where 1, 2, 3, etc are different Ceiling levels. |
| Ramp Configuration | [Wait for Third flash] Click for how many steps you want in Stepped mode. | Sets Number of Steps. |
| Thermal Configuration | [Wait for First flash] Click for N times for N degrees C. | Displays Current Temperature. |
| Thermal Configuration | [Wait for Second flash] Click for N times for 30C + N. | Sets Temperature Limit. |
| Beacon Configuration | [Wait for First flash] Click for N times N seconds per flash | Sets Beacon Speed. |
If you want to see how to calibrate the thermals, see this part of the FW1A review.
LED and Beam
In my review copy of the Wurkkos TS21 Andúril flashlight are three Luminus SST-20 emitters. Three because it’s a triple… What you see below is the 4000K version, but cooler versions are available (5000K, 6500K).


I don’t think the optic used here is stated, but based on the beam profile it’s almost certainly the narrow optic. That’s perfect for me!
LED Color Report (CRI and CCT)
I can’t see the product page specifying CRI but I’m seeing this as a High-CRI emitter. In the mid-90s for CRI, which is great. Also, it measures under 4000K by some margin. Again, that’s great for me personally, but you might have a different opinion. If the 5000K is similarly below the claim, then it should be very, very, good too.
Beamshots
These beamshots always have the following settings: f8, ISO100, 0.3s shutter, and manual 5000K exposure. These photos are taken at floor level, and the beam hits the ceiling around 9 feet away.
Tint vs BLF-348 (KillzoneFlashlights.com 219b version) (affiliate link)
I keep the test flashlight on the left and the BLF-348 reference flashlight on the right.
I compare everything to the KillzoneFlashlights.com 219b BLF-348 because it’s inexpensive and has the best tint!
Conclusion
What I like
- Great value
- Cell included for $3!
- Excellent use of Andúril2 user interface
- Triple emitters with the narrow optic give a great beam profile
- 4000K emitter option (and they’re a little warmer than that, too!)
- High CRI (at around 96 or so)
- Hardcover e-switch
- USB-C charging works well
- Great “out the front” brother to the HD20
What I don’t like
- Shorty tube isn’t included
- Andúril PWM
- Performance doesn’t hit claim on output (not even close to 3500 lumens)
- Throw specification is not nearly met, either.
Parting Shot
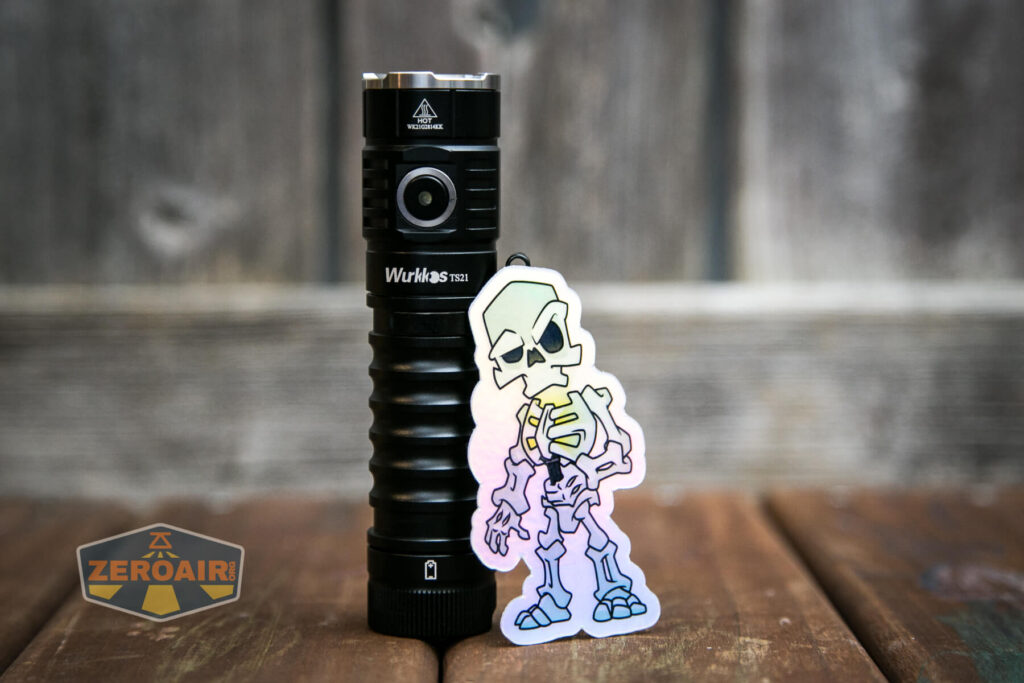
Check out this spoopy sticker by PhotonPhreaks!
Notes
- This content originally appeared at zeroair.org. Please visit there for the best experience!
- For flashlight-related patches, stickers, and gear, head over to PhotonPhreaks.com!
- Please use my amazon.com referral link to help support zeroair.org!
- Please support me on Patreon! I deeply appreciate your support!
Liked it? Take a second to support zeroair on Patreon!
Safety Precautions
Pay close attention to the proper installation of the battery. Incorrect installation could result in short
circuit when the tailcap is tightened, risking fire and causing damage to TS21. Always check at least three
times that the negative end of the battery is visible at the tube’s end before screwing the tailcap back
on.
Due to the high energy density of lithium‐ion batteries hazardous conditions are created when a cell is
short‐circuited or damaged. Always treat batteries carefully and properly dispose of any damaged
batteries.
Connect the included USB‐C charging cable to a 5V 2A USB charger and recharge TS21 when the low
voltage indication is given. This indication is an uncommanded drop in the light’s brightness, or a mode
change and a low output level. Eventually the light output will extinguish. The battery voltage may be
measured using the BattCheck feature.
TS21 is a very high‐intensity flashlight. Never point it directly at a person, animal, or moving vehicles
Please do not allow children to play with it. Strobe mode may cause seizure in persons with
photosensitive epilepsy.
When running at higher output levels the head of the flashlight will heat up quickly. This is normal. In
warmer ambient conditions this temperature may easily exceed 45°C depending on your settings, so
please take the necessary precautions when handling TS21.
Avoid hitting or dropping the flashlight. Be careful when using maximum brightness at high custom
temperature settings in order to avoid burning your hands.
Quick Start
Unscrew the tailcap to insert one 21700 battery with the anode side (+) towards the head, then screw
the tailcap back on. TS21 will blink once to confirm it has power and ist operational. Do not over‐tighten
the tailcap. When you change the battery the flashlight always starts at the regulated level (1×7135).
All functions are controlled using the electronic side switch. Basic usage is very simple. Click for on/off,
hold to change brightness. Release the button and hold again to change brightness in the other
direction.
In this manual, click is press the switch and release, while hold is press the switch until you get the
desired result, then release. Often the last of a series of button presses is a hold, so click, click, hold, is
to depress the switch and release twice, and depress a third time until the desired result. This would
be the same as 3H in the User Interface diagram. For multiple clicks, they need to be within a couple
tenths of a second. Not lighting fast, but fairly quick.
From OFF, hold the button to turn it on in the lowest level. TS21’s output will ramp up from a very low
level to maximum output. Release the button when the desired light output level is reached. The full
ramp takes about 3s. Use a single‐click at any time to turn TS21 OFF. The Operation Instructions section
of this manual describes all the features of TS21.
While ramping TS21 blinks to indicate the lowest brightness level (subsequently called FLOOR in this
manual) and highest brightness level (subsequently called CEILING in this manual).
TS21 has two different ramp modes; SMOOTH RAMP and STEPPED RAMP. You can change between
them when TS21 is ON with three clicks. Each ramp mode has its own individual settings for FLOOR and
CEILING. The stepped ramp has a user configurable number of steps of output brightness. Further
explanation of how to configure the ramp parameters, as well as additional TS21 capabilities are found
later in this manual.