
Manuals.eu
- Manuals.eu
- HP
- Computers & Peripherals
- Scanners & Fax
- Scanners
- Scanjet 200 Flatbed
- Scanjet 200/300 — Руководство пользователя
×
1
2
3
4
5
6
7
8
9
10
11
12
13
14
15
16
17
18
19
20
21
22
23
24
25
26
27
28
29
30
31
32
33
34
35
36
37
38
⟨
⟩
Copyright © Manuals.eu
Agreement
Privacy Policy
Contact us
- Инструкции и руководства
- Бренды
- HP
- ScanJet 200
- Справочник Пользователя
HP Scanjet 200/300
Руководство пользователя
HP ScanJet 200, 300
User Guide
Copyright and license 2015 Copyright HP Development Company, L.P. Reproduction, adaptation or translation without prior written permission is prohibited, except as allowed under the copyright laws. The information contained herein is subject to change without notice. The only warranties for HP products and services are set forth in the express warranty statements accompanying such products and services. Nothing herein should be construed as constituting an additional warranty. HP shall not be liable for technical or editorial errors or omissions contained herein.
Trademark credits ENERGY STAR is a U.S. registered service mark of the United States Environmental Protection Agency. Microsoft and Windows are registered trademarks of Microsoft Corporation. Edition 1, 11/2015
Contents
1 How to use the scanner How to scan (Windows) ……………………………………………………………………………………..3
Scanner and software overview ……………………………………………………………………….3 Overview of the scanner buttons ………………………………………………………………….3 Overview of HP scanning software ………………………………………………………………3
Scan pictures and documents ………………………………………………………………………….5 Scan pictures …………………………………………………………………………………………5 Scan documents ……………………………………………………………………………………..6 Scan to a PDF file ……………………………………………………………………………………7 Scan to email …………………………………………………………………………………………7 Scan to cloud …………………………………………………………………………………………8
Make copies ………………………………………………………………………………………………8 Scan from other applications …………………………………………………………………………..8
How to scan (Mac) ……………………………………………………………………………………………8 Scanner and software overview ……………………………………………………………………….9
Scanner buttons ………………………………………………………………………………………9 Scanning software …………………………………………………………………………………..9
Scan pictures and documents ………………………………………………………………………..10 Scan pictures ……………………………………………………………………………………….10 Scan documents ……………………………………………………………………………………10 Scan to a PDF file ………………………………………………………………………………….11 Scan to email ……………………………………………………………………………………….11 Scan to iCloud Photo Stream via iPhoto ……………………………………………………….12
Make copies …………………………………………………………………………………………….12 Scan from other applications …………………………………………………………………………13
Where to get additional information …………………………………………………………………….13
2 Care and maintenance Clean the scanner glass ……………………………………………………………………………………14 Remove and replace the scanner lid ……………………………………………………………………..15 Order maintenance and scanner supplies ………………………………………………………………17
3 Troubleshooting Basic troubleshooting tips ………………………………………………………………………………….18 Scanner installation troubleshooting ……………………………………………………………………..18
Check the USB cable …………………………………………………………………………………..19 Uninstall and then reinstall the software (Windows only) ……………………………………….19
Scanner initialization or hardware problems …………………………………………………………..19 Reset the scanner ……………………………………………………………………………………….20 Test the scanner hardware …………………………………………………………………………….20 Scanner has stopped working properly …………………………………………………………….20
1
Scanner operation problems ………………………………………………………………………………21 Scanner buttons are not working correctly …………………………………………………………21 Issues with text recognition (OCR) (Windows) …………………………………………………….22 Issues with text recognition (OCR) (Mac) …………………………………………………………..22 Scanned image is fuzzy ……………………………………………………………………………….23 Scanner is scanning items very slowly ………………………………………………………………23 Saved scan files are too large ………………………………………………………………………..23 Scanner glass needs to be cleaned ………………………………………………………………….23
Additional troubleshooting information ………………………………………………………………….24
4 Technical information HP limited warranty statement ……………………………………………………………………………..26 Safety instructions ……………………………………………………………………………………………27 Scanner specifications ………………………………………………………………………………………28 Environmental specifications ………………………………………………………………………………28 Energy information ………………………………………………………………………………………….29 Restriction of Hazardous Substances (Turkey) ………………………………………………………….29 Restriction of Hazardous Substances (Ukraine) ………………………………………………………..29 Recycle and restricted material information …………………………………………………………….29
Electronic hardware recycling ………………………………………………………………………..30 Product restricted material …………………………………………………………………………….30
Disposal of Waste Equipment by Users in Private Households in the European Union …………30
5 Product support Accessibility …………………………………………………………………………………………………..31 Getting assistance …………………………………………………………………………………………..31
Index…………………………………………………………………………………………………………………32
2
1 How to use the scanner This section provides an overview of the scanner and how to use it. Follow the instructions for your operating system.
How to scan (Windows) How to scan (Mac) Where to get additional information
How to scan (Windows) This section includes the following topics:
Scanner and software overview Scan pictures and documents Make copies Scan from other applications
Scanner and software overview This section includes the following topics:
Overview of the scanner buttons Overview of HP scanning software
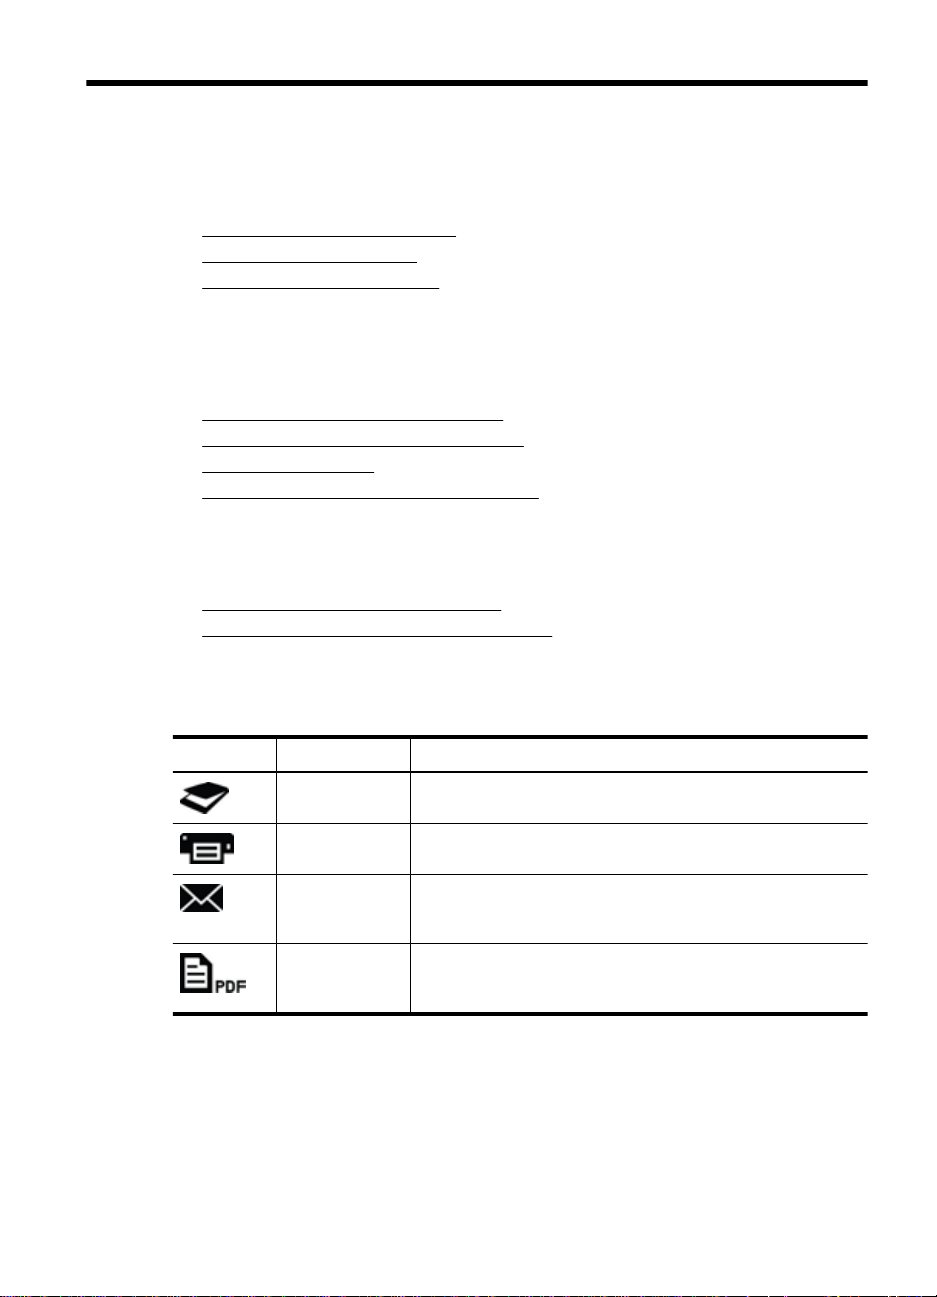
Overview of the scanner buttons
The following table introduces the scanner buttons.
Icon Button name Description
Scan button Scans pictures and documents.
Copy button Scans the item and sends the scan to a printer to make a copy.
Scan to E-mail button
Scans one or more pages and attaches the file to a new email message.
Scan to PDF button
Scans one or more pages and saves them as a PDF file for sharing or storing.
Overview of HP scanning software
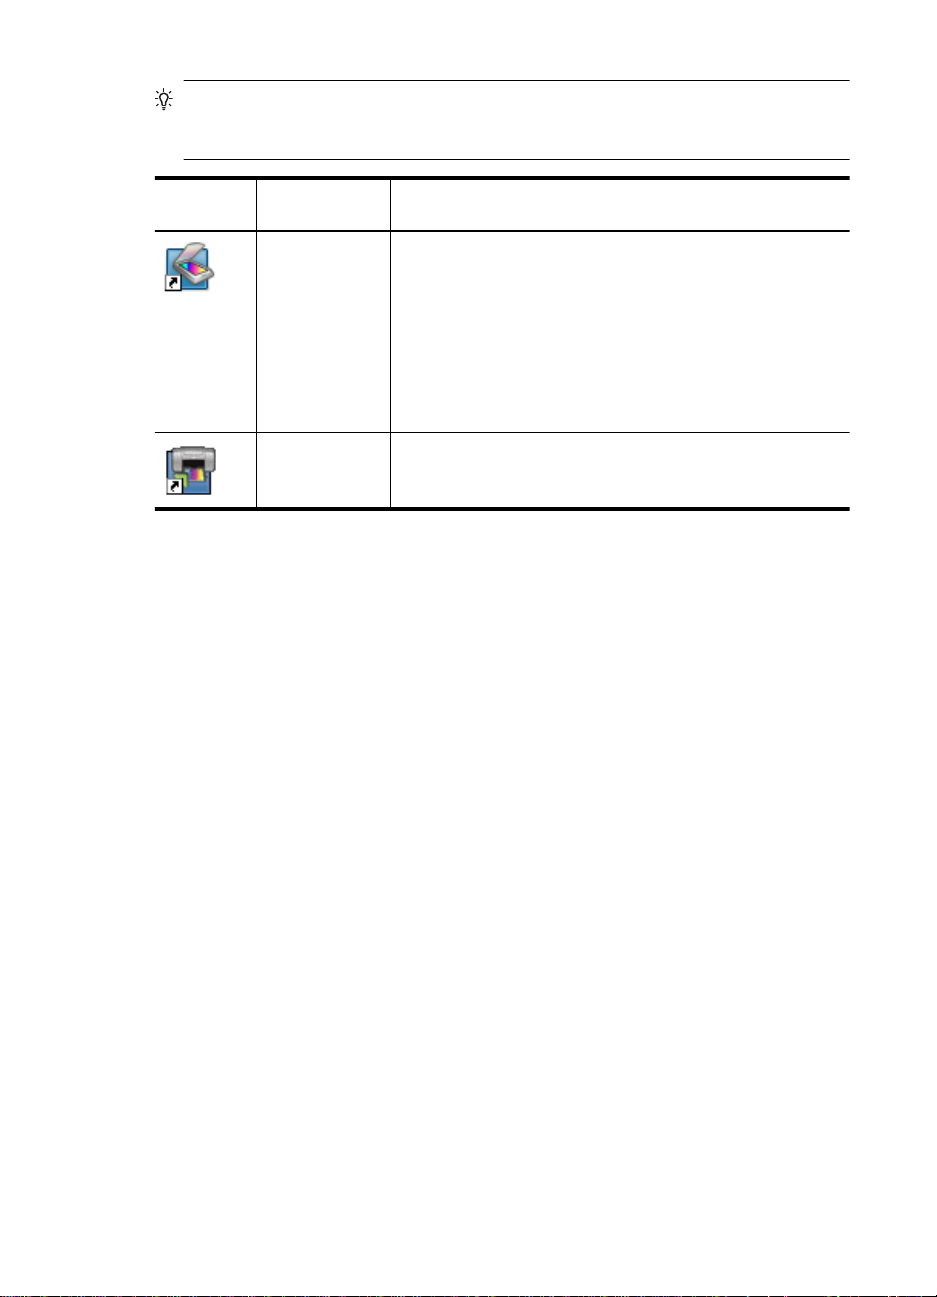
When you install the HP scanning software, you can choose to add two icons to your desktop. These icons open programs for scanning, editing, and printing your scans.
TIP: If you did not choose to add desktop icons, click Start > Programs (or All Programs) > HP > Scanjet > 200/300 > HP Scanning (or HP Copy) to access the HP scanning software.
How to use the scanner 3
Icon Feature name Description
HP Scanning icon
Use HP Scanning for all of the following:
Scan pictures and documents Access help and troubleshooting information Access the HP Scanning preview window to edit your
scans before saving them Modify settings and preferences
HP Copy icon Use HP Copy to scan pictures and documents and send the scan to a printer to make a copy.
To scan, double-click the HP Scanning icon on your desktop to display the HP Scanning shortcuts dialog box and follow the onscreen instructions.
To make a copy of a picture or a document, double-click the HP Copy icon on your desktop and follow the onscreen instructions.
You can assign the scanner buttons to other programs as long as Windows recognizes the programs as button-aware. To do so:
1. Double-click the HP Scanning icon on the desktop to open the HP scanning software.
2. In the HP Scanning shortcuts dialog box, select Options > Button Settings, and then change the scan shortcuts for each button.
3. Click OK.
Change scan settings You can change many scan settings from the HP scanning software, including:
Button settings for the scanner Scan preferences Using scan shortcuts
To view or change the scan settings 1. Double-click the HP Scanning icon on the desktop. 2. In the HP Scanning shortcuts dialog box, click the Options menu, and then select
the type of settings you want to view or change. To get help with settings, click Help.
You can change the Show a preview scan setting from the HP Scanning shortcuts dialog box.
To change the setting for a scan shortcut, select the shortcut, select or deselect Show a preview, and then click Save Shortcut.
To change the setting for a scanner button, select Options > Button Settings, select or deselect Show a preview, and then click OK.
Chapter 1
4 How to use the scanner
Scan pictures and documents
TIP: To scan or make a copy of a book or other thick originals, you can remove the scanner lid. For more information on how to remove and replace the scanner lid, see Remove and replace the scanner lid
Scan pictures Scan documents Scan to a PDF file Scan to email Scan to cloud
Scan pictures
This section includes the following topics:
To scan pictures To scan multiple pictures with one scan
To scan pictures 1. Open the scanner lid, and place the original face down on the scanner glass, as
indicated by the arrow below the scanner glass. 2. Close the scanner lid. 3. Do one of the following:
Press the Scan button ( ) on the scanner to display the HP Scanning shortcuts dialog box. Or
Double-click the HP Scanning icon on the desktop to display the HP Scanning shortcuts dialog box.
4. Select the scan shortcut you want to use. The corresponding settings are displayed to the right.
NOTE: If you want to change scan settings, click Change Settings and make the changes you want. For more information, see the scanner software help.
5. Click Scan. 6. If you have selected Show a preview scan, the HP Scanning preview window
opens. You can use the tools in the preview window to edit your scan before saving it.
7. Click Finish to save the scan. The software saves the scan to a subfolder in the My Pictures > My Scans folder. The subfolder is named for the current year and month.
To scan multiple pictures with one scan 1. Open the scanner lid, and then place the pictures face down on the scanner glass.
For the best results, leave at least 6 mm (0.25 inches) between the edges of the pictures.
2. Close the scanner lid.
How to scan (Windows) 5
3. Do one of the following: Press the Scan button ( ) on the scanner to display the HP Scanning
shortcuts dialog box. Or Double-click the HP Scanning icon on the desktop to display the HP Scanning
shortcuts dialog box. 4. Select the scan shortcut you want to use.
The corresponding settings are displayed to the right.
NOTE: If you want to change scan settings, click Change Settings and make the changes you want. For more information, see the scanner software help.
5. Click Scan. 6. If you selected Show a preview, you can click the Single Image tab to make
changes, such as rotating, to each picture individually. 7. When you are finished with all the pictures, click Finish to save the scan.
Each scanned image is saved as a separate picture. If you are scanning to a destination, the scanned image is sent to the destination that you selected in the scanner settings.
NOTE: To automatically scan multiple pictures using a scanner button, make sure that the destination setting for the Scan button ( ) is set to an application that can accept multiple images. For more information about changing scan settings, see Change scan settings.
Scan documents 1. Open the scanner lid, and place the original face down on the scanner glass, as
indicated by the arrow below the scanner glass. 2. Close the scanner lid. 3. Do one of the following:
Press the Scan button ( ) on the scanner to display the HP Scanning shortcuts dialog box. Or
Double-click the HP Scanning icon on the desktop to display the HP Scanning shortcuts dialog box.
4. Select the scan shortcut you want to use. The corresponding settings are displayed to the right.
NOTE: If you want to change scan settings, click Change Settings and make the changes you want. For more information, see the scanner software help.
5. Click Scan. 6. If you selected Show a preview and want to scan another document or page, place
the page on the glass and click Add Page(s). 7. Click Finish to save the scan.
The software saves the scan to the My Pictures > My Scans folder.
Chapter 1
6 How to use the scanner
Scan to a PDF file 1. Open the scanner lid, and place the original face down on the scanner glass, as
indicated by the arrow below the scanner glass. 2. Close the scanner lid. 3. Do one of the following:
Press the Scan to PDF button ( ) on the scanner to display the HP Scanning shortcuts dialog box. Or
Double-click the HP Scanning icon on the desktop to display the HP Scanning shortcuts dialog box.
4. Select the shortcut you want to use. The corresponding settings are displayed to the right.
NOTE: If you want to change scan settings, click Change Settings and make the changes you want. For more information, see the scanner software help.
5. Click Scan. 6. If you selected Show a preview and want to scan another document or page, place
the page on the glass and click Add Page(s). 7. Click Finish to save the scan.
The software saves the scan to the My Pictures > My Scans folder.
Scan to email
NOTE: To scan to email, make sure your computer is connected to the Internet.
1. Open the scanner lid, and place the original face down on the scanner glass, as indicated by the arrow below the scanner glass.
2. Close the scanner lid. 3. Do one of the following:
Press the Scan to E-mail button ( ) on the scanner to display the HP Scanning shortcuts dialog box. Or
Double-click the HP Scanning icon on the desktop to display the HP Scanning shortcuts dialog box.
4. Select the shortcut you want to use. The corresponding settings are displayed to the right.
NOTE: If you want to change scan settings, click Change Settings and make the changes you want. For more information, see the scanner software help.
5. Click Scan. 6. If you selected Show a preview and you want to scan another document, page, or
picture, place the item on the glass and click Add Page(s). 7. When you are finished with all pages, click Finish to automatically attach the scan
to an email message. 8. Enter the email address, subject and message, and then send the email message.
How to scan (Windows) 7
Scan to cloud
Follow these instructions to scan pictures or documents from the scanner to your network destinations, such as Google Docs, HP Snapfish, and Google Picasa.
NOTE: To scan to the cloud, make sure your computer is connected to the Internet.
1. Open the scanner lid, and place the original face down on the scanner glass, as indicated by the arrow below the scanner glass.
2. Close the scanner lid. 3. Double-click the HP Scanning icon on the desktop to display the HP Scanning
shortcuts dialog box. 4. From the Scan Shortcut list, select a cloud destination.
If your cloud destination is not in the Scan Shortcut list, click Change Settings, and then select a cloud destination from the Scan To list.
5. Click Scan. 6. When prompted, enter your login information for the cloud destination and follow
the onscreen instructions.
Make copies To duplicate a photo or document and send the scan to a printer, use the Copy button ( ) on the scanner or the HP Copy icon on your desktop.
1. Open the scanner lid, and place the original face down on the scanner glass, as indicated by the arrow below the scanner glass.
2. Close the scanner lid. 3. Press the Copy button ( ) or double-click the HP Copy icon on your desktop. 4. You can use the HP Copy dialog to adjust the image and select your printer.
To adjust the image when starting a scan from the Copy button ( ), click Cancel in the copy progress dialog box.
5. Click Start.
Scan from other applications You can scan an image directly into one of your applications if the application has a menu option such as Acquire, Scan, or Import New Object. If you are unsure whether the application is compliant or what the option is, see the documentation for that application.
How to scan (Mac) This section includes the following topics:
Scanner and software overview Scan pictures and documents Make copies Scan from other applications
Chapter 1
8 How to use the scanner
Scanner and software overview This section includes the following topics:
Scanner buttons Scanning software
Scanner buttons
Use the buttons on the scanner for basic scanning functions. The following table introduces the scanner buttons.
Icon Button name Description
Scan button Opens Image Capture so that you can scan and save your pictures and documents.
Copy button Automatically scans a full-color representation of the contents on the scanner glass and then displays a Print Images dialog for you to select a printer, the number of copies, and other settings.
Scan to E-mail button
Automatically scans a full-color representation of the contents on the scanner glass to a JPEG file and attaches the file to a new email message.
Scan to PDF button
Automatically scans a grayscale representation of the contents on the scanner glass to a searchable PDF file and saves the file to the Documents folder.
Scanning software
The HP ScanJet 200, 300 solution provides a scanner driver for Mac OS X. This allows you to use your HP scanner with any ICA-compliant application, including the Image Capture and Preview applications that are already installed on your computer.
Image Capture provides basic scanning features for scanning photographs and single-page documents. Image Capture is available in your Applications folder.
To scan using Image Capture 1. Open the scanner lid, and place the original face down on the scanner glass, as
indicated by the arrow below the scanner glass. 2. Close the scanner lid. 3. Press the Scan button ( ) on the scanner or, in the Applications folder, double-
click the Image Capture icon. The Image Capture window appears.
4. Make sure your scanner is selected in the Devices list.
TIP: For more Image Capture scanning options, click Show Details.
5. Select a destination in the Scan To list, and click Scan.
How to scan (Mac) 9
To change scan settings Use Image Capture to change scan settings, such as resolution, scan size, file
format, and brightness/contrast. Click Show Details to view all scan settings.
Scan pictures and documents
TIP: To scan or make a copy of a book or other thick originals, you can remove the scanner lid. For more information on how to remove and replace the scanner lid, see Remove and replace the scanner lid
This section includes the following topics.
Scan pictures Scan documents Scan to a PDF file Scan to email Scan to iCloud Photo Stream via iPhoto
Scan pictures
TIP: For most picture scans, 200 dpi is recommended. You can choose a higher resolution if you want to resize the scanned image to a larger dimension.
Use Image Capture to scan photos and pictures. For more information, see To scan using Image Capture.
To scan multiple pictures with one scan 1. Place the pictures face down on the scanner glass.
For better results, leave some space between the edges of the pictures. 2. Press the Scan button ( ) on the scanner or, in the Applications folder, double-
click the Image Capture icon. The Image Capture window appears.
3. Make sure that Detect Separate Items is selected (Mac OS X v10.6) or that Scan Size is set to Detect Separate Items (Mac OS X v10.7).
4. Select a destination in the Scan To list, and click Scan. Each scanned picture is saved to the destination as a separate image file.
Scan documents 1. Open the scanner lid, and place the original face down on the scanner glass, as
indicated by the arrow below the scanner glass. 2. Close the scanner lid. 3. Press the Scan button ( ) on the scanner or, in the Applications folder, double-
click the Image Capture icon. The Image Capture window appears.
4. Make sure your scanner is selected in the Devices list.
Chapter 1
10 How to use the scanner
5. If you intend to save the scanned image as searchable PDF or process the page in an optical character recognition (OCR) application for editable text, select an appropriate resolution and file format. Resolution: 300 dpi for most languages; 400 dpi for Asian, Cyrillic, and
bidirectional languages. File format: JPEG or TIFF file format is best for most OCR applications. See
the Help for your OCR application for more information. 6. Select the destination in the Scan To list and click Scan.
Each scanned page is saved to the destination as a separate image file.
Scan to a PDF file 1. Open the scanner lid, and place the original face down on the scanner glass, as
indicated by the arrow below the scanner glass. 2. Close the scanner lid. 3.
Press the Scan to PDF button ( ) on the scanner to scan the original to a searchable PDF automatically.
NOTE: Each page you scan is saved as a separate PDF file. You can merge PDF files into a multiple-page PDF file using Preview.
Scan to email
NOTE: To scan to email, make sure your computer is connected to the Internet.
1. Open the scanner lid, and place the original face down on the scanner glass, as indicated by the arrow below the scanner glass.
2. Close the scanner lid. 3. Do one of the following:
Press the Scan to E-mail button ( ) on the scanner to automatically attach the scan to an email message. Or
On your computer, double-click the Image Capture icon in the Applications folder, and choose Mail in the Scan To list to automatically attach the scan to an email message.
NOTE: The Scan to E-mail button supports only Apple Mail. If you use a different email application, either follow the steps below to configure Image Capture to scan to your email application, or scan to a file and then manually attach it to your email message:
To add your email application in the Scan To list, select Other, select your mail application, and then click Choose.
4. Enter the email address, subject and message, and then send the email message.
How to scan (Mac) 11
Scan to iCloud Photo Stream via iPhoto
Prerequisites
To scan to iCloud via iPhoto, make sure the following prerequisites are met:
Mac OS X Lion (v10.7) iPhoto ’11 (v9.2.1 or later) Internet connection iCloud account
If you are scanning to iCloud Photo Stream via iPhoto for the first time, configure your iCloud and iPhoto settings first.
To configure iCloud and iPhoto settings 1. Open System Preferences in the Applications folder. 2. Click the iCloud icon. 3. Make sure that Photo Stream is selected. 4. Open iPhoto. 5. Select Preferences from the iPhoto menu in the menu bar, view the Photo Stream
settings, and make sure Enable Photo Stream and Automatic Upload are selected.
To scan to iCloud Photo Stream 1. Open the scanner lid, and place the original face down on the scanner glass, as
indicated by the arrow below the scanner glass. 2. Close the scanner lid. 3. Double-click the Image Capture icon in the Applications folder. 4. Make sure your scanner is selected in the Devices list. 5. From the Scan To list, select iPhoto.
NOTE: If iPhoto does not appear in the Scan To list, select Other, select iPhoto, and then click Choose.
6. Click Scan.
Your scans will be automatically imported into iPhoto and automatically uploaded to your iCloud Photo Stream.
Make copies 1. Open the scanner lid, and place the original face down on the scanner glass, as
indicated by the arrow below the scanner glass. 2. Close the scanner lid. 3. Press the Copy button ( ) on the scanner.
When the scan completes, the Print Images dialog is displayed on the computer. 4. In the Print Images dialog, select your printer, specify the number of copies, and
make any other changes you want. 5. Click Continue.
Chapter 1
12 How to use the scanner
Scan from other applications You can scan an image directly into any ICA-compliant application. In your application, look for options to import or acquire images from a scanner.
NOTE: The HP software does not support TWAIN scanning. If your application has import or acquire functions, but your HP scanner is not listed, the application might only be searching for scanners that support TWAIN.
Where to get additional information For additional information and troubleshooting, go to www.hp.com/support. Select your location, click the Product Support & Troubleshooting option, and search for your scanner model number.
Where to get additional information 13
2 Care and maintenance This section provides information about how to care for and maintain the scanner.
Clean the scanner glass Remove and replace the scanner lid Order maintenance and scanner supplies
CAUTION: Avoid placing items that have sharp edges in the scanner. Doing so can damage the scanner. Before placing an item on the scanner glass, make sure that the item does not contain wet glue, correction fluid, or other substances that can be transferred to the glass.
Clean the scanner glass Cleaning of the scanner glass helps ensure high-quality scans. The amount of care needed depends upon several factors, including the amount of use and the environment. You should perform routine cleaning as necessary.
1. Disconnect the USB cable from the scanner. 2. Clean the glass using a soft, lint-free cloth that has been sprayed with a mild glass
cleaner, and dry the glass with a dry, soft, lint-free cloth.
CAUTION: Use only glass cleaner. Avoid abrasives, acetone, benzene, and carbon tetrachloride, all of which can damage the scanner glass. Avoid isopropyl alcohol because it can leave streaks on the glass.
Do not spray the glass cleaner directly on the glass. If too much glass cleaner is applied, the cleaner could run to the edges and damage the scanner.
3. When you have finished, reconnect the USB cable to the scanner.
NOTE: For instructions about how to clean the underside of the scanner glass, visit www.hp.com/support.
14 Care and maintenance
Remove and replace the scanner lid To scan or make a copy of a book or other thick originals, you can remove the scanner lid.
To remove the scanner lid 1. Open the scanner lid.
2. Pull up the scanner lid.
Remove and replace the scanner lid 15
3. Press in at the bottom of both hinges on the scanner lid.
4. Further pull up the scanner lid to remove it from the scanner.
To replace the scanner lid Align the inner slot (callout 1) of one hinge on the scanner lid with the black
bracket (callout 2) at the back of the scanner, do the same on the other hinge, and then push in the scanner lid.
NOTE: Make sure that you align the inner slot, not the outer slot, with the black bracket. Otherwise, you will fail to replace the scanner lid.
Chapter 2
16 Care and maintenance
Order maintenance and scanner supplies You can purchase maintenance parts online at the scanner support website at www.hp.com/buy/parts or from your local HP dealer.
Order maintenance and scanner supplies 17
3 Troubleshooting This section provides solutions for common problems with the scanner.
Basic troubleshooting tips Scanner installation troubleshooting Scanner initialization or hardware problems Scanner operation problems Additional troubleshooting information
Basic troubleshooting tips Simple issues such as smudges on the scanner glass or a loose cable can cause your scanner to produce fuzzy scans, operate in an unexpected manner, or fail to operate. Always check the following items when you encounter scanning problems.
If scans are fuzzy, check to see if the scanner glass is dirty or smudged. If so, clean the glass.
If you are scanning a document using an optical character recognition (OCR) shortcut, make sure that the original document is clear and crisp enough to be scanned.
Make sure that the USB cable is securely connected between the scanner and the computer.
If you have connected the scanner to the computer through a USB hub or through a USB port on the front of the computer, disconnect the scanner and then reconnect it to a USB port on the back of the computer.
Restart the computer. If a program has frozen, close it.
Windows: Press and hold CTRL, ALT, and DELETE to open the Windows Task Manager dialog. In the Applications tab, select the application to shut down, and then click End Task.
Mac: Press and hold Option, Command, and Esc. In the Force Quit dialog, select the program to shut down, and then click Force Quit.
Scanner installation troubleshooting This section provides solutions for installation and setup problems.
Check the USB cable Uninstall and then reinstall the software (Windows only)
18 Troubleshooting
Check the USB cable The USB cable is connected between the scanner and the computer.
Use the cable that was included with the scanner. Another USB cable might not be compatible with the scanner.
Ensure that the USB cable is securely connected between the scanner and the computer.
If the USB cable is connected to a USB port on the front of the computer, move it to a USB port on the back of the computer.
For additional USB troubleshooting information, see www.hp.com/support, select your country/region, and then use the search tool to find USB troubleshooting topics.
Uninstall and then reinstall the software (Windows only) An incomplete software installation could cause the scanner not to be recognized or the software not to launch correctly. Try uninstalling and then reinstalling the HP scanning software. To reinstall the HP scanning software, you must have the HP scanning software CD.
1. Click Start > Control Panel. 2. Do one of the following:
Windows XP: Click Add or Remove Programs, select HP Scanjet 200/300, and click Remove.
Windows Vista and 7: Click Programs and Features or Uninstall a program, select HP Scanjet 200/300, and click Uninstall.
3. Uninstall the HP Imaging Functions program. Windows XP: Select HP Imaging Device Functions 14.x, and click Remove. Windows Vista and 7: Select HP Imaging Device Functions 14.x, and click
Uninstall. 4. Unplug the scanner USB cable from the computer. 5. Reinstall the software, using the HP scanning software CD that came with your
scanner. 6. Reconnect the scanner USB cable when prompted by the software.
Scanner initialization or hardware problems If the scanner does not work after installation or if the scanner has stopped working correctly, you might see a message on the computer screen that is similar to one of the following:
The scanner could not be initialized. The scanner could not be found. An internal error has occurred. The computer cannot communicate with the scanner. The scanner is not listed and therefore unavailable for the user to select for
scanning.
Scanner initialization or hardware problems 19
To fix the problem, check the scanner as described in the following sections:
Reset the scanner Test the scanner hardware Scanner has stopped working properly
Reset the scanner If you receive an error message similar to Scanner initialization failed or Scanner not found when trying to use the scanner, use the following procedure:
1. Close the HP scanning software, if it is open. 2. Disconnect the cable that connects the scanner to the computer. 3. Reconnect the cable that connects the computer and the scanner.
Make sure that you are using the USB cable that came with the scanner. Make sure that the USB cable is connected to the back of the scanner
correctly. The USB symbol on the end of the cable (the connector) should be facing up. When connected correctly, the USB connector will feel slightly loose. When connected incorrectly, the USB plug will feel overly tight.
Try connecting the USB cable to a different USB port on your computer. If the USB cable is connected to a port on the front of the computer, move it to a port on the back of the computer.
4. Turn the computer off, wait 60 seconds, and then turn the computer on again.
Test the scanner hardware If you think that the scanner has a hardware problem, verify that the USB cable is firmly connected to the scanner and the computer. If the cable is correctly connected, test the scanner using the following procedure:
1. Disconnect the USB cable from the scanner. 2. Reconnect the USB cable to the scanner.
The carriage on the scanner will move forward and backward approximately 10 mm (0.39 inch).
If the carriage does not move, a problem might exist with the scanner hardware. Proceed with the next section.
Scanner has stopped working properly If the scanner stops scanning, complete the following steps, in order. After each step, start a scan to see if the scanner is working. If the problem continues, proceed with the next step.
1. Ensure that the USB cable is securely connected. 2. Turn the scanner off by disconnecting the USB cable and then reconnecting it to the
scanner and the computer. 3. Restart your computer. 4. Uninstall and then reinstall the scanner software.
If the scanner still does not work, visit www.hp.com/support or contact HP Customer Support. For more information, see Getting assistance.
Chapter 3
20 Troubleshooting
Scanner operation problems Scanner buttons are not working correctly Issues with text recognition (OCR) (Windows) Issues with text recognition (OCR) (Mac) Scanned image is fuzzy Scanner is scanning items very slowly Saved scan files are too large Scanner glass needs to be cleaned
Scanner buttons are not working correctly After each step, start a scan to see if the buttons are working. If not, proceed with the next step.
Ensure that the USB cable is securely connected. Turn the scanner off by disconnecting the USB cable and then reconnecting it to the
scanner and the computer. If you are using Mac, make sure all scanning applications are closed. The scanner
buttons are only enabled when another scanning application (for example, Image Capture) is not open.
Restart your computer.
If the problem persists, and you are using Windows, the buttons might be disabled outside of the HP scanning software. Follow the instructions to check the scanner properties:
1. Click Start > Control Panel. 2. Select the scanner:
Windows XP and Vista: Click Scanners and Cameras, and then select your scanner model from the list.
Windows 7: Click Devices and Printers or View devices and printers, and then select your scanner model.
3. Right-click your scanner model, and then click Properties. 4. Examine the buttons setting for your scanner:
Windows XP and Vista: Ensure the Take No Action option is not selected. Windows 7: Click Hardware > Properties > Driver, and ensure the Disable
button is not selected.
Scanner operation problems 21
Issues with text recognition (OCR) (Windows) The scanner uses optical character recognition (OCR) to convert text on a page to text that you can edit on your computer.
If you scan text but cannot edit it, make sure that you make the following selections during scanning: HP Scanning (Select Document.) Scan to (Select a word-processing program or Save to File.)
NOTE: If you select Save to File, make sure that you select a document type that creates editable text. If text is classified as a graphic, it is not converted to text.
To change text scanning options, click Scan Document Settings in the initial HP Scanning screen.
Check the originals The software might not recognize text that is tightly spaced. For example, if
the text that the software converts has missing or combined characters, «rn» might appear as «m».
The accuracy of the software depends on the image quality, text size, and structure of the original and the quality of the scan itself. Make sure that your original has good image quality.
Colored backgrounds can cause images in the foreground to blend too much. If the scanner glass is dirty, the scan file does not have optimum clarity. Make sure
the scanner glass is clean.
Issues with text recognition (OCR) (Mac) If you scan text but cannot edit it, check the following:
Verify the scan resolution setting: 200 dpi is sufficient for storing documents as images (JPEG or TIFF is the best
for most OCR applications). For most languages, 300 dpi is sufficient for using optical character
recognition (OCR) to create editable text. For Asian langauges and bidirectional languages, 400 dpi is the
recommended resolution. Check the originals
The software might not recognize text that is tightly spaced. For example, if the text that the software converts has missing or combined characters, «rn» might appear as «m».
The accuracy of the software depends on the image quality, text size, and structure of the original and the quality of the scan itself. Make sure that your original has good image quality.
Colored backgrounds can cause images in the foreground to blend too much. If the scanner glass is dirty, the scan file does not have optimum clarity. Make sure
the scanner glass is clean.
Chapter 3
22 Troubleshooting
Scanned image is fuzzy It is important that the item you scan comes in close contact with the scanner glass. If the resulting scanned image is not clear, check to see that the item is in full contact with the scanner glass.
Scanner is scanning items very slowly If you are scanning to edit text, the optical character recognition (OCR) causes the
scanner to scan more slowly, which is normal. Wait for the item to scan.
NOTE: Windows: For the best OCR results, scanner compression should be set to the minimum compression level or be disabled.
Mac: Integrated OCR is part of the Searchable PDF destination. If you want to process an image file after scanning, use another OCR application.
Scanning at a higher resolution than necessary increases scanning time and creates a larger file with no additional benefit. If you are scanning at a high resolution, set the resolution to a lower level to increase scanning speed.
Saved scan files are too large If the saved scans have very large file sizes, try the following:
Verify the scan resolution setting: 200 dpi is sufficient for storing documents as images (JPEG or TIFF is the best
for most OCR applications). For most languages, 300 dpi is sufficient for using optical character
recognition (OCR) to create editable text. For Asian languages and bidirectional languages, 400 dpi is the
recommended resolution. Scanning at a higher resolution than necessary creates a larger file with no additional benefit.
Save the scan to a compressed file format, such as JPEG, instead of uncompressed formats, such as TIFF or BMP.
Crop the scanned image to just the portion you need. Color scans create larger files than black and white scans. If you are scanning a large number of pages at one time, consider scanning fewer
pages at a time to create more, smaller files.
Scanner glass needs to be cleaned Clean the scanner glass under the following conditions:
Ink is on the glass. Fingerprints are on the glass. Items have excessive amount of dust or dirt on them. Smudges or other marks appear on scanned images. Haze or dust is on the glass.
Allow the glass to dry thoroughly before scanning another image.
Scanner operation problems 23
Additional troubleshooting information For additional information and troubleshooting, go to www.hp.com/support and select your location.
For additional troubleshooting information, click the Product Support & Troubleshooting option, and search on your scanner model number.
For updated information about the scanner, enter the scanner model number, and then press Enter.
If you do not have Internet access, see Getting assistance.
Chapter 3
24 Troubleshooting
4 Technical information This section includes regulatory information and product specifications for the scanner and accessories.
HP limited warranty statement Safety instructions Scanner specifications Environmental specifications Energy information Restriction of Hazardous Substances (Turkey) Restriction of Hazardous Substances (Ukraine) Recycle and restricted material information Disposal of Waste Equipment by Users in Private Households in the European
Union
Technical information 25
HP limited warranty statement
Duration of limited warranty: 90 days in the United States. 1 year in Canada, Latin Americas, Europe, Middle East, Africa and Asia Pacific. NOTE: Different warranty regulations might apply per country regarding local laws.
A. Extent of limited warranty 1. HP warrants to the end-user customer (Customer) that each HP product specified above (Product) shall be free from
defects in material and workmanship for the period specified above. The warranty period begins on the date of purchase by Customer.
2. For each software product, HPs limited warranty applies only to a failure to execute programming instructions. HP does not warrant that the operation of any Product will be uninterrupted or error free.
3. HPs limited warranty covers only those defects that arise as a result of normal use of a Product, and does not cover any other problems, including those that arise as a result of: a. Improper use, maintenance, storage, handling, or mod
More User Guides for HP Scanjet 200:
-
HP Scanjet 200 User giude (36 pages)
FAQ: Types of Manuals and Their Contents
HP Scanjet 200 Manuals come in various types, each serving a specific purpose to help users effectively operate and maintain their devices. Here are the common types of HP Scanjet 200 User Guides and the information they typically include:
- User Manuals: Provide comprehensive instructions on how to use the device, including setup, features, and operation. They often include troubleshooting tips, safety information, and maintenance guidelines.
- Service Instructions: Designed for technicians and repair professionals, these manuals offer detailed information on diagnosing and repairing issues with the device. They include schematics, parts lists, and step-by-step repair procedures.
- Installation Guides: Focus on the installation process of the device, providing detailed instructions and diagrams for proper setup. They are essential for ensuring the device is installed correctly and safely.
- Maintenance Manuals: Provide guidance on routine maintenance tasks to keep the device in optimal condition. They cover cleaning procedures, part replacements, and regular servicing tips.
- Quick Start Guides: Offer a concise overview of the essential steps needed to get the device up and running quickly. They are ideal for users who need immediate assistance with basic setup and operation.
Each type of HP Scanjet 200 instruction is designed to address specific needs, ensuring users have the necessary information to use, maintain, and repair their devices effectively.
Related Instructions for HP Scanjet 200:
1
sb21
Manual HP Projector Manual (File: hp-sb21-manual-10, Sat 12.2024)
10
400
72
2
Designjet T520
Datasheet PDF Guide (@SJUL7H), HP Designjet T520 Printer (26th Oct 2024)
2
1153
173
3
Blade dc72
Specification Blade dc72 (Desktop ePDF User Guide, #6C3129)
23
981
187
4
LaserJet MFP Analog Fax Accessory 300
Fax manual LaserJet MFP Analog Fax Accessory 300 (Fax Machine ePDF User Guide, #9G425V)
390
1105
266
5
Pavilion t345
2
1320
278
6
Pavilion dv9000
300
1450
261
7
PageWide Enterprise Color 765
140
870
183
8
Compaq tc1000
119
148
36
9
541 — Notebook PC
54
810
130
10
35s
Specification sheet HP Calculator Specification sheet (File: hp-35s-specifications-2, 25th Feb 2025)
2
1383
236
Scanner Devices by Other Brands:
|
Raven Scanner Compact Quick Start Manual Manual: Raven Scanner Compact (29UEY7, Upd.28/01/2025) (Network Enabled) 28 Jan 2025 | 2 |
|
|
LXE MX7 Installation Instructions User Guide: LXE MX7 (9NPC9X, Upd.Friday 25-04-2025) Installation Instruction Sheet 25 Apr 2025 | 2 |
|
|
J.P. Instruments FS-450M TWIN Pilot’s Manual PDF Guide (@EM14WY), J.P. Instruments FS-450M TWIN Scanner (21st Oct 2024) Pilot’s Guide 21 Oct 2024 | 28 |
|
|
Microtek ScanMaker 9800XL Plus Start Here Manual #C1I3Q2: ScanMaker 9800XL Plus Scanner Start here manual 1 17 Oct 2024 | 10 |
Categories:
Meter
Counter
Cutter
Sander
Workstations
Folding Machines

HP Scanjet 200/300
Guide de l’utilisateur

Copyright et licence
© 2012 Copyright Hewlett-Packard
Development Company, L.P.
La reproduction, l’adaptation ou la
traduction de ce document sans
l’autorisation écrite préalable de
Hewlett-Packard est interdite, sauf
dans des conditions conformes aux lois
relatives au copyright.
Les informations contenues dans ce
document peuvent être modifiées sans
préavis.
Les seules garanties pour les produits
et services HP sont décrites dans les
déclarations de garantie expresses
accompagnant ces mêmes produits et
services. Les informatio ns conte nue s
dans ce document ne constituent en
aucun cas une garantie
supplémentaire. HP ne pourra être tenu
responsable des erreurs ou omissions
de nature technique ou rédactionnelle
qui pourraient subsister dans le présent
document.
Marques déposées
ENERGY STAR est une marque de
l’agence américaine de protection de
l’environnement (United States
Environmental Protection Agency)
déposée aux États-Unis.
Microsoft et Windows sont des
marques déposées de Microsoft
Corporation.
Edition 1, 02/2012

Sommaire
1 Utilisation du scanner
Comment numériser (Windows)…………………………………………………………………………………….3
Présentation du scanner et du logiciel……………………………………….. ….. ……… ….. ……… … ….3
Présentation des boutons du scanner………………………………………………………………….3
Présentation du logiciel de numérisation HP…………………………………………………………3
Numérisation d’images et de documents…………………. ………………………………………………..5
Numérisation de photos …………………………….. ……………………………………………………..5
Numérisation de documents ……………………………………………….. …………………………….7
Numérisation au format PDF………………………………………………………………………………7
Numériser vers e-mail……………………….. .. …………………………….. .. ……………………………8
Numérisation vers le Cloud……………………. …………………………………………………………..8
Réalisation de copies……………………………………………………………………………………………..9
Numérisation à partir d’autres applications……………………………….. ……………………………….9
Comment numériser (Mac)………………………………………………… …………………………………………9
Présentation du scanner et du logiciel……………………………………….. ….. ……… ….. ……… … ….9
Boutons du scanner………………………………….. …………………………………………………….10
Logiciel de numérisation…………………………………………………………………………………..10
Numérisation d’images et de documents………………… ……………………………………………….11
Numérisation de photos………………………………. ……… … ………. … …….. ….. ……… … …….. .11
Numérisation de documents……………………………………………. …….. ……………. ………… .12
Numérisation au format PDF…………………………………………………………………………….12
Numériser vers e-mail……………………….. .. …………………………….. … …………………………12
Numérisation vers iCloud Photo Stream via iPhoto………………………………….. …… …….13
Réalisation de copies……………………………………………………………………………………………14
Numérisation à partir d’autres applications……………………………….. ……………………………..14
Informations supplémentaires……………………………………………………………………………………..14
2 Entretien et maintenance
Nettoyage de la vitre du scanner …………………………………………………………………………………15
Retrait et remise en place du capot du scanner……………………………………………………………..16
Commande des fournitures de maintenance et du scanner……………………………………………..18
3 Résolution des problèmes
Conseils de base pour le dépannage……………………………………………………………………………19
Résolution des problèmes d’installation du scanner………………………… … …………………………..19
Vérification du cordon USB……………………………………………………………………………………20
Désinstallez, puis réinstallez le logiciel (Windows uniquement)…………………………………..20
Problèmes liés à l’initialisation du scanner ou au matériel……………………………………………….20
Redémarrage du scanner …………………………………………………. ………………………………….21
Test du matériel du scanner ………………………………………………………………………………….21
Le scanner ne fonctionne plus correctement …………………………………………. ….. ……… …. ..21
1

Problèmes de fonctionnement du scanner…………………………………………………………………….22
Les boutons du scanner ne fonctionnent pas correctement………………………………………..22
Problèmes liés à la reconnaissance optique de caractèr es (OC R) s ous Window s …………23
Problèmes liés à la reconnaissance optique de caractères (OCR) sous Mac………………..24
L’image numérisée est brouillée …………………………………………………………………………….24
La numérisation est très lente ……………………………………………………………………………….24
Les fichiers de numérisation sauvegardés sont trop volumineux…………………………………25
La vitre du scanner a besoin d’être nettoyée…………………………………………………………….25
Informations su ppl ém e nt air e s sur la rés ol u t ion des p rob l èm es …. ….. ….. …. …. ….. ……. ….. …. …. 2 5
4 Informations techniques
Déclaration de garantie limitée de Hewlett-Packard………………………………………………………..27
Instructions de sécurité……………………………. ….. …………………………………….. … …………………..27
Caractéristiques du scanner………………………………………………………………………………………..29
Caractéristiques environnementales…………………………………………………………………………….30
Informations relatives à l’énergie………………………………………………………………………………….30
Restrictions sur les substances dangereuses (Turquie)…………………………………………….. ……30
Restrictions sur les substances dangereuses (Ukraine)………………………………………………….30
Informations sur le recyclage et la mise au rebut de certains matériaux…………………………….31
Recyclage du matériel électronique………………………………………………………………………..31
Mise au rebut de certains matériaux……………………………………………………………………….31
Collecte des déchets des partic uliers au sein de l’Union européenne .. ……………………………..31
5 Assistance produits
Accessibilité………………………………………………………………………………………………………………32
Obtention d’assistance……………………………………………………………………………………………….32
Index…………………………………………………………………………………………………………………………….33
2
1 Utilisation du scanner
Cette rubrique contient une présentation du scanner et des informations relatives à son
utilisation. Suivez les instructions corresponda nt à votr e systèm e d’ exploi tat ion.
Comment numériser (Windows)
•
Comment numériser (Mac)
•
•
Informations supplémentaires
Comment numériser (Windows)
Cette section contient les rubriq ues suivantes :
•
Présentation du scanner et du logiciel
Numérisation d’images et de documents
•
•
Réalisation de copies
Numérisation à partir d’autres applications
•
Présentation du scanner et du logiciel
Cette section contient les rubriq ues suivantes :
Présentation des boutons du scanner
•
•
Présentation du logiciel de numérisation HP
Présentation des boutons du scanner
Le tableau suivant décrit les boutons du scanner.
Icône Nom du bouton Description
Bouton
Numériser
Bouton Copier Numérise l’élément et envoie la numérisation vers l’imprimante
Bouton
Numériser vers
E-mail
Bouton
Numériser au
format PDF
Présentation du logiciel de numérisation HP
Lorsque vous installez le logiciel de numérisation HP, vo us pouvez choisir d’ajouter deux
icônes sur votre bureau. Ces icônes correspondent aux programmes de num érisatio n,
d’édition et d’impression de vos numérisatio ns.
Permet de numériser des images et des documents.
pour en faire une copie.
Numérise une ou plusieurs pages et joint le fichier à un nouveau
message électronique.
Numérise une ou plusieurs pages et les enregistre au format
PDF pour stockage ou partage.
Utilisation du scanner 3
Chapitre 1
Conseil Si vous n’avez pas ajouté les icônes sur le bureau, cliquez sur Démarrer
> Programmes (ou Tous les programmes) > HP > Scanjet > 200/300 >
Numérisation HP (ou Copie HP) pour accéder au logiciel de numérisation HP.
Icône Nom de la
fonction
Icône
Numérisation
HP
Icône Copie HP Utilisez la fonction Copie HP pour numériser des images et des
Utilisez le programme Numérisation HP pour toutes les tâches
suivantes :
Numérisation d’images et de documents
•
Accès à des informations d’aide et de résolution des
•
problèmes
Accès à la fenêtre de prévisualisation du logiciel
•
Numérisation HP pour éditer vos numérisations avant leur
sauvegarde
Modification des paramètres et des préférences.
•
documents, puis les envoyer vers une imprimante afin
d’effectuer une copie.
Description
Pour lancer une numérisation, double-cliquez su r l’icône Numérisation HP de votre
bureau pour afficher la boîte de dialogu e d es ra ccourcis de Numérisation HP, puis
suivez les instructions à l’écran.
Pour effectuer une copie d’image ou de docu m en t, double-cliquez sur l’icône Copie HP
de votre bureau et suivez les instructions à l’écran.
Vous pouvez associer les boutons du scanner à d’autres programmes, du moment que
Windows reconnaît ceux-ci comme compatibles avec les boutons. Pour ce faire :
1. Double-cliquez sur l’icône Numérisation HP de votre bureau pour ouvrir le logiciel
de numérisation HP.
2. Dans la boîte de dialogue des raccourcis du logiciel Numérisation HP, sélectionnez
Options > Paramètres des boutons, puis modifiez les raccourcis de numérisation
pour chaque bouton.
3. Cliquez sur OK.
Modification des paramètres de numérisation, , ,,
Vous pouvez modifier de nombreux paramètres de numérisati on à partir du logiciel de
numérisation HP, dont les suivants :
• Paramètres des boutons du scanner
• Préférences de numérisation
• Utilisation des raccourcis de numérisation
4 Utilisation du scanner

Pour afficher ou modifier les paramètres de numérisation
1. Double-cliquez sur l’icône Numérisation HP de votre bureau.
2. Dans la boîte de dialogue des raccourcis du logiciel Numérisation HP, cliquez sur
le menu Options et sélectionnez le type de paramètres que vous souhaitez afficher
ou modifier.
Pour plus d’informations sur les paramètres, cliquez sur Aide.
Vous pouvez modifier le paramètre Afficher un aperçu dans la boîte de dialogue des
raccourcis du logiciel Numérisation HP.
• Pour modifier le paramètre d’un raccourci de numérisation, sélectionnez le racco urci
en question, sélectionnez ou désélectionnez l’option Afficher un aperçu, puis
cliquez sur Enregistrer le raccourci.
• Pour modifier le paramètre d’un b outon du scanner, sélectionnez Options >
Paramètres des boutons, sélectionnez ou désélectionnez l’optio n Afficher un
aperçu, puis cliquez sur OK.
Numérisation d’images et de documents
Conseil Pour effectuer la numérisation ou la copie d’un livre ou d’autres originaux
de forte épaisseur, vous pouvez ôter le capot du scanner. Pour plus d’informations
sur le retrait et la remise en place du capot du scanner, voir
du capot du scanner
• Numérisation de photos
Numérisation de documents
•
Numérisation au format PDF
•
•
Numériser vers e-mail
Numérisation vers le Cloud
•
Retrait et remise en place
Numérisation de photos
Cette section contient les rubriq ues suivantes :
•
Pour numériser des images
•
Pour numériser plusieurs images sous un seul fichier
Pour numériser des images
1. Ouvrez le capot du scanner et placez l’original face vers le bas sur la vitre, en
respectant les flèches présentes sous la vitre du scanner.
2. Fermez le capot du scanner.
3. Effectuez l’une des actions suivantes :
•
Appuyez sur le bouton Numériser (
dialogue des raccourcis du logiciel Numérisation HP. — Ou —
• Double-cliquez sur l’icône Numérisation HP de votre bureau pour afficher la
boîte de dialogue des raccourcis du logici el Numérisation HP.
) du scanner pour afficher la boîte de
Comment numériser (Windows) 5

Chapitre 1
4. Sélectionnez le raccourci de numérisation à utiliser.
Les paramètres correspondants s’affichent sur la partie droite.
Remarque Si vous souhaitez modifier les paramètres de numérisation, cliquez
sur Modifier les paramètres et effectuez les changements souhaités. Pour plus
d’informations, reportez-vous à l’aide en ligne relative au logiciel du scanner.
5. Cliquez sur Numériser.
6. Si vous avez sélectionné Afficher un aperçu de numérisation, la fenêtre de
prévisualisation du logiciel Numéri sation HP s’affiche. Vous pouvez utiliser la fenêtre
de prévisualisation pour éditer votre numérisat ion a v ant de la sauvegarder.
7. Cliquez sur Terminer pour enregistrer la numérisation.
Le logiciel enregistre l’image numérisée dans le sous-dossier Mes images > Mes
numérisations. Le mois et l’année en cours sont inclus da ns le nom du sous-dossier.
Pour numériser plusieurs images sous un seul fichier
1. Ouvrez le capot du scanner et placez les images face vers le bas sur la vitre.
Pour optimiser les résultats, laissez au moins 6 mm (0,25 pouces) entre les bords de
chaque image.
2. Fermez le capot du scanner.
3. Effectuez l’une des actions suivantes :
•
Appuyez sur le bouton Numériser (
) du scanner pour afficher la boîte de
dialogue des raccourcis du logiciel Numérisation HP. — Ou —
• Double-cliquez sur l’icône Numérisation HP de votre bureau pour afficher la
boîte de dialogue des raccourcis du lo giciel Numérisation HP.
4. Sélectionnez le raccourci de numérisation à utiliser.
Les paramètres correspondants s’affichent sur la partie droite.
Remarque Si vous souhaitez modifier les paramètres de numérisation, cliquez
sur Modifier les paramètres et effectuez les changements souhaités. Pour plus
d’informations, reportez-vous à l’aide en ligne relative au logiciel du scanner.
5. Cliquez sur Numériser.
6. Si vous avez sélectionné l’option Afficher un aperçu, vous pouvez cl iquer sur l’onglet
Image unique pour apporter des modifications telles que la rotation de chaque image
individuelle.
7. Une fois que vous avez terminé l’opération pour toutes les images, cliquez sur
Terminer pour enregistrer la numérisation.
Chaque image numérisée est sauvegardée en tant que fichier sé paré. Si vous effect uez
la numérisation vers une destination particulière, l’image numérisée est envoyée à la
destination que vous avez choisie via les paramètre s du scan ner.
Remarque Pour numériser automatiquement plusieurs images en utilisant un
bouton du scanner, assurez-vous que le paramètre de desti na tion du bouton
Numériser (
multiples. Pour plus d’informations sur la modification des paramètres de
numérisation, voir
6 Utilisation du scanner
) est configuré sur une application compatible avec les images
Modification des paramètres de numérisation.

Numérisation de documents
1. Ouvrez le capot du scanner et placez l’original face vers le bas sur la vitre, en
respectant les flèches présentes sous la vitre du scanner.
2. Fermez le capot du scanner.
3. Effectuez l’une des actions suivantes :
•
Appuyez sur le bouton Numériser (
) du scanner pour afficher la boîte de
dialogue des raccourcis du logiciel Numérisation HP. — Ou —
• Double-cliquez sur l’icône Numérisation HP de votre bureau pour afficher la
boîte de dialogue des raccourcis du logici el Numérisation HP.
4. Sélectionnez le raccourci de numérisation à utiliser.
Les paramètres correspondants s’affichent sur la parti e droite.
Remarque Si vous souhaitez modifier les paramètres de numérisation, cliquez
sur Modifier les paramètres e t effectuez les changeme nts souhaités. Pour p lus
d’informations, reportez-vous à l’aide en l igne relative au logiciel du scanner.
5. Cliquez sur Numériser.
6. Si vous avez sélectionné l’option Afficher un aperçu et que vous souhaitez
numériser un autre document ou une autre page, placez la page sur la vit re et cliquez
sur Ajouter des pages.
7. Cliquez sur Terminer pour enregistrer la numérisation.
Le logiciel enregistre l’image numérisée dans le dossier Mes images > Mes
numérisations.
Numérisation au format PDF
1. Ouvrez le capot du scanner et placez l’original face vers le bas sur la vitre, en
respectant les flèches présentes sous la vitre du scanner.
2. Fermez le capot du scanner.
3. Effectuez l’une des actions suivantes :
•
Appuyez sur le bouton Numériser au format PDF (
) du scanner pour
afficher la boîte de dialogue de raccourcis du logiciel Numérisation HP. — Ou
—
• Double-cliquez sur l’icône Numérisation HP de votre bureau pour afficher la
boîte de dialogue des raccourcis du logici el Numérisation HP.
4. Sélectionnez le raccourci que vous souhaitez utiliser.
Les paramètres correspondants s’affichent sur la parti e droite.
Remarque Si vous souhaitez modifier les paramètres de numérisation, cliquez
sur Modifier les paramètres e t effectuez les changeme nts souhaités. Pour p lus
d’informations, reportez-vous à l’aide en l igne relative au logiciel du scanner.
5. Cliquez sur Numériser.
6. Si vous avez sélectionné l’option Afficher un aperçu et que vous souhaitez
numériser un autre document ou une autre page, placez la page sur la vit re et cliquez
sur Ajouter des pages.
7. Cliquez sur Terminer pour enregistrer la numérisation.
Comment numériser (Windows) 7

Chapitre 1
Le logiciel enregistre l’image numérisée dans le dossier Mes images > Mes
numérisations.
Numériser vers e-mail
Remarque Pour effectuer une numérisation vers un e-mail, assurez-vous que votre
ordinateur est connecté à Internet.
1. Ouvrez le capot du scanner et placez l’original face vers le bas sur la vitre, en
respectant les flèches présentes sous la vitre du scanner.
2. Fermez le capot du scanner.
3. Effectuez l’une des actions suivantes :
•
Appuyez sur le bouton Numériser vers e-mail (
) du scanner pour afficher la
boîte de dialogue de raccourcis du logiciel Numérisation HP. — Ou —
• Double-cliquez sur l’icône Numérisation HP de votre bureau pour afficher la
boîte de dialogue des raccourcis du lo giciel Numérisation HP.
4. Sélectionnez le raccourci que vous souhaitez utiliser.
Les paramètres correspondants s’affichent sur la partie droite.
Remarque Si vous souhaitez modifier les paramètres de numérisation, cliquez
sur Modifier les paramètres et effectuez les changements souhaités. Pour plus
d’informations, reportez-vous à l’aide en ligne relative au logiciel du scanner.
5. Cliquez sur Numériser.
6. Si vous avez sélectionné l’option Afficher un aperçu et que vous souhaitez
numériser un autre document, une autre page ou une autre image, placez l’élément
sur la vitre et cliquez sur Ajouter des pages.
7. Une fois que vous avez terminé l’opération pour toutes les images, cliquez sur
Terminer pour joindre automatiquement la numérisation à un message électronique.
8. Entrez l’adresse électronique, l’objet et le corps du message, puis envoyez celui-ci.
Numérisation vers le Cloud
Suivez ces instructions pour numériser des images ou des documents depuis votre
scanner vers des emplacements en réseau tels que Google Docs™, HP Snapfish ou
Google Picasa™.
Remarque Pour effectuer une numérisation vers le Cloud, assurez-vous que votre
ordinateur est connecté à Internet.
1. Ouvrez le capot du scanner et placez l’original face vers le bas sur la vitre, en
respectant les flèches présentes sous la vitre du scanner.
2. Fermez le capot du scanner.
3. Double-cliquez sur l’icône Numérisation HP de votre bureau pour afficher la boîte
de dialogue des raccourcis du logiciel Numérisation HP.
4. La liste des Raccourcis de numérisation, sélectionnez une destination dans le
Cloud.
Si votre destination de Cloud ne figure pas dans la liste des Raccourcis de
numérisation, cliquez sur Modifier les paramètres et sélectio nnez une de stinatio n
dans la liste Numériser vers.
8 Utilisation du scanner

5. Cliquez sur Numériser.
6. Lorsque vous y êtes invité, entrez vos informations de connexion à la destination dans
le Cloud et suivez les instructions à l’écran.
Réalisation de copies
Pour dupliquer une photo ou un document et l’envoyer vers une imprimante, utilisez le
bouton Copier (
1. Ouvrez le capot du scanner et placez l’original face vers le bas sur la vitre, en
respectant les flèches présentes sous la vitre du scanner.
2. Fermez le capot du scanner.
3.
Appuyez sur le bouton Copier (
bureau.
4. Vous pouvez utiliser la boîte de dialogue Copie HP pour régler l’image e t sélectionner
votre imprimante.
Pour régler l’image lors du lancement d’une numérisation à partir du bouton Copier
(
), cliquez sur Annuler dans la boîte de dialogue qui i ndi que la progression de
la copie.
5. Cliquez sur Démarrer.
) du scanner, ou l’icône Copie HP sur votre bureau.
Numérisation à partir d’autres applications
Vous pouvez numériser une image directement vers l’une de vos appli cation s si celle-ci
contient une option de menu telle que Acquisition, Numériser ou Importer un nouvel
objet. Si vous n’êtes pas certain de la compatibilit é avec l’application ou de l’option à
utiliser, reportez-vous à la documentation fo urnie ave c l’ap plicat io n.
) ou double-cliquez sur l’icône Copie HP de votre
Comment numériser (Mac)
Cette section contient les rubriq ues suivantes :
•
Présentation du scanner et du logiciel
•
Numérisation d’images et de documents
Réalisation de copies
•
Numérisation à partir d’autres applications
•
Présentation du scanner et du logiciel
Cette section contient les rubriq ues suivantes :
•
Boutons du scanner
Logiciel de numérisation
•
Comment numériser (Mac) 9
Loading…