

8
Ru
5
Отрегулируйте звук при
воспроизведении диска BD/DVD.
Убедитесь в том, что на дисплее ресивера
отображается индикация BD/DVD. Если индикация
отсутствует, нажмите кнопку BD на пульте
дистанционного управления, чтобы выбрать в
качестве источника входа диск BD/DVD.
1
Для выбора доступны несколько параметров
настройки звука. Подробнее см. раздел
Прослушивание системы на стр. 33.
2
Автоматическая настройка
объемного звучания (MCACC)
Автоматическая настройка многоканальной
акустической калибровки (MCACC) определяет
акустические характеристики помещения,
предназначенного для прослушивания, с учетом
внешних шумов, размера громкоговорителей и
расстояния до них и измеряет как задержку, так
и уровень сигнала в канале. С ее помощью
ресивер получает информацию от ряда тестовых
звуковых сигналов и на ее основе выбирает
оптимальные параметры громкоговорителей и
коррекции сигнала, наиболее подходящие для
конкретного помещения.
Внимание
• При использовании автоматической настройки
MCACC все предыдущие заданные параметры
громкоговорителей стираются.
• Перед использованием настройки Auto
MCACC функция iPod USB не должна
быть выбрана в качестве источника входа.
Предупреждение
• Тестовые сигналы, издаваемые системой
автоматической настройки MCACC, имеют
высокую громкость.
1
Включите ресивер и используемый
телевизор.
2
Подключите микрофон в гнездо
MCACC SETUP MIC
на передней панели.
Проверьте, нет ли препятствий между
громкоговорителями и микрофоном.
Если у вас есть штатив, используйте его для
установки микрофона приблизительно на уровне уха
в обычной точке прослушивания. Иначе установите
микрофон на уровне уха, используя стол или стул.
3
Нажмите кнопку RECEIVER (РЕСИВЕР)
на пульте дистанционного управления,
после чего нажмите кнопку SETUP.
На экране телевизора появится экранный
дисплей. Для перехода между экранами и
выделения пунктов меню используйте кнопки
/// и ENTER на пульте дистанционного
управления. Нажмите кнопку RETURN
(ВОЗВРАТ) для выхода из текущего меню.
• Нажмите на кнопку SETUP в любой момент
для выхода из меню настройки системы.
3
4
Выберите пункт «Auto MCACC»
в меню настройки системы, затем
нажмите кнопку ENTER.
4
После нажатия кнопки ENTER старайтесь
соблюдать тишину. Система сгенерирует ряд
тестовых звуковых сигналов, чтобы
определить уровень внешних шумов.
Примечание
1
Вам может понадобиться настроить используемый проигрыватель BD/DVD на воспроизведение аудиосигнала в
форматах Dolby Digital, DTS и 88,2 кГц/96 кГц PCM (2-канальный) (для получения дополнительной информации см.
инструкцию по эксплуатации используемого проигрывателя BD/DVD).
2
В зависимости от проигрывателя BD/DVD или воспроизводимого диска может выводиться только 2-канальный звук.
В этом случае, если необходимо получить многоканальное объемное звучание, для параметра режима
прослушивания необходимо установить значение STANDARD (СТАНДАРТНОЕ) (при необходимости см. раздел
Прослушивание материала с использованием объемного звучания на стр. 33), если необходимо многоканальное объемное
звучание.
BD
TV
INPUT SELECT
SOURCE
DVR
INPUT
TV CONTROL
RECEIVER
ZONE 2
ON/OFF
ENTER
RETURN
AUDIO
PARAMETER
TUNER EDIT
TOOLS
MASTER
VOLUME
BAND
MENU
HOME
MENU
SETUP
TOP
MENU
TUNE
TUNE
P
R
E
S
E
T
P
R
E
S
E
T
iPod CTRL
PTY SEARCH
RETURN
RECEIVER
ENTER
SETUP
RECEIVER
PTY SEARCH
3 •
Если в течение трех минут не осуществляются никакие действия, автоматически запускается экранная заставка.
При отмене автоматической настройки MCACC в любое время ресивер автоматически выйдет из текущего экрана
без изменения настроек.
•
Экранный дисплей не появится, если подключение к используемому телевизору выполнено с помощью выхода
HDMI.
Для настройки системы используйте компонентные или композитные подключения.
4
MIC IN
мигает, когда микрофон не подключен к MCACC SETUP MIC.
MASTER
VOLUME
MCACC
SETUP MIC
ENTER
R
DIO
System Setup
1.Auto MCACC
2.Manual SP Setup
3.Input Assign
Return
VSX-819H_KU_RU.book Page 8 Thursday, January 29, 2009 2:01 PM
-
Страница 1
Register y our product at: www .pioneerelectr onics.com (US) www .pioneerelectr onics.ca (Canada) • Protect y our new investment The details of your purchase will be on file f or reference in the e vent of an insurance claim such as loss or theft. • Impro ve product de velopment Y our input helps us contin ue to design products that meet your n[…]
-
Страница 2
If the AC plug of this unit does not match the AC outlet you want to use, the plug must be removed and appropriate one fitted. Replacement and mounting of an AC plug on the power supply cord of this unit should be performed only by qualified ser vice personnel. If connected to an AC outlet, the cut-off plug can cause severe electrical shock. Make s[…]
-
Страница 3
Read these instructions. Keep these instructions. Heed all warnings. Follow all instructions. Do not use this apparatus near water . Clean only with dry cloth. Do not block any ventilation openings. Install in accordance with the manufacturer ’s instructions. Do not install near any heat sources such as radiators, heat registers, stoves, or other[…]
-
Страница 4
4 En Contents 01 Before you start Checking what’s in the box . . . . . . . . . . . . . . . 6 Loading the batteries . . . . . . . . . . . . . . . . . . . 6 Installing t he receiver . . . . . . . . . . . . . . . . . . . 6 Ventilat ion . . . . . . . . . . . . . . . . . . . . . . . . . . 6 02 5 minute guide Intro duc tion to h ome t hea ter . . . . .[…]
-
Страница 5
English Italiano Français Nederlands Españo l Deutsch English Français Deutsch Nederlands Italiano Español 5 En 09 Making recordings Making an audio or a video recording . . . . . . 50 10 Controlling the rest of your syste m Settin g the remot e to con trol othe r component s . . . . . . . . . . . . . . . . . . . . . . . . . 51 Selecting preset[…]
-
Страница 6
Before you start 01 6 En Chapter 1: Before you start Checking w hat’s in the box Please check that yo u’ve received the following supplied accessories: • Setup mi cropho ne • Remote control • Dry cell batteries (AAA size IEC R03) x2 • AM loop ant enna •F M w i r e a n t e n n a •i P o d c a b l e • These operating instructions Loa[…]
-
Страница 7
Before you start 01 7 En English Français Deutsch Nederlands Italiano Español English Français Deutsch Nederlands Italiano Español Slot and openings in the cabinet ar e provided for ventilation and to protect the equipment from overheating. To p revent fire hazard, do not place anything directly on top o f the unit, make sure the openings are n[…]
-
Страница 8
5 minute guide 02 8 En Chapter 2: 5 minute guide Intro duction t o home theater Home theater refers to the use of multiple audio tracks to create a surround sound effect, making you feel like you’re in the middle of the actio n or concer t. The sur round sound you g et from a home theater system depends no t only on your speaker setup, but also o[…]
-
Страница 9
5 minute guide 02 9 En English Français Deutsch Nederlands Italiano Español 5 Play a BD/ DVD, an d adjust the volume. Make sure that BD/DVD is s howin g in th e receiver’s display. If it isn’t, press BD on th e remote to se t the receiver to the BD/DVD input. 1 There are several other sound options you can select. See Listening to your system[…]
-
Страница 10
5 minute guide 02 10 En 5 Follow t he instr uctions o n-scree n. • Make sure the m icrophone is connected. • Make sure the s ubwoofer is on and the volume is turned up . • See below for notes regarding ba ckground noise and other possible interference. 6 Wait for t he te st ton es to finish . A pro gres s rep ort is di spl ayed on-s cre en wh[…]
-
Страница 11
5 minute guide 02 11 En English Français Deutsch Nederlands Italiano Español Other problems when using the Auto MCACC Setup If the room environment is not optimal for the Auto MCACC Setu p (too m uch backg round noise, echo off the walls, obstacles blocking the speakers from the microphone) the final setti ngs may be incor rect. C heck f or house[…]
-
Страница 12
Connecting up 03 12 En Chapter 3: Connecting up Making cabl e connecti ons Make sure not to bend the cables over the top of this unit (as sho wn in the illustratio n). If this happens, the m agnetic field produced by the transformers in this unit may cause a humming noise from the speakers. Impo rta nt • Bef ore m aki ng or c han ging conn ectio […]
-
Страница 13
Connecting up 03 13 En English Français Deutsch Nederlands Italiano Español Analog audio cables Use stereo RCA phono cables to connect analog audio componen ts. These cables are typically red and white, and you should connect the red plugs to R (righ t) terminals and white plugs to L (left) terminals. Digital audio cables Commercially available c[…]
-
Страница 14
Connecting up 03 14 En Connecting a TV and B lu-ray Disc player or DVD player This pag e shows you ho w to conn ect your BD/DVD pla yer and TV to the re ceiver . 1 Connect the HDMI output on your BD/DVD player t o the HDMI BD/DVD IN i nput on this receiver. Use an HDMI cable for the connection. If an HDMI ou tput is not on your D VD playe r, use a […]
-
Страница 15
Connecting up 03 15 En English Français Deutsch Nederlands Italiano Español 3 Connect the composite v ideo output and the stereo analog audio outputs 1 on your BD/DVD player to the BD/DVD inputs on t his receiver. Use a stan dard RC A video cable 2 a nd a stereo RCA phono cable for the connection. • If your BD/DVD player has multichannel analog[…]
-
Страница 16
Connecting up 03 16 En Connect ing a sa telli te recei ver or other digi tal se t-top b ox Satellite and cable receivers, and terrestrial digital TV tuners are a ll examples of so-called ‘set-top box es’ . 1 If your set-top box has an HDMI output , connect it to an HDMI TV/SAT IN on this reciever . If your set-top box does not have a n HDMI out[…]
-
Страница 17
Connecting up 03 17 En English Français Deutsch Nederlands Italiano Español Connecti ng other audi o compon ents The num ber an d kind of conne ctions de pend s on the kind of component you’re connecting. 1 Follow the steps below to co nnect a CD-R, MD, DAT, tape record er or other audio com ponent. 1 If your compone nt has a digit al output, c[…]
-
Страница 18
Connecting up 03 18 En Connecting an HDD/DVD recorder, VCR and oth er video sources This receiver has audio/video inputs and outputs suitable for conne cting analog or digital video recorders, including VC Rs and HD D/DVD rec orders. 1 If you r vid eo component has an HDMI output, connect it to an H DMI DVR/VCR I N on this receiver. If yo ur vide o[…]
-
Страница 19
Connecting up 03 19 En English Français Deutsch Nederlands Italiano Español Using the compo nent video jacks Component video should deliver superio r picture quality when compared to com posite video. A further advanta ge (if y our source a nd TV are bot h compat ible) is p rogressive- scan video, which delivers a very stable, flicker-free pictur[…]
-
Страница 20
Connecting up 03 20 En Connecti ng to the f ront pan el video termin al Fron t vi deo co nnec ti ons ar e ac cess ed v ia th e front panel using the INPUT SELEC TOR or VIDEO butto n on the remote control. There a re standard audio/video jacks. Hook them up the same way you ma de the rear panel connections. •P u s h d o w n o n t h e PUSH OPEN tab[…]
-
Страница 21
Connecting up 03 21 En English Français Deutsch Nederlands Italiano Español Using external antennas To improve FM reception Use an F connector (not supplied) to connect an external FM antenna. To improve AM reception Connect a 5 m to 6 m (15 ft. to 18 ft.) length of vinyl-coated wire to the AM antenna terminal without disconnecting the supplied A[…]
-
Страница 22
Connecting up 03 22 En Connecting th e speakers A complete setup of six speakers (including the subwoofer) is shown here but every one’s home setup will vary. Simply conn ect the speakers you have i n the manner sho wn below. The receiver will work with just two stereo speakers (the front speakers in the diagram ) but using at least three speaker[…]
-
Страница 23
Connecting up 03 23 En English Français Deutsch Nederlands Italiano Español Bare wire connections A-Spe ake r term inals: 1 Twist ex posed wire st rands together . 2 Loosen terminal and insert exposed w ire. 3 Tig hte n te rmin al. B-Speak er terminal s: 1 Twist ex posed wire st rands together . 2 Push open the tabs and insert expos ed wire. 3 Re[…]
-
Страница 24
Connecting up 03 24 En Placing the speaker s To achieve the best po ssible surround sound, install your speakers as shown below. 5.1 channel sur round system: 6.1 channel sur round system: 1 7.1 channel sur round system: 1 Where you put your speakers in the room has a big effect on the quality of the sound. The follow ing guidelines should help you[…]
-
Страница 25
Connecting up 03 25 En English Français Deutsch Nederlands Italiano Español • If the surrou nd speakers cannot be set directly to the side of the listening position with a 7.1-channel system, the surround effect ca n be enhanc ed by tu rning o ff the UP Mix function (see Setting the Up Mix function on page 37). • Try not to place the surround[…]
-
Страница 26
Controls and displays 04 26 En Chapter 4: Controls and displays Front pane l 1 STANDBY/ON 2 INPU T SELEC TOR dial Selects an input source. 3 Tuner c ontrol buttons BAND Switches between AM, FM ST (stereo) and FM MONO radio bands (page 48). TUNE +/– Used to find radi o frequencies (page 48) and SIRIUS Radio channels (page 63). TUNER EDIT Use w[…]
-
Страница 27
Controls and displays 04 27 En English Français Deutsch Nederlands Italiano Español ADVANCED S URROUND Switches between the various surround modes (page 34). STANDARD SURROUND Press for St andard dec oding an d to swit ch between the various 2 Pro Logic II, 2 Pro Logic IIx and NEO:6 o ptions (page 33). 9S P E A K E R S Use to change the speaker s[…]
-
Страница 28
Controls and displays 04 28 En Display 1P H A S E Lights when the Phase C ontrol is switched on (page 11). 2A U T O Lights when the Au to Surround feature is switched on (see A uto playback on page 33). 3S T Lights when a stereo FM broadcast is being received in auto stereo mode. 4T U N E Lights when a n ormal broadcast chan nel or SIRIUS channel i[…]
-
Страница 29
Controls and displays 04 29 En English Français Deutsch Nederlands Italiano Español HD + Lights when a source with Dolby Digital Plus encod ed audio s ignals is detec ted. HD Lights when a source with Dolby TrueHD encoded au dio signa ls is detected. EX Ligh ts wh en a sour ce with D olb y Di git al EX encoded au dio signa ls is detected. 2 PLllx[…]
-
Страница 30
Controls and displays 04 30 En Remote co ntrol 1 INPUT SELECT Use to select the input source. 2 RECEIVER Switches t he receiv er betw een sta ndby a nd o n. 3 RECEIVER Switches the remote to control th e receiver (used to select the white commands above the numb er butto ns ( S.RETRIEV ER , etc)). Also use this button to set up surround sound ([…]
-
Страница 31
Controls and displays 04 31 En English Français Deutsch Nederlands Italiano Español 8 System Se tup and Com ponent contro l buttons The followi ng button cont rols can be accessed after you have selected the correspon ding MULTI CO NTROL button ( BD , TV , etc.). Press RECEIVER first to access: AUDIO PARAMETER Use to access the Audio options (pag[…]
-
Страница 32
Controls and displays 04 32 En S.RETR IEVER Press to restore CD quality sound to compressed audio sources (page 36). EQ Press to switch o n/off Acoustic Calibration EQ setting (page 36). CH SELE CT Press repea tedly to select a channel, then use +/– to adjust the level (page 43 ). CH SELE CT +/ – Use to ad just the channel leve l. SB CH Press t[…]
-
Страница 33
Listening to your sy stem 05 33 En English Français Deutsch Nederlands Italiano Español Chapter 5: Listening to your system Importan t • T he listeni ng modes and many features described in th is section may not be availa ble depending on the curre nt source, setting and status of t he receiver . Auto playback The simplest, most direct listen i[…]
-
Страница 34
Listening to your system 05 34 En With two channel sources , you can s elec t from : • DOLB Y PLII x MOVIE – Up to 7.1 channel sound, especially suited to movie sources • DOLB Y PLII x MUSIC – Up to 7.1 channel sound, especially su ited to music sources 1 • DOLB Y PLII x GAME – Up to 7.1 channel sound, especially suited to v ideo games […]
-
Страница 35
Listening to your sy stem 05 35 En English Français Deutsch Nederlands Italiano Español Listening in stereo When yo u sel ect STER EO you will hear the source through just the front left and right speakers (and possibly your subwoofer depend ing on your speaker settin gs). Dolby Digi tal a nd DTS mult ichann el sou rces a re downm ixed to ste reo[…]
-
Страница 36
Listening to your system 05 36 En Using Stream Direct Use the Stream Direct mode s when you want to hear the truest po ssible reproduction of a source. All unnecessary signal proc essing is byp asse d. • Whil e li stening to a s ource, press AUTO/ DIRECT to se lec t Stre am Dire ct m ode . • AUTO SURROUN D – See Auto pl ay back on page 33. ?[…]
-
Страница 37
Listening to your sy stem 05 37 En English Français Deutsch Nederlands Italiano Español Using surroun d back chann el process ing You can set the sur round back channel when the surround back spea ker is connected and NO is not selected for the speaker setting (page 42). You can have the receiver automatically u se 6.1 or 7.1 decoding for 6.1 enc[…]
-
Страница 38
Listening to your system 05 38 En Setting th e Audio options There are a numb er of additional sound setti ngs you can ma ke using the AUDIO PARAM ETER m enu. The defau lts, if not stated, are listed in bold. Importan t •T h e AUD IO PARAM ETER menu is no t available with MU LTI IN input (see Se lec ti ng t he m u lti ch an ne l an alo g inp ut s[…]
-
Страница 39
Listening to your sy stem 05 39 En English Français Deutsch Nederlands Italiano Español a. You can change the MIDNIGHT/LOU DNESS opti ons at any ti me by using MI DNIGHT button. b. You can change the Sound Retr iever feat ure at any t ime by using S.RETR IEVER butto n. c. WMA and MP3 playb ack availabl e only via i Pod/USB input. d. This setti ng[…]
-
Страница 40
Listening to your system 05 40 En Playing other s ources 1 Turn on the power of the playba ck component. 2 Turn on the power of the receiv er. 3 Selec t the source you want to playbac k. Use the MULTI CO NTRO L buttons ( INPUT SELEC TOR ). 4 Start playbac k of the component you selec ted in st ep 1 . Ch oosi n g th e i npu t si gn al On this receiv[…]
-
Страница 41
The System Setup menu 06 41 En English Français Deutsch Nederlands Italiano Español Chapter 6: The System Setup m enu Using the System Se tup menu The follow ing section shows you h ow to make detailed settings to specify how you’re using the receiver, and also explains how to fine-tune individual speaker system settings to your liking. 1 Switc[…]
-
Страница 42
The System Setup menu 06 42 En 1 Selec t ‘Manua l SP Setup’ then pres s ENTER . 2 Selec t the se ttin g you wa nt to adjus t. If you are doing this for the first time, you may want to adjust these settings in order: • Spea ker Se ttin g – Specify the size and number of speake rs you’ve connected (see bel ow). • Crosso ver N etwork – S[…]
-
Страница 43
The System Setup menu 06 43 En English Français Deutsch Nederlands Italiano Español • Surr . Ba ck – Select the number of surround back speakers you have (one, two or none) . 1 Select LARGE if your su rround back speakers reprodu ce bass frequencies effectively. Select SMALL to send bass frequencies to the other speakers or subwoofer . If you[…]
-
Страница 44
The System Setup menu 06 44 En 2 Select a se tup option. • Manua l – Move the test tone manually from speaker to speaker and adjust individual channel l evels. • Auto – Adjust channel levels as the test tone moves from speaker to speaker automatically. 3 Confirm your select ed setup opt ion. The test tones wi ll start after you press ENTER […]
-
Страница 45
The System Setup menu 06 45 En English Français Deutsch Nederlands Italiano Español 1 Press REC EIVE R on the remote contr ol, then press the SETUP button. An on-screen display (OSD) app ears on your TV. Use /// and ENTER on t he re mo te con tr ol t o n av iga te th ro ug h th e s c ree ns and select menu items. Press RETUR N to conf[…]
-
Страница 46
Using the MULTI-ZONE feature 07 46 En Chapter 7: Using the MULTI-ZONE feature MULTI- ZONE listening This receiver can powe r up to two independent systems in separate rooms after you have made the proper MULTI-ZONE conn ections. An example MULTI-ZONE setup is shown below. Different sources can be playing in tw o zones at the sam e time or, depen di[…]
-
Страница 47
Using the MULTI-ZONE feature 07 47 En English Français Deutsch Nederlands Italiano Español Using the MULTI-ZONE controls The following steps use the front panel controls to select sour ces. See MULTI-ZONE remote controls below. 1 Press the MULT I-ZON E ON/O FF button on the front panel. Each press selects a MULTI-ZONE option: • ZONE 2 O N – S[…]
-
Страница 48
Using the tuner 08 48 En Chapter 8: Using the tuner Listening to th e radio The following steps show you how to tune in to FM and A M rad io br oadcas ts using t he automa tic (se arch ) and ma nual ( step) tuning functions. Once you are tuned to a station you can memorize th e frequency for recall later— see Saving station p resets below for mor[…]
-
Страница 49
Using the tuner 08 49 En English Français Deutsch Nederlands Italiano Español 3 Press PRE SET / to sele ct the s tati on preset y ou w ant. You c an a lso use th e nu mber butt ons. 4 Press EN TER. After pressing ENTER , the p reset number stop blinking and the receiver stores the station. Listening to st ation presets You will need to have[…]
-
Страница 50
Making recordings 09 50 En Chapter 9: Making recordings Making an audio o r a video recording You can make an audio or a video recording from the b uilt-in tun er, or f rom an audi o or video so urce co nnected to the rece iver (s uch as a CD player o r TV). Keep in mind yo u can’ t make a digi tal recording from an an alog source or vice-versa, […]
-
Страница 51
Controlling the rest of your system 10 51 En English Français Deutsch Nederlands Italiano Español Chapter 10: Controlling the rest of your system Settin g the remot e to con trol other com ponent s Most components can be assign ed to one of the MULTI CONTROL bu ttons using the component’s manu facturer preset code stor ed in the remote. However[…]
-
Страница 52
Controlling the rest of your system 10 52 En Contro ls for TVs This remote control can control components after entering the proper codes or teaching the receiver the commands (see Cont rolling the rest o f your system on page 51 for more on this). Use the MULTI CON TROL buttons to select the component •T h e TV CO NTROL buttons on the rem ote co[…]
-
Страница 53
Controlling the rest of your system 10 53 En English Français Deutsch Nederlands Italiano Español Contr ols for other c omponents This remote control can contro l these components after entering the proper codes or teaching th e receiver the commands (see Controlling the rest of your system on page 51 for more on this). Use the MULTI CONTROL butt[…]
-
Страница 54
Controlling the rest of your system 10 54 En DISPLAY P ress to display informat ion. BD/DVD/DVR pl ayer TOP MENU Displays the disc ‘top’ menu of a BD/DVD player . BD/DVD/DVR player MENU Displays men us for the c urrent BD/D VD or DVR you a re using. BD/DVD/DVR pl ayer P a use s th e tap e. Cass ett e de ck Stops the tape. Cassette deck […]
-
Страница 55
Controlling the rest of your system 10 55 En English Français Deutsch Nederlands Italiano Español Preset Code List You should have no problem controll ing a componen t if you fi nd the ma nufactu rer in th is list, but please note that there are cases where codes fo r the manufacturer in the list will not work for the model that you are using. Th[…]
-
Страница 56
Controlling the rest of your system 10 56 En Electro grap h 0107 Electro hom e 0002, 000 3, 0004, 0006 Elemen t 0082 Emerso n 0004, 0006, 0007, 0008, 000 9, 0023, 0 103, 0104 Empre x 0092 Envisi on 0004, 0006, 0 100 Epson 0061 ESA 0103 Fujitsu 0009 Funai 0008, 0009, 0103, 0104 Futurete ch 0008, 0104 Gateway 0067, 010 7, 0108 GE 0000, 0003, 0004 , 0[…]
-
Страница 57
Controlling the rest of your system 10 57 En English Français Deutsch Nederlands Italiano Español Fuji 1004 Funai 10 05 Garrard 1005 Gate wa y 1017 GE 1002 , 10 04 GOI 1029 Goldstar 1000, 100 3 Gradiente 1005 Harl ey David son 1005 Harman /K ardon 1000 Head quarte r 1001 Hewl ett Packar d 1017 HNS 1016 Howard Comput ers 10 17 HP 1017 HTS 1029 Hug[…]
-
Страница 58
Other connections 11 58 En Chapter 11: Other connections Caut ion • Before making or changing the connecti ons , switch off the power and di sconnect the power cord from the power o utlet. Plug ging in com po nent s sh oul d be the last connection you make with your system. • Do not allow any contact between speaker wires from different termina[…]
-
Страница 59
Other connections 11 59 En English Français Deutsch Nederlands Italiano Español 2 Switch the rec eiver on and press the iPod USB i nput sour ce button to switch the receiver to the iP od. The front panel display shows Loading while the receiver verifies the connection and retrieves data from the iPod. 3U s e t h e TOP M ENU button t o displ ay iP[…]
-
Страница 60
Other connections 11 60 En Watching photos and video content To view ph otos or vide o on your iPod, si nce video contr ol is not possible us ing this receiv er, you must use the main contro ls of you r iPod instead. 1 Impo rta nt • To play ph otos or vid eo on yo ur iPod, y ou must connect the composite MONI TOR OUT jack and TV. 1 Press iPod CTR[…]
-
Страница 61
Other connections 11 61 En English Français Deutsch Nederlands Italiano Español •P u s h d o w n o n t h e PUSH OPEN tab to access the USB terminal. Connecting your USB device to the receiver 1 Switch on the rec eiver and your TV. 2 Press iPod USB on the remote control to switch the receiver to the iPod USB. NO DEVICE appears in the OSD. 3 Conn[…]
-
Страница 62
Other connections 11 62 En Compressed audio compatibility Note that alth ough most standard bit /sampling rate combi nations fo r compresse d audio ar e compatible, so me irregularl y encoded files may not play back. The list below shows compatible form ats for compr ess ed aud io file s: • MP3 (MPEG-1/2/2.5 Audio Layer 3) – Sampling rates: 8 k[…]
-
Страница 63
Other connections 11 63 En English Français Deutsch Nederlands Italiano Español Connecti ng your Sirius Connect TM Tuner To rece ive SIRIU S Satell ite Radio b roadca sts, you will n eed to a ctiva te yo ur Sir iusCon nec t tuner . 1 1 Connect a Si riusConnec t tuner to the SIRIUS I N jack on the rear of t his rece iver. You will also need to con[…]
-
Страница 64
Other connections 11 64 En Saving channel presets This receiv er can memori ze up to 30 ch annels, stored. 1 Select the cha nnel you want to memoriz e. See Selecting channels and browsing by gen re above. 2 Press T.EDIT . The display shows a blinki ng memory number. 3 Press / to s elec t t he channe l pre set you want. You can also use the nu[…]
-
Страница 65
Additional information 12 65 En English Français Deutsch Nederlands Italiano Español Chapter 12: Additional information Troubleshooting Incorrect operations are often mistaken for trouble and malfunctions. If you think that there is something wrong with this component, check the points below. Take a look at the other components and electrical app[…]
-
Страница 66
Additional information 12 66 En Consi derable noise in radi o broadca sts. • Connect the antenna (page 20) and adjust the position for best reception. • R oute any loo se c ables away fr om th e ante nna te rmina ls an d wir es. • F ully extend the FM wire antenna, position for best rece ption, and secure to a wall (or connect an outdoor FM a[…]
-
Страница 67
Additional information 12 67 En English Français Deutsch Nederlands Italiano Español HDMI Important information regarding the HDMI con nection There are cases w here you may not be able to route HDMI signals through this receiver (this depends on the HDMI eq uipped component yo u are connecting-check wi th the manufacturer f or HDMI comp atibilit[…]
-
Страница 68
Additional information 12 68 En iPod messages USB messages SIRIUS radio messages Symptom Caus e Action iPod/USB Error 1 (I/U ERR1) There is a problem with the signal path from the iPod to the receiver. Switch off th e receiver a nd reconne ct the i Pod to the receiver. If this doesn’t s eem to work, try resetting your iPod. iPod/USB Error 2 (I/U […]
-
Страница 69
Additional information 12 69 En English Français Deutsch Nederlands Italiano Español Resettin g the main unit Use this procedure to re set all the receiver’s settings to the factory def ault. Use the front panel cont rols to d o this. 1 Switch the recei ver into standby. 2 While holding down th e BAND button, press an d hold the STANDBY/ON […]
-
Страница 70
Additional information 12 70 En Power co rd cau tion Handle the power cor d by the plug. Do not pull out the plug by tugging the cord and n ever touch t he powe r cor d when your ha nds ar e wet as this c ould cause a short cir cuit or an el ectric shock. Do not place the unit, a piece of furniture, etc., on the power cord, or pinch the cord. Never[…]
-
Страница 71
Additional information 12 71 En English Français Deutsch Nederlands Italiano Español VSX-819H_KU.book Page 71 Thursday, December 25, 2008 8:36 AM[…]
-
Страница 72
Ce produit est destiné à une utilisation domestique générale. T oute panne due à une utilisation autre qu’à des fins privées (comme une utilisation à des fins commerciales dans un restaurant, dans un autocar ou sur un bateau) et qui nécessite une réparation sera aux frais du client, même pendant la période de garantie. K041_Fr Si l[…]
-
Страница 73
Ce point d’exclamation, placé dans un triangle équilatéral, a pour but d’attirer l’attention de l’utilisateur sur la présence, dans les documents qui accompagnent l’appareil, d’explications importantes du point de vue de l’exploitation ou de l’entretien. Ce symbole de l’éclair , placé dans un triangle équilatéral, a pour b[…]
-
Страница 74
4 Fr Table des matières 01 Pr ép ar at if s Vérification des accessoires livrés avec l’appareil . . . . . . . . . . . . . . . . . . . . . . . . . . . . . 6 Chargement des piles . . . . . . . . . . . . . . . . . . . 6 Installation du récepteur . . . . . . . . . . . . . . . . . 6 Ventilat ion . . . . . . . . . . . . . . . . . . . . . . . . . .[…]
-
Страница 75
English Italiano Français Nederlands Españo l Deutsch 5 Fr English Français Español 08 Utilisation du tuner Pour écouter la radio . . . . . . . . . . . . . . . . . . . 48 Amélioration du son stéréo FM . . . . . . . . . . 48 Mémorisation de st ations préréglées . . . . . . 48 Pour écouter les stat ions préréglées . . . . . . 49 Att r[…]
-
Страница 76
6 Fr Chapitre 1: Préparatifs Vérific ation des a ccessoires livrés avec l’appareil Veuillez vérifier que les accessoires suivants sont livrés avec l’appareil: • Microphone d e configuration • Télécommande • Piles à anode sèche (AAA IEC R03) x2 • Antenne cadre AM • Antenne fi laire FM •C â b l e i P o d • Ce mo de d’emp[…]
-
Страница 77
7 Fr English Français Español Le coffret est pourvu de fentes et d’ouvertures pour permettre une bo nne ventilation et pour empêcher la surchauffe. Pour éviter tout risque d’incendie, ne rien placer directement au dessus de l’appareil, s’assurer que les ouve rtur es ne s oie nt jam ais bloqué es ou couvertes (par des journaux, des napp[…]
-
Страница 78
8 Fr Chapitre 2: Guide en 5 minutes Présentation de l’appa reil de cinéma à domicile Le système de cinéma à domicile repose sur l’utilisation d e pistes audio multiples qui permett ent de créer un son surr ound, e t vous donne ainsi l’impression d’être au c entre de l’action ou du co ncert. La qu alité du son surround émise par […]
-
Страница 79
9 Fr English Français Español 5 Lancez l a lecture d’ un BD/DVD et réglez l e volume. Assurez-vous que BD/ DVD apparaît sur l’écran du récepteur. Si ce n’est pas le cas, appuyez sur la touch e BD de la télé commande pour régler le récepteur sur l’entrée du lecteur de BD/D VD. 1 Vous avez la poss ibilité de séle ctionner d’aut[…]
-
Страница 80
10 Fr 5 Suivez les inst ruct ions à l’écr an. • Assurez-vous que le m icrophone es t connecté. • Vérif iez que le caisso n de basses e st allu mé et que le volume est monté. • Consultez les remarques ci-dess ous relatives au bruit de fond et aux autres interférences possibles. 6 Attendez qu e les tonalités de tes t ne retentis sent […]
-
Страница 81
11 Fr English Français Español Autres problèmes lors de l’utilisation de la configuration MCACC automatique Si l’environnement de la pièce n’est pas optimal pour la configuration MCACC automatique (trop de bruit de fond, écho dans les murs, obstacles en tre les ence intes et le micro phone) il se peut que les réglages finaux soient inco[…]
-
Страница 82
12 Fr Chapitre 3: Raccordements Racc or de ment s de s câ ble s Veillez à ne pas plier les câbles par dessus l’appareil (conformément à l’illustration). Dans ce cas, le champ m agnétique produ it par les transformateurs de l’appareil pourrait prov oq uer le r onf lem ent des e nce int es. Impo rta nt • Avant un r accord ement o u une […]
-
Страница 83
13 Fr English Français Español Câbles audio analogiques Utilisez des câbles phono stéréo RCA pour raccorder les appareils audio analo giques. Ces câbles sont le plus souv ent ro uges et blancs ; les fiches rouges doivent être raccordées aux bornes R (côté droit) et les fiches blanches au x bornes L (côté gauche). Câbles audio numériq[…]
-
Страница 84
14 Fr Raccordeme nt d’un tél éviseur et d’un lecteur de d isques Bl u-ray (BD) ou d’un lect eur de DVD Cette page décrit la façon de raccorder votre lecteur de BD/DVD et v otre téléviseur au récepteur. 1 Racc ordez la sort ie HDMI de vot re lecte ur de BD/DVD à l’entrée HDMI BD/DVD IN de ce récepteu r. Utilisez un câble HDMI pour[…]
-
Страница 85
15 Fr English Français Español 3 Rac cordez l a so rtie vidé o en c omp osan tes et les s orti es audio s tér éo analo giques 1 de votre l ecte ur de BD/ DVD aux ent rées BD/DVD de ce récepteur. Utilisez un câbl e vidéo RCA standard 2 et un câble phono RCA stéréo pour ce raccordement. • Si votre lecteur de BD/DVD est équipé de sorti[…]
-
Страница 86
16 Fr Raccor dement d’u n récepteur sate lli te ou d’ un boî tier déco deur n umé rique Les récepteurs satellites et par câble, ainsi que les syntoniseurs de téléviseur numérique terrestre sont tous des exemples de ce que l’on appelle boîtiers décodeurs. 1 Si votre boî tier déco deur comporte une sort ie HDMI, rac cordez -la à u[…]
-
Страница 87
17 Fr English Français Español Raccordeme n t d’autres appareils audio Le nombre et le type de raccorde ment dépendent des appa reils que vous désirez raccorder. 1 Su ivez les étapes ci-dessous pour raccorder un lec teur CD-R , MD, DAT, u n magn étop hon e ou tout autr e app are il aud io. 1 Si vot re apparei l est équi pé d’une sortie […]
-
Страница 88
18 Fr Raccordement d’un enregistreur HDD/DVD, magnétoscope et autres sources vidéo Ce récepteur est muni d’entrées et de so rties audio/vidéo adaptées au raccordem ent d’enregistreurs analogiques ou nu mériques, tels que des magnétoscopes ou des enregistreurs HDD/ DVD . 1 Si votre compos ant vidé o est équipé d’une sortie HDMI, r[…]
-
Страница 89
19 Fr English Français Español Utilisation des prises femelles vidéo en comp osantes Les prises femelles vidéo en composantes o ffrent généralement une q ualité d’image supérieure aux prises vidéo composites. D e plus, la fonction de balayage pr ogressif permet d’obtenir des images extrêmement stables et sans scintillement (s i la so […]
-
Страница 90
20 Fr Raccordemen t à la borne vidéo du panne au fronta l Les racc ordeme nts vidé o av ant sont access ibles via le pa nneau av ant à l’aide de la touche INPUT SE LEC TOR ou VID EO de la télécomma nde. Ce sont des pris es audio/vi déo standard. Faites les raccord ements comm e vous l’avez fait pour les connexions du panneau arrière. ?[…]
-
Страница 91
21 Fr English Français Español Utilisation des antennes externes Pour améliorer l a réception FM Utilisez un connecteur de type F (non fourni) pour raccorder une anten ne FM externe. Pour améliorer l a réception AM Connect ez un fil recouv ert de vinyle de 5 à 6 mètres de lon g à la born e d’antenne A M sans déconne cter l’a ntenne ca[…]
-
Страница 92
22 Fr Racc ord ement des e ncein te s Une configuratio n complète des six enceintes (y compris le subwoofer) est illustrée ci- après ; toutefois, la con figuration varie pour chaque installation. Racco rdez tout simplement vos enceintes de la façon su ivante : Le récepteu r fonctionnera avec seulement de ux enceintes stéréo (les enceintes av[…]
-
Страница 93
23 Fr English Français Español Branchement des fils nus Bor nes d’ enc ei nt es A : 1 Torsad ez ensem b le les brins d e fil dénudés. 2 Libére z la borne de l’e nceinte et insé rez-y le fil . 3 Refermez l a borne. Bor nes d’ enc ei ntes B : 1 Torsad ez ensem b le les brins d e fil dénudés. 2 Poussez sur les languettes pour les ouvrir […]
-
Страница 94
24 Fr Installation des enceintes Pour obt enir le meil leur s on s urrou nd po ssi ble, installez v os enceintes conf ormément à l’illustration c i-dessous. Système surround à 5.1 canaux : Système surround à 6.1 canaux : 1 Système surround à 7.1 canaux : 1 L’emplacement des enceintes dans la pièce d’écoute a une grande infl uence su[…]
-
Страница 95
25 Fr English Français Español • Les ence intes s urround et surr ound a rrière doivent être plac ées 60 cm à 90 cm plus haut que vos oreill es et légèreme nt incli nées ve rs le b as. Assu rez-v ous qu e les encei ntes ne so nt pas f ace à face . Pour le s signaux DVD audio, les enceint es doivent être plus ra pprochées de l’audite[…]
-
Страница 96
26 Fr Chapitre 4: Commandes et affichages Panneau fr ontal 1 STANDBY/ON 2C a d r a n INPU T SELEC TOR Permet de sélectionner une source d’en trée. 3 Touches de c ommande du tuner BAND Permet de nav iguer entre les bandes de signaux radio A M, FM ST (stéréo) et FM MONO (pa ge 48). TUNE +/– Ces touches servent à trou ver la fréquence ra[…]
-
Страница 97
27 Fr English Français Español ADVANCED S URROUND Permet de navigu er entre les divers modes surround (page 34). STANDARD SURROUND Appuyez sur ce tte touche pour le décoda ge standard et pour nav iguer parmi les différentes opti ons 2 Pro Logic II, 2 Pro Logic IIx et NEO:6 (page 33). 9S P E A K E R S Utilise z cette touche pour changer le syst?[…]
-
Страница 98
28 Fr Affich age 1P H A S E S’allume lorsque la touche Phase Contro l est sélectionnée (page 11). 2A U T O S’allume lorsque l’option Auto Su rround est sélectionnée (voir Lecture en mode Auto à la page 33). 3S T S’allume lorsque la bande d’émission FM stéréo est captée en mode stéréo au to. 4T U N E S’allume lors de la récep[…]
-
Страница 99
29 Fr English Français Español HD + S’allu me lorsqu ’une so urce co mportant de s si gn au x au di o D ol by Dig it al P lu s encodés est détectée. HD S’allu me lorsqu ’une so urce co mportant de s sig na ux a ud io Dol by True HD en cod é s est détectée. EX S’allu me lorsqu ’une so urce co mportant de s si gn au x au di o D ol[…]
-
Страница 100
30 Fr Télécommande 1 INPUT SELECT Servent à sélectionner la source d’entrée. 2 RECEIVER Cette touch e permet d’ allumer le récepteu r et de le m ettre en veille. 3 RECEIVER Allume la télécommande pour commander le récepteur (s’utilise pour sélectionner les commandes blanches au-dessu s des touches numérotées ( S.RE TRIEVER , e[…]
-
Страница 101
31 Fr English Français Español 8 Touch es de Configurat ion du syst ème et de com mande d’aut res compos ants Pour ut iliser le s touche s de commande suivan tes, appuyez d’abord sur la touche MULTI CONTROL correspondante ( BD , TV , etc.). Appuyez d’a bord sur REC EIVER pour a ccéder au menu : AUDIO PARAMETER Permet d’accéd er aux opt[…]
-
Страница 102
32 Fr S.RETR IEVER Appuyez sur c ette touche pour restaurer un son de qualité CD vers des sources audio compressées (page 36). EQ Appuyez sur c ette touche pour sélectionner/désélectionner le réglage Acoustic Calibration EQ (page 36). CH SELE CT Appuyez sur cette touche plusieurs fois pour sélectionne r un canal, puis sur +/– pour régler […]
-
Страница 103
33 Fr English Français Español Chapitre 5: Écoute de so urces à l’aide de votre s ystème Importan t • Les modes d’écoute et de nombreuses fonctio ns déc rites dans l a prés ente sec tion peuvent ne pas êt re disp onibles en fonct ion de la sour ce, des par amètres et de l’état actuels du récept eur. Lecture e n mode Au to La fon[…]
-
Страница 104
34 Fr Si vous avez raccordé des enceintes surround arrière, reportez-vous également à la section Utilisation du traitement de canal surround arrière à la page 37. Les options suivantes sont disponi bles avec les sources à deux canaux : • DOLB Y PLII x MOVIE – Les sons jusqu’à 7.1 cana ux sont par ticuli ère ment ada ptés aux source […]
-
Страница 105
35 Fr English Français Español Écoute en mod e stéréo Lorsque v ous sélectio nnez STEREO , la so urce est seulement reproduite sur les enceintes avant droite et gauche (et éventuellement su r votre caisson de basses (subwoofer) sel on vos réglages d’enceintes). Les sources multi canaux Dolby Digit a l et DTS sont remixées en stéréo. En[…]
-
Страница 106
36 Fr Utilisation des modes Stream Direc t Les modes Stream Direct permettent de reprodu ire une so urce de la manière l a plus fidèle possible. Toutes l es fonctions de traitement de signal non nécessaires sont contournées. • L ors de l’é coute d’une source, appuye z sur AUTO/DIRECT pour sélecti onner un mode Stream Direct. • AUTO SU[…]
-
Страница 107
37 Fr English Français Español Utilis ation du traitement de canal su rround ar rière Vous pouvez régler le canal surround arrière lorsque l’enceinte surround arrière est raccordée et que NO n’est pas sélectionné pour la configuration des enceintes (page 42). Vous pouvez indiquer au récepteur d’ut iliser automatiquement le décodag […]
-
Страница 108
38 Fr Réglage des o ptions audio De nombreux réglages audio supplémentaires peuvent être effectués à l’aide du menu AUDIO PARAMETER . Si elles ne so nt pas expressément marqu ées comme telles, les options par défaut sont présen tées en gras. Impo rta nt •L e m e n u A UDIO PARAME TER n’est pas disponible avec l’entrée MULTI IN ([…]
-
Страница 109
39 Fr English Français Español a. Les optio ns MIDNIGHT/L OUDNESS peuvent être mod ifiées à tout moment à l’ aide de la touche MIDNIGHT . b. Vous pouvez modif ier à tout mom ent la fonct ion Sound Retri ever à l’ai de de la touc he S.RETRIEV ER . c. Lecture de fic hiers WMA et MP3 disponib le uniqu ement via l’ent rée iPod/U SB. d. C[…]
-
Страница 110
40 Fr Lecture d’autres so urces 1 Mettez l’ appareil de lecture s ous tensi on. 2 Mettez le récepte ur sous tension. 3 Sélec tionnez l a source que vous dés irez lire. Utilisez les touch es MULTI CONT ROL ( INPUT SELEC TOR ). 4 La ncez la le ctu re d e l’a ppa reil q ue vo us avez sélec tionné à l’ étape 1. Choix du s ignal d’entr?[…]
-
Страница 111
41 Fr English Français Español Chapitre 6: Menu de configuration du système Utilisation du menu d e configuration du système La section suivant e décrit de façon détaillée comment effectuer les réglages adap tés à votre propre utilisation du récepteur et comment régler chaque système d’en ceintes séparément selon vos exigences. 1 […]
-
Страница 112
42 Fr 1 Sélec tionnez ‘ Manual SP Setup ’ puis appuyez sur la touche ENTER. 2 Sélectionn ez le réglage que vous voulez ajuste r. Si vous effectuez ces réglages pour la première fois, il est préférable de respecter l’ordre suivant : • Spea ker Se ttin g – Perm et d’indiqu er la taille et le nombre des enceintes connectées (voir c[…]
-
Страница 113
43 Fr English Français Español • Surr . Ba ck – Sélection nez le nombre d’enceintes surround arri ère que vous possédez (une, d eux ou zéro). 1 Sélection nez LARGE si vos enceintes surr ound reproduisent de façon fidèle les fréque nces grave s. Sélectionn ez SMALL pour envoyer les fréquences gr aves vers le s au tr e s e n c e i n[…]
-
Страница 114
44 Fr 2 S électionnez u ne option de configuration. • Manua l – Dé pl ac ez la to n al ité d ’ ess ai manuellement d’une enceinte à l’au tre et régl ez chaq ue nivea u de cana l individuelleme nt. • Auto – Réglez les ni veaux des canaux en suivant automatiquement la tonalité d’essai d’une enceinte à l’autre. 3 Confirmez […]
-
Страница 115
45 Fr English Français Español 1 Appuyez sur la touc he RECEIVER de la télécommande, puis sur la touche SETUP . Un affichage à l’écran ap paraît sur votre téléviseur. Utilisez l es touches / // et ENTER de la télécommand e pour nav iguer dans les écrans et sélectionner des options de menu. Appu yez su r RETURN po ur conf[…]
-
Страница 116
46 Fr Chapitre 7: Utilisation de la fonction MULTI-ZONE Écoute MULTI -ZONE Ce récepteur peu t alimenter jusqu’à deux systèmes indépendants se trouvant dans des pièces séparées une fois que vous avez procédé aux raccordemen ts MULTI-ZONE adéquats. L’illustration ci-dessous présente un exempl e de config urati on MULTI-ZON E. Vous pou[…]
-
Страница 117
47 Fr English Français Español Utilisation des commandes MULTI-ZONE Les étapes suivantes font appel aux command es du p anneau av ant po ur la sélection des sour ces. Consul tez Télécomm ande s MULTI-Z ONE ci-dessous. 1 Appuyez sur la touc he MULTI- ZONE ON/OFF du pannea u ava nt. Chaque pre ssion sur la to uche séle ctionne u ne option MULT[…]
-
Страница 118
48 Fr Chapitre 8: Utilisation du tuner Pour écouter la radio Les é tapes suiva ntes décriv ent la faço n de ré gler les bandes FM et AM à l’aide de la rech erche automatique et des fonctions de ré glage manuel. Lorsque vo us avez réglé une station, v ous pouvez en mémoriser la f réquence pour y accéder ulté rieu rem en t —co nsu lt[…]
-
Страница 119
49 Fr English Français Español 3 Appuye z sur la touche PRE SET / pour sélectionne r la station pr éréglée que vous désire z. Pour cela, vous pouvez aussi utilis er les touches n uméri que s. 4 Appuyez su r la touche ENTER. Après avoir appuyé su r la touche ENTER , le numéro prérég lé cesse de clignoter et le récepteur mémo ri[…]
-
Страница 120
50 Fr Chapitre 9: Pour faire un enregistrement Faire un enregistremen t audio ou vidéo Vous pouve z faire un enr egistre ment au dio ou vidéo à partir du syntoniseur intégré, ou d’une source a udio ou vidé o raccor dée au récep teur (un lecteur de C D ou un téléviseur par ex.). N’oubliez pas que vous ne pouvez pas faire d’enregistre[…]
-
Страница 121
51 Fr English Français Español Chapitre 10: Commande r le reste de votre système Configur er la téléc ommand e pour com mander d’au tres composant s La plupart des composants peuvent être affect és à l’ une des touches MULTI CONTROL en utilisant le co de de préréglage du fabricant du composant st ocké dans la télécomman de. Cependa[…]
-
Страница 122
52 Fr Comma ndes pou r les télévis eurs Cette télécommande peut commander des compos ant s après saisie des bons codes ou bien apprendre au récepteu r les commandes (voir Commande r le reste de vo tre système à la page 51 pour en savoir plus). Utilisez les tou ches M ULTI CONTROL p our sél ec tion ner le c o mpos an t. • Les touche s TV […]
-
Страница 123
53 Fr English Français Español Comm andes po ur autres compos ants Cette téléco mman de peut com mander de s com posants après s aisie des bo ns codes ou bien apprendre au récepteur les comman des (voir Comma nder le reste de votre système à la page 51 pour en savoir plus). Utilisez les to uches M ULTI CONTROL pour sélection ner le composa[…]
-
Страница 124
54 Fr DISPLAY Appuyez sur cette touche pour afficher des informations. Lecteur de BD/DVD/DVR TOP MENU Affiche le menu ‘supérieur ’ du disque d’un lecteur de BD/DVD. Lecteur de BD/DVD/DVR MENU Affiche les menus du BD/DVD ou DVR que vous utilisez . Lecteur de BD/DVD/DVR Met la cassette en pause. Platine cassette Arrête la c assette. P[…]
-
Страница 125
55 Fr English Français Español Liste des codes de p réréglage Vous ne devriez rencontrer aucun problème de command e d’un composant si le fabricant apparaît dans la liste. Il se peut toutefois que certa ins codes de fabricant figurant dans la liste ne fonct ionnent pas pour le modèle que vous utilisez. Il est ég alemen t possible q ue seu[…]
-
Страница 126
56 Fr Harman/ Kardon 0101 Harvard 0008, 010 4 Havermy 0014 Hewl ett Pa ck ard 0053 Hisense 0069 Hitachi 0004, 0006, 0007 Hyund ai 0098 Ilo 0089, 0091 IMA 0008 Infinity 0101 InFocus 0074 Initial 0091 Insignia 0085, 0086 Inteq 0099 Janei l 0012 JBL 0101 JC Pe nney 0000, 0004, 0005, 0006, 0010 JCB 0002 Jensen 0004, 0006 JVC 0007, 0010, 0044 Kawasho 00[…]
-
Страница 127
57 Fr English Français Español NEC 1000, 10 01 Nikko 1003 Nive us Me dia 1017 Noblex 1002 Northgate 1017 Olympus 1004 Optimus 1003 Orion 1014, 1019 Pioneer 1120 Pana sonic 1004, 10 08 Philco 1004 Philips 1004, 1011, 101 6, 1020, 1022 , 1023 , 1024, 1025 Philips Magn avox 1011 Pilot 1003 Prosca n 1030 Pulsar 1018 Quarter 100 1 Quartz 1001 Quasar 1[…]
-
Страница 128
58 Fr Chapitre 11: Autres raccordement s Atte nti on • Avant un raccordement ou une modification de ra ccor de ment , mettez l’appareil hors tensi on et débr anche z le cor don d’alimentation de la prise d’alimen tation. Vous dev ez d’abo rd avoi r effectué tou s les raccordements du s ystème avant d’ y raccorder d’au tres composan[…]
-
Страница 129
59 Fr English Français Español 2 Allumez le récept eur et appuye z sur la touche iPod USB input sourc e pour mettre le récepteur en mode iP od. Le panneau avant affiche Loadin g pendan t que le récepteur vérifie la connexion et lit les données de l’iPod. 3 Appuyez sur la touc he TOP ME NU pour affiche r le menu pri ncipal de l’iP od. Dè[…]
-
Страница 130
60 Fr Visualisation de photos et de contenu vidéo Pour vis ualiser d es photos ou u ne vidé o sur votre iPod, comme c e récepteur ne permet pas la commande vidéo, vous devez utiliser les commandes prin cipales de votre iPod. 1 Impo rta nt • Pour lire des photos ou une vi déo sur votr e iPod , vous dev ez racco rder la p rise MONITOR OUT comp[…]
-
Страница 131
61 Fr English Français Español • A ppuyez sur la languette PUSH OPEN pour accéder à la borne USB . Raccordement de votre périphérique USB au récepteur 1 Allumez le récepteur et votre téléviseur. 2 Appuyez sur iPod USB de la télécommande pour basculer le récepteur s ur l’entré e iPod USB. NO DEVICE apparaît dans l’affichage à l[…]
-
Страница 132
62 Fr Si cela ne résout pas le pro blème, il est fort probable que v otre périphérique USB soit incompatible. Compatibilité des fichiers audio compr essé s Notez que bien que la plupart des combi naisons standard de débit binaire/taux d’échantill onnage pou r les fich iers a udio co mpre ssé s soien t compatible s, c ertains f ichier s e[…]
-
Страница 133
63 Fr English Français Español Raccordement de votre syntoniseu r Sirius Connect TM Pour recevoi r les émissio ns de SIRIUS Satell ite Radio , vo us de vez a ctive z votre sy ntoni seur Siriu sConn ect. 1 1 Raccor dez un syntoni seur Sir iusCo nnect à la p rise SIRIUS IN à l’arrière de ce récept eur. Vous devez également raccorder l’ant[…]
-
Страница 134
64 Fr • Appuy ez sur DISPLAY pour changer les informations Sirius radio affichée s sur le panneau av ant. • La station actuellement sélectionnée est automatiquement choisie (sans appu yer sur ENTER ) après 2 secondes. Mémorisation des stations pr ésél ec ti on nées Ce récep teur peut mé moriser jus qu’à 30 canaux . 1 Sélectionn ez[…]
-
Страница 135
65 Fr English Français Español Chapitre 12: Information complémentaire Guide de dépan nage Une utilisation incorrecte de l’appareil est souvent interprétée co mme un problème ou un dysfonctionnement. Si vous êtes convaincu que cet appareil ne fonctionne pas correctement, contrôlez les poi nts ci-dessous. Inspect ez les autr es appareils […]
-
Страница 136
66 Fr Bruit c onsid érable l ors de la radiodiffusion. • Rac cordez l’ante nne (pa ge 20) et réglez sa posit ion de façon à obten ir une b onne rcept io n. • Eloign ez tou s les câble s détach és des borne s d’an tenne et des f ils é lectr ique s. • Déro ulez le fil de l’an ten ne fil air e FM, plac ez-le de faç on à o bten i[…]
-
Страница 137
67 Fr English Français Español HDMI Information importante concernant la connexion HDMI Dans certains cas, il ne sera peut-être pas possible d’acheminer les signaux HDMI via ce récepteur (ceci dépend du composant HDMI que vous connectez — contrôlez l es informations du fabricant concernant la compatibilité HDMI). Si vous ne recevez pas cor[…]
-
Страница 138
68 Fr iPod messages Messages USB Messages radio SIRIUS Symptôme Ca use Action iPod/USB Error 1 (I/U ERR1) Il y a un pr oblème au niveau du parcours du sign al en tre l’iPo d et le réc epte ur. Éteign ez le ré cepteur et recon nectez l’iPod au récepteur. Si cela ne don ne aucun rés ultat, réinit ialise z votre iPod. iPod/USB Error 2 (I/U[…]
-
Страница 139
69 Fr English Français Español Réinitiali sation de l’appareil principal Respectez cette procédu re pour rétablir les réglages d’usine du ré cepteur. Utilisez les command es du pa nneau fr ontal po ur ce faire . 1 Me ttez le récep teu r en m ode de vei lle. 2 Tout en maintenant la t ouche BAND enfoncée, appuye z sur la tou che STAN[…]
-
Страница 140
70 Fr Précautions d ’usage pour le cordon d’alimentation Tenez le cordon d’ alimentat ion par s a prise lorsqu e vou s le m anipule z. Ne débranc hez pas l’appa reil en tirant sur l e cordon e t ne t ouchez jamais le cordon d’al imentat ion a vec le s main s mouillées; vous pourriez provoquer un court- circuit ou pre ndre un cho c éle[…]
-
Страница 141
71 Fr English Français Español VSX-819H_KU_French.book Page 71 Thursday, December 25, 2008 11:36 AM[…]
-
Страница 142
Este producto es para tareas domésticas generales. Cualquiera avería debida a otra utilización que tareas domésticas (tales como el uso a largo plazo para motivos de negocios en un restaurante o el uso en un coche o un barco) y que necesita una reparación hará que cobrarla incluso durante el período de garantía. K041_Sp Si la clavija del ca[…]
-
Страница 143
El punto exclamativo dentro un triángulo equilátero convenido para avisar el usuário de la presencia de importantes instrucciones sobre el funcionamiento y la manutención en la libreta que acompaña el aparato. La luz intermitente con el símbolo de punta de flecha dentro un triángulo equilátero. Está convenido para avisar el usuario de la p[…]
-
Страница 144
4 Sp Índice 01 Antes de comenz ar Comprobación del co ntenido de la caja . . . . . 6 Instalación de las pi las . . . . . . . . . . . . . . . . . . 6 Instalación del receptor . . . . . . . . . . . . . . . . . 6 Ve ntil ac ió n . . . . . . . . . . . . . . . . . . . . . . . . . . 6 02 Guía rápida Introducción al ci ne en casa . . . . . . . . .[…]
-
Страница 145
English Italiano Français Nederlands Españo l Deutsch 5 Sp English Français Español 09 Grabación Cómo hacer una grabación de audio o víde o . . . . . . . . . . . . . . . . . . . . . . . . . . . . . . 5 0 10 Control de otros componentes del sistema Uso del mando a distancia para contr olar otros com pon entes . . . . . . . . . . . . . . . . […]
-
Страница 146
6 Sp Capítulo 1: Antes de comenzar Comproba ción del conten ido de la ca ja Comprueb e que ha recibido todos los accesorios siguie ntes: • Micrófono d e configur ación • Mando a distancia • Pilas secas (tamaño AAA IEC R03) x2 • Antena d e cuadro de A M • Antena a lámbrica de FM •C a b l e i P o d • Este manual de instrucciones I[…]
-
Страница 147
7 Sp English Français Español La caja está dotada de ranuras y aberturas para permitir su vent ilación y para proteger el equipo de posibles sobrecalentamientos. Para evitar riesgos de incendio, no coloque nada encima de la un idad, asegúrese de q ue las aberturas no estén bloquead as ni cubiertas por objetos (tales como periódicos, man tele[…]
-
Страница 148
8 Sp Capítulo 2: Guía rápida Intr oducc ión al ci ne en cas a El término “cine en casa” h ace referencia al uso de múltiples pistas de audio para crear u n efecto de sonido envolvente, lo que permite al oyente experimentar la sensa ción de encontrarse en medio de la acción o en un concierto. El soni do surround que obtiene d e un siste […]
-
Страница 149
9 Sp English Français Español 5 Reproduzca un di sco Bl u-ray/DVD y aj uste el vol umen. Asegúrese de que aparece BD/ DVD en la pantalla del receptor. Si no aparece, pulse BD en el mando a distancia para sele ccionar la entrada BD/DVD en el receptor. 1 Existen otras op ciones de sonid o qu e puede seleccionar. P ara m ás deta lles, consulte Uso[…]
-
Страница 150
10 Sp 5 Siga la s instru ccio nes que ap arece n en pan tal la. • Asegúrese d e que el micrófono esté conectado. • Asegúrese de que el subwoofer está encendido y de que el volumen está acti vado. • C onsulte las notas sobre ruido de fondo y otras interfe rencias posible s a continuac ión. 6 Espere hast a que f inalicen los ton os de pr[…]
-
Страница 151
11 Sp English Français Español Otros problemas al utilizar la configuración Auto MCACC Setup Si el ambiente de la habitación no es óptimo para la configuración Au to MCACC Setup (si ha y demasiado r uido de fon do, ecos producidos por las paredes, obstácu los entre los altavoces y el micróf ono), los ajustes resultantes pueden ser incorrect[…]
-
Страница 152
12 Sp Capítulo 3: Conexiones Conexiones de los cables Asegúrese de no doblar los cables por encima del equi po (como se muestra en la ilust ración) . Si esto sucede, el campo magnético producido por los transformado res del equipo po drán hacer que los altavoces pro duzcan un zumbido . Impo rta nte • Antes de hacer o ca mbiar las cone xiones[…]
-
Страница 153
13 Sp English Français Español Cables de audio analógico Utilice cables fonográfico s RCA estéreo para conectar co mponentes de audio ana lógico. Estos cables generalmente tienen una clavija roja y otra b lanca; conecte las cl avijas ro jas a los terminales R (derechos) y las clav ijas blancas a los terminales L (izquierdos). Cables de audio […]
-
Страница 154
14 Sp Conexión de un televisor y u n reproduct or de disco s Blu-ray o DVD En esta página se e xplica cómo co nectar un repro ductor de dis cos Blu-ray /DVD y un tel evisor al reproductor. 1 Conecte l a salida HDMI de su reproductor de Blu-ra y/DVD a la entra da HDMI BD/DVD IN del receptor . Utilice un cable HDMI para realizar la conex ión. Si […]
-
Страница 155
15 Sp English Français Español 3 Conecte la salida de víde o compue sto y las salidas de sonido analógico estéreo 1 de su reprod uctor de Blu-ra y/DVD a las entradas BD/D VD del receptor. Utili ce un cable de ví deo RCA es tándar y un cable fono gráfico R CA esté reo para la conexión . 2 • S i el reproducto r de BD/DVD dispone d e salid[…]
-
Страница 156
16 Sp Conexión de un recep tor satélite u otro módulo de conexión digital Los receptores satélite o de cable y los sint onizadores de televisor digit al terrestre son todos ejemplos de los llama dos ‘módulos de conexión’. 1 Si su desc odific ador cuenta con una salida HDMI, coné ctela al conect or HDMI TV/S AT IN del receptor . Si en lu[…]
-
Страница 157
17 Sp English Français Español Conexión de otro s comp onentes de audio El número y tipo de conexion es depende del tipo de componente que esté conectando. 1 Siga los pasos siguient es para conectar una grabadora de CD-R, MD, D AT o cinta u otro componente de audio . 1 Si su componente dispone de una s alida digital , coné ctela a una entrada[…]
-
Страница 158
18 Sp Conexión de una grabadora de HDD/DVD, de un VCR y de otras fuentes de vídeo Este receptor tiene entrada s y salidas de audio/vídeo adec uadas para co nectar videograb adoras analógicas o digitales, incluido s VCR y grabad oras de HDD/DV D. 1 Si su co mponente de ví deo dispone de una sali da HDMI, conécte la al conec tor HDMI DVR/VCR IN[…]
-
Страница 159
19 Sp English Français Español Uso de co nectore s de vídeo de c omponent es El vídeo d e componen tes deberí a ofrece una calidad de imagen m ayor que el vídeo compu esto. Una ventaja adiciona l (si la fuente y el televisor son compa tibles) es el vídeo de barrido progresivo que ofrece una ima gen muy estable y sin parpa deos. Para saber si[…]
-
Страница 160
20 Sp Conexión al term inal de vídeo del panel front al Puede accede r a las co nexion es d e vídeo frontales a través de l panel frontal mediante el botón INPUT SELEC TOR o VID EO del mando a distancia. Allí encontrar á los conectores estánda r de audio y vídeo. Conéctelos del mismo modo que la s conexione s del panel poste rior . •P r[…]
-
Страница 161
21 Sp English Français Español Uso de antenas ext eriores Para m ejorar la rece pción en FM Utilice un conect or F (no suministr ado) pa ra conecta r una an tena FM ext erna. Para m ejorar la rece pción en A M Conecte un cabl e con revestimient o de vini lo de 5 a 6 metros d e longitud a un terminal de antena AM sin desconectar la antena de cua[…]
-
Страница 162
22 Sp Conexión de los altavoces Aquí se muest ra una c onfigur ación compl eta de seis altavoces (incluido el subwoofer), pe ro la configuración in dividual de cada usuario puede variar. Simplemente conecte los altavoces que tiene de la forma que se indica a continu ación. El receptor fu nciona con sólo dos altavoces estéreo (los altavoces f[…]
-
Страница 163
23 Sp English Français Español Conexiones de cables pel ados A-Terminales de altavoces: 1 Trence l os hil os exp uestos del cabl e. 2 Afloje el te rminal e inse rte el hi lo expuesto . 3 Apriete el te rminal. B-Terminales de altavoces: 1 Trence l os hil os exp uestos del cabl e. 2 Empuje par a abrir las pes tañas e introduzc a los hil os expues […]
-
Страница 164
24 Sp Disposición de los altavoces Para obtener el me jor sonido envolvente posible, instale los alta voces com o se indica a continuación. Sistema de sonido en volvente de 5.1 canales: Sistema de sonido en volvente de 6.1 canales: 1 Sistema de sonido en volvente de 7.1 canales: 1 La disposición de los altav oces en la sala influy e de manera im[…]
-
Страница 165
25 Sp English Français Español • Si los altavoces de sonido envolvente no se pueden colocar directamente a un lado de la posición de escucha con un sistema de 7.1 canales, se puede mejorar el efecto envolvente apagan do la función UP Mix (consulte Ajuste de la función Up Mix en la página 37). • Intente no colocar los altavoces de soni do […]
-
Страница 166
26 Sp Capítulo 4: Controles e indicadores Panel frontal 1 STANDBY/ON 2 Dia l INPU T SELEC TOR Selecciona una fuente de entrada. 3 Botones de c ontrol del s intoni zador BAND Cambia entre las sintonías AM, FM ST (estéreo) y FM MONO (página 48). TUNE +/– Se utiliz a para b uscar frec uencia s de radio (página 48) y canales de SIRIUS Radio […]
-
Страница 167
27 Sp English Français Español ADVANCED S URROUND Alterna entre los diversos modos surround (página 34). STANDARD SURROUND Púlselo para la descodificación Estánd ar y para alternar entre las distintas opciones 2 Pro Logic II, 2 Pro Log ic I Ix y NE O:6 (página 33). 9S P E A K E R S Utilícelo para cambiar el sistema de altavoces (página 25)[…]
-
Страница 168
28 Sp Pantalla 1P H A S E Se ilumina cuando se enciende Ph ase Control (página 11). 2A U T O Se ilumina cuando la f unción Auto Surrou nd está activa (consulte Reproducción automátic a en la página 33). 3S T Se il umina dur ante la rece pció n de un a emisión de FM estéreo en m odo estéreo automático. 4T U N E Se ilumina c uando el equip[…]
-
Страница 169
29 Sp English Français Español HD + Se ilumina cuando se detecta una fuente con señales de soni do codificadas Dolb y Digit al Plus. HD Se ilumina cuando se detecta una fuente con señales de soni do codificadas Dolb y TrueHD. EX Se ilumina cuando se detecta una fuente con señales de soni do codificadas Dolb y Digit al EX. 2 PLllx Se ilumina pa[…]
-
Страница 170
30 Sp Mando a dist ancia 1 INPUT SELECT Utilícelo para selecc ionar la fuente de entrada. 2 RECEIVER Alterna el receptor entr e el encendid o y el modo de es pera. 3 RECEIVER Hace que el man do a distancia cont role el receptor (se utiliz a para seleccionar las funciones en blanco que están encima de los botones de número ( S.RETR IEVER , et[…]
-
Страница 171
31 Sp English Français Español 8 Botones System Se tup y de cont rol de compon entes Se pueden usar los siguientes botones de control después d e pulsar el botón MU LTI CONTROL correspondien te ( BD , TV , etc.). Pulse RECEIVER primero p ara acceder: AUDIO PARAMETER Utilícelo para acceder a las opciones de Audio (página 38). SETUP Pulse para […]
-
Страница 172
32 Sp S.RETR IEVER Pulse para restaurar el sonido con calidad de CD a fuent es de a udio c ompr imid as (página 36). EQ Púlselo para activar/desactivar e l ajuste Ecualizació n de calibr ación acústi ca (página 36). CH SELE CT Pulse es te botón repetid amen te para seleccionar un cana l; luego, utilice +/– para aj ust ar el n ivel (página[…]
-
Страница 173
33 Sp English Français Español Capítulo 5: Uso del sistema Importan te • L os modos de escucha y m uchas funciones descrit as en esta sección pueden no estar dispon ibles dep endiend o de la fuent e actual, l os aju stes y el esta do del recept or. Reprod ucción au tomática La opción de escucha más simple y directa es la funció n Auto Su[…]
-
Страница 174
34 Sp Si ha conectado l os altavoces de sonido envolvente traseros, consulte también Uso del procesamiento del canal envolvente tr asero en la página 37. Con fuentes de dos canales , puede seleccionar entre: • DOLBY PLIIx MOVIE – Sonido de hasta 7.1 canales, especialmente apro piado para pel ícu la s • DOLB Y PLII x MUSI C – Sonido de ha[…]
-
Страница 175
35 Sp English Français Español Reprod ucción estére o Al selecci onar STEREO , oirá la fuente únicamente a través de los altavoces frontales izquierdo y derecho (y, posiblemente, del subwoofer, según la configuració n de los altavoces). Las fuentes multicanal Dolb y Digital y DTS se mezclan a estéreo. En el modo estéreo con cont rol auto[…]
-
Страница 176
36 Sp Uso de Stream Direc t Utilice los modos de Stream Direct cuando desee escuchar la reproducción más fiel posible de una fuente. Se omiten todos los procesamientos de señales innecesarios. • Mi entras escucha una fuente, pulse AUTO /DIRECT para s elecci onar el modo Stream Direct. • AUTO SURROUND – Consulte Reproduc ción automática e[…]
-
Страница 177
37 Sp English Français Español Uso del procesamiento del can al envolvente t rasero Se puede ajustar el canal trasero envolvente cuando el altavoz trasero envolvente está conectado y no se ha seleccionado NO para el ajuste de altavoces (página 42). Puede hacer que el receptor utilice automáticamente la descod ificación de fuentes codificadas […]
-
Страница 178
38 Sp Ajuste de las o pciones de Audio Existe una serie de ajustes de sonido adicionales que se pueden rea lizar desde el menú AUDIO PAR AMETE R . Los valores predeterminados , si no se indica n, aparecen en negrita. Importan te •E l m e n ú A UDIO PA RAM ETER no está dis po nib le con la ent rad a M ULTI IN (consulte Selección de las e ntrad[…]
-
Страница 179
39 Sp English Français Español a. Pu ede cam bi ar la s o pci on es MI DN IGH T/ LOU DN ESS en c ual qui er mom en to con e l bo tó n MIDNIGHT . b. Puede modific ar la func ión Sound Re triever en cua lquier mo mento con el botón S.RET RI EVE R . c. Reproducci ón de WMA y MP3 sól o está di sponible a través de la entrada i Pod/USB. d. Este[…]
-
Страница 180
40 Sp Reprodu cción de o tras fuentes 1 Encie nda el component e de reproducc ión. 2 Encienda e l receptor. 3 Selec ci one la fuente que de sea reproducir . Utilice los boto nes MULTI CON TROL ( INPUT SELEC TOR ). 4 Inic ie la reproduc ción en el component e sele cciona do en el paso 1. Selección de la señal de entrad a En este receptor se pue[…]
-
Страница 181
41 Sp English Français Español Capítulo 6: El menú System S etup Uso del m enú System Se tup En la siguiente sección se explica cómo realizar ajustes detallados para especificar cómo se está usand o el receptor, y cómo adaptar un sistema de altavoces especí fico a su gusto. 1 E ncie nda el r ece ptor y su te le viso r. Utilice el botón […]
-
Страница 182
42 Sp 1 Selec cione ‘M anual SP Setu p’ y lue go pulse EN TER. 2 Seleccione la opción que desea ajustar. Si es pr imera vez que l o hace, le recomenda mos ajustar las opciones en orden: • Spea ker Sett ing – Especifique el tamaño y el número de a ltavoces que ha conectado (véase más aba jo). • Crosso ver N etwork – Para especi fica[…]
-
Страница 183
43 Sp English Français Español • Surr . Ba ck – Seleccione el número de altavoces de sonido envolvente traseros de los qu e dispon e (uno, do s o nin guno). 1 Seleccione LARGE si los altavoces traseros de sonido envolven te reprodu cen frecuencias de graves de forma eficaz. Seleccione SMAL L para enviar las frecuencias bajas a los o tros alt[…]
-
Страница 184
44 Sp 2 Sel ecc ione u na op ci ón de c onfig ura ción. • Manua l – Para mo ver el tono de pru eba manual ment e de alt avoz e n alt avoz y ajustar los niveles d e canales individuales. • Auto – Para ajustar autom áticamente los niveles de los canales a medida que el tono de pru eba se despl aza de un a ltavo z a otro . 3 Confirme la opc[…]
-
Страница 185
45 Sp English Français Español 1P u l s e REC EIVE R en el mando a distanc ia y , a continua ción, pul se el botón SETUP . Aparecerá una pantalla (OSD) en su televisor. Utilice / // y ENTER en el mando a distancia para desplazarse p or las pantallas y seleccionar los elementos d el menú. Pulse RETURN para confirmar las opcione s […]
-
Страница 186
46 Sp Capítulo 7: Uso de la función MULTIZONA Escucha en MULTIZONA Este receptor puede alimentar dos sistemas independientes en di stintas habitacion es despu és de hace r las conex ione s MULTI ZONA necesarias. Abajo se muestra un ejemplo de configur ación MULT IZONA. Distintas fuentes pueden reprodu cir en dos zonas al mismo tiempo o, según […]
-
Страница 187
47 Sp English Français Español Uso de los controles MULTIZONA En los siguientes pasos se uti lizan los controles del panel frontal para seleccionar fuentes. Co nsulte Controles a distancia MULTIZONA más ab ajo. 1 P ulse el botón MULTI-ZONE ON/OFF de l panel f rontal . Cada pulsación seleccion a una opción MULTIZONA: • ZONE 2 O N – Activa […]
-
Страница 188
48 Sp Capítulo 8: Uso del sintonizador Recepción de r adio El siguiente pro cedim iento describe c ómo sintoni zar emisi ones de r adio de F M o AM utilizando las fun ciones de sinto nización automática (búsqu eda) y sintonización manual (por pasos). Una vez que haya sintoni zado una em isora, p odrá memori zar la frecuencia para recuperarl[…]
-
Страница 189
49 Sp English Français Español 3 Pulse PR ESET / p a ra se le ccio na r l a pre sint oni zaci ón d e emi sor as d esead a. También se pueden usar los botones de númer o. 4 Pul se ENTE R. Despu és d e p ulsar ENTER , el número de la presintonía deja de parpa dear y el receptor almacena la estación. Cómo sintonizar emisoras memorizada[…]
-
Страница 190
50 Sp Capítulo 9: Grabación Cómo hac er una grab ación de audio o vídeo Puede hac er una grabación de audio o vídeo desde el sintoniz ador incorporado o d esde una fuente de audio o vídeo conectada al receptor (por ejemplo, un repro ductor de C D o un televisor). Tenga presente que no es posible hacer un a grab aci ón di gi tal a part ir d[…]
-
Страница 191
51 Sp English Français Español Capítulo 10: Control de otros componentes del sistema Uso del m ando a distancia par a control ar otros componen tes La mayoría de los componentes p uede asignar se a uno de los bot ones MULTI CONTROL utilizando el código de preajuste del fabricante del componente almacenad o en el mando a distancia. Sin embargo,[…]
-
Страница 192
52 Sp Contro les para televisore s Este mando a distancia puede con trolar componentes una vez que se han introducid o los códigos aprop iados o después de qu e se p rogram an com andos en el receptor (para más detalles, consulte Control de otros comp onent es de l si ste ma en la página 51). Utilice los botones MUL TI CONT ROL para seleccionar[…]
-
Страница 193
53 Sp English Français Español Cont rol es p ara ot ros compon ent es Este mando a distancia puede controlar componente s una vez que se han introducido los có digos apropiados o después de q ue se programa n comando s en el receptor (p ara más detalles, c onsulte Control de otro s compo nentes de l sistema en la p ágina 51). Utilice los boto[…]
-
Страница 194
54 Sp DISPLAY Púl selo p ar a ve r la info rma ció n. Repro du cto r BD /DV D/D VR TOP MENU Muestra el menú “ superior ” del reproductor de BD/DVD. Reproductor BD/DVD/DVR MENU Muestra los menús del BD/DVD o DVR que está utilizando . Reproduct or BD/DVD/DVR P ara hacer una pausa en l a reproducción de la cinta. Platina de casete P […]
-
Страница 195
55 Sp English Français Español Lista de códigos de preajuste No debería tener pr oblemas para co ntrolar un componen te cuyo fabricante figure en la lista, pero tenga en cuenta que hay casos e n los que lo s códi gos del fabrica nte no funci onan con el model o que está usando. Tam bién hay casos en los que la asignación del código p redet[…]
-
Страница 196
56 Sp Hallmark 0004, 000 6 Harman/ Kardon 0101 Harvard 0008, 010 4 Havermy 0014 Hewl ett Pa ck ard 0053 Hisense 0069 Hitachi 0004, 0006, 0007 Hyund ai 0098 Ilo 0089, 0091 IMA 0008 Infinity 0101 InFocus 0074 Initial 0091 Insignia 0085, 0086 Inteq 0099 Janei l 0012 JBL 0101 JC Pe nney 0000, 0004, 0005, 0006, 0010 JCB 0002 Jensen 0004, 0006 JVC 0007, […]
-
Страница 197
57 Sp English Français Español Nikko 1003 Nive us Medi a 1017 Noblex 1002 Northgate 1017 Oly mpus 1004 Optimus 1003 Ori on 1014, 1 019 Pio neer 112 0 Panas onic 10 04, 10 08 Phi lco 10 04 Philips 1004, 1011, 1 016, 1020, 1 022, 1023, 1024, 1025 Philips M agnav ox 1011 Pilot 1003 Proscan 1030 Pul sar 10 18 Quar ter 1 001 Quar tz 1 001 Quas ar 1004[…]
-
Страница 198
58 Sp Capítulo 11: Otras conexiones Precauc ión • Antes de r ealizar o cambiar las conexiones , desconecte la alimentación y desenchufe el cable de alimentación de la to ma de corriente. Los componentes d eberán conectarse al sistema en último lugar. • No permita el contacto entre cables de altavoz de di ferentes terminales . Conexión de[…]
-
Страница 199
59 Sp English Français Español 2 Encie nda el rece ptor y pulse el botón fuente de entr ada iP od USB para pasar el receptor al i Pod. En la p an ta lla d e l pa ne l fr on ta l a par ec e Loading mientras el receptor verifica la conexión y recupera los datos del iPod. 3 Utili ce el botón TOP ME NU para ver e l menú princi pal del iPod. Cuand[…]
-
Страница 200
60 Sp Visionado de fotos y vídeos Puesto que no se pued e cont rolar e l víde o med iante este rec ept or, pa ra ver f otos y ví deo en el iPo d d ebe usa r lo s c ontr ol es pr in cipa le s del iP od. 1 Impo rta nte • Para reproduc ir fotos o v ídeo en el iP od, debe conectar la toma compuesta MONITOR OUT y el tel evisor . 1P u l s e iPod CT[…]
-
Страница 201
61 Sp English Français Español • Presion e la tapa PUSH OPEN para acceder al terminal USB . Conexión de un dispositivo USB al recepto r 1 E nciend a e l re cepto r y su te levi sor . 2P u l s e iPod USB en el man do a distan cia para pasa r el receptor al i Pod USB. NO DEVICE aparece en la pantalla. 3 Conecte s u disposi tivo USB. 1 El termina[…]
-
Страница 202
62 Sp Compatibilidad de sonido comprimido Tenga en cuenta que aunque la mayor ía de las combinaciones de tasas de muestreo/bits de audio comprimido son compatibles, puede que algunos archi vos codificados de forma irre gular no se reproduzcan . La lista que aparece a continu ación mues tra fo rmatos comp atibles de archivos de audio comprimido: ?[…]
-
Страница 203
63 Sp English Français Español Conexión del sintonizador SiriusConnect TM Para recibir las emisiones por satél ite SIRIUS, deberá activar su sintonizador SiriusConnect. 1 1 Conec te un sintonizador Siri usConnect a la tom a SIRI US IN de la p arte tra sera de l recep tor. También deberá conectar la antena y adaptador de CA al sintonizador Si[…]
-
Страница 204
64 Sp Memo riza ción d e can ales Este receptor puede mem orizar hasta 30 canales, almac enados. 1 Seleccione el canal que desea memoriz ar. Consult e Selección de canales y desp laz amien to po r géne ros más arriba. 2P u l s e T.EDIT . En la pa ntall a par padea un número de memoria. 3P u l s e / para seleccion ar el can al memorizado […]
-
Страница 205
65 Sp English Français Español Capítulo 12: Información adicional Solución de p roblemas Un manej o incor recto a menudo pue de conf undi rse con pr oblem as o mal fu ncionami ento. Si cree que este componente tiene algún p roblema, compruebe los puntos siguientes. Eche u n vistazo a los otros componentes y aparatos electrónicos que se está[…]
-
Страница 206
66 Sp Las emisi ones de radio contie nen una c antid ad con sider able de ru ido. • Co nect e l a ant en a (pá gina 20 ) y a just e l a po sic ión p ar a ob tene r la mejo r re ce pci ón. • Aleje los cables suel tos de los hilos y t erminale s de la antena . • Extie nda al máximo l a antena de c able FM, orién tela cor rectamente y fí j[…]
-
Страница 207
67 Sp English Français Español HDMI Información importante relativa a la conexión HDMI Habrá casos en los q ue no pod rá encaminar señales HDMI a trav és de este recep tor (depende d el componente que est á conectando; consulte al fabricante si es compatible con HDMI). Si no está recibiendo señales HDMI correctamente a través de este re[…]
-
Страница 208
68 Sp Mensajes de iPod me nsajes Mensajes USB Mensajes de radio SIRIUS Síntom a Causa Acción iPod/USB Error 1 (I/U ERR1) Exis te un pro blem a c on la ru ta de la se ñal entr e el iPod y el receptor. Desconecte el receptor y vuelva a cone ctar el iPod al re ceptor. Si con es to no se resu elve, inte nte re inicia lizar e l iPod . iPod/USB Error […]
-
Страница 209
69 Sp English Français Español Resta blecimi ento de lo s ajust es por defe cto del equipo Lleve a cabo este pro cedimiento para restablecer todos los ajustes realizad os en el receptor a los valores por defecto. Para ello, utilice los co ntroles del panel frontal. 1 Ponga el rec eptor en modo de espe ra. 2 Mientras man tiene pulsado el bot ón B[…]
-
Страница 210
70 Sp Cable de alimentación Al manipular el cable de alimentación, tómelo de la clavija. No desc onecte la clavija tirando del cable; nunca toque el cable d e alimentación con las ma nos mojadas, ya que esto puede causar cortocircuitos o descargas eléctricas. No coloque el equipo, un mu eble, etc., encima del cable de alimentación, y asegúre[…]
-
Страница 211
LIMITED WARRANTY WARRANTY VALID ONLY IN COUNTRY OF PRODUCT PURCHASE WARRANTY Pioneer Electronics (USA) Inc. (PUSA), and Pioneer Electronics Of Canada, Inc. (POC), warrant that products distributed by PUSA in the U.S.A., and by POC in Canada that fail to function properly under normal use due to a manufacturing defect when installed and operated acc[…]
-
Страница 212
GARANTIE LIMITÉE GARANTIE VALIDE SEULEMENT DANS LE PAYS OU LE PRODUIT A ÉTÉ ACHETÉ GARANTIE Pioneer Electronics (USA) Inc. (PUSA) et Pioneer Électronique du Canada, Inc. (POC) garantissent que les produits distribués par PUSA aux États-Unis et par POC au Canada qui, après avoir été installés et utilisés conformément au manuel de l’ut[…]
-
Страница 213
Should this product require ser vice in the U.S.A. and you wish to locate the nearest P ioneer Authorized Independent Ser vice Company , or if you wish to purchase replacement parts, operating instructions, ser vice manuals, or accessories, please call the number shown below . 1 – 8 0 0 – 4 2 1 – 1 4 0 4 Please do not ship your product to P i[…]

AUDIO/VIDEO MULTI-CHANNEL RECEIVER
RECEPTEUR AUDIOVISUEL A
VOIES MULTIPLES
RECEPTOR MULTICANAL DE AUDIO/VÍDEO
VSX-819H
Register your product at:
www.pioneerelectronics.com (US)
www.pioneerelectronics.ca (Canada)
• Protect your new investment
The details of your purchase will be on file for reference in the event of an
insurance claim such as loss or theft.
• Receive free tips, updates and service bulletins on
your new product
• Improve product development
Your input helps us continue to design products that meet your needs.
• Receive a free Pioneer newsletter
Registered customers can opt in to receive a monthly newsletter.
Operating Instructions
Mode d’emploi
Manual de instrucciones

WARNING
This equipment is not waterproof. To prevent a fire
or shock hazard, do not place any container filled
with liquid near this equipment (such as a vase or
flower pot) or expose it to dripping, splashing, rain
or moisture.
WARNING
Before plugging in for the first time, read the following
section carefully.
The voltage of the available power supply differs
according to country or region. Be sure that the
power supply voltage of the area where this unit
will be used meets the required voltage (e.g., 230 V
or 120 V) written on the rear panel.
This product is for general household purposes. Any
failure due to use for other than household purposes
(such as long-term use for business purposes in a
restaurant or use in a car or ship) and which
requires repair will be charged for even during the
warranty period.
D3-4-2-1-3_B_En
D3-4-2-1-4_A_En
K041_En
If the AC plug of this unit does not match the AC
outlet you want to use, the plug must be removed
and appropriate one fitted. Replacement and
mounting of an AC plug on the power supply cord of
this unit should be performed only by qualified
service personnel. If connected to an AC outlet, the
cut-off plug can cause severe electrical shock. Make
sure it is properly disposed of after removal.
The equipment should be disconnected by removing
the mains plug from the wall socket when left
unused for a long period of time (for example, when
on vacation).
D3-4-2-2-1a_A_En
WARNING: Handling the cord on this product or
cords associated with accessories sold with the
product will expose you to chemicals listed on
proposition 65 known to the State of California and
other governmental entities to cause cancer and
birth defect or other reproductive harm.
Wash hands after handling
D36-P4_A_En
IMPORTANT NOTICE – THE SERIAL NUMBER FOR THIS EQUIPMENT IS LOCATED IN THE REAR.
PLEASE WRITE THIS SERIAL NUMBER ON YOUR ENCLOSED WARRANTY CARD AND
KEEP IN A SECURE AREA. THIS IS FOR YOUR SECURITY.
D1-4-2-6-1_En
NOTE: This equipment has been tested and found to comply with the limits for a Class B digital device, pursuant to
Part 15 of the FCC Rules. These limits are designed to provide reasonable protection against harmful interference in
a residential installation. This equipment generates, uses, and can radiate radio frequency energy and, if not
installed and used in accordance with the instructions, may cause harmful interference to radio communications.
However, there is no guarantee that interference will not occur in a particular installation. If this equipment does
cause harmful interference to radio or television reception, which can be determined by turning the equipment off
and on, the user is encouraged to try to correct the interference by one or more of the following measures:
– Reorient or relocate the receiving antenna.
– Increase the separation between the equipment and receiver.
– Connect the equipment into an outlet on a circuit different from that to which the receiver is connected.
– Consult the dealer or an experienced radio/TV technician for help.
D8-10-1-2_En
This Class B digital apparatus complies with Canadian ICES-003.
Cet appareil numérique de la Classe B est conforme à la norme NMB-003 du Canada.
D8-10-1-3_EF
Information to User
Alterations or modifications carried out without appropriate authorization may invalidate the user’s right to operate
the equipment.
D8-10-2_En
CAUTION: This product satisfies FCC regulations when shielded cables and connectors are used to connect the
unit to other equipment. To prevent electromagnetic interference with electric appliances such as radios and
televisions, use shielded cables and connectors for connections.
D8-10-3a_En
FEDERAL COMMUNICATIONS COMMISSION DECLARATION OF CONFORMITY
This device complies with part 15 of the FCC Rules. Operation is subject to the following two conditions: (1) This
device may not cause harmful interference, and (2) this device must accept any interference received, including
interference that may cause undesired operation.
Product Name: AUDIO/VIDEO MULTI-CHANNEL RECEIVER
Model Number: VSX-819H-K
Responsible Party Name: PIONEER ELECTRONICS SERVICE, INC.
Address: 1925 E. DOMINGUEZ ST. LONG BEACH, CA 90801-1760, U.S.A.
Phone: 1-800-421-1404
IMPORTANT
The lightning flash with arrowhead symbol,
within an equilateral triangle, is intended to
alert the user to the presence of uninsulated
«dangerous voltage» within the product’s
enclosure that may be of sufficient
magnitude to constitute a risk of electric
shock to persons.
Read these instructions.
1)
Keep these instructions.
2)
Heed all warnings.
3)
Follow all instructions.
4)
Do not use this apparatus near water.
5)
Clean only with dry cloth.
6)
Do not block any ventilation openings. Install in
7)
accordance with the manufacturer’s instructions.
Do not install near any heat sources such as

radiators, heat registers, stoves, or other apparatus
(including amplifiers) that produce heat.
Do not defeat the safety purpose of the polarized or
9)
grounding-type plug. A polarized plug has two
blades with one wider than the other. A grounding
type plug has two blades and a third grounding
prong. The wide blade or the third prong are
provided for your safety. If the provided plug does
not fit into your outlet, consult an electrician for
replacement of the obsolete outlet.
Protect the power cord from being walked on or
10)
pinched particularly at plugs, convenience
receptacles, and the point where they exit from the
apparatus.
CAUTION:
TO PREVENT THE RISK OF ELECTRIC
SHOCK, DO NOT REMOVE COVER (OR
BACK). NO USER-SERVICEABLE PARTS
INSIDE. REFER SERVICING TO QUALIFIED
SERVICE PERSONNEL.
CAUTION
RISK OF ELECTRIC SHOCK
DO NOT OPEN
Only use attachments/accessories specified by the
11)
manufacturer.
Use only with the cart, stand, tripod, bracket, or
12)
table specified by the manufacturer, or sold with the
apparatus. When a cart is used, use caution when
moving the cart/apparatus combination to avoid
injury from tip-over.
Unplug this apparatus during lightning storms or
13)
when unused for long periods of time.
Refer all servicing to qualified service personnel.
14)
Servicing is required when the apparatus has been
damaged in any way, such as power-supply cord or
plug is damaged, liquid has been spilled or objects
have fallen into the apparatus, the apparatus has
been exposed to rain or moisture, does not operate
normally, or has been dropped.
The exclamation point within an equilateral
triangle is intended to alert the user to the
presence of important operating and
maintenance (servicing) instructions in the
literature accompanying the appliance.
D3-4-2-1-1_En-A
P1-4-2-2_En
WARNING
To prevent a fire hazard, do not place any naked
flame sources (such as a lighted candle) on the
equipment.
D3-4-2-1-7a_A_En
VENTILATION CAUTION
When installing this unit, make sure to leave space
around the unit for ventilation to improve heat
radiation (at least 60 cm at top, 10 cm at rear, and
30 cm at each side).
WARNING
Slots and openings in the cabinet are provided for
ventilation to ensure reliable operation of the
product, and to protect it from overheating. To
prevent fire hazard, the openings should never be
blocked or covered with items (such as newspapers,
table-cloths, curtains) or by operating the
equipment on thick carpet or a bed.
D3-4-2-1-7b_A_En
Operating Environment
Operating environment temperature and humidity:
+5 ºC to +35 ºC (+41 ºF to +95 ºF); less than 85 %RH
(cooling vents not blocked)
Do not install this unit in a poorly ventilated area, or in
locations exposed to high humidity or direct sunlight (or
strong artificial light)
D3-4-2-1-7c_A_En
CAUTION
The STANDBY/ON switch on this unit will not
completely shut off all power from the AC outlet.
Since the power cord serves as the main disconnect
device for the unit, you will need to unplug it from
the AC outlet to shut down all power. Therefore,
make sure the unit has been installed so that the
power cord can be easily unplugged from the AC
outlet in case of an accident. To avoid fire hazard,
the power cord should also be unplugged from the
AC outlet when left unused for a long period of time
(for example, when on vacation).
CAUTION
For U.S. and Australia Model
D3-4-2-2-2a_A_En
To prevent fire hazard, the
Class 2 Wiring Cable
should be used for
connection with speaker,
and should be routed
away from hazards to
avoid damage to the
insulation of the cable.

Thank you for buying this Pioneer product. Please read through these operating instructions so you will know how to operate
your model properly. After you have finished reading the instructions, put them away in a safe place for future reference.
Contents
01 Before you start
Checking what’s in the box . . . . . . . . . . . . . . . 6
Loading the batteries . . . . . . . . . . . . . . . . . . . 6
Installing the receiver . . . . . . . . . . . . . . . . . . . 6
Ventilation . . . . . . . . . . . . . . . . . . . . . . . . . . 6
02 5 minute guide
Introduction to home theater . . . . . . . . . . . . . 8
Listening to Surround Sound . . . . . . . . . . . . . 8
Automatically setting up for surround
sound (MCACC) . . . . . . . . . . . . . . . . . . . . . . . 9
Other problems when using the
Auto MCACC Setup . . . . . . . . . . . . . . . . . . 11
Better sound using Phase Control . . . . . . . . 11
03 Connecting up
Making cable connections . . . . . . . . . . . . . . 12
HDMI cables . . . . . . . . . . . . . . . . . . . . . . . 12
About HDMI . . . . . . . . . . . . . . . . . . . . . . . . 12
Analog audio cables. . . . . . . . . . . . . . . . . . 13
Digital audio cables . . . . . . . . . . . . . . . . . . 13
Video cables . . . . . . . . . . . . . . . . . . . . . . . . 13
About video outputs connection . . . . . . . . . . 13
Connecting a TV and Blu-ray Disc player
or DVD player . . . . . . . . . . . . . . . . . . . . . . . . 14
Connecting the multichannel analog
outputs. . . . . . . . . . . . . . . . . . . . . . . . . . . . 15
Connecting a satellite receiver or other
digital set-top box . . . . . . . . . . . . . . . . . . . . . 16
Connecting other audio components . . . . . . 17
Connecting an HDD/DVD recorder,
VCR and other video sources . . . . . . . . . . . . 18
Using the component video jacks . . . . . . . . . 19
Connecting to the front panel video
terminal . . . . . . . . . . . . . . . . . . . . . . . . . . . . 20
Connecting antennas . . . . . . . . . . . . . . . . . . 20
Using external antennas. . . . . . . . . . . . . . . 21
Connecting the speakers . . . . . . . . . . . . . . . 22
Use the PRE OUT outputs to connect
the surround back speakers . . . . . . . . . . . . 23
Placing the speakers . . . . . . . . . . . . . . . . . 24
Switching the speaker system . . . . . . . . . . 25
04 Controls and displays
Front panel . . . . . . . . . . . . . . . . . . . . . . . . . . 26
Operating range of remote control . . . . . . . 27
Display . . . . . . . . . . . . . . . . . . . . . . . . . . . . . 28
Remote control . . . . . . . . . . . . . . . . . . . . . . . 30
05 Listening to your system
Auto playback . . . . . . . . . . . . . . . . . . . . . . . . 33
Listening in surround sound . . . . . . . . . . . . . 33
Using the Advanced surround effects. . . . . 34
Listening in stereo. . . . . . . . . . . . . . . . . . . . . 35
Using Front Stage Surround Advance . . . . . . 35
Using Stream Direct . . . . . . . . . . . . . . . . . . . 36
Using the Sound Retriever. . . . . . . . . . . . . . . 36
Listening with Acoustic Calibration EQ . . . . . 36
Using surround back channel processing . . . 37
Setting the Up Mix function. . . . . . . . . . . . . . 37
Setting the Audio options . . . . . . . . . . . . . . . 38
Playing other sources . . . . . . . . . . . . . . . . . . 40
Choosing the input signal . . . . . . . . . . . . . . . 40
Selecting the multichannel analog inputs. . . . 40
Using the headphone . . . . . . . . . . . . . . . . . . 40
06 The System Setup menu
Using the System Setup menu . . . . . . . . . . . 41
Manual speaker setup. . . . . . . . . . . . . . . . . . 41
Speaker Setting . . . . . . . . . . . . . . . . . . . . . 42
Crossover Network . . . . . . . . . . . . . . . . . . . 43
Channel Level . . . . . . . . . . . . . . . . . . . . . . . 43
Speaker Distance . . . . . . . . . . . . . . . . . . . . 44
The Input Assign menu . . . . . . . . . . . . . . . . . 44
07 Using the MULTI-ZONE feature
MULTI-ZONE listening . . . . . . . . . . . . . . . . . . 46
Making MULTI-ZONE connections . . . . . . . 46
Using the MULTI-ZONE controls . . . . . . . . . 47
08 Using the tuner
Listening to the radio. . . . . . . . . . . . . . . . . . . 48
Improving FM stereo sound . . . . . . . . . . . . 48
Saving station presets . . . . . . . . . . . . . . . . . . 48
Listening to station presets. . . . . . . . . . . . . 49
Naming preset stations. . . . . . . . . . . . . . . . 49
4
En

09 Making recordings
Making an audio or a video recording . . . . . . 50
10 Controlling the rest of your
system
Setting the remote to control other
components . . . . . . . . . . . . . . . . . . . . . . . . . 51
Selecting preset codes directly . . . . . . . . . . . 51
Clearing all the remote control settings. . . . . 51
Controls for TVs. . . . . . . . . . . . . . . . . . . . . . . 52
Controls for other components . . . . . . . . . . . 53
Preset Code List . . . . . . . . . . . . . . . . . . . . . . 55
11 Other connections
Connecting an iPod. . . . . . . . . . . . . . . . . . . . 58
Connecting your iPod to the receiver . . . . . 58
iPod playback . . . . . . . . . . . . . . . . . . . . . . . 59
Watching photos and video content . . . . . . 60
About iPod . . . . . . . . . . . . . . . . . . . . . . . . . 60
Connecting a USB device . . . . . . . . . . . . . . . 60
Connecting your USB device to the
receiver. . . . . . . . . . . . . . . . . . . . . . . . . . . . 61
Basic playback controls . . . . . . . . . . . . . . . 61
Compressed audio compatibility. . . . . . . . . 62
Using SIRIUS Radio . . . . . . . . . . . . . . . . . . . 62
Connecting your SiriusConnect
Tuner . . . . . . . . . . . . . . . . . . . . . . . . . . . . . 63
Listening to SIRIUS Radio. . . . . . . . . . . . . . 63
Saving channel presets. . . . . . . . . . . . . . . . 64
Using the SIRIUS Menu . . . . . . . . . . . . . . . 64
Connecting an IR receiver . . . . . . . . . . . . . . . 64
TM
Manufactured under license from Dolby
Laboratories. Dolby, Pro Logic, Surround EX
and the double-D symbol are trademarks of
Dolby Laboratories.
Manufactured under license under U.S.
Patent #’s: 5,451,942; 5,956,674; 5,974,380;
5,978,762; 6,226,616; 6,487,535 & other U.S.
and worldwide patents issued & pending.
DTS is a registered trademark and the DTS
logos, Symbol, DTS-HD and DTS-HD Master
Audio are trademarks of DTS, Inc. © 19962007 DTS, Inc. All Rights Reserved.
English
English Italiano Français
Deutsch
Français
Italiano
Nederlands
12 Additional information
Troubleshooting . . . . . . . . . . . . . . . . . . . . . . 65
HDMI . . . . . . . . . . . . . . . . . . . . . . . . . . . . . 67
Important information regarding the
HDMI connection . . . . . . . . . . . . . . . . . . . . 67
iPod messages . . . . . . . . . . . . . . . . . . . . . . 68
USB messages . . . . . . . . . . . . . . . . . . . . . . 68
SIRIUS radio messages . . . . . . . . . . . . . . . 68
Resetting the main unit. . . . . . . . . . . . . . . . . 69
Specifications . . . . . . . . . . . . . . . . . . . . . . . . 69
Power cord caution. . . . . . . . . . . . . . . . . . . . 70
Cleaning the unit. . . . . . . . . . . . . . . . . . . . . . 70
Español
Nederlands
EspañolDeutsch
5
En

Before you start01
Chapter 1:
Before you start
Checking what’s in the box
Please check that you’ve received the following
supplied accessories:
• Setup microphone
• Remote control
• Dry cell batteries (AAA size IEC R03) x2
• AM loop antenna
•FM wire antenna
•iPod cable
• These operating instructions
Loading the batteries
Caution
Incorrect use of batteries may result in such
hazards as leakage and bursting. Observe the
following precautions:
• Never use new and old batteries together.
• Insert the plus and minus sides of the
batteries properly according to the marks
in the battery case.
• Batteries with the same shape may have
different voltages. Do not use different
batteries together.
• When disposing of used batteries, please
comply with governmental regulations or
environmental public instruction’s rules
that apply in your country or area.
• Do not use or store batteries in direct
sunlight or other excessively hot place,
such as inside a car or near a heater. This
can cause batteries to leak, overheat,
explode or catch fire. It can also reduce the
life or performance of batteries.
6
En
(Symbol examples for batteries)
These symbols are only valid
in the European Union.
Pb
K058c_A1_En
Installing the receiver
• When installing this unit, make sure to put
it on a level and stable surface.
Don’t install it on the following places:
– on a color TV (the screen may distort)
– near a cassette deck (or close to a device that
gives off a magnetic field). This may interfere
with the sound.
– in direct sunlight
– in damp or wet areas
– in extremely hot or cold areas
– in places where there is vibration or other
movement
– in places that are very dusty
– in places that have hot fumes or oils (such as
a kitchen)
Ventilation
When installing this unit, make sure to leave
space around the unit for ventilation to improve
heat dispersal (at least 60 cm (24 in.) at the
top). If not enough space is provided between
the unit and walls or other equipment, heat will
build up inside, interfering with performance
and/or causing malfunctions.
60 cm (24 inches)
Receiver

Before you start 01
Slot and openings in the cabinet are provided
for ventilation and to protect the equipment
from overheating. To prevent fire hazard, do not
place anything directly on top of the unit, make
sure the openings are never blocked or covered
with items (such as newspapers, table-cloths
and curtains), and do not operate the
equipment on thick carpet or a bed.
English
English
Deutsch
Deutsch
Français
Français
Italiano
Italiano
Nederlands
Nederlands
Español
Español
7
En

5 minute guide02
Chapter 2:
5 minute guide
Introduction to home theater
Home theater refers to the use of multiple
audio tracks to create a surround sound effect,
making you feel like you’re in the middle of the
action or concert. The surround sound you get
from a home theater system depends not only
on your speaker setup, but also on the source
and the sound settings of the receiver.
This receiver will automatically decode
multichannel Dolby Digital, DTS, or Dolby
Surround sources according to your speaker
setup. In most cases, you won’t have to make
changes for realistic surround sound, but
other possibilities (like listening to a CD with
multichannel surround sound) are explained in
Listening to your system on page 33.
Listening to Surround Sound
With the following quick setup guide, you
should have your system hooked up for
surround sound in no time at all. In most
cases, you can simply leave the receiver in the
default settings.
• Be sure to complete all connections before
connecting to an AC power source.
1 Connect your TV and Blu-ray Disc player
or DVD player.
See Connecting a TV and Blu-ray Disc player or
DVD player on page 14 to do this. For surround
sound, you’ll want to hook up using a digital
connection from the BD/DVD player to the
receiver.
2 Connect your speakers and place them for
optimal surround sound.
See Connecting the speakers on page 22.
Where you place the speakers will have a big
effect on the sound. Place your speakers as
shown below for the best surround sound
effect. Also see Placing the speakers on page 24
for more on this.
Subwoofer (SW)
Front
Left (L)
Surround
Left (SL)
Center (C)
Front
Right (R)
Surround Back
Left (SBL)
Listening
position
Surround
Right (SR)
Surround Back
Right (SBR)
Important
• To connect the surround back speakers, an
additional amplifier is required. Connect
the additional amplifier to the PRE OUT
SURROUND BACK outputs of this unit and
connect the surround back speakers to the
additional amplifier. For details, see Use
the PRE OUT outputs to connect the
surround back speakers on page 23.
3 Plug in and switch on the receiver, followed
by your BD/DVD player, subwoofer and TV.
Make sure you’ve set the video input on your TV
to this receiver. Check the manual that came
with the TV if you don’t know how to do this.
4 Use the on-screen automatic MCACC
setup to set up your system.
See Automatically setting up for surround
sound (MCACC) on page 9 for more on this.
8
En

5 minute guide 02
5 Play a BD/DVD, and adjust the volume.
Make sure that
receiver’s display. If it isn’t, press
BD/DVD
is showing in the
BD
on the
remote to set the receiver to the BD/DVD input.
There are several other sound options you can
select. See Listening to your system on page 33
for more on this.
2
Automatically setting up for
surround sound (MCACC)
The Auto Multi-Channel Acoustic Calibration
(MCACC) setup measures the acoustic
characteristics of your listening area, taking
into account ambient noise, speaker size and
distance, and tests for both channel delay and
channel level. After you have set up the
microphone provided with your system, the
receiver uses the information from a series of
test tones to optimize the speaker settings and
equalization for your particular room.
Important
• The Auto MCACC Setup will overwrite any
existing speaker settings you’ve made.
• Before using the Auto MCACC Setup, the
iPod USB function should not be selected
as an input source.
Caution
• The test tones used in the Auto MCACC
Setup are output at high volume.
RECEIVER
RECEIVER
INPUT SELECT
SOURCE
ZONE 2
RECEIVER
BD TV
ON/OFF
TV CONTROL
INPUT
DVR
AUDIO
PARAMETER
TOP
MENU
T
E
S
E
R
P
HOME
MENU
SETUP
SETUP
iPod
CTRL
CATEGORY
T
ENTER
ENTER
T
U
U
N
E
E
N
TUNER EDIT
TOOLS
P
R
E
S
E
T
RETURN
RETURN
MENU
BAND
MASTER
VOLUME
1 Switch on the receiver and your TV.
2 Connect the microphone to the
SETUP MIC
1
jack on the front panel.
Make sure there are no obstacles between the
speakers and the microphone.
ENTER
IO
R
MCACC
SETUP MIC
MASTER
VOLUME
If you have a tripod, use it to place the
microphone so that it’s about ear level at your
normal listening position. Otherwise, place the
microphone at ear level using a table or a chair.
3 Press
then press the
RECEIVER
SETUP
on the remote control,
button.
An on-screen display (OSD) appears on your
TV. Use /// and ENTER on the remote
control to navigate through the screens and
select menu items. Press RETURN to exit the
current menu.
• Press SETUP at any time to exit the System
Setup menu.
3
4 Select ‘Auto MCACC’ from the System
Return
4
Setup menu then press ENTER.
System Setup
1.Auto MCACC
2.Manual SP Setup
3.Input Assign
Try to be as quiet as possible after pressing
ENTER. The system outputs a series of test
tones to establish the ambient noise level.
MCACC
English
Deutsch
Français
Italiano
Nederlands
Español
Note
1 You may need to set your BD/DVD player to output Dolby Digital, DTS and 88.2 kHz/96 kHz PCM (2 channel) audio (see your
BD/DVD player’s manual for more on this).
2 Depending on your BD/DVD player or source disc, you may only get 2 channel sound. In this case, the listening mode must be
set to STANDARD (see Listening in surround sound on page 33 if you need t o do this) if you want multichannel surround sound.
3 • The screensaver automatically starts after three minutes of inactivity. If you cancel the Auto MCACC Setup at any time, the
receiver automatically exits and no settings will be made.
• The OSD will not appear if you have connected using the HDMI output to your TV. Use component or composite connections
for system setup.
4 MIC IN blinks when the microphone is not connected to MCACC SETUP MIC.
9
En

5 minute guide02
5 Follow the instructions on-screen.
• Make sure the microphone is connected.
• Make sure the subwoofer is on and the
volume is turned up.
• See below for notes regarding background
noise and other possible interference.
6 Wait for the test tones to finish.
A progress report is displayed on-screen while
the receiver outputs test tones to determine the
speakers present in your setup. Try to be as
quiet as possible while it’s doing this.
1.Auto MCACC
Now Analyzing
Environment Check
Ambient Noise
Speaker YES/NO
Return
• For correct speaker settings, do not adjust
the volume during the test tones.
7 Confirm the speaker configuration.
The configuration shown on-screen should
reflect the actual speakers you have.
• With error messages (such as Too much
ambient noise) select RETRY after
checking for ambient noise (see Other
problems when using the Auto MCACC
Setup on page 11).
1.Auto MCACC
Check!
[ YES ]
Front
[ YES ]
Center
[ YES ]
Surr
[YESx2]
Surr. Back
[ YES ]
Subwoofer
10:Next
OK
Return
If the speaker configuration displayed isn’t
correct, use / to select the speaker and
/ to change the setting. When you’re
finished, go to the next step.
If you see an error message (ERR) in the right
side column, there may be a problem with the
speaker connection. If selecting RETRY
doesn’t fix the problem, turn off the power and
check the speaker connections.
8 Make sure ‘OK’ is selected, then press
ENTER.
If the screen in step 7 is left untouched for 10
seconds and the ENTER button is not pressed
in step 8, the Auto MCACC setup will start
automatically as shown below.
A progress report is displayed on-screen while
the receiver ou tputs more test tones to determine
the optimum receiver settings for channel level,
speaker distance, and Acoustic Calibration EQ.
1.Auto MCACC
Now Analyzing
Surround Analyzing
Speaker System
Speaker Distance
Channel Level
Acoustic Cal EQ
Return
Again, try to be as quiet as possible while this
is happening. It may take 1 to 3 minutes.
9 The Auto MCACC Setup has finished!
You return to the System Setup menu.
The settings made in the Auto MCACC Setup
should give you excellent surround sound from
your system, but it is also possible to adjust
these settings manually using the System
Setup menu (starting on page 41).
1
Note
1 • Depending on the characteristics of your room, sometimes identical speakers with cone sizes of around 12 cm (5 inches)
will end up with different size settings. You can correct the setting manually using the Speaker Setting on page 42.
• The subwoofer distance setting may be farther than the actual distance from the listening position. This setting should be
accurate (taking delay and room characteristics into account) and generally does not need to be changed.
10
En

5 minute guide 02
Other problems when using the Auto
MCACC Setup
If the room environment is not optimal for the
Auto MCACC Setup (too much background
noise, echo off the walls, obstacles blocking
the speakers from the microphone) the final
settings may be incorrect. Check for household
appliances (air conditioner, fridge, fan, etc.),
that may be affecting the environment and
switch them off if necessary. If there are any
instructions showing in the front panel display,
please follow them.
• Some older TVs may interfere with the
operation of the microphone. If this seems
to be happening, switch off the TV when
doing the Auto MCACC Setup.
Better sound using Phase Control
This receiver’s Phase Control feature uses
phase correction measures to make sure your
sound source arrives at the listening position in
phase, preventing unwanted distortion and/or
coloring of the sound (see illustration below).
During multichannel playback, LFE (LowFrequency Effects) signals as well as lowfrequency signals in each channel are
assigned to the subwoofer or other the
subwoofer and the most appropriate speaker.
At least in theory, however, this type of
processing involves a group delay that varies
with frequency, resulting in phase distortion
where the low-frequency sound is delayed or
muffled by the conflict with other channels.
With the Phase Control mode switched on,
this receiver can reproduce powerful bass
sound without deteriorating the quality of the
original sound (see illustration below).
P
H
A
S
E
C
O
N
T
R
O
L
O
F
F
P
H
A
S
E
C
O
N
T
R
O
L
O
N
Sound
source
Sound
source
Front speaker
Subwoofer
Front speaker
Subwoofer
Listening
position
Listening
position
?
Phase Control technology provides coherent
sound reproduction through the use of phase
matching
1
for an optimal sound image at your
listening position. The default setting is on
and we recommend leaving Phase Control
switched on for all sound sources.
HDD
DVD
VCR
RECEIVER
RECEIVER
RECEIVER
BD TV
INPUT SELECT
ZONE 2
ON/OFF
TV CONTROL
INPUT
DVR
SOURCE
1
S.RETRIEVER
4
SB CH
7
DIMMER
+
10
D.ACCESS
PHASE
SPEAKERS
2
EQ
5
8
0
3
CH SELECT
6
9
ENTER
DISPLAY
SLEEP
CH
MIDNIGHT
CH
SHIFT
• Press RECEIVER, then press PHASE to
switch on phase correction.
English
Deutsch
Français
Italiano
Nederlands
Español
Note
1 Phase matching is a very important factor in achieving proper sound reproduction. If two waveforms are ‘in phase’, they crest
and trough together, resulting in increased amplitude, clarity and presence of the sound signal. If a crest of a wave meets a
trough (as shown in the upper section of the diagram above) then the sound will be ‘out of phase’ and an unreliable sound
image will be produced.
• If your subwoofer has a phase control switch, set it to the plus (+) sign (or 0°). However, the effect you can actually feel when
PHASE CONTROL is set to ON on this receiver depends on the type of your subwoofer. Set your subwoofer to maximize the
effect. It is also recommended you try changing the orientation or the place of your subwoofer.
• Set the built-in lowpass filter switch of your subwoofer to OFF. If this cannot be done on your subwoofer, set the cutoff
frequency to a higher value.
• If the speaker distance is not properly set, you may not have a maximized PHASE CONTROL effect.
• The PHASE CONTROL mode cannot be set to ON in the following cases:
– When the PURE DIRECT mode is switched on.
– When the MULTI IN input is selected.
11
En

Connecting up03
Chapter 3:
Connecting up
Making cable connections
Make sure not to bend the cables over the top
of this unit (as shown in the illustration). If this
happens, the magnetic field produced by the
transformers in this unit may cause a
humming noise from the speakers.
Important
• Before making or changing connections,
switch off the power and disconnect the
power cord from the AC outlet.
• Before unplugging the power cord, switch
the power into standby.
HDMI cables
The HDMI cab les transfers uncompressed digital
video, as well as almost every kind of digital audio
that the connected component is compatible
with, including DVD-Video, DVD-Audio, Dolby
Digital Plus, Dolby TrueHD, DTS-HD Master
Audio (see below for limitations), Video CD/Super
VCD, CD, SACD (DSD 2 ch only) and 192 kHz/
8 ch (Max. number of channel inputs) PCM.
1
Be careful to connect the terminal in the
proper direction.
About HDMI
HDMI (High Definition Multimedia Interface)
supports both video and audio on a single
digital connection for use with DVD players,
DTV, set-top boxes, and other AV devices. HDMI
was developed to provide the technologies of
High Bandwidth Digital Content Protection
(HDCP) as well as Digital Visual Interface (DVI)
in one specification. HDCP is used to protect
digital content transmitted and received by DVIcompliant displays.
HDMI has the capability to support standard,
enhanced, or high-definition video plus
standard to multi-channel surround-sound
audio. HDMI features include uncompressed
digital video, a bandwidth of up to 2.2 gigabytes
per second (with HDTV signals), one connector
(instead of several cables and connectors), and
communication between the AV source and AV
devices such as DTVs.
This receiver is also compatible with the
DeepColor and x.v.Color feature (x.v.Color is
trademarks of Sony Corporation).
HDMI, the HDMI logo and High-Definition
Multimedia Interface are trademarks or
registered trademarks of HDMI Licensing, LLC.
HDMI cable
Note
1 • Set the HDMI parameter in Setting the Audio options on page 38 to THRU (THROUGH) and set the input signal in Choosing
the input signal on page 40 to HDMI, if you want to hear HDMI audio output from your TV or flat panel TV (no sound will be
heard from this receiver).
• If the video signal does not appear on your TV or flat panel TV, try adjusting the resolution settings on your component or
display. Note that some components (such as video game units) have resolutions that may not be displayed. In this case, use
a (analog) composite connection.
• The signals input from the analog (composite and component) video inputs of this unit will not be output from the HDMI
OUT.
12
En

Connecting up 03
Analog audio cables
Use stereo RCA phono cables to connect
analog audio components. These cables are
typically red and white, and you should
connect the red plugs to R (right) terminals
and white plugs to L (left) terminals.
Analog audio cables
Right (red)
Left (white)
Digital audio cables
Commercially available coaxial digital audio
cables or optical cables should be used to
connect digital components to this receiver.
Coaxial digital audio cable Optical cable
Video cables
Standard RCA video cables
These cables are the most common type of
video connection and are used to connect to
the composite video terminals. The yellow
plugs distinguish them from cables for audio.
Component video cables
Use component video cables to get the best
possible color reproduction of your video
source. The color signal of the TV is divided
into the luminance (Y) signal and the color (P
R) signals and then output. In this way,
and P
interference between the signals is avoided.
Component video cables
Green (Y)
B
)
Blue (P
1
About video outputs connection
Red (P
R
)
This receiver is not loaded with a video
converter. When you use component video
cables or HDMI cables for connecting to the
input device, the same cables should be used
for connecting to the TV.
English
B
Deutsch
Français
Italiano
Nederlands
Español
tandard RCA video cable
Note
1 • When connecting optical cables, be careful when inserting the plug not to damage the shutter protecting the optical socket.
• When storing optical cable, coil loosely. The cable may be damaged if bent around sharp corners.
• You can also use a standard RCA video cable for coaxial digital connections.
13
En

Connecting up03
Connecting a TV and Blu-ray Disc player or DVD player
This page shows you how to connect your BD/DVD player and TV to the receiver.
This receiver
RAUX
L
IN
HDMI
2 4
VIDEO IN
RL
ANALOG AUDIO OUT
HDMI
BD/DVD
IN
TV/SAT
IN
DVR/VCR
IN
OUT
OUT
IR
IN
ASSIGNABLE
COAXIAL
COAXIAL
IN 1
IN 1
(CD)
(CD)
OPTICAL
IN 2
(AUX)
IN 1
IN 1
(CD-R/TAPE)
(CD-R/TAPE)
ASSIGNABLE ASSI
1-2
CD-R/TAPE CD
OUT
DVR/VCR TV/SAT
OUT
AUDIODIGITAL
BD/DVD MULTI CH IN
CENTERSURROUND
SUBWOOFER
IN IN
IN
TV/SAT
FRONT
BD/DVD IN
BD/DVD IN
ZONE2
UNBAL
75
LOOP
FM
Ω
AM
ANTENNA
OUT
OUT
MONITOR OUT BD/DVD IN
MONITOR OUT BD/DVD IN TV/SA
COMPONENT VIDEO
L
R
IN
IN
L
L
R
R
L
L
SIRIUS
IN
R
R
SURROUND
R
BACK
DVR/VCR
L (Single)R
PRE
SU
L R
IN
YPBP
2
HDMI IN
TV
OPTICAL
DIGITAL
AUDIO OUT
4
1
1 Connect the HDMI output on your
BD/DVD player to the HDMI BD/DVD IN input
on this receiver.
Use an HDMI cable for the connection. If an
HDMI output is not on your DVD player, use a
digital audio cable to connect the coaxial or
optional output and this unit.
Note
1 In this case, you’ll need to tell the receiver which digital input you connected the player to (see Choosing the input signal on
page 40).
2 • When you use an HDMI cable for connection in steps 1 and 2, you can enjoy the home theater in multichannel playback
without following steps 3 and 4.
• The OSD will not appear if you have connected using the HDMI output to your TV. Use component or composite connections
for system setup.
3See Using the component video jacks on page 19 if you want to use the component video outputs to connect this receiver to
your TV.
1
1
HDMI OUT
COAXIAL
DIGITAL
AUDIO OUT
BD/DVD player
RL
ANALOG AUDIO OUT
2 Connect the HDMI OUT on this receiver to
an HDMI input on your TV.
If an HDMI input is not on your TV, connect the
MONITOR OUT video jack on this receiver to a
video input on your TV.
Use a standard RCA video cable to connect to
the composite video jack.
3
2
3
14
En
VIDEO OUT

Connecting up 03
3 Connect the composite video output and
the stereo analog audio outputs
1
on your
BD/DVD player to the BD/DVD inputs on this
receiver.
Use a standard RCA video cable
2
and a stereo
RCA phono cable for the connection.
• If your BD/DVD player has multichannel
analog outputs, see Connecting the
multichannel analog outputs below
for how to connect it.
4 Connect the analog audio outputs from
your TV to the TV/SAT inputs on this receiver.
This will allow you to play the sound from the
TV’s built-in tuner. Use a stereo RCA phono
cable to do this.
• If your TV has a built-in digital decoder, you
can also connect an optical digital audio
output from your TV to the DIGITAL
OPTICAL IN 2 (AUX) input on this receiver.
Use an optical cable for the connection.
3
Connecting the multichannel analog outputs
For DVD Audio and SACD playback, your BD/DVD player may have 5.1 channel analog outputs. In this
case, you can connect them to the multichannel analog outputs to the multichannel inputs of this
receiver as shown below.
4
This receiver
HDMI
BD/DVD
IN
TV/SAT
IN
DVR/VCR
IN
OUT
(CD-R/TAPE)
COAXIAL
OPTICAL
IN 1
IN 2
(AUX)
IN 1
R AUX
L
IN
IN IN
CD-R/TAPE CD
OUT
DVR/VCR TV/SAT
OUT
IR
IN
ASSIGNABLE
(CD)
ASSIGNABLE
1-2
AUDIODIGITAL
IN
CENTERSURROUND
FRONT
FRONT
CENTERSURROUND
BD/DVD IN
SUBWOOFER
SUBWOOFER
BD/DVD MULTI CH IN
BD/DVD MULTI CH IN
L
R
IN
L
R
UNBAL
75
L
L
SIRIUS
IN
R
R
LOOP
ZONE2
OUT
OUT
MONITOR OUT BD/DVD IN TV/SAT IN
ANTENNA
FM
Ω
AM
COMPONENT VIDEO
SURROUND
L (Single)R
BACK
L R
IN
DVR/VCR VIDE
BD/DVD IN
R
PRE OUT
SUBWOOFER
YPBP
ASSIGNABLE
AUDI
PRE OU
OUT
IN 2
(TV/SAT
IN 1
(BD/DVD
1—2
English
Deutsch
Français
Italiano
Nederlands
CENTER
OUTPUT
RL
SURROUND
OUTPUT
WOOFER
OUTPUT
RL
SUB-
FRONT
OUTPUT
DVD/multi-channel decoder
VIDEO
OUTPUT
with multi-channel analog
output jacks
Note
1 This connection will allow you to make analog recordings from your BD/DVD player.
2 If your player also has a component video output, you can connect this too. See Using the component video jacks on page 19
for more on this.
3 In this case, you’ll need to tell the receiver which digital input you connected the TV to (see Choosing the input signal on page 40).
4 • The multichannel input can only be used when MULTI IN is selected (see page 40).
• You can assign COMPONENT VIDEO IN 1 or IN 2 to the multi channel input. (For more on this, see The Input Assign menu
on page 44.)
Español
15
En

Connecting up03
Connecting a satellite receiver or other digital set-top box
Satellite and cable receivers, and terrestrial digital TV tuners are all examples of so-called ‘set-top
boxes’.
This receiver
R AUX
HDMI
HDMI
BD/DVD
IN
TV/SAT
TV/SAT
IN
IN
DVR/VCR
IN
OUT
COAXIAL
IN 1
(CD)
OPTICAL
IN 2
IN 2
(AUX)
(AUX)
IN 1
(CD-R/TAPE)
IN
IR
ASSIGNABLE
ASSIGNABLE
OUT
OUT
1-2
AUDIODIGITAL
1 1 2
L
IN
IN IN
CD-R/TAPE CD
IN
TV/SAT
DVR/VCR TV/SAT
CENTERSURROUND
BD/DVD IN
SUBWOOFER
BD/DVD MULTI CH IN
FRONT
L
R
IN
IN
L
L
R
R
UNBAL
75
L
SIRIUS
IN
R
LOOP
ZONE2
OUT
OUT
MONITOR OUT BD/DVD IN TV/SAT IN
ANTENNA
FM
Ω
AM
COMPONENT VIDEO
SURROUND
L (Single)R
BACK
L R
IN
DVR/VCR VIDEO
YPBP
R
AUDIO
PRE OUT
SUBWOOFER
PRE OUT
TV/SAT IN
OUT
IN 2
(TV/SAT)
IN 1
(BD/DVD)
ASSIGNABLE
1-2
SPEAKERS A
R
SPEAKERS B
FRONT
R
HDMI OUT
OPTICAL
DIGITAL OUT
AUDIO/VIDEO OUT
VIDEOAUDIORL
STB
1 If your set-top box has an HDMI output,
connect it to an HDMI TV/SAT IN on this
reciever.
If your set-top box does not have an HDMI
output but a digital output, connect it to a
digital input on this receiver.
The example shows an optical connection to
the DIGITAL OPTICAL IN 2 (AUX) input.
Note
1 In this case, you’ll need to tell the receiver which input you connected the set-top box to (see Choosing the input signal on
page 40).
2 If you’ve already connected your TV to the TV/SAT inputs, simply choose another input. However, to receive a signal, you’ll
need to press the input select button for the input you connected the set-top box to.
3See Using the component video jacks on page 19 if your set-top box also has a component video output.
1
2 Connect a set of audio/video outputs on
the set-top box component to the TV/SAT
AUDIO and VIDEO inputs on this receiver.
Use a stereo RCA phono cable for the audio
connection and a standard RCA video cable for
the video connection.
3
16
En
2

Connecting up 03
Connecting other audio
components
The number and kind of connections depends
on the kind of component you’re connecting.
Follow the steps below to connect a CD-R, MD,
DAT, tape recorder or other audio component.
1 If your component has a digital output,
connect this to a digital input on the receiver
as shown.
The example shows an optical connection to
the DIGITAL OPTICAL IN 1 (CD-R/TAPE)
input.
2 If necessary, connect the analog audio
outputs of the component to a set of spare
audio inputs on this receiver.
You’ll need to make this connection for
components without a digital output, or if you
want to record from a digital component. Use a
stereo RCA phono cable as shown.
3 If you’re connecting a recorder, connect
the analog audio outputs to the analog audio
inputs on the recorder.
The example shows an analog connection to
the CD-R/TAPE analog output jack using a
stereo RCA phono cable.
This receiver
R AUX
L
IN
HDMI
BD/DVD
IN
1
TV/SAT
IN
DVR/VCR
IN
OUT
DIGITAL
COAXIAL
COAXIAL
IN 1
IN 1
(CD)
(CD)
OPTICAL
OPTICAL
IN 2
(AUX)
IN 1
IN 1
(CD-R/TAPE)
(CD-R/TAPE)
IN
IR
ASSIGNABLE
ASSIGNABLE
1-2
CD-R/TAPE
CD-R/TAPE CD
OUT
OUT
DVR/VCR TV/SAT
OUT
AUDIODIGITAL
BD/DVD MULTI CH IN
AUDIO
CENTERSURROUND
SUBWOOFER
IN IN
IN
IN
FRONT
BD/DVD IN
L
L
R
R
IN
L
ANTENNA
R
FM
UNBAL
75
Ω
L
SIRIUS
IN
R
AM
LOOP
Z
O
M
English
Deutsch
Français
1 23
IN
OPTICAL COAXIAL
DIGITAL OUT
RL
REC
AUDIO IN
CD-R, MD, DAT, Tape recorder, etc.
OUT
RL
PLAY
AUDIO OUT
Italiano
Nederlands
Español
Note
1 Note that you must connect digital components to analog audio jacks if you want to record to/from digital components (like
an MD) to/from analog components.
17
En

Connecting up03
Connecting an HDD/DVD recorder, VCR and other video sources
This receiver has audio/video inputs and outputs suitable for connecting analog or digital video
recorders, including VCRs and HDD/DVD recorders.
This receiver
R AUX
HDMI
HDMI
BD/DVD
IN
TV/SAT
IN
DVR/VCR
IN
OUT
DIGITAL
COAXIAL
IN 1
(CD)
OPTICAL
OPTICAL
IN 2
IN 2
(AUX)
(AUX)
IN 1
(CD-R/TAPE)
IN
IR
ASSIGNABLE
ASSIGNABLE
1—2
CD-R/TAPE CD
OUT
DVR/VCR
DVR/VCR TV/SAT
OUT
OUT
AUDIODIGITAL
BD/DVD MULTI CH IN
IN
CENTERSURROUND
SUBWOOFER
L
IN IN
IN
IN
FRONT
BD/DVD IN
L
R
IN
L
L
R
R
FM
UNBAL
75
L
SIRIUS
IN
R
LOOP
ZONE2
OUT
OUT
OUT
MONITOR OUT BD/DVD IN TV/SAT IN
ANTENNA
Ω
AM
COMPONENT VIDEO
SURROUND
L (Single)R
BACK
L R
IN
IN
DVR/VCR VIDEO
DVR/VCR VIDEO
YPBP
R
AUDIO
PRE OUT
SUBWOOFER
PRE OUT
OUT
(TV/SAT)
(BD/DVD)
ASSIGNABLE
SPEAK
R
SPEA
IN 2
IN 1
1-2
1
HDMI OUT
1
OPTICAL
DIGITAL OUT
3 2
IN
RL
REC
VIDEO IN
AUDIO IN
OUT
RL
PLAY
AUDIO OUT
VIDEO OUT
DVR, VCR, LD player, etc.
1 If your video component has an HDMI
output, connect it to an HDMI DVR/VCR IN
on this receiver.
If your video component does not have an
HDMI audio output but a digital audio output,
connect it to a digital input on this receiver.
The example shows a recorder connected to
the DIGITAL OPTICAL IN 2 (AUX) input.
1
2 Connect a set of audio/video outputs on
the recorder to the DVR/VCR AUDIO and
VIDEO inputs on this receiver.
Use a stereo RCA phono cable for the audio
connection and a standard RCA video cable for
the video connection.
2
3 Connect a set of audio/video inputs on
the recorder to the DVR/VCR AUDIO and
VIDEO outputs on this receiver.
Use a stereo RCA phono cable for the audio
connection and a standard RCA video cable for
the video connection.
Note
1 In this case, you’ll need to tell the receiver which digital input you connected the component to (see Choosing the input signal
on page 40).
2 If your video component also has a component video output, you can connect this too. See Using the component video jacks
on page 19 for more on this.
18
En

Connecting up 03
Using the component video jacks
Component video should deliver superior picture quality when compared to composite video. A
further advantage (if your source and TV are both compatible) is progressive-scan video, which
delivers a very stable, flicker-free picture. See the manuals that came with your TV and source
component to check whether they are compatible with progressive-scan video.
This receiver
R AUX
HDMI
BD/DVD
IN
2
P
R YPB
COMPONENT VIDEO IN
TV/SAT
IN
DVR/VCR
IN
OUT
COAXIAL
IN 1
(CD)
OPTICAL
IN 2
(AUX)
IN 1
(CD-R/TAPE)
IN
1
TV
P
R YPB
COMPONENT VIDEO OUT
Important
• If you connect any source component to
the receiver using a component video
input, you must also have your TV
connected to this receiver’s COMPONENT
VIDEO OUT jacks.
1 Connect the component video outputs of
your source to a set of component video
inputs on this receiver.
Use a three-way component video cable for the
connection.
L
IN
IN IN
CD-R/TAPE CD
IR
ASSIGNABLE
ASSIGNABLE
1-2
OUT
DVR/VCR TV/SAT
OUT
AUDIODIGITAL
BD/DVD MULTI CH IN
CENTERSURROUND
SUBWOOFER
IN
FRONT
BD/DVD IN
L
R
IN
L
R
FM
UNBAL
75
L
SIRIUS
IN
R
LOOP
BD/DVD player
2 If necessary, assign the component video
inputs to the input source you’ve connected.
This only needs to be done if you didn’t
connect according to the following defaults:
• COMPONENT VIDEO IN 1 – BD/DVD
• COMPONENT VIDEO IN 2 – TV/SAT
See The Input Assign menu on page 44 for
more on this.
3 Connect the COMPONENT VIDEO OUT
jacks on this receiver to the component video
inputs on your TV or monitor.
Use a three-way component video cable.
ZONE2
OUT
OUT
MONITOR OUT BD/DVD IN TV/SAT IN
ANTENNA
Ω
AM
COMPONENT VIDEO
COMPONENT VIDEO
SURROUND
L (Single)R
BACK
L R
IN
DVR/VCR VIDEO
YPBP
YPBP
R
R
AUDIO
PRE OUT
SUBWOOFER
PRE OUT
OUT
OUT
IN 2
(TV/SAT)
IN 1
IN 1
(BD/DVD)
(BD/DVD)
ASSIGNABLE
ASSIGNABLE
1—2
1-2
SP
S
English
Deutsch
Français
Italiano
Nederlands
Español
19
En

Connecting up03
Connecting to the front panel
video terminal
Front video connections are accessed via the
front panel using the INPUT SELECTOR or
VIDEO button on the remote control. There are
standard audio/video jacks. Hook them up the
same way you made the rear panel connections.
•Push down on the PUSH OPEN tab to
access the front video connections.
VIDEO INPUT
USB
This receiver
MULTI-ZONE
SPEAKERS
CONTROL
iPod
USB
iPod
ON/OFF
VIDEO INPUT
AUDIO/VIDEO OUTPUT
RLAUDIOVIDEO
MASTER
VOLUME
RLAUDIOVIDEO
MCACC
SETUP MIC
Video camera
(etc.)
LVIDEO
R
Connecting antennas
Connect the AM loop antenna and the FM wire
antenna as shown below. To improve reception
and sound quality, connect external antennas
(see Using external antennas on page 21).
fig. a fig. b
2
3
1
LOOP
ANTENNA
AM
4
1 Push open the tabs, then insert one wire
fully into each terminal, then release the tabs
to secure the AM antenna wires.
2 Fix the AM loop antenna to the attached
stand.
To fix the stand to the antenna, bend in the
direction indicated by the arrow (fig. a) then
clip the loop onto the stand (fig. b).
3 Place the AM antenna on a flat surface
and in a direction giving the best reception.
4 Connect the FM wire antenna in the same
way as the AM loop antenna.
For best results, extend the FM antenna fully
and fix to a wall or door frame. Don’t drape
loosely or leave coiled up.
20
En

Connecting up 03
Using external antennas
To improve FM reception
Use an F connector (not supplied) to connect
an external FM antenna.
ANTENNA
FM
UNBAL
75
Ω
AM
LOOP
To improve AM reception
Connect a 5 m to 6 m (15 ft. to 18 ft.) length of
vinyl-coated wire to the AM antenna terminal
without disconnecting the supplied AM loop
antenna.
For the best possible reception, suspend
horizontally outdoors.
Outdoor
antenna
F connecto
ANTENNA
FM
UNBAL
75
Ω
AM
LOOP
English
Deutsch
Français
Italiano
Nederlands
Español
Indoor antenna
(vinyl-coated wire)
5 m to 6 m
(15 ft. to 18 ft.)
21
En

Connecting up03
Connecting the speakers
A complete setup of six speakers (including the
subwoofer) is shown here but everyone’s home
setup will vary. Simply connect the speakers
you have in the manner shown below. The
receiver will work with just two stereo speakers
(the front speakers in the diagram) but using at
least three speakers is recommended, and a
complete setup is best for surround sound. If
you’re not using a subwoofer, change the front
speaker setting (see Speaker Setting on
page 42) to LARGE.
Make sure you connect the speaker on the
right to the right terminal and the speaker on
the left to the left terminal.
SW
Powered subwoofer
Front speakers
R
L
You can use the speakers connected to the B
speaker terminals to listen to stereo playback
in another room. Make sure to review Placing
the speakers on page 24 when placing the
speakers in another room. See Switching the
speaker system on page 25 for the listening
options with this setup.
You can use speakers with a normal
impedance between 6 Ω and 16 Ω.
However, note that only the front speakers are
set to a value between 12 Ω and 16 Ω if you
select SPAB in Switching the speaker system
on page 25.
Be sure to complete all connections before
connecting this unit to the AC power source.
Center speaker
C
Surround speakers
SL SR
22
En
SURROUND
BACK
IN
L
R
IN
L
R
L
SIRIUS
IN
R
IN
UNBAL
75
LOOP
FM
Ω
AM
ANTENNA
ZONE2
OUT
DVR/VCR VIDEO
OUT
MONITOR OUT BD/DVD IN TV/SAT IN
R
COMPONENT VIDEO
L (Single)R
L R
IN
PRE OUT
SUBWOOFER
SUBWOOFER
PRE OUT
PRE OUT
YPBP
(TV/SAT)
(BD/DVD)
ASSIGNABLE
SPEAKERS A
SPEAKERS A
AUDIO
RL
RL
SPEAKERS B
SPEAKERS B
OUT
IN 2
IN 1
1-2
FRONT
FRONT
RL
RL
SURROUND CENTER
SURROUND CENTER
R L
R L
Class 2 Wiring
Class 2 Wiring
Speaker system B
LR

Connecting up 03
Bare wire connections
A-Speaker terminals:
1 Twist exposed wire strands together.
2 Loosen terminal and insert exposed wire.
3 Tighten terminal.
123
10 mm
(3/8 in.)
B-Speaker terminals:
1 Twist exposed wire strands together.
2 Push open the tabs and insert exposed
wire.
3 Release the tabs.
12
3
10 mm
(3/8 in.)
Caution
• These speaker terminals carry
HAZARDOUS LIVE voltage. To prevent
the risk of electric shock when connecting
or disconnecting the speaker cables,
disconnect the power cord before touching
any uninsulated parts.
• Make sure that all the bare speaker wire is
twisted together and inserted fully into the
speaker terminal. If any of the bare speaker
wire touches the back panel it may cause
the power to cut off as a safety measure.
Use the PRE OUT outputs to connect
the surround back speakers
Connect the PRE OUT outputs of the unit and
additional amplifier to add a surround back
speaker.
Surround back
channel amplifier
ANALOG
INPUT
LR
SURROUND
L (Single)R
BACK
ZONE2
OUT
L R
IN
DVR/VCR VIDEO
OUT
MONITOR OUT BD/DVD IN TV/SAT IN
R
ANTENNA
FM
UNBAL
75
Ω
AM
LOOP
COMPONENT VIDEO
• You can use the additional amplifier on the
surround back channel pre-outs for a
single speaker as well. In this case plug
the amplifier into the left (L (Single))
terminal only.
Surround Back speakers
SPEAKERS A
AUDIO
SUBWOOFER
PRE OUT
OUT
IN 2
(TV/SAT)
IN 1
(BD/DVD)
1-2
FRONT
RL
SPEAKERS B
PRE OUT
YPBP
ASSIGNABLE
Class 2 Wiring
RL
SBL SBR
SURR
R
English
Deutsch
Français
Italiano
Nederlands
Español
23
En

Connecting up03
Placing the speakers
To achieve the best possible surround sound,
install your speakers as shown below.
5.1 channel surround system:
Front left
Surround
left
Center
Subwoofer
120°
6.1 channel surround system:
Front left
Surround
left
Center
Subwoofer
120°
Surround Back
7.1 channel surround system:
Front left Front right
Surround
left
Surround back
Center
Subwoofer
90°
left
60°
Front right
120°
1
Front right
120°
1
90°
Surround back
right
Surround
right
Surround
right
Surround
right
Where you put your speakers in the room has a
big effect on the quality of the sound. The
following guidelines should help you to get the
best sound from your system.
• The subwoofer can be placed on the floor.
Ideally, the other speakers should be at
about ear-level when you’re listening to
them. Putting the speakers on the floor
(except the subwoofer), or mounting them
very high on a wall is not recommended.
• For the best stereo effect, place the front
speakers 2 m to 3 m (6 ft. to 9 ft.) apart, at
equal distance from the TV.
• When placing speakers near the TV, we
recommend using magnetically shielded
speakers to prevent possible interference,
such as discoloration of the picture when
the TV is switched on. If you do not have
magnetically shielded speakers and notice
discoloration of the TV picture, move the
speakers farther away from the TV.
• If you’re using a center speaker, place the
front speakers at a wider angle. If not, place
them at a narrower angle.
• Place the center speaker above or below
the TV so that the sound of the center
channel is localized at the TV screen. Also,
make sure the center speaker does not
cross the line formed by the leading edge
of the front left and right speakers.
• It is best to angle the speakers towards the
listening position. The angle depends on
the size of the room. Use less of an angle
for bigger rooms.
• Surround and surround back speakers
should be positioned 60 cm to 90 cm (2 ft.
to 3 ft.) higher than your ears and titled
slight downward. Make sure the speakers
don’t face each other. For DVD-Audio, the
speakers should be more directly behind
the listener than for home theater playback.
Note
1 • This layout is available only when the additional amplifier is connected to the unit and the surround back speakers are
connected to the amplifier. For details, see Use the PRE OUT outputs to connect the surround back speakers on page 23.
• When the Surround back channel processing is set to SB CH ON (see page 37) in this layout, sound is output from the
surround back speakers even with the use of 5.1ch input signal.
24
En

Connecting up 03
• If the surround speakers cannot be set
directly to the side of the listening position
with a 7.1-channel system, the surround
effect can be enhanced by turning off the
UP Mix function (see Setting the Up Mix
function on page 37).
• Try not to place the surround speakers
farther away from the listening position
than the front and center speakers. Doing
so can weaken the surround sound effect.
Caution
• Make sure that all speakers are securely
installed. This not only improves sound
quality, but also reduces the risk of
damage or injury resulting from speakers
being knocked over or falling in the event of
external shocks such as earthquakes.
Switching the speaker system
Three speaker system settings are possible
using the SPEAKERS button.
• Use the SPEAKERS button on the front
panel to select a speaker system setting.
CONTROL
MULTI-ZONE
ON/OFF
SPEAKERS
SPEAKERS
1
• SPAB – Sound is output from speaker
system A, the two speakers in speaker
system B, and the subwoofer.
Multichannel sources are downmixed only
when the STEREO or A.L.C mode is
selected for stereo output from speaker
2
systems A and B.
• SP – No sound is output from the
speakers but from the headphone jack.
English
Deutsch
Français
Italiano
Nederlands
Press repeatedly to choose a speaker system
option:
• SPA – Sound is output from the speakers
connected to the A speaker terminals and
SURROUND BACK PRE OUT
(multichannel playback is possible).
• SPB – Sound is output from the two
speakers connected to speaker system B
(only stereo playback is possible).
Note
1 The subwoofer output depends on the settings you made in Speaker Setting on page 42. However, if SPB is selected above,
no sound is heard from the subwoofer (the LFE channel is not downmixed).
2 You can use speakers with a normal impedance between 6 Ω and 16 Ω. However, be aware that only the front speakers are set
to a value between 12 Ω and 16 Ω when you select SPAB.
Español
25
En

Controls and displays04
Chapter 4:
Controls and displays
Front panel
1 23 64 5
STANDBY/ON
INPUT
SELECTOR
1
STANDBY/ON
2
INPUT SELECTOR
Selects an input source.
3 Tuner control buttons
BAND
Switches between AM, FM ST (stereo) and
FM MONO radio bands (page 48).
TUNE +/–
Used to find radio frequencies (page 48)
and SIRIUS Radio channels (page 63).
TUNER EDIT
Use with TUNE +/–, PRESET +/– and
ENTER to memorize and name stations for
recall (page 48, 49). Used to preset the
channel in SIRIUS Radio (page 63).
PRESET +/–
Use to select preset radio stations
(page 49) and to select SIRIUS Radio
channels (page 63).
4 Character display
See Display on page 28.
PHASE
CONTROL
–
STEREO/
+
TUNE
ADVANCED
SURROUND
STANDARD
SURROUND
A.L.C.
PRESET
TUNER EDIT ENTER
SPEAKERS
TUNE
BAND
AUTO SURROUND/
STREAM DIRECT
PHONES
7 8 10 13129 11
5
MCACC
dial
Lights when Acoustic Calibration EQ (page 36) is
on (Acoustic Calibration EQ is automatically set
to on after the Auto MCACC Setup (page 9)).
6
MASTER VOLUME
PHONES
7
Use to connect headphones (page 40).
8 Listening mode buttons
AUTO SURROUND/STREAM DIRECT
Switches between Auto surround mode
(Auto playback on page 33) and Stream
Direct playback. Stream Direct playback
bypasses the tone controls for the most
accurate reproduction of a source
(page 36).
STEREO/A.L.C.
Switches between stereo playback, Auto
level control stereo mode (page 35) and
Front Stage Surround Advance modes
(page 35).
–
CONTROL
USB
+
PRESET
MULTI-ZONE
ON/OFF
VIDEO INPUT
iPod
indicator
jack
RLAUDIOVIDEO
AUDIO/VIDEO MULTI- CHANNEL RECEIVER VSX
MCACC
SETUP MIC
dial
–
MASTER
VOLUME
819H
26
En
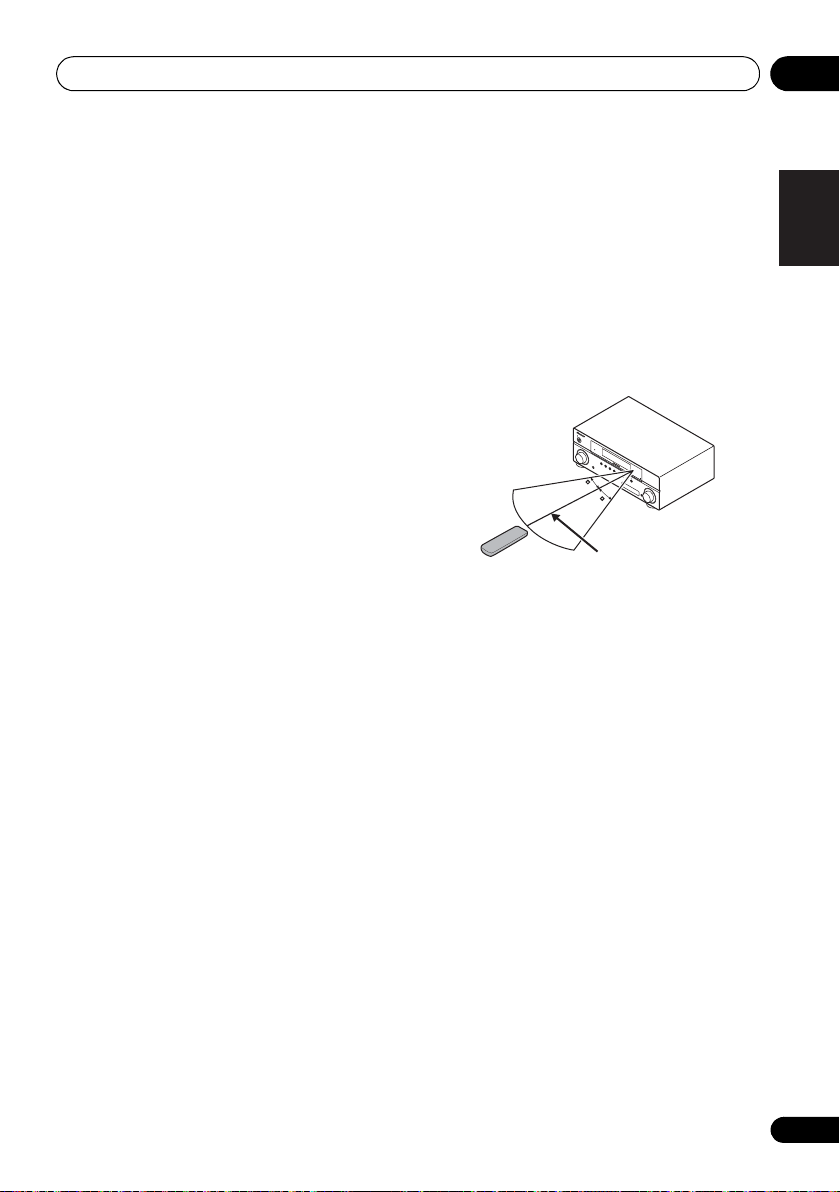
Controls and displays 04
ADVANCED SURROUND
Switches between the various surround
modes (page 34).
STANDARD SURROUND
Press for Standard decoding and to switch
between the various 2 Pro Logic II, 2 Pro
Logic IIx and NEO:6 options (page 33).
9SPEAKERS
Use to change the speaker system (page 25).
10 MULTI ZONE controls
If you’ve made MULTI-ZONE connections (see
MULTI-ZONE listening on page 46) use these
controls to control the sub zone from the main
zone (see Using the MULTI-ZONE controls on
page 47).
11
iPod
/USB terminal
Use to connect your Apple iPod or USB mass
storage device as an audio source (page 58
and page 60).
12
AUDIO/VIDEO
input
See Connecting to the front panel video terminal
on page 20.
13
MCACC SETUP MIC
jack
Use to connect a microphone when
performing Auto MCACC setup.
Operating range of remote control
The remote control may not work properly if:
• There are obstacles between the remote
control and the receiver’s remote sensor.
• Direct sunlight or fluorescent light is
shining onto the remote sensor.
• The receiver is located near a device that is
emitting infrared rays.
• The receiver is operated simultaneously
with another infrared remote control unit.
STANDBY/ON
INPUT
SELECTOR
PHASE
CONTROL
BAND
TUNE
–
AUTO SURROUND/
STREAM DIRECT
TUNE
+
STEREO/
A.L.C.
PHONES
ADVANCED
TUNER
SURROUND
EDIT ENTER
STANDARD
AUDIO
SURROUND
/
VIDEO MULTI-
PRESET
–
CHANNEL
SPEAKERS
RECEIVER
PRESET
+
VSX
CONTROL
MULTI-ZONE
–
519V
ON/OFF
30
30
MASTER
VOLUME
PORTABLE
7 m (23 ft.)
English
Deutsch
Français
Italiano
Nederlands
Español
27
En

Controls and displays04
Display
1 2 3 4 5 6 7 8
9
10
1PHASE
Lights when the Phase Control is switched on
(page 11).
2AUTO
Lights when the Auto Surround feature is
switched on (see Auto playback on page 33).
3ST
Lights when a stereo FM broadcast is being
received in auto stereo mode.
4TUNE
Lights when a normal broadcast channel or
SIRIUS channel is being received.
5ZONE
Lights when the MULTI-ZONE feature is active
(page 46).
6 Speaker indicators
Lights to indicate the current speaker system,
A and/or B (page 25).
7 Sleep timer indicator
Lights when the receiver is in sleep mode
(page 32).
8 Tuner/SIRIUS preset indicators
PRESET
Shows when a preset radio station is
registered or called.
MEM
Blinks when a radio station is registered.
11 12 13 14 14 1615
9 PRESET Information or Input signal
indicator
Shows the preset number of the tuner or the
input signal type, etc.
10 Character display
Displays various system infomation.
11 DTS indicators
DTS
Lights when a source with DTS encoded
audio signals is detected.
HD
Lights when a source with DTS-EXPRESS
or DTS-HD encoded audio signals is
detected.
ES
Lights when a source with DTS-ES
encoded audio signals is detected.
96/24
Lights when a source with DTS 96/24
encoded audio signals is detected.
NEO:6
When one of the NEO:6 modes of the
receiver is on, this lights to indicate
NEO:6 processing (page 33).
12 Dolby Digital indicators
2
Lights when a Dolby Digital encoded signal
is detected.
28
En

Controls and displays 04
HD+
Lights when a source with Dolby Digital
Plus encoded audio signals is detected.
HD
Lights when a source with Dolby TrueHD
encoded audio signals is detected.
EX
Lights when a source with Dolby Digital EX
encoded audio signals is detected.
2PLllx
Lights to indicate 2 Pro Logic II / 2 Pro
Logic IIx decoding (see Listening in
surround sound on page 33 for more on
this).
13 ADV.S.
Lights when one of the Advanced Surround
modes has been selected (see Using the
Advanced surround effects on page 34 for more
on this).
14 SIGNAL SELECT indicators
DIGITAL
Lights when a digital audio signal is
selected.
Blinks when a digital audio signal is not
selected.
HDMI
Lights when an HDMI signal is selected.
Blinks when an HDMI signal is not
selected.
15 UP MIX indicator
Lights when the UP MIX Setting is set to ON
(see page 37). Also, lights when DIMMER is set
to off.
16 DIR.
Lights when the DIRECT or PURE DIRECT
mode is switched on (page 36).
English
Deutsch
Français
Italiano
Nederlands
Español
29
En

Controls and displays04
Remote control
1
RECEIVER
RECEIVER
BD TV
CD CD-R
VIDEO MULTI IN
iPod USB
AUTO/
DIRECT
AUDIO
PARAMETER
TOP
MENU
T
E
S
E
R
P
HOME
MENU
SETUP
iPod
CTRL
CATEGORY
HDD
1
S.RETRIEVER
4
SB CH
7
DIMMER
+
D.ACCESS
BASS
10
INPUT SELECT
ZONE 2
ON/OFF
SIRIUS
STEREO/
A.L.C.
U
T
ENTER
T
U
DVD
EQ
PHASE
SPEAKERS
RECEIVER
212
3
4
5
6
7
8
9
10
11
N
E
E
N
2
5
8
0
TV CONTROL
INPUT
DVR
TUNER
AUX
SIGNAL SEL
BD MENU
STANDARD
TUNER EDIT
TOOLS
P
R
E
S
E
T
RETURN
ANT
VCR
3
CH SELECT
6
9
ENTER
SOURCE
ADV SURR
MENU
BAND
TRE
DISPLAY
MIDNIGHT
CH
VOL
MASTER
VOLUME
MUTE
SLEEP
CH
CH
SHIFT
13
14
15
16
17
1 INPUT SELECT
Use to select the input source.
2
RECEIVER
Switches the receiver between standby and on.
3 RECEIVER
Switches the remote to control the receiver
(used to select the white commands above the
number buttons (S.RETRIEVER, etc)). Also use
this button to set up surround sound (page 41)
or Audio parameters (page 38).
4 ZONE 2 ON/OFF
Switches zone 2 of the multi-zone function
between on and off.
5
MULTI CONTROL
buttons
Press to select control of other components (see
Controlling the rest of your system on page 51
6
SIGNAL SEL
Use to select an input signal (page 40).
Press BD first to access:
BD MENU
Displays the disc menu of Blu-ray Discs.
7 Listening mode buttons
AUTO/DIRECT
Switches between Auto surround mode
(Auto playback on page 33) and Stream
Direct playback. Stream Direct playback
bypasses the tone controls for the most
accurate reproduction of a source
(page 36).
STEREO/A.L.C.
Switches between stereo playback, Auto
level control stereo mode (page 35) and
Front Stage Surround Advance modes
(page 35).
STANDARD
Press for Standard decoding and to switch
between 2 Pro Logic II options (page 33).
ADV SURR
Switches between the various surround
modes (page 34).
).
30
En
Loading…
Найди любой мануал:
Например: Sony VGN-FW460J/T
Вы можете бесплатно скачать Инструкция по эксплуатации для Pioneer VSX-819H.
Также вы сможете прочесть онлайн этот документ без скачивания.
Скачать Инструкция по эксплуатации для Pioneer VSX-819H
Тип файла
PDF
Размер
9.25 Mb
Кол-во страниц
213
Просмотров
4216
Читать онлайн Инструкция по эксплуатации для Pioneer VSX-819H (Страница 1)

Другие Стереосистемы Pioneer VSX-819H
Топ Pioneer Стереосистемы
Ранее вы смотрели
Эта страница полезна для вас? Поделитесь ссылкой: