
manualsocean.ru
manualsocean.ru — это единая платформа для онлайн-руководств. Вы можете легко найти и просмотреть пользовательские руководства онлайн. В нашей базе данных более 600 000 PDF-руководств. Мы каждый день собираем и добавляем новые пользовательские руководства, чтобы вы могли найти подходящее руководство для своего поиска. Вы можете бесплатно просматривать все онлайн-руководства.
WMF 1200 S
µ
WMF 1200 S
Produktmanagement Kaffeemaschinen JB
27.02.2012

WMF 1200 S
µ
Описание
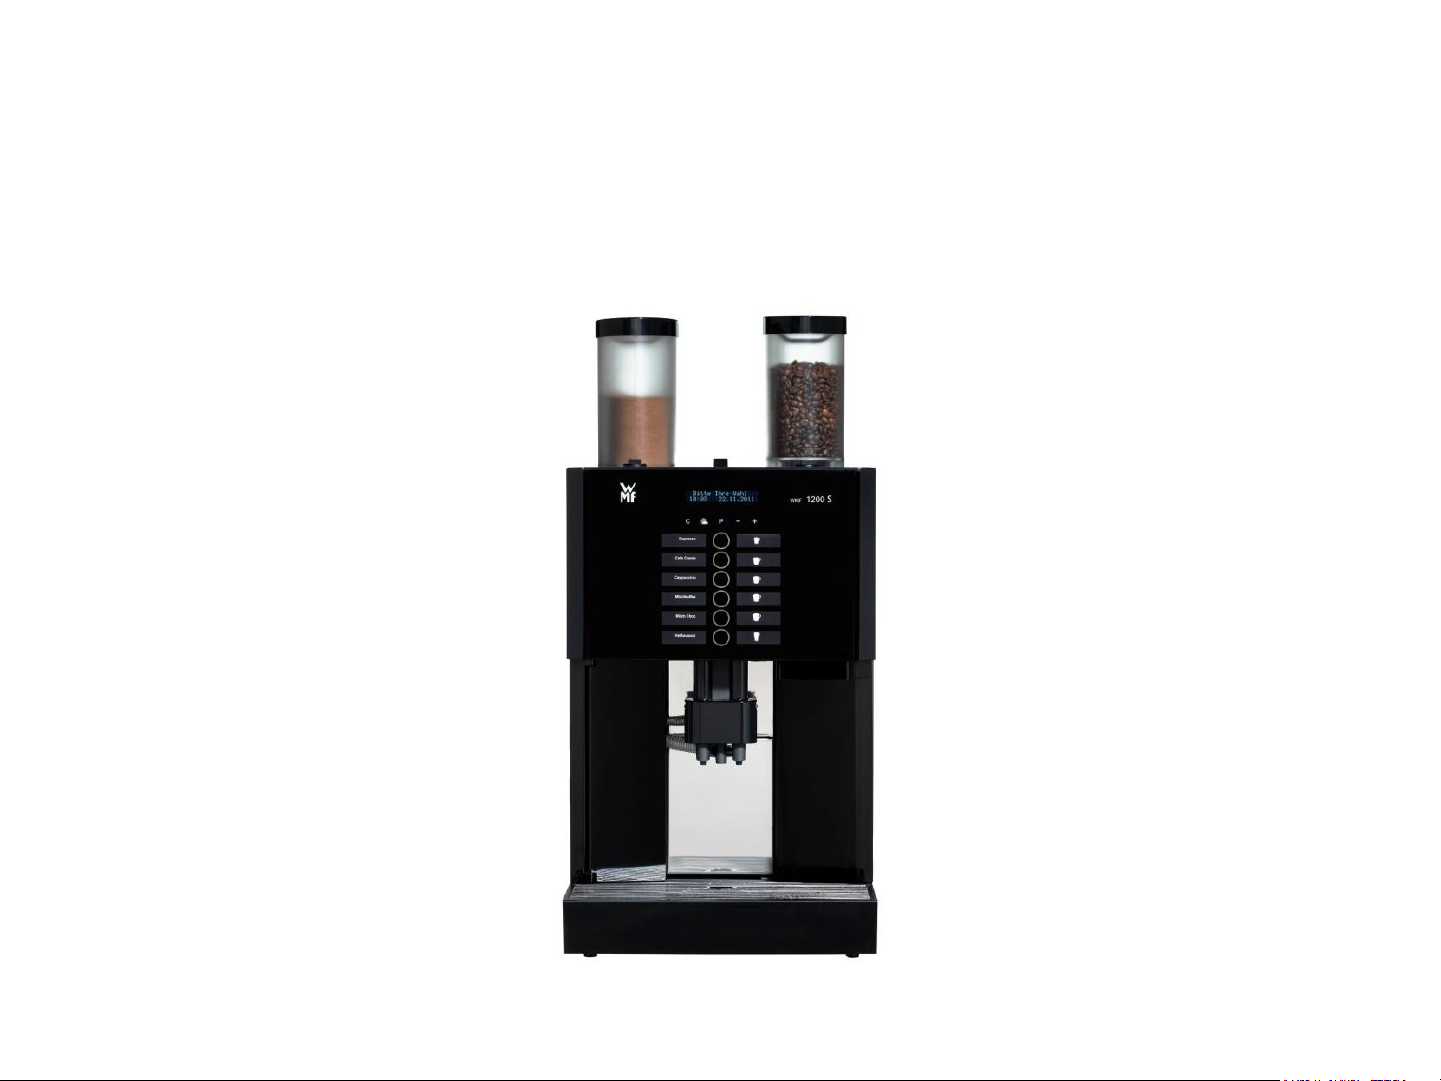
• Автоматическая кофемашина WMF 1200 S технически основана на
кофемашине Prestolino и поэтому содержит ее существенные
компоненты. Основное отличие – кроме цветового дизайна – это новая
передняя панель (состоящая из платы и модуля подачи напряжения),
новый оптимизированный вспениватель и привлекательная цена.
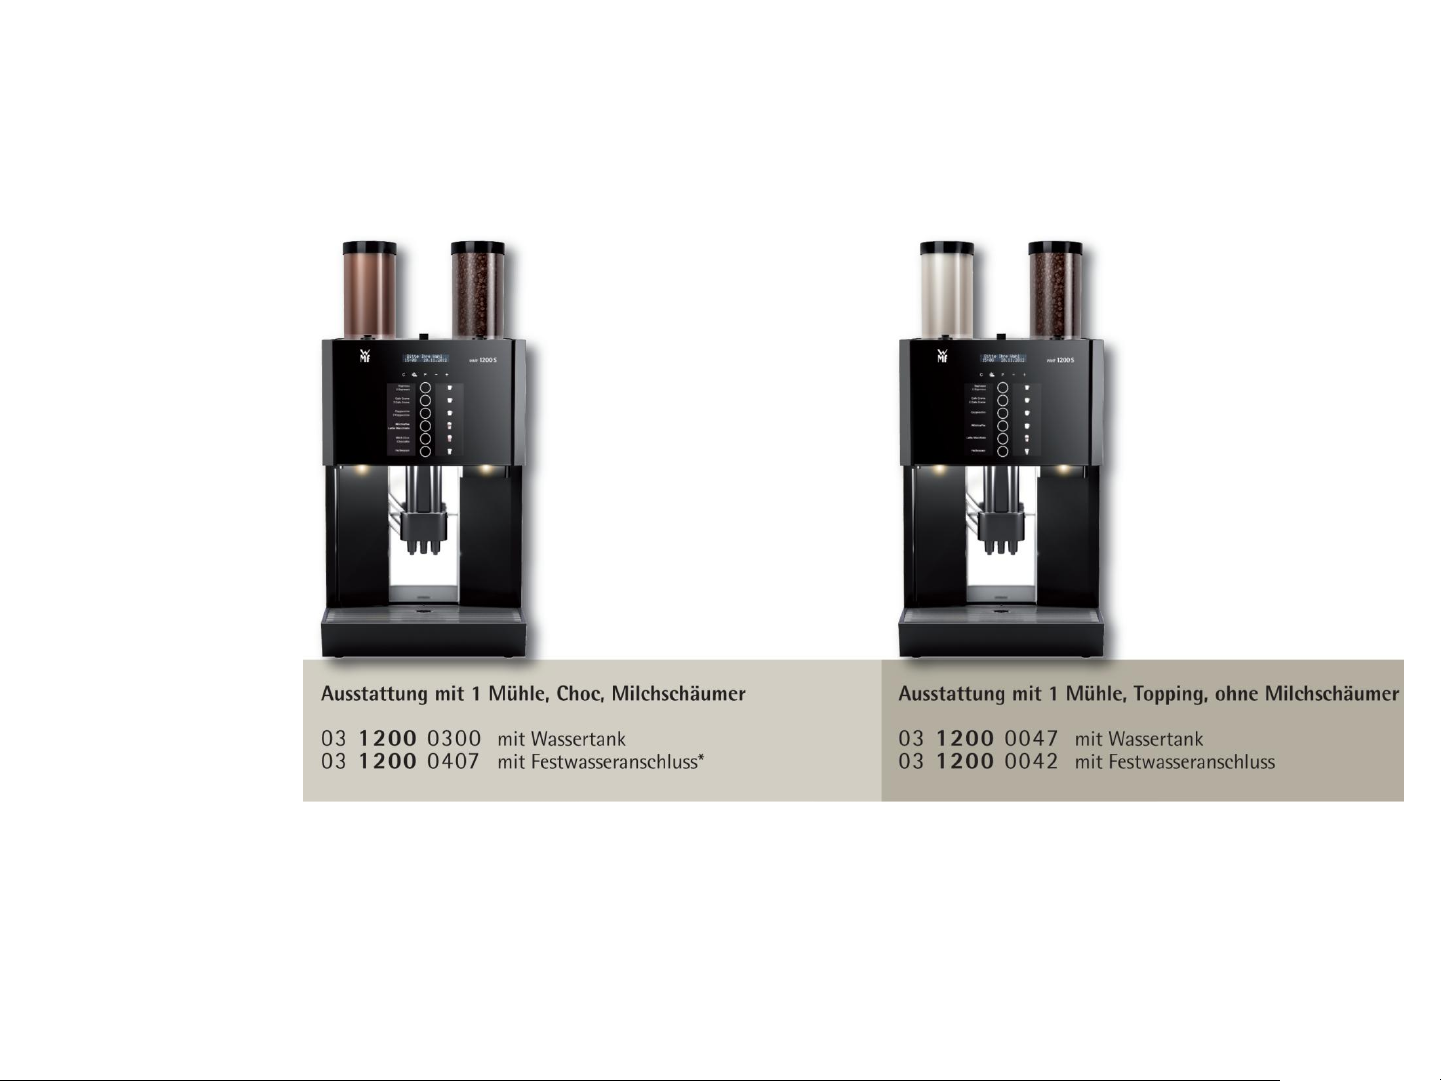
• Для того, чтобы уменьшить множество вариантов и гарантировать
быструю поставку, было определено 8 основных моделей, которые
позволяют использовать все конфигурации бункеров, а также
стационарное или наливное подключение воды.
• Для работы на кофемашине без использования свежего молока,
разработано два варианта кофемашин с использованием сухого молока
(топинга).
• Подача кипятка происходит через центральный комбивыход.
• Нет подачи пара
• Дополнительные опции, как замки на бункер (и крышка для ручной
засыпки), выброс жмыха через стойку, а также ножки можно
доукомплектовать.
Produktmanagement Kaffeemaschinen JB
27.02.2012
WMF 1200 S
µ
Другие улучшения по сравнению с Рrestolino!
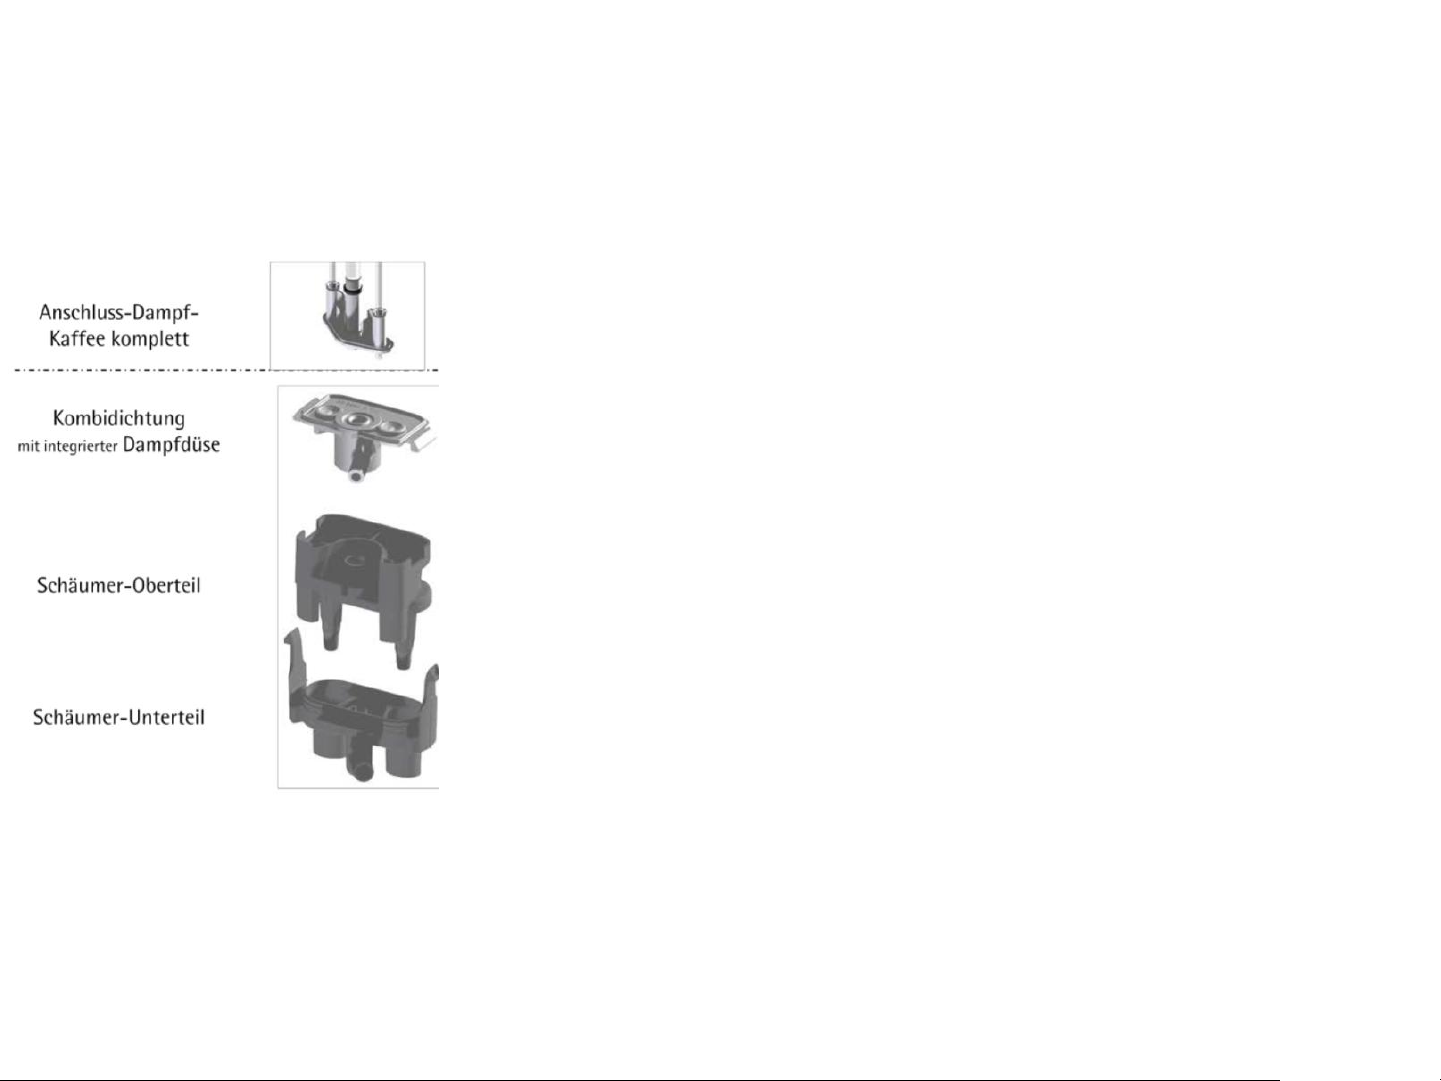
• Комбивыход, состоящий из 3-х частей, с интегрированной
подачей кипятка и другими преимуществами:
• Оптимизация путем разделения подачи молока и пены
(правое отверстие – молоко, левое — пена)
• Паровая дюза снимается и поэтому ее легко можно
почистить при проведение каждодневной чистки
• Но, по желанию, клиент может дополнительно заказать
целостный комбивыход.
• Тихая работа вентилятора
• Оптимизированная установка мельниц и
шумопроизводящих деталей для уменьшения уровня шума
при помоле.
Produktmanagement Kaffeemaschinen JB
27.02.2012

WMF 1200 S
µ
Стандартные модели:
* Модели со стационарным подключением и вспенивателем молока серийно
поставляются с Plug&Clean.
Produktmanagement Kaffeemaschinen JB
27.02.2012
WMF 1200 S
µ
Стандартные модели:
* Модели со стационарным подключением и вспенивателем молока серийно
поставляются с Plug&Clean.
** В моделях с использованием сухого молока Plug&Clean не используется
Produktmanagement Kaffeemaschinen JB
27.02.2012
**
WMF 1200 S
µ
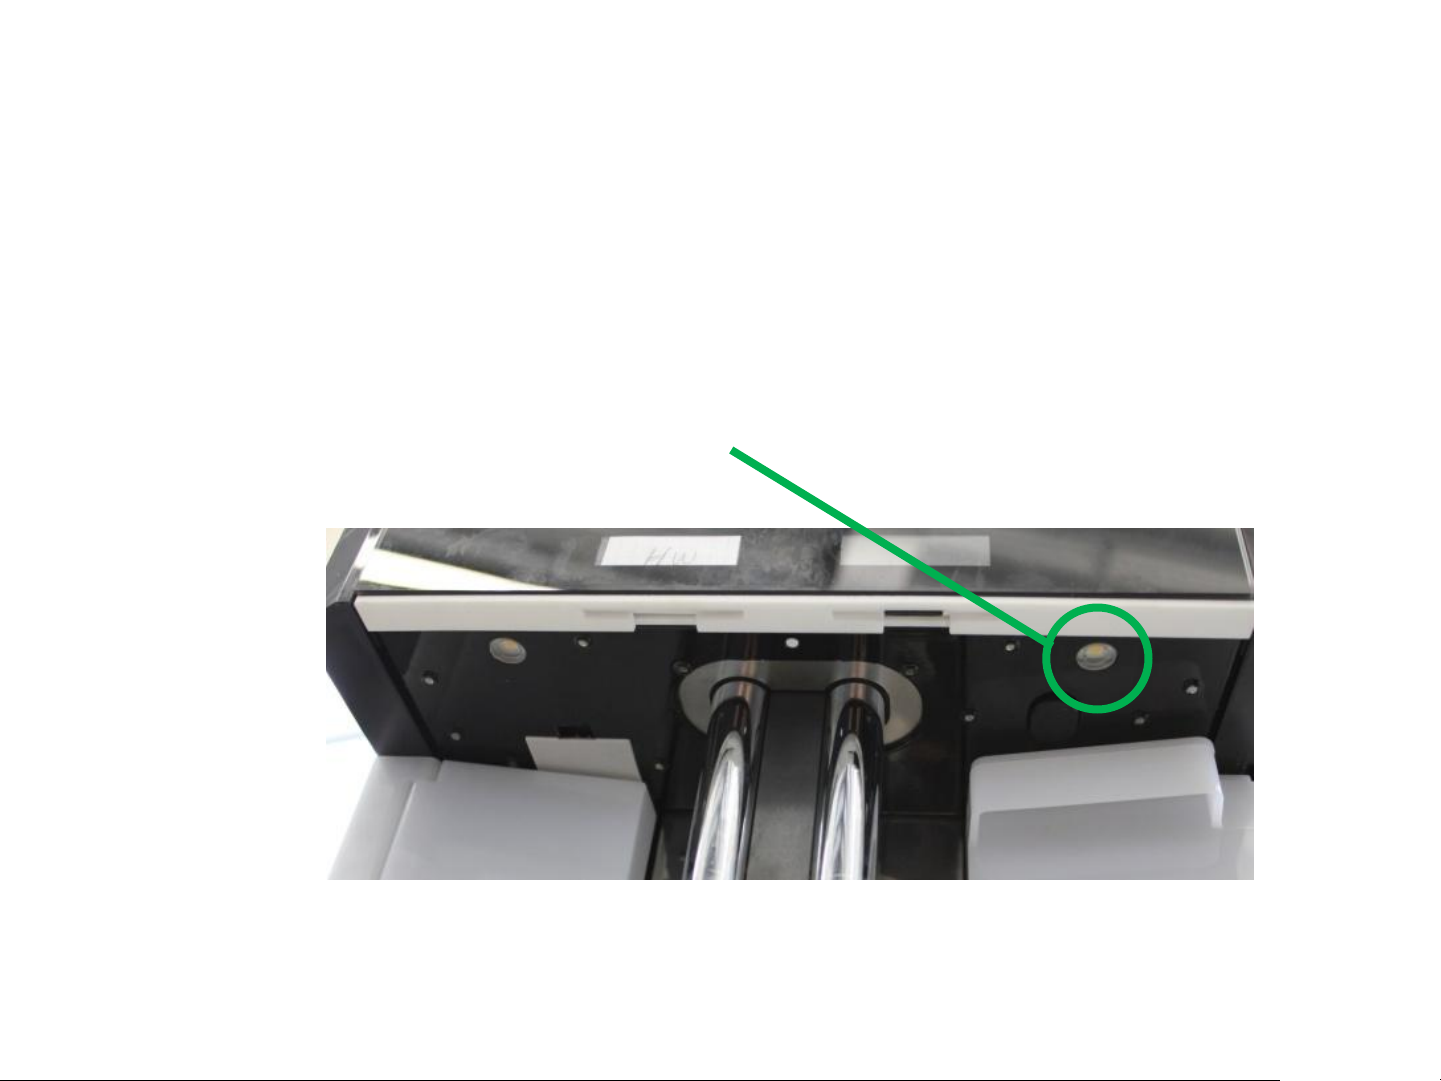
Концепция подсветки: включение/выключение
• В WMF 1200 S внизу под передней панелью находятся 2 светодиода
(подсветка LED) для подсветки кнопок напитка (они
включаются/выключаются пользователем при помощи меню)
• Кнопка Вкл./Выкл. находится также в нижней части передней
панели.
Produktmanagement Kaffeemaschinen JB
27.02.2012
WMF 1200 S
µ
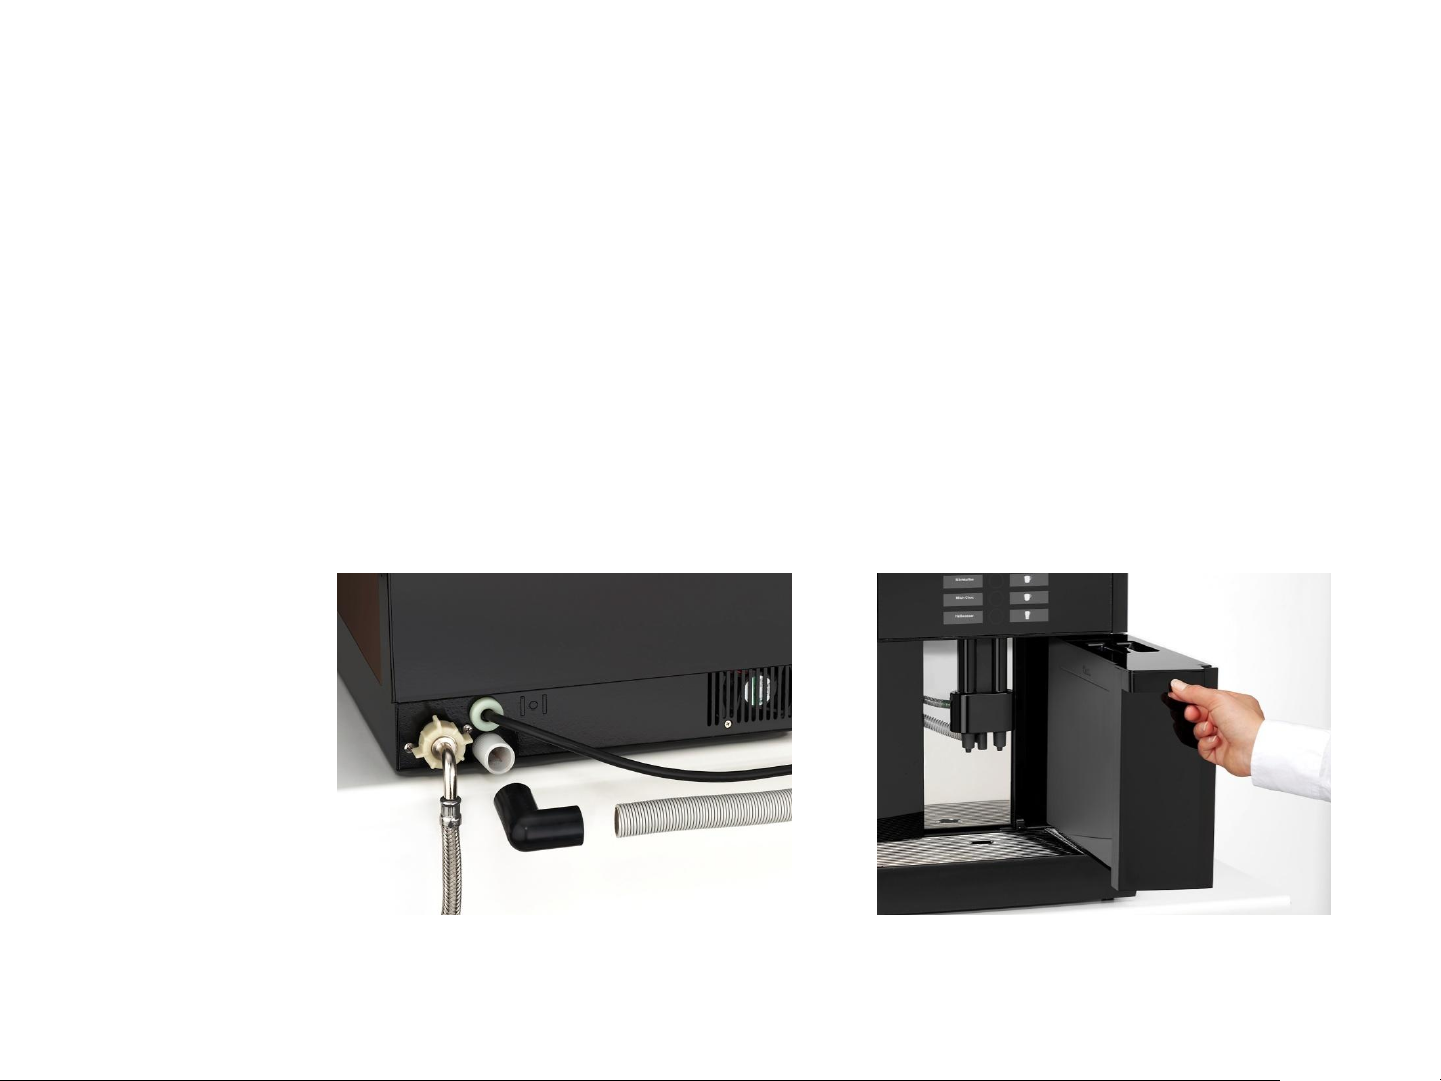
Подключение воды:
• По желанию и в зависимости от условий, WMF 1200S может быть как со
стационарным подключением к водопроводу в комплекте со сливом, так
и наливная.
• Объем контейнера для воды при наливной версии кофемашины = 4 л.
• Опция Aquaflex в таком случае невозможна!!!
Produktmanagement Kaffeemaschinen JB
27.02.2012
Table of Contents
- CLEANING TABLET CHECK SHEET
- REMOVAL OF GROUTS
- CLEANING INTERVALS OVERVIEW
- MILK SYSTEM EXCHANGE & CLEAN
- REFILL COFFEE HOPPERS
- HOPPER CLEANING
- References
- Read User Manual Online (PDF format)
- Download This Manual (PDF format)
WMF 1200S
Operating & cleaning instructions
CLEANING TABLET CHECK SHEET
REMOVAL OF GROUTS
IMPORTANT PROCESS
- Push combi spout all the way up
- Remove grounds container
- Empty and replace grounds container
- Confirm process on the display
CLEANING INTERVALS OVERVIEW
DAILY WEEKLY MONTHLY
| System cleaning
—|—
Clean Screen (CleanLock)
Grouts container cleaning
Clean the brewing unit
Drip tray cleaning
Milk System Manual Clean
Clean the mixer
Bean hopper cleaning
Clean powder hopper
For further information please refer to the care menu instructions or the user
manual
MACHINE CLEAN – EASY MILK (PLUMBED)
PERFORM THIS AT LEAST ONCE EVERY 24 HOURS
THIS CLEANING PROCEDURE TAKES APPROX. 15 MINUTES
CHECK CORRECT TABLET IS USED FOR EACH STAGE. USE ONLY URBEX TABLETS.
| STEP 1. | STEP 2. | STEP 3. |
|---|
Press
Touch until the cleaning program is displayed and select clean. program
browse: -/+ cleaning
OK: P browse: -/+ switching off
OK: P browse: -/+
Press P| empty drip tray Confirm with P
OK: P cancel: C
That the drip tray has been emptied empty grounds cont.| Disconnect milk hose
from container Removes the milk container and clean.
STEP 4.| STEP 5.| STEP 6.
insert cleaning tablet for milk system in cleaning container start: P
Place cleaning tablet for milk system in the empty blue cleaning container.
Do not add water
Press P
| Place the cleaning container into the cooler and insert the milk hose.
Do not close the cooler door| Machines with a water tank Place a 2L container
under the combi spout
STEP 7.| STEP 8.| STEP 9.
cleaning container inserted start: P
Press P
| Add cleaning tablet and close the manual insert
insert the tablet into the manual insert| start: P
Press P
Machine cleaning will start.
If choc beverages have been dispensed, cleaning will start with mixer rinsing.
STEP 10.| STEP 11.| STEP 12.
—|—|—
Clean will take approx 11 Minutes| When cleaning with the “switching off”
option, the message the next time the machine is switched on.
remove and rinse cleaning remove and rinse cleaning container OK: P
Remove cleaning container and rinse thoroughly, then Press P| milk container
inserted OK: P
Place a container under the combi spout. Place milk container into the cooler
Press P
STEP 13.| |
rinse running
The hoses are filled with milk. This results in some liquid running out of the
combi spout. This is followed by a foamer rinse
The machine is now ready for use.| |
MILK SYSTEM EXCHANGE & CLEAN
PERFORM THIS AT LEAST ONCE EVERY 24 HOURS”
THIS CLEANING PROCEDURE TAKES APPROX. 15 MINUTES
USE ONLY WMF-CERTIFIED MILK CLEANING TABLETS.
| STEP 1. | STEP 2. | STEP 3. |
|---|---|---|
| Pull forward the lever behind the combi spout | Remove combi spout & remove | |
| milk hose from the container | Dismantle combi spout into separate pieces |
ready for soaking & immerse the length of the remaining milk hose in the
cleaning solution
STEP 4.| STEP 5.| STEP 6.
Re-mount the spare clean foamer, choc hose & milk line| Fill the container
with warm water and add one RINZA tablet. Place dirty foamer & milk line, soak
for 5 hours| After soaking, rinse all pieces under the tap and dry
STEP 7.| |
Store in the tub with a lid to avoid contamination and ready for the next
weekly exchange| |
REFILL COFFEE HOPPERS
PERFORM THIS WHEN PROMPTED BY A MACHINE
THIS PROCEDURE TAKES APPROX. 2-3 MINUTES
DURING REFILL BE CAREFUL THAT NO FOREIGN DEBRIS FALLS INTO THE HOPPER
| NOTE. | STEP 1. |
|---|
Fill hoppers with fresh coffee to just below the lid line. The hoppers will
empty at the same rate so ensure all hoppers are filled to the same level.| If
the machine runs out of coffee, it will prompt the operator to refill the
hopper.
STEP 2.| STEP 3.
Remove the lid of the poured coffee into the empty hopper.| Once the hopper
is topped up, tap on the green tick to continue.
HOPPER CLEANING
PERFORM THIS AT THE END OF THE MONTH.
THIS CLEANING PROCEDURE TAKES APPROX. 15 MINUTES
ENSURE HOPPERS ARE DRY BEFORE RE-FITTING
| STEP 1. | STEP 2. |
|---|
Press the ON/OFF switch for longer than 2 seconds until the coffee machine
switches off.
Disconnect the mains plug.| Unlock hoppers with multitool by turning in a
clockwise direction
STEP 3.| STEP 4.
Lift hopper out and empty.
Unscrew the union nut at the front & rear and remove the dosing auger.
Never clean hoppers in the dishwasher.| Thoroughly wipe out the hopper using a
damp cloth.
Thoroughly clean individual dosing auger components.
STEP 5.| Allow hopper and individual components to dry completely before
reassembling
IMPORTANT: HOPPER REASSEMBLY
Please note, that once you have dried the hopper after washing, it is
important that the hopper is reassembled correctly for proper functioning.
Please use the exploded diagram as a guide for reassembly and make sure that
the half moon opening is at the top before re-inserting the hopper.
Welcome to My Coffee Shop!
Our hours of operation are Monday – Friday 9 am to 5 pm. Visit us at your
convenience at www.mycoffeeshop.com.au.
Orders and service requests can be placed by:
Phone: 1300 365 487
E-mail:
clientservices@mycoffeeshop.com.au
Online: www.mycoffeeshop.com.au
Remittances:
accountsreceiveable@mycoffeeshop.com.au
Service inquiries:
servicecentre@mycoffeeshop.com.au
Next business day delivery via courier to Adelaide Canberra Melbourne Sydney
for product orders placed by 1.30 pm
Please note you will be advised when ordering if delivery charges apply to
your order.
Once again, welcome to My Coffee Shop, and remember we are here to help. If
you have any questions please don’t hesitate to contact us.
We look forward to exceeding your expectations and making your day easier and
more enjoyable.
Kind regards,
My Coffee Shop
Client Services
My Coffee Shop Pty Ltd
My Coffee Shop Pty Ltd
ACN 102 850 037
390 Johnston St
Abbotsford VIC 3067
Ph: 03 9946 4160
97 / 1-5 Harwood St
Pyrmont NSW 2009 Ph: 02 9034 6580
clientservices@mycoffeeshop.com.au
1300 365 487
www.mycoffeeshop.com.au
References
- Coffee Machines and Coffee Beans for Office and Home | My Coffee Shop
- Coffee Machines and Coffee Beans for Office and Home | My Coffee Shop
Read User Manual Online (PDF format)
Read User Manual Online (PDF format) >>
Download This Manual (PDF format)
Download this manual >>
Report abuse
Libble takes abuse of its services very seriously. We’re committed to dealing with such abuse according to the laws in your country of residence. When you submit a report, we’ll investigate it and take the appropriate action. We’ll get back to you only if we require additional details or have more information to share.
Product:
Get your user manual by e-mail
Enter your email address to receive the manual of Wmf 1200 S in the language / languages: English as an attachment in your email.
The manual is 1,35 mb in size.
You will receive the manual in your email within minutes. If you have not received an email, then probably have entered the wrong email address or your mailbox is too full. In addition, it may be that your ISP may have a maximum size for emails to receive.
The manual is sent by email. Check your email
If you have not received an email with the manual within fifteen minutes, it may be that you have a entered a wrong email address or that your ISP has set a maximum size to receive email that is smaller than the size of the manual.
FAQ: Types of Manuals and Their Contents
WMF 1200 S Manuals come in various types, each serving a specific purpose to help users effectively operate and maintain their devices. Here are the common types of WMF 1200 S User Guides and the information they typically include:
- User Manuals: Provide comprehensive instructions on how to use the device, including setup, features, and operation. They often include troubleshooting tips, safety information, and maintenance guidelines.
- Service Instructions: Designed for technicians and repair professionals, these manuals offer detailed information on diagnosing and repairing issues with the device. They include schematics, parts lists, and step-by-step repair procedures.
- Installation Guides: Focus on the installation process of the device, providing detailed instructions and diagrams for proper setup. They are essential for ensuring the device is installed correctly and safely.
- Maintenance Manuals: Provide guidance on routine maintenance tasks to keep the device in optimal condition. They cover cleaning procedures, part replacements, and regular servicing tips.
- Quick Start Guides: Offer a concise overview of the essential steps needed to get the device up and running quickly. They are ideal for users who need immediate assistance with basic setup and operation.
Each type of WMF 1200 S instruction is designed to address specific needs, ensuring users have the necessary information to use, maintain, and repair their devices effectively.
Related Instructions for WMF 1200 S :
1
LONO
Operating manual WMF Grill Operating manual (File: wmf-lono-operating-manual-33, Thu 03.2025)
33
984
178
3
KUCHENminis 1-Ei-Kocher My Egg
Operating manual KUCHENminis 1-Ei-Kocher My Egg (Egg Cooker ePDF Manual, #34T5XO)
64
242
54
4
Kult S Stabmixer
Operating manual WMF Blender Operating manual (File: wmf-kult-s-stabmixer-operating-manual-25, 15.03.2025)
25
461
70
7
LINEO Edelstab
Operating manual WMF Blender Operating manual (File: wmf-lineo-edelstab-operating-manual-10, 28/03/2025)
10
1383
346
8
2000 S
Service manual #RY2L65: 2000 S Coffee Maker Service manual
39
1355
204
10
SKYLINE Vario
29
180
31
Coffee Maker Devices by Other Brands:
|
Fetco CBS-2052E Operation & User’s Manual Coffee Maker #3U9G1Z FETCO®, LUXUS®, EXTRACTOR® and Driven To Pioneer Innovation™ are trademarks or trade names of Food Equipment Technologies Company. 26 Jan 2025 | 24 |
|
|
Atrium ES 175 Instruction Manual ES 175 Instruction manual — 6ZBB56 ES 175 22 Oct 2024 | 63 |
|
|
Smeg DCF01 Original Instructions Manual Smeg DCF01 User Guide (Original instructions manual), @8ME318 Dear Customer, 16 Apr 2025 | 20 |
|
|
ETNA A2793RVS Manual Coffee Maker #9KT296 Handleiding 26 Feb 2025 | 46 |
Categories:
Toaster
Timer
Hob
Food mixers
Storage Bin
Food Warmer