
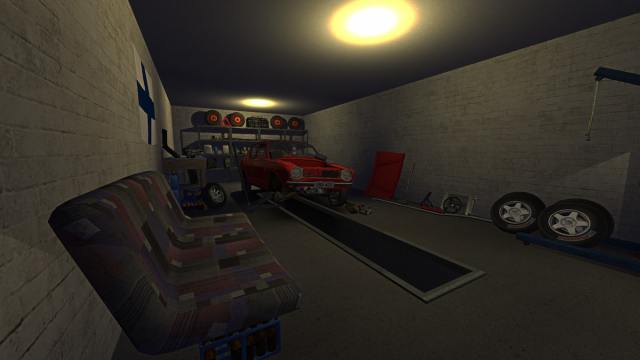
On this page of our guide to My Summer Car, you will learn the most important information about the assembly of the Satsuma car which stands in front of the garage. We will show you how to use the tools and how to install the individual parts. You will also find a list of additional parts and tips for finding them.
- Preparations
- Required parts
- How to use the tools
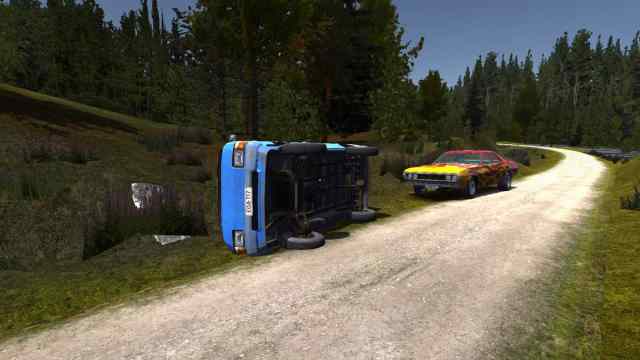
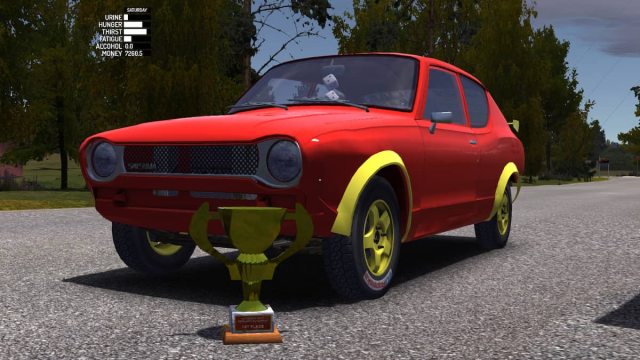
The ugly duckling can change over time (and with money) into a nice hot-hatch!
Preparations
Assembling the Satsuma car is one of the main goals and one of the busiest activities in the game. Everything will take a good few days in the game world — you should start this process with the appropriate preparations and forming the right habits.
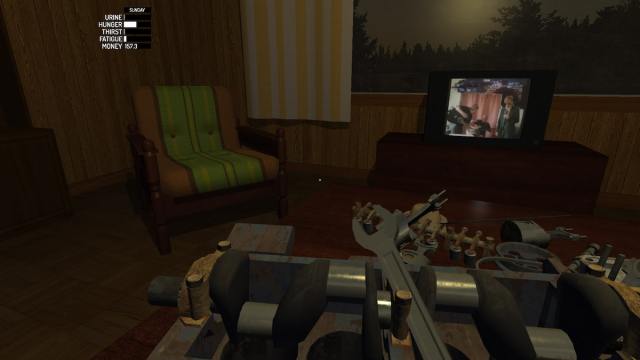
First, remember to monitor your needs all the time: fatigue, hunger, thirst, urine, stress. Buy a lot of food in the store, drink tap water, use the sauna to reduce stress, and go to sleep when the night comes — you won’t use electricity. Also, you can see better during the daytime. Screwing and watching the car take shape is very exciting which means that it is easy to forget about everything else.
Collect all the necessary parts — the construction of the car will go smoother. Place the SPANNER SET in the right spot so that you always have it at hand. When installing the suspension and wheels, you can also raise the front or rear of the car using the CAR JACK. You will find it in the corner of the garage. Grab the bottom part to move the car jack. Press the left mouse button to raise it, a single click with the right button lowers everything down.
If you are sure what the individual parts are for, you can move them piece by piece in advance next to the car (e.g. suspension elements) and place them on the left and right to have faster access. If you are not sure, move them separately from the garage where most of them are grouped respectively.
Some parts are only for a specific place in the car: front or rear and left or right. They are described as follows:
- FR — Front Right
- FL — Front Left
- RR — Rear Right
- RL — Rear Left
Some parts are for the right or the left side.
Required parts
Before assembling the car, collect all the missing parts. Most of them are in your garage, but the rest must be bought at the store. Even though you have some of them in the garage, you should still purchase them and install new ones, because the ones you own are severely worn out. They will either not work properly after attaching or fall down instantly. You have to do this with the battery and the oil filter.
You also won’t find any wheels in the house. A free set is hidden on the map and you can easily get it (see section: Where to find wheels?), but these wheels should be considered only as a temporary solution. The free wheels are heavily worn out and won’t pass a vehicle inspection. Use them in the assembly process for moving the car with ease or in test drives. The good wheels have to be ordered in the workshop for the appropriate price.
The rest of the necessary parts are in the store in the city (chapter: Shopping). Remember to have at least 2,500 mk to buy spare parts, fuel and food.
In general, you have to buy almost everything from the shelves on the left wall. Remember to bring the GASOLINE canister with you to the shop to fill it with the fuel necessary for the engine to start once the car is complete.
The shopping list will look like this:
|
Part’s name |
Number of units required |
|
Alternator belt |
1 |
|
Battery |
1 |
|
Spark plug box |
1 |
|
Brake/clutch fluid |
4 |
|
Coolant |
2 |
|
Motor oil |
2 |
|
Gasoline |
18 liters |
You can also buy a new upholstery (blue stand with the Suomi text), but its pattern is exactly the same as the entire rack. Decide if it is worth the price.
How to use the tools
When using tools, the most cumbersome thing is the constant switching between wrenches. Each part requires a different size of bolts and you always have to choose the right one. Fortunately, you do not need to look for small nuts anywhere and make sure not to lose them — just use the wrench on the bolt to start the installation. Do not be afraid to use the Q key and go through the body and the texture — this is not a bug, but a very useful feature!
In the Spanner set, you will find size 5-15 wrenches, a screwdriver, a sparkplug wrench and a ruler.
During the assembly process, you will constantly switch between:
- Hand mode — to move parts and their assembly (key 1)
- Tools mode — to select the wrenches and tightening or loosening bolts (key 2)
The assembly blueprint of the parts is as follows:
- Click on the desired part with the left mouse button to move it freely. Put it in the right place in the car. When the part is more or less in the right place, a white OK symbol will appear. Then, left-click to install the part. NOTE — this is not all. If you don’t want the part to fall off, it must be screwed. If you have to do that, use the right mouse button on the installed part to remove it.
- Go to the tools mode by pressing key 2. Select the correct wrench size. Place the crosshair in the center of the screen on the bolts — if the wrench is correct, the bolt will glow green. Moving the mouse wheel up to tighten the bolt, move it down — to unscrew. Once all the bolts are screwed, the part is installed. To remove it, you must first unscrew all the bolts.
Remember that sometimes the screws will be completely invisible, for example, hidden under other elements. However, you don’t need to look at them from the front to tighten them — the twisting works from any point of view, you only need to find the bolt. If you don’t see any bolts, go around the car and keep Q (grab) and C (crouch) keys pressed down. At later stages, be careful not to accidentally unscrew a bolt from another part that is the same size.
When installing parts into the vehicle, keep moving them until you see the white OK sign.
You use the wrenches in the tool mode (2), indicated by the icon in the upper right corner. If the wrench is correct, the screw will turn green.
Sometimes, the bolts will be very difficult to access or invisible at a first glance. Despite that — they always light up if you point the crosshair at them.
This article is over 7 years old and may contain outdated information
Amistech Games released My Summer Car late last year, and quickly reached cult-hit status. In this simulation game, players must try to survive the Finnish summer and build their own car from various parts. The goal of the game is to persevere through harsh road conditions, while also being able to maintain your car’s integrity.
A lot of players have been frustrated with the complexity of building their first working car. After all — you only start with the room full of parts and no descriptions of how any of them fit together. Thankfully, Steam user Necronomicron has offered up some comprehensive advice on how to build a working car in My Summer Car. Here’s the rundown.
Building Your First Working Car in My Summer Car
Prepare before you try to build.
Since it will probably take a good bit of time both in and out of game to complete your first car, you will want to stock up on as many resources as you possibly can ahead of time. Necronomicron advised to first gather as much money as possible so that you can buy a fan belt, motor oil, and coolant.
All these things will be essential to get your car up and running, so it’s better to have them on hand before you start building.
Necromicon gives the following essential advice:
“…save the game before buying stuff, because your bag with goods will unpack on game load. It is easier to move just one bag rather than 20 items to your home.
I would recommend to buy everything on the left side of the store (which will cost 1,995 mk). However, you will need at least [one] fan belt, three brake/clutch fluids, one motor oil, [and] one coolant.”
He also suggests buying food and other supplies, since this will take awhile to build, and mother nature waits for no one.
| Part | Price |
|---|---|
| Fan Belt | 295 mk |
| Brake/Clutch Fluid | 35 mk |
| Motor Oil | 149 mk |
| Coolant | 195 mk |
Step One: Work on the Front Suspension
The first thing you need to do is jack the car up so you can work on the frame and underpinnings of the vehicle. To raise the body:
- Place the floor jack under the front bumper of the car.
- Use the lever to raise the floor jack (and the car) to its limit.
Once you’ve got the car jacked up, head over to the tool box. To use the tool box, hover your cursor to its opening and press “Use”. You’ll need to come back here often to switch out tools as necessary. To get to a specific tool, press 2, then click on whichever one you need. Once you have it, press 1 to hide that tool.
Now it’s time to work on the front part of your car’s frame. Here’s the order in which you need to attach your parts (and what screws or bolts you need to use):
- Subframe, Wishbones, Spindles
- Attach sub frame with 10mm screws (x4)
- Attach front left (FL) and front right (FR) wishbones with 10mm screws (x2 each)
- Attach FL and FR spindles with 12mm screws (x1 each)
- Disc Brakes, Halfshafts
- Put on the 2 disc brakes, but do NOT tighten them.
- Put on the 2 halfshafts with 9mm screws (x3)
- Tighten the disc brakes with 14mm screws (x1 each)
- Steering Rack, Steering Rods, Struts
- Attach the steering rack with 9mm screws (x4)
- Put on FL/FR steering rods, but do NOT tighten
- Put on FL/FR struts, but do NOT tighten
- Tighten the steering rods with 12mm screws (x1 each) and a size 14 adjustment nut.
- Tighten the struts with 10mm screws (x3) on top, and 9mm screws (x4) on the bottom
- Front Wheels, Steering Column
- Attach the FL and FR wheel steels with 13mm screws (x4)
- Attach the steering column with 8mm screws (x2)

Step 2: Work on the Rear Suspension
The next major step in this process is putting together the rear suspension. So you’ll want to lower your frame and remove the floor jack. Move it to the rear bumper of the car, then jack the vehicle back up.
Once it’s up, you’ll need to add more parts in the following order:
- Trail Arms, Coil Springs, Shock Absorbers, Drum Brakes, Rear Wheels
- Attach rear left (RL) and rear right (RR) trail arms with 12mm screws (x2 each)
- Attach two coil strings (no screws needed)
- Attach two shock absorbers with 12mm screws (x1 each) on top, and 6mm screws (x2 each) on the bottom.
- Attach two drum brakes with 14mm screws (x1 each)
- Attach RL and RR wheel steel with 13mm screws (x4 each)

Step 3: Put Together the Engine
Now that you’ve got your rear suspension built, lower the floor jack and remove it. Push your car into the garage where you’ll complete the next several steps.
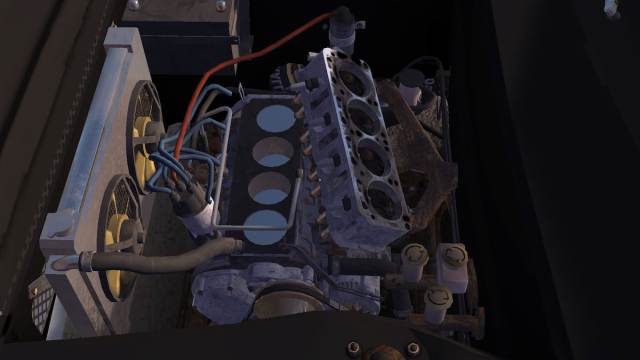
For right now, though, you’re going to set the car aside and focus on building your engine. Set the engine block on a spacious work table and build it out as follows:
- Block, Crankshaft, Main Bearings, Pistons
- Put the engine block on a table
- Attach the crankshaft (no screws needed)
- Attach main bearings 1, 2 and 3 with 9mm screws (x2 each)
- Attach pistons 1, 2, 3, and 4 with size 7 nuts (x2 each)
- Head Gasket, Cylinder Head, Headers, Motor Hoist
- Attach the head gasket (no screws needed)
- Attach the cylinder head with 7mm screws (x10)
- Attach the headers with 8mm screws (x5)
- Place the motor hoist on top of the engine
- Fasten the engine to the motor hoist with 10mm screws (x2)
- As you tighten each screw, the engine will align into the correct position.
- Carburetor, Rocker Shaft, Rocker Cover
- Attach the carburetor with 8mm screws (x4)
- Attach the rocker shaft with 8mm screws (x5)
- Don’t try to adjust the valvetrain just yet — we’ll do that later.
- Fasten the rocker cover with 7mm screws (x6)
- Camshaft, Camshaft Gear, Timing Belt, Timing Cover
- Attach the camshaft with 5mm screws (x2)
- Attach the camshaft gear with a 10mm screw (x1)
- Put on the timing belt (no screws needed)
- Attach the timing cover with 6mm screws (x6)
- Water Pump, Water Pump Pulley, Crankshaft Pulley
- Attach the water pump with 7mm screws (x5)
- Attach the water pump pulley with 7mm screws (x4)
- Attach the crankshaft pulley with an 11mm screw (x1)
- Alternator, Fan Belt
- Attach the alternator with a 7mm screw (x1) on top and a size 10 nut (x1) on the bottom.
- Attach the fan belt (no screws needed)
- Grab the screwdriver from the tool box.
- Using the mouse scroll wheel, adjust the alternator so it slightly touches the fan belt.
- Tighten the screw.
- Note: Later in the process, you’ll need to calibrate this part. If the fan belt is too loose, your car won’t start at all!
- Engine Plate, Starter, Flywheel
- Attach the engine plate (no screws needed)
- Attach the starter with 7mm screws (x2)
- Attach the flywheel with 7mm screws (x6)
- Clutch Cover Plate, Clutch Pressure Plate, Clutch Disc
- Put the clutch pressure plate into the clutch cover plate
- Put the clutch disc into the clutch pressure plate
- Attach the whole thing to the engine with 6mm screws (x6)
- Oilpan, Gearbox, Drive Gear
- Attach the oil pan with 7mm screws (x8) and a 13mm screw (x1)
- Attach the gearbox with 7mm screws (x6) and a 10mm screw (x1)
- Attach the drive gear with 6mm screws (x7)
- Spark Plugs, Fuel Pump, Distributor
- Tighten the spark plugs with the spark plug wrench
- Attach the fuel pump with 7mm screws (x2)
- Attach the distributor with a 6mm screw (x1)

Step 4: Install the Engine
Now comes a tricky part. You need to get the engine you just built into the car by hoisting it. Grab the hoist and use it to lift up the engine. Be careful, though! The engine can detach from the hoist if you aren’t paying attention.
Move the host over to the car, then lower it. As soon as the engine is in the proper position, bolts will appear — two 11mm bolts on the front side and one 11mm bolt on the rear side.
Once you’ve got the engine aligned properly, unscrew it from the hoist. Then raise the hoist again and put it away. Now you’re ready to start working on the guts of the car that will make it run!
Step 5: Work On Everything Under the Hood
It’s time to dig deep into your car building process and start making all the internal connections that will turn this hunk of metal from a collection of parts to a fully running vehicle. Here’s the order in which you need to build everything:
- Battery and Electrics
- Put the Battery in position next to the engine
- Attach the electrics to the engine compartment with 8mm screws (x2)
- Fuel Strainer, Radiator, Radiator Hoses, Oil Filter
- Attach the fuel strainer with an 8mm screw (x1)
- Attach the radiator with 7mm screws (x4)
- Attach radiator hose 1
- Attach radiator hose 2 to the engine block
- Attach radiator hose 3
- Tighten the oil filter with your hand (using the mouse scroll wheel)
- Note: Just putting the oil filter on is NOT enough
- Clutch Master Cylinder, Brake Master Cylinder
- Place the clutch master cylinder and the break master cylinder between the engine and the frame of the car using 8mm screws (x2) on the engine side and 9mm screws (x1 each) on the cabin side.
- Clutch Lining, Brake Lining
- Attach the clutch lining with 7mm screws (x2)
- Attach the brake lining with 7mm screws (x8)
- Tighten the nuts for each attached wheel with 7mm screws
The nuts you’re looking for on each wheel look like this:

- Fuel Tank, Halfshafts
- Attach the fuel tank with 11mm screws (x7)
- Pay close attention to the 12mm nut (x1) that you also need to attach this tank. If you miss it, all your fuel will leak.
- Tighten the halfshafts to the engine with 9mm screws (x3)
- Attach the fuel tank with 11mm screws (x7)
- Gear Linkage, Gear Stick, Handbrake
- Attach the gear linkage with 5mm screws (x3), two on the bottom and one on the top.
- Attach the gear stick with 6mm screws (x3)
- Attach the handbrake with 8mm screws (x4)
- Tighten the 5mm bolt near the fuel tank
- Exhaust Pipe, Exhaust Muffler, Fuel Tank Pipes
- Attach the exhaust pip with one 7mm screw on the back side and two 7mm screws on the engine side.
- Attach the exhaust muffler with a 7mm screw (x1)
- Attach the fuel tank pipe (no screws needed)
Step 6: Build Out the Car Interior
Finally! You’ve got a car that should be able to run on its own. But that’s pretty useless without a comfortable interior. So now it’s time to build out the inside of your summer ride.
- Dashboard, Dashboard Meters, Gauges
- Attach the dashboard with 10mm screws (x2)
- Set aside the meter display section of the dashboard.
- Arrange your dashboard meters on the table.
- Choose which meter you want to use (RPM gauge or clock gauge) and tighten it into the display with 7mm screws (x2)
- Attach the meter display to the dashboard with 6mm screws (x2)
- Seats, Back Panels
- Attach the rear seats with 9mm screws (x2)
- Choose whether you’d like to have a normal back panel or a subwoofer panel
- Insert your panel of choice (no screws needed)
- Attach the driver’s seat and passenger’s seat with 9mm screws (x4 each)
- Stock Steering Wheel, Radio
- Attach the stock steering wheel to the steering column with a 10mm screw (x1)
- Insert the radio into the dashboard

Step 7: Work on the Car Exterior
Now that you have seats and a steering wheel to make your car much more driveable, you’ll need to add all the external features like doors and headlights that will keep you rolling along.
- Headlights, Grille, Hood, Air Filter
- Insert the headlights into the front bumper and attach them with 7mm screws (x2 each)
- Attach the grill to the front bumper with 6mm screws (x2)
- Place the hood on top of the car without tightening it.
- Open the hood with hood lock.
- Tighten the hood with 6mm screws (x4), but do NOT close it. (It needs to stay open for later steps.)
- Insert and attach the air filter with 6mm screws (x2)
- Doors, Fenders, Bootlid
- Attach the left and right doors with 10mm screws (x4 each)
- Attach the left and right fenders with 5mm screws (x5 each)
- Place the bootlid on the trunk of the car, then tighten it with 6mm screws (x4)
- Bumpers, Rear Lights
- Attach the front and rear bumpers with 8mm screws (x2 each)
- Attach the left and right rear lights
- Liquids
- Open the radiator’s cap.
- Pour coolant into the radiator. (But DON’T throw the bottle out when you’re finished. It isn’t empty.)
- Open the rocker cover’s cap and pour motor oil in it. (Again, DON’T throw out the bottle, because it isn’t empty.)
- Open any of the two brake master cylinder caps and pour in brake fluid. (Do get rid of this bottle, because it’s empty.)
- Do the same with the second cylinder cap opening.
- Open the clutch master cylinder cap and repeat the process. (This time the bottle will NOT be empty.)
- Open the jerrycan and put gas in your gas tank.

Step 8: Adjust Your Wheels
You’re almost ready to go! But before you start zooming around, you need to make sure your wheels are up to snuff. The orientation of your front wheels is probably pretty messed up by now, so you’ll need to adjust the nut on the inside of each wheel (14mm).
- Turn the nut to its absolute limit.
- Note: The nut can turn infinitely, but after a certain point the wheel will stop rotating with it. This is how you know that it’s at its limit.
- When the wheel is at its limit, turn the nut in the opposite direction 60 times.
- Repeat for the other wheel.
Step 9: Paint Your Car
Time to customize your sweet summer ride! There are 12 glossy and 1 matte paints. So pick which one you want to use and pick it up. Press the “Use” button to paint your car with that color.

Step 10: Start Your Engine!
You’re getting so close to vehicular freedom that you can almost taste it. But you have adjust your fan belt and test everything out to make sure it’s running smoothly before you hit the road.
To start your car:
- Open your hood
- Get in the car and pull out the choke
- Hold LMB on the ignition
- Hold the gas
When you do this, the fan belt may squeak. Even if it doesn’t, you should adjust it by following the steps below:
- Hop out of the car and loosen the bolt once — but DON’T totally unscrew it
- Loosen the alternator until it squeaks
- Tighten it once so that it stops squeaking
- Tighten the bolt and close the hood
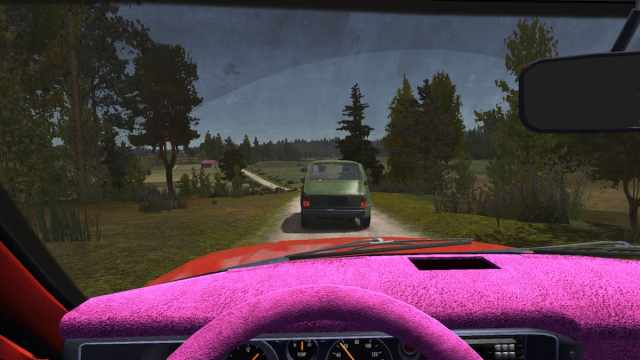
Step 11: Test Drive
Finally, the moment you’ve been waiting for. Time to see if your car can actually go anywhere.
Get back into the car. Your engine is probably still cold, which is why you pulled out the choke in a previous step — you need it to heat until the temperature arrow is in the middle position on the gauge. Rev the engine a bit to heat it up faster.
Once your engine is heated, push in the choke and drive! Hopefully everything is running smoothly and you don’t experience any sort of breakdown.

Step 12: Register Your Car
The last step in getting your car road-ready is going through a car inspection to make sure that vehicle isn’t a safety risk to your or anyone else. You can have your car inspected for 325 mk.
Once it passes inspection, register your plates. Now you’re ready to go! Drive your car to your heart’s content.
Step 13: Upgrade as Necessary
This last step is optional, but we’re willing to bet that you’ll take advantage of it at some point or another. Once you’ve built a base car, you can invest in upgrades that will pimp out your ride and make you the talk of your Finnish town. If you want to buy everything, you’ll need almost 30,000 mk. But if you only want to invest in a few pieces here and there, below is a full list of each part you can upgrade and how much it costs:
| Upgraded Part | Price |
|---|---|
| Window Grille | 219 mk |
| Rear Spoiler 2 | 329 mk |
| Rear Spoiler | 199 mk |
| Front Spoiler | 249 mk |
| Fender Flares and Fender Flare Spoiler | 1195 mk |
| Wheels Rally | 3249 mk |
| Wheels Spoke | 1519 mk |
| Wheels Hayosiko | 1575 mk |
| Wheels Racing | 3615 mk |
| Windows Black Wrap | 299 mk |
| Sport Steering Wheel | 349 mk |
| Dash Cover Zebra | 295 mk |
| Dash Cover Leopard | 295 mk |
| Dash Cover Plush | 295 mk |
| Seat Cover Zebra | 139 mk |
| Seat Cover Leopard | 139 mk |
| Seat Cover Plush | 139 mk |
| Wheel Cover Zebra | 49 mk |
| Wheel Cover Leopard | 49 mk |
| Fuel Mixture Gauge | 549 mk |
| Extra Gauges | 299 mk |
| Tachometer | 829 mk |
| CD Player | 1395 mk |
| Subwoofers | 695 mk |
| Steel Headers | 649 mk |
| Twin Carburators | 1750 mk |
| Racing Exhaust | 429 mk |
| Racing Muffler | 169 mk |
| Racing Radiator | 1215 mk |
| Racing Harness | 645 mk |
| Bucket Seats | 5095 mk |
| Rally Steering Wheel | 895 mk |
—
That wraps up our guide to building a working car in My Summer Car! Now that you can roam freely around the roads of your small Finland town, be sure to check out the rest of our My Summer Car guides for even more tips and tricks:
- How to Save Your Game in My Summer Car
- My Summer Car Guide: The Most Fun Way to Find the Shop
- My Summer Car Guide: How Do I Wash? By Using the Sauna!
Destructoid is supported by our audience. When you purchase through links on our site, we may earn a small affiliate commission. Learn more about our Affiliate Policy
Amistech Games’ My Summer Car is a simulation game that will have you working on building your own running car from scratch. The game does a good job of making such a process as realistic as possible—which means this is going to be a headache for some, but a very enjoyable project for many as well.
That said, here’s a quick guide on how you can build your first car in the game. There is a lot of advice out there, but we have simplified it for you so you won’t have to go through the trouble of searching for info anymore. It’s all here.
Ready to build your first working vehicle in My Summer Car? Let’s go!
Things to do before working on your car

My Summer Car isn’t just about building your car. It’s also about you, the character who is building the car. You’ll have to take care of yourself as you take on the laborious task of building a working car from scratch.
The game is designed to be very realistic, which means there’s permadeath—your character can die in the process of building that first car. You need to be very careful to monitor your urine, hunger, thirst, and fatigue levels so you don’t kill yourself.
What to get before working on the car
So, before building your car you’ll need to gather enough money so you can stock up on as many resources as you can. Save the game, then buy the following items:
- Food and supplies for your person
- Supplies for the car you’ll be working on (see table below)
Here’s what you need to buy:
| Part Name | Quantity |
| Alternator Belt | 1 |
| Battery | 1 |
| Brake/Clutch fluid | 4 |
| Coolant | 2 |
| Gasoline | 18 liters |
| Motor Oil | 2 |
Basically, you’ll need to buy those things on the shelves on the left wall in the store. Be sure to bring a gasoline canister for the fuel, which you will need to start your car later on. Also, connect the car battery to the charger before working on your car. It will be charged by the time you finish the car.
Working on your car
You should be ready to build after securing all of that. Here’s a step-by-step guide to building your car.
Your Car’s Front Suspension
Start by working on your car’s front suspension. This will allow you to work on your car’s frame and underpinnings.
Place the floor jack under the front bumper, then lift the car as high as possible. After that, go to your toolbox and press “use” while hovering your cursor over its opening. Then, work on the following parts in this order:
- Attach the sub frame using four 10mm screws. Next, attach the front left and front right wishbones using two 10mm screws for each, and attach the front left and front right spindles using one 12mm screw each
- Put on the two disc brakes without tightening them, then put on the two halfshafts using three 9mm screws. After that, tighten the disc brakes using one 14mm screw for each disc brake.
- Attach the steering rack using four 9mm screws. Next, put on front left and front right steering rods without tightening them, then do the same for the front left and front right struts.
After that, tighten the two steering rods using one 12mm screw each, followed by a size 14 adjustment nut. Tighten the struts using three 10mm screws on top, and four 9mm screws at the bottom. Attach the front left and front right wheel steels using four 13mm screws, then attach the steering column using two 8mm screws.
Your Car’s Rear Suspension
After working on the Front Suspension, lower the car frame and move the floor jack to the rear bumper. You’ll then need to lift the frame as high as possible so you can work on your car’s rear suspension, specifically the Trail Arms, Coil Springs, Shock Absorbers, Drum Brakes, and Rear Wheels.
Now, attach the rear left and rear right trail arms using two 12mm screws each, then attach two coil strings and two shock absorbers using one 12mm screw on top of each, followed by two 6mm screws each at the bottom. Next, using two 14mm screws, attach two drum brakes, then attach the rear left and rear right wheel steel using four 13mm screws each.
Related | How to Unlock story in Pixel Car Racer
Now that you have the front and rear suspensions ready, let’s move on the next major thing: the Engine.
Working on Your Car’s Engine
Your car needs a good, working engine to be able to run. It’s not that difficult to build an engine. All you need to do are the following steps:
Before working on the engine
Lower the floor jack, and leave your car for a while. Then, set your car’s engine block on a work table and work on the following:
- Attach the crankshaft to the engine block. Next, attach the first, second, and third main bearings using two 9mm screws for each; and attach pistons 1, 2, 3, and 4 using two size 7 nuts for each.
- Attach the head gasket to the engine, then attach the cylinder head using ten 7mm screws. attach the headers using five 8mm screws.
- Place the motor hoist on top of the engine, and fasten the engine to the motor hoist using two 10mm screws. The engine will be aligned to the correct position as you tighten the screws
- First, attach the carburetor using four 8mm screws. Next, attach the rocker shaft using five 8mm screws, but don’t adjust the valvetrain yet. Secure the rocker cover using six 7mm screws.
- Attach the camshaft using two 5mm screws, and attach the camshaft gear using one 10mm screw.
- Put on the timing belt, then attach the timing cover using six 6mm screws.
- Attach the water pump using five 7mm screws, then the water pump pulley using four 7mm screws.
- Attach the crankshaft pulley last using one 11mm screw
- Attach the alternator using a 7mm screw on top, and one size 10 nut at the bottom. Attach the fan belt afterward. Next, grab the screwdriver from the tool box, then use it to adjust the alternator so that it touches the fan belt. Tighten the screw after.
- Attach the engine plate, followed by the starter using two 7mm screws. Attach the flywheel using six 7mm screws after.
- Put the clutch pressure plate into the clutch cover plate, then the clutch disc into the clutch pressure plate. Afterwards, attach the assembly to the engine using six 6mm screws.
- Attach the oilpan using eight 7mm screws and one 13mm screw. Next, attach the gearbox using six 7mm screws (and one 10mm screw). Attach the drive gear last using seven 6mm screws.
- Use a spark plug wrench to tighten the spark plugs. Attach the fuel pump using two 7mm screws, then attach the distributor using a 6mm screw after that.
Building a running car
Now that you’re done with the engine, let’s proceed to the next important step: installing it into your car, and making it run.
Installing the Engine
Go to your car, which you left outside, and push it into your garage. Once it’s there, use the hoist to lift your engine. Make sure that the engine is securely attached to the hoist so that it won’t fall, then move the hoist to position the engine over the car.
Three 11mm bolts will appear once the engine is positioned correctly: two on the front side and one at the rear. Unscrew the engine from the hoist, then remove the hoist so you can start working on the next steps.
Now that your engine is installed, you need to work on the following parts to get your car running. The process is a bit tedious, but doing it properly will result in a working car.
- Get the battery you charged at the start of the process, and position it beside the engine. Then, attach the electrics to the engine compartment using 8mm screws
- First, Use an 8mm screw to attach the fuel strainer. Next, attach the radiator using four 7mm screws, then attach radiator hose 1.
- Connect the radiator hose to the engine block, then attach radiator hose 3. Lastly, use your hand to tighten the oil filter.
- Position the clutch master cylinder and the brake master cylinder between the engine and the frame of the car. To secure, use two 8mm screws (x2) on the engine side and one 9mm screw for each on the cabin side.
- Attach the clutch lining using two 7mm screws, and the brake lining using eight 7mm screws. Then use 7mm screws to tighten the nuts for each attached wheel.
- Attach the fuel tank using seven 11mm screws. You will also need to attach one 12mm nut to prevent your fuel from leaking. Lastly, use three 9mm screws to tighten the halfshafts to the engine.
- First, attach the gear linkage using 5mm screws at the top and bottom, then attach the gear stick using six 6mm screws.
- Attach the handbrake next using four 8mm screws. Tighten the 5mm bolt located near the fuel tank last.
- Attach the exhaust pipe using two 7mm screws on the engine side, and one 7mm screw on the back side.
- Finally, attach the exhaust muffler next using a 7mm screw the fuel tank pipe last.
Related | What Is the Fastest Car in Brookhaven? – Answered
If you’ve made it this far, congratulations! Your car can probably run by now, but there are still some things that need to be done before you’re actually finished.
Street Legal

Your car should be able to run at this point, but it’s not ready to be taken to the streets yet. You need to work on the following before it can be roadworthy:
- Attach the dashboard to your car. Select from either an RPM gauge or clock gauge, and fasten it into the meter display using screws. Insert the radio into the dashboard.
- Attach rear seats using 9mm screws. Next, choose from either a normal back panel or a subwoofer panel, then insert it. Lastly, attach the front seats—the driver’s seat and the passenger seat—using screws.
- Lastly, attach the steering wheel to the steering column.
At this point, you’ll be able to drive the car comfortably. However, it still is not ready for the road—both legally and practically. You’ll need to work on your Headlights, Grille, Hood, and Air Filter.
Insert headlights into your car’s front bumper and fasten them using 7mm screws. Attach the grille to the bumper as well and secure using 6mm screws. Place the hood on top of the front of your car, but don’t tighten it yet. Use the hood lock to keep it open, then tighten the hood using screws. Attach the air filter afterwards.
Next, you’ll need to work on the Doors, Fenders, and Bootlid. Attach all doors using 10mm screws, and all fenders using 5mm screws. You should then place the bootlid on the trunk and fasten it using 6mm screws.
Lastly, attach the front and rear bumpers of your car, then attach the rear lights as well.
Final touches
Now that you’ve made a running car, all you need to do are the final touches to make sure it runs properly and without a problem on the streets. Don’t make the mistake of ignoring these, though, as these are essential to a good ride:
- Motor oil: Open the rocker cover’s cap to pour motor oil in as needed.
- Radiator coolant: Remove the radiator cap and pour coolant in. Make sure to check if the bottle still has content for a later time.
- Brake fluid: Open one of the brake master cylinder caps to pour in brake fluid, then close when done. Repeat the process for the other brake master cylinder cap.
- Clutch fluid: Open the clutch master cylinder cap to pour in clutch fluid.
- Gas: Open your jerrycan so you can put gas in your car’s gas tank.
After making sure that your car has the necessary fluids, you’ll need to make sure that your whiles are properly aligned so you can drive properly. To do that, you have to adjust the 14mm nut on the inside of each wheel. Turn the nut until the wheel stops rotating, then turn the nut in the opposite direction 60 times.
FInally, pick and choose from the glossy and matte paints available, and use it on your car. It won’t affect its performance but its fun to customize!
Starting the engine
By now you’re probably roaring to take your car out for a spin. Don’t worry—that’s what you’ll be doing. To start your car, you need to open the hood, then get inside the vehicle and pull out the choke to heat up the engine and make it more conducive to start. You’ll then need to hold on to the ignition and the gas to start the car.
If the fan belt squeaks as you start the car, you need to adjust it. Go out of the car and loosen the bolt without unscrewing it completely. Loosen the alternator until you hear squeaking sounds, then tighten it once to stop the squeak. Tighten the bolt you loosened earlier and close the hood.
Road test and Registration
If your car starts, then that means you are closer to taking it out with you for a spin. Remember the choke you pulled earlier? You should push it back in once you see the temperature gauge’s arrow in the middle. The car should be in great condition, and breakdowns and issues should not happen as you drive your car.
Keep in mind that this driving simulator features permadeath, so make sure to drive slowly until you get the feel of your own car. You wouldn’t want to end up dying in an accident just after you succeeded in bringing what could’ve been a pile of junk to life.
After driving your car and finding nothing wrong with it, have it inspected and register your plates once you pass. You’ll spend 325mk for the inspection, but it’s worth it.
Полностью переведенная инструкция по сборке Сатсумы(Quick Reference Chart — Garage Flag Replacement) 1.0 для для My Summer Car » 4Mods.ru
- 28 108
- 31 мар 2021
- 2
Описание
Скачать

Перевел всю инструкцию по сборке сатсумы, дабы новичкам было немного легче определиться куда и что поставить и прикрепить. Пытался делать всё под оригинальный шрифт и размер, и если вы найдете неточность или помарку — пишите в комментариях, всё поправлю по мере возможности. Так же можете предлагать свои идеи, что бы вы хотели увидеть в переводе.
ИНСТРУКЦИЯ ПО УСТАНОВКЕ
1. Перейти по пути (ваше место установки)My Summer Car\Images
2. Перетащите файл из архива в папку и подтвердите замену файла
3. Готово, вы прекрасны!
-
Если Вам нравится эта, или другие работы Kossowade — вы можете поддержать его(ее) творчество:
К сожалению автор в своем профиле не заполнил данные, но вы всегда можете его поддержать, нажав кнопку ПОДДЕРЖАТЬ АВТОРА!
Информация о модификации