

Девушка в окне (The Girl in the Window)
— Игра головоломка с поиском предметов и кучей загадок. В начале истории мы узнаем, что в одном из домов скрытого города произошло ужасное убийство, и с тех пор этот дом был закрыт и заброшен. Однако люди стали замечать в доме странные вещи, а некоторые даже утверждали, что видели девушку в окне. Это очень странно, потому что этот дом заброшен уже 20 лет. Наш персонаж чувствует притяжение к дому и решает войти внутрь, но дверь тут же за ним закрывается. Итак, наша задача найти способ отпереть дверь и сбежать из дома. И в ходе прохождения игры мы узнаем намного больше о тайне, окружающей этот дом. Если вы застряли и не знаете как пройти какую-то из локаций, на нашем сайте можно посмотреть прохождение игры Девушка в окне, и найти способ сбежать с этого ужасного дома.
Прохождение игры Девушка в окне
Здесь вы можете посмотреть полное прохождение игры Девушка в окне (The Girl in the Window), пошагово в картинках.
1. Шаг

2. Шаг

3. Шаг

4. Шаг

5. Шаг
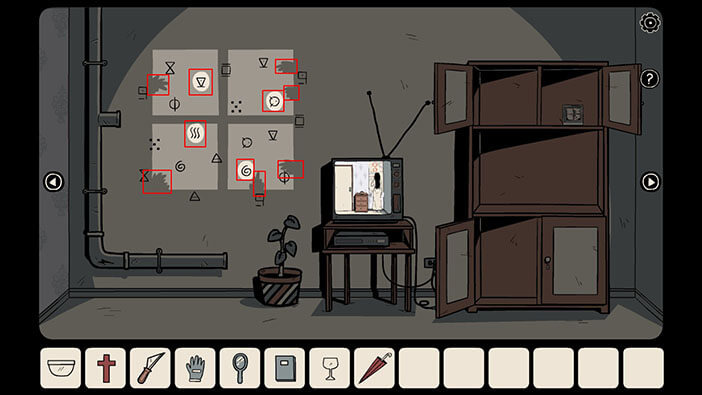
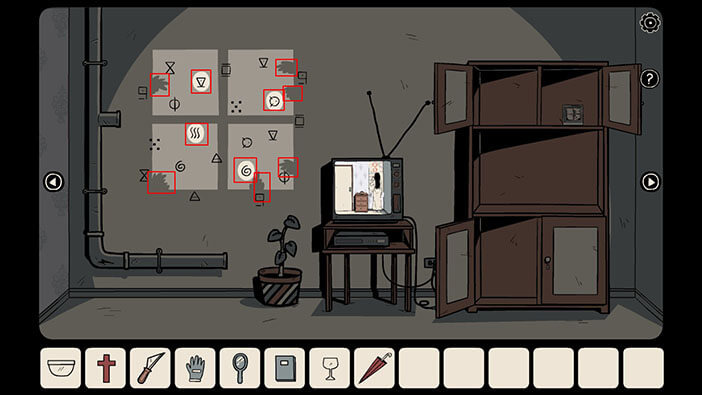
Здесь мы видим десять символов, но отмечены только четыре из них. Кроме того, рядом с каждым из отмеченных символов мы можем видеть римскую цифру, она представляет порядок пароля в головоломке.

6. Шаг

7. Шаг

8. Шаг

9. Шаг

10. Шаг

11. Шаг

12. Шаг

13. Шаг

14. Шаг

15. Шаг

16. Шаг

17. Шаг

18. Шаг
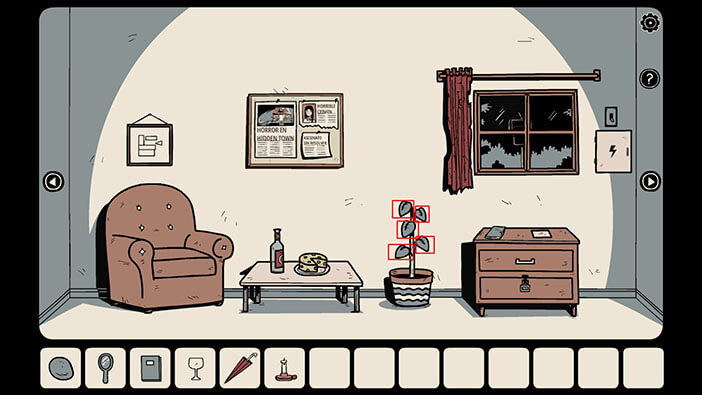
Головоломка решается путем подсчета количества листьев на растениях в вазах.

19. Шаг
Введем правильное количество листьев. В соответствии с вашей последовательностью, у всех она разная.

20. Шаг

21. Шаг

22. Шаг

23. Шаг

24. Шаг

25. Шаг

26. Шаг

27. Шаг

28. Шаг

29. Шаг

30. Шаг

31. Шаг

32. Шаг

33. Шаг
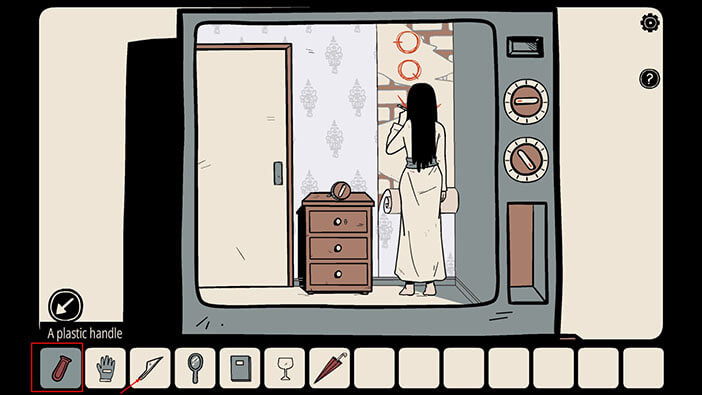
Теперь мы должны повернуть обе крутили в правильное положение. Правильное положение циферблатов нарисовано на кругах над девушкой.

34. Шаг

35. Шаг

36. Шаг

37. Шаг

38. Шаг

39. Шаг
В вашей игре знак под обоями может отличаться от буквы «М» например, буква «W».

40. Шаг

41. Шаг

42. Шаг

43. Шаг

44. Шаг

45. Шаг

46. Шаг

47. Шаг

48. Шаг

49. Шаг

50. Шаг

51. Шаг

52. Шаг

53. Шаг

54. Шаг

55. Шаг

56. Шаг

57. Шаг

58. Шаг

59. Шаг

60. Шаг

61. Шаг

62. Шаг

63. Шаг

64. Шаг
Порядок символов может отличаться в вашем прохождении, но вы можете определить правильный порядок символов, выполнив шаги, описанные выше.

65. Шаг

66. Шаг

67. Шаг

68. Шаг (Секретная концовка)

69. Шаг

70. Шаг

71. Шаг

72. Шаг

73. Шаг

74. Шаг

75. Шаг

Поздравляем вы полностью прошли игру Девушка в окне.
Hello everyone and welcome to our walkthrough for “The Girl in the Window” a room escape game created by the Dark Dome. The Girl in the Window is the second game in the series, and the story of this game is also set in Hidden Town, which is filled with all kinds of mysteries. In this walkthrough, we will show you how to solve all the puzzles and finish the game.
NOTE: Some puzzles will CHANGE with each playthrough, but the logic behind solving the puzzles will always remain the SAME. For example, in one playthrough a code to open a safe could be 1234, and in another playthrough, the code could be 4321. However, you will always discover the numbers for the code at the same location and by using the same hints.
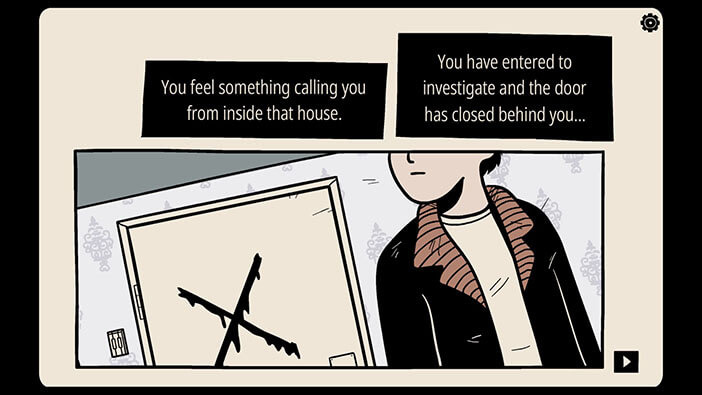
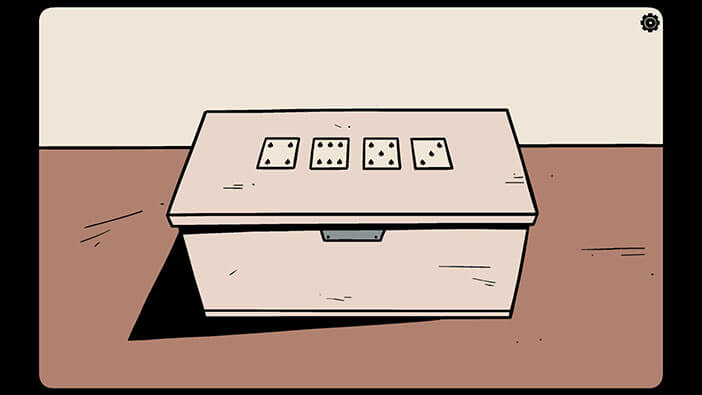
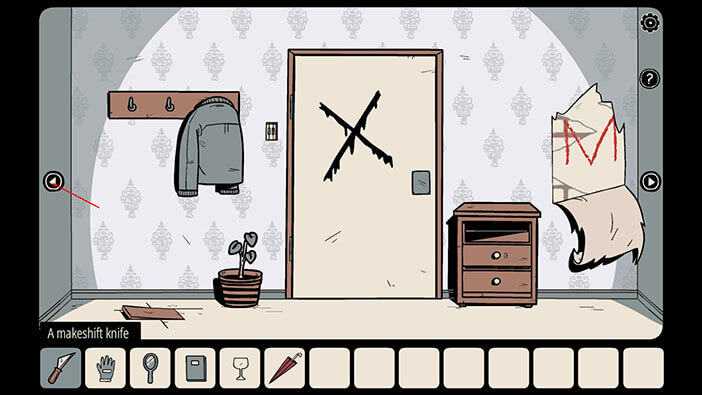
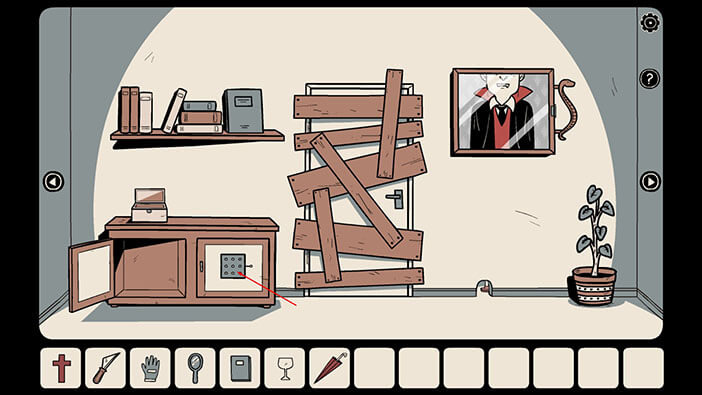
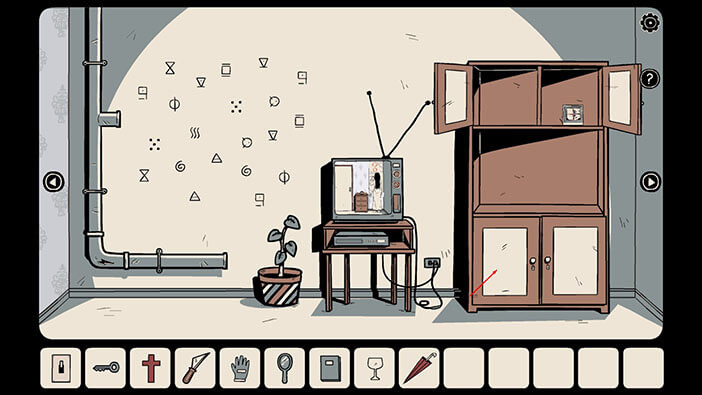
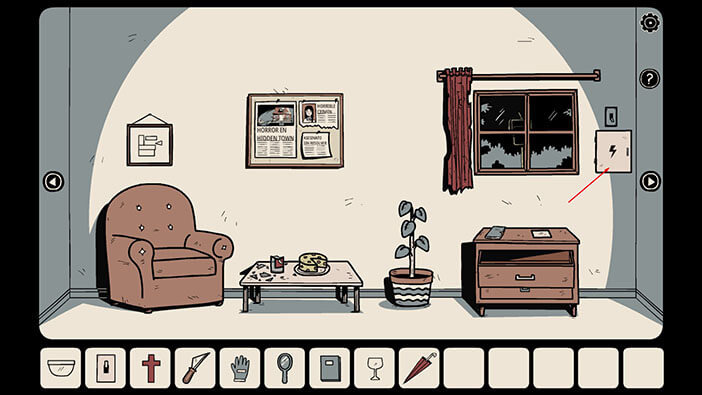
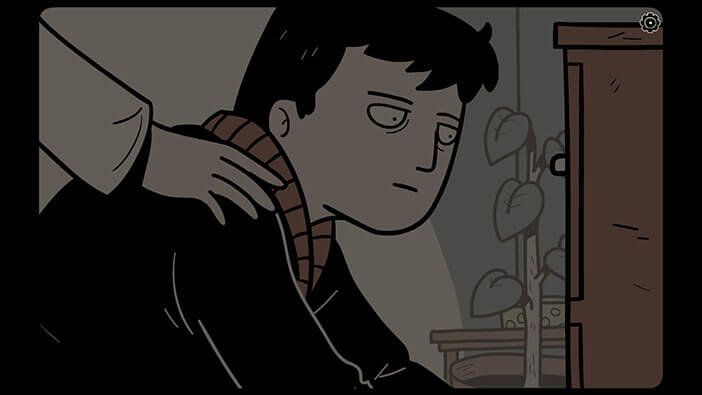
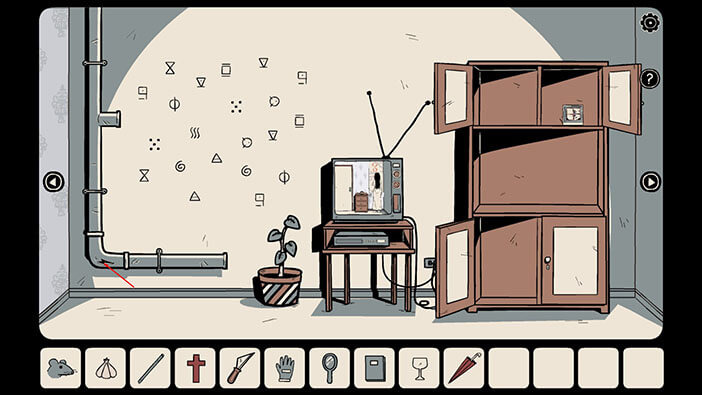
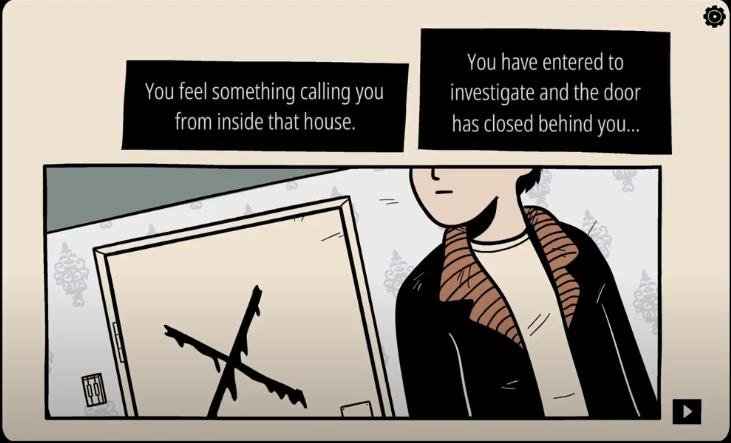
At the beginning of the story, we find out that a terrible murder happened in one of the houses in Hidden Town, and this house was closed and abandon ever since. However, the people started noticing some strange things inside the house, with some of them even claiming that they saw the girl in the window. Our character feels drawn to the house and decides to step inside, but the door immediately shuts behind him. So, our task is to find a way to unlock the door and escape from the house… We will probably learn more about the mystery surrounding this house, while we’re trying to find a way to escape.
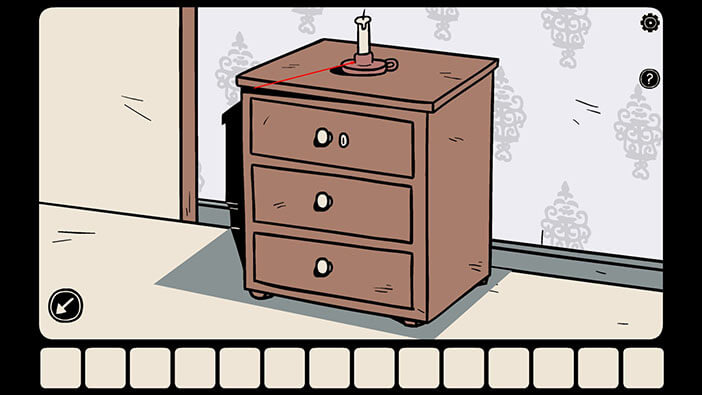
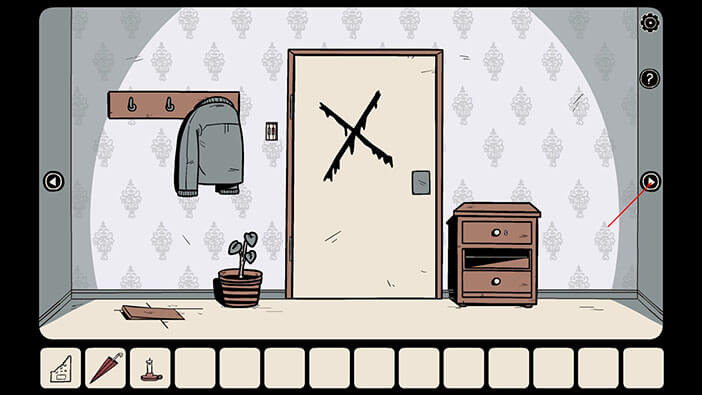
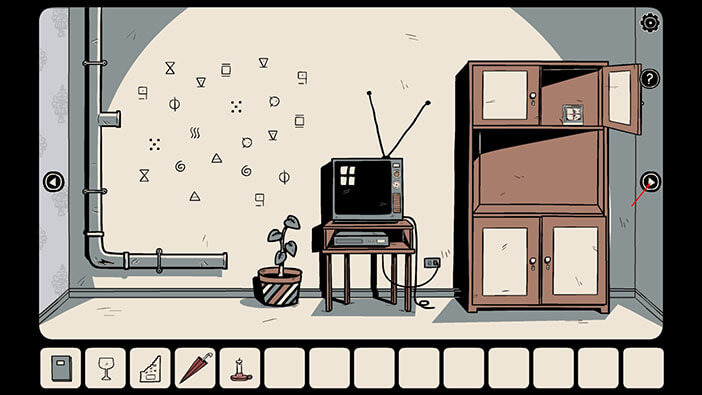
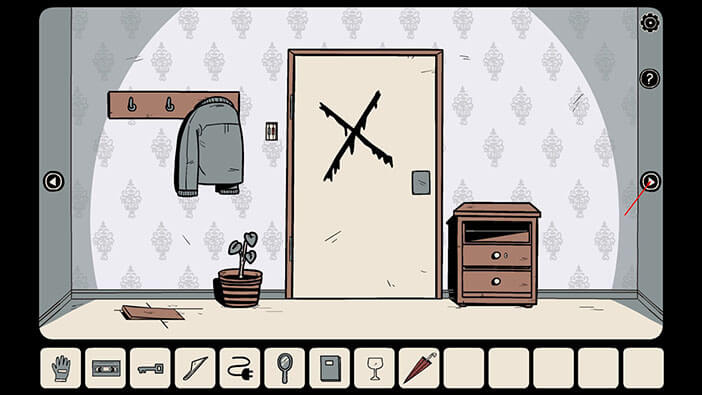
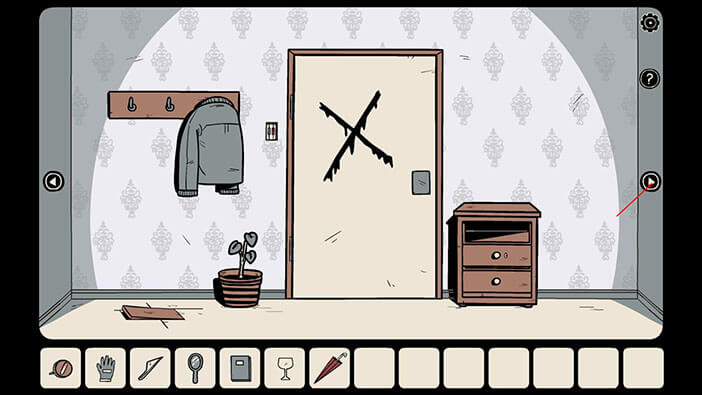
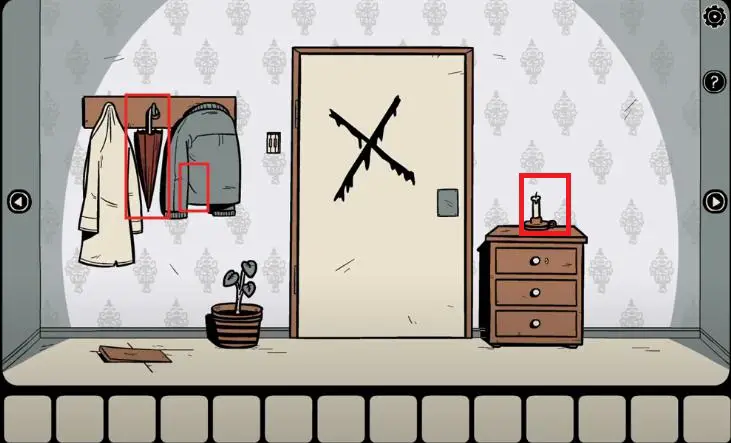
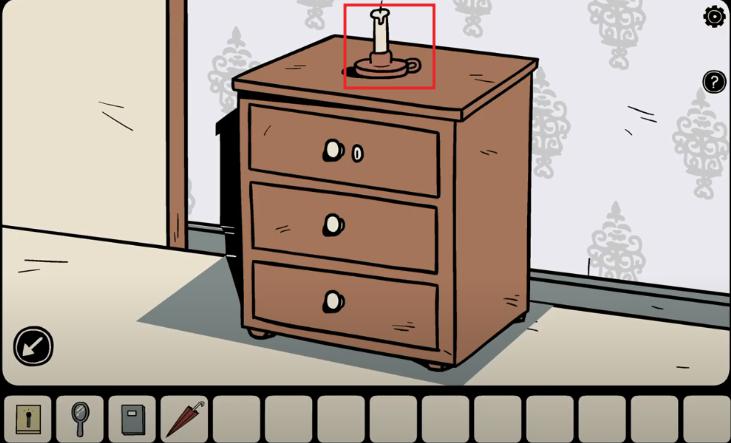
On the small cabinet to the right of the door, you will see a candle. Tap on it to take a closer look and tap once more to pick it up. A “Candle” will be added to your inventory.
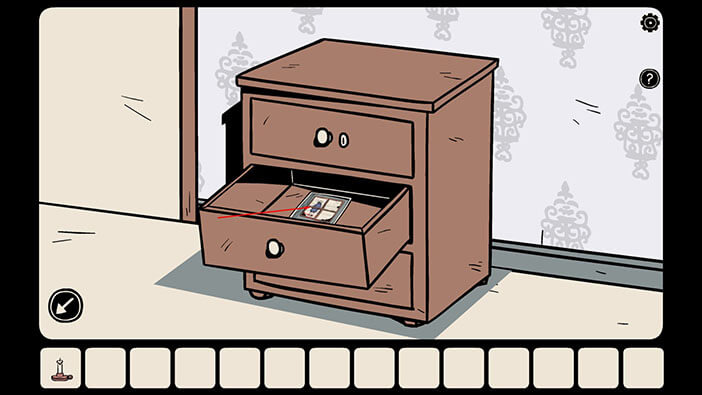
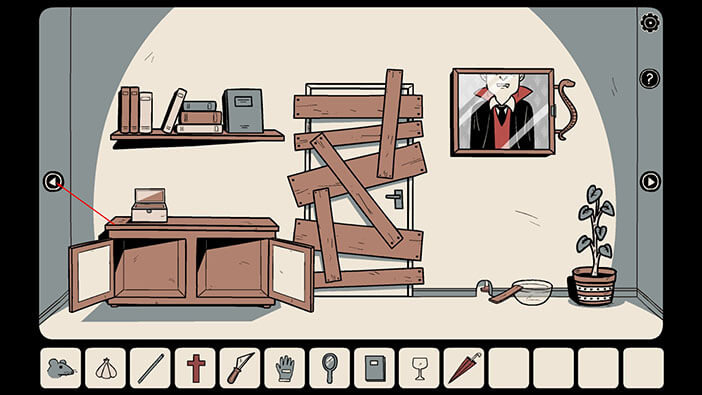
Now tap on the middle drawer to open it. Inside you’ll see a photo. Tap on it to take a closer look. We can see that a stranger stood in front of the house for three hours. Let’s put down the photo and see what else we can find.
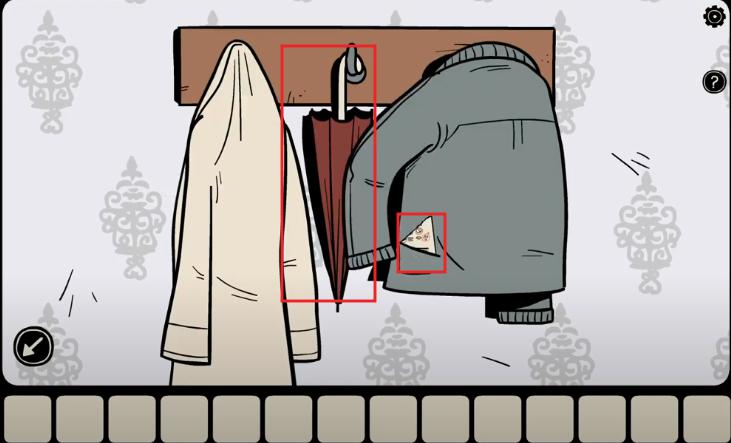
Tap on the umbrella to take a closer look. Tap once more to pick it up, and an “Umbrella” will be added to your inventory.

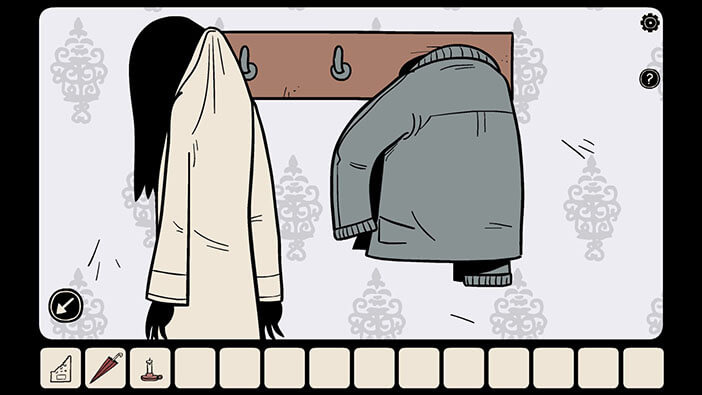
Now, tap on the sleeve of the jacket on the right to move it aside. You will see a torn-out note in the pocket below the sleeve. Tap on the note to pick it up. We should probably look for the other part of the note.
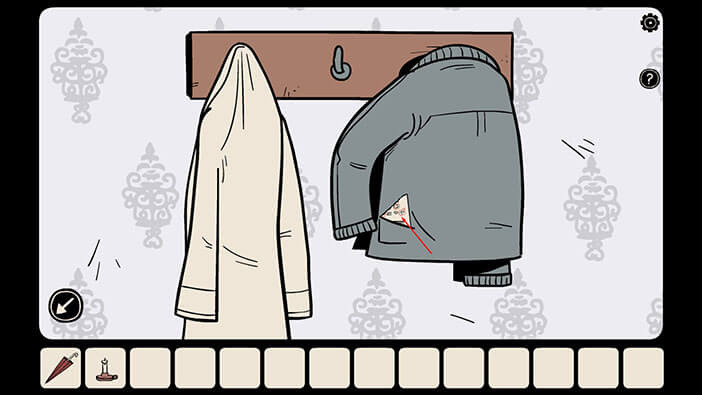
Also, as soon as we took out the note from the pocket, some kind of a ghost appeared inside the coat on the left and walked away with it.
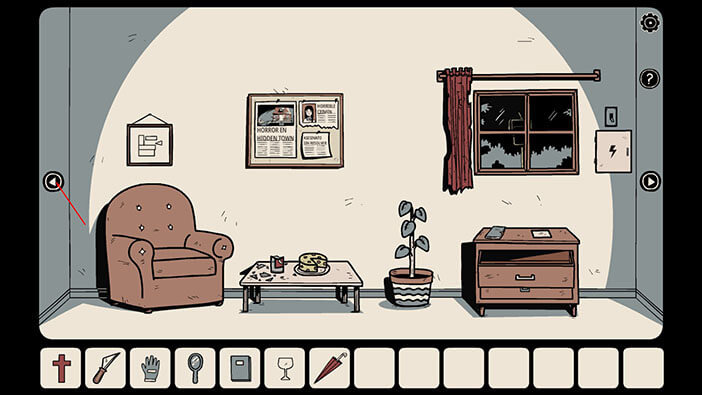
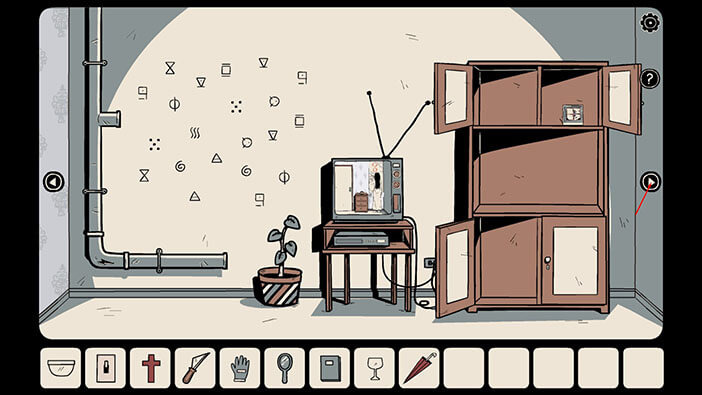
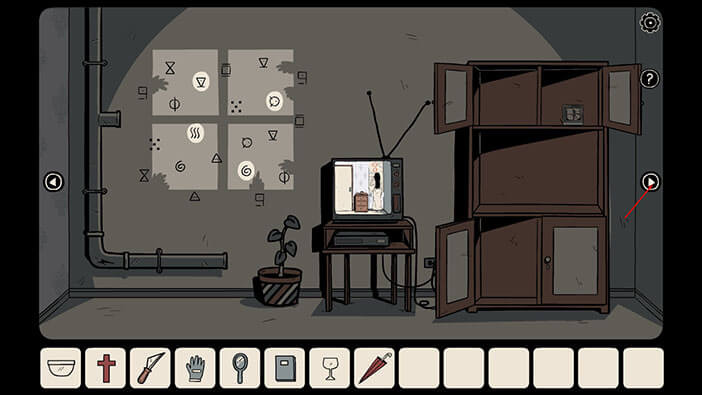
Ok, now let’s see what we can find in the room on the right. Tap on the arrow on the right to go there.
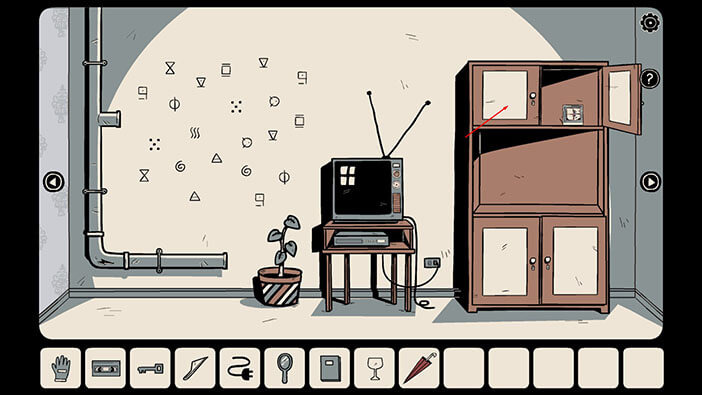
As soon as we entered, we could see a goblet moving on its own. Tap on it to pick it up, and a “Goblet” will be added to your inventory.
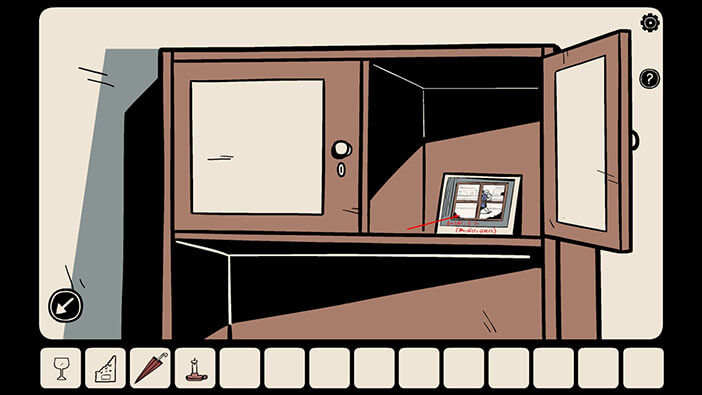
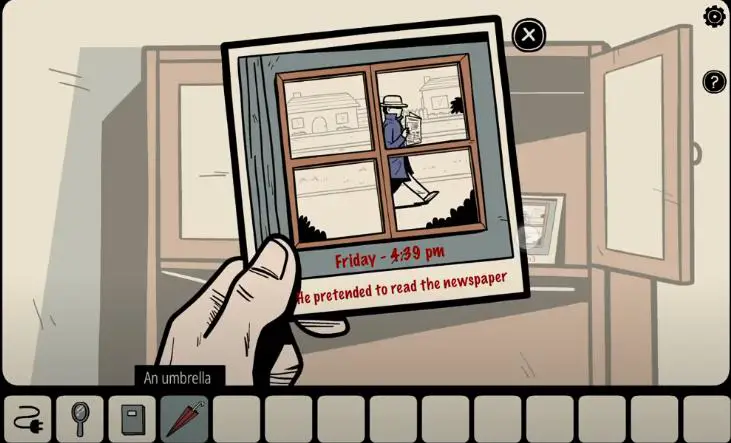
We can also tap on the top-right cabinet door, and we will see a photo inside it. Tap on the photo to take a closer look. It looks like the stranger was spying on the house again while pretending to read a newspaper. Let’s put down the photo and see what else we can find.
Tap on the arrow on the right to go to the next room.
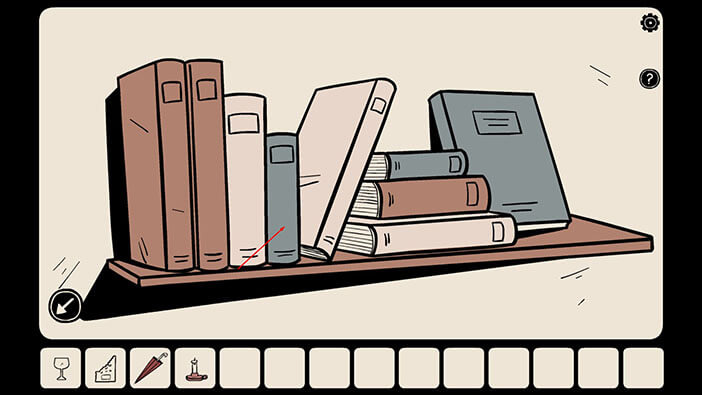
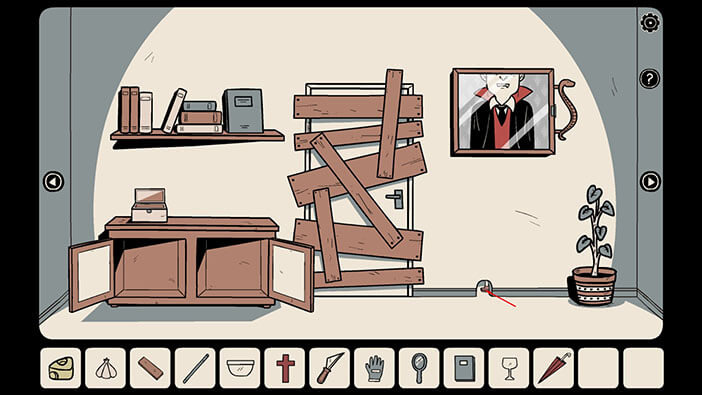
As soon as we entered we could see that one of the books on the wall shelf moved. Tap on the blue book to the left of it to take a closer look, and tap again to pick it up.
Tap on the book that we just picked up to take a closer look, and tap on the arrow on the right to open it.
Tap on the photo to take a closer look at it. We can see the stranger showed up again and spied on someone inside the house.
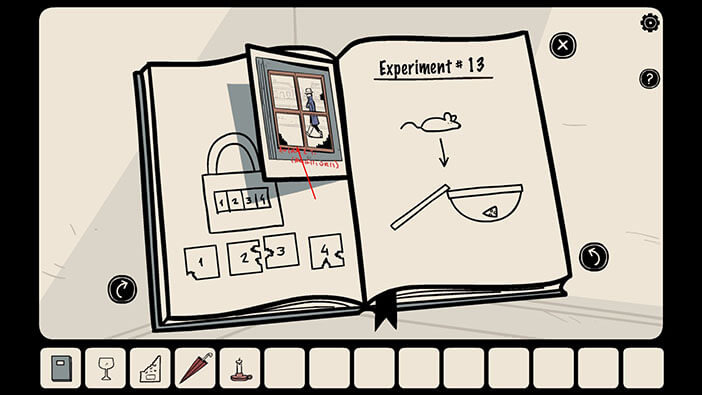
Ok, this book contains many useful notes that will help us in solving the puzzles inside this house. But, let’s first skip to the last page by tapping twice on the arrow on the right.
Looks like we found the other half of the torn-out note. So, select a “Piece of Paper” from the inventory and tap on the page on the right to reassemble it.
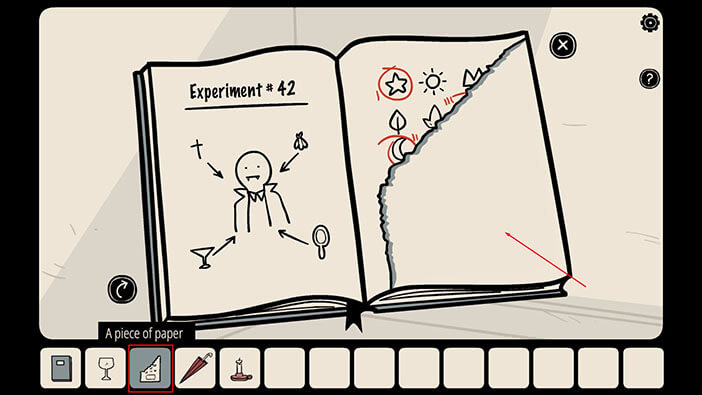
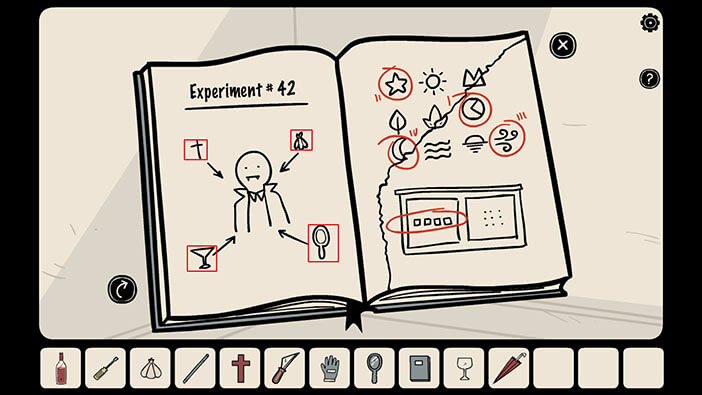
Here we can see ten symbols, but only ten of them are marked. Also, next to each of the marked symbols, we can see a roman numeral, and it represents their order in the next puzzle. So, let’s write down/memorize the order of the symbols.
First, we have a “Star”
Second, we have a “Crescent Moon”
Third, we have a “Circle with the triangle”
Fourth, we have some lines that look like a “Wind” blowing
We can also see that these symbols should be used to unlock the left cabinet door.
NOTE: The order of the symbols might be different in your game, but you can still determine the correct order of the symbols by looking at the roman numerals next to them.
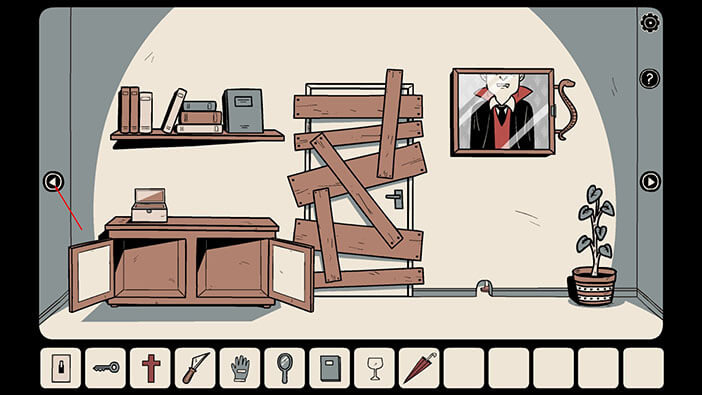
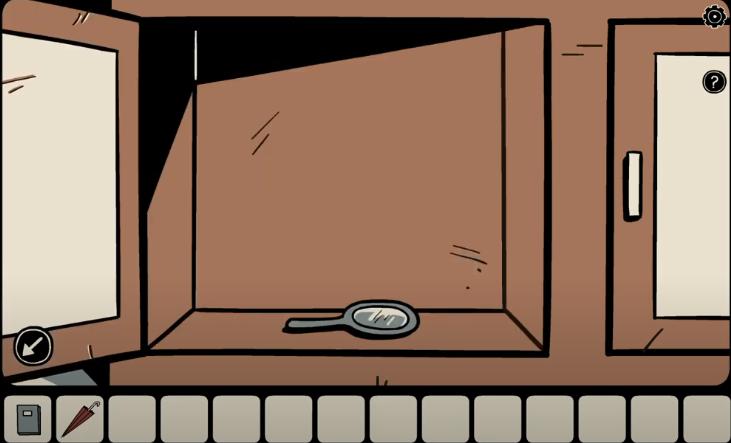
So, tap on the left door of the cabinet to take a closer look.

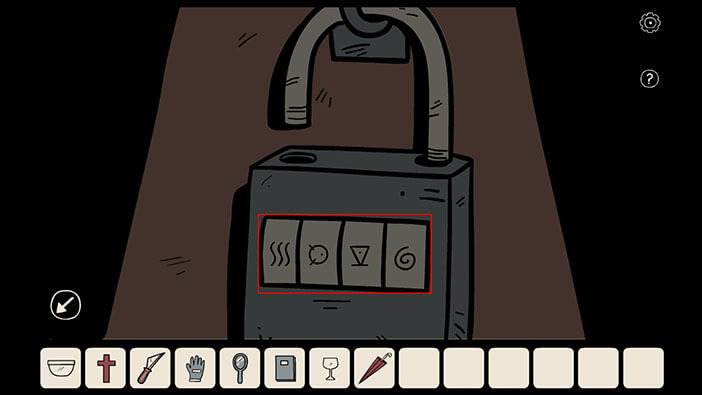
Tap on the fields of the puzzle, and entered the symbols in the same order (left to right) as we saw on the note in the book. The order was: a “Star”, a “Crescent Moon”, a “Circle with the triangle”, and a “Wind”. As soon as you enter the correct symbols, you will hear a clicking sound, indicating that the cabinet door is unlocked.
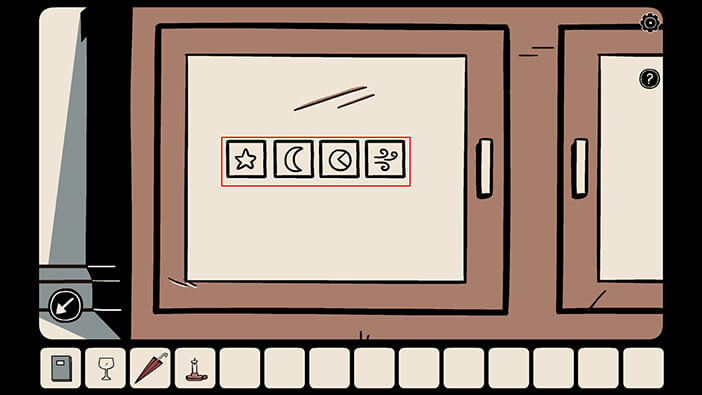
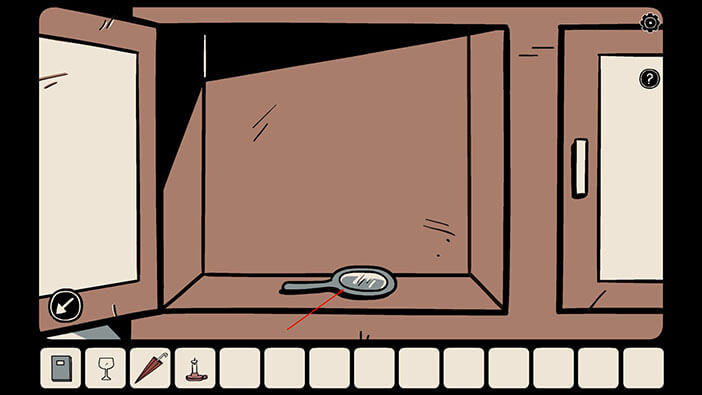
Tap on the cabinet door to open it. Tap on a “Mirror” inside to pick it up and it will be added to your inventory.
Now, let’s take a look at the notes inside the book again.

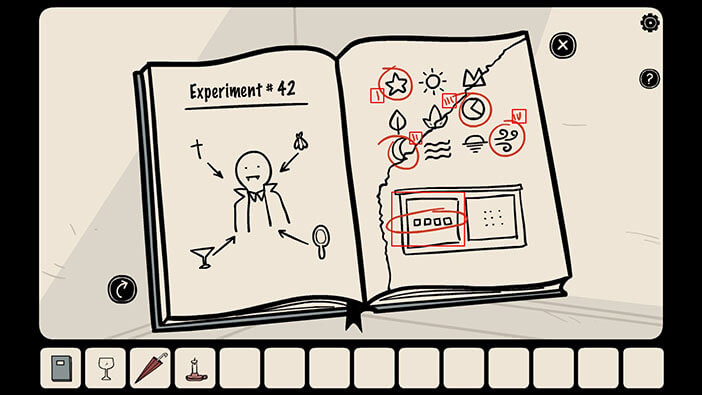
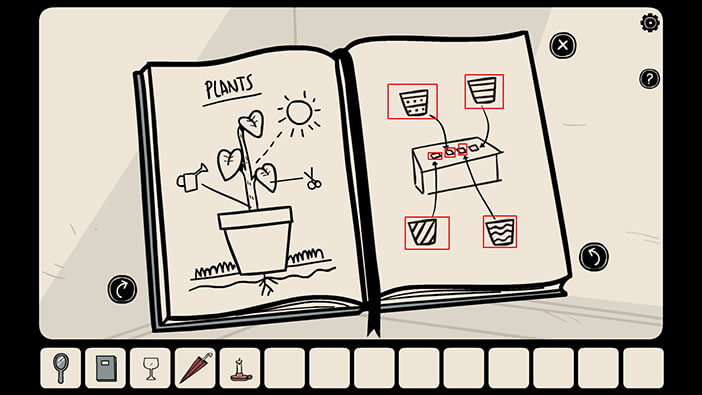
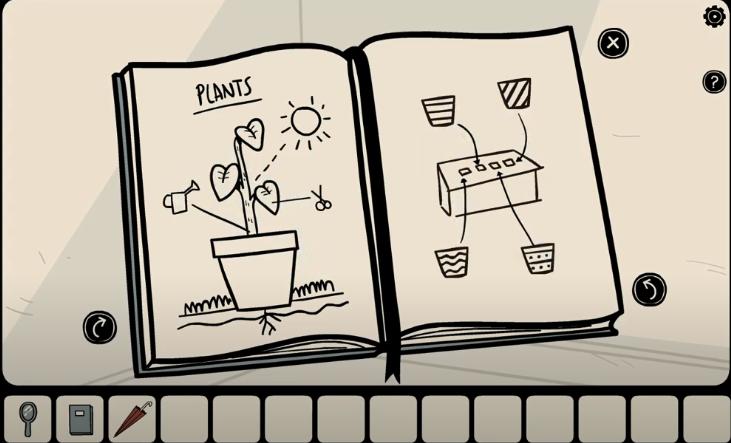
Tap on the arrow on the left to turn the page. Here we can see another puzzle, and this one is solved by counting the number of leaves on the plants inside the vases, as you’ll soon see. However, we also have to look at the vases in the correct order. So, looking from right to left, the order is:
First, the vase with diagonal stripes
Second, the vase with stripes and dots
Third the vase with “wavy” stripes
Fourth, the vase with horizontal stripes
Write down/ memorize the order of the vases.
NOTE: The order of the vases might be different in your game.
Ok, inside this room we can see a vase with the stripes and dots (the second one). We can see that there are SIX leaves on the plant inside this vase. Memorize/Write down this information.
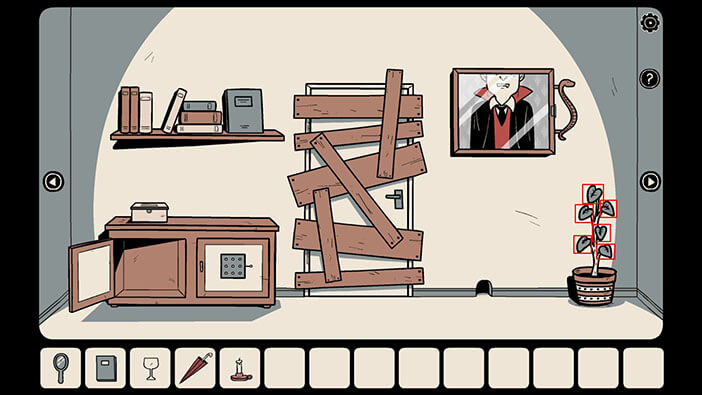
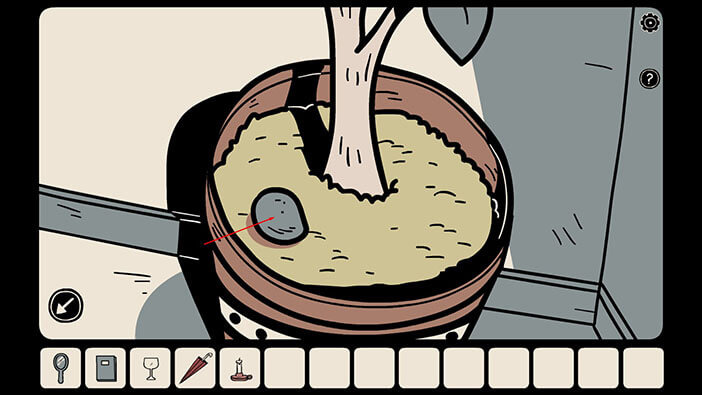
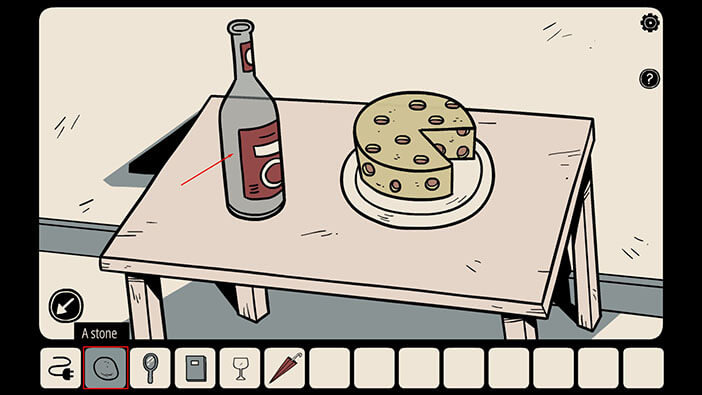
Since we’re already here, let’s tap on the vase to take a closer look at it. Inside we can see a stone. Tap on it to pick it up, and a “Stone” will be added to your inventory.
Ok, now let’s look for the other vases. Tap on the arrow on the right to go to the next room.

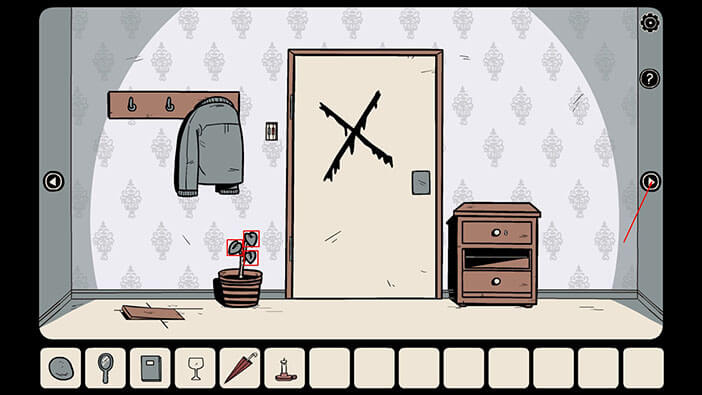
In this room, we can see the third vase, the one with wavy stripes. There are FIVE leaves on the plant inside the vase. Write down/memorize this information.
There are some more things that we could examine in this room, but let’s first finish the puzzle with the vases. So, tap on the arrow on the right to go to the next room.

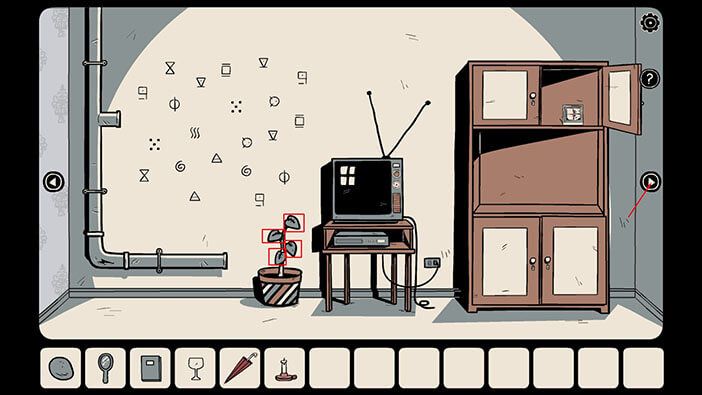
In this room, we can see the fourth vase, the one with horizontal stripes. There are THREE leaves on the plant inside the vase. Write down/memorize this information, and let’s proceed to the next room.
Finally, in this room, we can see the first vase, the one with the diagonal stripes. There are FOUR leaves on the plant inside the vase. Write down/memorize this information, and let’s proceed to the next room, and solve this puzzle.
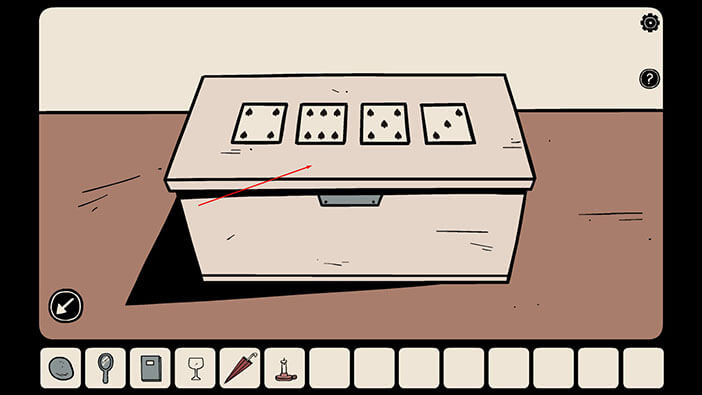
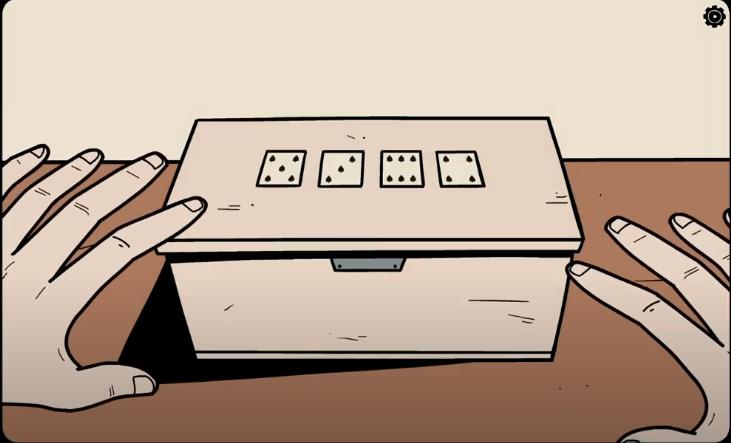
In this room, you will see a white box. Tap on it to take a closer look.
Ok, now let’s tap on the fields and enter the correct number of leaves. So, starting from right to left we have:
First field = Four leaves (the vase with diagonal stripes)
Second field = Six leaves (the vase with stripes and dots)
Third field = Five leaves (the vase with “wavy” stripes)
Fourth field = Three leaves (the vase with horizontal stripes)
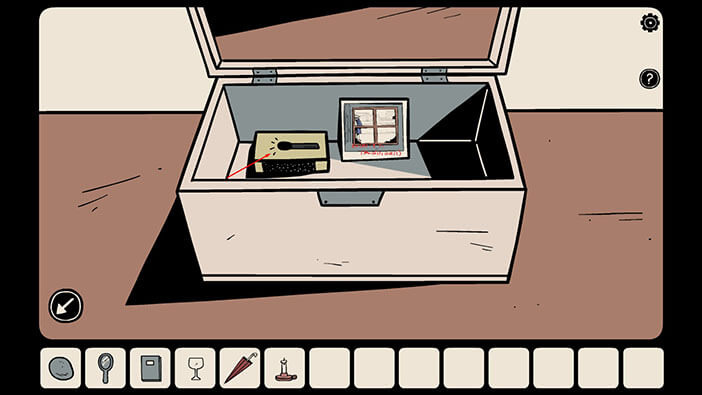
As soon as you enter the correct code, you will see a clicking sound, indicating that you managed to unlock the box. Also, the ghost of the dark-haired girl will suddenly appear behind our character, and it seems that she wanted to touch his shoulder. But it looks like she’s gone, so tap on the box to open it.
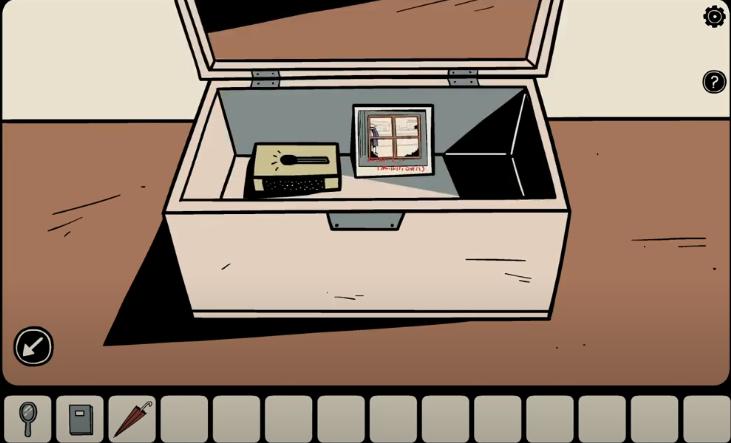
Tap on the image inside the box to take a closer look at it. We can see that the stranger was no longer trying to look inconspicuous, as he now openly stood in front of the window and stared at someone inside the house.

Tap on the other item inside the box to pick it up and a “Box of Matches” will be added to your inventory.
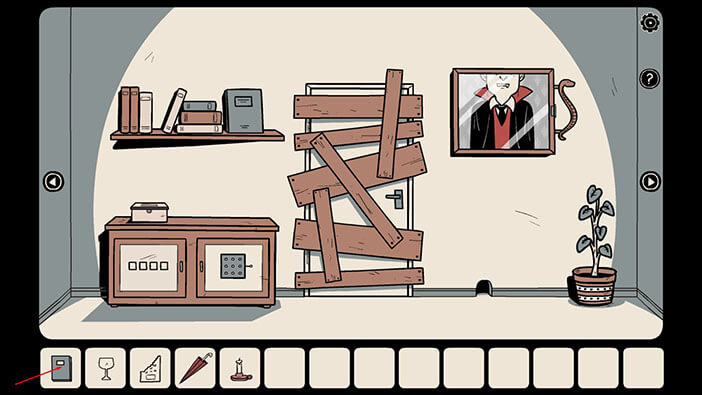
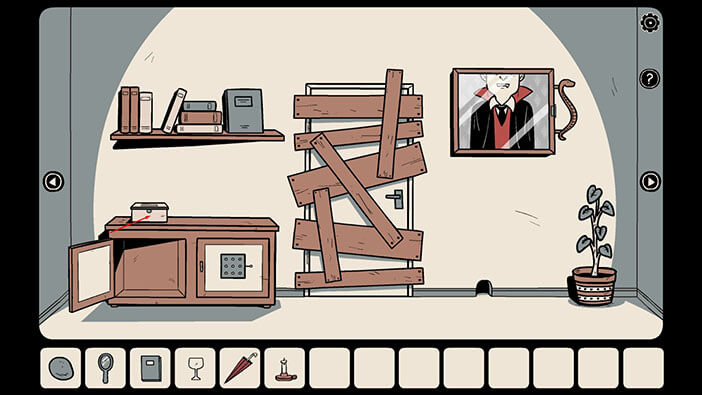
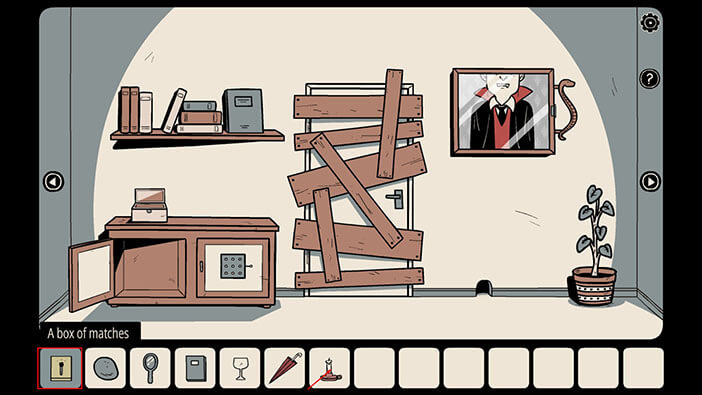
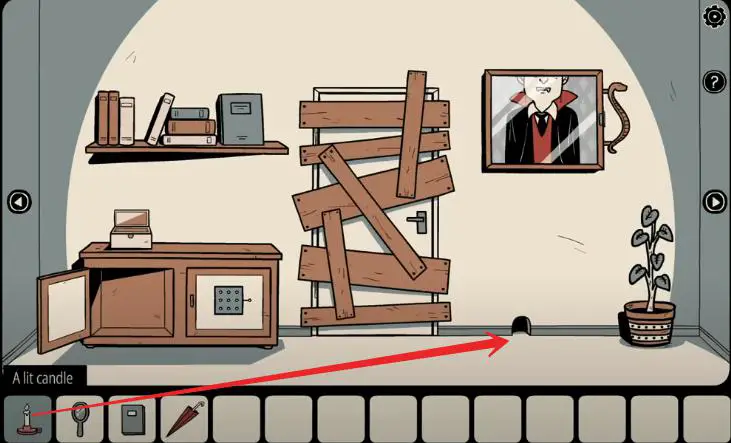
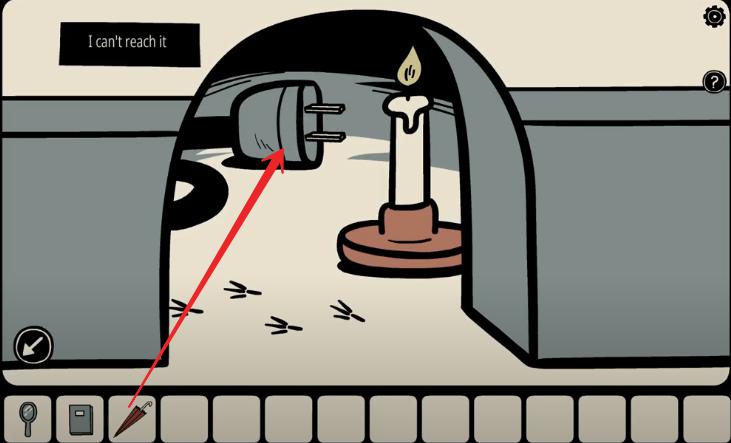
Ok, we can see a mouse hole to the right of the boarded door. We can light up the candle with matches and use it to illuminate the mouse hole. So, let’s do that. Select the “Box of Matches” from your inventory and tap on the “Candle” to light it up – a “Lit Candle” will be added to your inventory.
Now, tap on the mouse hole in the wall to take a closer look at it. Select the “Lit Candle” from the inventory and tap inside the mouse hole to place the candle and illuminate the hole.
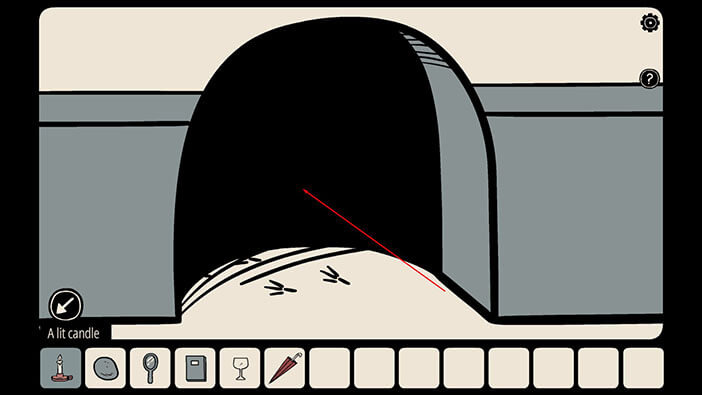
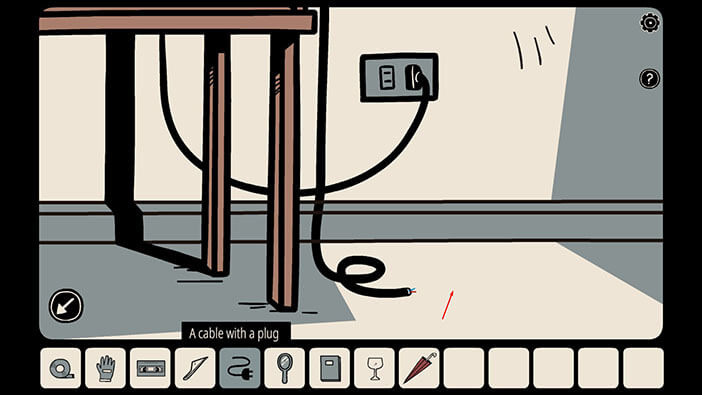
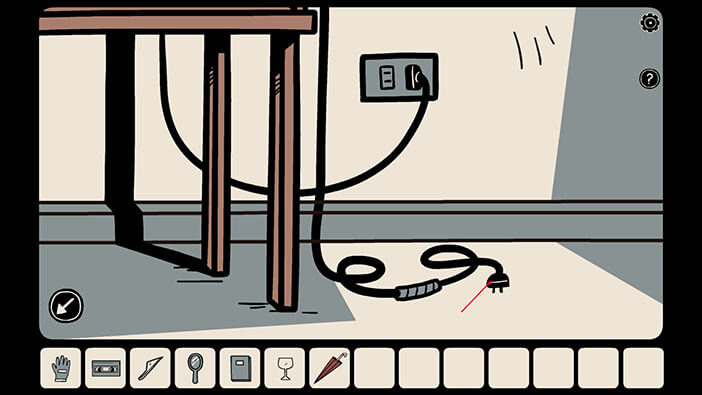
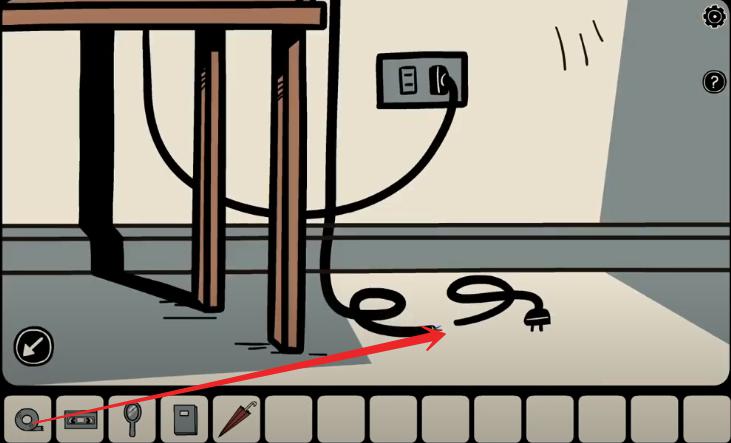
We can see an electrical cable inside the hole. However, if we tap on it, we can see that our character can’t reach it with his hand. Also, we can see some mouse tracks.
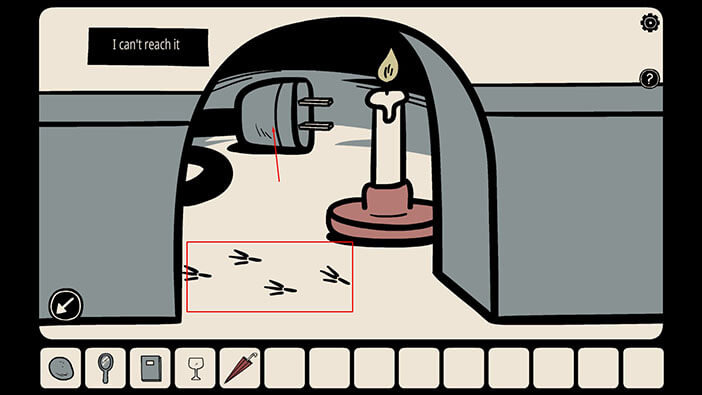
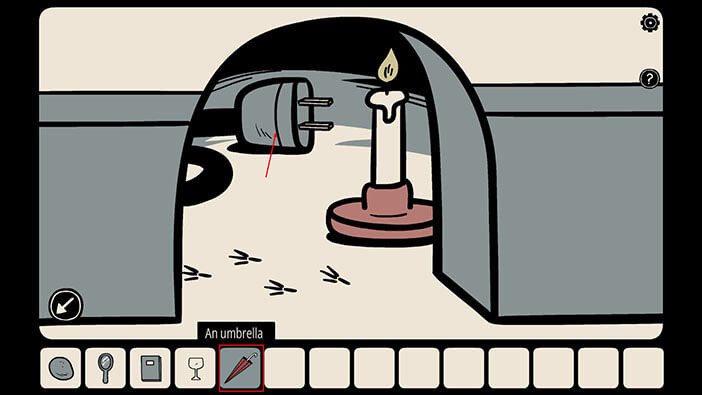
So, select the “Umbrella” from the inventory and tap on the electrical cable. Our character will be able to reach it and a “Cable with a Plug” will be added to your inventory.
Ok, now let’s go to the next room on the right.
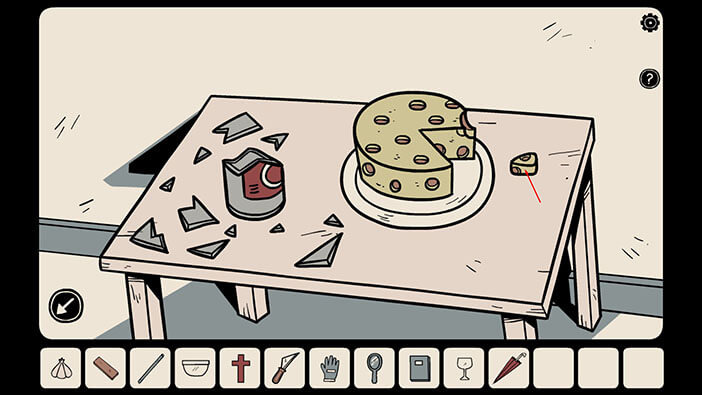
Tap on the table to take a closer look at it.

You will see an empty bottle and a cheese. Select the “Stone” from the inventory (we found it inside the vase) and tap on the bottle to break it.
Tap on a piece of broken glass to pick it up, and a “Piece of Glass” will be added to the inventory.
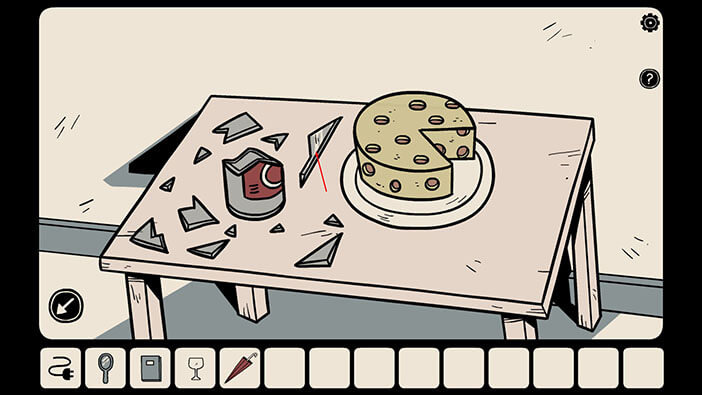
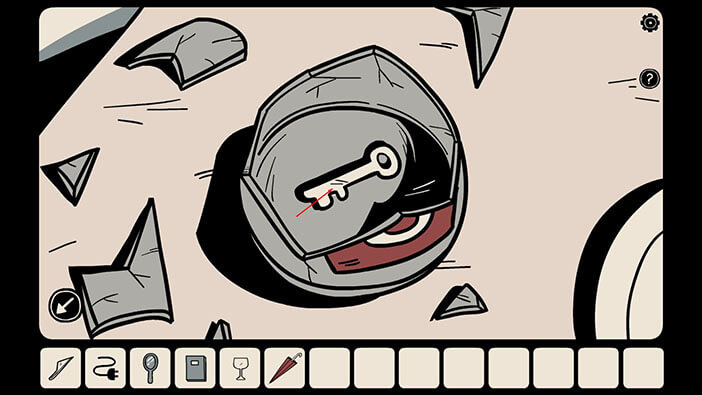
Now, tap on the broken bottle to look inside it. Inside the broken bottle, you will see a small key. Tap on it to pick it up and a “Key with the round handle” will be added to your inventory.
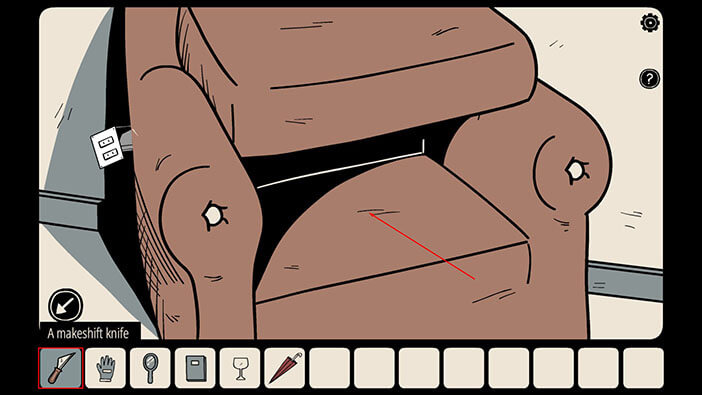
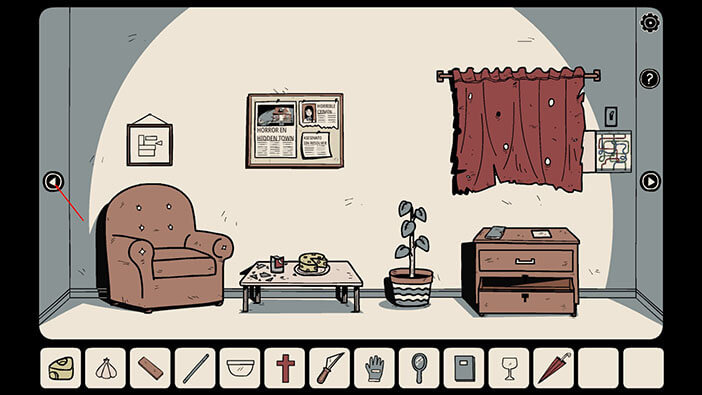
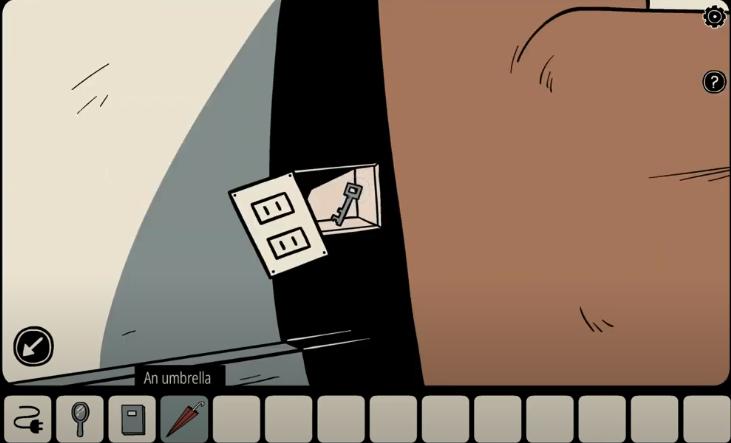
There is also an armchair in the left corner of the room. Tap on the armchair to take a closer look at it.

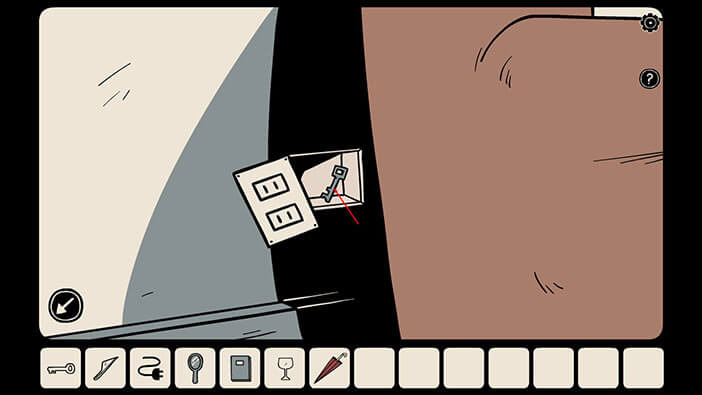
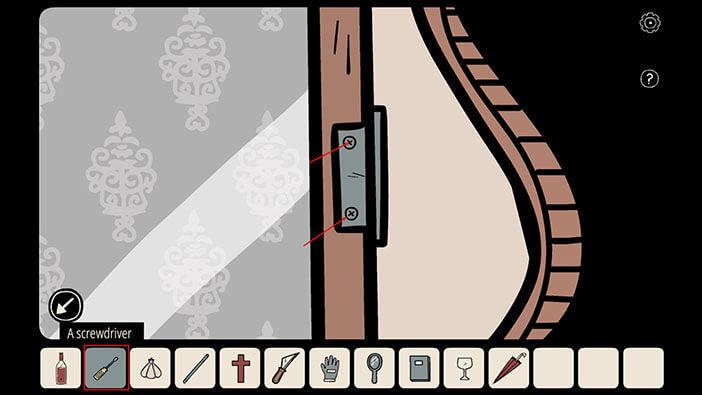
Behind the armchair, you will see a loose outlet. Tap on it to take a closer look, and tap again to remove it.

We can see that a small key was hidden behind the outlet. Tap on it to pick it up and a “Key with a square handle” will be added to your inventory.
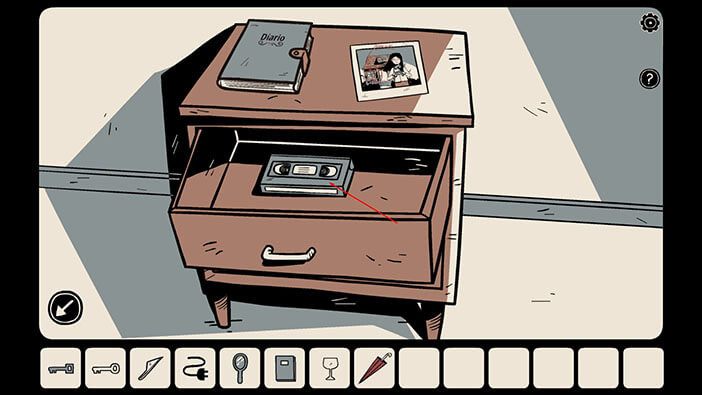
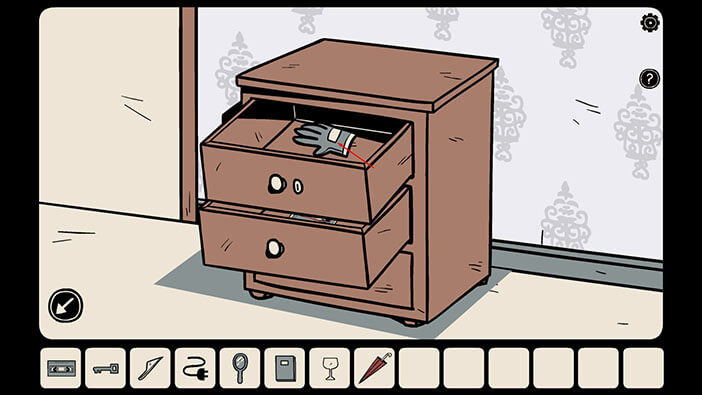
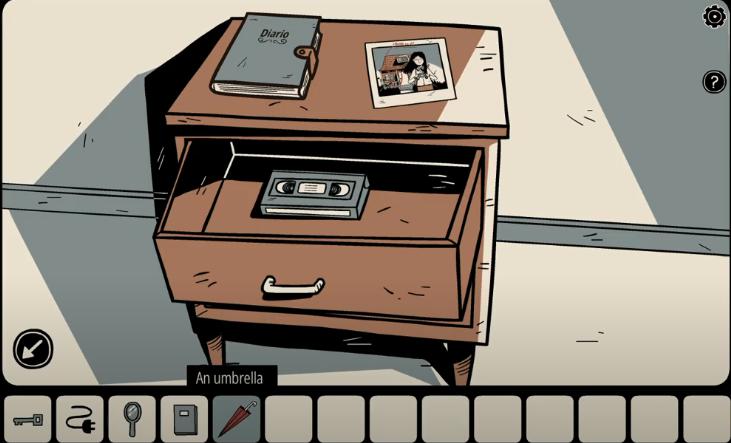
Now, let’s take a look at the top drawer of the cabinet on the right. Tap on it to take a closer look, and tap once more to open it.
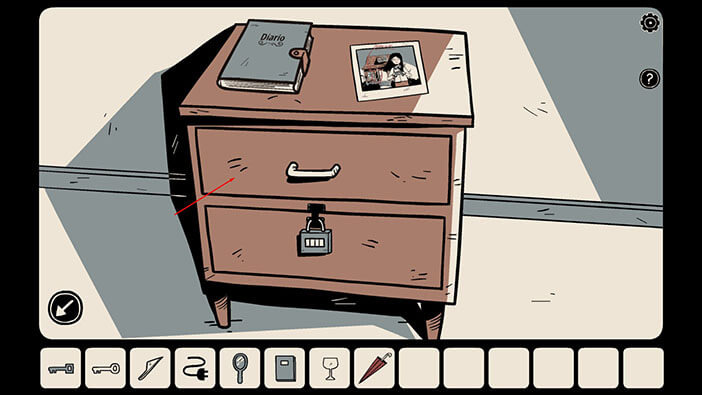
Inside the drawer, you will see a VHS tape. Tap on it to pick it up, and a “Video Cassette tape” will be added to your inventory.
Ok, now let’s go to the next room on the right.
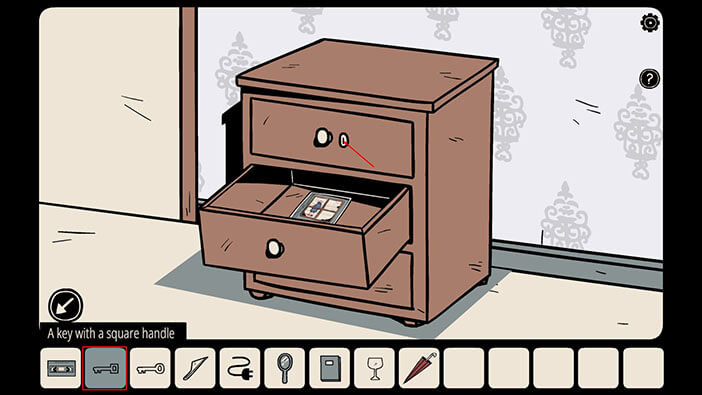
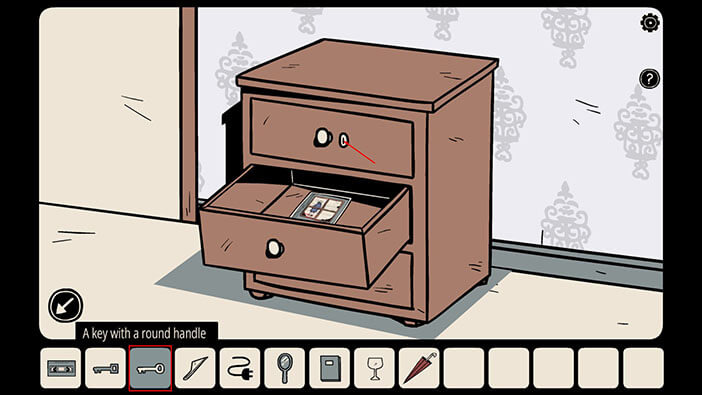
Tap on the drawer to the right of the front door to take a closer look at it. Select the “Key with the round handle” (we found it inside the broken bottle) from the inventory and tap one keyhole on the top drawer to unlock it.
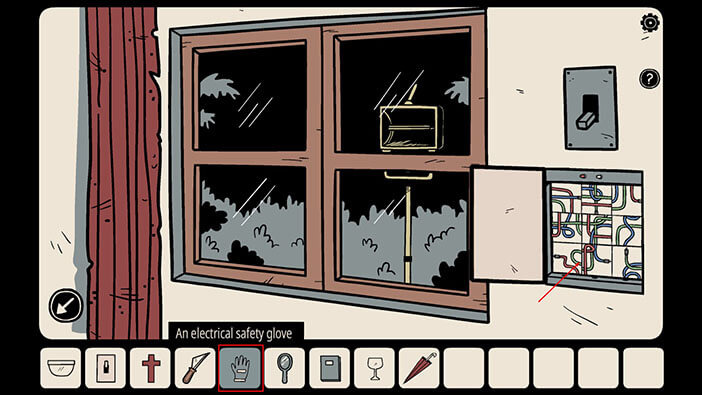
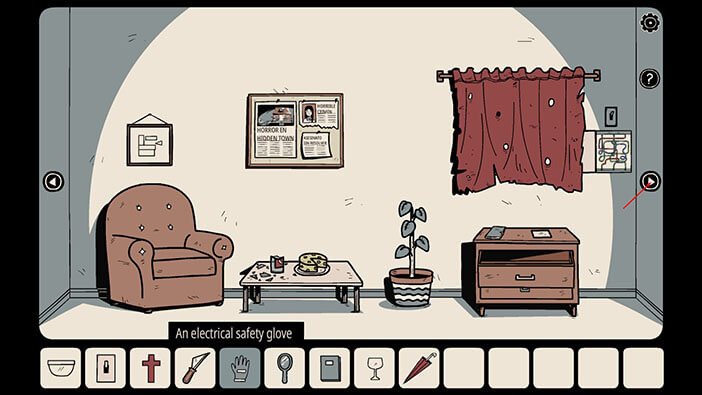
Tap on the drawer to open it, and inside you will see some kind of glove. Tap on the glove to pick it up, and an “Electrical Safety Glove” will be added to your inventory.
Ok, now let’s go to the next room on the right (the one with the TV).
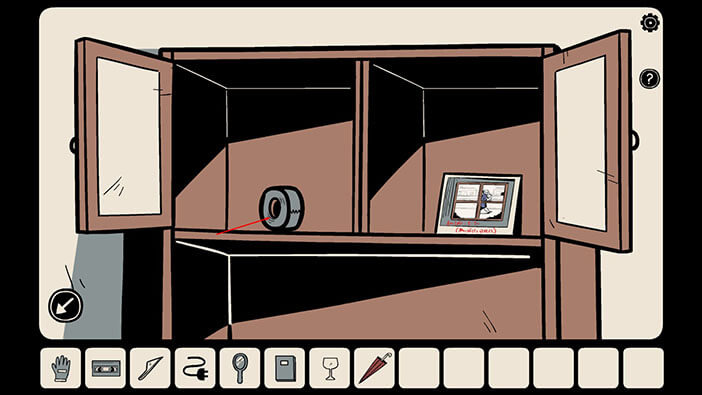
Now, let’s take a look at the upper-left cabinet door.
Select the “Key with the square handle” (we found it behind the armchair) from the inventory and tap on the keyhole on the cabinet door to unlock it.
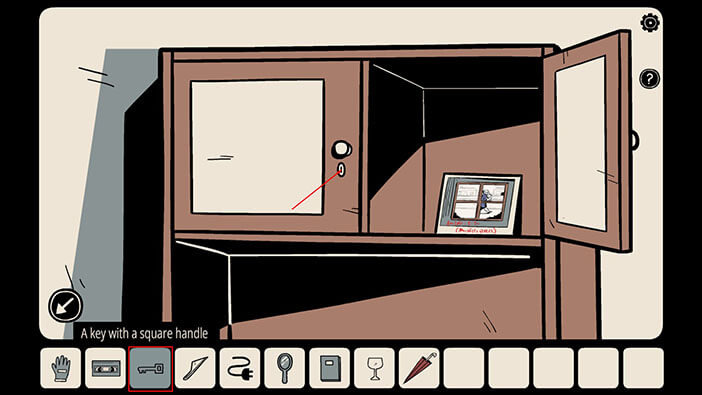
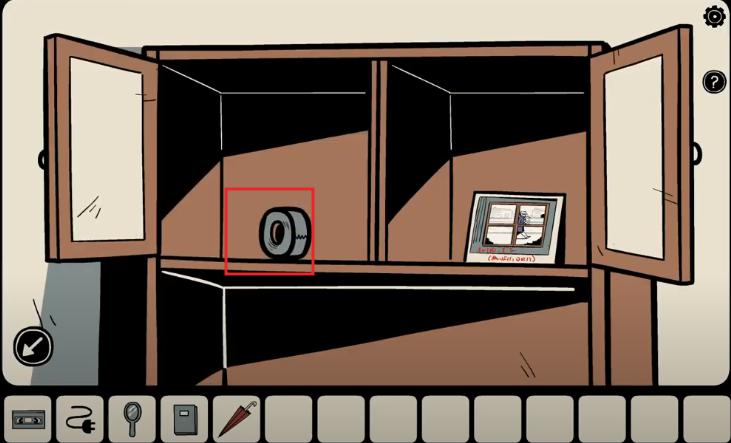
Tap on the cabinet door to open it and inside you will see duct tape. Tap on it to pick it up, and “Electrical insulating tape” will be added to your inventory.
Ok, now let’s take a look at the cable below the TV.
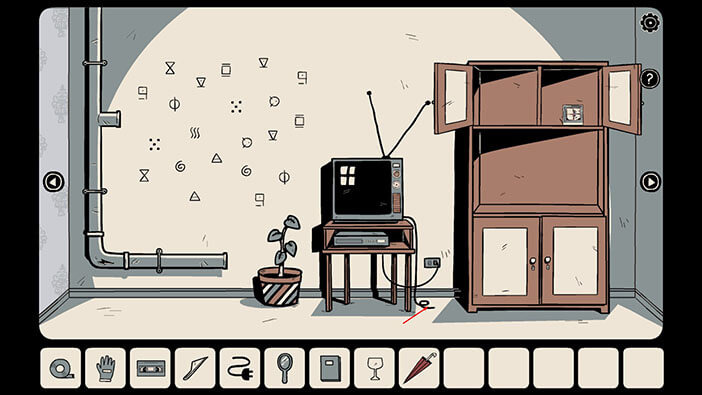
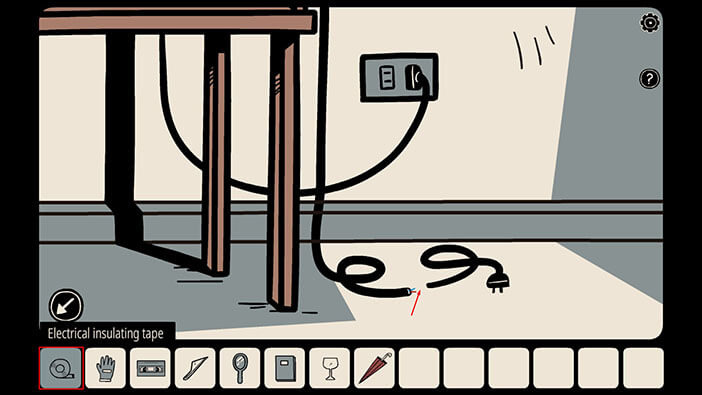
We can see that the cable is broken. Select the “Cable with a plug” from the inventory and tap to the right of the broken cable.
Ok, now let’s fix this cable. Select the “Electrical insulating tape” from the inventory and tap between the two cables to connect them.
Now, tap on the cable to plug it into the electrical outlet.
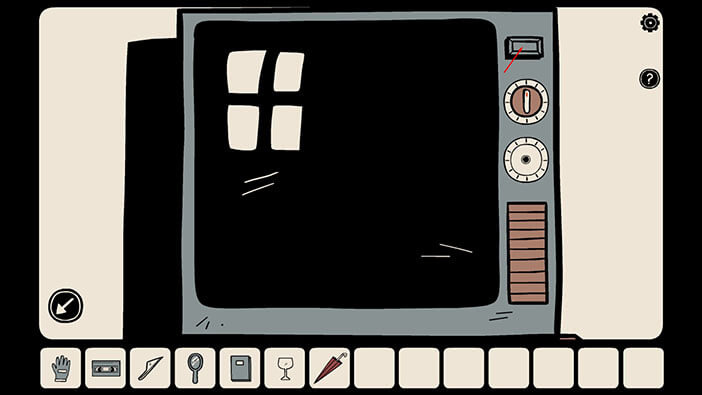
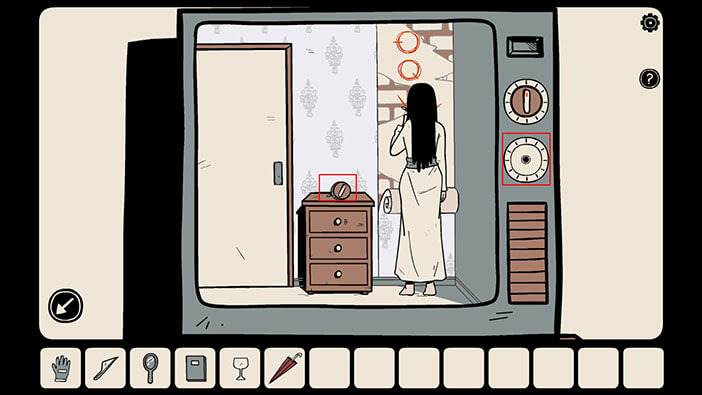
We repaired the cable, so we can now turn on the TV. First, tap on the TV to take a closer look at it. Then, tap on the bottom in the upper right corner of the TV to turn it on.
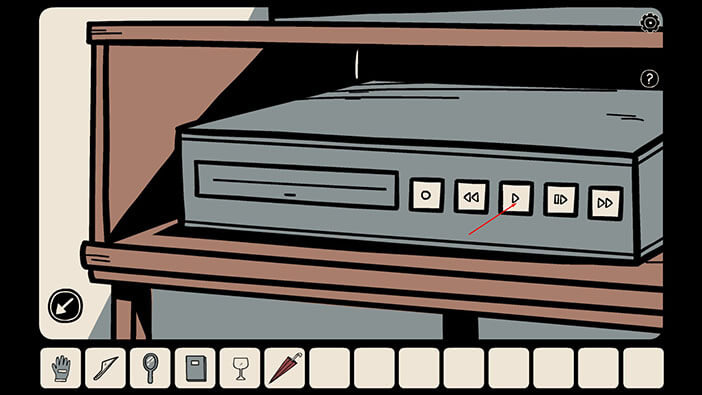
Ok, now let’s see what’s on the videotape. First, tap on the VCR to take a closer look at it. After that, select the “Video Cassette tape” from the inventory and tap on the VCR to put it in.
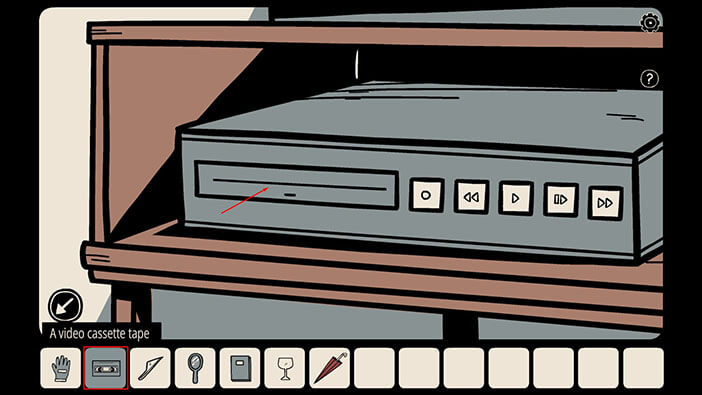
Tap on the “play” button so we can finally see what’s on this tape.
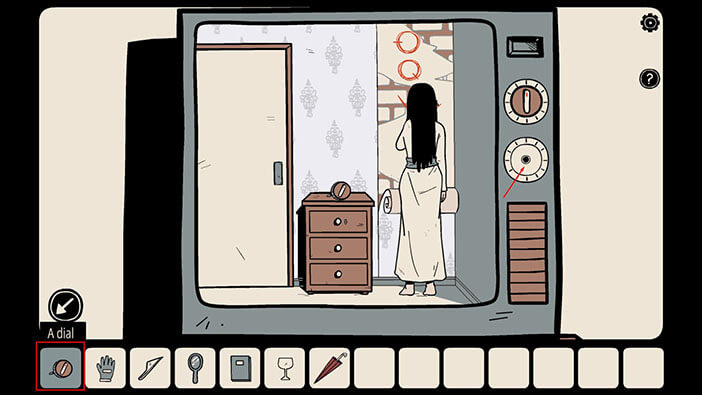
You will see that the lower dial on the TV is missing. However, we saw that it appeared in the video on top of the cabinet. So, maybe it also appeared there in real time? Let’s check it out.
Tap on the arrow on the left to go back to the previous room.

We can see that the dial appeared on the drawer, just like in the video. Tap on the dial to take a closer look at it, and tap once more to pick it up. A “Dial” will be added to your inventory.

Ok, let’s go back to the room with the TV.
As before, tap on the TV to take a closer look at it. Now, select the “Dial” from the inventory and tap on the empty slot to insert it.
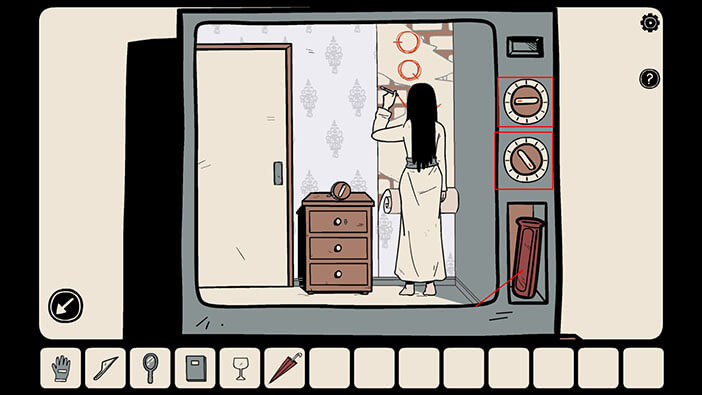
We should now turn both dials to the correct position. The correct position of the dials is drawn on the circles, above the creepy girl. Also, you can tell in which directions the dials are pointing by looking at the small red line.

Ok, now let’s turn the dials. As you can see on the image, the upper dial should be pointing at the 9 o’clock position, while the lower dial should be pointing at the 5 o’clock position.
As soon as you point the dials to the correct position, the small compartment below them will open up, and we can see that there’s something inside it. Tap on this item to pick it up, and a “Plastic Handle” will be added to your inventory.
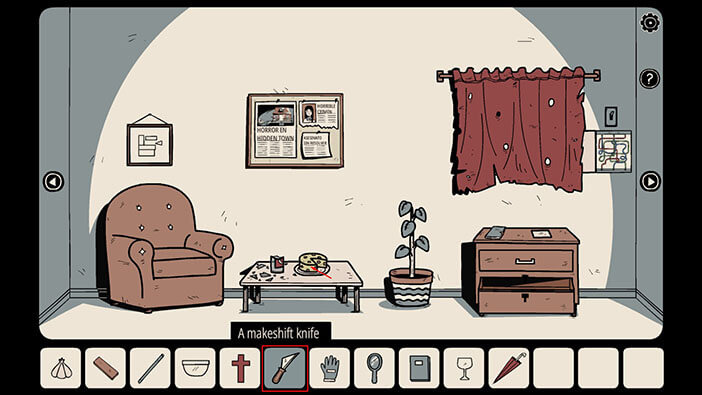
Ok, we can now make the improvised knife, so let’s do that. Select the “Plastic Handle” from the inventory and tap on the “Piece of glass” to combine these two items. A “Makeshift Knife” will be added to your inventory.
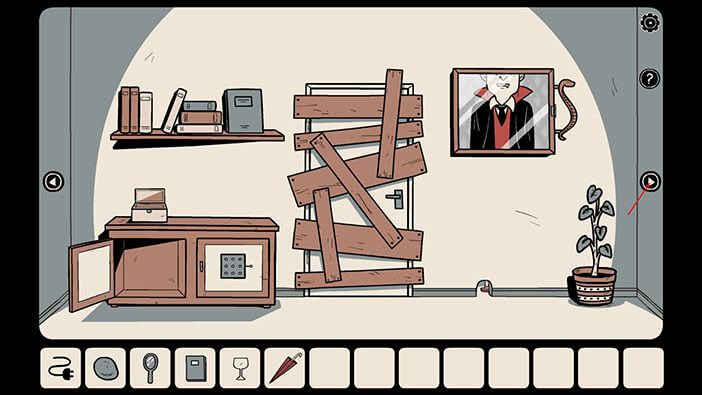
Ok, now let’s go back to the room on the left and use the knife to remove the wallpaper.
Ok, since the dial appeared on this cabinet, we know that the girl in the video was drawing on the wall to the right of it. So, select the “Makeshift Knife” from the inventory and tap on the wallpaper several times to remove it.
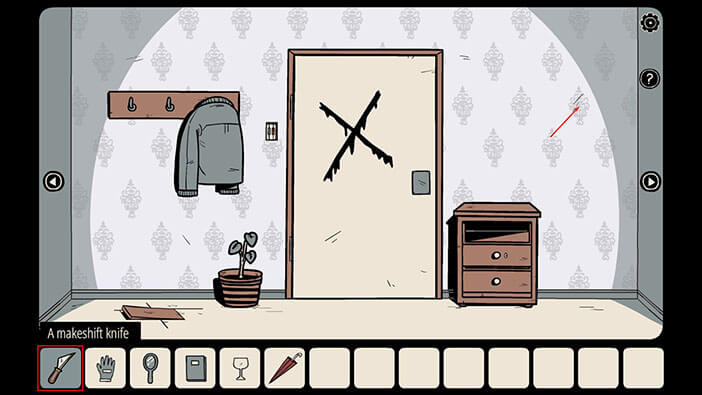
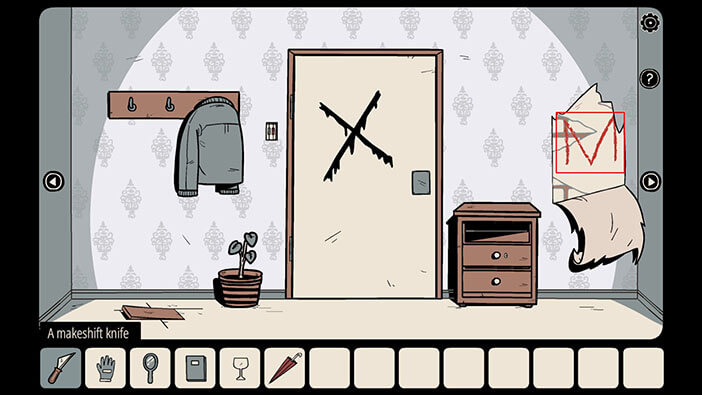
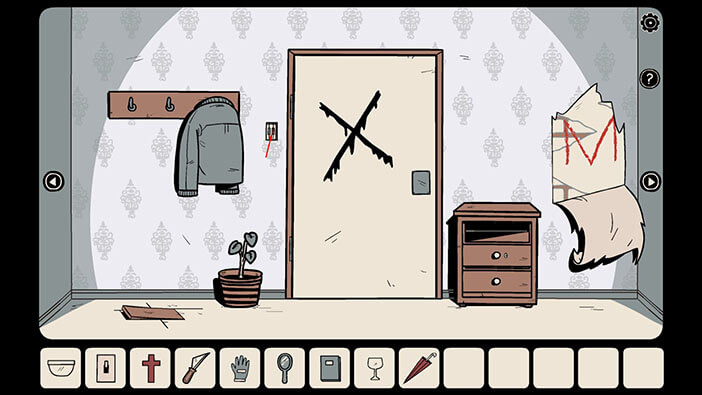
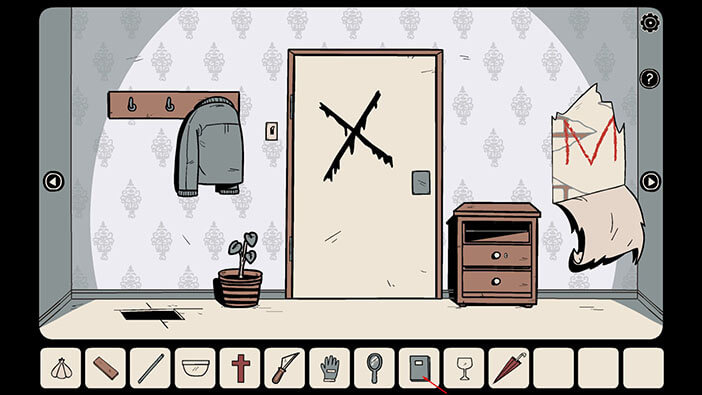
After removing the wallpaper, we can see that there’s a symbol that resembles the letter “M” below it. We will use this information to solve yet another puzzle, so memorize this symbol.
NOTE: In your game, the sign below the wallpaper could be something different than the letter “M” (letter “W” for example). But you will always discover it by removing the wallpaper with the makeshift knife.
Ok, before solving the puzzle with the symbol “M” let’s first go to the room on the left (the one with the armchair).
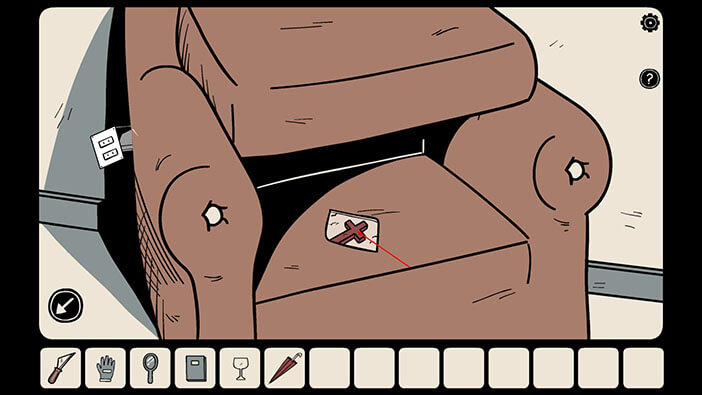
Tap on the armchair to take a closer look at it, then tap again to lift up the cushion – your character will say that he can feel something hidden inside the armchair.

Now, select the “Makeshift Knife” from the inventory and tap below the cushion (twice) to cut the armchair.
Our character will discover the crucifix hidden inside the armchair. Tap on it to pick it up, and a “Wooden Cross” will be added to your inventory.
Ok, now let’s go to the next room on the left.
Tap on the cabinet door on the right to take a closer look at it, and tap again to start the interaction.
Ok, here we need to draw the symbol that we discovered below the wallpaper. In our case that’s the letter “M”. So let’s do it. You can draw the letter “M” by tapping on certain fields as shown in the image below.
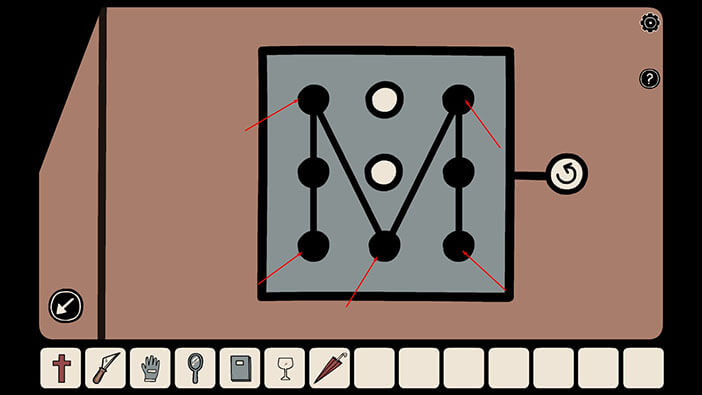
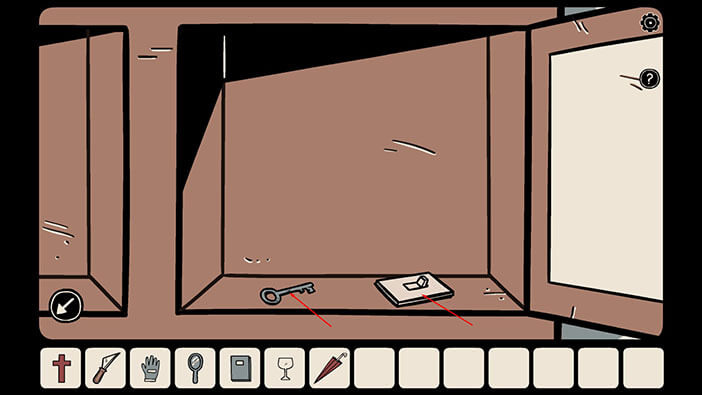
As soon as you draw the correct symbol, you will hear a clicking sound that indicates that the cabinet door is unlocked. So, tap on the door to open it. Inside you’ll see two items. Tap on them to pick them up and a “Light Switch” and a “Key with an oval-shaped handle” will be added to your inventory.
Ok, now let’s go back to the room with the TV – it’s the first one on the left.
Tap on the lower left cabinet to take a closer look at it.
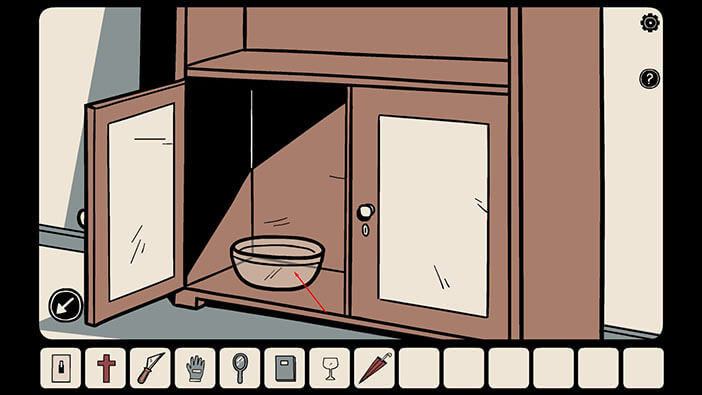
Select the “Key with an oval-shaped handle” and tap on the keyhole on the left to unlock the cabinet door.
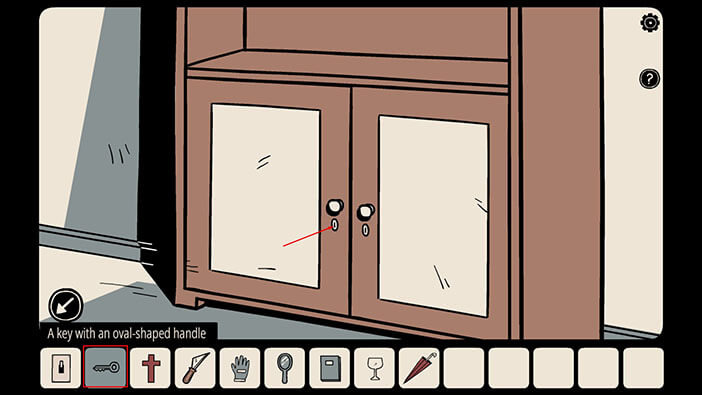
After that, tap on the cabinet door to open it, and inside you will see some kind of a bowl. Tap on it to pick it up and a “Glass Bowl” will be added to your inventory.
Ok, now let’s go to the room with the armchair. It’s the second one on the right.
Let’s check out that electrical panel on the right. Tap on it twice to take a closer look and open it.
We can see a lot of wires, but it seems that our character can’t touch them with his bare hands.
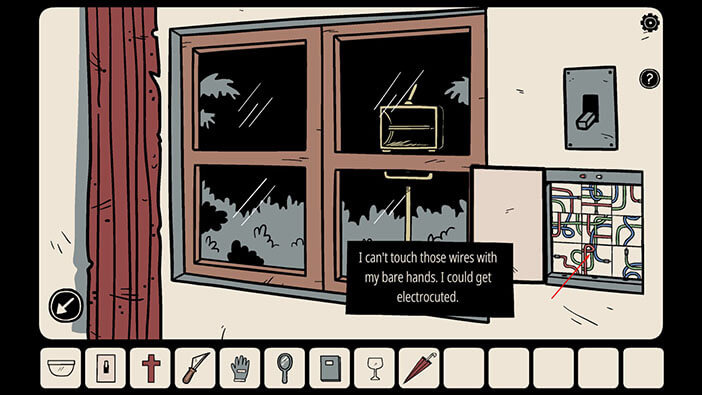
But we have a solution for this problem. Select the “Electrical Safety Glove” from the inventory and tap on the cables.
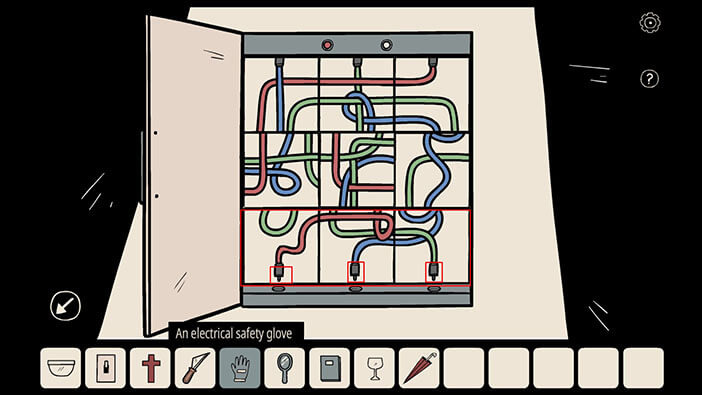
Well, now we should properly reconnect the cables. This puzzle might seem somewhat confusing at first, but it can be easily solved in three simple steps.
Step 1
We are going to rotate the cable in the first (top) row so that their plugs are all pointing upward. So,
Rotate the left field in the first row until the plug on the blue cable is pointing upwards.
Rotate the middle field in the first row until the plug on the green cable is pointing upwards.
Rotate the right field in the first row until the plug on the red cable is pointing upwards.
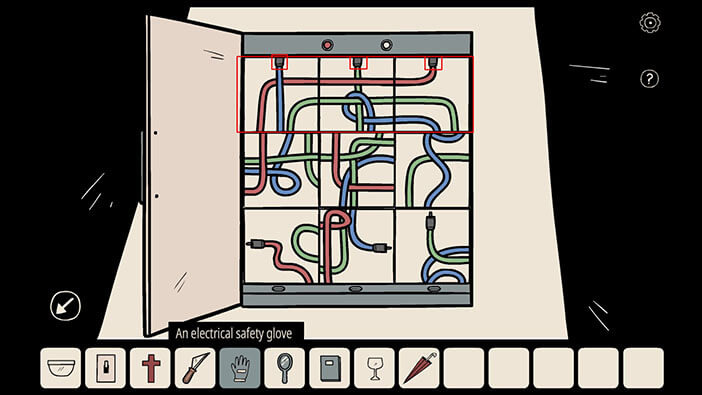
Step 2
We will do the similar thing as in step 1, only this time the plugs on the cables in the third (bottom) row should be inserted into the slots (pointing downwards). So,
Rotate the left field in the third row until the plug on the red cable is pointing downwards.
Rotate the middle field in the third row until the plug on the blue cable is pointing downwards.
Rotate the right field in the third row until the plug on the green cable is pointing downwards.
Step 3
Ok, the only thing left to do now is to connect the cables in the second (middle) row with the cables in the other rows. So,
Rotate the left field in the second row until the green cable is reconnected with the green cable below it (left field in the third row). NOTE: you could also choose to line up the cables with the field above.
Rotate the middle field in the second row until the green and red cables are reconnected with the green and red cable below them (middle field in the third row).
Rotate the right field in the second row until the blue cable is reconnected with the blue cable below it (right field in the third row).
NOTE: As you line up the cables in the fields in the second row with the cables in the fields in the third row, they will be also lined up with the cables in the first row.
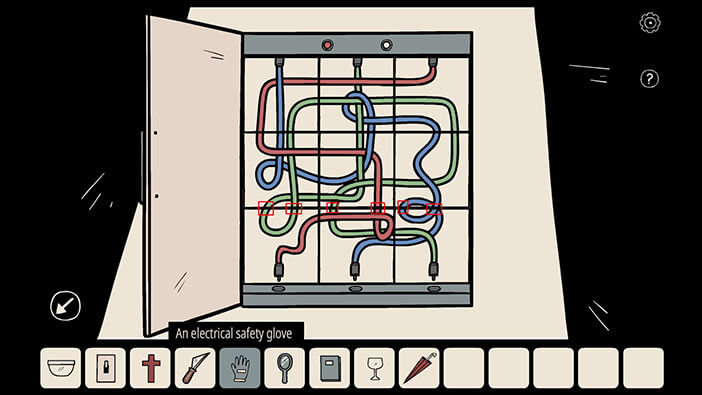
After completing this puzzle we have restored the power to the street light outside. So, tap on the switch to turn on the light.
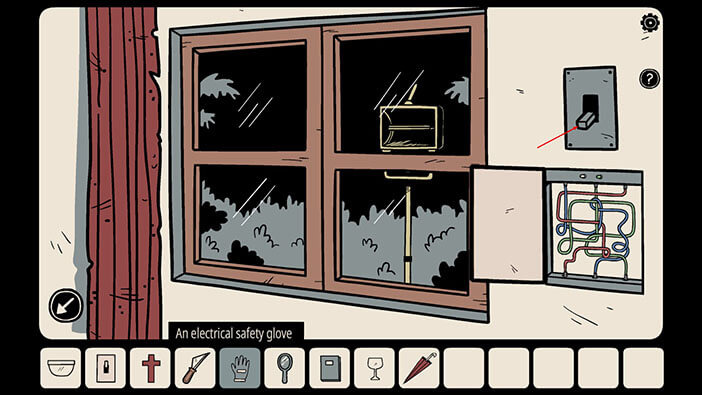
Next, tap on the red curtain on the left to pull it over the window.
Ok, now let’s go back to the front door. It’s the first room on the right.
We can see that to the left of the front door, the light switch is missing. Tap to examine the wires more closely.
Select the “Light Switch” from the inventory and tap on the slot to reconnect it.
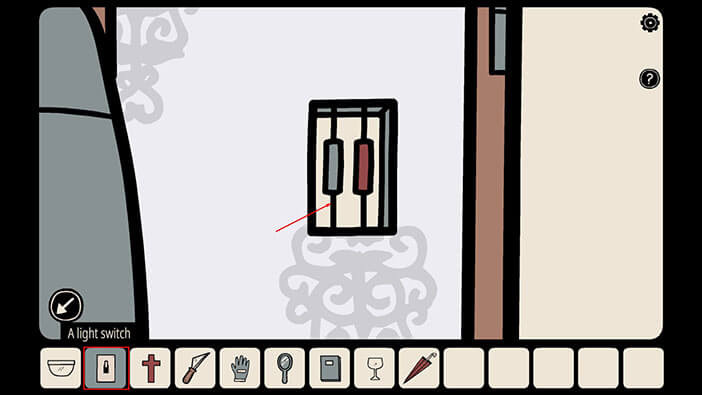
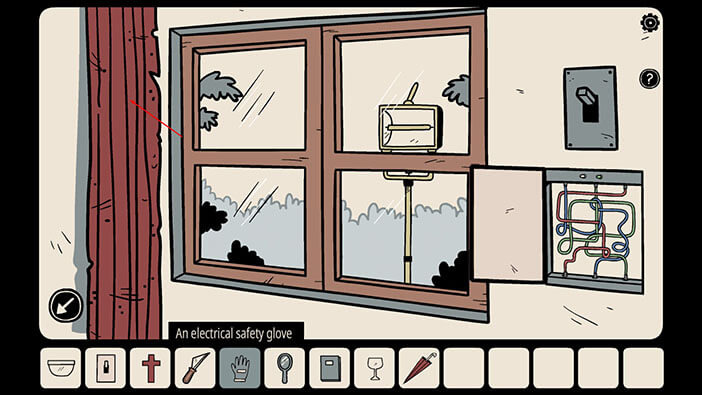
Ok, now tap on the switch to turn off the light.

Let’s go and check out the room on the right (the one with the TV).
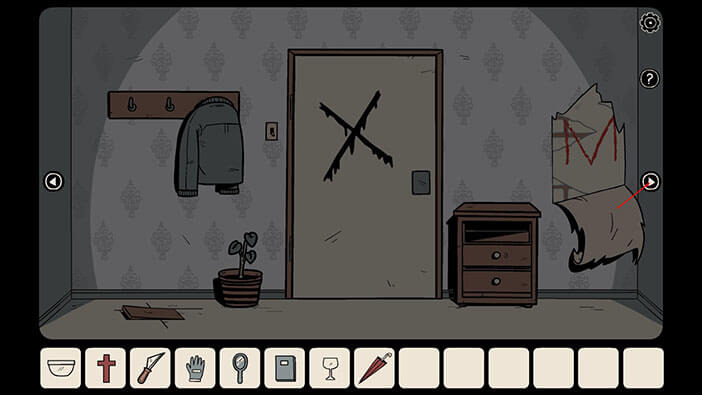
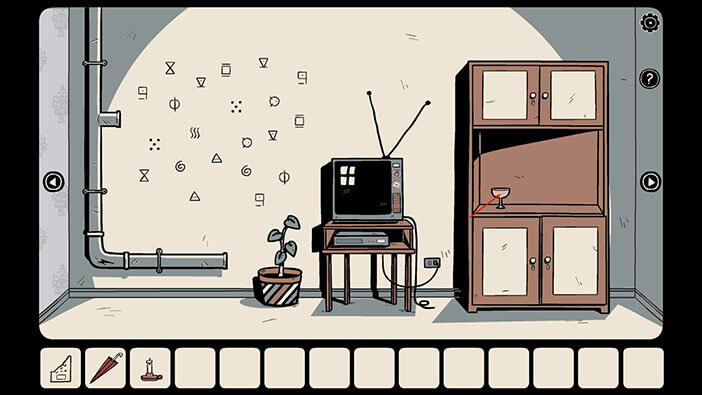
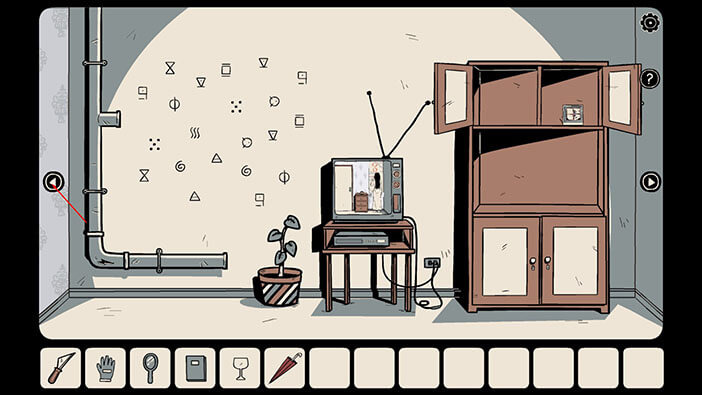
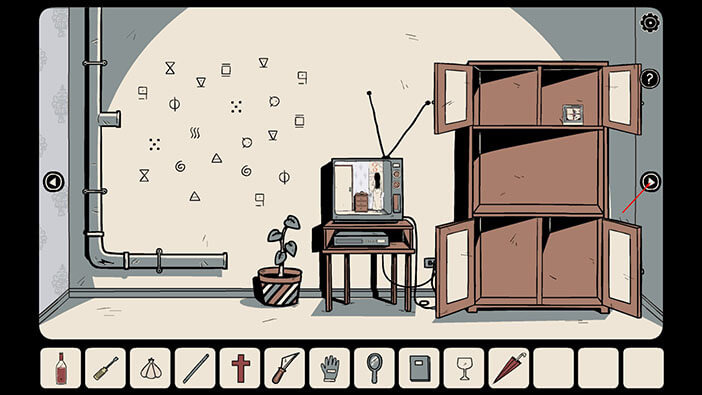
After turning off the lights, we can see that shadows are forming four squares on the wall, and inside of the squares, there are some symbols. Some of the symbols are marked with white circles. Also, some shadows are cutting inside the squares – take note of these shapes.
Now, let’s check out the book in our inventory and look for clues about this puzzle. Go to the first page.

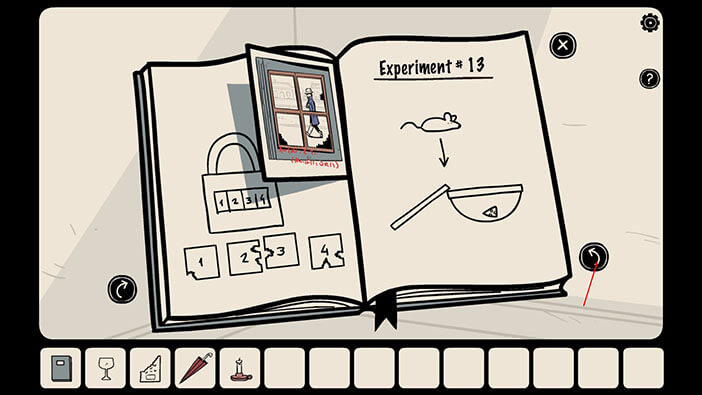
On the left page, we can see a padlock marked with numbers 1,2,3, and 4. Below it there are four notes, also marked with numbers 1,2,3, and 4. Also, each note looks like a square, but there are some pieces missing from each square. So, if you look closely you can conclude that the pieces of the note that are missing will match perfectly with the shadows on the squares that we just looked at. So, let’s first memorize what pieces are the notes on the hint missing and compare them with the shadow squares on the wall.
Number 1 Note is missing a bottom left corner
Number 2 Note has two cuts on the right side (missing two parts)
Number 3 Note has a single cut on the left side (missing a single part)
Number 4 Note has one cut on the bottom and one cut on the right side (missing two parts)
NOTE: In your game, the notes might look differently, because different parts of the note might be cut out. However, you can still solve this puzzle by using the same logic – comparing the notes with “shadow squares”.

Ok, now let’s take a look again at the squares on the wall and compare them with notes.
The First note (marked with number 1) was missing a bottom left corner, just like the lower-left square. The marked symbol inside the square is some kind of vertical wavy line. So, the First Symbol = “Vertical Wavy Lines”
The Second Note was missing two parts on the right side, just like the square in the upper right corner. The marked symbol inside the square is a circle with two diagonal lines. So, the Second Symbol = “Circle with two diagonal lines”
The Third Note was missing a single part on the left side, just like the square in the upper left corner. The marked symbol inside the square is some kind of a reverse triangle. So, the Third Symbol = “Reversed Triangle”.
The Fourth Note was missing one part at the bottom and one part on the right side, just like the square in the lower right corner. The marked symbol inside the square looks like a drawing of a ripple. So, the Fourth Symbol = “Ripple”
Memorize/ Write Down this information and let’s finally solve this puzzle. You could also draw these symbols on the note if that’s easier.
Ok, these symbols are used to unlock the drawer on the cabinet that is located in the room with the armchair. So, let’s go there. It’s the second room on the right.
First, let’s close the top drawer.

Then tap on the padlock on the bottom drawer to examine it. We can see that we will need four symbols to unlock this padlock, so let’s enter the symbols that we discovered by solving the previous puzzle. So, looking from left to right, we have
First = “Vertical Wavy Lines”
Second = “Circle with two diagonal lines”
Third = “Reversed Triangle”
Fourth = “Ripple”
NOTE: As I already mentioned, the order of the symbols might be different in your game, but you can solve this puzzle by following the steps in this guide.
As soon as you enter the correct symbols you will unlock the drawer but, at this moment the “creepy girl” will appear behind our character and she will gently touch his shoulder.
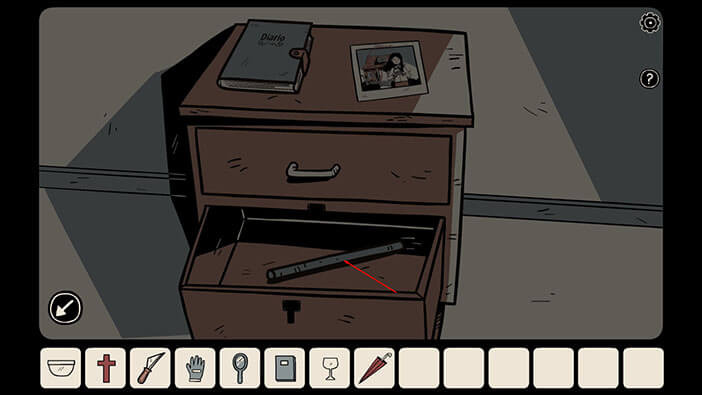
Tap to open the bottom drawer. Inside of it, you will see a metal pipe. Tap on it to pick it up and a “Metal Bar” will be added to your inventory.
Ok, before we continue, let’s first go back to the front door, and turn on the lights. It’s the first room on the right.

Tap on the switch next to the door to examine it, and tap once more to turn on the light.

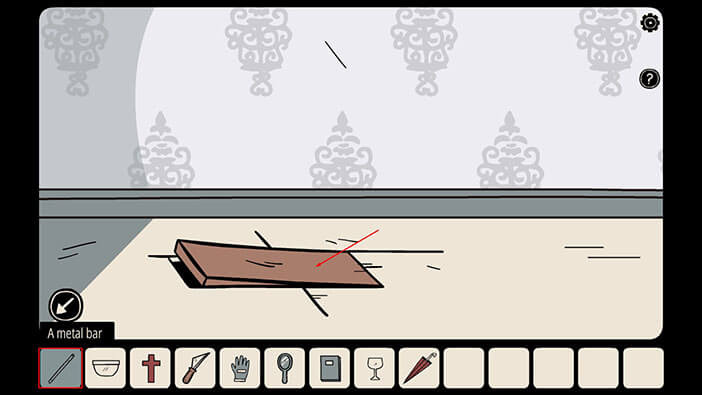
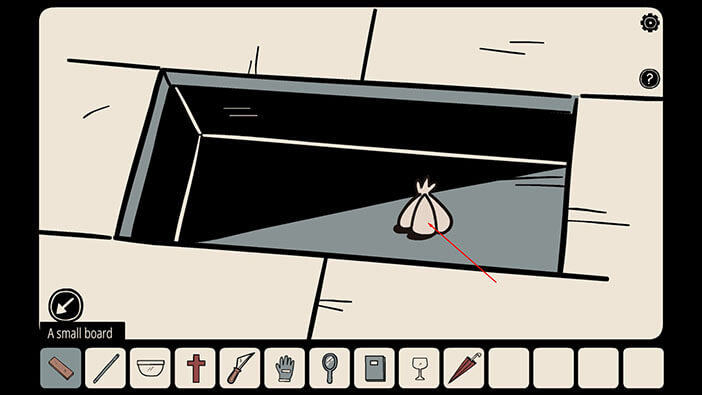
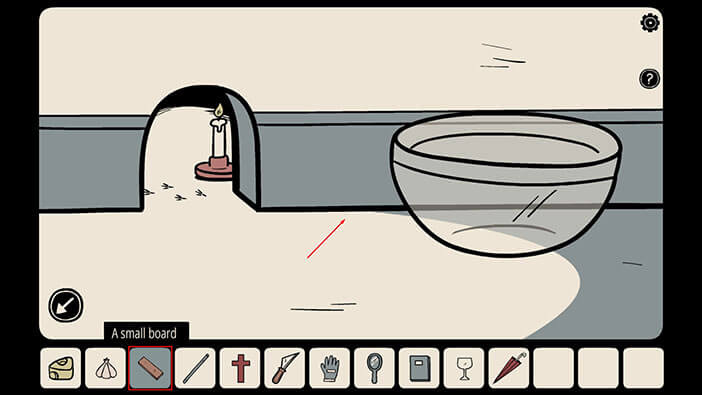
Inside this room, we can also see that there’s a loose floorboard, to the left of the vase. Tap on the board to examine it. Then, select the “Metal Bar” from the inventory and tap on the floorboard to remove it.
Tap on the floorboard to pick it up and a “Small Board” will be added to your inventory.
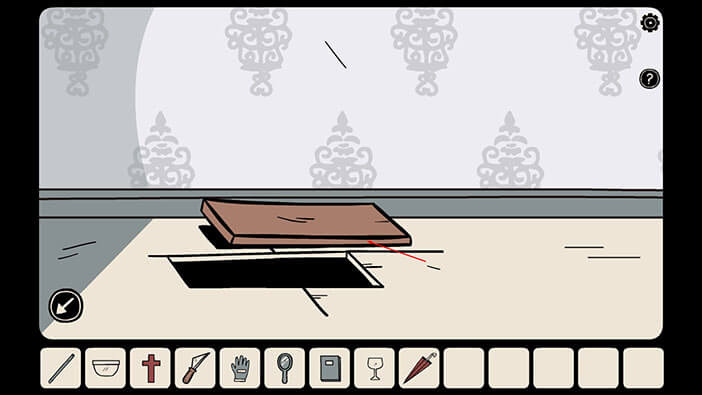
Before we move on, tap on the hole in the floor to look if there’s anything inside. Tap on the white object inside the hole, and “Garlic” will be added to your inventory.
Now, let’s take a look at the book with clues, once more.
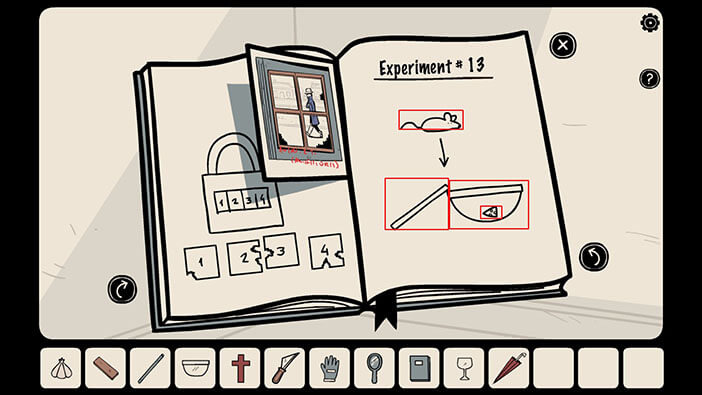
On the first page on the right, we can see the instructions for making a mousetrap. To make the mousetrap we will need a bowl, a small board, and a slice of cheese. The only thing that we are missing is cheese, so let’s go get it.
Tap on the left arrow to go to the room with the armchair.

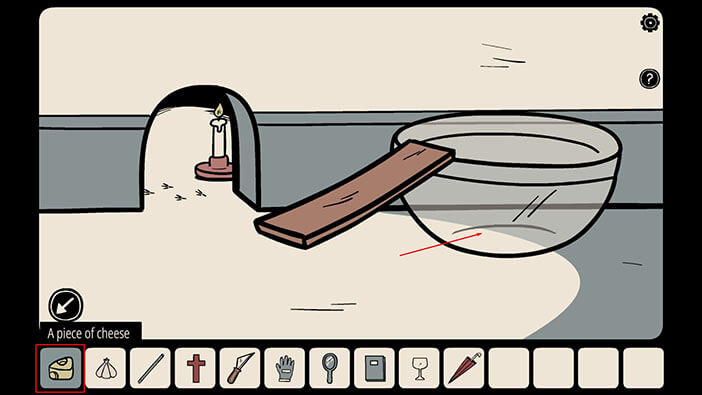
Select the “Makeshift Knife” from the inventory, tap to look at the cheese, and tap once more to cut it.
Tap on the slice of cheese to pick it up and a “Piece of Cheese” will be added to your inventory.
Let’s go to the room in which we saw a mouse hole in the wall. It’s the first one on the left.
Tap on the mouse hole to take a closer look at it.
Now, let’s set the trap. First, select the “Glass Bowl” from the inventory and tap on the right of the mouse hole to place it.
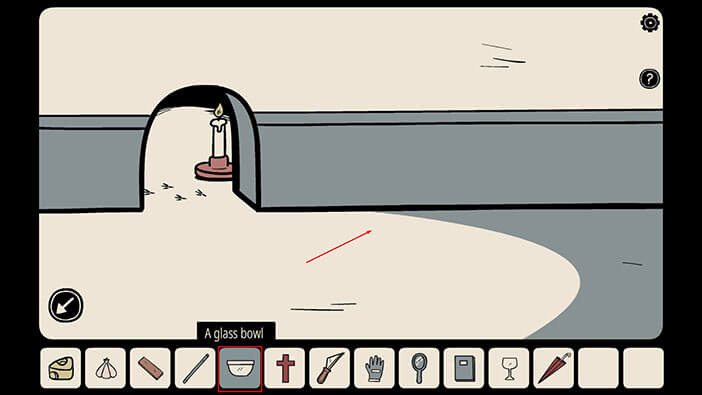
Next, select the “Small board” from the inventory, and tap to the left of the glass bowl to set up a platform through which a mouse can enter into a bowl.
Finally, select the “Piece of Cheese” from the inventory and tap inside the glass bowl to set the bait.
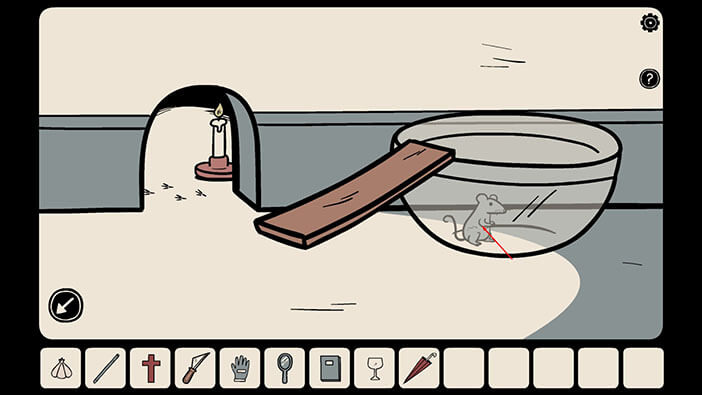
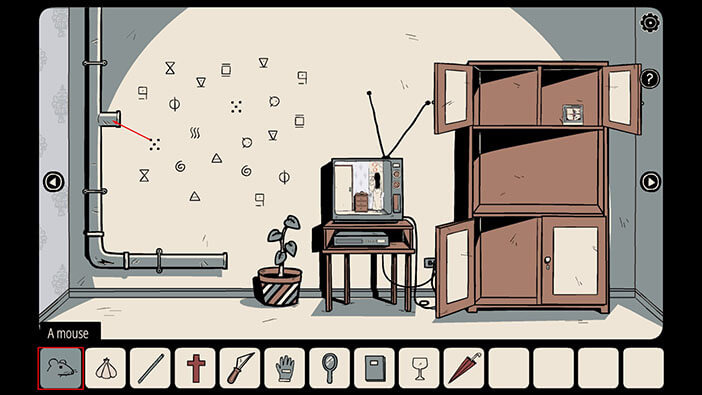
The mouse will get out of this hole, climb over the board, and inside the bowl. He will eat the cheese but won’t be able to get out. So, tap on the mouse to pick it up and a “Mouse” will be added to your inventory.
Now, let’s go to the room with the TV. It’s the first one on the left.
Tap on the crack in the pipe on your left to take a closer look at it.
At first, we could see the eyes of some kind of a ghost, looking at us through the crack in the pipe. But, once he left, we could see that there’s a small key inside the pipe.
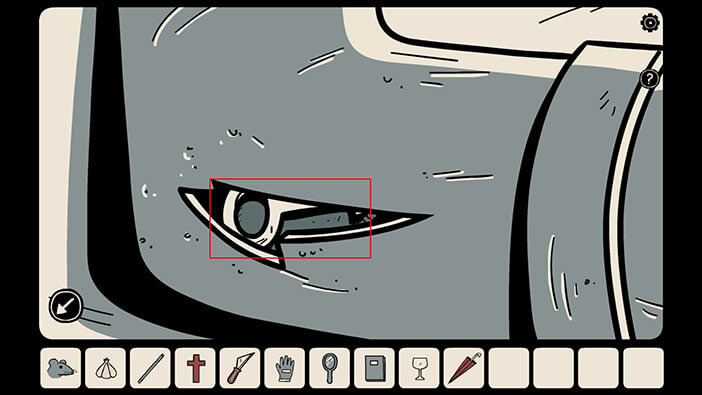
Ok, now let’s use the mouse to get the key inside the pipe. Select the “Mouse” from your inventory and tap on the higher opening on the pipe to put it inside.
The mouse will get to the other end of the pipe, and it will push out the key. The hand of the ghostly black creature will try to reach the key from the pipe, but fortunately, the key fell too far away. So, tap on the key to pick it up, and a “Key with hexagonal handle” will be added to your inventory.

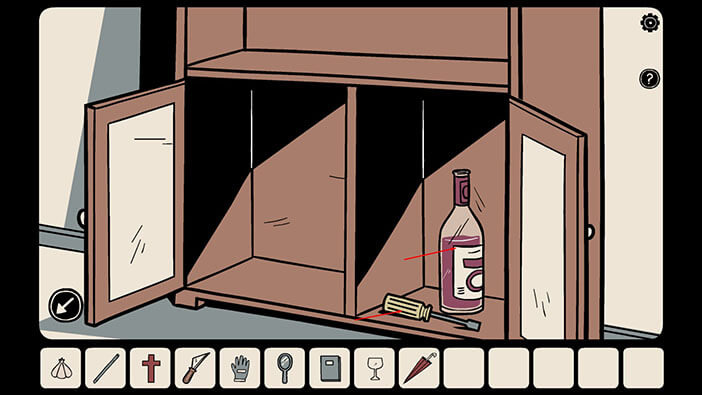
The lower right cabinet door inside this room is still locked, and we can use this key to unlock it. So, tap on the lower right cabinet door to take a closer look at it. Select the “Key with hexagonal handle” from the inventory and tap on the keyhole on the door to unlock it.
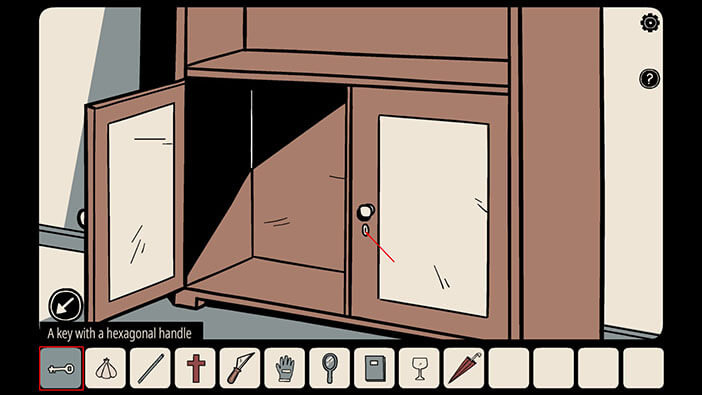
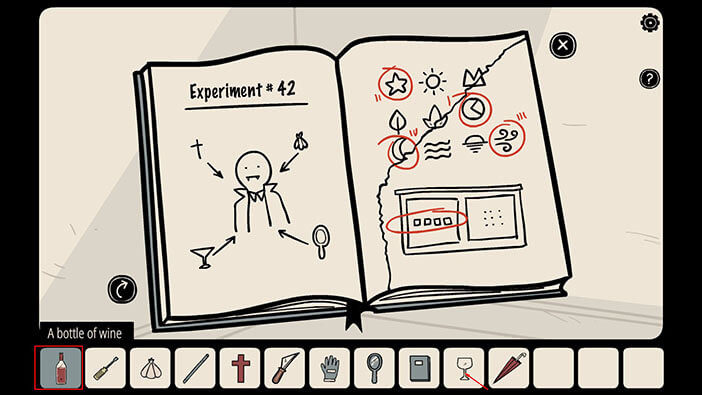
Ok, tap on the cabinet door to open in. You will see two items inside. Tap on them to pick them up and a “Screwdriver” and a “Bottle of Wine” will be added to your inventory.
Let’s go to the first room on the right.
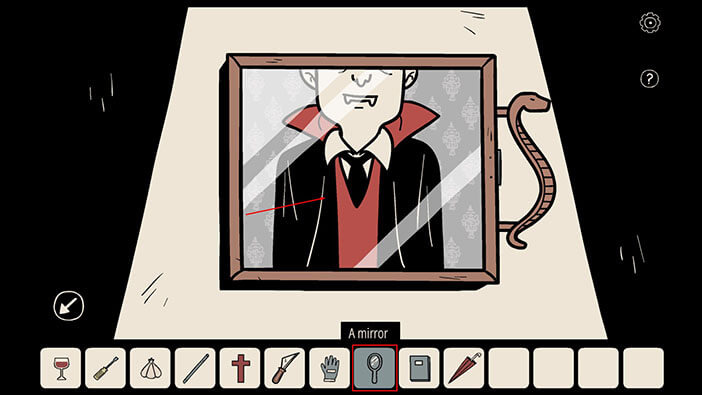
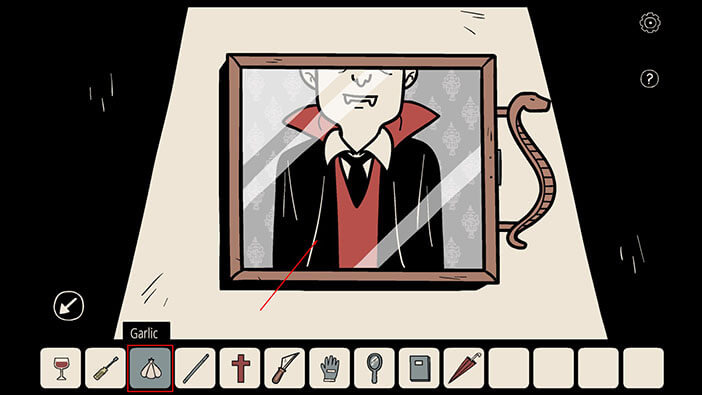
Tap on the picture on the wall to take a closer look at it.
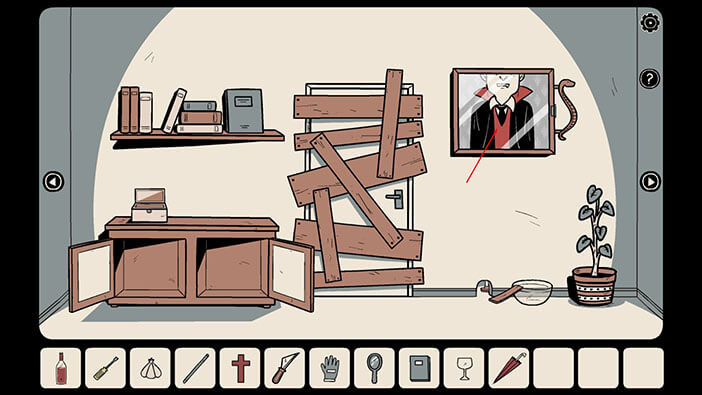
Ok, now tap on the screws on the right to take a look at them. Select the “Screwdriver” from the inventory and tap on the screws to remove them.
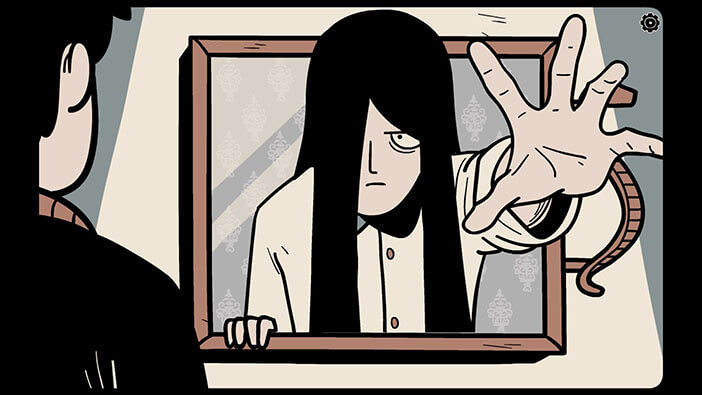
After removing the screws, the “Vampire” will disappear, and our character will see the “creepy girl” jumping out from the picture and trying to grab him. Well, it seems that he wasn’t too scared, and even chuckled a few moments after the event.
Tap on the “handle” of a picture to open it and see what’s behind it.

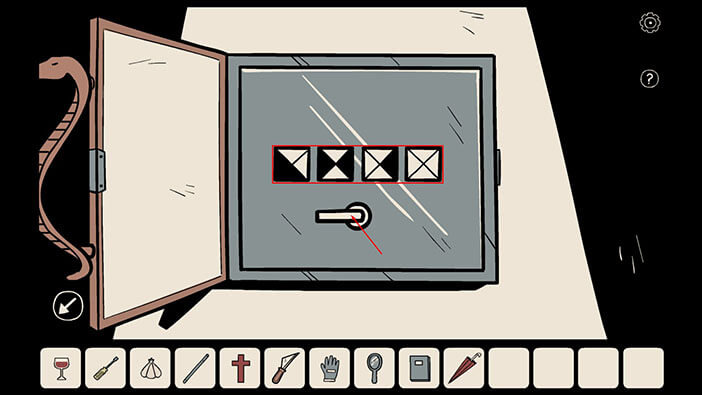
You will see four symbols, that look like four white triangles inside a square. Clearly, we will need a correct combination of the symbols in order to unlock the safe behind the picture. So, let’s leave it alone for now, and put the picture back in its place.

Let’s take a look at our book with clues.

On, the last page of the book we can see a “Vampire” just like the one in the picture on the wall. We can also see that we should “give” four items to the Vampire: a wooden cross, garlic, a goblet with wine, and a mirror. Fortunately, we already have all four required items. However, we still do not know in which order we should give these items to the Vampire in the picture. So, let’s find out.
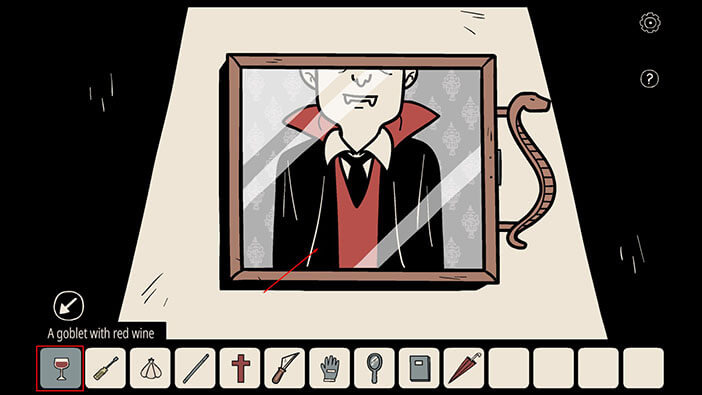
Before we proceed, let’s pour the wine into the goblet. Select the “Bottle of Wine” from your inventory and tap on the goblet. A “Goblet with the red wine” will be added to your inventory.
Ok, now let’s go to the next room on the right and look for clues about the Vampire.

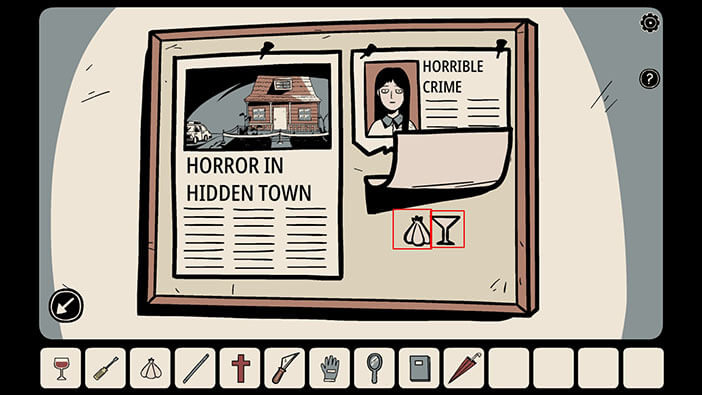
Tap on the board with the cutout articles from the newspaper to take a closer look at it.

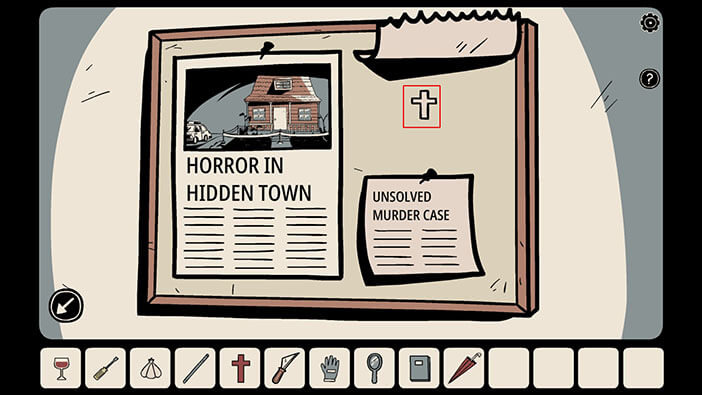
Tap on the first article “Horror in the Hidden Town”.
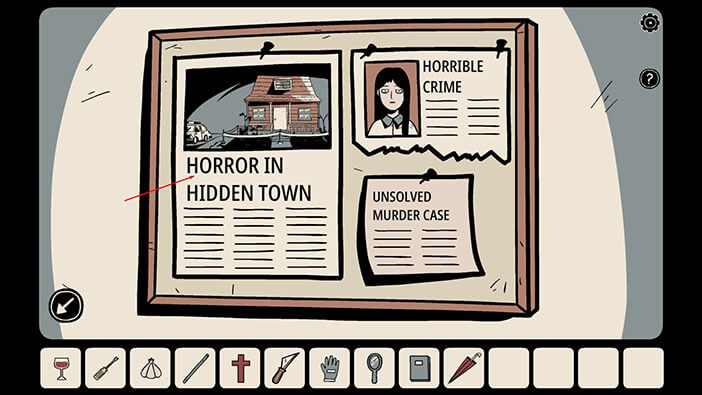
Our character will move the article, and behind it, you will see a mirror. If we presume that the clues were left in the order from left to right, the mirror should be the first thing we should give to the Vampire. So, the First Item = Mirror
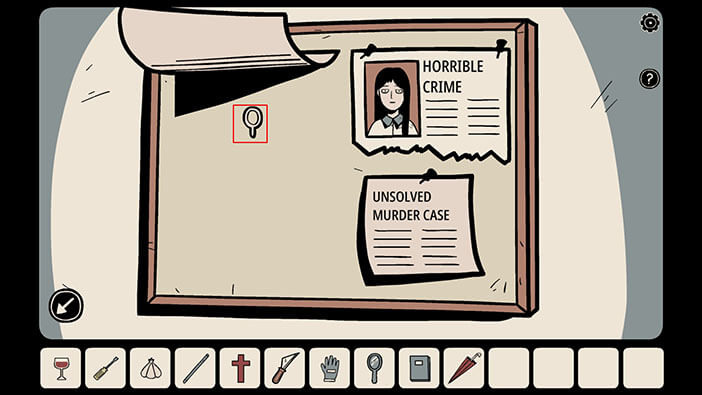
Ok, now tap on the “Horrible Crime” article.
Our character will move the article, and behind it, you will see a wooden cross. So, the Second Item = Wooden Cross
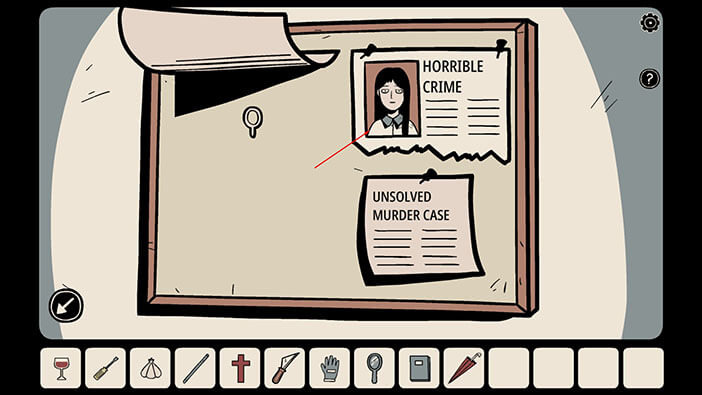
Tap on the last article “The Unsolved Murder Case”.
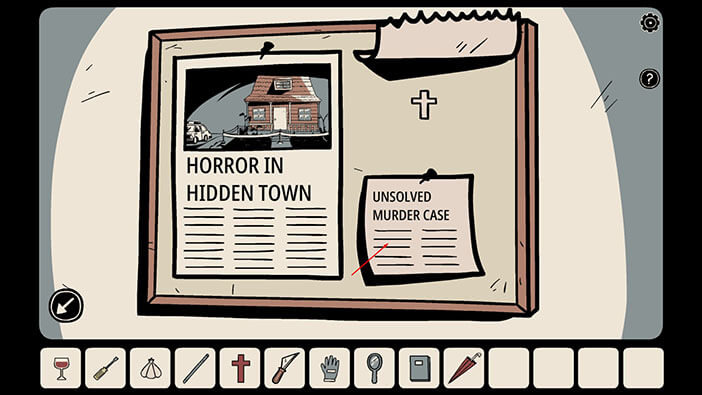
Our character will move the article, and behind it, you will see two items, Garlic, and a Goblet. So,
Third Item = Garlic
Fourth Item = Goblet
Write Down/Memorize the order of the items.
NOTE: The order of the items might be different in your game, but you can discover the correct order just like we did – by looking behind the cutout newspaper articles.
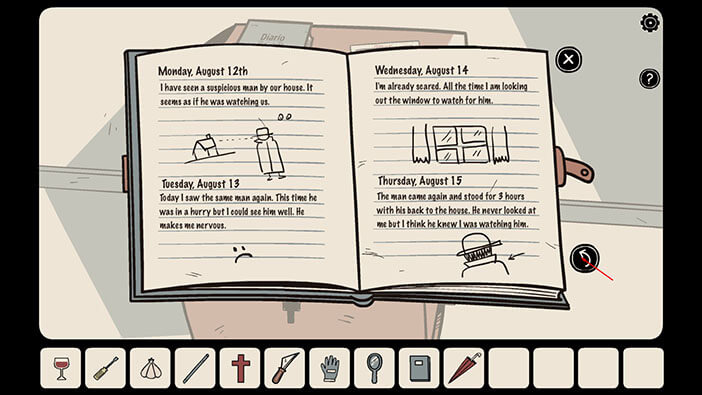
Before we solve the last puzzle, there’s something that I forgot to do. Let’s take a look at the Diary, located on top of the wooden cabinet. Tap to take a closer look at it, and tap again to open the “Diario”.

We can clearly see that whoever wrote this diary (probably the girl in the window) was being spied on by some stranger for several days. It’s obvious that she was frightened of him. Let’s take a look at the next page, by tapping on the arrow on the right.
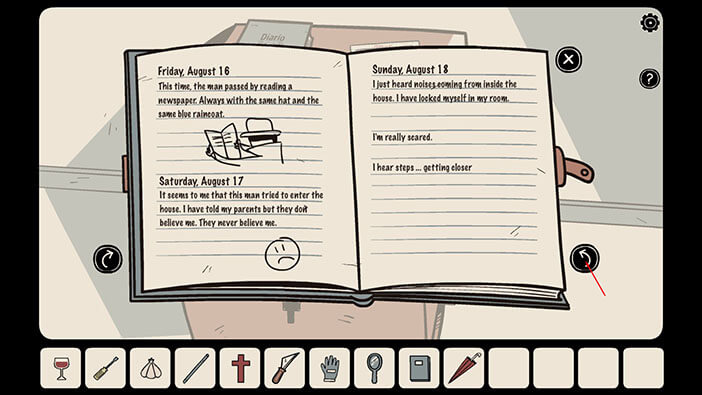
The girl told her parents about this man and that he tried to break into the house, but they didn’t believe her. However, it seems that he managed to break in on his second try. The girl locked herself in the bathroom, hoping that he will leave her alone. But, it seems that he knew where she hid…
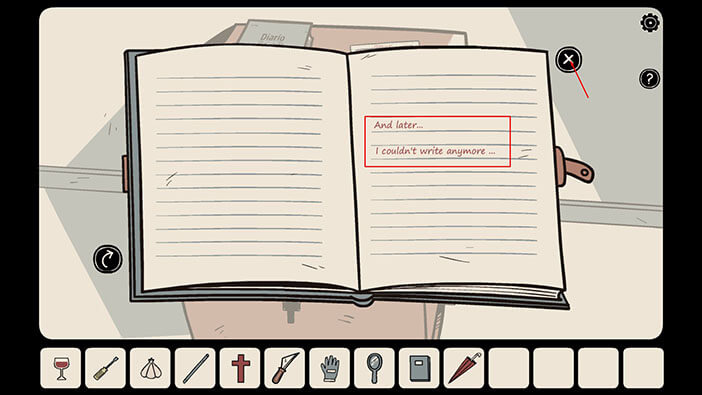
As we turn to the next page, the red text will appear before the eyes of our character. It seems that it was written by the “creepy girl” after her death… Let’s leave the diary alone, and solve the last puzzle so that we can get out of this cursed house.
Tap on the arrow on the left to go back to the room with the picture of a Vampire.

Tap on the picture of a Vampire to take a closer look at it.

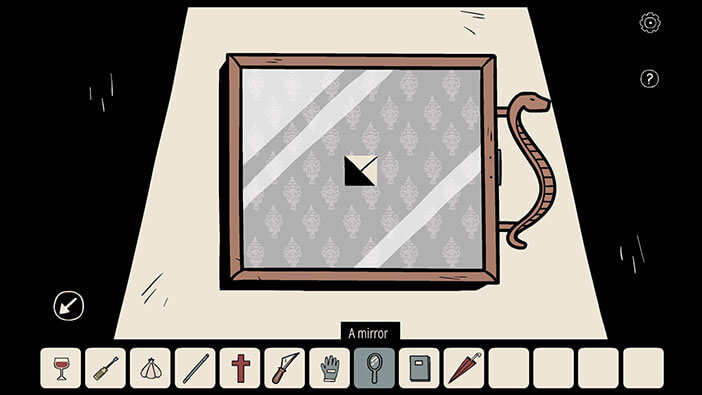
Ok, now let’s give the four items from our inventory to the Vampire and see what happens. We discovered the order of the items by looking below the cutout newspaper articles. So, first, select the “Mirror” from your inventory and tap on the picture of the Vampire.
The first symbol for solving the puzzle behind the picture will appear. So,
First Symbol = black bottom and left triangles / white top and right triangles
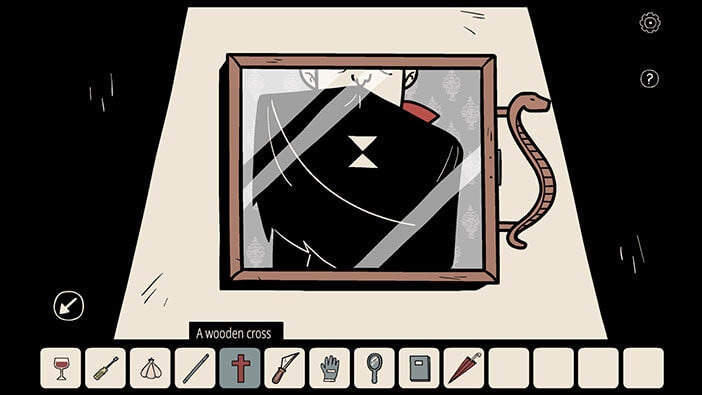
Let’s give him the second item. Select the “Wooden Cross” from the inventory and tap on the picture of the Vampire.
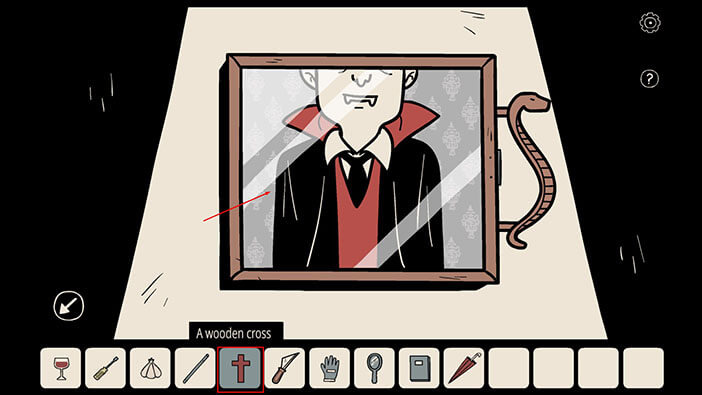
The second symbol for solving the puzzle behind the picture will appear.
The second Symbol = black right and left triangles / white top and bottom triangles
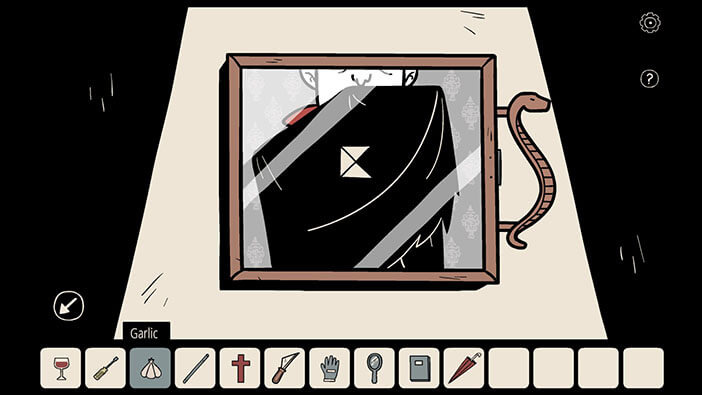
Let’s give him the third item. Select “Garlic” from the inventory and tap on the picture of the Vampire.
The third symbol for solving the puzzle behind the picture will appear.
Third Symbol = black right triangle / the other three triangles are white
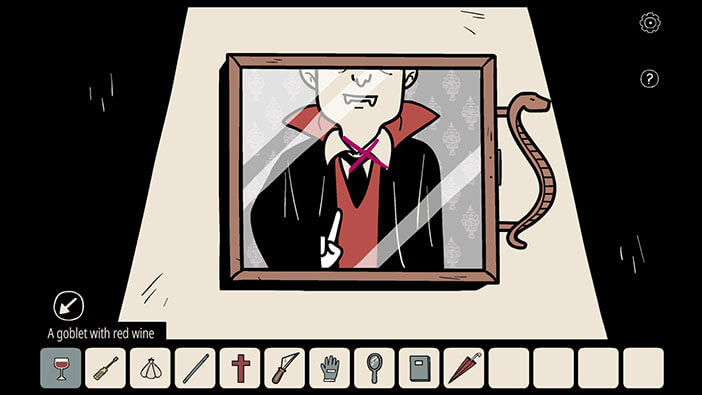
Let’s give him the fourth item. Select “Goblet with red wine” from the inventory and tap on the picture of the Vampire.
The Vampire will lick his lips and will draw an “X” sign with red wine. This probably means that all four triangles are visible. So,
The fourth Symbol = Four white triangles
When we put it all together, we have
First Symbol = black bottom and left triangles / white top and right triangles
The second Symbol = black right and left triangles / white top and bottom triangles
Third Symbol = black right triangle / the other three triangles are white
The fourth Symbol = Four white triangles
Write Down/Memorize this information. Let’s take a look behind the picture and solve this puzzle.
NOTE: The order of the symbols might be different in your playthrough, but you can discover the correct order of the symbols by following the steps in this guide.

Tap on the four fields of this puzzle and enter the symbols that we discovered.
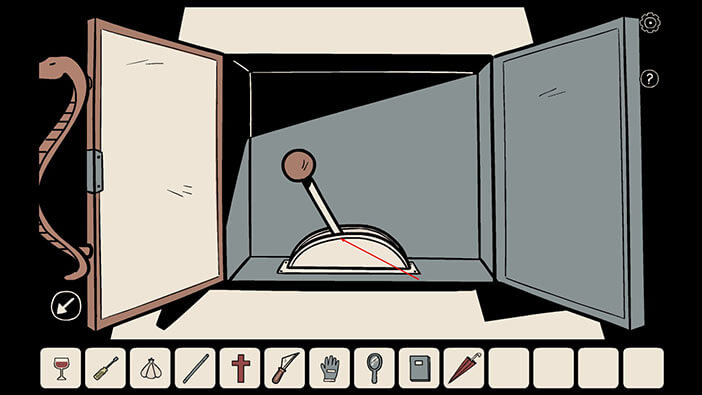
After entering the correct symbols, tap on the handle to open the safe.
Tap on the lever to pull it, and you will unlock and open the front door.
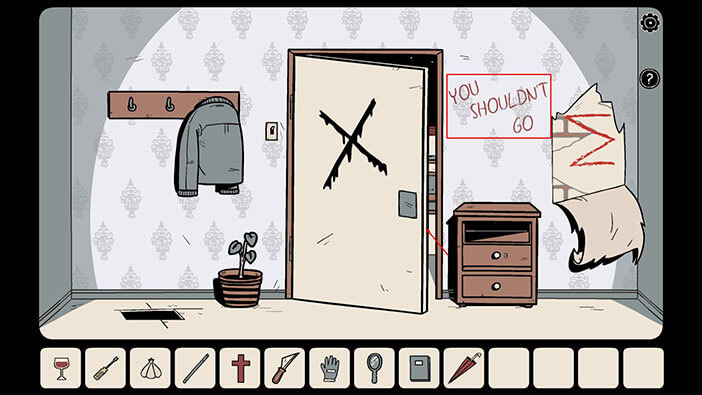
But, as soon as our character reached the door, the note on the wall appeared, and it says that he shouldn’t go. But, we have no other choice but to tap on the door and try to get out.
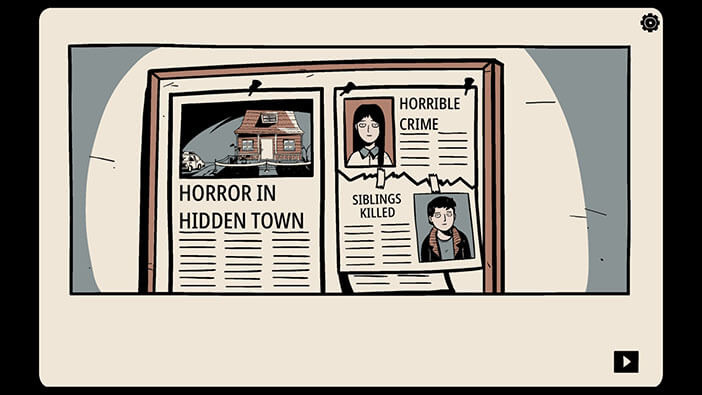
At first, our character was very happy because he finally escaped from the haunted house. But then, he saw the other part of the cutout news article. The title was “Siblings Killed”. He was shocked when he realized that his face is on the picture of the article.
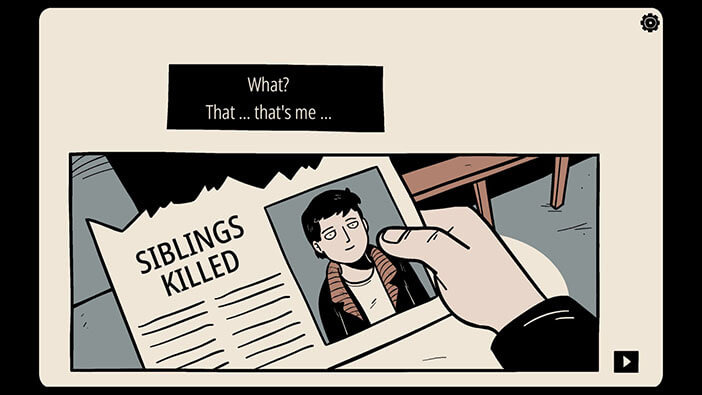
He realized that’s the other half of the newspaper article that he saw inside the house. At this moment the “creepy girl” which is actually his sister, appeared behind our character and gently pulled him back into the house. He didn’t even try to resist, because he realized that he should stay inside with her…
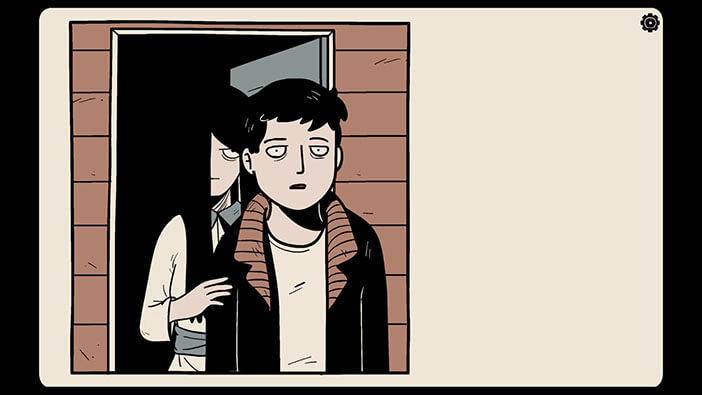
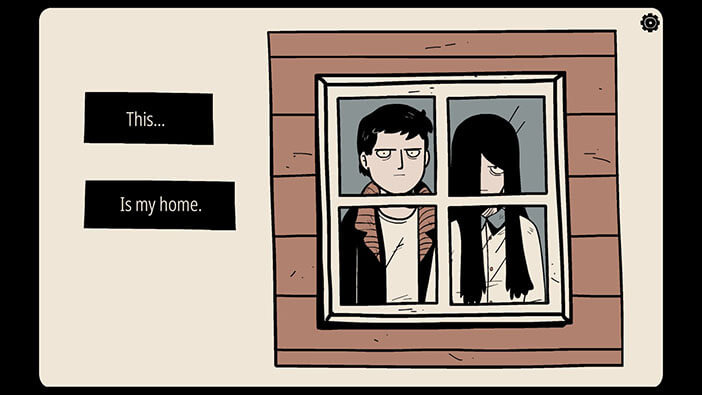
The story ends with our character looking through the window, together with this sister…
Well, that brings us to the end of this adventure, it certainly had an unexpected ending. If you’re interested in Escape Room games, check out our guides for the other games of this genre.
Thank you for reading.
Берем с тумбы свечу, осматриваем полки, видим первую фотографию. Берем с вешалки зонт. Разворачиваемся, берем со шкафа бокал. Смотрим в верхнем ящике шкафа, видим вторую фотографию. С книжной полки берем книгу, в ней видим третью фотографию. В цветочном горшке найдем камень.
На тумбе видим очередное фото, в верхнем ящике берем кассету. Разбиваем бутылку на столе, берем осколок. Со дна бутылки берем ключ. За креслом в тайнике также лежит ключик.
Открываем белым ключом шкаф около двери, получим перчатку. Используем ее на щитке. Теперь можно переключать день и ночь.
Используем синий ключ на верхнем ящике шкафа. Смотрим на фото и берем изоленту. Ставим кассету в магнитофон.
Решаем загадку с кодом. В книге показаны горшки с разным узором — диагональ, полоски с точками, волны и полосы. Считаем число листочков — 4653. Вводим код на коробке около заколоченной двери — видим очередном фото и берем спички. Зажигаем свечу.
В трещине на трубе виден ключ, но рукой его не достать. Ставим свечу в мышиную нору, видим вилку. Достаем ее зонтом, приделываем к телевизору изолентой, включаем кассету. Смотрим, затем находим на тумбе циферблат. Ставим его на телевизор, ставим уровни, как показано в ролике — на 9 часов и на 5. Получим пластиковую ручку, крепим ее к осколку, режем кресло.
Находим крест. Также режем стеклом обои на стене и кусочек сыра. Рисуем на ящике с точками фигуру, что нарисована под оторванными обоями. Найдем ключи и выключатель. Открываем шкаф, получим миску, ставим ее около норы, кладем сыр. Ставим выключатель около двери. Выключим свет, включим его на лампе на улице, задернем шторы.
Видим символы, используем подсказку с порядком из книги. Получим — круг с двумя полосками, перевернутый треугольник на линии, завиток, волны. Вводим код, получим металлическую трубу. Ей убираем доску с пола, получим чеснок. Забираем доску, ставим ее около миски.
Ловим мышь, отправим ее в верхнее отверстие трубы, чтобы она достала ключ. Открываем шкаф, найдем отвертку и вино. Наливаем вино в бокал, отверткой снимаем шурупы около вампира.
В кармане зеленой куртки найдем записку. Ставим ее в книгу, получим порядок — звезда, луна, круг с долей, ветер. Вводим, получим зеркало. Решаем загадку с вампиром — используем зеркало, крест, чеснок и вино. Вводим в этом порядке символы. Нажимаем на рычаг. Смотрим финальную сцену, в которой рассказывают об истории героя, за которого мы играли.
Complete walkthrough of the game The Girl in the Window for IOS and Android. Solving all puzzles and riddles. Game from Developer Dark Dome

Did you like the article?
Full Game Walkthrough — Girl in the Window
The front door is locked. Inspect the pockets of the gray jacket that is hanging on the hanger. Take the torn sheet. The coat will go away. Take an umbrella. Follow right twice to the boarded door. Inside the gray notebook that sits on the bookshelf are clues for the puzzles. Also inside you will find the second part of the torn sheet. Combine both pieces in inventory. This is the code for the drawer below the bookshelf. There is a mirror inside.
Examine the box on the box. Leaves are drawn on the squares. Examine the flower pots in the rooms. The number of leaves on plants is the code .
Now there is a photo with the day of the week, time and matches.
Take the candle from the cabinet to the right of the front door. Use matches and use them on the mouse hole in the wall. Use an umbrella and take out the plug with the wire.
Go to the TV room and look in the top drawer of the cabinet. Take the photo, you will find another one in the middle drawer near the front door. Touch the chair to find a hidden socket on the left. Take the key. Take the photo that is on the stand. In the box abovelook for the videotape. Use the key to open the cabinet drawer. Take the electrical tape. Now use your piece of wire and electrical tape and apply it to the TV wire.
Use the video cassette on the video player. Turn on the TV and watch the recording. This is a hint. Take the second handle from the cabinet. Paste it and repeat the steps in the prompt. Take the handle.
Examine the cabinet and take the glass. Head to the room where the painting with the vampire hangs. Take the stone from the pot. Go to the room with the chair. Use the stone on the bottle and take the glass. Connect it to the handle. Also take the key that was inside the bottle.
Use a knife and cut the cushion from the chair. Take the cross. Open the box on top near the front door and take the glove. It will be useful to solve the puzzle in the electrical panel by the window.
Click on the switch above and the lamp outside the window will light up. Close the curtain. Cut a small piece of cheese and study the information from the diary on the cabinet.
Go to the front door and examine the cut in the wallpaper. Pull and see the capital letter M. Now you can open the safe in the room where the painting with the vampire hangs.Take the key and switch. Place the switch to the left of the front door and turn off the lights. Head to the TV room and pay attention to the marked symbols on the wall. The order of the characters is indicated in the notepad in the inventory. Turn the light back on.
Head to the room with the window and open the padlock on the cabinet.
Take the metal tube. Go to the front door again and pick up the board under the hanger. She will stand out. Take garlic. Use the key on the drawer below in the closet and take the bowl. Place a bowl near the mouse hole, place the cheese and board in the bowl. Catch the mouse.
Go to the TV room. Inspect the pipe, there is a key in the crack. Place the rodent there and now you have the key.
Open the remaining drawer in the closet and take the wine and screwdriver. Pour the wine into the glass and use the screwdriver on the frame of the picture with the vampire. There is a safe there. Treat the vampire to wine, also offer a cross, garlic and a mirror. You now have the code to the safe. You will find the order of the symbols on the board with newspaper clippings.
the Window — game guide» width=»50%» class=»lazy» data-src=»/storage/uploads/guides/2023-11-23/552837506b0d1232279a6c92137064c1.jpg»>
Turn the lever inside the safe.
The front door is now open. Go out and pick up the newspaper with the photo.
- Puzzle
- Quest
More interesting articles
Marvel SHOCKED fans! New Avengers delayed — what happened and who will play Doctor Doom
Fans of the Marvel Cinematic Universe have received an unpleasant surprise: the releases of two key films, Avengers: Doomsday and Avengers: Secret Wars, have been officially postponed to later dates. Both blockbusters will be delayed by six months compared to the previously announced dates.
Until Dawn digital release
The film adaptation of the popular horror Until Dawn has finally been released in digital format — exactly one month after its premiere in foreign cinemas. The film, based on the cult game, is now available online thanks to Sony Pictures and PlayStation Productions.
Capcom Almost Turned Resident Evil 9 Into an Open-World Online Survival Game — Leaked Plans Shock Fans!
New details have surfaced online about what Resident Evil 9 could have been like if Capcom had not changed course. Reputable insider Dusk Golem has shared some interesting information, according to which the continuation of the legendary series was initially conceived in a completely different way.
Introduction
The Girl in the Window offers thrilling gameplay with a blend of Puzzle, hidden object, and Adventure game elements for Android. It was created by the developers of Haunted Laia, The Unwanted Experiment, Ghost Case, and Nowhere House.
We have already completed walkthroughs of all games released by the same developer. Besides, it occurs in Hidden Town, where people have reported that strange things are happening continuously. In short, they claim to see an unknown entity looking out from the house’s window.
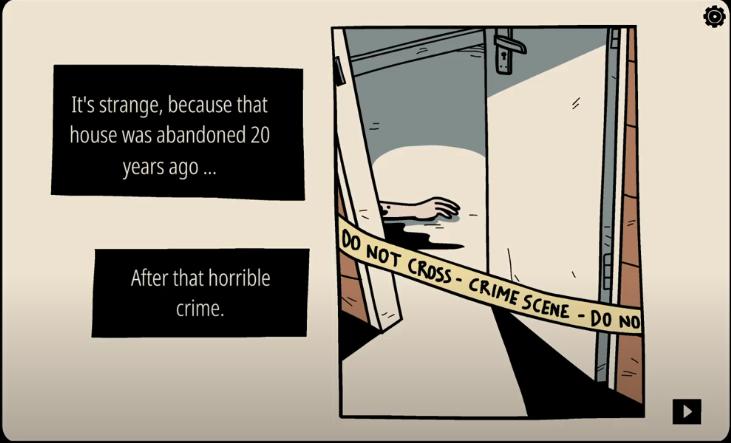
Moreover, a strange girl sees something odd from the window because the house has been vacant for 20 years. Now, a detective has been called to investigate the scene and unravel the mystery of the Hidden Town, where the game takes place. You assume the detective’s role is to explore multiple rooms and search for hidden items. Bring the truth out and figure out the girl’s secrets.
According to a plot, almost 20 years ago, a strange murder happened in the house. No one was eligible to solve cases, and the house was vacant from then on. So, villagers have been claiming to see strange things inside the home.
Read More: Haunted Laia Walkthrough Guide
Be the Best Detective and Solve the Mystery
As the protagonist, you need to investigate the case and bring the dark secrets out. As you arrive home, you feel something is calling you inside the house, and the door is closed behind you as you enter the house. Now, you can explore the house, find hidden objects, and solve mysteries by finding clues.
The game features an inventory at the bottom of the screen where you can add items you collect during the game and click to use them whenever you need them. The game features arrows on both sides of your screen that help you move between rooms. Start your search to discover clues, and if you need any help, read The Girl in the Window Walkthrough Guide.
A Series of Seventh Games
Dark Dome introduces a series of escape games, which includes almost six titles to play; however, the seventh installment is on the way to be released soon. The latest release will contain all familiar characters and new puzzles to complete. Here’s a list of all game walkthroughs released by Dark Dome.
- The Girl in the Window Walkthrough
- Ghost Case Walkthrough
- Nowhere House Walkthrough
- Unwanted Experiment Walkthrough
- Another Shadow Walkthrough
- Haunted Laia Walkthrough
- Escape from the Shadows Walkthrough
The door was closed as you stepped into the house mysteriously, leaving you no option other than finding clues and the way out. We already have covered walkthroughs of other games released by the same developer. Follow the steps in our Guide, “The Girl in the Window Walkthrough,” to find all solutions and answers.
- First, tap the coat on the left side and click on its arm to reveal a puzzle piece. Collect the paper piece and tap on the umbrella that will be added to your inventory.
- Head to the cabinet on the right side and pick up a candle from the spot.
- Second, go to the third room, tap the arrow on the right side twice, and head to the bookshelf. Please pick up a book from the shelf and add it to your list.
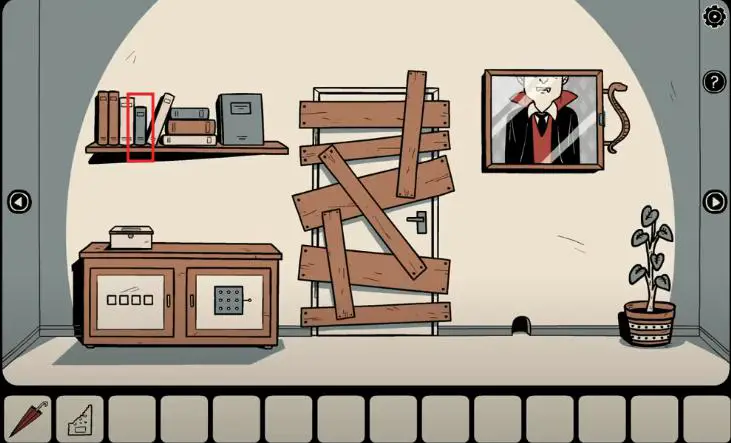
- Now, select the book from the inventory, open it up, and swap the pages to discover the half-broken paper.
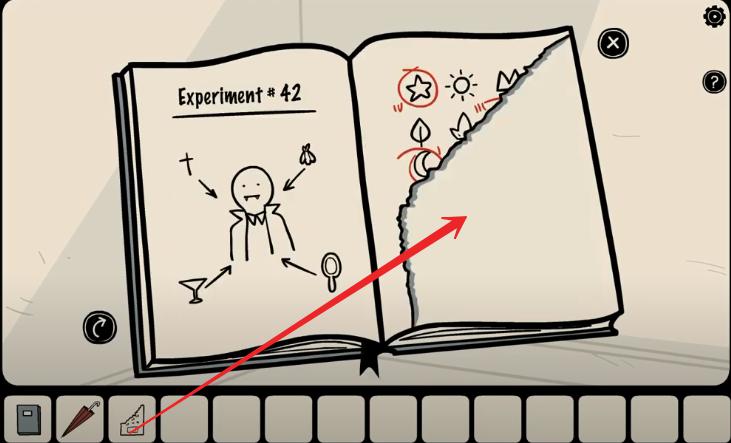
- Next, select the paper piece from your inventory and attach it to the book to find the clue on page “Experiment 42.”

- Hit the back button and tap on the cabinet storage. Head to the first door and set the images as shown in the picture given below. Moon, Wind, Pie, and Star.
Read More: Nowhere House Walkthrough Guide
- Open the storage cabinet and pick up the magnifying glass.
- Now, return to the book in your inventory and swap pages to discover “Plants” and keep the shapes in mind that may help you solve another puzzle.
- First, explore the house to count leaves on the plant pot and then move on to the fourth room to see the shapes on the wall.
- Afterward, return to the third room and set the numbers in the following sequence: 5, 3, 6, and 4.
- Open the box to discover a Matchbox and a Photo with the Date and Time Printed (Monday – 11:03 am). Please pick up the matchbox from the spot and add it to your inventory.
- Go to the fourth room, select the matchbox from your list, and combine it with the candle. It may help you get the Lit Candle.
- Return to the Third Room by tapping the left side arrow and the mouse hole near the plant pot.
- Select the candle from your list and keep it close to the mouse hole to discover a switch you can bring out using the umbrella.
- Afterward, go to the second room and open the cupboard’s storage drawer to discover the second photo. Notice the date and time, and leave the room for a while.
- Head to the fourth room and tap the sofa to discover a socket behind it. Tap the socket to remove its cover and uncover a key.
- Before leaving the fourth room, tap the cabinet on the right side and open its first drawer to get a video cassette.
- Afterward, go to the second room and use the key to open the first drawer of the cabinet in the closet to discover a tape.
- Head to the TV near the closet and tap on the damaged wire. Using the tape, select the plug from your inventory and attach it to the broken wire.
- To see the video on the TV, head to the VCR below the TV and insert the Cassette from your inventory.

- Next, turn on the TV and hit the Play Button on the VCR to run the video. You will discover a girl writing something on the wall.
To be Continued…
Conclusion
The Girl in the Window is released with a well-written storyline around a girl who was killed. The soundtracks and graphics are great and may amuse you; however, the mechanics are almost similar to what we found in other games by the same developer. After that, the house had four rooms; each was fully furnished. Moving between rooms to find hidden objects and utilizing them is only the solution to solving the mystery.