
1


2
3
4


5

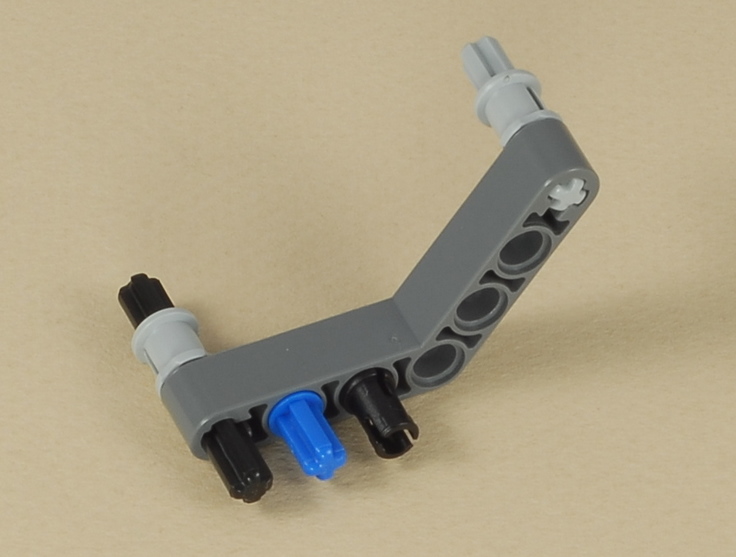
Примечание. Убедитесь, что рычаг не перевернут. Посмотрите на концы тщательно.
6

7

8

|
Этот шаг немного сложный. Попробуйте вот так:
|

9

10

11


12

13
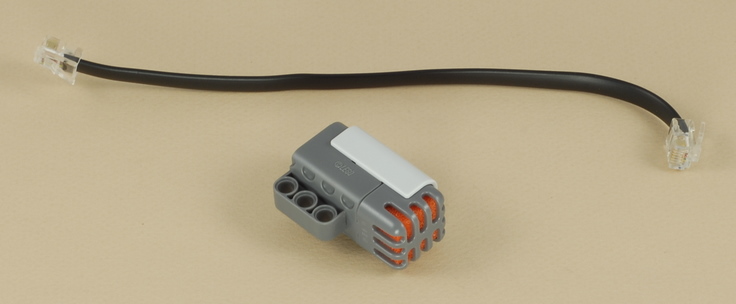
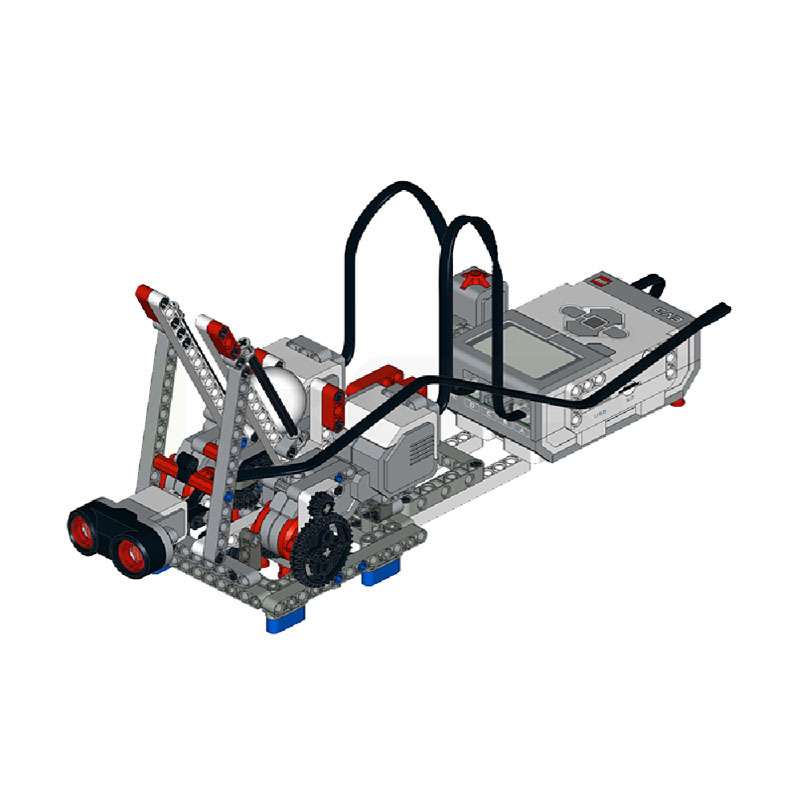
Используйте самый короткий провод для этого шага и подключите его к порту 2 на NXT.

14
15


16
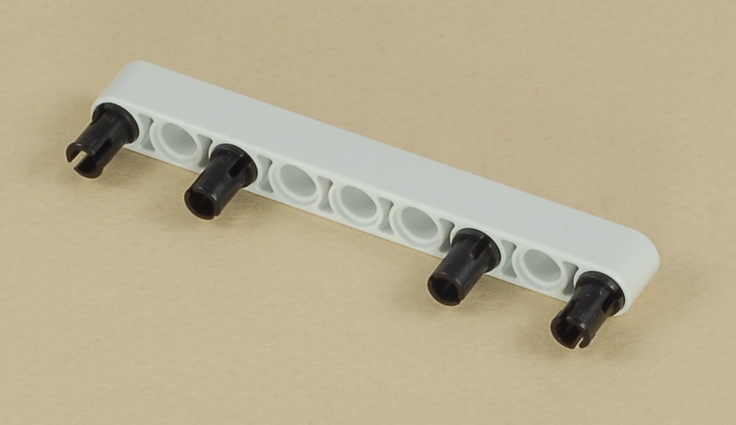
Примечание. Убедитесь, что наконечник метательного рычага имеет кончик оси под резиновыми частями, как показано ниже.

17

18
|
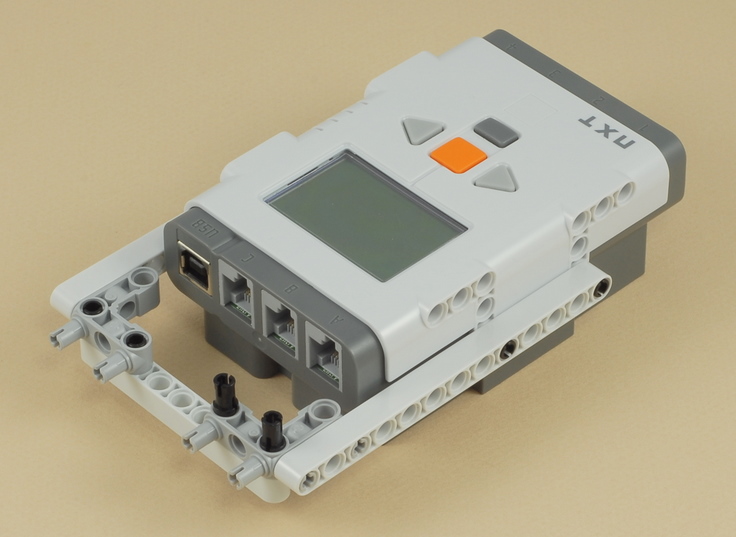
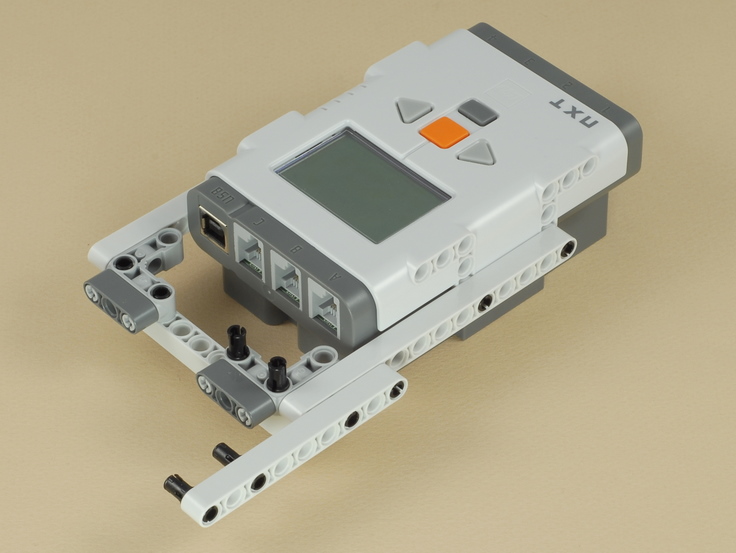
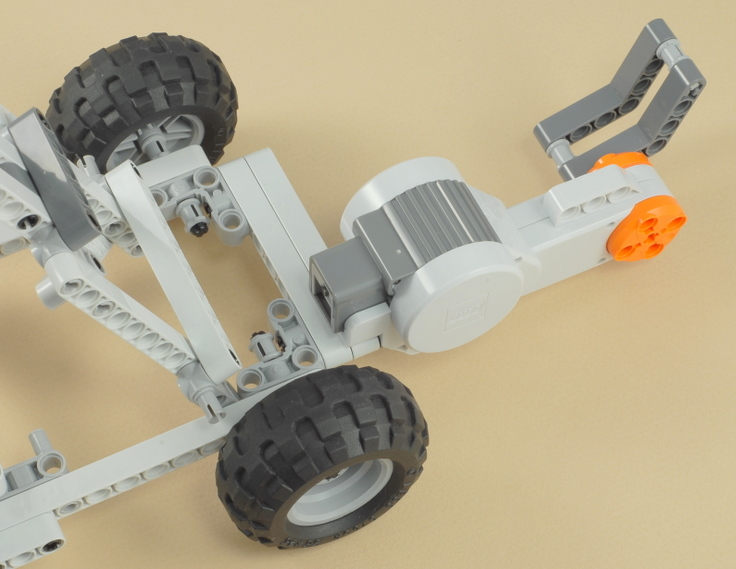
Подключите провод от двигателя к порту C на NXT. Убедитесь, что провод позволяет NXT повесить в основном прямо и не мешает пути кирпича NXT, когда он падает. |

19
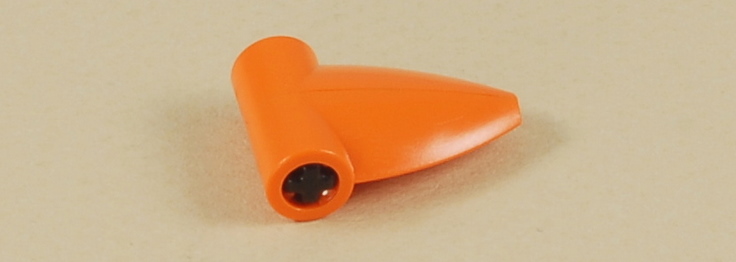
Вы можете экспериментировать с различными малыми снарядами для катапульты. Вот один проект.


Эта информация доступна только после входа в личный кабинет
В нем вы указываете свои наборы Лего, а мы просчитываем, насколько точно Вы можете собрать эту модель: какие детали у вас есть в наличии, а каких не хватает.
Эта информация доступна только после входа в личный кабинет
В нем вы указываете свои наборы Лего, а мы просчитываем, насколько точно Вы можете собрать эту модель: какие детали у вас есть в наличии, а каких не хватает.
Эта информация доступна только после входа в личный кабинет
В нем вы указываете свои наборы Лего, а мы просчитываем, насколько точно Вы можете собрать эту модель: какие детали у вас есть в наличии, а каких не хватает.
2025-04-21 16:44
Инструкции Lego EV3
Скачать инструкцию
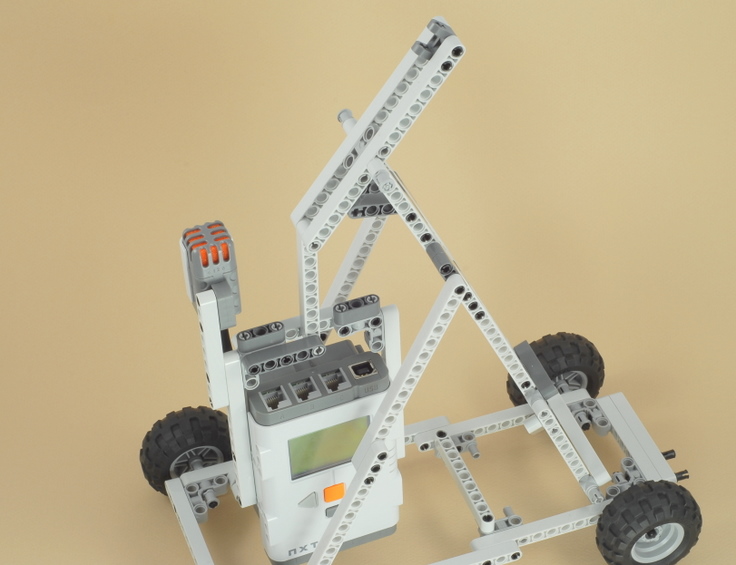
Introduction: Lego Catapult
Hey there peoples of the Internet. This is my first Instructable, but I thought I’d give it a try. This will show you how to make a suprizingly small lego catapult with alot of launch power. It might take between 5 and 10 minutes to make once you find all the pieces.
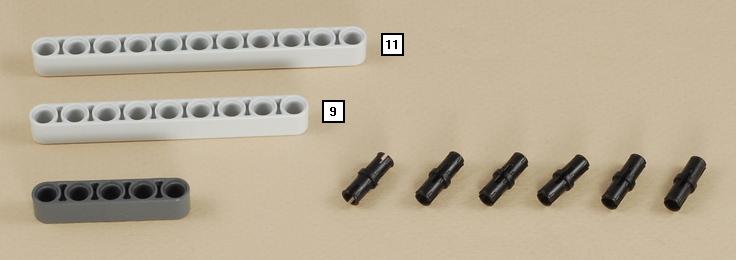
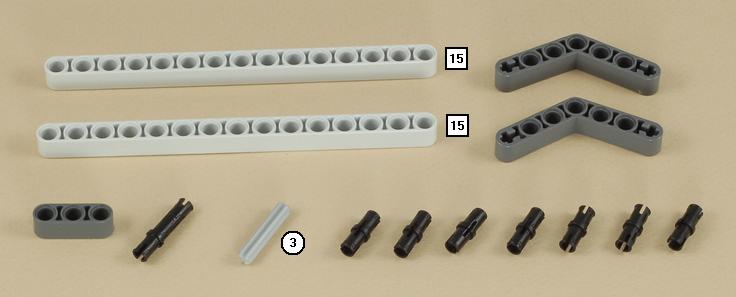
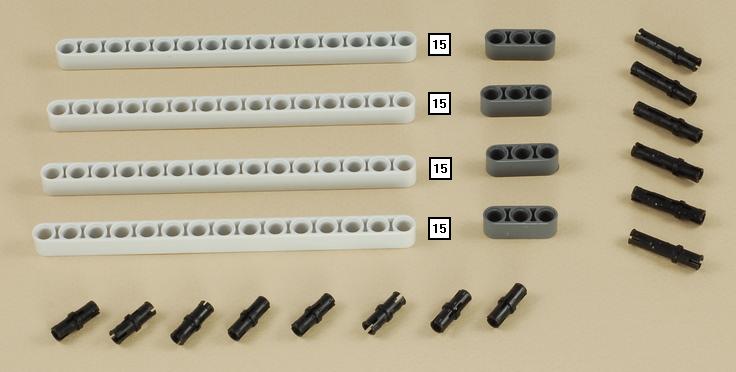
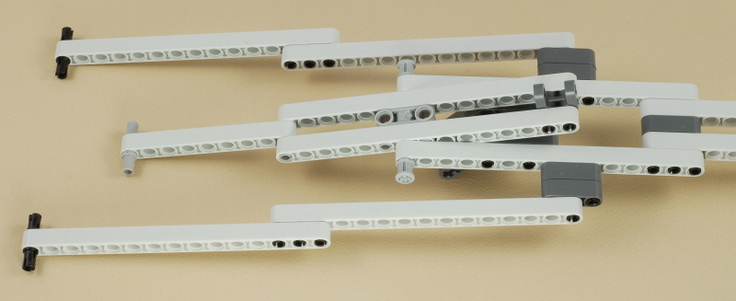
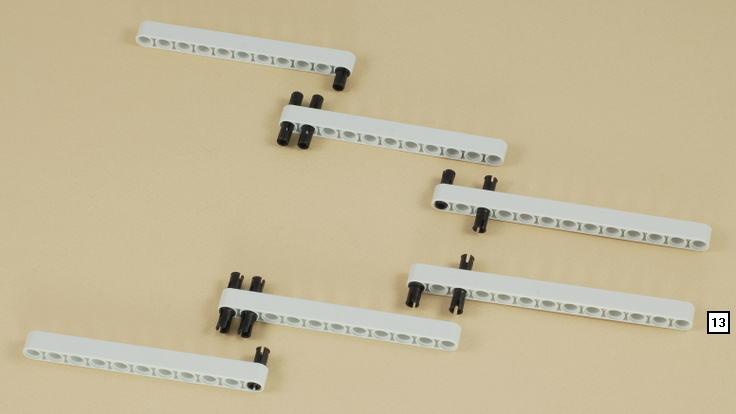
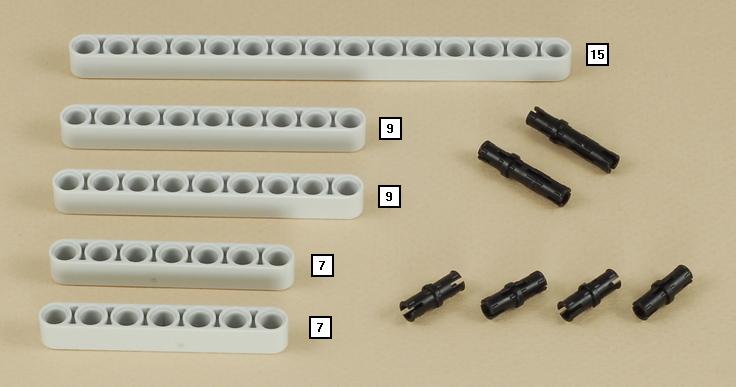
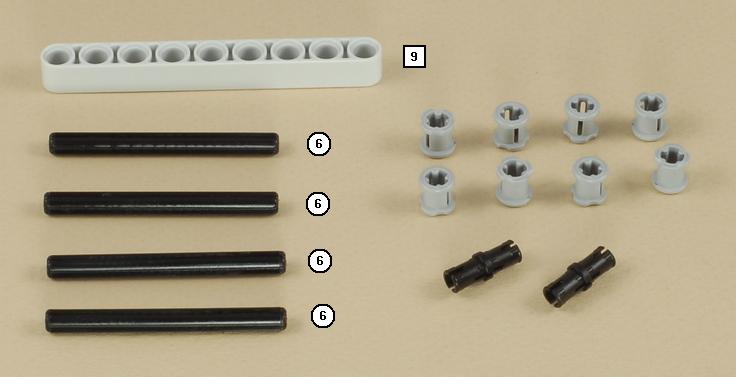
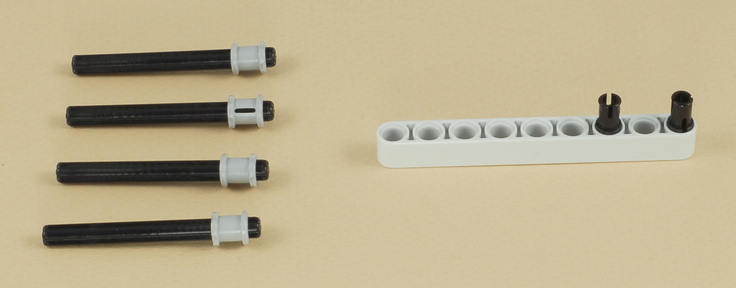
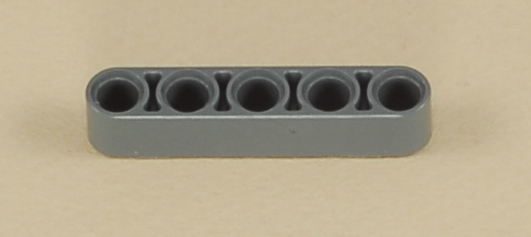
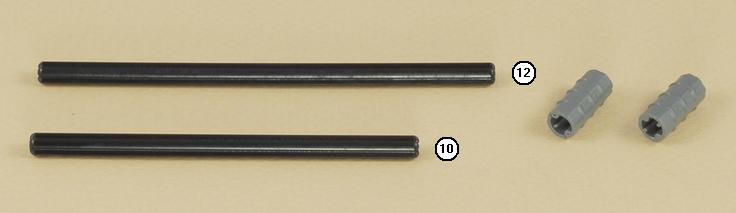
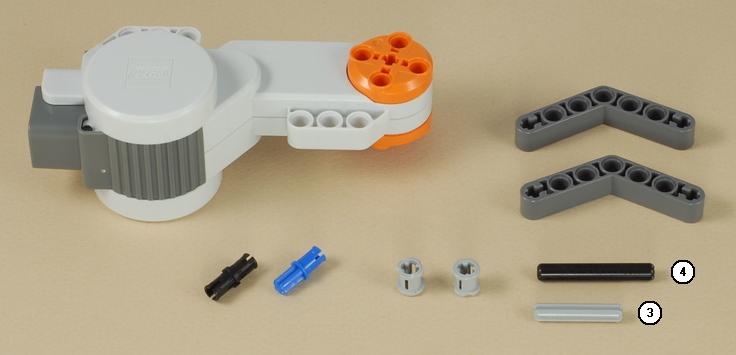
First step: Gather all the parts. You will need (4) 8 stud long beams, (3) 4 stud long beams, (3) 4 stud long beams with 3 holes in the sides, (3) 2 stud long beams with one hole in the sides, a 1 stud long beam with a hole or not, a 2 stud long beam with or without holes, one of those beams that are round at the edges with no studs and 9 holes in the sides, another one of those with 5 holes, (4) of those black connector thingys, 2 of those with an extra length added, (3) 2 stud long skinny planks, (2) 4 stud long skinny planks, one long cross stick, two medium cross sticks, a cross joint with a hole, (2) cross ends with holes in them, one cross beam with a stud at the end, one tiny cross stick, one small grey cross stick, one rubber band (standard size), a little cone stud thing, a little «bracelet» for the crosses, and the little thingr with two holes for crosses and one for connector things. (just use 2nd pic!)
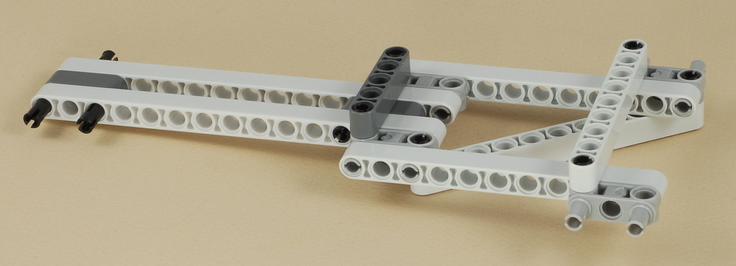
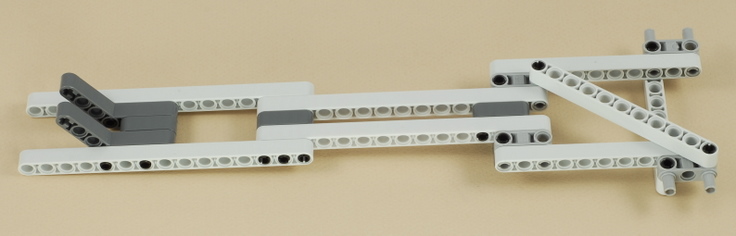
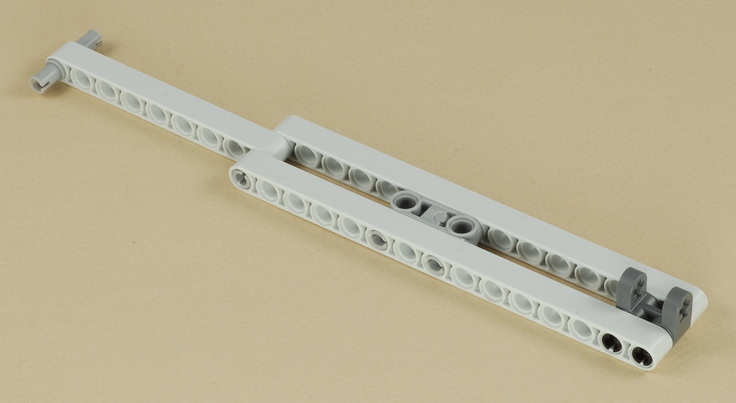
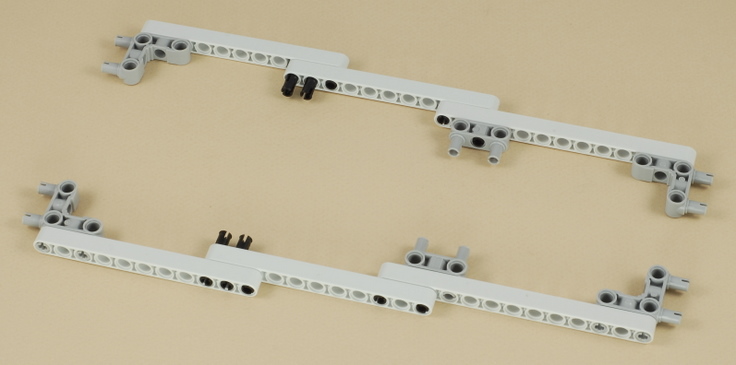
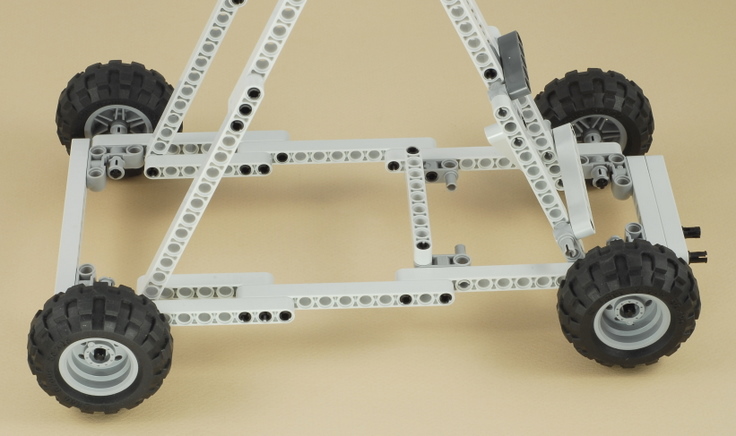
Step 1: Base of Catapult
Make it look like the pictures:
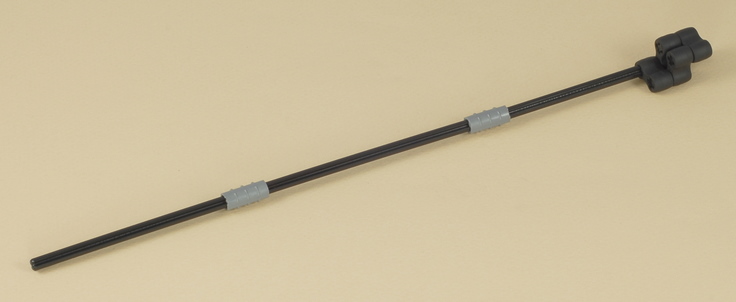
Step 2: Arm of Catapult
Use the long cross rod, the cross rod ends, the cross rod joint, and the tiny cross rod for this step.
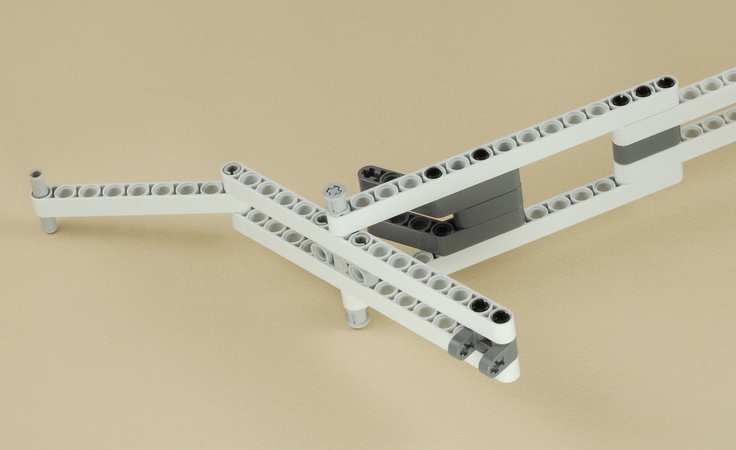
Step 3: Attatching Arm to Base
put the hole of joint over iddle hole of topmost brick, put in cross rod with stud to attatch. Put the bracelet on back of rod to secure; not too tight, not too loose.
Step 4: Support Column
This bar keeps base from snapping in half. Put one black connector at end of 9 hole long stick, then one three from the other end. add to back of cataput next to the bracelet, on the right.
Step 5: Threading the Band.
put the band through the orange part of the arm as in the picture.the, put both loops arounf the first beam. then take the rightmost part, and pull over other beam.
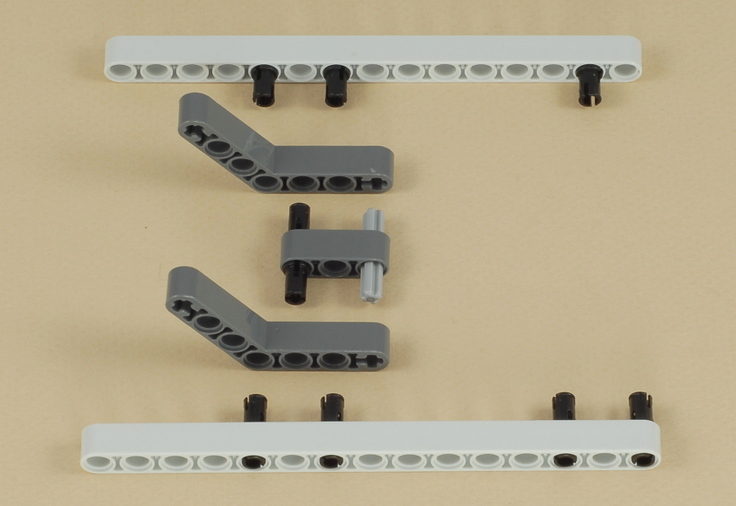
Step 6: Stopper.
To stop the launching arm at exactly 45 degrees which works the best, do this: Take this 5 holed beam and put a black connector in it (pic 1). then attach next to that bracelet on the back, opposite the other support (pic 2). Then take the 2 med rods and put them through the a hole in each of the beams (very top of light gray, second to top of dark grey(pic 2)). then put the black thingy in the pic on, and secure othe back with the white piece (pics 3 and 4).
Step 7: Ammo
Picture is pretty self explanatory.
Step 8: Fire!
Put the bullet in the black end of the firing arm. to fire, just pull the arm down, lower for farther distance. Due to the support, the catapult will not collape if you pull too hard. Please post to tell me how your’s works. I havent measured how far it flys yet, but it sure hurts from 10 ft away. That black rod holding the arm in place is optional, can be used as trigger for it.
Sorry for any spelling atrocities. I was a bit tired when i typed this…