
Скачать
KRC-291
KRC-26
KRC-191
KRC-16
© B64-2106-00 (EW/EN)
CASSETTE RECEIVER
INSTRUCTION MANUAL
KRC-291/26(E)_Cover_r2 01.10.3 2:44 PM Page 1
Русский
- Bedienungsanleitung Kenwood KRC-16
- Kenwood KRC-16 User Manual
- Manual Usuario Kenwood KRC-16
- Mode d’emploi Kenwood KRC-16
- Istruzioni Kenwood KRC-16
- инструкция Kenwood KRC-16
- Kenwood KRC-16の取扱説明書
- Handleiding Kenwood KRC-16
- Manual de uso Kenwood KRC-16
Вам нужна инструкция? Мы поможем Вам ее найти и сэкономить Ваше время.
- 28 stron
- 0.4 mb
Изделие Kenwood KRC-16, а также другие, которыми Вы пользуетесь ежедневно, наверняка вы получили в комплекте с инструкцией обслуживания. Из опыта наших пользователей мы знаем, что большинство из Вас не уделили этому особого внимания. Большая часть инструкций, сразу же после покупки попадает в корзину для мусора вместе с коробкой — это ошибка. Ознакомьтесь с информацией, касающейся инструкции Kenwood KRC-16, которая поможет Вам в будущем сэкономить нервы и избежать головной боли.
Важная подсказка — не забывайте хотя бы раз прочитать инструкцию Kenwood KRC-16
Если вы не хотите каждый раз читать информационные брошюры, касающиеся, тех или Kenwood KRC-16 иных изделий, достаточно, прочитать их раз — сразу же после покупки устройства. Вы получите основное знания, касающиеся поддержания изделия Kenwood KRC-16 в хорошем эксплуатационном состоянии, так, чтобы без проблем достигнуть его планируемого цикла работы. Затем инструкцию можно отложить на полку и вернуться к ней только в случае, если вы не уверены, правильно ли проводится техобслуживание изделия. Правильный уход является необходимым элементом Вашего удовольствия Kenwood KRC-16.
Раз в году пересмотрите шкафчик, в котором держите инструкции для всех устройств, — выбросите те, которыми вы уже не пользуетесься. Это поможет Вам сохранять порядок в своей домашней базе инструкций обслуживания.
Summary of Contents for Kenwood KRC-16
Что находится в инструкции Kenwood KRC-16? Почему стоит ее прочитать?
- Гарантия и подробности, касающиеся техобслуживания изделия
Хорошей идеей будет прикрепить чек к странице инструкции. Если что-то плохое случится во время использования Kenwood KRC-16, у вас будет комплект документов, необходимый для гарантийного ремонта. В этой части инструкции вы найдете информацию об авторизованных сервисных центрахKenwood KRC-16 а также, как самостоятельно правильно ухаживать за оборудованием — так, чтобы не потерять гарантийных прав. - Указания по монтажу и Setup
Не терять нервов и времени на самостоятельную попытку установки и первого запуска изделия. Воспользуйтесь рекомендациями производителя Kenwood KRC-16 чтобы правильно запустить изделие, без лишнего риска повреждения оборудования. - Информация, касающаяся дополнительных запчастей (входящих в комплект а также являющихся опцией)
Пересматривая эту часть документа вы сможете проверить, доставлен ли ваш Kenwood KRC-16 с полним комплектом аксессуаров. Вы также сможете узнать, какие дополнительные запчасти или аксессуары для Kenwood KRC-16 Вы сможете найти и докупить к своему устройству. - Troubleshooting
Самые частые проблемы, касающиеся Kenwood KRC-16 и методы их решения. Это очень полезная часть руководства по обслуживанию — она позволит Вам сэкономить много времени на поиск решений. 90% проблем с Kenwood KRC-16 повторяется у многих пользователей. - Требования, касающиеся питания и энергетический класс
Информация, касающаяся количества потребляемой энергии, а также рекомендации, касающиеся установки и питания Kenwood KRC-16. Прочитайте, чтобы оптимально пользоваться Kenwood KRC-16 и не использовать большего количества ресурсов, нежели это необходимо для правильной работы изделия. - Специальные функции Kenwood KRC-16
Здесь вы можешь узнать, как персонализировать изделие Kenwood KRC-16. Вы узнаете, какие дополнительные функции могут помочь Вам удобно использовать продукт Kenwood KRC-16 а также, какие функции Вашего устройства оптимальны для выполнения конкретной деятельности.
Как видите в инструкции вы найдете информацию, которая реально поможет Вам в использовании Вашего изделия. Стоит с ней ознакомиться, чтобы избежать разочарований, возникающих из более короткого, нежели предусматривалось, периода исправности изделия Kenwood KRC-16. Если все же вы не хотите копить инструкции в своем доме, наш сайт поможет Вам в этом — вы должны найти у нас руководство по обслуживанию большинства из своих устройств, а также Kenwood KRC-16.
Комментарии (0)

KRC-291
KRC-26
KRC-191
KRC-16
CASSETTE RECEIVER
INSTRUCTION MANUAL
© B64-2106-00 (EW/EN)

Contents
Safety precautions………………….3
About Cassette tape……………….4
English
About RDS …………………………….4
General features …………………….5
Power
Volume
Attenuator
Selecting the Source
Loudness
dB (Sound Coordinate)
Audio Control
Switching Display
TEL Mute
Theft Deterrent Faceplate
Tuner features………………………..8
Tuning
Station Preset Memory
Auto Memory Entry
Preset Tuning
RDS features………………………..10
Traffic Information
Presetting Volume for Traffic Information
PTY (Program Type)
Program Type Preset
Changing Language for PTY Function
Cassette player features………..13
Playing Cassette Tapes
Fast Forwarding and Rewinding
Tuner Call
External disc control features..14
Playing External Disc
Fast Forwarding and Reversing
Track Search
Album Search
Track/Album Repeat
Track Scan
Disc Scan
Random Play
Magazine Random Play
Disc Naming (DNPS)
Text/Title Scroll
Menu system………………………..17
Menu System
Touch Sensor Tone
Manual Clock Adjustment
Synchronize Clock
Power OFF Timer
News Bulletin with Timeout Setting
Local Seek
Tuning Mode
Auto Memory Entry
AF (Alternative Frequency)
Restricting RDS Region
(Region Restrict Function)
Auto TP Seek
Monaural Reception
Text Scroll
Accessories………………………….21
Installation Procedure …………..21
Connecting Cables
to Terminals ………………………22
Installation …………………………..23
Troubleshooting Guide ………….25
Specifications ………………………28
— 2 —
Safety precautions
2WARNING
To prevent injury and/or fire, take the
following precautions:
•Insert the unit all the way until it is fully
locked in place. Otherwise it may fly out of
place during collisions and other jolts.
•When extending the ignition, battery or
ground wires, make sure to use automotivegrade wires or other wires with an area of
2
0.75mm
deterioration and damage to the wire
coating.
•To prevent short circuits, never put or leave
any metallic objects (e.g., coins or metal
tools) inside the unit.
•If the unit starts to emit smoke or strange
smells, turn off the power immediately and
consult your Kenwood dealer.
•Make sure not to get your fingers caught
between the faceplate and the unit.
•Be careful not to drop the unit or subject it to
strong shock.
The unit may break or crack because it
contains glass parts.
•Do not touch the liquid crystal fluid if the
LCD is damaged or broken due to shock. The
liquid crystal fluid may be dangerous to your
health or even fatal.
If the liquid crystal fluid from the LCD
contacts your body or clothing, wash it off
with soap immediately.
(AWG18) or more to prevent wire
2CAUTION
To prevent damage to the machine,
take the following precautions:
•Make sure to ground the unit to a negative
12V DC power supply.
•Do not open the top or bottom covers of the
unit.
•Do not install the unit in a spot exposed to
direct sunlight or excessive heat or humidity.
Also avoid places with too much dust or the
possibility of water splashing.
•Do not set the removed faceplate or the
faceplate case in areas exposed to direct
sunlight, excessive heat or humidity. Also
avoid places with too much dust or the
possibility of water splashing.
•To prevent deterioration, do not touch the
terminals of the unit or faceplate with your
fingers.
•Do not subject the faceplate to excessive
shock, as it is a piece of precision
equipment.
•When replacing a fuse, only use a new one
with the prescribed rating. Using a fuse with
the wrong rating may cause your unit to
malfunction.
•To prevent short circuits when replacing a
fuse, first disconnect the wiring harness.
•Do not place any object between the
faceplate and the unit.
•During installation, do not use any screws
except for the ones provided. The use of
improper screws might result in damage to
the main unit.
IMPORTANT INFORMATION
About the disc changer to be
connected:
To connect a disc changer having the «O-N»
switch to this unit, set the «O-N» switch to «N».
To connect a disc changer having no «O-N»
switch to this unit, the converter cord CADS100 and/or switching adapter KCA-S210A
are required as options.
A disc changer doesn’t work when it is
connected without using these options.
If a model with no «O-N» switch is connected,
some unavailable functions and information
that cannot be displayed are generated.
Note that none of the KDC-C100, KDC-C302,
C205, C705, and non-Kenwood CD changers
can be connected.
You can damage both your unit and the CD
changer if you connect them incorrectly.
— 3 —
Safety precautions
NOTE
•If you experience problems during
installation, consult your Kenwood dealer.
English
•If the unit does not seem to be working
right, try pressing the reset button first. If
that does not solve the problem, consult
your Kenwood dealer.
•Press the reset button if the Disc auto
changer fails to operate correctly. Normal
operation should be restored.
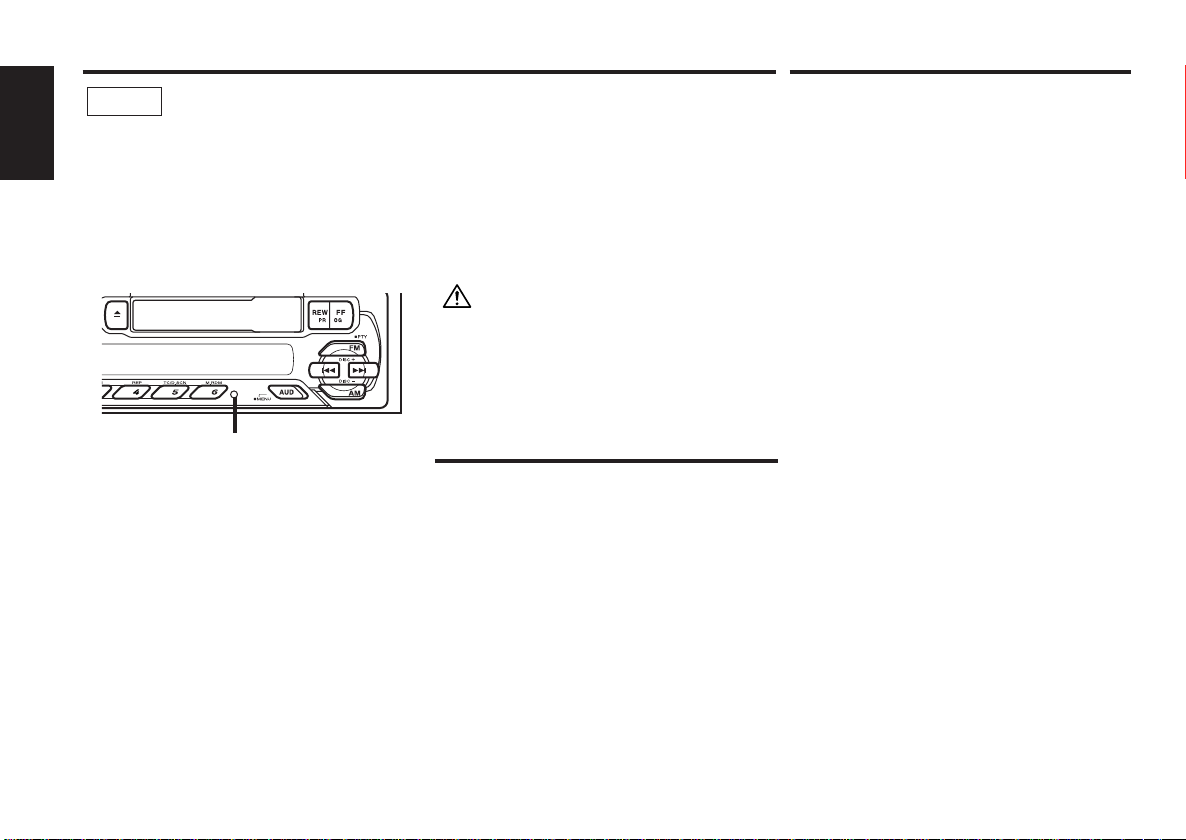
Reset button
•Characters in the LCD may become difficult
to read in temperatures below 41 ˚F (5 ˚C).
•The illustrations of the display and the panel
appearing in this manual are examples used
to explain more clearly how the controls are
used. Therefore, what appears on the display
in the illustrations may differ from what
appears on the display on the actual
equipment, and some of the illustrations on
the display may represent something
impossible in actual operation.
Cleaning the Faceplate Terminals
If the terminals on the unit or faceplate get
dirty, wipe them with a dry, soft cloth.
Cleaning the Unit
If the faceplate of this unit is stained, wipe it
with a dry soft cloth such as a silicon cloth.
If the faceplate is stained badly, wipe the stain
off with a cloth moistened with neutral
cleaner, then wipe neutral detergent off.
Applying spray cleaner directly to the unit may
affect its mechanical parts. Wiping the
faceplate with a hard cloth or using a volatile
liquid such as thinner or alcohol may scratch
the surface or erases characters.
About Cassette tape
Cleaning the tape head
When there’s noise or the sound quality is bad
during tape play the tape head maybe dirty,
clean the tape head.
About Cassette tape
•If the tape is slack tighten it.
•If the cassette tape label is peeling off glue it
on again.
•Don’t use deformed cassette tape.
•Don’t place cassette tape on the dashboard
etc. where the temperature is high.
•Don’t use cassette tape that’s 100 minutes
long or longer.
About RDS
RDS (Radio Data System)
When listening to an RDS station, the
programme service name of the station is
displayed, advising you quickly which station is
being received.
RDS (Radio Data System) stations also
transmit frequency data for the same station.
When you are making long trips, this function
automatically alternative switches to the
particular frequency with the best reception
for the particular network of stations that you
want to listen to. The data is automatically
stored, allowing you to switch quickly to
another RDS stations, broadcasting the same
programme, that has better reception. These
include stations stored in the station preset
memory that you often listen to.
Enhanced Other Network
Stations that offer <Enhanced Other
Network> also transmit information about
other RDS stations that have traffic
information. When you are tuned to a station
that is not transmitting traffic information, but
another RDS station starts transmitting a
traffic bulletin, the tuner automatically
switches to the other station for the duration
of the bulletin.
Alarm
When an emergency transmission (announcing
disasters, etc.) is sent, all current functions are
interrupted to allow the warning to be
received.
— 4 —
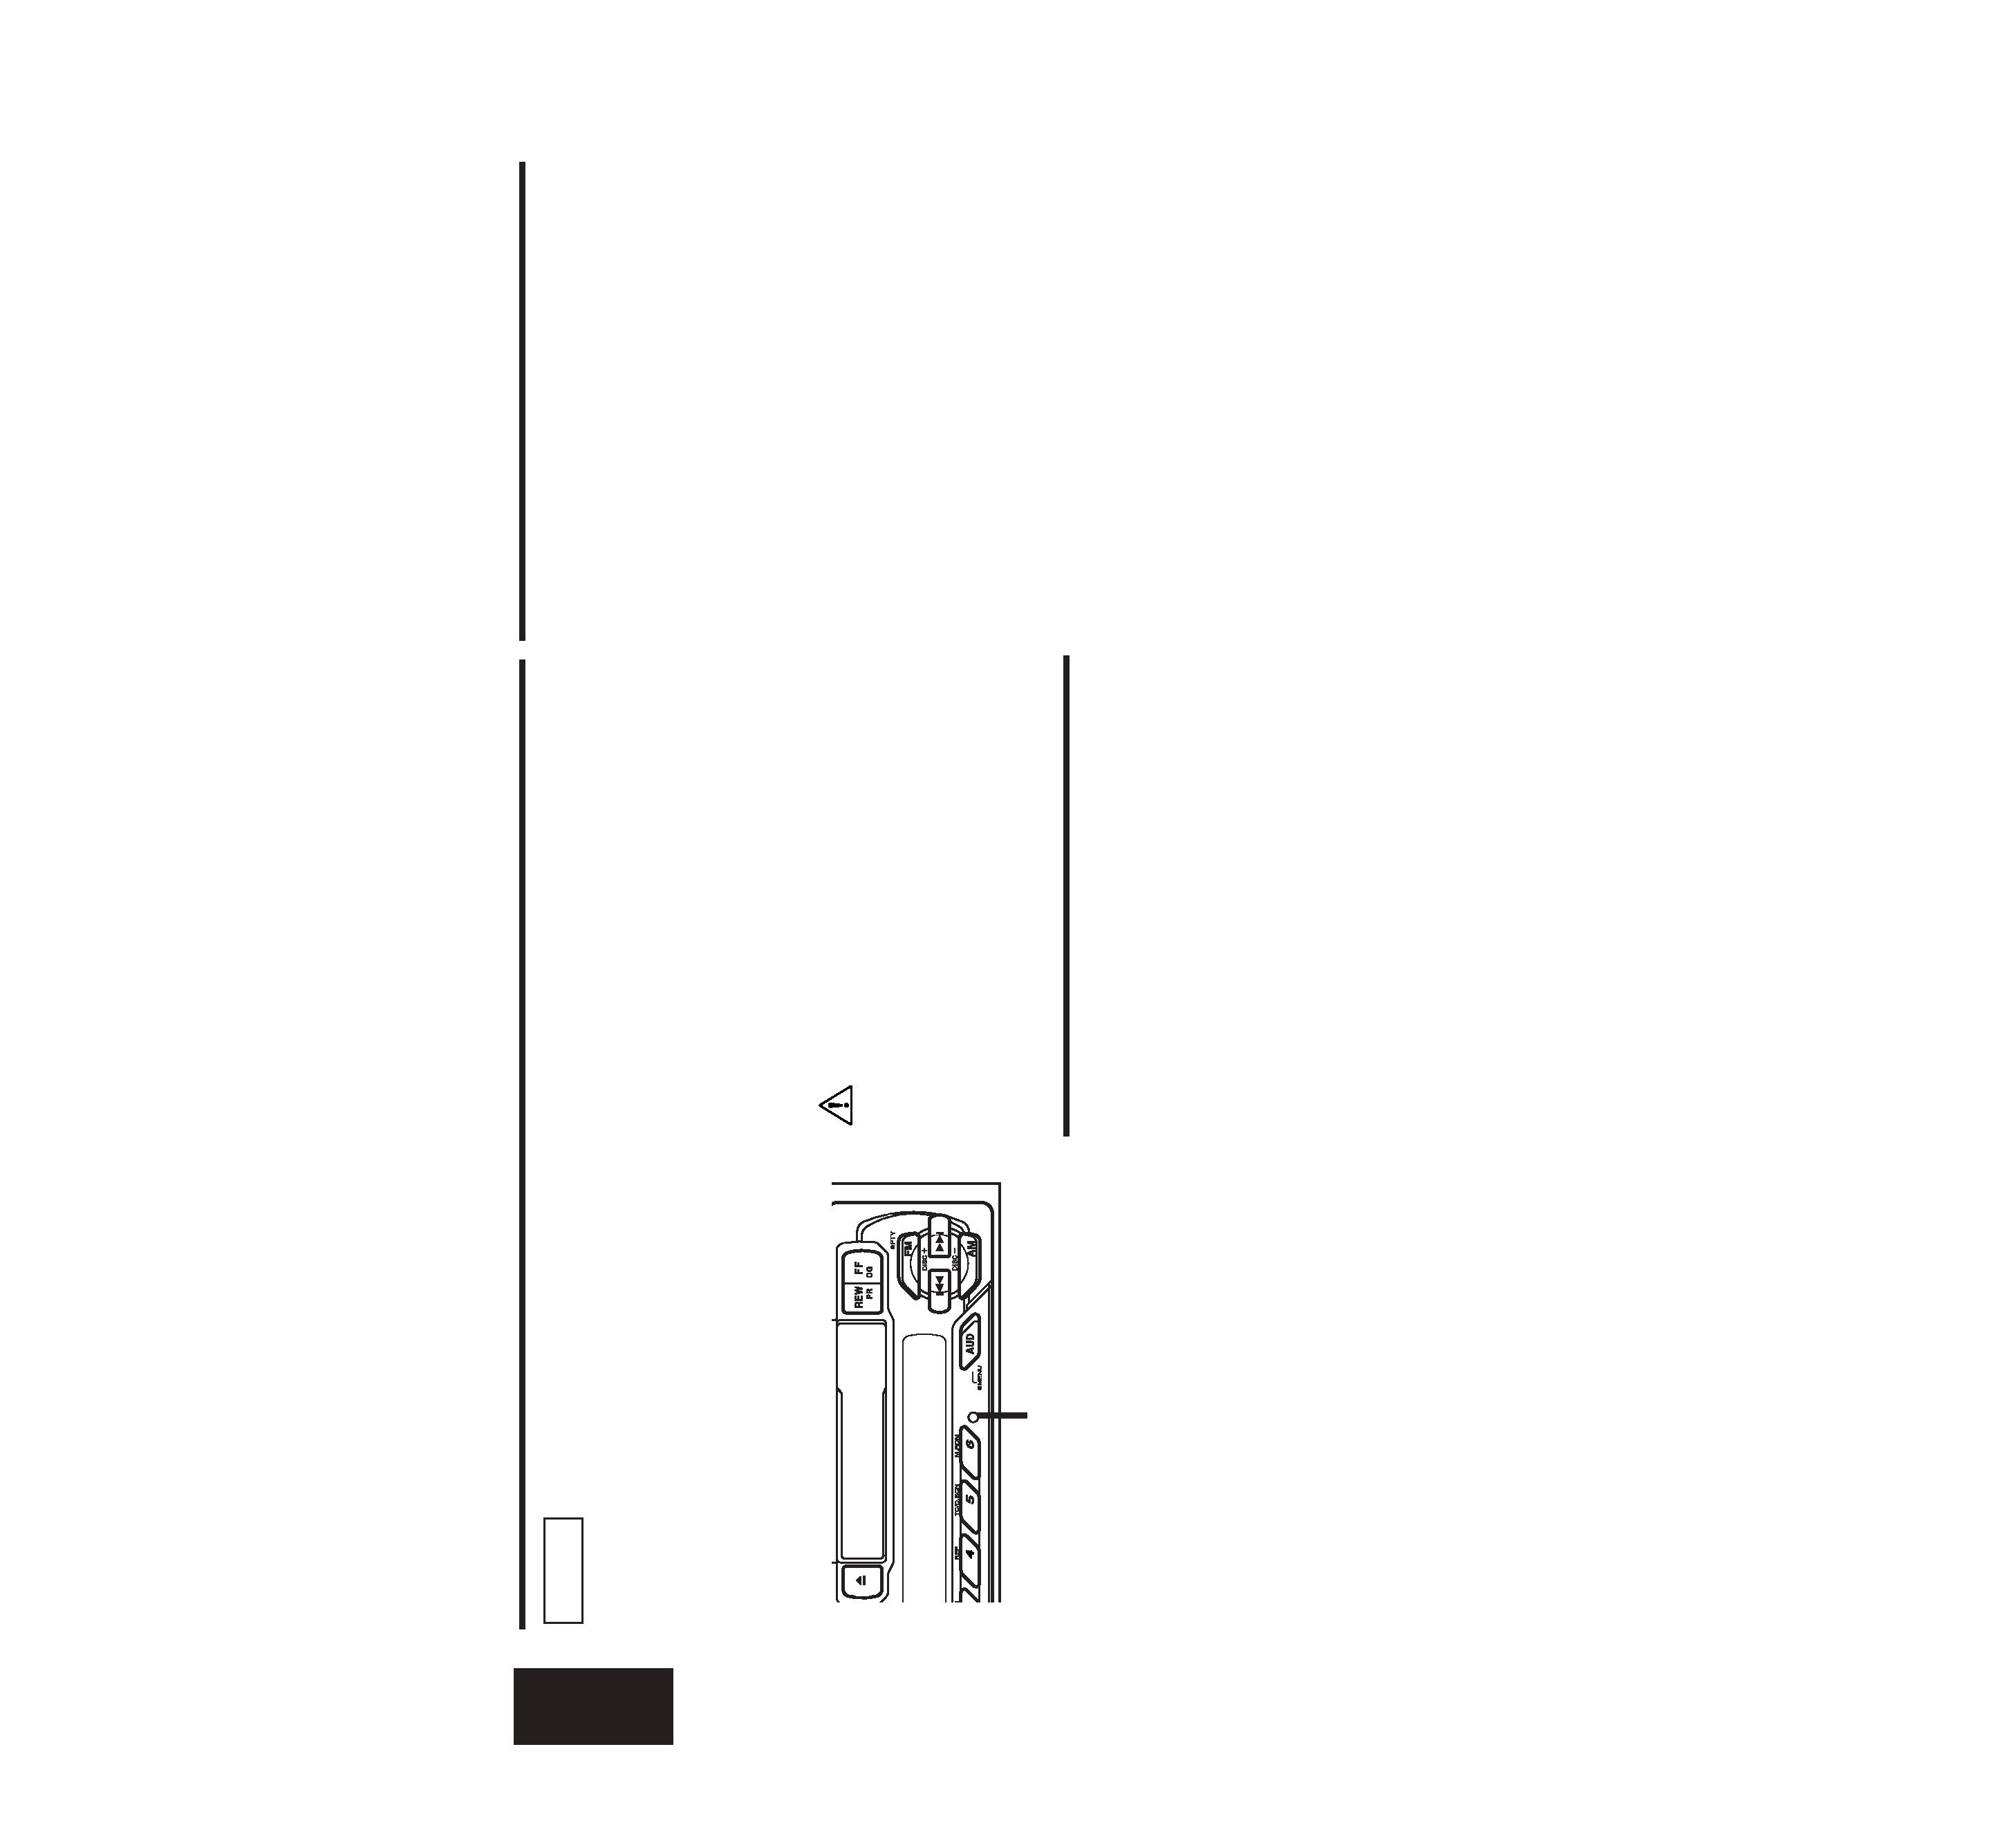
General features
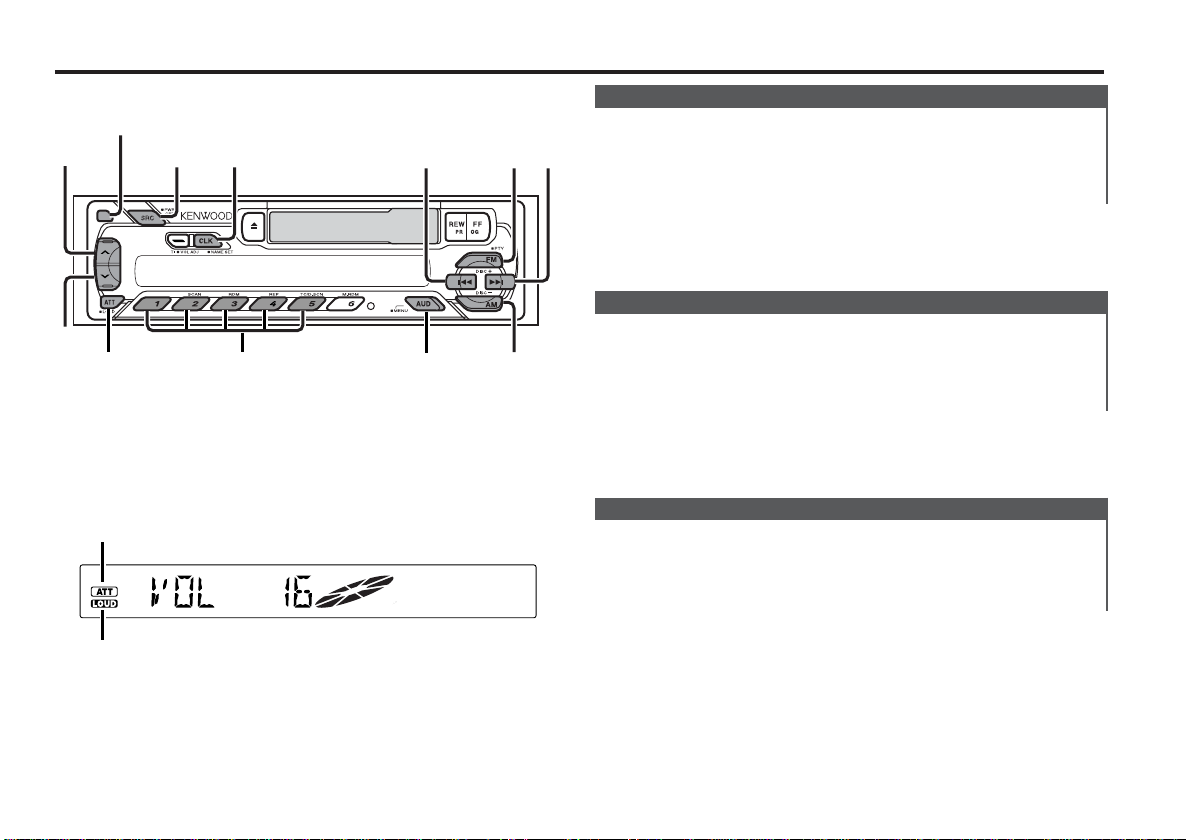
SRC/
PWR OFF
¢
4
CLK FM
AM
AUD
ATT/
LOUD
#1 — 5
d
u
Release button
Power
Turning ON the Power
Press the [SRC] button.
Turning OFF the Power
Press the [PWR OFF] button for at least 1 second.
Volume
Increasing Volume
Press the [u] button.
Decreasing Volume
Press the [d] button.
ATT indicator
LOUD indicator
Attenuator
Turning the volume down quickly.
Press the [ATT] button.
Each time the button is pressed the Attenuator turns ON or OFF.
When it’s ON, the «ATT» indicator blinks.
— 5 —
General features
Selecting the Source
Press the [SRC] button.
English
Source required Display
Tuner «TUNER»
Tape «TAPE»
External disc (KRC-291/ 26 only) «DISC»
Standby (Illumination only mode) «ALL OFF»
This unit automatically turns full power OFF after 20 minutes lapses
in Standby mode in order to save the vehicles battery.
The time until full power OFF can be set in <Power OFF Timer>
(page 18).
Loudness
Compensating for low and high tones during low volume.
Press the [LOUD] button for at least 1 second.
Each time the button is pressed for at least 1 second the
Loudness turns ON or OFF.
When it’s ON, «LOUD» indicator is ON.
dB (Sound Coordinate)
You can recall the best sound setting preset for different types of
the music.
1 Select the source to set
Press the [SRC] button.
2 Enter Control mode
Press the [AUD] button.
3 Select the Audio item for adjustment
Press the [FM] or [AM] button.
Select the «DB » display.
4 Select the Sound type
Press the [#1] — [#5] button.
Press button Sound setting Display
[#1] Flat «DB FLAT»
[#2] Rock «DB ROCK»
[#3] Pops «DB POPS»
[#4] Jazz «DB JAZZ»
[#5] Easy «DB EASY»
When the dB(Sound Coordinate) setting is changed, the Bass and
Treble set in audio control replace the dB(Sound Coordinate) values.
5 Exit Control mode
Press the [AUD] button.
Audio Control
1 Select the source for adjustment
Press the [SRC] button.
2 Enter Audio Control mode
Press the [AUD] button.
3 Select the Audio item for adjustment
Press the [FM] or [AM] button.
— 6 —
Each time the button is pressed the items that can be adjusted
switch as shown below.
4 Adjust the Audio item
Press the [4] or [¢] button.
Adjustment Item Display Range
Bass level «BAS» –8 — +8
Treble level «TRE» –8 — +8
Balance «BAL» L15 — R15
Fader «FAD» R15 — F15
5 Exit Audio Control mode
Press the [AUD] button.
Switching Display
Switching the information displayed.
Press the [CLK] button.
Each time the button is pressed the display switches as shown
below.
In Tuner source
Information
Program Service name or Frequency
Clock
Displaying the frequency during Program Service name
reception
Press the [CLK] button for at least 2 seconds.
The frequency for the RDS station will be displayed for 5
seconds instead of the station name.
In Tape source
Information
Play side
Clock
In External disc source (KRC-291/26)
Information Display
Track Time
Disc name «D-NAME»
Disc title «D-TITLE»
Track title «T-TITLE»
Clock
TEL Mute
The audio system automatically mutes when a call comes in.
When a call comes in
«CALL» is displayed.
The audio system pauses.
Listening to the audio during a call
Press the [SRC] button.
The «CALL» display disappears and the audio system comes back
ON.
When the call ends
Hang up the phone.
The «CALL» display disappears and the audio system comes back
ON.
— 7 —
General features
Theft Deterrent Faceplate
The faceplate of the unit can be detached and taken with you,
helping to deter theft.
English
Removing the Faceplate
Press the Release button.
The faceplate is unlocked, allowing you to detach it.
• The faceplate is a precision piece of equipment and can be
damaged by shocks or jolts. For that reason, keep the faceplate in
its special storage case while detached.
• Do not expose the faceplate or its storage case to direct sunlight
or excessive heat or humidity. Also avoid places with too much
dust or the possibility of water splashing.
Reattaching the Faceplate
1 Align the projections on the unit with the grooves on the
faceplate.
2 Push the faceplate in until it clicks.
The faceplate is locked in place, allowing you to use the unit.
Tuner features
ST indicator
Frequency display
Preset station number
Band display
— 8 —
Tuning
Selecting the station.
1 Select tuner source
Press the [SRC] button.
Select the «TUNER» display.
2 Select the band
Press the [FM] or [AM] button.
Each time the [FM] button is pressed it switches between the
FM1, FM2, and FM3 bands.
3 Tune up or down the band
Press the [4] or [¢] button.
During reception of stereo stations the «ST» indicator is ON.
Station Preset Memory
Putting the station in the memory.
1 Select the band
Press the [FM] or [AM] button.
2 Select the frequency to put in the memory
Press the [4] or [¢] button.
3 Put the frequency in the memory
Press the [#1] — [#6] button for at least 2 seconds.
The preset number display blinks 1 time.
On each band, 1 station can be put in the memory on each [#1]
— [#6] button.
Auto Memory Entry
Putting a station with good reception in the memory
automatically.
1 Select the band for Auto Memory Entry
Press the [FM] or [AM] button.
2 Enter Menu mode
Press the [MENU] button for at least 1 second.
«MENU» is displayed.
3 Select the Auto Memory Entry mode
Press the [FM] or [AM] button.
Select the «A-MEMORY» display.
4 Open Auto Memory Entry
Press the [4] or [¢] button for at least 2 seconds.
When 6 stations that can be received are put in the memory
Auto Memory Entry closes.
• When the <AF Function> (page 19) is ON, only RDS stations are
put in the memory.
• When Auto Memory Entry is done in the FM2 band, the RDS
stations preset in the FM1 band aren’t put in the memory.
Likewise, when it is done in the FM3 band, RDS stations preset in
FM1 or FM2 aren’t put in the memory.
Preset Tuning
Calling up the stations in the memory.
1 Select the band
Press the [FM] or [AM] button.
2 Call up the station
Press the [#1] — [#6] button.
— 9 —
Loading…
A good user manual
The rules should oblige the seller to give the purchaser an operating instrucion of Kenwood KRC-16, along with an item. The lack of an instruction or false information given to customer shall constitute grounds to apply for a complaint because of nonconformity of goods with the contract. In accordance with the law, a customer can receive an instruction in non-paper form; lately graphic and electronic forms of the manuals, as well as instructional videos have been majorly used. A necessary precondition for this is the unmistakable, legible character of an instruction.
What is an instruction?
The term originates from the Latin word „instructio”, which means organizing. Therefore, in an instruction of Kenwood KRC-16 one could find a process description. An instruction’s purpose is to teach, to ease the start-up and an item’s use or performance of certain activities. An instruction is a compilation of information about an item/a service, it is a clue.
Unfortunately, only a few customers devote their time to read an instruction of Kenwood KRC-16. A good user manual introduces us to a number of additional functionalities of the purchased item, and also helps us to avoid the formation of most of the defects.
What should a perfect user manual contain?
First and foremost, an user manual of Kenwood KRC-16 should contain:
— informations concerning technical data of Kenwood KRC-16
— name of the manufacturer and a year of construction of the Kenwood KRC-16 item
— rules of operation, control and maintenance of the Kenwood KRC-16 item
— safety signs and mark certificates which confirm compatibility with appropriate standards
Why don’t we read the manuals?
Usually it results from the lack of time and certainty about functionalities of purchased items. Unfortunately, networking and start-up of Kenwood KRC-16 alone are not enough. An instruction contains a number of clues concerning respective functionalities, safety rules, maintenance methods (what means should be used), eventual defects of Kenwood KRC-16, and methods of problem resolution. Eventually, when one still can’t find the answer to his problems, he will be directed to the Kenwood service. Lately animated manuals and instructional videos are quite popular among customers. These kinds of user manuals are effective; they assure that a customer will familiarize himself with the whole material, and won’t skip complicated, technical information of Kenwood KRC-16.
Why one should read the manuals?
It is mostly in the manuals where we will find the details concerning construction and possibility of the Kenwood KRC-16 item, and its use of respective accessory, as well as information concerning all the functions and facilities.
After a successful purchase of an item one should find a moment and get to know with every part of an instruction. Currently the manuals are carefully prearranged and translated, so they could be fully understood by its users. The manuals will serve as an informational aid.
Table of contents for the manual

KRC-291
KRC-26
KRC-191
KRC-16
© B64-2106-00 (EW/EN)
CASSETTE RECEIVER
INSTRUCTION MANUAL
KRC-291/26(E)_Cover_r2
01.10.3
2:44 PM
Page 1

— 2 —
English
Contents
Safety precautions………………….3
About Cassette tape ……………….4
About RDS …………………………….4
General features …………………….5
Power
Volume
Attenuator
Selecting the Source
Loudness
dB (Sound Coordinate)
Audio Control
Switching Display
TEL Mute
Theft Deterrent Faceplate
Tuner features ………………………..8
Tuning
Station Preset Memory
Auto Memory Entry
Preset Tuning
RDS features ………………………..10
Traffic Information
Presetting Volume for Traffic Information
PTY (Program Type)
Program Type Preset
Changing Language for PTY Function
Cassette player features………..13
Playing Cassette Tapes
Fast Forwarding and Rewinding
Tuner Call
External disc control features ..14
Playing External Disc
Fast Forwarding and Reversing
Track Search
Album Search
Track/Album Repeat
Track Scan
Disc Scan
Random Play
Magazine Random Play
Disc Naming (DNPS)
Text/Title Scroll
Menu system………………………..17
Menu System
Touch Sensor Tone
Manual Clock Adjustment
Synchronize Clock
Power OFF Timer
News Bulletin with Timeout Setting
Local Seek
Tuning Mode
Auto Memory Entry
AF (Alternative Frequency)
Restricting RDS Region
(Region Restrict Function)
Auto TP Seek
Monaural Reception
Text Scroll
Accessories ………………………….21
Installation Procedure …………..21
Connecting Cables
to Terminals ………………………22
Installation …………………………..23
Troubleshooting Guide ………….25
Specifications ………………………28
KRC-291(E)_U.S_r3
01.10.2
4:46 PM
Page 2
— 3 —
To prevent injury and/or fire, take the
following precautions:
·Insert the unit all the way until it is fully
locked in place. Otherwise it may fly out of
place during collisions and other jolts.
· When extending the ignition, battery or
ground wires, make sure to use automotive-
grade wires or other wires with an area of
0.75mm2 (AWG18) or more to prevent wire
deterioration and damage to the wire
coating.
·To prevent short circuits, never put or leave
any metallic objects (e.g., coins or metal
tools) inside the unit.
· If the unit starts to emit smoke or strange
smells, turn off the power immediately and
consult your Kenwood dealer.
· Make sure not to get your fingers caught
between the faceplate and the unit.
· Be careful not to drop the unit or subject it to
strong shock.
The unit may break or crack because it
contains glass parts.
· Do not touch the liquid crystal fluid if the
LCD is damaged or broken due to shock. The
liquid crystal fluid may be dangerous to your
health or even fatal.
If the liquid crystal fluid from the LCD
contacts your body or clothing, wash it off
with soap immediately.
2WARNING
To prevent damage to the machine,
take the following precautions:
· Make sure to ground the unit to a negative
12V DC power supply.
· Do not open the top or bottom covers of the
unit.
· Do not install the unit in a spot exposed to
direct sunlight or excessive heat or humidity.
Also avoid places with too much dust or the
possibility of water splashing.
· Do not set the removed faceplate or the
faceplate case in areas exposed to direct
sunlight, excessive heat or humidity. Also
avoid places with too much dust or the
possibility of water splashing.
·To prevent deterioration, do not touch the
terminals of the unit or faceplate with your
fingers.
· Do not subject the faceplate to excessive
shock, as it is a piece of precision
equipment.
· When replacing a fuse, only use a new one
with the prescribed rating. Using a fuse with
the wrong rating may cause your unit to
malfunction.
·To prevent short circuits when replacing a
fuse, first disconnect the wiring harness.
· Do not place any object between the
faceplate and the unit.
· During installation, do not use any screws
except for the ones provided. The use of
improper screws might result in damage to
the main unit.
2CAUTION
IMPORTANT INFORMATION
About the disc changer to be
connected:
To connect a disc changer having the «O-N»
switch to this unit, set the «O-N» switch to «N».
To connect a disc changer having no «O-N»
switch to this unit, the converter cord CA-
DS100 and/or switching adapter KCA-S210A
are required as options.
A disc changer doesn’t work when it is
connected without using these options.
If a model with no «O-N» switch is connected,
some unavailable functions and information
that cannot be displayed are generated.
Note that none of the KDC-C100, KDC-C302,
C205, C705, and non-Kenwood CD changers
can be connected.
You can damage both your unit and the CD
changer if you connect them incorrectly.
Safety precautions
KRC-291(E)_U.S_r3
01.10.2
4:46 PM
Page 3
— 4 —
English
· If you experience problems during
installation, consult your Kenwood dealer.
· If the unit does not seem to be working
right, try pressing the reset button first. If
that does not solve the problem, consult
your Kenwood dealer.
·Press the reset button if the Disc auto
changer fails to operate correctly. Normal
operation should be restored.
· Characters in the LCD may become difficult
to read in temperatures below 41 °F (5 °C).
· The illustrations of the display and the panel
appearing in this manual are examples used
to explain more clearly how the controls are
used. Therefore, what appears on the display
in the illustrations may differ from what
appears on the display on the actual
equipment, and some of the illustrations on
the display may represent something
impossible in actual operation.
NOTE
Cleaning the Faceplate Terminals
If the terminals on the unit or faceplate get
dirty, wipe them with a dry, soft cloth.
Cleaning the Unit
If the faceplate of this unit is stained, wipe it
with a dry soft cloth such as a silicon cloth.
If the faceplate is stained badly, wipe the stain
off with a cloth moistened with neutral
cleaner, then wipe neutral detergent off.
Applying spray cleaner directly to the unit may
affect its mechanical parts. Wiping the
faceplate with a hard cloth or using a volatile
liquid such as thinner or alcohol may scratch
the surface or erases characters.
Safety precautions
RDS (Radio Data System)
When listening to an RDS station, the
programme service name of the station is
displayed, advising you quickly which station is
being received.
RDS (Radio Data System) stations also
transmit frequency data for the same station.
When you are making long trips, this function
automatically alternative switches to the
particular frequency with the best reception
for the particular network of stations that you
want to listen to. The data is automatically
stored, allowing you to switch quickly to
another RDS stations, broadcasting the same
programme, that has better reception. These
include stations stored in the station preset
memory that you often listen to.
Enhanced Other Network
Stations that offer <Enhanced Other
Network> also transmit information about
other RDS stations that have traffic
information. When you are tuned to a station
that is not transmitting traffic information, but
another RDS station starts transmitting a
traffic bulletin, the tuner automatically
switches to the other station for the duration
of the bulletin.
Alarm
When an emergency transmission (announcing
disasters, etc.) is sent, all current functions are
interrupted to allow the warning to be
received.
About RDS
Cleaning the tape head
When there’s noise or the sound quality is bad
during tape play the tape head maybe dirty,
clean the tape head.
About Cassette tape
· If the tape is slack tighten it.
· If the cassette tape label is peeling off glue it
on again.
· Don’t use deformed cassette tape.
· Don’t place cassette tape on the dashboard
etc. where the temperature is high.
· Don’t use cassette tape that’s 100 minutes
long or longer.
About Cassette tape
Reset button
KRC-291(E)_U.S_r3
01.10.2
4:46 PM
Page 4

Turning the volume down quickly.
Press the [ATT] button.
Each time the button is pressed the Attenuator turns ON or OFF.
When it’s ON, the «ATT» indicator blinks.
Attenuator
Increasing Volume
Press the [u] button.
Decreasing Volume
Press the [d] button.
Volume
Turning ON the Power
Press the [SRC] button.
Turning OFF the Power
Press the [PWR OFF] button for at least 1 second.
Power
General features
— 5 —
SRC/
PWR OFF
¢
4
CLK
FM
AM
AUD
ATT/
LOUD
#1 — 5
d
u
ATT indicator
LOUD indicator
Release button
KRC-291(E)_U.S_r3
01.10.2
4:46 PM
Page 5