

G3500
3.5A (3500mA)
6V & 12V
Owner’s Manual & User Guide
WARNING
WELCOME!
CONTENTS
1
Risk of SERIOUS INJURY OR DEATH.
ELECTRICAL SHOCK, EXPLOSION,
FIRE, AND EYE INJURY HAZARDS.
PROTECT YOURSELF AND OTHERS.
Before use, READ AND UNDERSTAND
the manufacturer’s instructions and
Owner’s Manual and User Guide.
Failure to read and understand this
information could result in SERIOUS
INJURY or DEATH.
DO NOT REMOVE OR COVER THIS
INFORMATION.
CONTACTING NOCO GENIUS
About Our Products
For questions regarding our products,
you can contact technical support at:
Phone: 1.800.456.6626
Email: support@geniuschargers.com
You can also nd troubleshooting tips
in this manual. See the section called
“Troubleshooting.” You can also nd
our troubleshooting tips online at:
geniuschargers.com/troubleshooting
Thank you for buying the
NOCO Genius G3500. SAVE
THESE INSTRUCTIONS. This
Owner’s Manual and User Guide
contains important safety and
operating instructions for model
G3500.
WHAT’S IN THE BOX:
• G3500 Charger
• Battery Clamp Connectors
• Eyelet Terminal Connectors
• Owner’s Manual & User Guide
• Product Registration Card
About Our Products
NOCO Genius is a brand
of Wicked Smart Battery
Chargers developed by The
NOCO Company.
THE NOCO COMPANY
23200 Commerce Park
Cleveland, OH 44122-5921
United States of America
Hours of Operation:
Between 8AM & 5PM (EST)
Monday through Friday
SAFETY & PRECAUTIONS
PERSONAL PRECAUTIONS
BEFORE CHARGING
LOCATING BATTERY CHARGER
MOUNTING BATTERY CHARGER
USING THE G3500
BATTERY SPECS
CHARGE MODES
CONNECTING TO THE BATTERY
HOW TO START CHARGING
USER INTERFACE
FEATURE OVERVIEW
CHARGING STEPS
CHARGING TIMES
MAINTENANCE
TECHNICAL SPECS
TROUBLESHOOTING
LIMITED WARRANTY
REGISTER MY BATTERY CHARGER
Manuel du propriétaire et guide de l’utilisateur en français
Manual del usuario y guía de usuario en español
2
6
6
7
7
8
8
11
13
14
16
18
20
20
21
22
26
28
29
59
G3500
geniuschargers.com
SAFETY & PRECAUTIONS
IMPORTANT SAFETY INSTRUCTIONS
SAFETY & PRECAUTIONS
32
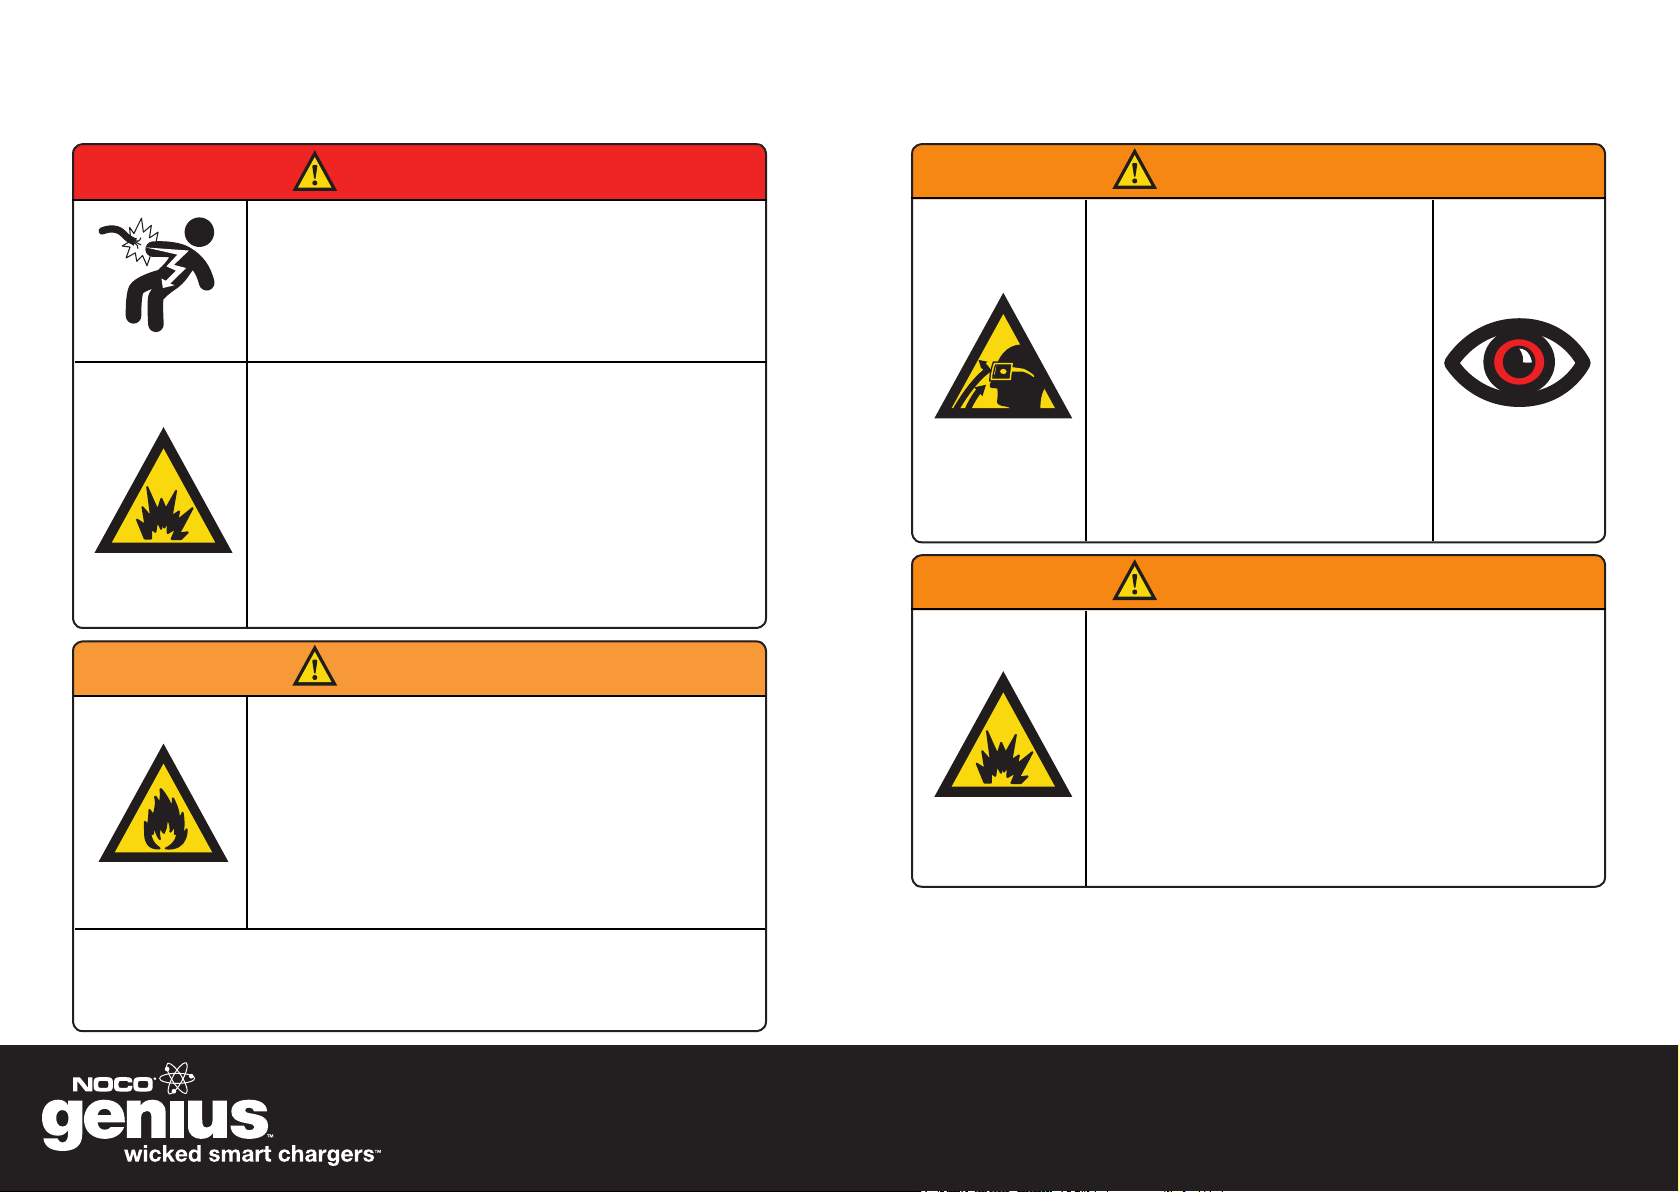
DANGER
ELECTRICAL SHOCK HAZARD
CHARGER IS AN ELECTRICAL DEVICE THAT CAN
SHOCK AND CAUSE SERIOUS INJURY.
DO NOT CUT POWER CORDS.
DO NOT SUBMERGE IN WATER OR GET CHARGER WET.
EXPLOSION HAZARD
UNMONITORED, INCOMPATIBLE, OR DAMAGED
BATTERIES CAN EXPLODE IF USED WITH CHARGER.
DO NOT LEAVE CHARGER UNATTENDED WHILE IN USE.
DO NOT ATTEMPT TO CHARGE DAMAGED OR FROZEN
BATTERIES.
USE CHARGER ONLY WITH BATTERIES OF
RECOMMENDED VOLTAGE.
OPERATE CHARGER ONLY IN WELL-VENTILATED
AREAS.
WARNING
FIRE HAZARD
CHARGER IS AN ELECTRICAL DEVICE THAT EMITS
HEAT AND CAN BURN.
DO NOT COVER CHARGER.
DO NOT SMOKE OR USE ANY OTHER SOURCE OF
ELECTRICAL SPARK OR FIRE WHEN OPERATING
CHARGER.
KEEP CHARGER AWAY FROM COMBUSTIBLE
MATERIALS.
WARNING
EYE INJURY HAZARD
BATTERIES CAN EXPLODE AND
CAUSE FLYING DEBRIS.
BATTERY ACID CAN CAUSE EYE
IRRITATION.
WEAR EYE PROTECTION WHEN
OPERATING CHARGER.
AVOID CONTACT WITH EYES
AND WASH HANDS AFTER USING
CHARGER.
IN CASE OF EYE CONTACT, FLUSH
AFFECTED AREA WITH PLENTY OF
WATER.
WARNING
RISK OF EXPLOSIVE GASES
WORKING IN VICINITY OF A LEAD-ACID BATTERY
IS DANGEROUS. BATTERIES GENERATE EXPLOSIVE
GASES DURING NORMAL BATTERY OPERATION. FOR
THIS REASON, IT IS OF UTMOST IMPORTANCE THAT
YOU FOLLOW THE INSTRUCTIONS EACH TIME YOU
USE THE CHARGER.
To reduce risk of battery explosion, follow these
instructions and those published by battery
manufacturer and manufacturer of any equipment
intended to be used in vicinity of battery. Review
cautionary markings on these products and on engine.
BATTERY POSTS, TERMINALS, AND RELATED ACCESSORIES CONTAIN
CHEMICALS, INCLUDING LEAD, KNOWN TO THE STATE OF CALIFORNIA TO
CAUSE CANCER AND BIRTH DEFECTS OR OTHER REPRODUCTIVE HARM.
ALWAYS WASH YOUR HANDS AFTER HANDLING THESE PRODUCTS.
G3500
geniuschargers.com
SAFETY & PRECAUTIONSSAFETY & PRECAUTIONS
54
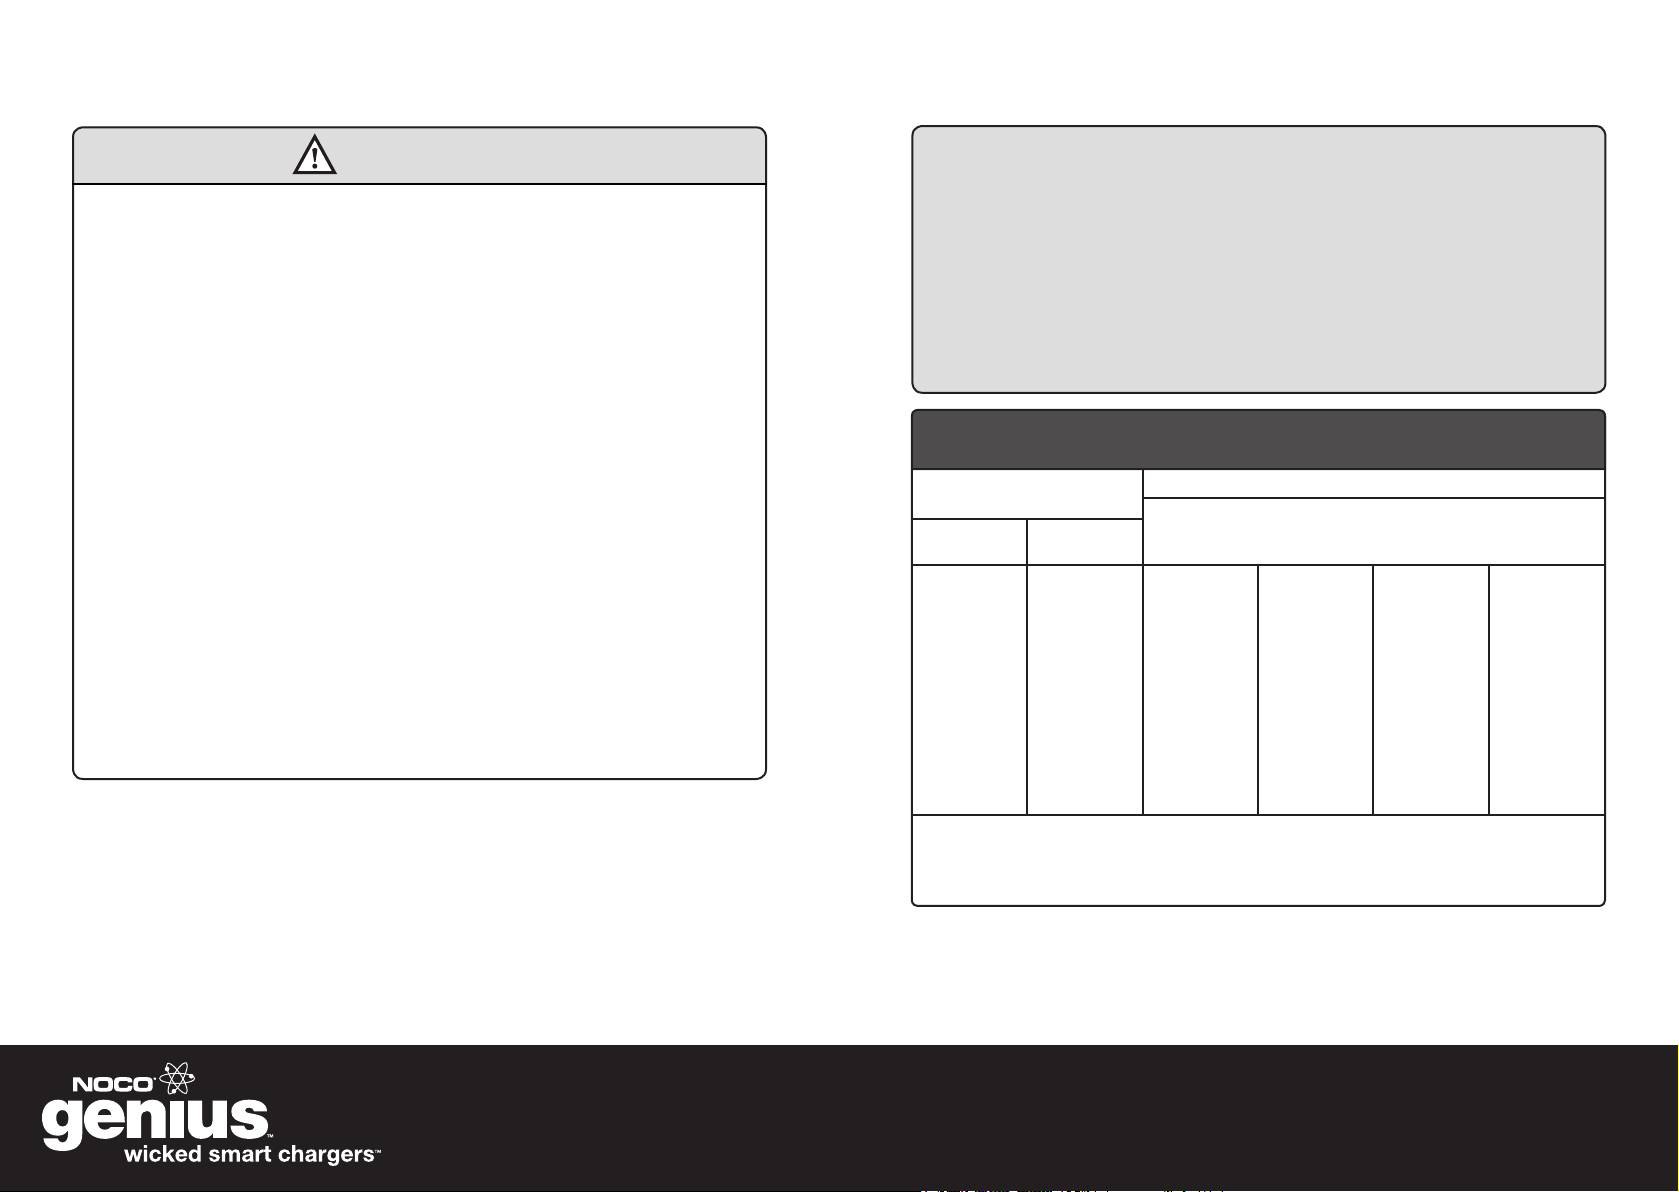
CAUTION
Do not expose charger to rain or snow.
Use of an attachment not recommended or sold by the battery
charger manufacturer may result in a risk of re, electric shock, or
injury to persons.
To reduce risk of damage to electric plug and cord, pull by plug
rather than cord when disconnecting charger.
Do not operate charger with damaged cord or plug – replace the
cord or plug immediately.
Do not operate charger if it has received a sharp blow, been
dropped, or otherwise damaged in any way; take it to a qualied
serviceman.
Do not disassemble charger; take it to a qualied serviceman
when service or repair is required. Incorrect reassembly may
result in a risk of electric shock or re.
To reduce risk of electric shock, unplug charger from outlet
before attempting any maintenance or cleaning. Turning off
controls will not reduce this risk.
DO NOT USE EXTENSION CORDS unless absolutely necessary. Using
an improper extension cord could result in a risk of re and electric
shock and may result in property damage, personal injury or death. If
extension cord must be used, make sure that:
1.) The pins on the extension cord plug have the same number, size,
and shape as those of the AC power cord plug on the charger.
2.) The extension cord is properly wired and is in good electrical
condition.
3.) The wire size is as specied in Table I below:
TABLE 1:
AC INPUT RATING,
AMPERES*
Equal To Or
Greater Than
0
2
3
4
5
6
8
10
12
14
16
18
*If the input rating of a charger is given in watts rather than amperes, the corresponding ampere
rating is to be determined by dividing the wattage rating by the voltage rating — for example:
RECOMMENDED MINIMUM AWG SIZE FOR
EXTENSION CORDS FOR BATTERY CHARGERS
AWG SIZE OF CORD
But Less
Than
2
3
4
5
6
8
10
12
14
16
18
20
25
(7.6)
18
18
18
18
18
18
18
16
16
16
14
14
1250 watts/125 volts = 10 amperes
Length Of Cord, Feet (m)
50
(15.2)
18
18
18
18
16
16
14
14
12
12
12
12
100
(30.5)
18
16
16
14
14
12
12
10
10
10
8
8
150
(45.6)
16
14
14
12
12
10
10
8
8
8
8
6
G3500
geniuschargers.com

SAFETY & PRECAUTIONS
SAFETY & PRECAUTIONS
76
PERSONAL PRECAUTIONS
USE THE FOLLOWING PRECAUTIONS WHEN YOU WORK
NEAR LEAD-ACID BATTERIES:
• Someone should be within range of your voice or close enough to come to
your aid if you have an accident.
• Have plenty of fresh water and soap nearby in case battery acid contacts
skin, clothing, or eyes.
• Wear complete eye protection and protective clothing. Avoid touching
your eyes while working near a battery. If battery acid contacts your skin
or clothing, wash immediately with soap and water. If acid enters an eye,
immediately ood the eye with running cold water for at least ten (10) minutes
and seek medical attention as soon as possible.
• Be extra cautious when handling metal tools around a battery. If you drop
a metal tool near a battery it might spark or create a short circuit between
the battery terminals and some other metal part. Either event may cause a
dangerous electrical shock hazard, a re, or even an explosion, resulting in
property damage, personal injury, or death.
• Never smoke or allow an open spark or ame in the vicinity of the battery or
engine.
• Remove all personal items made of metal, such as, rings, bracelets,
necklaces, and watches when working with a lead-acid battery. A lead-acid
battery can produce a short-circuited current high enough to weld a metal ring
or other piece of jewelry, causing a severe burn.
• This battery charger is for charging LEAD-ACID BATTERIES ONLY. DO
NOT USE THE BATTERY CHARGER FOR DRY-CELL BATTERIES THAT
ARE COMMONLY USED WITH HOME APPLIANCES. THESE TYPES
OF BATTERIES MAY BURST AND MAY CAUSE PROPERTY DAMAGE,
PERSONAL INJURY OR DEATH.
•NEVER charge a frozen battery.
BEFORE CHARGING
• To avoid an electric arc (or spark), turn off or disconnect all of the
accessories in the vehicle. Always remove the cable that is connected to
grounded terminal from battery rst.
• Make sure the area around the battery is well-ventilated while the battery is
being charged. If necessary, use a non-metallic material to blow away the gas
in the area.
• If necessary, clean the battery terminals. Be careful to keep the corrosion
and other debris from coming in contact with your skin or eyes.
• If the battery is not a sealed battery, add distilled water to each cell (if
necessary) until the battery acid solution reaches the level specied by battery
manufacturer. Do not overll. For a battery without cell caps, such as a valve
regulated lead-acid battery (VRLA), carefully follow the battery manufacturer’s
charging instructions.
• Before charging, carefully read the battery manufacturer’s specic
precautions and recommended rates of charge.
• Determine the voltage of the battery by referring to the vehicle’s owner’s
manual and make sure that the charge mode is set at the correct voltage.
• Connect and disconnect the DC output cables only after the battery charger
is placed in the STANDBY mode and the AC cord is removed from the
electrical outlet. Never allow the battery clamp or eyelet terminal connectors
to touch each other.
LOCATING BATTERY CHARGER
• Locate the battery charger as far away from the battery as possible.
• Never place the battery charger directly above the battery; gases from
battery will corrode and damage battery charger.
• When reading electrolyte specic gravity or ling battery, never allow battery
acid to come in contact with the battery charger.
• Do not operate the battery charger in a closed-in area or an area with
restricted ventilation.
• Do not set a battery on top of battery charger.
MOUNTING BATTERY CHARGER
The G3500 has four (4) external mounting holes in the casing of the battery
charger enclosure. These external mounting holes can be used to mount the
battery charger permanently in a desired location for battery charging. When
mounting the battery charger to a xed location, keep in mind the distance to
the battery from the battery charger. The cable length from the battery charger
with either the battery clamp or eyelet terminal connectors is approximately
72” (6’). Allow for at least 12” (1’) of slack in the battery connections. Thus, we
recommend not to extend the battery connections past 60” (5’).
G3500
geniuschargers.com
USING THE G3500
USING THE G3500
98
BATTERY SPECS
The following recommendations should ONLY be considered as guidelines.
Always refer to the battery manufacturer’s recommendations for battery
charging. The G3500 is suitable for charging all types of 6V &12V lead-acid
batteries, including Wet (Flooded), Gel, MF (Maintenance-Free) and AGM
(Absorption Glass Mat) batteries and battery sizes from 1.2 to 120Ah (and 1.2
to 14Ah for small batteries). The battery charger can also maintain all battery
sizes.
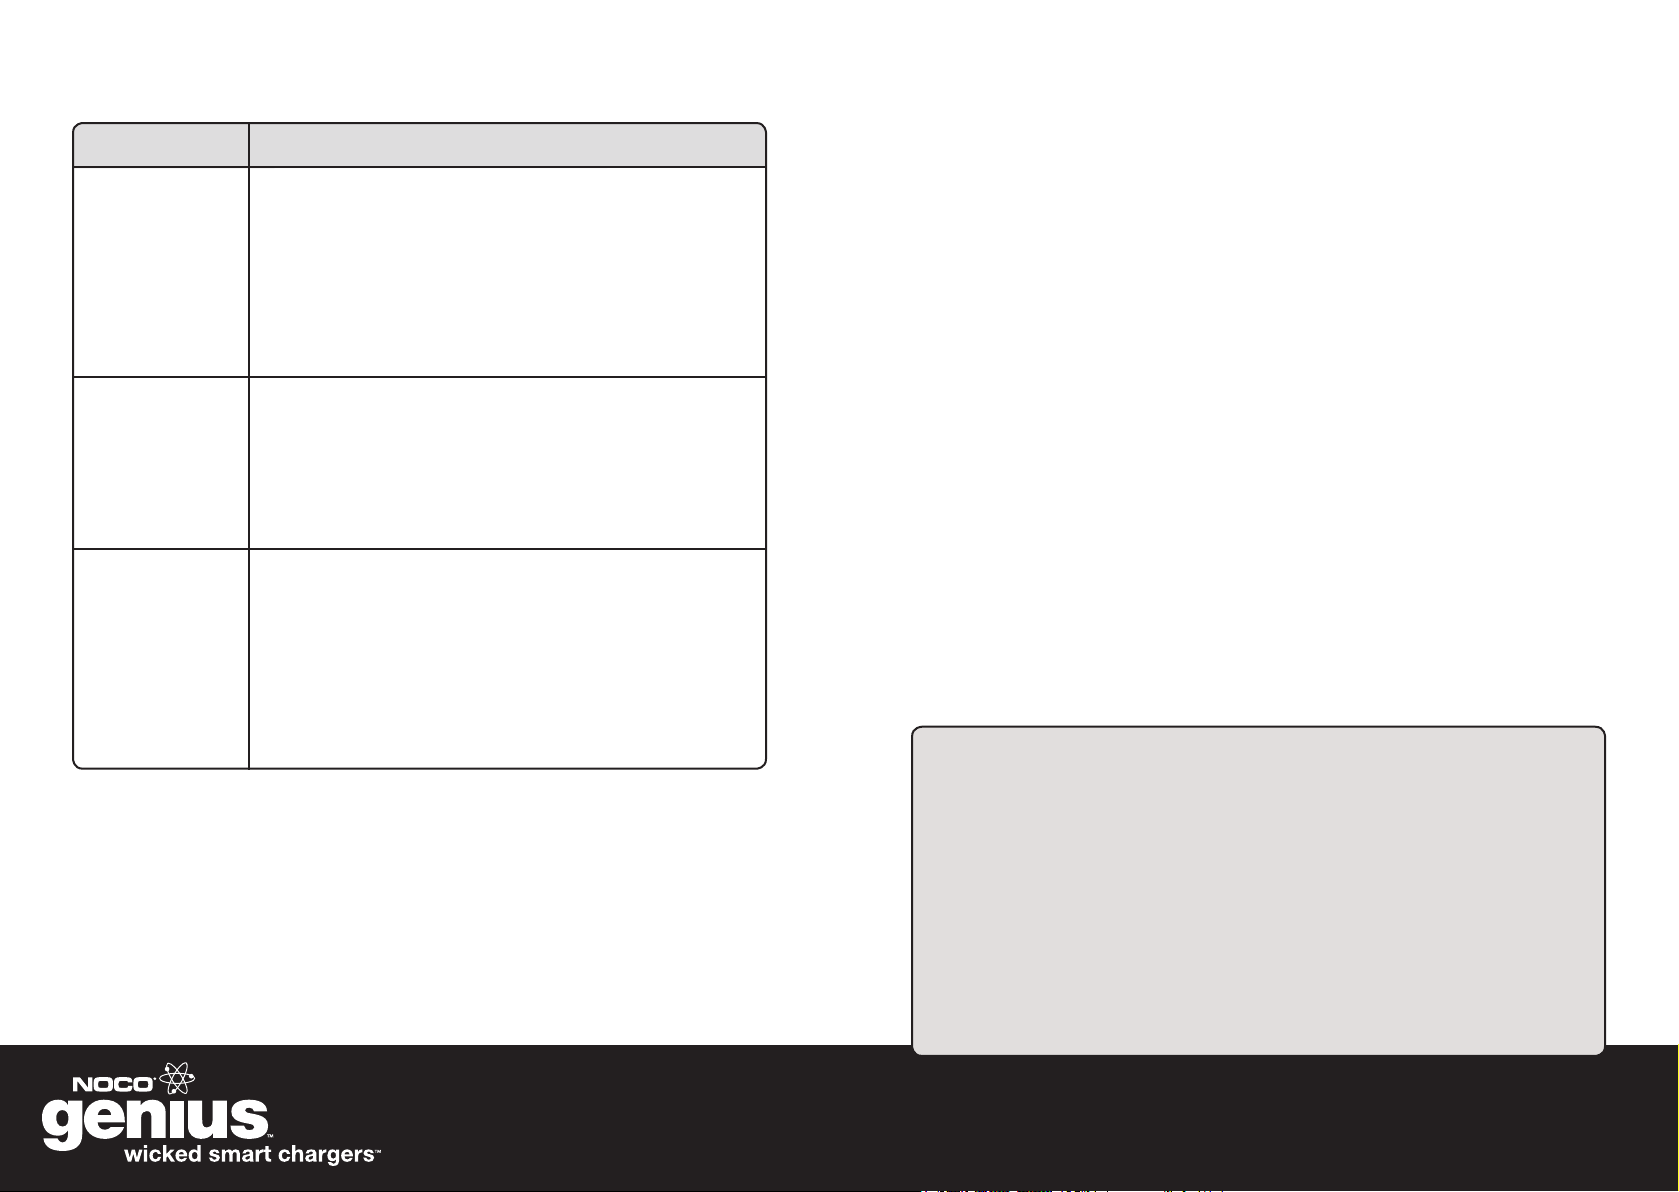
CHARGE MODES
The G3500 is equipped with eight (8) charging modes: 6V NORM, 6V COLD/
AGM, 12V NORM, 12V COLD/AGM, SMALL 6V NORM, SMALL 6V COLD/
AGM, SMALL 12V NORM and SMALL 12V COLD/AGM. Before selecting a
charge mode, it is important to understand the differences and the purpose of
each mode. The charge modes are explained below:
MODE EXPLANATION
6V NORM
7.2V
14-120Ah
3.5A (3500mA)
Red LED
6V COLD/AGM
7.4V
14-120Ah
3.5A (3500mA)
Blue LED
12V NORM
14.4V
14-120Ah
3.5A (3500mA)
Red LED
The “normal” (“NORM”) charge mode is for charging
Wet Cell, Maintenance-Free and Gel Cell batteries. If
you are unsure of the chemistry of your battery, use
the NORM charge mode. When selected, a Red LED
will illuminate.
The COLD/AGM charge mode is for charging
batteries in cold weather and AGM (also known as
“spiral wound”) batteries. If a battery’s (Wet, Gel, MF
or AGM) temperature is below 32o F (0o C), use the
COLD/AGM charge mode. If you are unsure of the
chemistry of your battery, DO NOT use this charge
mode, and use the NORM charge mode instead.
When selected, a Blue LED will illuminate.
The “normal” (“NORM”) charge mode is for charging
12V Wet Cell, Maintenance-Free and Gel Cell
batteries. If you are unsure of the chemistry of your
battery, use the NORM charge mode. When selected,
a Red LED will illuminate.
CHARGE MODES continued
MODE EXPLANATION
12V COLD/AGM
14.7V
14-120Ah
3.5A (3500mA)
Blue LED
The SMALL charge modes are for charging smaller capacity batteries (1.2 to
14 Ah) typically found on a motorcycle, ATV, snowmobile and some lawn and
garden equipment. Use the SMALL charge modes when dealing with SMALL
Ah batteries. The SMALL charge modes are explained below:
MODE EXPLANATION
6V SMALL
NORM
7.2V
1.2-14Ah
0.9A (900mA)
Red LED
Continued On Next Page
The COLD/AGM charge mode is for charging 12V
batteries in cold weather and AGM (also known as
“spiral wound”) batteries. If a battery’s (Wet, Gel, MF
or AGM) temperature is below 32oF (0oC), use the
COLD/AGM charge mode. If you are unsure of the
chemistry of your battery, DO NOT use this charge
mode, and use the NORM charge mode instead.
When selected, a Blue LED will illuminate.
The “normal” (“NORM”) charge mode is for charging
Wet Cell, Maintenance-Free and Gel Cell batteries. If
you are unsure of the chemistry of your battery, use
the SMALL NORM charge mode. When selected, a
Red LED will illuminate.
WICKED SMART TIP
Amp Hour (Ah) is a rating that measures a battery’s storage capacity.
The Ah rating indicates how much amperage is available in the battery
over a twenty (20) hour period. In order to determine how many
constant Amps the battery can output for 20 hours, divide the Ah rating
by 20. For example, if you have a 100Ah battery, it can deliver 5 Amps
for 20 hours before it is fully discharged (100 / 20 = 5).
Now That’s Smart, Wicked Smart.™
G3500
geniuschargers.com
USING THE G3500
USING THE G3500
1110
MODE EXPLANATION
6V SMALL
COLD/AGM
7.4V
1.2-14Ah
0.9A (900mA)
Blue LED
12V SMALL
NORM
14.4V
1.2-14Ah
0.9A (900mA)
Red LED
12V SMALL
COLD/AGM
14.7V
1.2-14Ah
0.9A (900mA)
Blue LED
The COLD/AGM charge mode is for charging
batteries in cold weather and AGM (also known as,
“spiral wound”) batteries. If a battery’s (Wet, Gel, MF
or AGM) temperature is below 32˚F (0˚C), use the
COLD/AGM charge mode. If you are unsure of the
chemistry of your battery, DO NOT use this charge
mode, and use the NORM charge mode instead.
When selected, a Blue LED will illuminate.
The “normal” (“NORM”) charge mode is for charging
12V Wet Cell, Maintenance-Free and Gel Cell
batteries. If you are unsure of the chemistry of your
battery, use the SMALL NORM charge mode. When
selected, a Red LED will illuminate.
The COLD/AGM charge mode is for charging
batteries in cold weather and AGM (also known as
“spiral wound”) batteries. If a battery’s (Wet, Gel, MF
or AGM) temperature is below 32˚F (0˚C), use the
COLD/AGM charge mode. If you are unsure of the
chemistry of your battery, DO NOT use this charge
mode, and use the NORM charge mode instead.
When selected, a Blue LED will illuminate.
CONNECTING TO THE BATTERY
Before you connect to the battery, make sure that the AC power plug is
not connected to an electrical outlet. DO NOT CONNECT THE BATTERY
CHARGER AC POWER PLUG TO THE ELECTRICAL OUTLET UNTIL ALL
OTHER CONNECTIONS ARE MADE. Make sure you have identied the
correct polarity of the battery terminals on the battery. The POSITIVE battery
terminal is typically marked by these letters or symbol (POS,P,+). The
NEGATIVE battery terminal is typically marked by these letters or symbol
(NEG,N,-). If you are having difculty determining the polarity of the battery
terminals, see the Wicked Smart Tip below, before proceeding.
IF THE BATTERY IS OUTSIDE OF THE VEHICLE
1.) Connect the POSITIVE (Red) battery clamp or eyelet terminal connector to
the POSITIVE (POS,P,+) battery terminal.
2.) Connect the NEGATIVE (Black) battery clamp or eyelet terminal connector
to the NEGATIVE (NEG,N,-) battery terminal. If you have accidentally reversed
the polarity, an ERROR LED (Orange) will illuminate. The battery charger has
an internal safety feature to protect the battery charger from damage if this
situation should occur. Reverse the connections to clear the ERROR LED and
proceed to the next step.
3.) Connect the battery charger’s AC power plug into a suitable electrical
outlet. DO NOT FACE THE BATTERY WHEN MAKING THIS CONNECTION.
4.) When disconnecting the battery charger, disconnect in the reverse
sequence, removing the NEGATIVE rst.
WICKED SMART TIP
HOW TO IDENTIFY THE POSITIVE AND NEGATIVE BATTERY
TERMINALS. The Reverse Polarity Protection feature on the G3500 is
enabled even when the AC power plug is not connected. MAKE SURE
THE AC POWER PLUG IS NOT CONNECTED TO AN ELECTRICAL
OUTLET. Connect the battery clamp or eyelet terminal connectors to
the battery terminals. If an ERROR LED (Orange) illuminates, the battery
connections are reversed (positive to negative, and vice versa). If the
ERROR LED (Orange) DOES NOT illuminate, the battery connections
were made correctly. In either case, you will be able to identify the
polarity of the battery terminals. Make sure to make a note of it.
Now That’s Smart, Wicked Smart.™
G3500
geniuschargers.com
USING THE G3500
USING THE G3500
1312
IF THE BATTERY IS INSTALLED INSIDE OF THE VEHICLE
1.) Position both the AC power plug and battery clamps or eyelet terminal
connectors to avoid accidental damage by moving vehicle parts (i.e. hoods,
doors) or moving engine parts (i.e. fan blades, belts, pulleys).
2.) Determine the vehicle’s battery system. If the POSITIVE (POS,P,+) battery
terminal is connected to the vehicle chassis, then the vehicle has a Positive
Ground System. If the NEGATIVE (NEG,N,-) battery terminal is connected to
the vehicle chassis, then the vehicle has a Negative Ground System. Negative
Ground Systems are the most common.
3: Option A) For Negative Ground Systems, connect the POSITIVE (Red)
battery clamp or eyelet terminal connector to the POSITIVE (POS,P,+) battery
terminal. Next, connect the NEGATIVE (Black) battery clamp or eyelet terminal
connector to the vehicle chassis. DO NOT CONNECT TO THE CARBURETOR,
FUEL LINES, OR THIN SHEET METAL PARTS. MAKE THE CONNECTION TO
THE ENGINE BLOCK OR A HEAVY GAUGE METAL PART OF THE FRAME.
3: Option B) For Positive Ground Systems, connect the NEGATIVE (Black)
battery clamp or eyelet terminal connector to the NEGATIVE (NEG,N,-) battery
terminal. Next, connect the POSITIVE (Red) battery clamp or eyelet terminal
connector to the vehicle chassis. DO NOT CONNECT TO THE CARBURETOR,
FUEL LINES, OR THIN SHEET METAL PARTS. MAKE THE CONNECTION TO
THE ENGINE BLOCK OR A HEAVY GAUGE METAL PART OF THE FRAME.
4.) Connect the battery charger’s AC power plug into a suitable electrical
outlet. DO NOT FACE THE BATTERY WHEN MAKING THIS CONNECTION.
5.) When disconnecting the battery charger, disconnect in the reverse
sequence.
HOW TO START CHARGING
1.) Conrm that you have connected the battery clamp or eyelet terminal
connectors properly and the AC power plug is plugged into an electrical
outlet.
2.) The battery charger will begin in the STANDBY mode, indicated by a Green
LED. In the STANDBY mode, the battery charger is not outputting any current.
By pressing the MODE button, toggle to the appropriate charge mode, based
on the size and chemistry of your battery, to begin the charging process.
3.) Depending on the charge mode selected, an LED will illuminate the
selected charge mode and the CHARGE LEDs (25%, 50%, 75%, 100%) will
begin to illuminate (depending on the health of the battery), indicating the
charging process has started.
4.) When the battery is fully charged, all the CHARGE LEDs will be a solid
color (Red, Red, Yellow, Green), indicating the charge process is completed.
5.) The battery charger can be left connected to the battery at all times to
provide maintenance charging. However, it is good practice to check the
battery periodically.
WICKED SMART TIP
Positive Ground Systems are not very common nowadays. They
are typically found on vintage cars (i.e. classic cars) and tractors
manufactured before the early 1970’s. The reason for the conversion to
Negative Ground Systems was primarily due to the battery corrosion
that accumulated on the positive battery terminals. It was believed that
Positive Ground Systems suffered from increased battery corrosion
due to the opposite polarity since anodes have an oxidation reaction
and cathodes have a reduction reaction. In a battery, the cathode is the
positive.
Now That’s Smart, Wicked Smart.™
WICKED SMART FEATURE
INITIALIZATION. When the battery charger is plugged into an AC
electrical outlet and connected to a battery, there will be a brief (one to
three seconds) delay, then all LEDs will light up for a half (1/2) second,
to conrm all LEDs are operational. After the initialization, the only LED
that will illuminate is the last mode selected. If not in STANDBY mode,
the battery charger will begin charging after ve (5) seconds. The ve (5)
second delay allows time to toggle through the charge modes.
Now That’s Smart, Wicked Smart.™
G3500
geniuschargers.com
USING THE G3500
1514
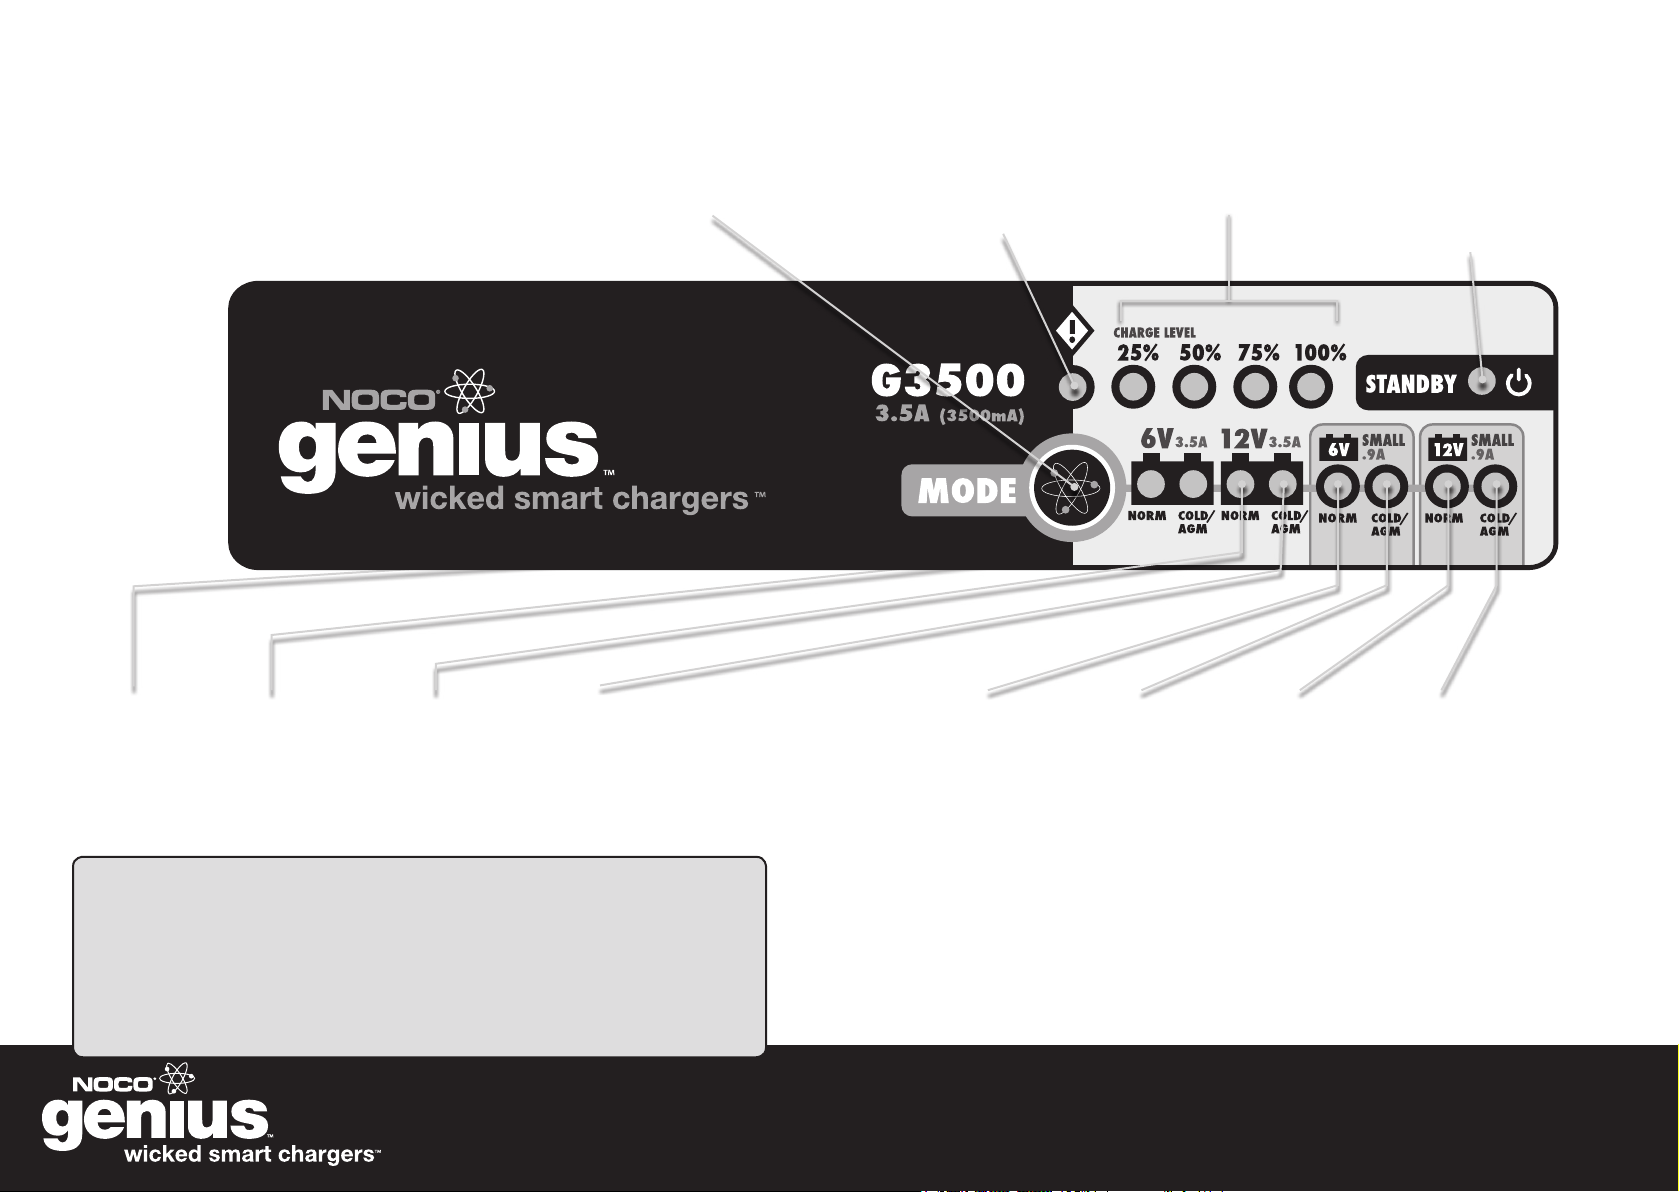
MODE BUTTON
The MODE button
is used to select
the charging modes
manually.
USER INTERFACE
6V NORM LED
Charge mode for
6V Wet, Gel and MF
batteries.
(14-120Ah)
6V COLD/
AGM LED
Charge mode for
6V batteries below
32°F (0°C) and
AGM batteries.
(14-120Ah)
12V NORM LED
Charge mode for
12V Wet, Gel and MF
batteries.
(14-120Ah)
12V COLD/
AGM LED
Charge mode for
12V batteries below
32°F (0°C) and
AGM batteries.
(14-120Ah)
WICKED SMART FEATURE
ERROR CONDITION. An ERROR condition could happen for multiple
reasons. If an ERROR condition occurs, the ERROR LED and CHARGE
LEDs (25%, 50%, 75%, 100%) will blink “on” and “off” at 5Hz. For
assistance in resolving ERRORs, see the section entitled, TROUBLE
SHOOTING.
Now That’s Smart, Wicked Smart.™
ERROR LED
The ERROR LED (Orange)
will illuminate when an error
condition or reverse polarity
is present.
6V SMALL
NORM LED
Charge mode for
6V Wet, Gel and MF
batteries.
(1.2-14Ah)
6V SMALL
COLD/AGM
LED
Charge mode for
6V batteries below
32°F (0°C) and
AGM batteries.
(1.2-14Ah)
CHARGE LEVEL
Indicates the current
charge level of the
battery.
12V SMALL
NORM LED
Charge mode for
12V Wet, Gel and MF
batteries.
(1.2-14Ah)
STANDBY LED
The STANDBY LED
(Green) illuminates
when a charging
mode has not been
selected.
12V SMALL
COLD/AGM
LED
Charge mode for
12V batteries below
32°F (0°C) and
AGM batteries.
(1.2-14Ah)
G3500
geniuschargers.com
USING THE G3500
USING THE G3500
1716
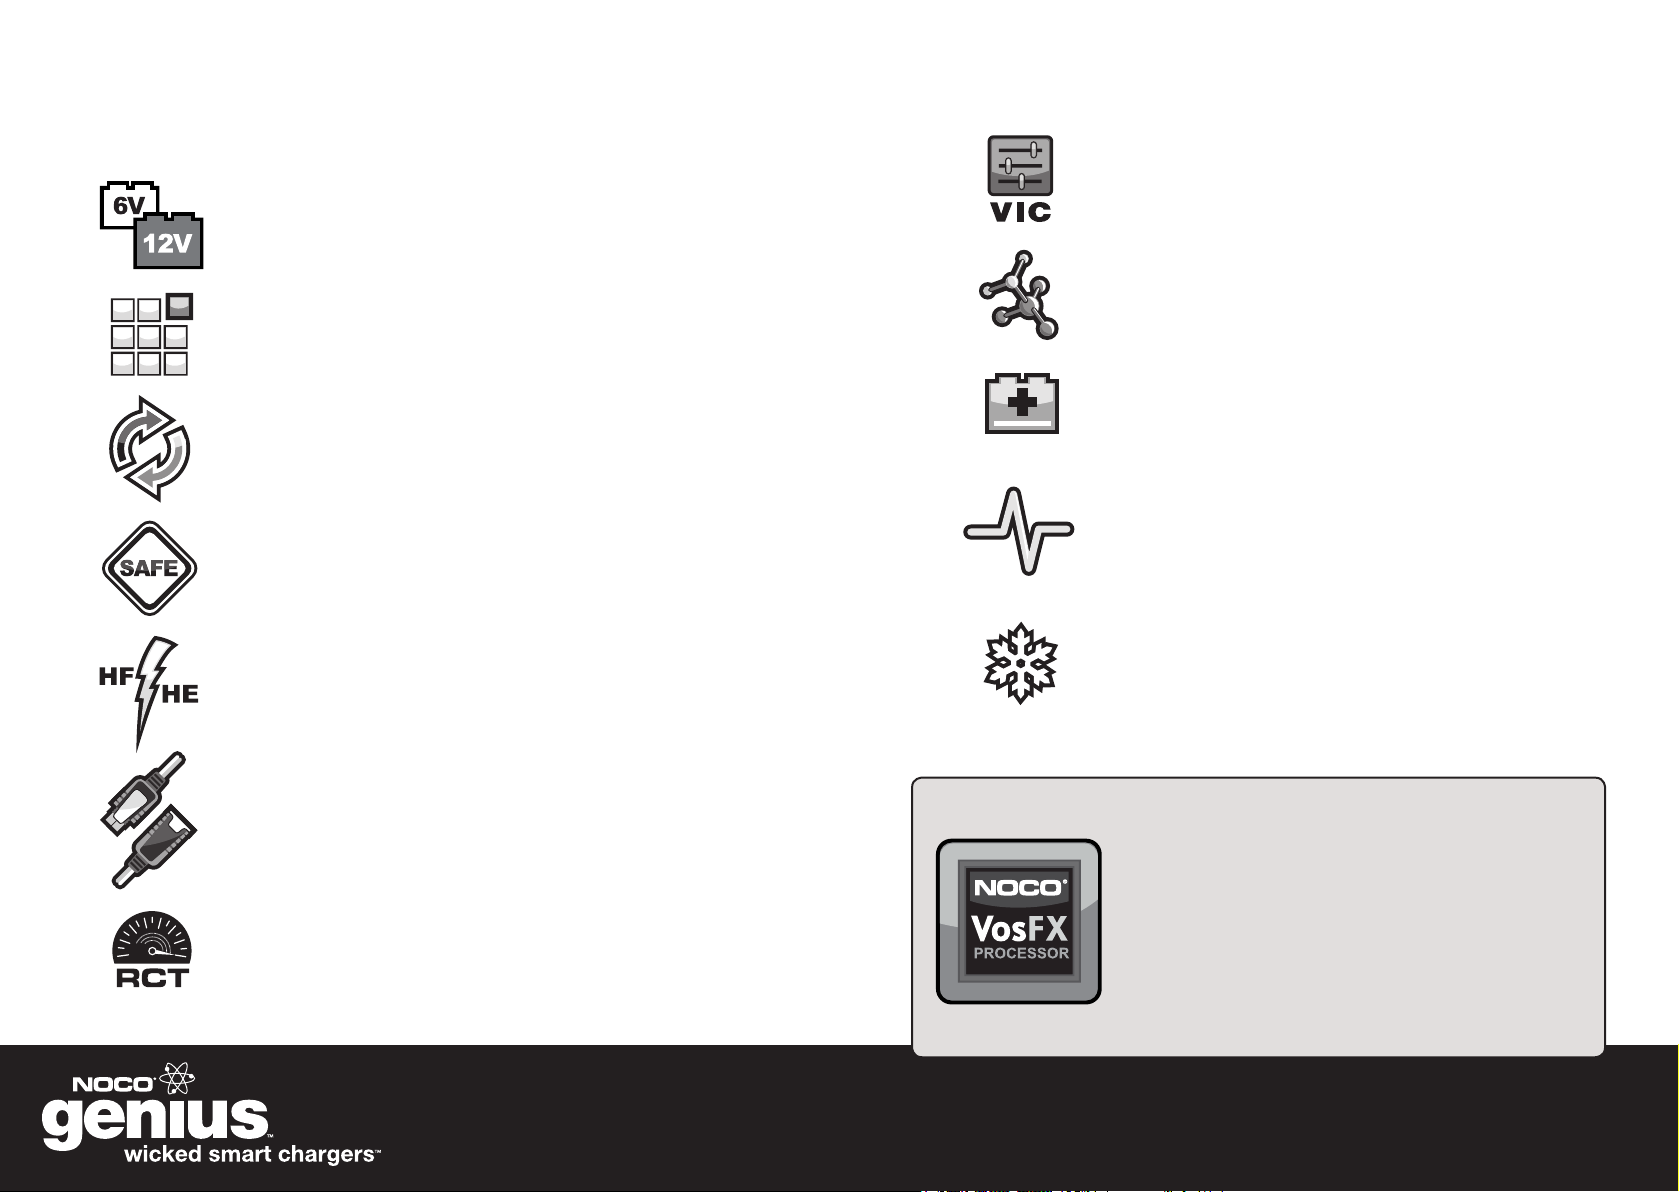
FEATURE OVERVIEW
6V/12V COMPATIBILITY
Charges 6V&12V batteries
AUTO-MEMORY
Returns to last selected mode when restarted
FULLY INTERACTIVE
Automatically adjusts itself to changing current needs
DESIGNED FOR SAFETY
Reverse polarity, short circuit, open circuit, spark proof,
overheat, overcurrent & overcharge
HF/HE SWITCH MODE DESIGN
High-frequency, high-efciency for a lightweight,
compact charger
VARIABLE INPUT COMPENSATED
100% full charge even with varying A/C input voltages
MULTIPLE BATTERY CHEMISTRY
Safely charges Wet, Gel, MF & AGM batteries
RECOVERY MODE
Recovers deeply discharged & sulfated batteries with
pulse charging
ABNORMALITY PROTECTION
Automatically shuts “off” if charger remains in Bulk
charge mode for an extended period of time
COLD/AGM MODE
Optimized charge mode for cold weather or AGM
batteries
+ SMALL BATTERY MODE
EXTENDABLE CONNECTORS
Plug-n-play connectors for easy accessory changes
RAPID CHARGING TECHNOLOGY
Charges batteries 2X faster than traditional linear
battery chargers
WICKED SMART FEATURE
The VosFX Processor is a revolutionary smart
processor utilizing sophisticated levels of
intelligence to alter the charge process based on
organic feedback from the battery to extend battery
life. The VosFX Processor quickly and efciently
makes decisions on how to charge the battery
without risking user safety or damage to the battery.
Now That’s Smart, Wicked Smart.™
G3500
geniuschargers.com
USING THE G3500
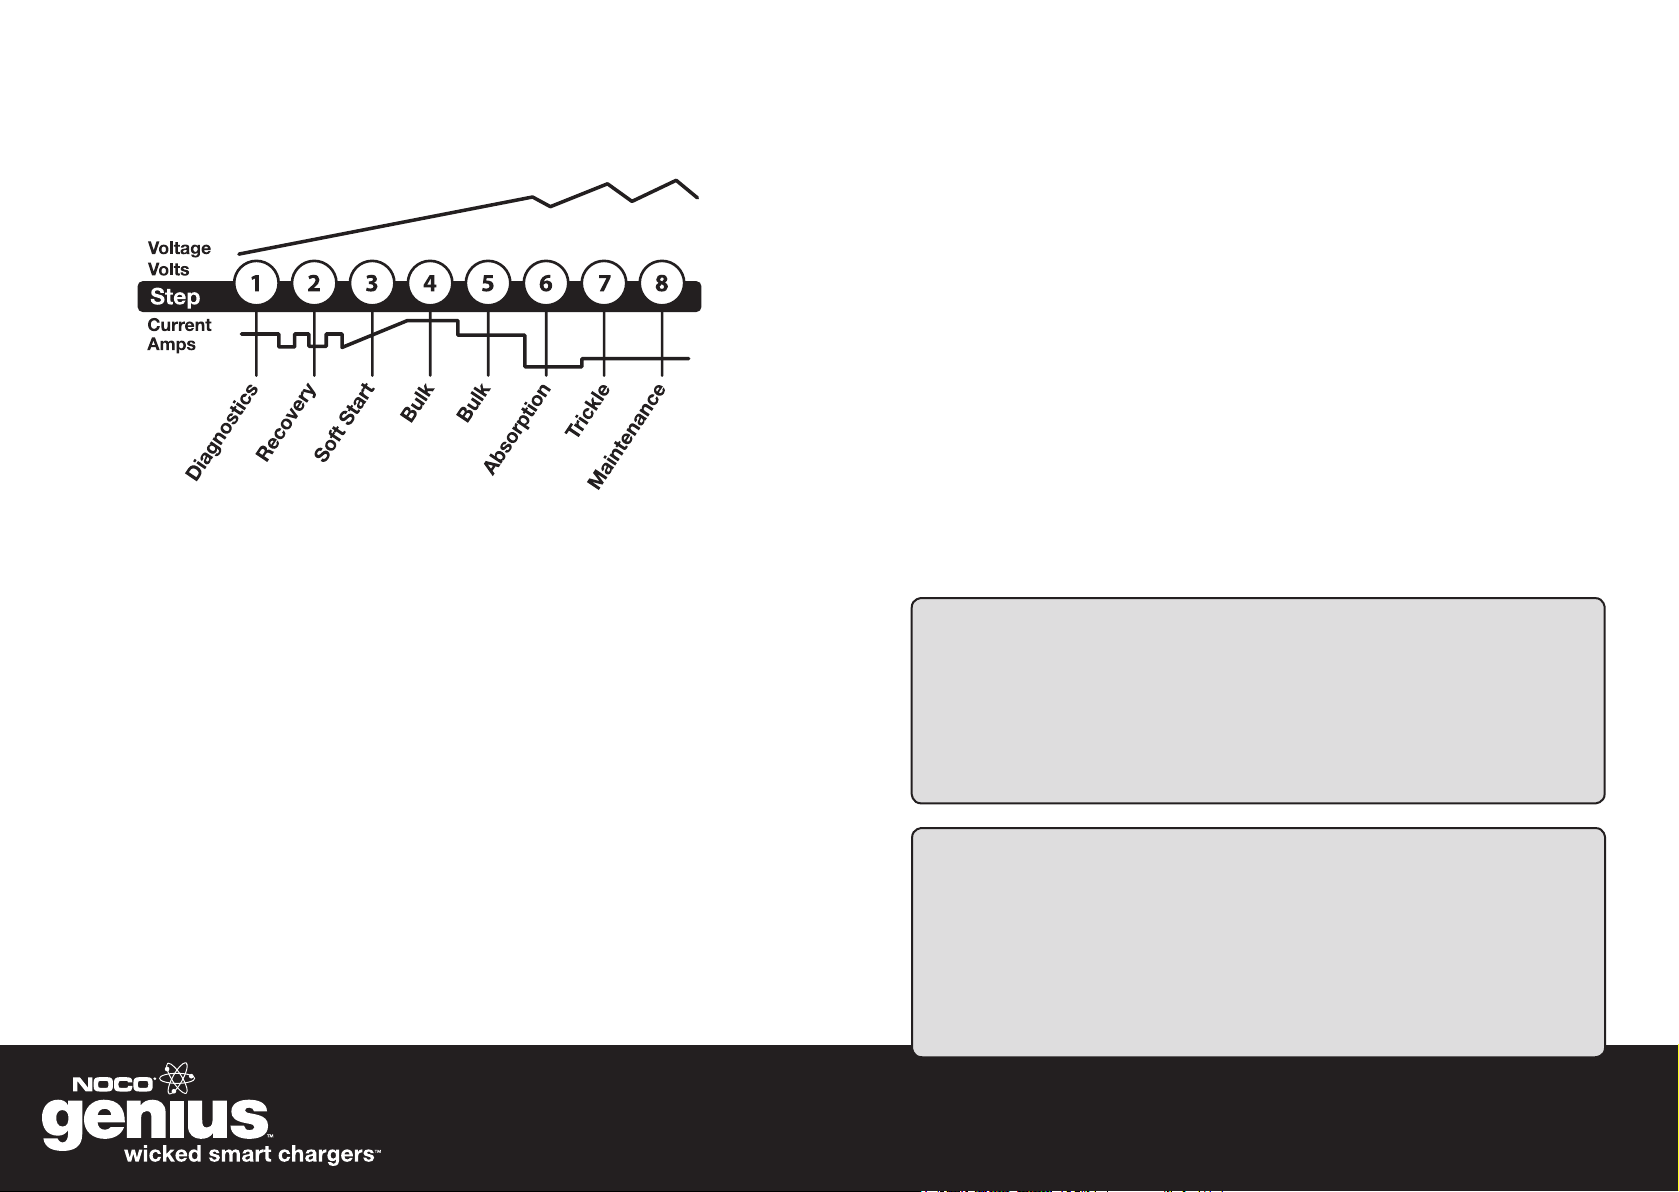
CHARGING STEPS
Step 1: Diagnostics
Checks the battery voltage to make sure battery connections are good and the
battery is in a stable condition before beginning the charge process.
Step 2: Recovery
Initializes the Recovery process, if needed, for deeply discharged or sulfated
(desulfation) batteries by pulsing small amounts of current.
Step 3: Soft Start
Begins Bulk charging process with a gentle (soft) charge.
USING THE G3500
Step 7: Trickle
Battery is fully charged and ready to use, indicated by the 100% CHARGE
LED being a solid Green. In this step, the battery charger will only deliver
enough current to keep the battery full. If the battery tells the charger that
more current is needed, the battery charger will switch to Maintenance.
Step 8: Maintenance
Continuously monitors the battery voltage to determine if a maintenance
charge should be initiated. If the terminal voltage falls below 6.4V (6V) and
12.8V (12V), the charger will start the Maintenance cycle until voltage reaches
7.2V (6V) and 14.4V (12V) and then discontinues the charge cycle. The cycle
between Trickle and Maintenance is repeated indenitely to keep the battery at
full charge, without overcharging. The battery charger can be left connected
indenitely.
1918
WICKED SMART FEATURE
RECOVERY MODE. The Recovery Mode is a specialized charging step
designed to rescue sulfated batteries by switching to a pulse cycle,
if needed, to help regain battery capacity. The Recovery Mode is not
always used. The Recovery Mode will only be initiated if the battery
charger detects it can improve the battery’s performance.
Now That’s Smart, Wicked Smart.™
Step 4-5: Bulk
The Bulk charging process continues using both a High Rate and Medium
Rate charge and returns 80% of battery capacity, indicated by the 25%, 50%
and 75% CHARGE LEDs.
Step 6: Absorption
Brings the charge level to 90%. The battery charger will deliver small amounts
of current to provide a safe, efcient charge and limit battery gassing.
WICKED SMART FEATURE
AUTO-MEMORY. At any time the battery charger is disconnected from
its power source, either from a power loss or accidentally disconnecting
the AC power plug from the electrical outlet, the battery charger will
remember the previously selected charge mode when power is restored.
The battery charger will automatically resume the charging process to
ensure your battery is fully charged.
Now That’s Smart, Wicked Smart.™
G3500
geniuschargers.com
USING THE G3500
TECHNICAL SPECS
2120
WICKED SMART FEATURE
ABNORMALITY PROTECTION. If the battery charger
is in the Bulk mode for more than 48 hours, the battery
charger will go into an ERROR condition. This feature
prevents damage if the battery is faulty.
Now That’s Smart, Wicked Smart.™
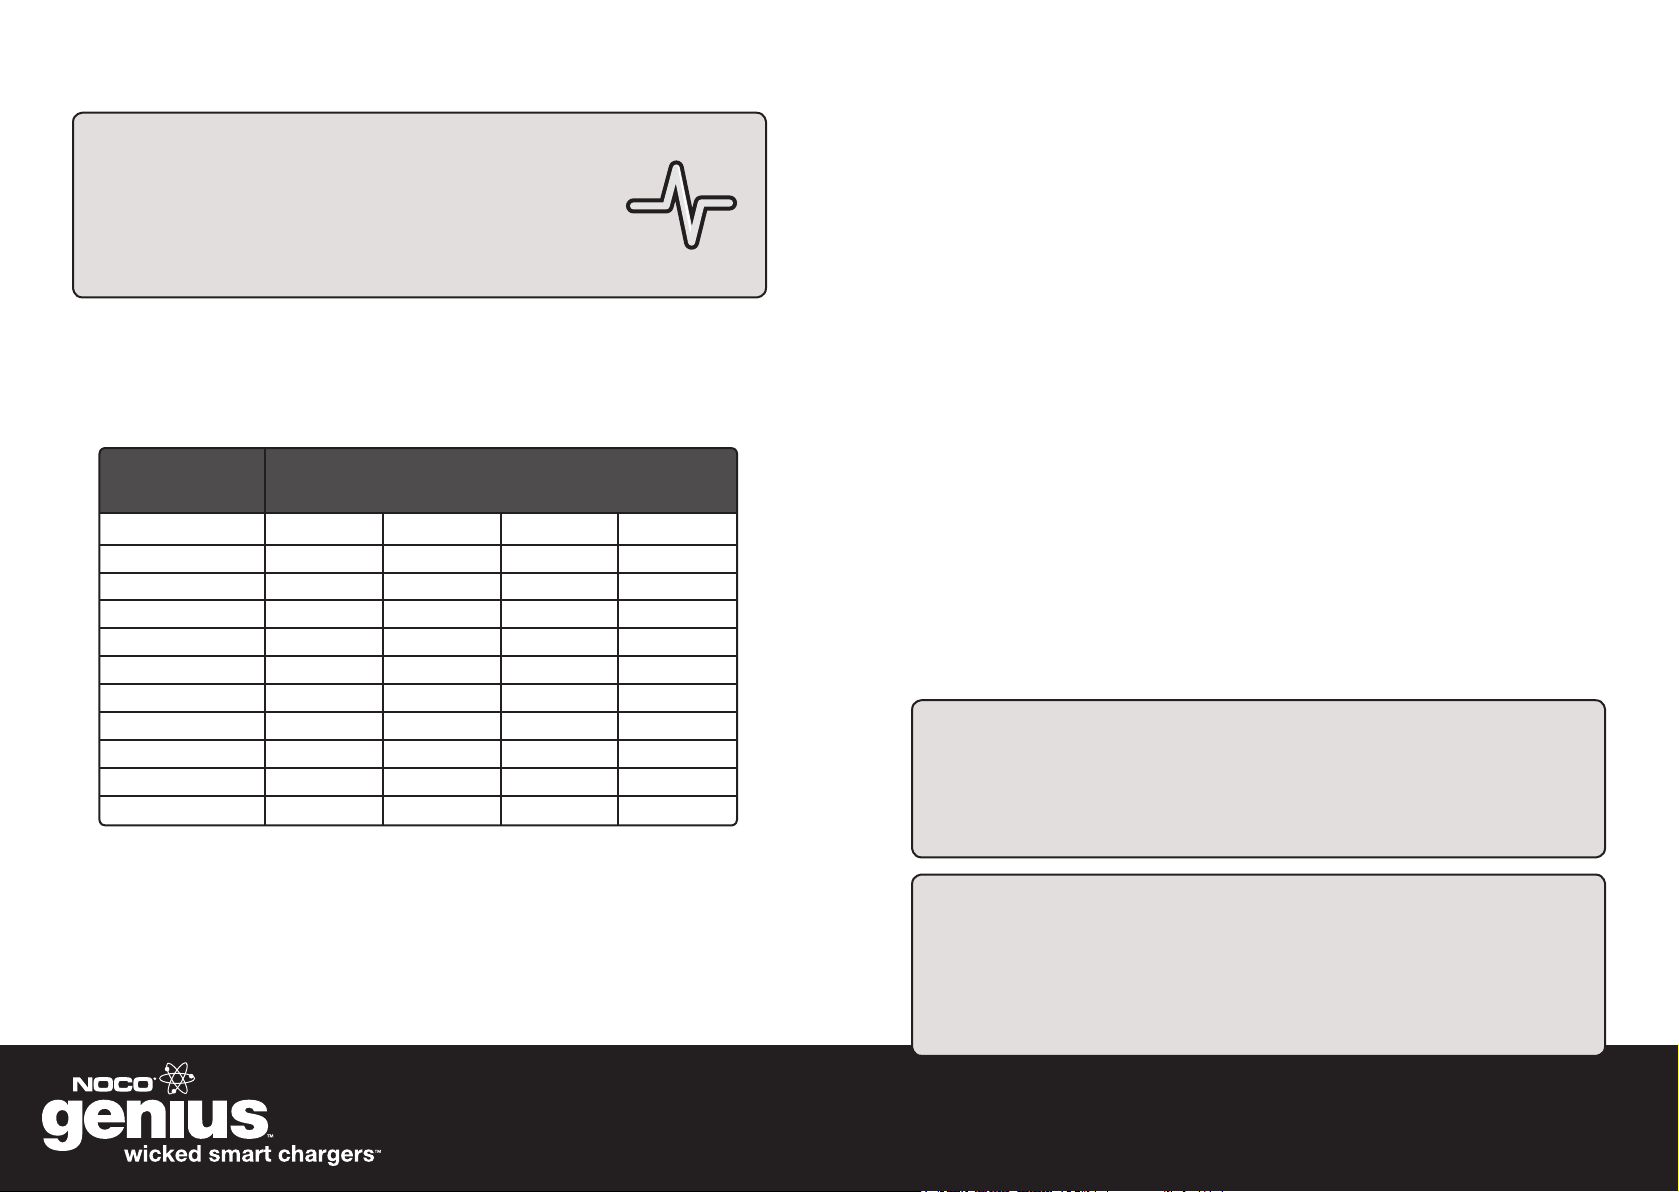
CHARGING TIMES
The time required for the G3500 to charge a normally discharged battery
is shown below. Deeply discharged batteries may take longer to charge
depending on the depth of discharge (DOD). The charge time is based on an
average depth of discharge to a fully charged battery.
BATTERY SIZE
(Ah)
1.2
2.2
7.2
14
25
30
40
50
60
100
120
*Note: The above table is for reference purposes only. Actual data may differ due to battery conditions. The
time required for the G3500 to charge a normally discharged battery is based on an average DOD of 50%.
APPROX. TIME TO CHARGE IN HOURS*
6V 6V
—
—
—
2.5
4.5
5.0
7.0
9.0
10.0
17.5
21.0
12V 12V
—
—
—
2.5
4.5
5.0
7.0
9.0
10.0
17.5
21.0
SMALL SMALL
1.0
1.5
4.5
9.0
—
—
—
—
—
—
—
1.0
1.5
4.5
9.0
—
—
—
—
—
—
—
MAINTENANCE
The G3500 does not require any maintenance. Do not attempt to open or
repair the battery charger as it will invalidate the limited warranty. A damp
cloth may be used to clean dust, dirt, or other debris off of the battery charger.
BEFORE ATTEMPTING TO CLEAN THE BATTERY CHARGER, MAKE SURE
YOU REMOVE THE AC POWER PLUG FROM THE POWER SOURCE.
Input Voltage AC
Working Voltage AC
Input Current
Efciency
Power
Charging Voltage
Charging Current
Back Current Drain
Ripple
Ambient Temperature
Charger Type
Type of Batteries
Battery Chemistries
Battery Capacity
Housing Protection
Cooling
Noise Level
Dimensions (L x W x H)
Weight
110-120 VAC, 50-60Hz
85-130 VAC, 50-60Hz
1200mA RMS Max
85% Approx.
60W Max
7.2/14.4, 7.4/14.7V
(Cold/AGM)
3500mA (Large),
900mA (Small)
<5mA
<2%
0°C to +40°C
8 Step, Fully Automatic,
Switch-Mode
6V & 12V Lead-Acid
Wet, Gel, MF & AGM
14-120Ah (Large),
1.2-14Ah (Small)
IP65
Natural Convection
<50 dB
7.7 x 2.7 x 1.9 Inches
1.1 Pounds
WICKED SMART TIP
SMALL BATTERY MODE. In this mode, you can charge batteries from
1.2 to 35Ah, however, for any battery 14Ah or higher, we recommend
you use the LARGE battery mode for faster charging.
Now That’s Smart, Wicked Smart.™
WICKED SMART TIP
RIPPLE. Describes the disturbances by current and voltage. A ripple
voltage may cause damage to other equipment connected to the
battery. Less than 2% is wicked low, which will help increase battery life
and protect equipment from damage.
Now That’s Smart, Wicked Smart.™
G3500
geniuschargers.com

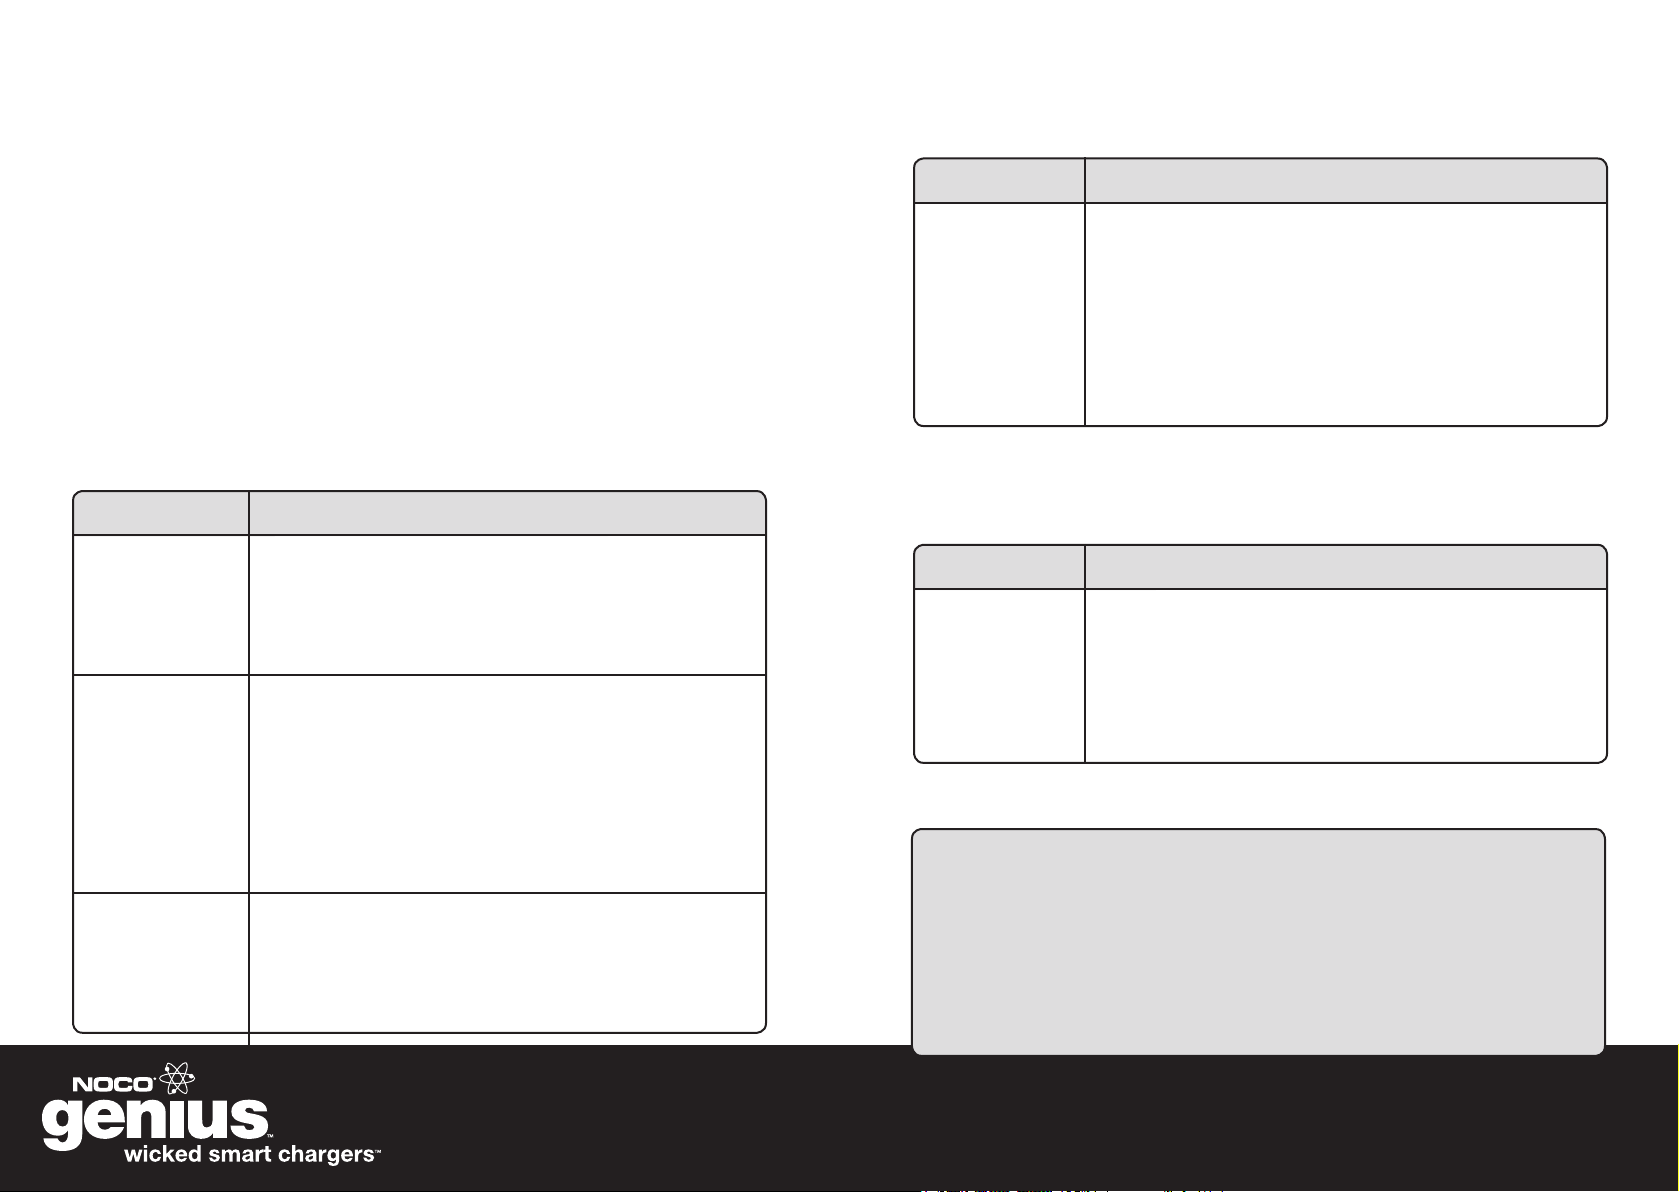
TROUBLESHOOTING
TROUBLESHOOTING
2322
TROUBLESHOOTING
ORANGE ERROR LED ILLUMINATES
If you have accidentally reversed the battery connections, POSITIVE to
NEGATIVE (and vice versa), an ERROR LED (Orange) will illuminate solid. If
you see the ERROR LED illuminated, you will need to clear the ERROR by
correcting the battery connections, POSITIVE to POSITIVE and NEGATIVE
to NEGATIVE. The ERROR LED is a visual diagnostic tool to inform you that
you have made the wrong battery connections. Accidentally connecting
to the battery in reverse polarity will not cause any damage to the battery
charger or battery. This safety feature is enabled even when the AC power
plug is unplugged.
BLINKING ERROR AND CHARGE LED ILLUMINATES
When the battery charger detects an ERROR condition, the ERROR LED and
CHARGE LEDs (25%, 50%, 75%, 100%) will blink. If you are seeing this
ERROR condition, it could be the result of one of the following situations:
• BATTERY VOLTAGE INCOMPATIBILITY
Check to make sure you have selected the correct charge mode for your
battery. For example, if you have a 12V battery, make sure you have selected
a 12V charge mode. If you have accidentally selected the wrong charge
mode, it could cause this ERROR condition. Select the appropriate charge
mode to resolve this ERROR condition.
• SULFATED, DAMAGED OR POOR BATTERY
This ERROR condition can be the result of a sulfated, damaged or poor
battery. To properly diagnose a sulfated, damaged, or poor battery, take
the battery to a local battery store for an evaluation. If you have checked
all other possible ERROR conditions and cannot clear the ERROR, it is
probably the result of a sulfated, damaged, or poor battery. For other
possible conditions of a sulfated, damaged, or poor battery, see the sections
entitled “CHARGE LEDs FULLY ILLUMINATE IMMEDIATELY” and “BATTERY
CHARGER MAKING A CLICKING SOUND” below.
• LOW VOLTAGE BATTERY
If the battery voltage is below 2.0VDC (6V) or 7.0VDC (12V), it could cause
this ERROR condition. See the section entitled “LOW VOLTAGE BATTERY”
below to resolve this ERROR condition.
• HIGH VOLTAGE BATTERY
If the battery voltage is above 7.0VDC and you have selected 6V charge
mode, it could cause this ERROR condition. This ERROR will cause the
CHARGE LED and ERROR LED to blink continuously. To resolve this ERROR
condition, select 12V charge mode.
• ABNORMALITY PROTECTION
This ERROR condition is the result of the battery charger being in the Bulk
mode for more than 48 hours. This ERROR condition is the result of a bad
battery. To resolve this ERROR condition, take the battery to a local battery
store for an evaluation.
NO LIGHTS COME ON WHEN THE BATTERY CHARGER IS PLUGGED
INTO AN ELECTRICAL OUTLET
• POOR AC CONNECTION
Check if the AC outlet has power. If the AC outlet has no or limited power, it
could cause this ERROR condition. Plug a light into the AC outlet to check
if the outlet has power. If the light is extremely dim, this could be the result
of limited AC power. The battery charger is designed for use at 85-130VAC.
If there is no power or the power is below 85VAC, locate another AC outlet
that has sufcient power to resolve this ERROR condition.
BATTERY CHARGER STAYS IN STANDBY MODE AND WILL NOT CHANGE
MODES
If the battery charger stays in the STANDBY mode and will not change modes,
it could be the result of one of the following situations:
• BLOWN FUSE IN BATTERY CONNECTOR HARNESS
Check the fuse in the battery connector harness. If the fuse in the battery
connector harness has blown, it could cause this ERROR condition. Replace
the fuse with a 10 amp automotive blade-type fuse to resolve this ERROR
condition.
• CORROSION ON BATTERY TERMINALS
Check the battery connections for battery corrosion. If battery corrosion is
present on the battery connections, it could cause this ERROR condition.
Remove the battery corrosion to resolve this ERROR condition.
• LOOSE BATTERY CONNECTIONS
Check the battery connections to the battery. If the battery connections are
loose, it could cause this ERROR condition. Tighten the battery connections
to resolve this ERROR condition.
G3500
geniuschargers.com

TROUBLESHOOTING
CHARGE LED(S) IMMEDIATELY ILLUMINATE TO 100%
If the battery charger’s CHARGE LED(S) immediately illuminate to 100%
when the AC power is applied to the battery charger, the battery is either
already fully charged or the battery is in extremely poor condition as a result
of sulfation or damage. If the battery is new, the battery is likely already fully
charged. If the battery is relatively old and has not been used for a long
period of time, the battery is probably so severely damaged that the battery
cannot accept any current.
BATTERY CHARGER MAKING A CLICKING SOUND
If the battery charger is making a “clicking” sound and will not go into
a charge mode, it is probably the result of a battery in extremely poor
condition as a result of sulfation or damage. The “clicking” noise you hear
does not signify a battery charger failure. The “clicking” noise is the battery
charger attempting to enter into a charge mode, but when current is applied
to the battery, the battery voltage rises too quickly, and the battery charger
shuts off. Once the current is removed from the battery, the battery voltage
rapidly decreases, and the battery charger again tries to enter into a charge
mode. The “clicking” sound and this ERROR loop condition will continue
until the poor battery is removed.
TROUBLESHOOTING
• FOR 12V BATTERIES (1.2-14Ah)
If you are trying to charge a 12V battery that is below 7.0VDC, switch the
battery charger into 6V mode to begin charging a low voltage 12V battery.
Choose either 6V SMALL NORM mode for Wet Cell, MF, or Gel Cell batteries
or 6V SMALL COLD/AGM mode for AGM batteries. When the 100%
CHARGE LED turns to a solid (not blinking) Green, the battery voltage
will be above 7.0VDC and you can return the battery charger back to the
appropriate 12V SMALL charge mode, depending on the chemistry of your
battery, to begin the charge cycle.
• FOR 12V BATTERIES (14-120Ah)
If you are trying to charge a 12V battery that is below 7.0VDC, switch the
battery charger into 6V mode to begin charging a low voltage 12V battery.
Depending on the chemistry of your battery, choose 6V NORM mode for Wet
Cell or Gel Cell batteries or 6V COLD/AGM mode for AGM batteries. When
the 100% CHARGE LED turns to a solid (not blinking) Green, the battery
voltage will be above 7.0VDC and you can return the battery charger back
to the appropriate 12V charge mode, depending on the chemistry of your
battery, to begin the charge cycle.
2524
LOW VOLTAGE BATTERY
If the battery voltage is below 2.0VDC (6V) or 7.0VDC (12V), the ERROR LED
(Orange) and the CHARGE LEDs (25%, 50%, 75%, and 100%) will blink,
indicating the battery is out of range for the battery charger. In this situation,
the battery charger has determined that the battery voltage is too low to
begin a normal charge mode. In order to increase the battery voltage to
allow the battery charger to begin charging, follow these steps:
• FOR 6V BATTERIES
If you are trying to charge a 6V battery that is below 2.0VDC, you will need to
jump start the battery or connect the battery to a power supply to increase
the battery voltage above 2.0VDC to begin the charge cycle.
Continued On Next Page
TESTING TO SEE IF CHARGER IS CHARGING
Before applying AC power to the charger, measure the battery with a digital
volt meter and write the value down. Then plug the charger in making sure
that within 5 seconds the charger is indicating that the charging process has
begun (See WICKED SMART FEATURE: INITIALIZATION). Wait 30 seconds
and measure the battery again with the digital volt meter. The battery voltage
should be higher and slowly moving up.
WICKED SMART TIP
If you have a severely discharged battery, a battery that is below
4.5VDC (6V) or 9.0VDC (12V), it could be the result of a defective
battery. Batteries that have been severely discharged as a result of an
accidental load should respond quickly when current is applied to the
battery, resulting in a sharp increase in battery voltage.
Now That’s Smart, Wicked Smart.™
G3500
geniuschargers.com

LIMITED WARRANTY
LIMITED WARRANTY
2726
The NOCO Company (“NOCO”) warrants that its Battery Charger products
(the “Product”) will be free from defects in material and workmanship for a
period of ve (5) years from the date of purchase (the “Warranty Period”). For
defects reported during the Warranty Period, NOCO will, at its discretion, and
subject to NOCO’s technical support analysis, either repair or replace, for the
fees set forth below, any Product manufactured by NOCO that contains such
a defect. Replacement parts and products will be new or serviceably used,
comparable in function and performance to the original part and warranted for
the remainder of the original Warranty Period.
THE FOREGOING LIMITED WARRANTY IS IN LIEU OF AND EXCLUDES
ALL OTHER WARRANTIES NOT EXPRESSLY SET FORTH HEREIN,
WHETHER EXPRESS OR IMPLIED BY OPERATION OF LAW OR
OTHERWISE, INCLUDING, BUT NOT LIMITED TO, ANY IMPLIED
WARRANTIES OF MERCHANTABILITY OR FITNESS FOR A PARTICULAR
PURPOSE.
NOCO’S LIABILITY UNDER THIS LIMITED WARRANTY IS EXPRESSLY
LIMITED TO REPLACEMENT (IN THE FORM AND UNDER THE TERMS
ORIGINALLY SHIPPED), OR TO REPAIR, WHETHER SUCH CLAIMS
ARE FOR BREACH OF WARRANTY OR FOR NEGLIGENCE. NOCO
SHALL NOT BE LIABLE FOR ANY INCIDENTAL, CONSEQUENTIAL, OR
SPECIAL LOSSES, DAMAGES OR EXPENSES OF ANY KIND, INCLUDING,
WITHOUT LIMITATION, ANY SUCH LOSSES, DAMAGES, OR EXPENSES
ARISING DIRECTLY OR INDIRECTLY FROM THE SALE, HANDLING, OR
USE OF THE PRODUCT FROM ANY OTHER CAUSE RELATING THERETO,
OR FROM PERSONAL INJURY OR LOSS OF PROFIT.
Some states do not allow the exclusion or limitation of incidental or
consequential damages or length of an implied warranty so the above
limitation(s) or exclusion(s) may not apply. This Limited Warranty gives you
specic legal rights and you may also have other legal rights which vary from
state to state.
This Limited Warranty is made to the original purchaser from NOCO and
does not extend to any other person or entity and is not assignable. It is the
obligation of the original purchaser to forward the Product, with the proof of
purchase and completed Product registration card, prepaid, to NOCO. All
warranties should be sent to:
The NOCO Company
Attn: Warranty Department
23200 Commerce Park
Cleveland, OH 44122 USA
THE COSTS OF TRANSPORTING PRODUCTS TO NOCO FOR WARRANTY
SERVICE IS THE RESPONSIBILITY OF THE ORIGINAL PURCHASER.
THIS LIMITED WARRANTY IS VOID UNDER THE FOLLOWING CONDITIONS:
1.) The Product is misused, subjected to careless handling, or operated
under conditions of extreme temperature, shock, or vibration beyond NOCO’s
recommendations for safe and effective use.
2.) The Product has not been installed, operated, or maintained in accordance
with approved procedures.
3.) The Product is disassembled, altered, or repaired by anyone, except
NOCO.
4.) The electrical connections to either the AC input or the DC output of the
charger are modied without the express written consent of NOCO.
5.) The Product is subject to improper storage or accident.
6.) The original purchaser fails to complete and return/submit the Product
registration card.
G3500
geniuschargers.com
Loading…

Owner’s Manual & User Guide
G3500
3.5A
(3500mA)
6V & 12V
Description
This PDF user guide is for the NOCO Genius G3500 Battery Charger/Maintainer.
About the Item
NOCO Genius G3500 6V/12V 3.5A Smart Battery Charger and Maintainer
The NOCO Genius G3500 represents some of the most innovative and advanced technology on the market, making each charge simple and easy. It is quite possibly the safest and most efficient charger you will ever use. The G3500 is designed for charging all types of 12V lead-acid and 12V lithium-ion batteries, including Wet (Flooded), Gel, MF (Maintenance-Free), CA (Calcium), EFB (Enhanced Flooded Battery), AGM (Absorption Glass Mat), and LIB (Lithium Ion) batteries. It is suitable for charging battery capacities from 2 to 120 Amp-Hours and maintaining all battery sizes.
The G3500 3.5 Amp is designed to charge 6-volt and 12-volt lead-acid and lithium-ion batteries up to 120Ah. It can also effectively maintain automotive, marine, RV, power sport, lawn & garden and deep-cycle batteries. It charges 2x faster than ordinary battery chargers, can repair damaged batteries and is designed for use with micro-hybrid start-stop vehicles and CANBUS electrical systems. Guided by an onboard microcomputer, the G3500 monitors battery activity for safe and efficient charging, automatically minimizes energy consumption and provides redundant levels of safety protection, including spark-proof technology, as well as reverse polarity and overcharge protection. It can remain safely connected 24/7, while its streamlined design makes it ultra-compact, portable, and incredibly lightweight. The G3500 features external mounting holes and a rubberized base that avoids surface slipping and scratches, while remaining impact, UV and water-resistant (IP65). Intuitive LED indicators provide visual state-of-charge feedback and diagnostic information, even when in maintenance mode.
Read and understand the User Guide before operating the charger.
(PDF) USER GUIDE (ENGLISH) (ESPAÑOL) (FRANÇAIS)
SUMMARY OF CONTENTS
– What’s In The Box.
– About G3500
– How to use NOCO Genius G3500
– Getting Started
– Mounting
– Charging Modes: Standby, 12V NORM, 12V COLD/AGM, 12V NORM [Small], 12V COLD/AGM [Small], 6V NORM, 12V LITHIUM, 12V REPAIR.
– Connecting to the Battery
– Begin Charging
– Understanding Charge LEDs:
25% Red LED – The 25% Charge LED will slowly pulse “on” and “off”, when the battery is less than 25% fully charged. When the battery is 25% charged, the red Charge LED will be solid.
50% Red LED – The 50% Charge LED will slowly pulse “on” and “off”, when the battery is less than 50% fully charged. When the battery is 50% charged, the red Charge LED will be solid.
75% Orange LED – The 75% Charge LED will slowly pulse “on” and “off”, when the battery is less than 75% fully charged. When the battery is 75% charged, the orange Charge LED will be solid.
100% Green LED – The 100% Charge LED will slowly pulse “on” and “off”, when the battery is less than 100% fully charged. When the battery is fully charged, the green LED will be solid, and the 25%, 50% and 75% Charge LEDs will turn “off”.
100% Maintenance Green LED – During maintenance charging, the 100% Charge LED will pulse “on” and “off” slowly. When the battery is topped off and fully charged again, the 100% Charge LED will turn solid green. The charger can be left connected to the battery indefinitely.
– Understanding Advanced Diagnostics:
Single Flash: Battery will not hold a charge. Have battery checked by a professional.
Double Flash: Possible battery short. Have battery checked by a professional.
Triple Flash: Battery voltage is too high for the selected charge mode. Check the battery and charge mode.
Error LED Solid Red: Reverse polarity. Reverse the battery connections.
Standby Solid Orange: Battery voltage is too low for charge to detect or charger is in supply. Jumpstart the battery to raise the battery voltage.
– Charging Steps:
Step 1 & 2: Analyze & Diagnose
Step 3: Recovery
Step 4: Initialize
Step 5: Bulk
Step 6: Absorption
Step 7: Optimization
Step 8: Maintenance
– Charging Times
– Technical Specifications
Why Download the Manual?
This user guide provides all the information from NOCO about the Genius G3500 Battery Charger/Maintainer, as detailed in the table of contents. Reading it completely will address most questions you might have. You can download and save it for offline use, including viewing it on your device or printing it for your convenience if you prefer a paper version.
How to Download the Manual?
Download it by clicking the button below
Helped you out?
Glad to hear that. It would be awesome if you could . . .
FAQ: Types of Manuals and Their Contents
NOCO Genius G3500 Series Manuals come in various types, each serving a specific purpose to help users effectively operate and maintain their devices. Here are the common types of NOCO Genius G3500 Series User Guides and the information they typically include:
- User Manuals: Provide comprehensive instructions on how to use the device, including setup, features, and operation. They often include troubleshooting tips, safety information, and maintenance guidelines.
- Service Instructions: Designed for technicians and repair professionals, these manuals offer detailed information on diagnosing and repairing issues with the device. They include schematics, parts lists, and step-by-step repair procedures.
- Installation Guides: Focus on the installation process of the device, providing detailed instructions and diagrams for proper setup. They are essential for ensuring the device is installed correctly and safely.
- Maintenance Manuals: Provide guidance on routine maintenance tasks to keep the device in optimal condition. They cover cleaning procedures, part replacements, and regular servicing tips.
- Quick Start Guides: Offer a concise overview of the essential steps needed to get the device up and running quickly. They are ideal for users who need immediate assistance with basic setup and operation.
Each type of NOCO Genius G3500 Series instruction is designed to address specific needs, ensuring users have the necessary information to use, maintain, and repair their devices effectively.
Related Instructions for NOCO Genius G3500 Series:
1
BOOST X GBX55
21
1039
229
3
Boost HD GB70
144
676
156
5
BOOST X GBX45
User manual & warranty NOCO Genius BOOST X GBX45 Manual (User manual & warranty), @899KQ1
32
236
59
6
G3500 Genius
Owner’s manual NOCO Genius Battery Charger Owner’s manual (File: noco-genius-g3500-genius-owner-s-manual-1, Friday 13-12-2024)
1
1325
318
7
BLSOLAR5
Manual BLSOLAR5 (Battery Charger ePDF Guide, #G7829U)
6
1276
192
9
BOOST X GBX45
Quick user manual #X48C32: BOOST X GBX45 Battery Charger Quick user manual
2
1200
288
10
BoostPro GB150
144
596
132
Battery Charger Devices by Other Brands:
|
ABB VTC254-23 Operation Manual PDF Guide (@UK79ZC), ABB VTC254-23 Engine (23rd Oct 2024) Operation Manual 23 Oct 2024 | 206 |
|
|
Bosch AL 1115 CV Original Instructions Manual #133888: AL 1115 CV Battery Charger Original instructions manual Robert Bosch GmbH 08 Apr 2025 | 123 |
|
|
Energizer LR14 Product Data Sheet Battery Charger #687RK6 C 03 May 2025 | 1 |
|
|
Ergotron Zip40 Operation & User’s Manual #122OV2: Zip40 Battery Charger Operation & user’s manual 1 of 17 14 Nov 2024 | 17 |
Categories:
Remote Starter
Inverter
Security System
Controller
Adapter
Battery Pack
NOCO G3500
Welcome. Thank you for buying the NOCO Genius
®
G3500. Read and understand the User Guide before
operating the charger. For questions regarding our
chargers, view our comprehensive support information at
www.no.co/support. To contact NOCO for personalized
support (not available in all areas), visit www.no.co/connect.
What’s In The Box.
• G3500 Smart Charger
• (1) Battery Clamp Connectors
• (1) Eyelet Terminal Connectors
• User Guide
• Information Guide and Warranty
User Guide
G3500 V2.0
PRIOR TO USE, READ AND UNDERSTAND
PRODUCT SAFETY INFORMATION.
Failure to follow the instructions may result
in ELECTRICAL SHOCK, EXPLOSION,
or FIRE, which may result in SERIOUS
INJURY, DEATH, DAMAGE TO DEVICE or
PROPERTY. Do not discard this information.
DANGER
View the manual for the NOCO G3500 here, for free. This manual comes under the category chargers and has been rated by 43 people with an average of a 8.3. This manual is available in the following languages: English. Do you have a question about the NOCO G3500 or do you need help?
Ask your question here
Product Images (10)

NOCO G3500 specifications
Below you will find the product specifications and the manual specifications of the NOCO G3500.
The noco g3500 is a charger designed to provide reliable and efficient charging for 6/12-volt batteries. It has an output current of 3.5 A, making it suitable for batteries with a capacity of 2 Ah to 120 Ah. It features LED indicators that provide information on the charging status and International Protection (IP) code of IP65, which means that it is dust-tight and protected against low-pressure water jets.
The device measures 69 millimeters in width, 193 millimeters in depth, and 48 millimeters in height. It weighs 510 grams, making it lightweight and portable. The built-in display is not available on this device.
The noco g3500 is equipped with power protection features such as over current, overcharge, and overheating, which ensure that it is safe to use and protects the battery during the charging process.
Overall, the noco g3500 is a compact and reliable charger that is suitable for various battery capacities. Its power protection features ensure that the battery is protected during the charging process, making it a safe and efficient option for recharging your batteries.
General
| Brand | NOCO |
| Model | G3500 | A100600006 |
| Product | charger |
| EAN | 0046221120059 |
| Language | English |
| Filetype | Manual (PDF) |
Features
| Charging voltage | 6/12 V |
| Output current | 3.5 A |
| AC input frequency | 50 — 60 Hz |
| Built-in display | No |
| LED indicators | Yes |
| Power plug | — |
| International Protection (IP) code | IP65 |
| Product colour | Black, Grey, Red |
| Battery capacity (min) | 2 Ah |
| Battery capacity (max) | 120 Ah |
| Power protection features | Over current, Overcharge, Overheating |
| AC input voltage | 110 — 120 V |
Weight & dimensions
| Width | 69 mm |
| Depth | 193 mm |
| Height | 48 mm |
| Weight | 510 g |
show more
Questions & answers
Can’t find the answer to your question in the manual? You may find the answer to your question in the FAQs about the NOCO G3500 below.
How to Troubleshoot NOCO G3500 Charger Flashing Lights
How do I select the appropriate charging mode for my battery type using the NOCO G3500 charger?
To select the charging mode, first identify your battery type (e.g., lead-acid, lithium, AGM). Then, press and hold the «Mode» button until the appropriate mode LED indicator lights up. Release the button and ensure that the corresponding charging mode matches your battery type.
Est-ce que le NOCO G3500 a des indicateurs LED ?
Yes, the NOCO G3500 does have LED indicators. This allows users to easily see the charging status of their battery.
Can I charge multiple batteries at the same time using the NOCO G3500 charger?
Yes, the NOCO G3500 charger allows for parallel charging of multiple batteries. Simply connect the charger’s clamps or eyelet connectors to the respective positive and negative terminals of each battery, ensuring proper polarity. However, please note that the total amperage may be divided between the batteries connected.
How do I know if my battery is fully charged while using the NOCO G3500 charger?
The NOCO G3500 charger features an intuitive LED display. Once the charging process is complete, the charger’s LED indicator will show a solid green light. This indicates that your battery is fully charged and ready for use.
Can I use the NOCO G3500 charger to revive a deeply discharged battery?
Absolutely! The NOCO G3500 charger offers a specialized mode called «Force Mode,» specifically designed for reviving deeply discharged batteries. To activate this mode, press and hold the «Mode» button for 3 seconds, and the charger will automatically switch to Force Mode. This ensures effective charging and recovery of heavily drained batteries.
How can I determine the charging progress or monitor the charging voltage and current with the NOCO G3500 charger?
You can check the charging progress, voltage, and current by pressing the «Mode» button quickly without holding it. Each press allows you to cycle through different charging status indicators, including voltage, current, and other relevant information. This feature assists in monitoring the charging process and ensures you stay informed about the charging parameters.
Does the NOCO G3500 have a built-in display?
No, the NOCO G3500 does not have a built-in display. This means that users will not be able to see detailed charging information on the charger itself.
What is the International Protection (IP) code for the NOCO G3500?
The International Protection (IP) code for the NOCO G3500 is IP65. This means that the charger is protected against dust and low-pressure water jets from any direction. It is a relatively high level of protection, making it suitable for outdoor use.
What is the minimum battery capacity that the NOCO G3500 can charge? Quelle est la capacité de batterie minimale que le NOCO G3500 peut charger?
The NOCO G3500 can efficiently charge batteries with a minimum capacity of 2 Ah, making it suitable for charging smaller batteries.
Does the NOCO G3500 have power protection features?
Yes, the NOCO G3500 has power protection features including over current, overcharge, and overheating protection. This ensures the safety of the battery being charged and prevents any potential damage from occurring.
What is the weight of the NOCO G3500?
The NOCO G3500 has a weight of 510 g.
What is the height of the NOCO G3500?
The NOCO G3500 has a height of 48 mm.
What is the width of the NOCO G3500?
The NOCO G3500 has a width of 69 mm.
What is the depth of the NOCO G3500?
The NOCO G3500 has a depth of 193 mm.
Is the manual of the NOCO G3500 available in English?
Yes, the manual of the NOCO G3500 is available in English .
Is your question not listed? Ask your question here