WSD 81I ПАЯЛЬНАЯ СТАНЦИЯ, ЦИФРОВАЯ WELLER
Weller WSD 81i Set – одноканальная паяльная станция с цифровым контролем температуры, мощностью 80 Вт. Программирование силового блока PUD81i, входящего в комплект, осуществляется с помощью кнопок, расположенными на передней панели станции.
Цифровая паяльная станция Weller WSD 81i Set (влажная очистка) рекомендуется для бессвинцовой пайки. Оснащена микропроцессорным управлением. Имеет возможность подключения калибратора как для чтения установок, так и для перекалибровки и обновления программного обеспечения.
Антистатическое исполнение корпуса способствует повышению уровня защиты от формирования ЭСР (электростатического разряда), применимо для выполнения монтажных и демонтажных работ с ЧЭСР-компонентами. Штекер для заземления силового блока Веллер расположен на передней панели.
Оригинальный артикул: T0053294599
ТЕХНИЧЕСКИЕ ХАРАКТЕРИСТИКИ ЦИФРОВОЙ ПАЯЛЬНОЙ СТАНЦИИ WSD 81I:
Максимальная мощность: 80 Вт.;
Диапазон регулировки температуры: от 50 до 450°C;
Размер силового блока: 166 х 115 х 101 мм;
Питание силового блока: 230В/50 Гц;
Класс защиты: 1 (силовой блок), класс защиты 3 (паяльник);
Дисплей: Трехзначный ЖК-дисплей.
ОТЛИЧИТЕЛЬНЫЕ ОСОБЕННОСТИ ЦИФРОВОЙ ПАЯЛЬНОЙ СТАНЦИИ WSD 81I:
Автоматическое распознавание подключенного инструмента;
Цифровая система электронного контроля;
Программирование времени ожидания;
Программирование температурного сдвига;
Переключение температурной шкалы (градус или фаренгейт);
Блокировка заданной температуры при помощи пароля;
Общий сброс станции до заводских установок.
КОМПЛЕКТ ПОСТАВКИ ЦИФРОВОЙ ПАЯЛЬНОЙ СТАНЦИИ WSD 81I:
Базовый блок PUD 81;
Микропаяльник WSP 80 (80W / 24V) с жалом LT B (резец, Ø 2,4 x 0,8 мм);
Подставка KH 18.
ДОПОЛНИТЕЛЬНЫЕ ТЕХНИЧЕСКИЕ ХАРАКТЕРИСТИКИ ЦИФРОВОЙ ПАЯЛЬНОЙ СТАНЦИИ WSD 81I:
| Дисплей: | LED |
| Используемые жала: | LT |
| Количество каналов: | 1 |
| Погрешности температурных измерений: | ± 9 |
| Стабильность температуры: | ± 5 |
| Тип пайки: | Контактная пайка |
| USB интерфейс: | Нет |
СКАЧАТЬ инструкцию по эксплуатации WSD 81i Паяльная станция, цифровая Weller
Артикул: T0053294599
Бренд: WELLER
Гарантия: 1 год
WSD 81i Паяльная станция, цифровая Weller Отзывы:
Ваш отзыв может быть первым.
WT 1
WT 1H
DE Ergänzende Betriebsanleitung
GB Supplementary operating instructions
ES Manual de instrucciones complementario
FR Mode d’emploi complémentaire
IT Istruzioni per l’uso integrative
PT Manual complementar
NL Aanvullende gebruiksaanwijzing
SV Tilläggsbruksanvisning
DK Supplerende betjeningsvejledning
FI Täydentävä käyttöopas
GR Συμπληρωματικές οδηγίες λειτουργίας
TR Tamamlayıcı kullanım kılavuzu
CZ Dodatečný návod k provozu
PL Uzupełniająca instrukcja obsługi
HU Kiegészítő üzemeltetési utasítás
SK Doplnkový návod na obsluhu
SL Dodatna navodila za uporabo
EE Lisakasutusjuhend
LV Papildu lietošanas pamācība
LT Eksploatacijos instrukcijos papildymas
BG Допълнително Ръководство за работа
RO Manualul de utilizare suplimentar
HR Dodatne Upute za uporabu
CN
补充的用户手册
JP
補足取扱説明書
Table of Contents
- Weller WE 1 Digital Soldering Station
- Product Information
- Product Usage Instructions
- WHATS IN THE BOX
- Safety information
- INSTALLATION INSTRUCTIONS
- Soldering
- User groups
- Care and maintenance
- Warranty
- Technical Data
- Symbols
- EC declaration of conformity
- References
- Read User Manual Online (PDF format)
- Download This Manual (PDF format)

Weller WE 1 Digital Soldering Station

Product Information
The product is the WE 1 WEP 70 PH 70 soldering iron, manufactured by Weller.
The product operates on 230V and has a standby time of 1-99 minutes. It also
has a temperature display and can be locked to prevent accidental changes to
the settings. The product can be reset to factory settings by pressing the UP
and DOWN buttons when turning it on.
Product Usage Instructions
- Plug in the soldering iron and turn it on by pressing the ON button.
- Set the standby time by pressing the MENU button and using the + and – buttons to select a time between 1-99 minutes.
- Set the temperature by pressing the MENU button and using the + and – buttons to select a temperature between 1-999 degrees.
- Lock the settings by pressing the MENU button and selecting the lock function. This will prevent accidental changes to the temperature and standby time settings.
- Use the soldering iron to complete your soldering task.
- When finished, turn off the soldering iron by pressing the OFF button.
Read these instructions and the safety guidelines carefully before starting up
the unit and starting work. Failure to observe the safety regulations results
in a risk to life and limb. Keep these instructions in a place that is
accessible to all users. Please adhere to the operating instructions of the
connected devices.
WHATS IN THE BOX

Safety information
This appliance can be used by children aged from 16 years and above and
persons with reduced physical, sensory or mental capabilities or lack of
experience and knowledge if they have been given supervision or instruction
concerning use of the appliance in a safe way and understand the hazards
involved. Children shall not play with the appliance. Cleaning and user
maintenance shall not be made by children without supervision. Keep other
persons well away from your workplace. The work area is out of bounds for
children and unauthorised persons. Never allow other persons to touch the
soldering tool or cable.
WARNING Electrical shock
Connecting the control unit incorrectly poses a risk of injury due to electric
shock and can damage the device.
- Carefully read the attached safety information, the safety information accompanying these operating instructions as well as the operating instructions for your control unit before putting the control unit into operation and observe the safety precautions specified therein.
- Only connect WELLER tools.
If the device is faulty, active electrical conductors may be bare or the PE
conductor may not be functional.
- Repairs must always be referred to a Weller-trained specialist
- If the electrical tool‘s power supply cord is damaged, it must be replaced with a specially prefabricated power supply cord available through the customer service organisation.
Protect yourself against electric shocks. The handles on soldering tools with
an antistatic design are conductive.
- Avoid touching earthed objects such as pipes, heaters, cookers and refrigerators.
- Do not use the soldering tool in a damp or wet environment.
- Never work on voltage-carrying parts.
- Caution! To provide continued protection against risk of electric shock, connect to properly grounded outlets only.
WARNING Risk of burns
Risk of burns from the soldering tool while the control unit is operating.
Tools may still be hot long after they have been switched off. The soldering
tip becomes very hot during soldering work. There is a risk of burns from
touching the tips. After the soldering process, the soldering tool and the
workpiece holder are still hot.
- Always place the soldering tool in the safety rest while not in use. Make sure the safety holder is stable.
- Do not touch the hot soldering tips and keep them away from inflammable objects..
- Only replace solder tips when cold
Risk of burning through liquid solder. Protect yourself against solder
splashes.
- Wear appropriate protective clothing to protect yourself against burns. Protect your eyes by wearing eye protection.
- When working with adhesives, special attention must be paid to the warning information provided by the adhesive manufacturer.
WARNING Fire hazard
Covering the soldering iron or the safety holder poses a fire hazard. Always
keep objects well away from the soldering iron and safety holder.
- Always keep objects well away from the soldering iron and safety holder.
- Keep all combustible objects, liquids or gases well away from the hot soldering tool
Store your soldering tool in a safe place. When not in use, units and tools
should be stored in a dry, high or locked area out of the reach of children.
Make sure that unused soldering tools are free of voltage and de-pressurised.
The power cable must only be plugged into the power socket or adapter approved
for this purpose. Check to see if the mains voltage matches the ratings on the
nameplate. Make sure the machine is switched off before plugging in. Do not
use the cable for purposes other than those for which it is intended.Never
carry the unit by the cable. Do not use the cable to pull the plug out of the
socket. Protect the cable against heat, oil and sharp edges.. Be alert. Pay
attention to what you are doing. Be smart when using the unit. Do not use the
soldering tool if you are having difficulty concentrating. Avoid abnormal
posture. Arrange your work station in an ergonomically correct way. Avoid bad
posture when using the unit, as this can lead to postural problems.
The soldering tool must be operated only in perfect technical working order.
Safety devices must not be deactivated. Faults and defects must be repaired
immediately. Before using the unit / tool, safety devices must be carefully
checked to make sure that they are functioning properly and in the manner
intended. Check that moving parts are functioning properly and are not
sticking, and whether parts are damaged. All parts must be correctly fitted
and must satisfy all the requirements necessary to guarantee troublefree
operation of the unit. Use the correct tool. Use only accessories or auxiliary
devices which are included in the list of accessories or approved for use by
the manufacturer. Use WELLER accessories or auxiliary devices on original
WELLER equipment only. The use of other tools and other accessories can cause
injury. Secure the tool. Use clamping fixtures to hold the workpiece. Use a
solder fume extraction unit. If appliances for connecting solder fume
extraction units are available, ensure that they are connected and used
properly
INSTALLATION INSTRUCTIONS


Soldering
Please be sure to read and follow the operating instructions for your Weller
Supply Unit Use only original Weller soldering tips!
Handling the soldering tips
- Coat the selective and tinnable soldering tip with solder when heating it up for the first time. This removes oxide coatings which have formed during storage and impurities from the soldering tip.
- Make sure that the soldering tip is well coated with solder during breaks between soldering work and prior to storage of the device.
- Do not use aggressive fluxing agents.
- Always make sure that the soldering tips are fitted properly.
- Select as low a working temperature as possible.
- Select the largest possible soldering tip shape for the application. Rule of thumb: the soldering tip should be roughly as large as the soldering pad.
- Coat the soldering tip well with solder to ensure that there is efficient heat transfer between the soldering tip and the soldering area.
- Prior to extended breaks between soldering work, switch off the soldering system or use the Weller function to reduce the temperature when the soldering equipment is not in use.
- Coat the tip with solder prior to storage if you do not intend to use the soldering iron for an extended period of time.
- Apply solder directly to the soldering area, not to the soldering tip.
- Do not apply mechanical force to the soldering tip.
Specified Conditions Of Use
Supply unit for WELLER soldering tools. Use the soldering station only for the
purpose of soldering, as specified in the Operating Instructions. Use the
soldering iron exclusively for the purpose indicated in the Operating
Instructions of soldering and desoldering under the conditions specified here.
The soldering iron may only used in combination with Weller Supply Units. This
device may only be used at room temperature and indoors. Protect against
moisture and direct sunlight.
User groups
Due to differing degrees of risk and potential hazards, sever-al work steps
may only be performed by trained experts.
Work step User groups
- Default soldering parameters Specialist personnel with technical training
- Replacing electrical replacement parts Electricians
- Default maintenance intervals Safety expert
- Operation Filter change Non-specialists
- Operation Filter change Replacing electrical replacement parts Technical trainees under the guidance and supervision of a trained expert
Care and maintenance
WARNING
Before doing any work on the machine, pull the plug out of the socket. Leave
the unit to cool down. Check all connected cables and hoses on a regular
basis. If power tools are damaged, they must be immediately removed from use.
Only replace the soldering tips when they are cold. The soldering tool must be
left switched off in the safety rest for at least 3 minutes until the
soldering tip has cooled down. The LED status indicator must be at „OFF“. Keep
the heat transfer surfaces of the soldering tip and heating element clean. The
heating element must not come into contact with soldering tin. Repairs must
always be referred to a Weller-trained specialist. Use original replacement
parts only.
Warranty
Claims by the buyer for physical defects are time-barred after a period of one
year from delivery to the buyer. This does not apply to claims by the buyer
for indemnification in accordance with §§ 478, 479 BGB (German Federal Law
Gazette). We shall only be liable for claims arising from a warranty furnished
by us if the quality or durability warranty has been furnished by use in
writing and using the term „Warranty“. The warranty shall be void if damage is
due to improper use and if the device has been tampered with by unauthorised
persons. For more information please visit www.weller-tools.com.
Technical Data
| Soldering station | WE 1 | |
|---|---|---|
| Dimensions L x W x H | (mm) | 150 x 125 x 100 |
| (Inch) | 5,91 x 4,92 x 3,94 | |
| Weight | (kg) | 1,9 |
| Mains supply voltage | ( V / Hz) | 230 / 50/60 |
| 120 / 60 | ||
| 100 / 50/60 | ||
| Power consumption | (W) | 85 |
| Safety class | I, antistatic housing III, Soldering tool | |
| Temperature range | (°C) | 100 – 450 |
| Tool dependent | (°F) | 200 – 850 |
| Temperature accuracy | (°C/°F) | Average tip tem- perature can be |
„offset“ to +/- 5°C (+/-°9F) at idle with
no load
Temperature stability| (°C/°F)| ± 6 / ± 10
Soldering iron| WEP 70
—|—
Temperature range| (°C / °F)| 50- 450
Power consumption| (W)| 70
Mains supply voltage| (V AC)| 23
Heat-up time
(50°C to 350°C) (120°F to 660°F)
| (s)| 28
Tip top condition| ET
Supply unit|
Temperature performance
The soldering tool has an internal usage sensor which can be used to set an
automatic switch-off function (Stand-by). The settings can be found in the
station’s operating instructions.
Symbols
EC declaration of conformity
We hereby declare that the products described herein comply with the following
guidelines: Authorised to compile technical documentation
www.weller-tools.com/registration
GERMANY Weller Tools GmbH Carl-Benz-Straße 2 74354 Besigheim
- Tel : +49 (0)7143 580-0
- Fax : +49 (0)7143 580-108
- www.weller-tools.com
© 2022, Apex Tool Group, LLC. Weller® is a registered Trademark and registered
Design of Apex Tool Group, LLC.
References
- tools.com | Buy Power Tools and Automotive Parts online
- Weller Product Registration | Weller Tools
Read User Manual Online (PDF format)
Read User Manual Online (PDF format) >>
Download This Manual (PDF format)
Download this manual >>
Паяльная станция – одно из важнейших инструментов для работы с электроникой и монтажа электрических компонентов. Веллер – мировой лидер в производстве паяльных станций, обеспечивающих высокое качество пайки. Но настройка паяльной станции Веллер может показаться сложной задачей для новичков.
В этой статье мы предоставим вам пошаговую инструкцию по настройке паяльной станции Веллер, которая поможет вам уверенно исправлять поломки и выполнять монтажные работы с высокой точностью.
Мы рассмотрим основные этапы настройки паяльной станции Веллер, правильный выбор температуры, использование различных насадок и советы по уходу за оборудованием. Следуйте нашим рекомендациям, и ваша работа с паяльной станцией Веллер станет удобной и эффективной.
Подготовка к работе

Перед началом работы с паяльной станцией Веллер необходимо провести следующие шаги:
- Проверьте наличие всех необходимых компонентов: паяльник, паяльная станция, паяльная жидкость и прочее оборудование.
- Убедитесь, что все элементы паяльной станции находятся в исправном состоянии и не имеют повреждений.
- Подключите паяльную станцию к электрической сети и дайте ей время прогреться до необходимой температуры.
- Установите кончик паяльника и настройте температуру в соответствии с требованиями вашей работы.
- Убедитесь, что рабочее место оборудовано всеми необходимыми инструментами и материалами для пайки.
После проведения всех вышеперечисленных шагов вы готовы приступить к работе с паяльной станцией Веллер.
Выбор подходящей паяльной станции
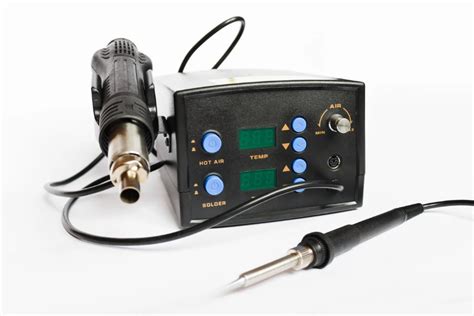
При выборе паяльной станции Веллер необходимо учитывать следующие критерии:
- Мощность станции должна быть достаточной для выполнения задач и обеспечения быстрого прогрева паяльника.
- Регулируемая температура позволит работать с различными материалами без риска повреждения.
- Наличие сменных насадок и паяльных жал обеспечит универсальность и удобство в работе.
- Хорошая репутация и отзывы пользователей подтвердят надежность и качество станции.
Подключение паяльной станции
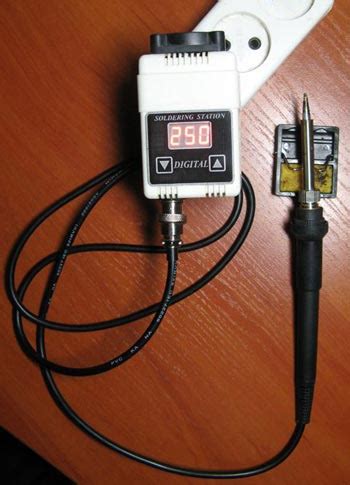
Для начала работы с паяльной станцией Веллер необходимо правильно подключить ее к источнику питания. Поместите паяльную станцию на устойчивую поверхность, обеспечивающую безопасную работу.
Подключите сетевой шнур паяльной станции к розетке переменного тока с напряжением, указанным на корпусе паяльника. Убедитесь, что контакты шнура надежно вставлены в розетку.
Подключение к электросети
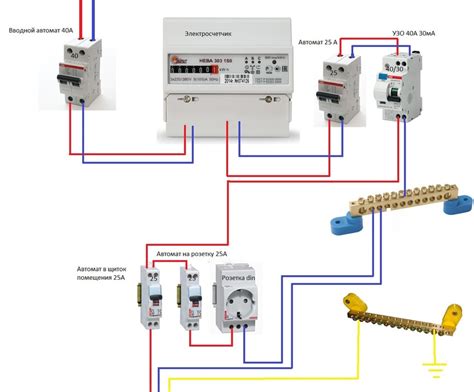
Прежде чем подключать паяльную станцию Веллер к электросети, убедитесь, что напряжение на станции соответствует напряжению сети. Проверьте целостность шнура питания и розетки.
Далее следует вставить штекер паяльной станции в розетку. Убедитесь, что шнур питания не перегибается или не искажается, это может привести к повреждению соединений.
После подключения к сети включите паяльную станцию нажатием на кнопку питания. Дождитесь, пока индикатор показывает, что станция нагрелась до рабочей температуры.
Настройка температуры
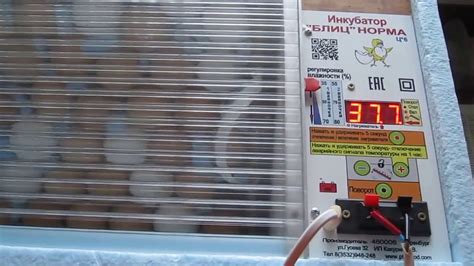
1. Включите паяльную станцию, нажав кнопку питания.
2. Установите желаемую температуру с помощью ручки регулятора на передней панели паяльной станции.
3. Дождитесь, пока паяльная станция нагреется до заданной температуры. Следите за индикатором на дисплее.
4. После достижения нужной температуры паяльную станцию можно использовать для пайки компонентов.
5. При необходимости, в процессе работы, можно корректировать температуру, поворачивая ручку регулятора.
Выбор оптимальной температуры для пайки
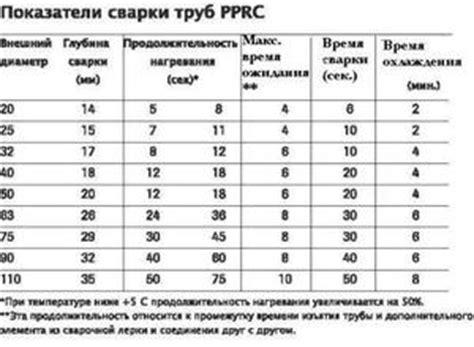
Для успешной пайки необходимо выбрать правильную температуру на паяльной станции. Если температура слишком низкая, паяльными соединениями может быть сложно работать и результат может быть не надежным. Слишком высокая температура может повредить плату или компоненты.
Оптимальная температура зависит от типа используемого припоя и конкретной задачи. Обычно для электронных компонентов на плате рекомендуется установить температуру от 300°C до 350°C. Для крупных элементов может потребоваться повышенная температура.
Важно следить за изменениями в процессе пайки и регулировать температуру в зависимости от конкретных условий работы. Экспериментируйте с различными значениями температуры, чтобы найти оптимальный вариант для вашего проекта.
Выбор паяльной насадки
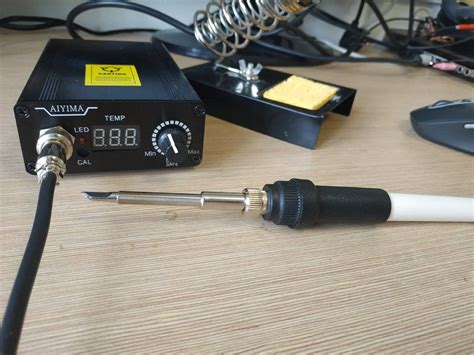
Выбор правильной паяльной насадки крайне важен для успешного выполнения работ. Паяльные насадки различаются по форме, размеру и материалу, что позволяет выбирать насадку в зависимости от конкретной задачи.
- Для пайки мелких деталей и печатных плат чаще всего используют узкие конические или круглые насадки.
- Для работы с крупными элементами и большими поверхностями подойдут широкие паяльные насадки.
- Для пайки поверхностно-монтируемых компонентов рекомендуется использовать насадки с плоским концом.
- Материал насадки (медь, никелированная медь, серебро) также может влиять на качество пайки.
Размер и форма насадки влияют на качество соединения
Выбор правильной насадки для паяльника Веллер играет важную роль в процессе пайки. Размер и форма насадки должны быть подобраны в зависимости от конкретного вида работ: для мелких элементов необходима узкая и тонкая насадка, в то время как для крупных деталей лучше использовать более широкую насадку.
Особое внимание следует уделить форме насадки: конические и плоские насадки позволяют достичь разного типа соединения. Коническая насадка подходит для точных работ, а плоская — для монтажа поверхностных компонентов. Правильный выбор насадки существенно повысит качество соединения и упростит процесс пайки.
Пайка деталей
Шаг 1: Подготовьте поверхности деталей, которые будут паяться. Они должны быть чистыми и обработанными.
Шаг 2: Подготовьте паяльную станцию Веллер, установив необходимую температуру и насадку.
Шаг 3: Нанесите паяльную флюс на соединяемые поверхности деталей. Флюс поможет обеспечить хорошее сцепление между деталями и паяльным припоем.
Шаг 4: Соедините детали в нужном положении и приложите паяльник к месту пайки. Дайте паяльной станции Веллер прогреться и начните пайку, нагревая место соединения.
Шаг 5: Нанесите паяльный припой на место пайки и дайте ему расплавиться достаточно, чтобы хорошо пропитать соединяемые поверхности.
Шаг 6: Уберите паяльник и дайте плате остыть. Не трогайте соединение, пока оно полностью не застынет.
Вопрос-ответ

Какие компоненты входят в паяльную станцию Веллер?
Паяльная станция Веллер обычно включает в себя паяльник (ручку паяльника), стойку для паяльника, блок питания, держатель для паяльника, сопло для распыления флюса и другие аксессуары для пайки.
Как правильно подключить паяльную станцию Веллер к сети?
Для подключения паяльной станции Веллер к сети, сначала убедитесь, что напряжение на блоке питания соответствует напряжению вашей электросети. Затем подключите шнур питания к блоку питания и вставьте вилку в розетку. Включите паяльную станцию.
Как выбрать температуру на паяльной станции Веллер?
Для выбора температуры на паяльной станции Веллер используйте регулятор температуры на блоке питания или на ручке паяльника. Источники пайки разных компонентов могут требовать разные температуры плавления, поэтому установите температуру в соответствии с требованиями вашей работы.
Как проверить работоспособность паяльной станции Веллер после настройки?
Для проверки работоспособности паяльной станции Веллер после настройки, подождите несколько минут, чтобы она прогрелась до установленной температуры. Затем проверьте, как легко паяльник плавит припой на образце. Если припой плавится равномерно и быстро, значит паяльная станция правильно настроена.
Перейти к контенту
- Manuals
- Brands
- Weller Manuals
- Soldering Gun
- WMP
- Operating instructions manual
-
Bookmarks
Quick Links
Weller
WMP
Betriebsanleitung
D
Manuel d’Utilisation
F
Istruzioni per l’uso
I
Operating Instruction
GB
Kullanım açıklamaları
TR
®
Related Manuals for Weller WMP
Summary of Contents for Weller WMP
-
Page 1
Weller ® Betriebsanleitung Manuel d’Utilisation Istruzioni per l’uso Operating Instruction Kullanım açıklamaları… -
Page 2
| ˙ çindekiler Inhaltsverzeichnis Seite Indice Pagina Sayfa 1. Sicherheitshinweise 1. Norme di sicurezza 1. Güvenlik üzerine notlar 2. Beschreibung 2. Descrizione 2. Tasvir Technische Daten Dati tecnici Teknik veriler 3. Inbetriebnahme 3. Messa in esercizio 3. Kullanıma alı¸ s 4. -
Page 3
4D9R772 1. Lötspitze 2. Ergonomischer Griff aus antistatischem Kunststoff 3. Temperaturbeständige antistatische Silikonleitung 4. Verriegelbarer Anschlußstecker 1. Panne 1. Punta di brasatura 1. Soldering bit 1. Lehim kalemi uçları 2. Manche ergonomique en plastique 2. Impugnatura ergonomica in 2. Ergonomic handle made 2. -
Page 4: Sicherheitshinweise
– Lötkolben waagrecht halten. – Sechskant- Werkzeug für den Spitzenwechsel über den Heizkörper Der Weller Micro Lötkolben WMP eignet sich durch sein handliches Konzept zur Be- bis zum Anschlag in den Handgriff einführen. arbeitung professioneller SMD Elektronik. Eine kurze Distanz zwischen Griffpunkt und –…
-
Page 5: Consignes De Sécurité
– Tenir le fer à souder horizontalement. – Introduire l’outil six-pans pour changement de panne dans Avec son concept de maniabilité, le micro fer à souder Weller WMP convient pour le la poignée par dessus l’élément chauffant jusqu’à la butée.
-
Page 6: Norme Di Sicurezza
Punte diritte per saldatura – Tenere in posizione orizzontale lo stilo brasatore. Il saldatore Weller Micro WMP è particolarmente adatto per la lavorazione di – Introdurre l’utensile esagonale per il cambio della punta sul corpo componenti elettronici professionali SMD, grazie al suo maneggevole concetto. La breve riscaldante fino al fermo nell’impugnatura.
-
Page 7: Safety Instructions
– hold soldering iron horizontal. – Guide hex tool for changing the tip over the heater element Due to its handy design, the Weller WMP micro soldering iron is suitable for work on to the stop on the handle. professional SMD electronics. A short distance between the handle and the soldering –…
-
Page 8: Tasvir
– Lehim kalemini yere yatay tutunuz. – Uç de˘ g i¸ s tirmek için altı kenarlı anahtarı ısıtıcı üzerinden biti¸ s noktasına Weller WMP Mikro Lehim kalemi kolay kullanım ve el uygunlu˘ g u özellikleri sayesinde kadar kulpun içerisine sürünüz.
-
Page 9
NT-Spitzen für WMP NT-Tips for WMP Pannes NT pour WMP WMP için NT lehim 74 mm Punte NT per WMP kalemi uçları Beschreibung Breite A Dicke B Länge C Modell / Best. Nr. Description Largeur A Epaisseur B Longueur C Type / Référence… -
Page 10
NT-Spitzen für WMP NT-Tips for WMP Pannes NT pour WMP WMP için NT lehim 74 mm Punte NT per WMP kalemi uçları Beschreibung Breite A Dicke B Länge C Modell / Best. Nr. Description Largeur A Epaisseur B Longueur C Type / Référence… -
Page 11
SMT-Spitzen für WMP SMP-Tips for WMP Pannes SMT pour WMP WMP için SMT lehim 74 mm Punte SMP per WMP kalemi uçları Beschreibung Breite A Dicke B Länge C Komponenten Typ Modell / Best. Nr. Description Largeur A Epaisseur B…
Многофункциональная 3-х канальная цифровая станция WMD3 поверхностного монтажа. Станция с возможностью пайки, отпайки и пайки горячим воздухом, со встроенным компрессором.
Паяльная станция WMD3 представляет собой полностью укомплектованное рабочее место для выполнения всех операций поверхностного монтажа.
3 канала паяльной станции WMD3 позволяют одновременно подключать 3 инструмента. Стандартно в комплекте с паяльной станцией поставляется паяльник, паяльник для отпайки и паяльник для пайки горячим воздухом. Однако вы можете комплектовать станцию по своему усмотрению. Поскольку паяльная станция WMD3 имеет систему автоматического распознавания подключенного инструмента, вы можете работать с любым инструментом. Например , вы можете подключить нагревательную панель, паяльник и термопинцет.
Широкий спектр специальных насадок для паяльной станции WMD3 позволяет отпаивать большие компоненты.
ПРЕИМУЩЕСТВА:
• Станция WMD3 имеет встроенный компрессор и вакуум
• Диапазон температур WMD3 :
— от 50°С до 450°С для всех паяльных и отпаивающих инструментов
— от 50°С до 550°С для паяльника НАР1
• Электростатическая защита.
• Мощность WMD3 : 175 Вт
• Максимальная выходная мощность 100 Вт.
60 000
15 000
4 300
6 000
11 000
3 500
4 000
1 200
4 300
Types of Manuals:
The main types of Weller WMD 3 instructions:
- User guide — rules of useing and characteristics
- Service manual — repair, diagnostics, maintenance
- Operation manual — description of the main functions of equipment
Soldering Gun Instructions by Weller:
-
BASETech 1553618
• Beachten Sie, dass das Netzkabel nicht gequetscht, geknickt, durch scharfe Kanten beschädigt oder anders mechanisch belastet wird. Vermeiden Sie eine übermäßige thermische Belastung des Netzkabels durch große Hitze oder große Kälte. Verändern Sie das Netzkabel nicht. Wird dies nicht beachtet, kann das Netz …
1553618 Soldering Gun, 4
-
Conrad Electronic 588527
Version 06/04BEDIENUNGSANLEITUNGwww.conrad.comDDieser Bedienungsanleitung ist eine Publikation der Conrad Electronic GmbH,Klaus-Conrad-Straße 1, D-92240 Hirschau.Diese Bedienungsanleitung entspricht dem technischen Stand bei Druckle-gung. Änderung in Technik und Ausstattung vorbehalten.© Copyright 2004 by Conrad Ele …
588527 Soldering Gun, 2
-
Weller WSP 80
WSP 80Betriebsanleitung — Mode d’emploi — Gebruiksaanwijzing — Istruzioni per l’uso — OperatingInstructions — Instruktionsbok — Manual de uso — Betjeningsvejledning — Manual do utilizador -Käyttöohjeet — √‰ËÁ›Â˜ §ÂÈÙÔ˘ÚÁ›·˜ — Kullan∂m k∂lavuzu — Návod k pouÏití — Instrukcja obs∏ugi …
WSP 80 Power Tool, 10
-
Weller whs 40d
Wel le rBetriebsanleitung®DManuel d’UtilisationFGebruiksaanwijzingNLIstruzioni per l’usoIOperating InstructionGBBruksanvisningSInstrucciones para el ManejoEBeskrivelseDKDescriçãoPKäyttöohjeetFINΑπκλλησηKullanım açıklamalarıGRH CZSLOWHS 40D TR …
whs 40d Soldering Gun, 49
-
Lincoln Electric POWER WAVE IM718
POWER WAVE AC/DC ™OPERATOR’S MANUALIM718June 2002Safety Depends on YouLincoln arc welding and cuttingequipment is designed and builtwith safety in mind. However, youroverall safety can be increased byproper installation … and thought-ful operation on your part. DONOT INSTALL, OPERATE ORREPAIR THIS EQUI …
POWER WAVE IM718 Soldering Gun, 48
-
Weller WTCP 51
WTCP 51BetriebsanleitungMode d’emploiGebruiksaanwijzingIstruzioni per l’usoOperating InstructionsInstruktionsbok Manual de usoBetjeningsvejledning Manual do utilizadorKäyttöohjeet DFNLIGBESDKPFIN√‰ËÁ›Â˜ §ÂÈÙÔ˘ÚÁ›·˜Kullan∂m k∂lavuzuNávod k pouÏitíInstrukcja obs∏ugiÜzemeltetési utas …
WTCP 51 Soldering Gun, 53
-
Beta 1823 60
ENLPL DMODE D’EMPLOIGEBRAUCHSANWEISUNGINSTRUCCIONESGEBRUIKSAANWIJZING,16758.&-$2%6á8*, IISTRUZIONI PER L’USOINSTRUCTIONS FOR USEENFINSTRUÇÕES DE USOHASZNÁLATI ÚTMUTATÓPTHU1823 60 …
1823 60 Soldering Gun, 24
-
Weller wecp-20
56Weller®DFNLIGBWECP-20BetriebsanleitungManuel d’UtilisationGebruiksaanwijzingIstruzioni per l’usoOperating InstructionBruksanvisningSInstrucciones para el ManejoBeskrivelseDescriçãoLaiiteenkuvausΑπκ#λλησηSFGREPDKWECP20.pm65 11.03.2002, 11:19 Uhr56 …
wecp-20 Soldering Gun, 57

1
WR 2
DE Originalbetriebsanleitung
EN Translation of the original instructions
ES Traducción del manual original
FR Traduction de la notice originale
IT Traduzione delle istruzioni originali
PT Tradução do manual original
NL Vertaling van de oorspronkelijke gebruiksaanwijzing
SV Översättning av bruksanvisning i original
DK Oversættelse af den originale brugsanvisning
FI Alkuperäisten ohjeiden käännös
GR Μετάφρασητουπρωτοτύπουτωνοδηγιώνχρήσης
TR Orijinalişletmetalimatıçevirisi
CZ Překladpůvodníhonávodukpoužívání
PL Tłumaczenieminstrukcjioryginalnej
HU Eredetihasználatiutasításfordítása
SK Prekladpôvodnéhonávodunapoužitie
SL Prevod izvirnih navodil
EE Algupärase kasutusjuhendi tõlge
LV Instrukcijutulkojumamnooriģinālvalodas
LT Originalios instrukcijos vertimas
BG преводнаоригиналнатаинструкция
RO Traducere a instructiunilor originale
HR Prijevod originalnih uputa
RU Оригинальноеруководствопоэксплуатации
-
Contents
-
Table of Contents
-
Bookmarks
Quick Links
Weller
WMD 3
D
Betriebsanleitung
F
Mode d’emploi
NL
Gebruiksaanwijzing
Istruzioni per l’uso
I
GB
Operating Instructions
S
Instruktionsbok
E
Manual de uso
DK
Betjeningsvejledning
P
Manual do utilizador
FIN
Käyttöohjeet
®
GR
Οδηγίες Λειτουργίας
TR
Kullan∂m k∂lavuzu
CZ
Návod k pouÏití
Instrukcja obs∏ugi
PL
H
Üzemeltetési utasítás
Návod na pouÏívanie
SK
SLO
Navodila za uporabo
EST
Kasutusjuhend
LT
Naudojimo instrukcija
LV
Lieto‰anas instrukcija
Summary of Contents for Weller WMD 3
Это тоже интересно:
