
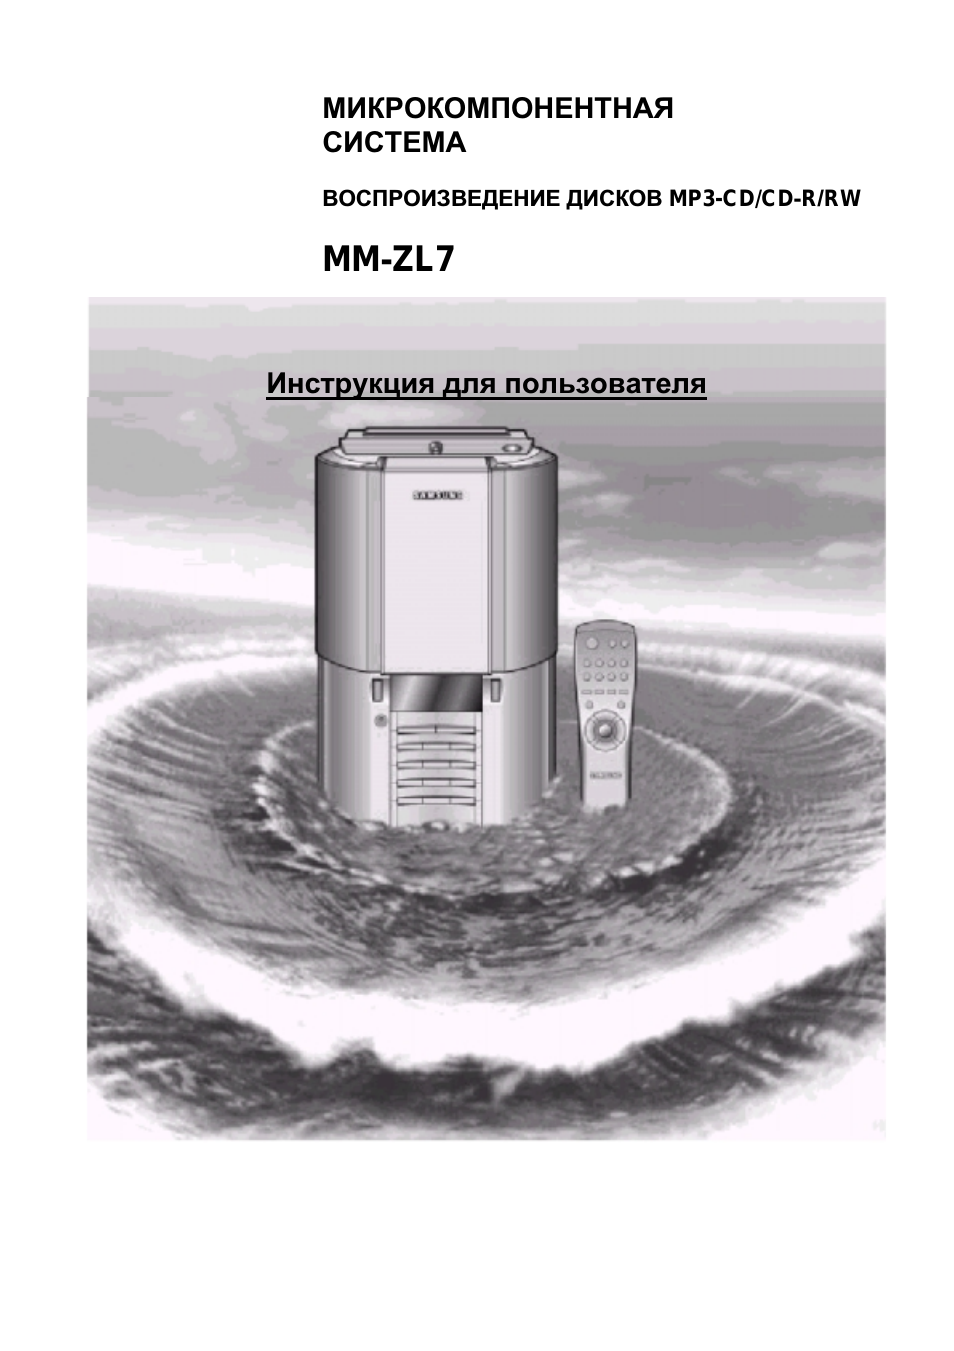
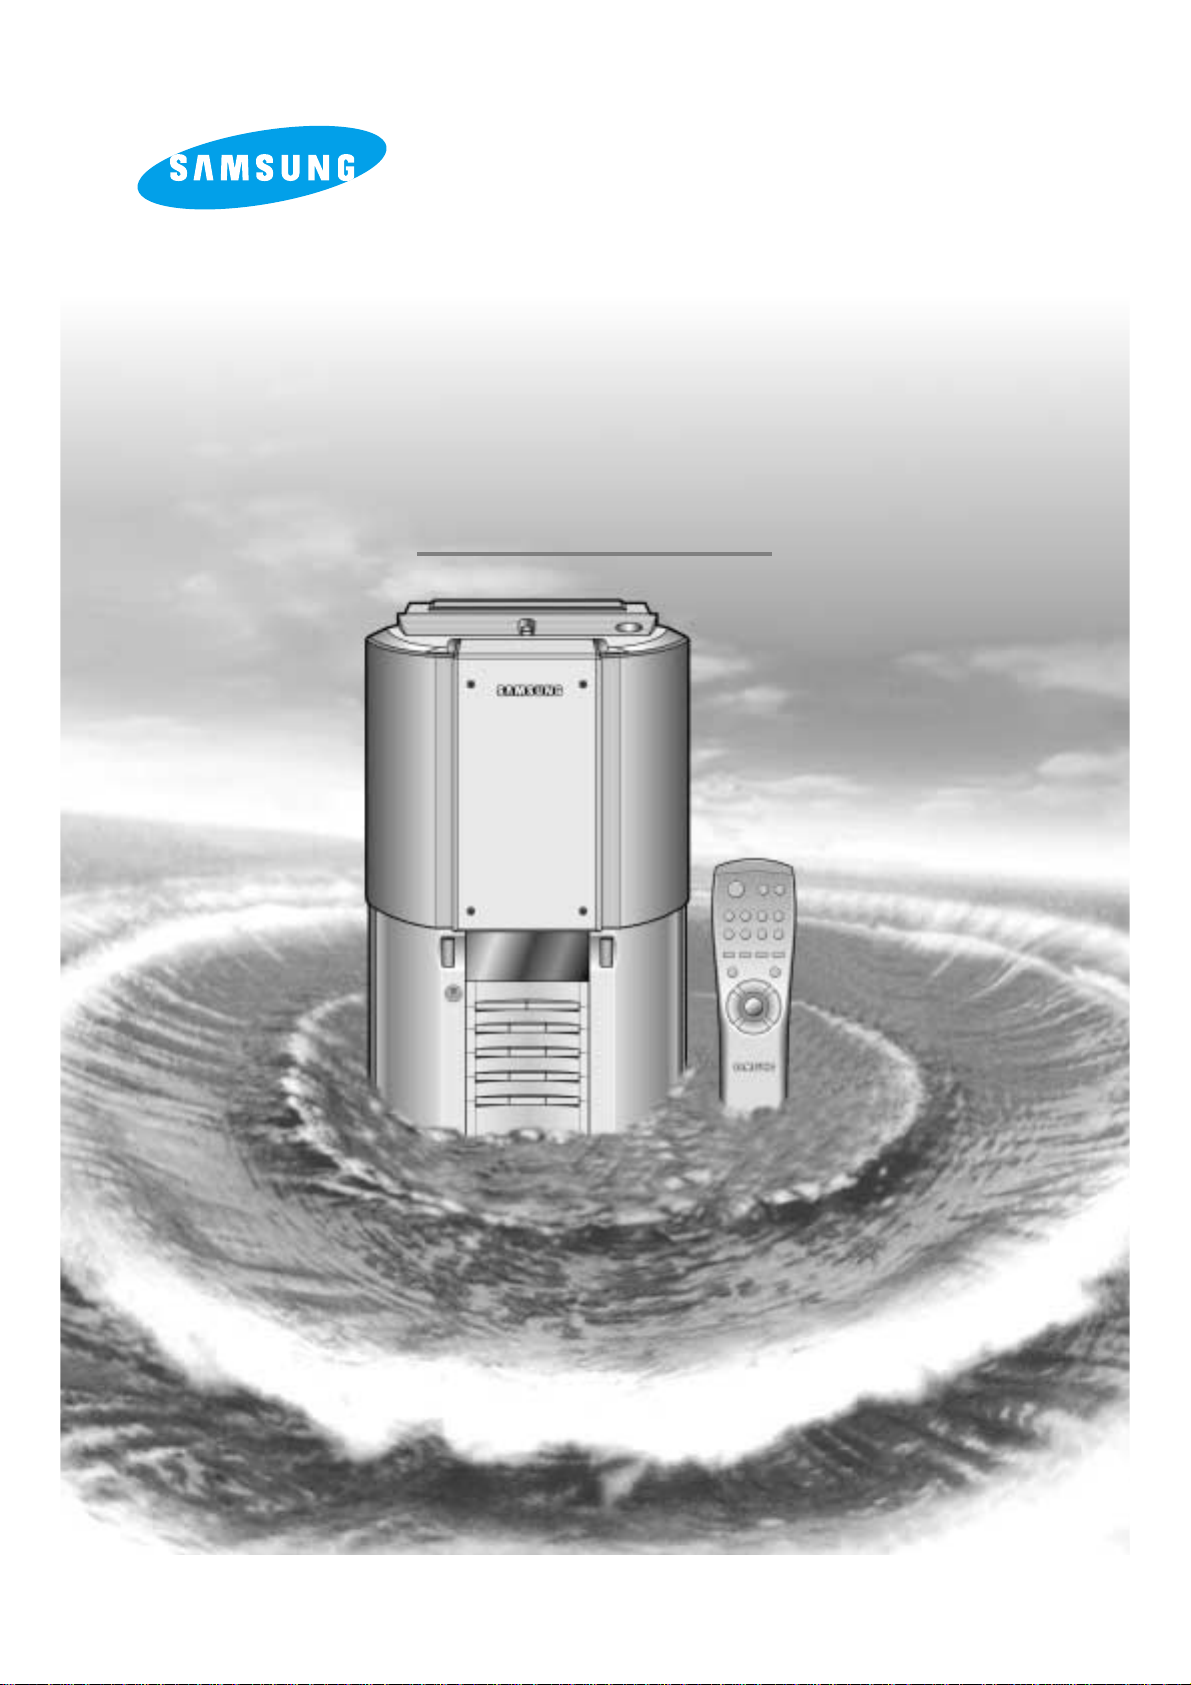
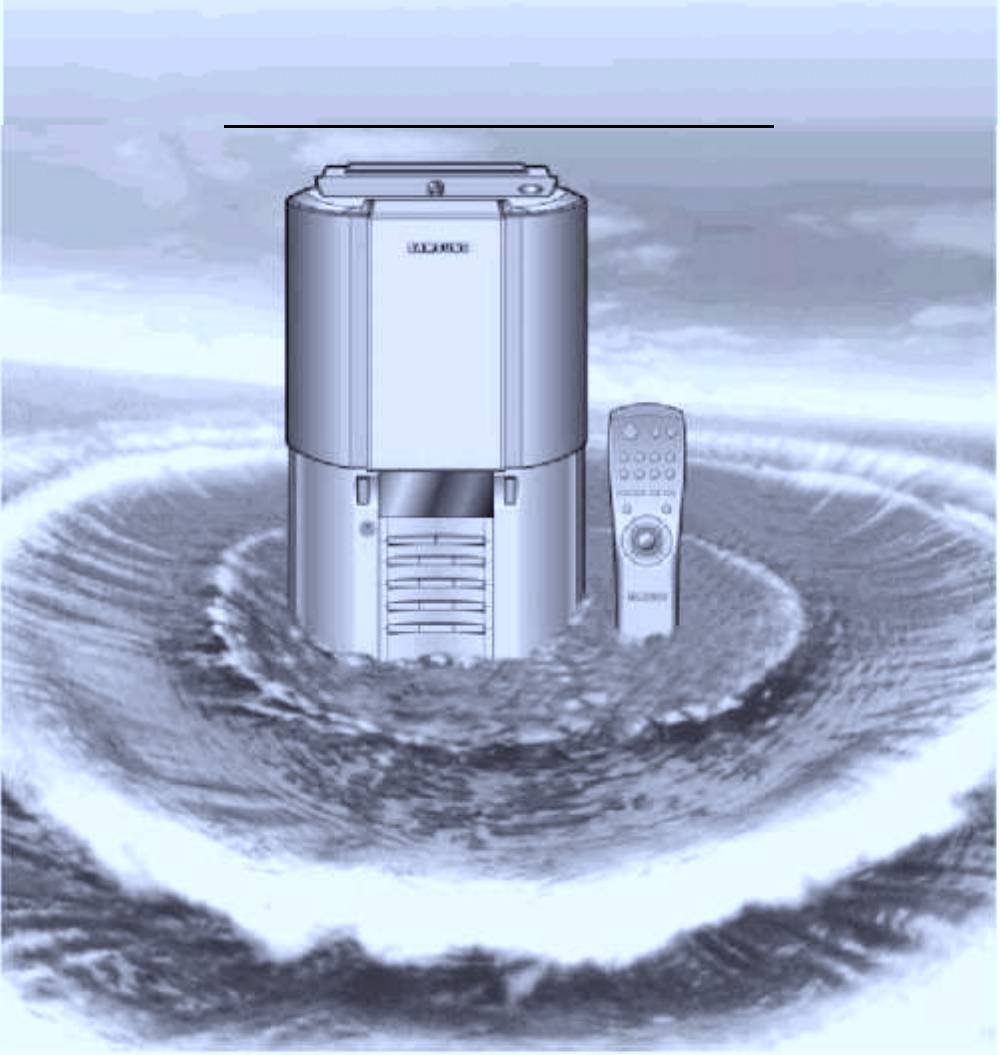
МИКРОКОМПОНЕНТНАЯ
СИСТЕМА
ВОСПРОИЗВЕДЕНИЕ ДИСКОВ MP3-CD/CD-R/RW
MM^ZL
7
Инструкция для пользователя
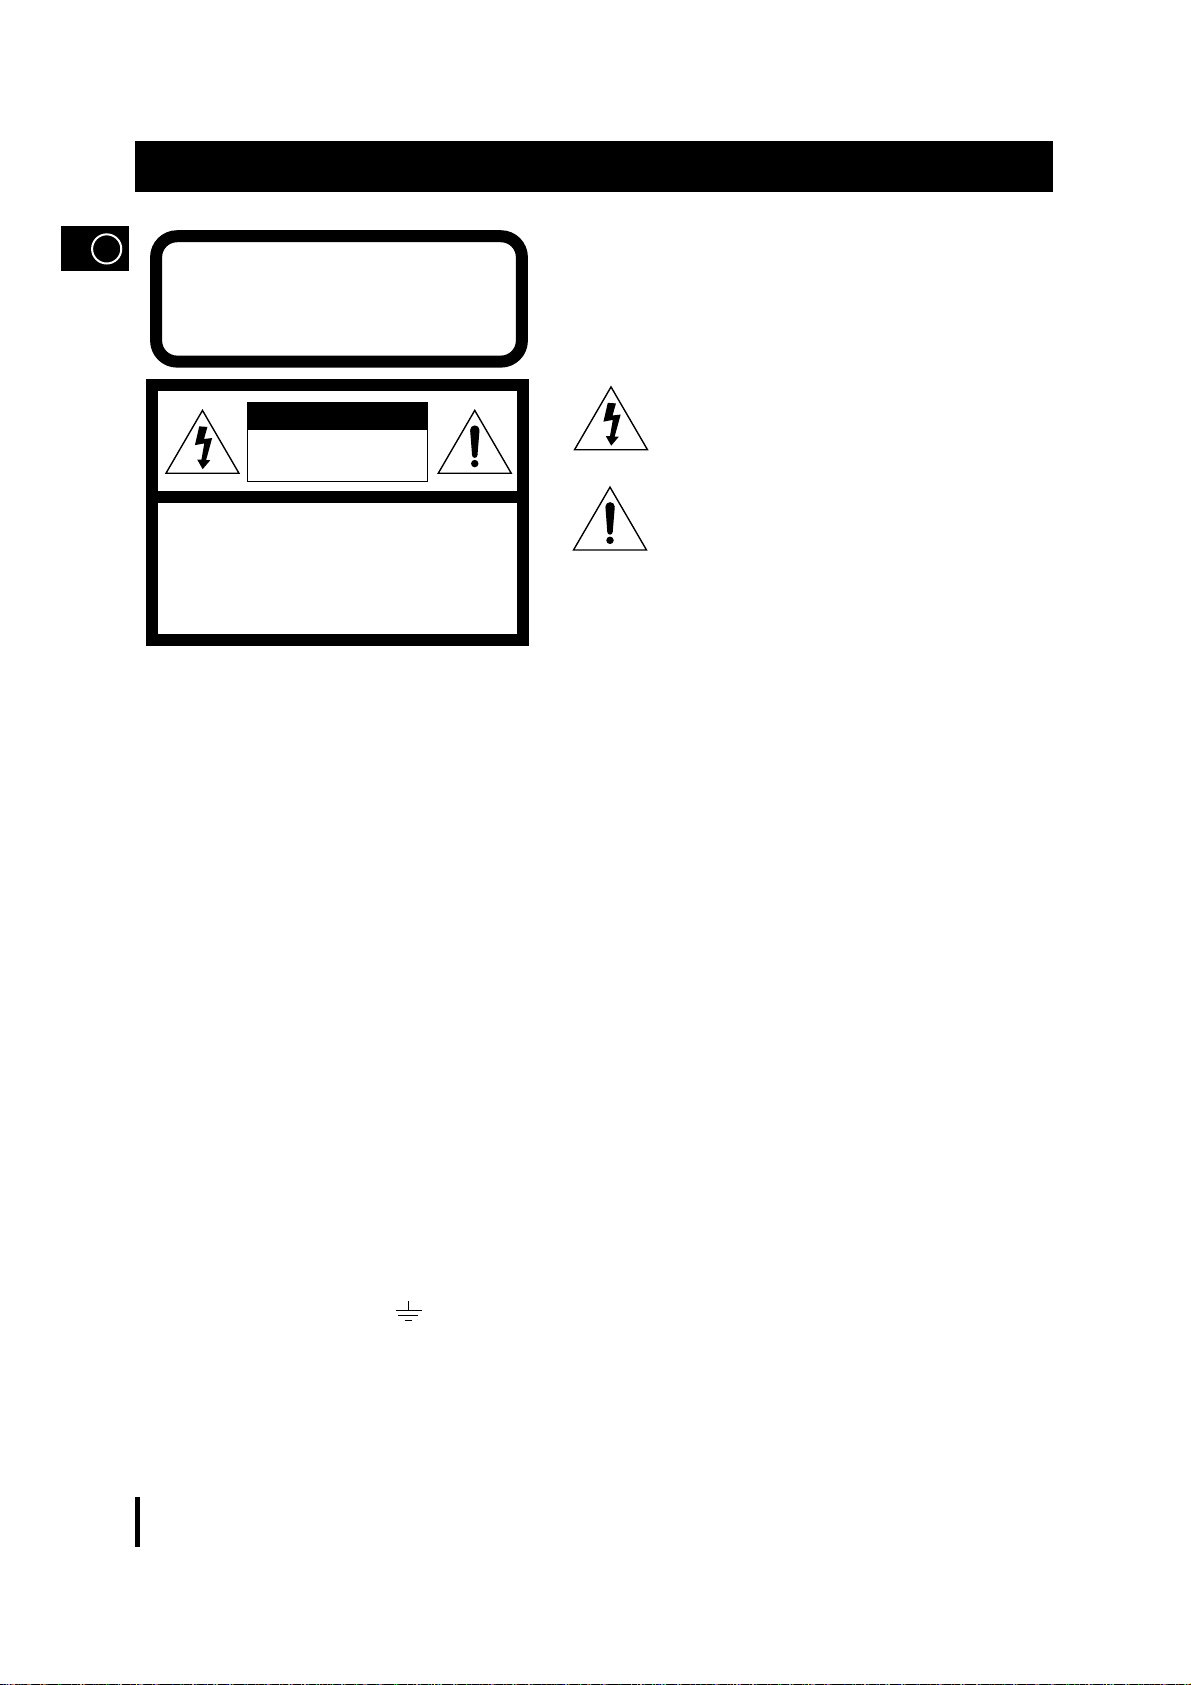
Предупреждения по технике безопасности
ПРЕДОСТЕРЕЖЕНИЕ
ОПАСНОСТЬ ПОРАЖЕНИЯ
ЭЛЕКТРИЧЕСКИМ ТОКОМ.
НЕ ОТКРЫВАТЬ
ПРЕДОСТЕРЕЖЕНИЕ:
ВО ИЗБЕЖАНИЕ ПОРАЖЕНИЯ ЭЛЕКТРИЧЕСКИМ
ТОКОМ, НЕ СНИМАЙТЕ ЗАДНЮЮ КРЫШКУ.
ВНУТРИ НЕТ ДЕТАЛЕЙ, ОБСЛУЖИВАЕМЫХ
ПОЛЬЗОВАТЕЛЕМ. ДЛЯ ТЕХНИЧЕСКОГО
ОБСЛУЖИВАНИЯ ОБРАЩАЙТЕСЬ К
КВАЛИФИЦИРОВАННОМУ СПЕЦИАЛИСТУ.________
ЛАЗЕРНОЕ ИЗДЕЛИЕ КЛАССА 1
Этот проигрыватель компакт дисков
классифицирован как ЛАЗЕРНОЕ ИЗДЕЛИЕ
КЛАССА 1.
Использование органов управления, регулировки или
выполнение процедур, не описанных в данной
Инструкции, может привести к опасному облучению
лазером.
ПРЕДУПРЕЖДЕНИЕ — НЕВИДИМОЕ ЛАЗЕРНОЕ
ИЗЛУЧЕНИЕ. ПРИ СНЯТИИ КОРПУСА И
ОТКЛЮЧЕНИИ БЛОКИРОВОЧНЫХ КОНТАКТОВ
ИЗБЕГАЙТЕ ПОПАДАНИЯ ПОД ЛУЧ ЛАЗЕРА.
Этот символ указывает, что внутри данного
изделия имеется опасное напряжение,
которое может привести к поражению
электрическим током.
Этот символ указывает, что в
документации на изделие имеется
важная инструкция по его использованию
или обслуживанию.
ПРЕДУПРЕЖДЕНИЕ: Чтобы уменьшить риск
возгорания или поражения
электрическим током, не
допускайте попадания данного
изделия под дождь или в
условия высокой влажности.
ОСТОРОЖНО: ВО ИЗБЕЖАНИЕ ПОРАЖЕНИЯ
ЭЛЕКТРИЧЕСКИМ ТОКОМ,
ПОЛНОСТЬЮ ВСТАВЛЯЙТЕ ВИЛКУ
В РОЗЕТКУ ТАК, ЧТОБЫ ШИРОКАЯ
ПЛАСТИНА ВИЛКИ СОВПАЛА С
ШИРОКИМ ОТВЕРСТИЕМ РОЗЕТКИ.
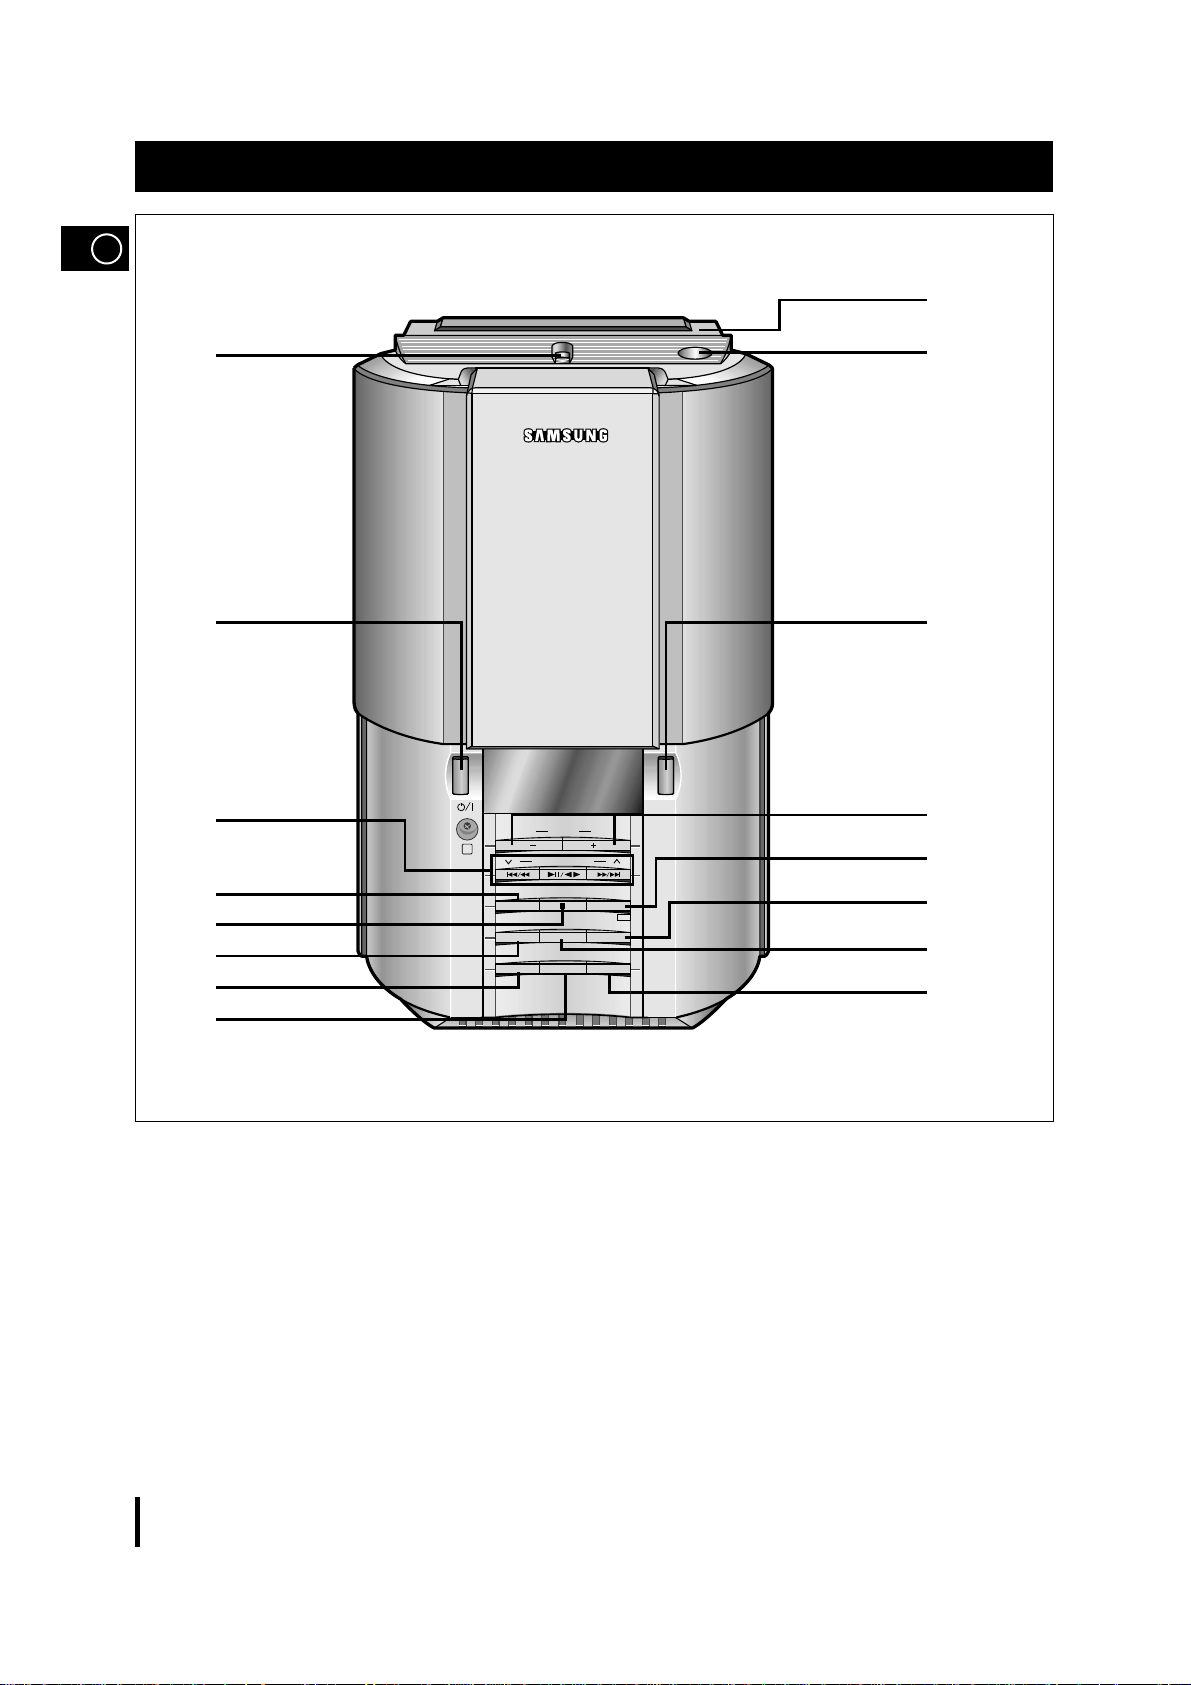
Вид передней панели
1. Кнопка открытия отсека для компакт-дисков
10.
2. Кнопка Питание/ Готовность
11.
3. Многофункциональные кнопки (для Компакт-диска/ 12.
Кассеты/ Тюнера)
13.
4. Кнопка «Повтор компакт-диска»
14.
5. Кнопка «Режим настройки на радиостанции» (Стоп)
6. Кнопка выбора диапазона частот тюнера
15.
7. Кнопка Программа/ Установка/Повтор последней
16.
воспроизводившейся дорожки
8. Кнопка синхронизированной записи компакт-диска
17.
9. Гнездо для подсоединения микрофона (не во всех
моделях)
Кнопка Push Eject (Нажмите для выброса кассеты)
Гнездо для подсоединения наушников
Кнопка выбора функций системы
Кнопки регулировки громкости
Кнопка «Повтор (А ^ В)» K Дорожка K Альбом для
диска MP3-CD
Кнопка «+1O» (компакт-диск)
Кнопка выбора предустановленных настроек
эквалайзера
Кнопка начала/останова записи
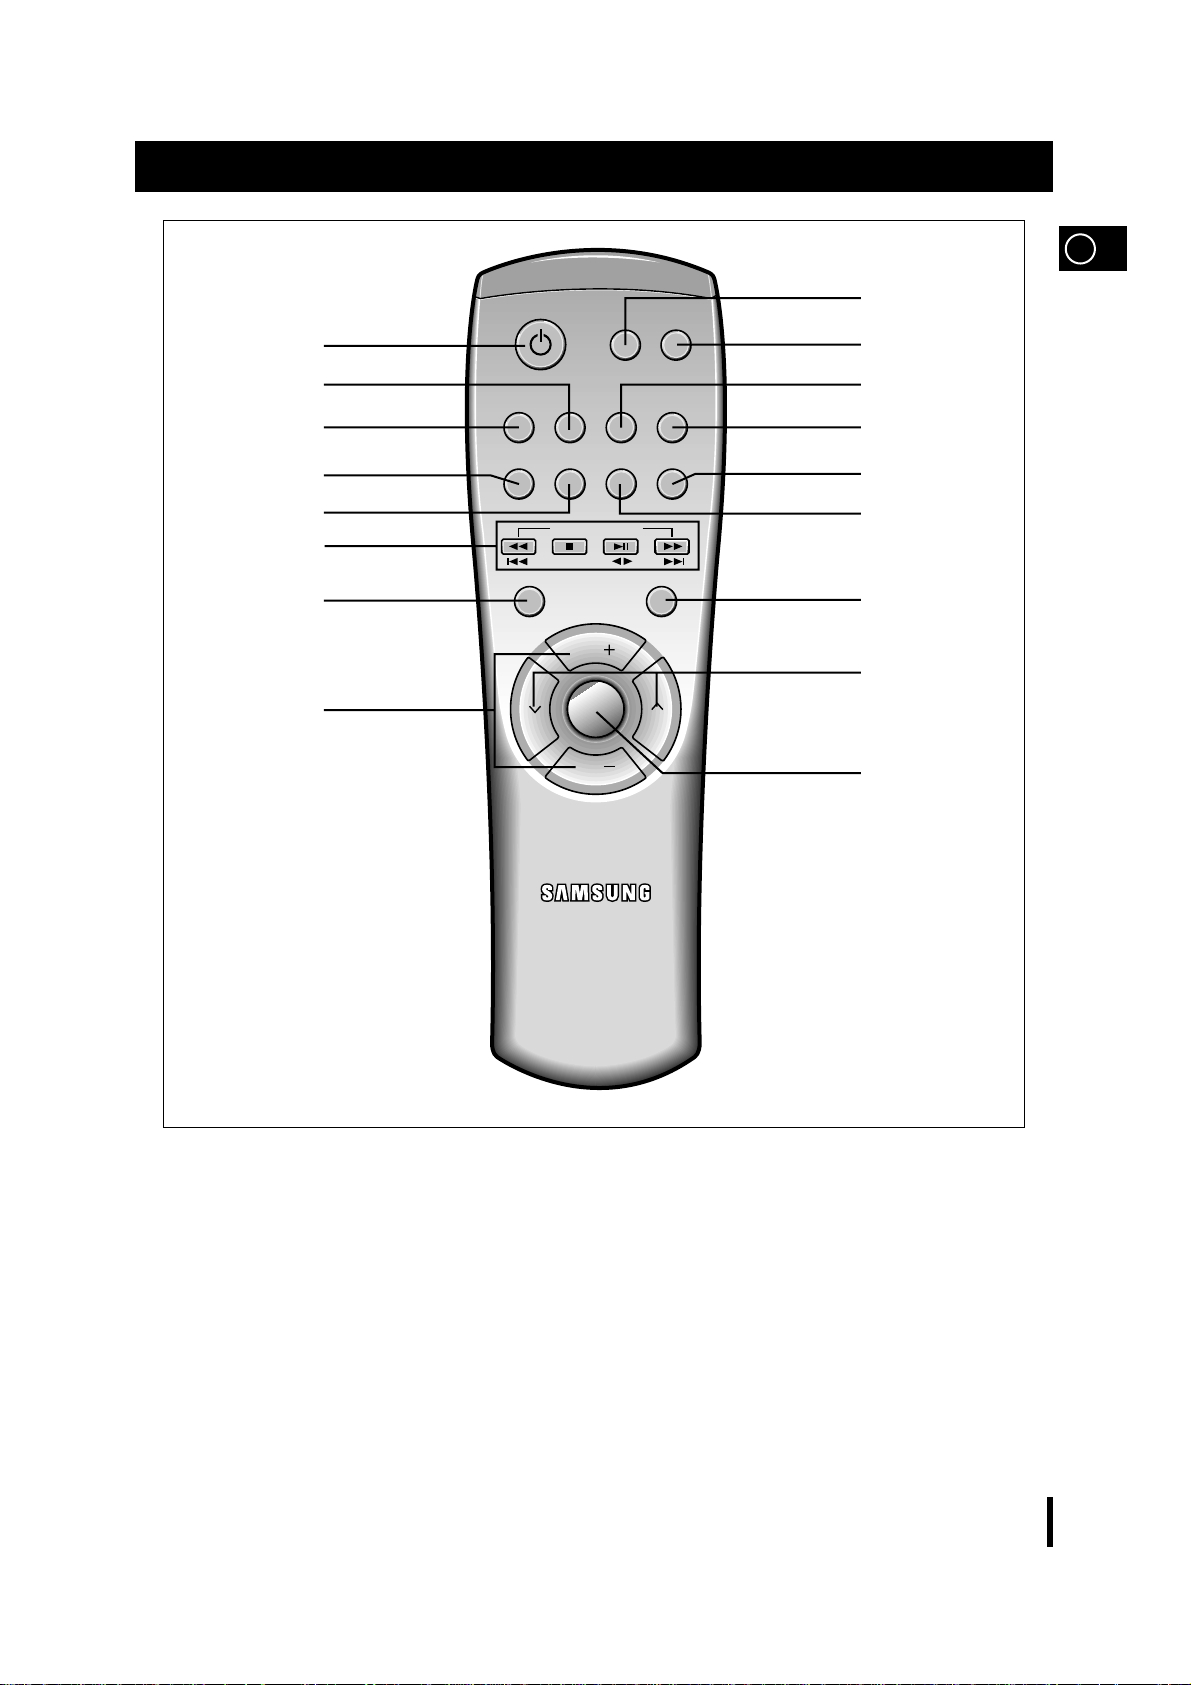
Пульт дистанционного управления
1.
Кнопка Питание/ Готовность
10.
2.
Кнопка выбора настроек эквалайзера
11.
3.
Кнопка функции Power Sound
12.
4.
Кнопка выбора режима Моно/ Стерео
13.
5.
Кнопка выбора режима реверса кассеты
6.
Многофункциональные кнопки (для Компакт-диска/ 14.
Кассеты/ Тюнера)
15.
7.
Кнопка выбора диапазона частот тюнера
16.
8.
Кнопки регулировки громкости
17.
9.
Кнопка «Сон»
Кнопка временного отключения звука
Кнопка Включения/ Выключения таймера
Кнопка установки Таймера/ Часов
Кнопка Программа/ Установка/ Повтор последней
воспроизводившейся дорожки
Кнопка «Повтор»
Кнопка выбора функций системы
Кнопка поиска радиостанций
Кнопка «Режим настройки на радиостанции» /
Дорожка / Альбом для диска МР3-СО

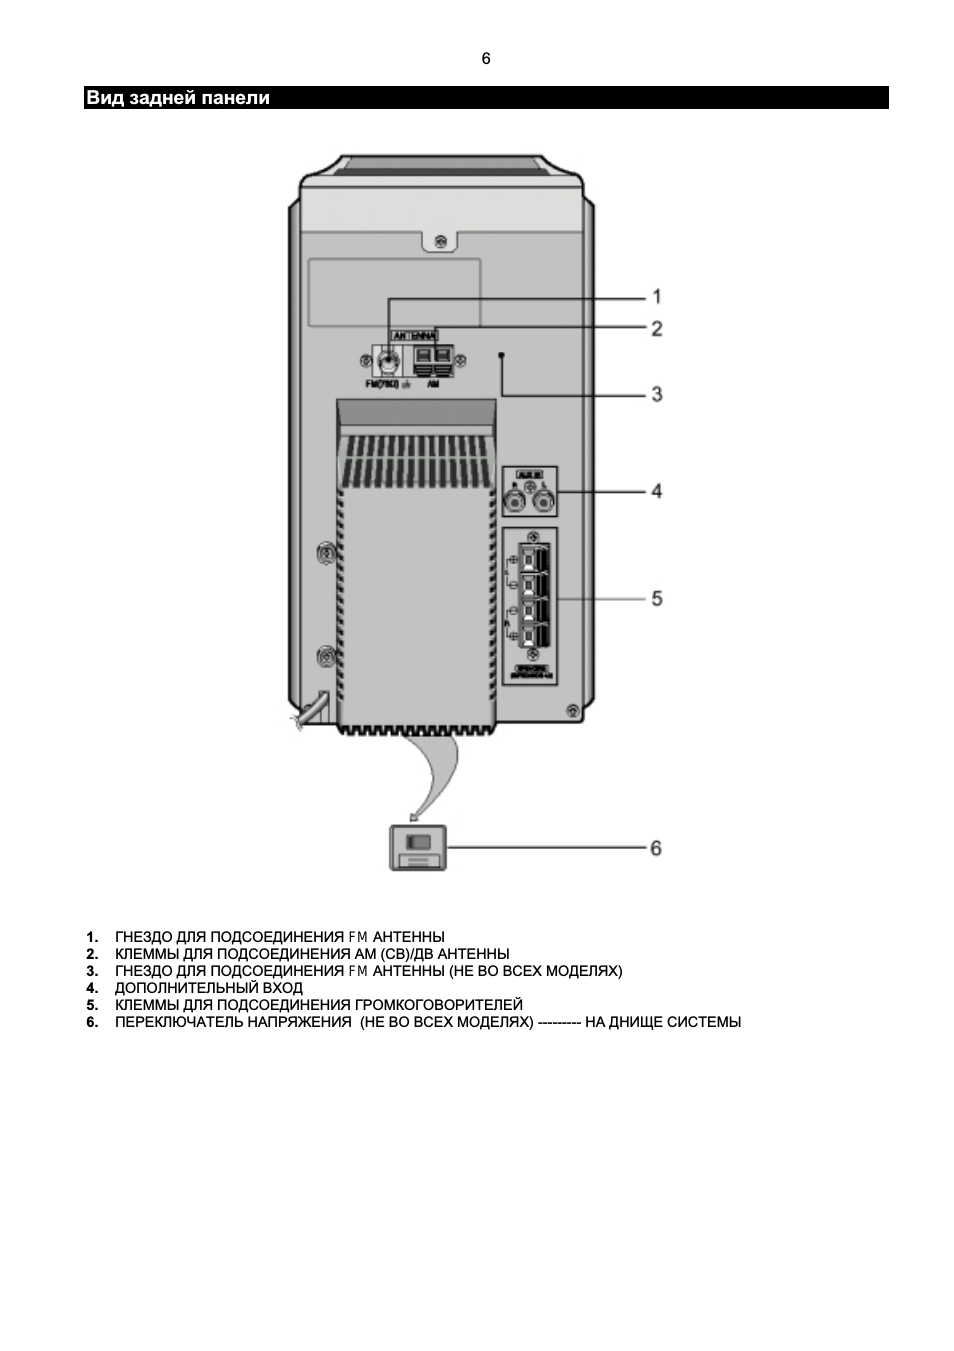
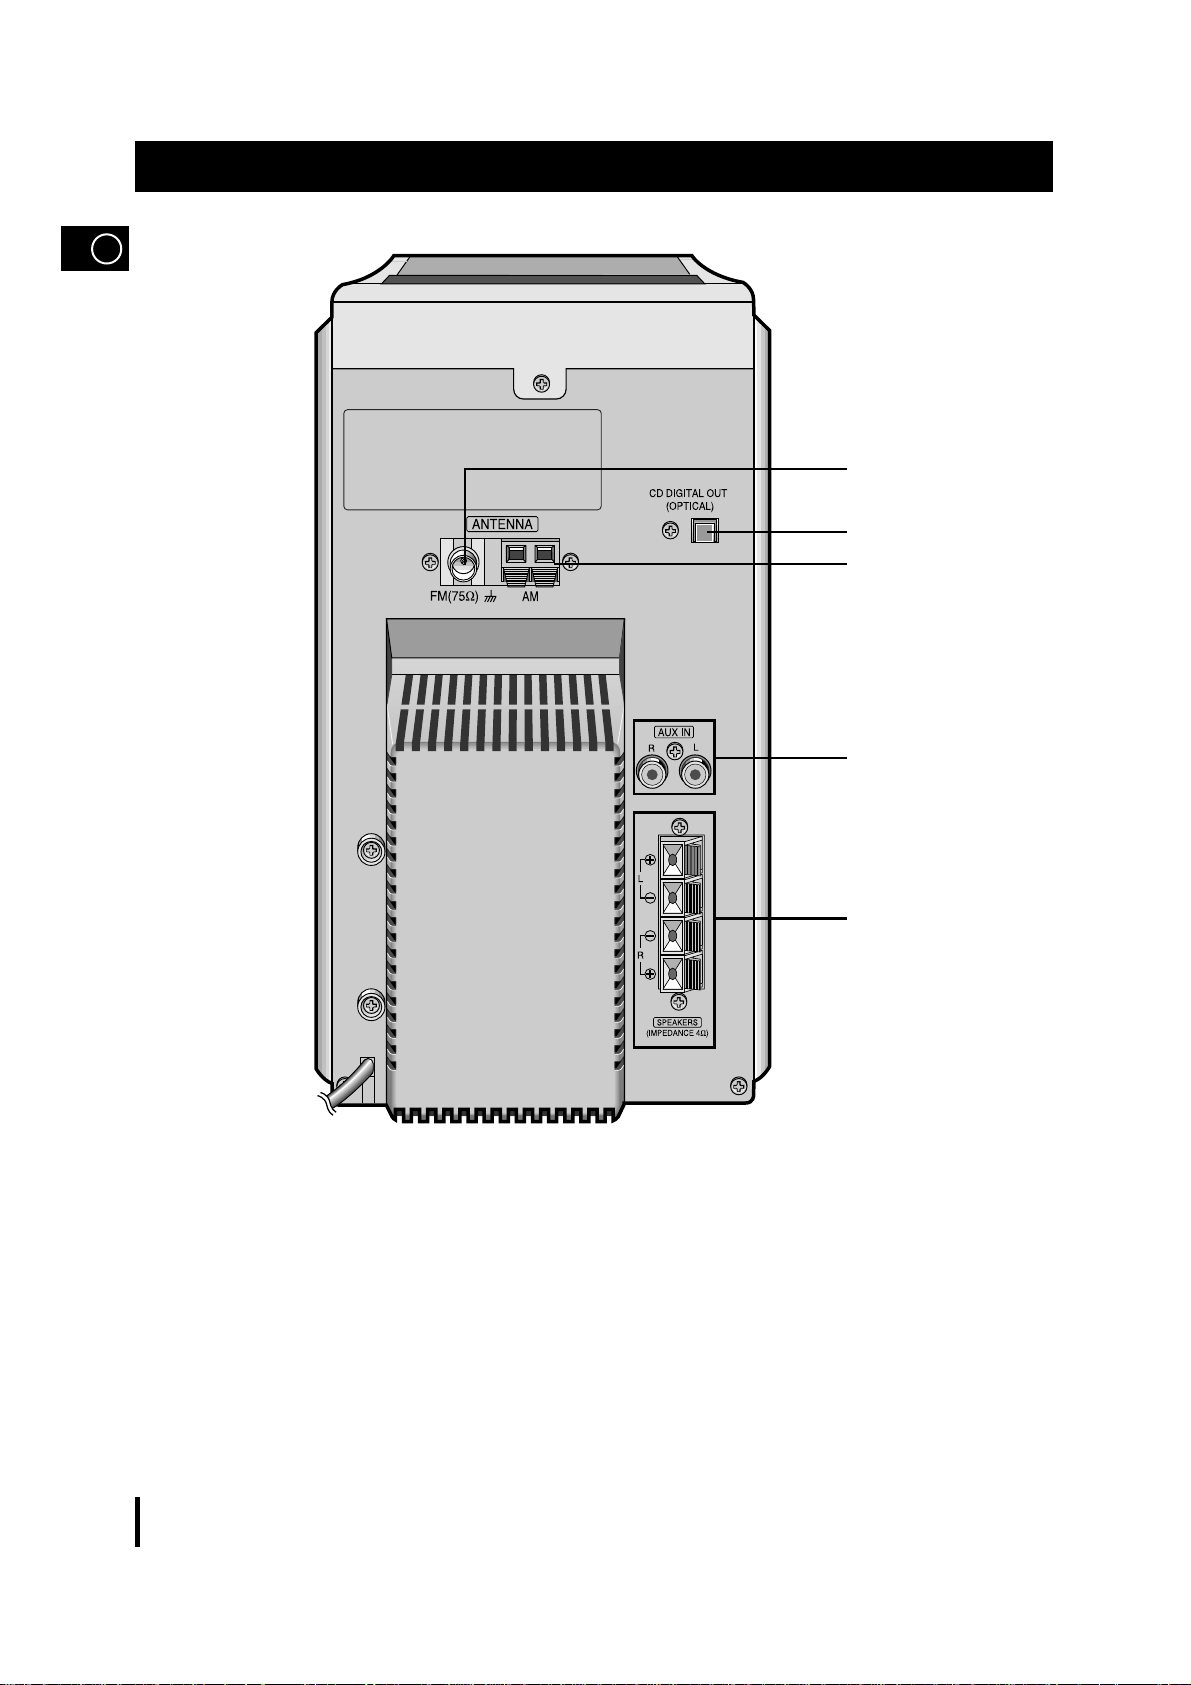
Вид задней панели
1.
ГНЕЗДО ДЛЯ ПОДСОЕДИНЕНИЯ ЕМ АНТЕННЫ
2.
КЛЕММЫ ДЛЯ ПОДСОЕДИНЕНИЯ АМ (СВ)/ДВ АНТЕННЫ
3.
ГНЕЗДО ДЛЯ ПОДСОЕДИНЕНИЯ ЕМ АНТЕННЫ (НЕ ВО ВСЕХ МОДЕЛЯХ)
4.
ДОПОЛНИТЕЛЬНЫЙ ВХОД
5.
КЛЕММЫ ДЛЯ ПОДСОЕДИНЕНИЯ ГРОМКОГОВОРИТЕЛЕЙ
6.
ПЕРЕКЛЮЧАТЕЛЬ НАПРЯЖЕНИЯ (НЕ ВО ВСЕХ МОДЕЛЯХ)—————-НА ДНИЩЕ СИСТЕМЫ
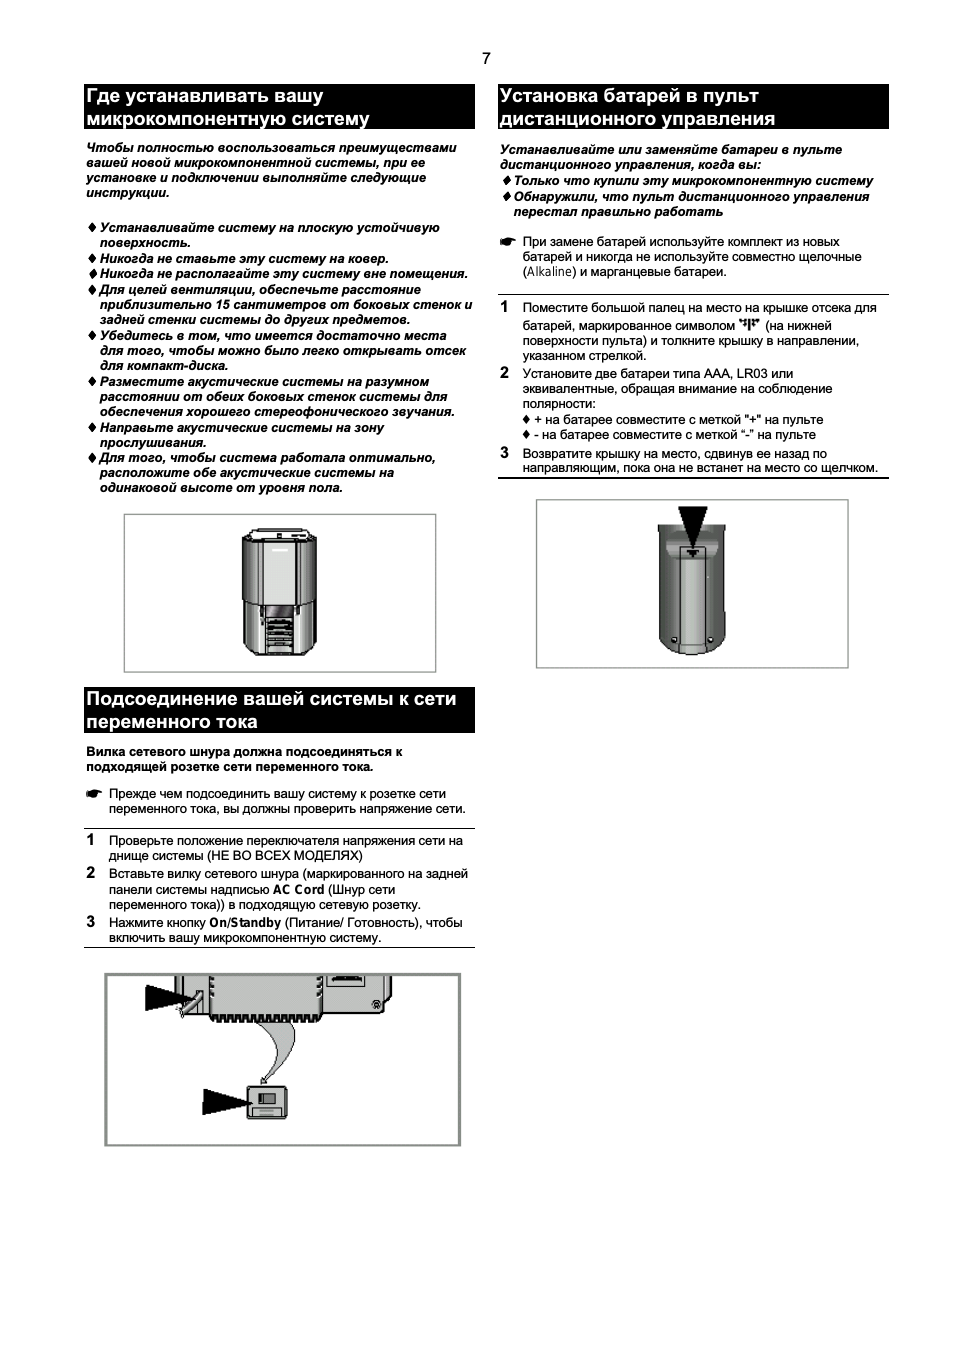
Где устанавливать вашу
микрокомпонентную систем
Чтобы полностью воспользоваться преимуществами
вашей новой микрокомпонентной системы, при ее
установке и подключении выполняйте следующие
инструкции.
♦ Устанавливайте систему на плоскую устойчивую
поверхность.
♦ Никогда не ставьте эту систему на ковер.
♦ Никогда не располагайте эту систему вне помещения.
♦ (ля целей вентиляции, обеспечьте расстояние
приблизительно 15 сантиметров от боковых стенок и
задней стенки системы до других предметов.
♦ Убедитесь в том, что имеется достаточно места
для того, чтобы можно было легко открывать отсек
для компакт-диска.
♦ Разместите акустические системы на разумном
расстоянии от обеих боковых стенок системы для
обеспечения хорошего стереофонического звучания.
♦ Направьте акустические системы на зону
прослушивания.
♦ Для того, чтобы система работала оптимально,
расположите обе акустические системы на
одинаковой высоте от уровня пола.
Подсоединение вашей системы к сети
переменного тока
Вилка сетевого шнура должна подсоединяться к
подходящей розетке сети переменного тока.
Прежде чем подсоединить вашу систему к розетке сети
переменного тока, вы должны проверить напряжение сети.
1
2
Проверьте положение переключателя напряжения сети на
днище системы (НЕ ВО ВСЕХ МОДЕЛЯХ)
Вставьте вилку сетевого шнура (маркированного на задней
панели системы надписью AC Cord (Шнур сети
переменного тока)) в подходящую сетевую розетку.
Нажмите кнопку On/Standby (Питание/ Готовность), чтобы
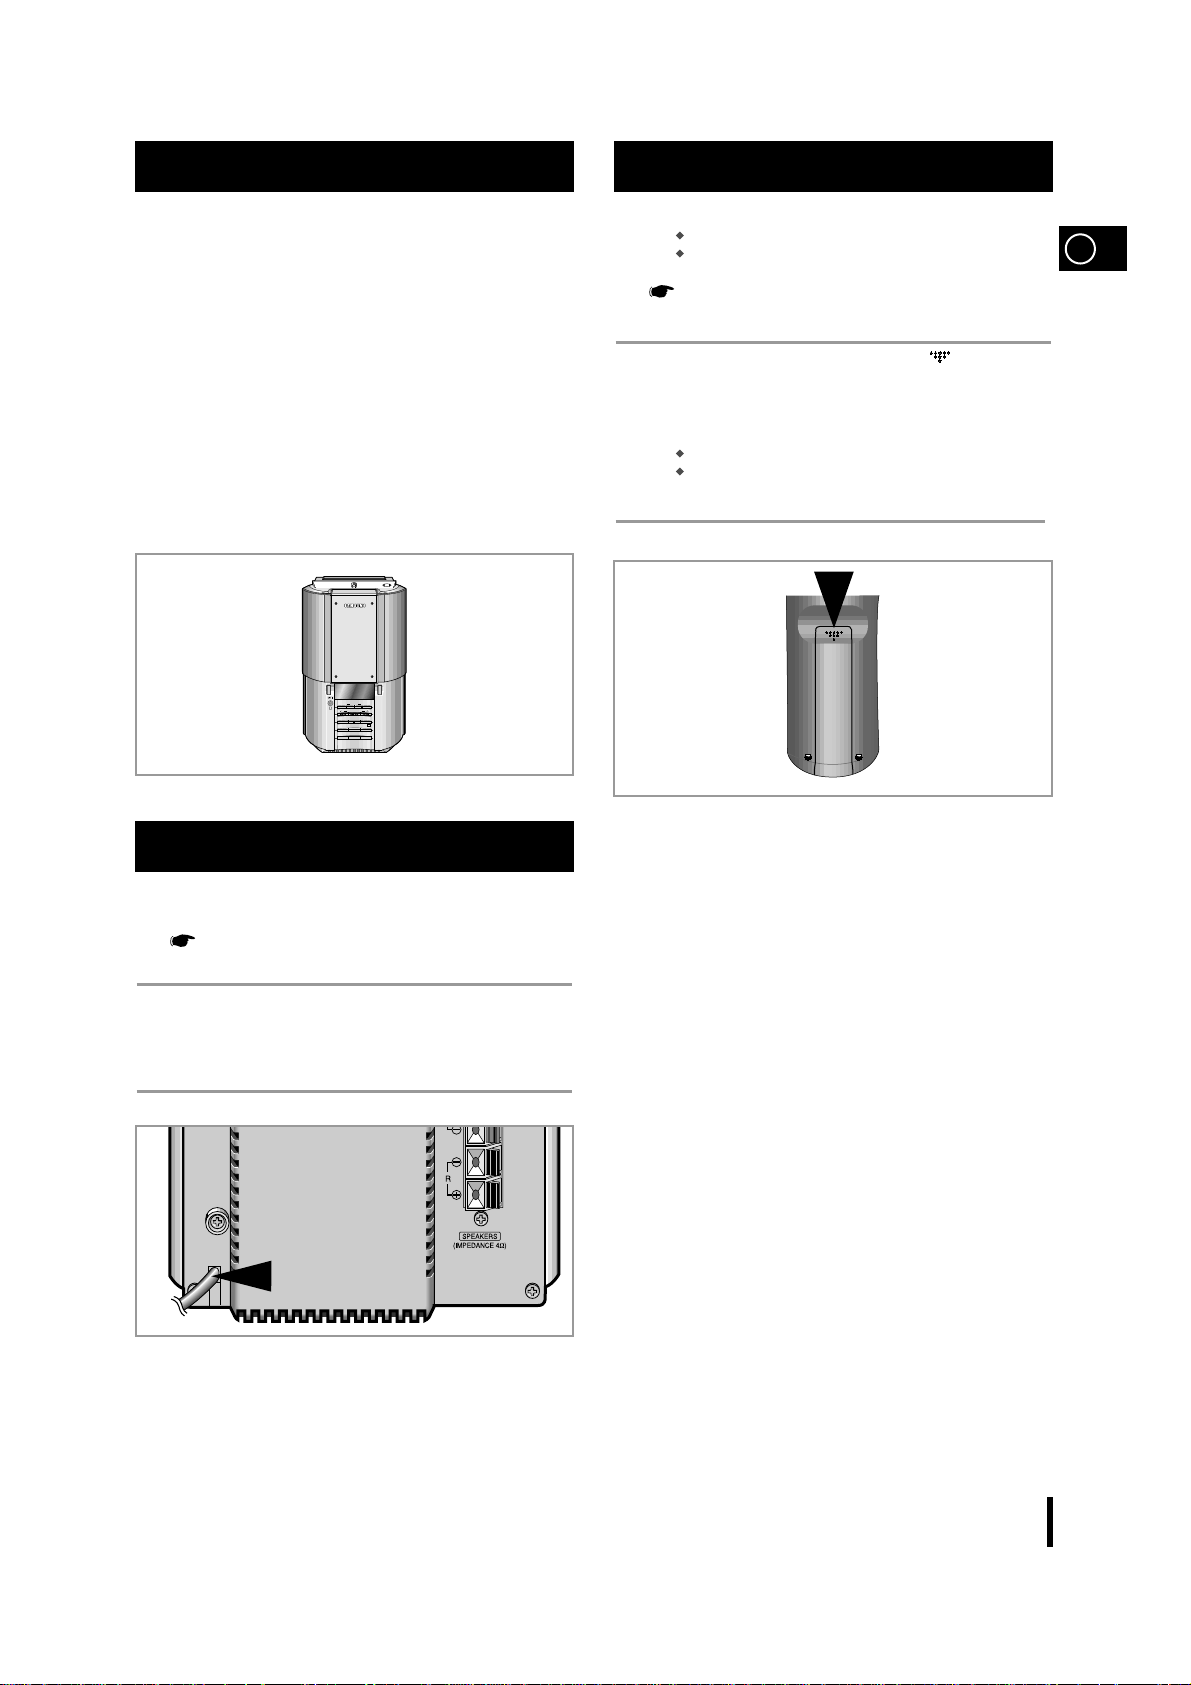
Установка батарей в пульт
дистанционного управления
Устанавливайте или заменяйте батареи в пульте
дистанционного управления, когда вы:
♦ Только что купили эту микрокомпонентную систему
♦ Обнаружили, что пульт дистанционного управления
перестал правильно работать
При замене батарей используйте комплект из новых
батарей и никогда не используйте совместно щелочные
(Alkaline) и марганцевые батареи.
1
Поместите большой палец на место на крышке отсека для
батарей, маркированное символом ’^1*’ (на нижней
поверхности пульта) и толкните крышку в направлении,
указанном стрелкой.
2 Установите две батареи типа ААА, LR03 или
эквивалентные, обращая внимание на соблюдение
полярности:
♦ 9 на батарее совместите с меткой «+» на пульте
♦ — на батарее совместите с меткой на пульте
3
Возвратите крышку на место, сдвинув ее назад по
направляющим, пока она не встанет на место со щелчком.
Подсоединение к внешнему источнику сигнала, Подсоединение акустических систем, Л указания по установке акустических систем
Страница 8 Чат поддержки
- Изображение
- Текст
Подсоединение к внешнему источнику
сигнала
Имеющийся в системе дополнительный вход может
быть использован для того, чтобы воспользоваться
преимуществами качества звука, обеспечиваемого
вашей микрокомпонентной системой, при
прослушивании сигнала от других источников.
Примеры: ♦ Телевизор
♦ Проигрыватель видеодисков
♦ Видеомагнитофон системы HI-FI stereo
^ Чтобы можно было подключить внешний источник звука, у
него должен иметься аудио выход. Кроме того, вам
потребуется соединительный кабель с разъемами типа
RCA (“тюльпан”).
1
Перед подсоединением к внешнему источнику сигнала,
установите систему в режим готовности и отсоедините ее и
внешний источник звука от сети переменного тока.
2
Подсоедините кабель для аудио сигнала к гнездам,
расположенным на задней панели микрокомпонентной
системы.
Подсоедините…
К гнезду, маркированному…
Красный штепсель………..R (правый канал)
Белый штепсель………….. L (левый канал)
^ Для получения оптимального качества звучания не
меняйте местами правый и левый каналы.
Вновь подсоедините систему к сети и нажмите кнопку
On/Standby (Питание/ Готовность), чтобы включить ее.
Выберите вход от внешнего источника звука, нажимая
кнопку FUNC. (Функция).
Результат: Дисплей показывает сообщение AUX.
Включите внешний источник звука.
Настройте громкость звука и баланс низких и высоких
частот, как вам требуется, используя:
♦ Регулятор громкости
♦ Эквалайзер
Пример: Вы можете смотреть фильм, используя
преимущества стереозвучания, как если бы вы
были в кинотеатре (при условии, что
оригинальная звуковая дорожка записана в
режиме стерео).
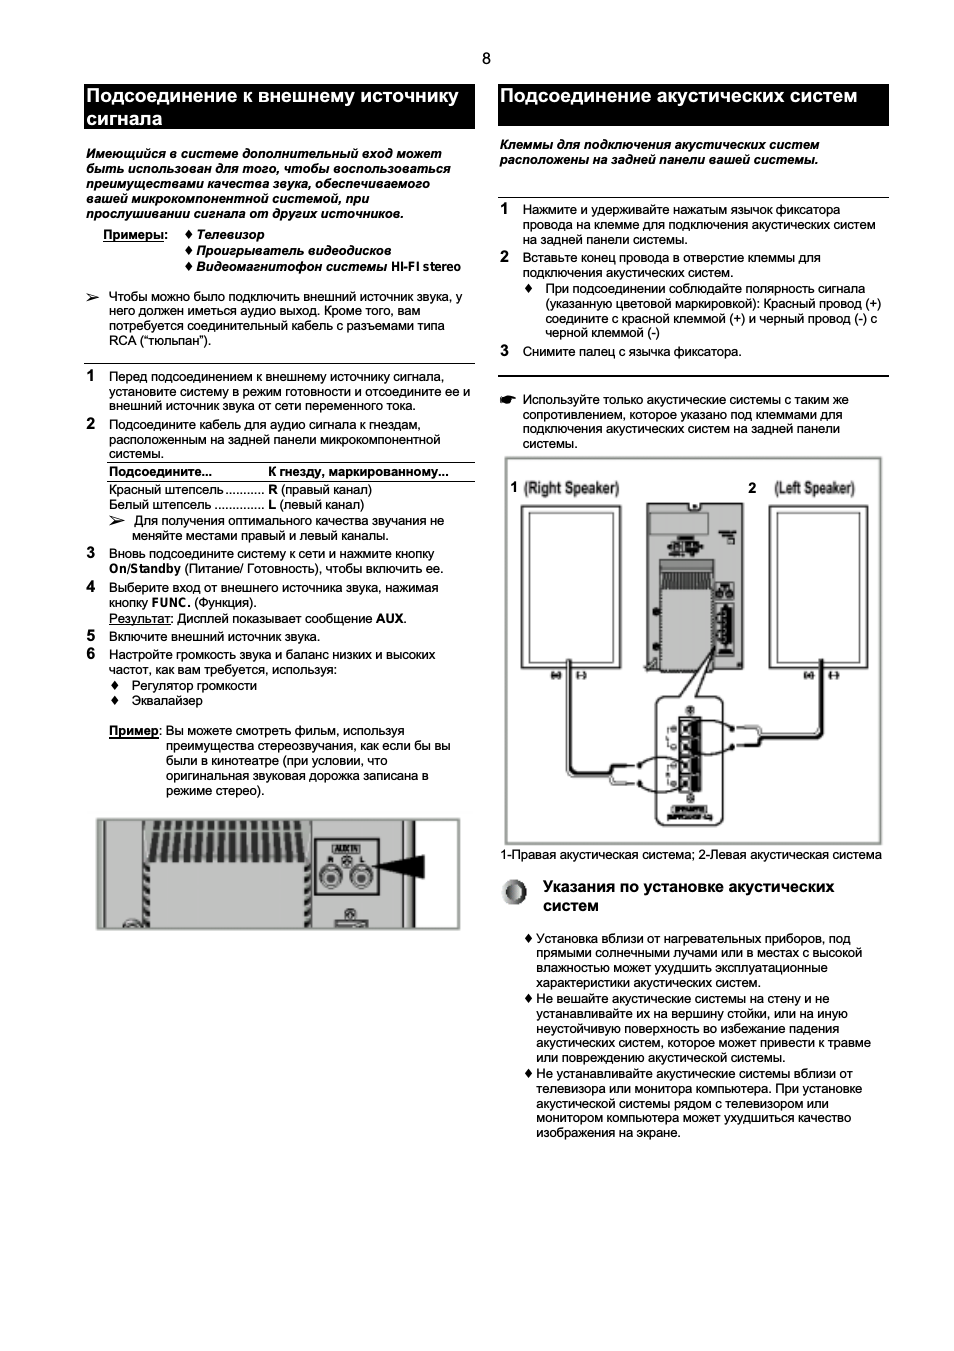
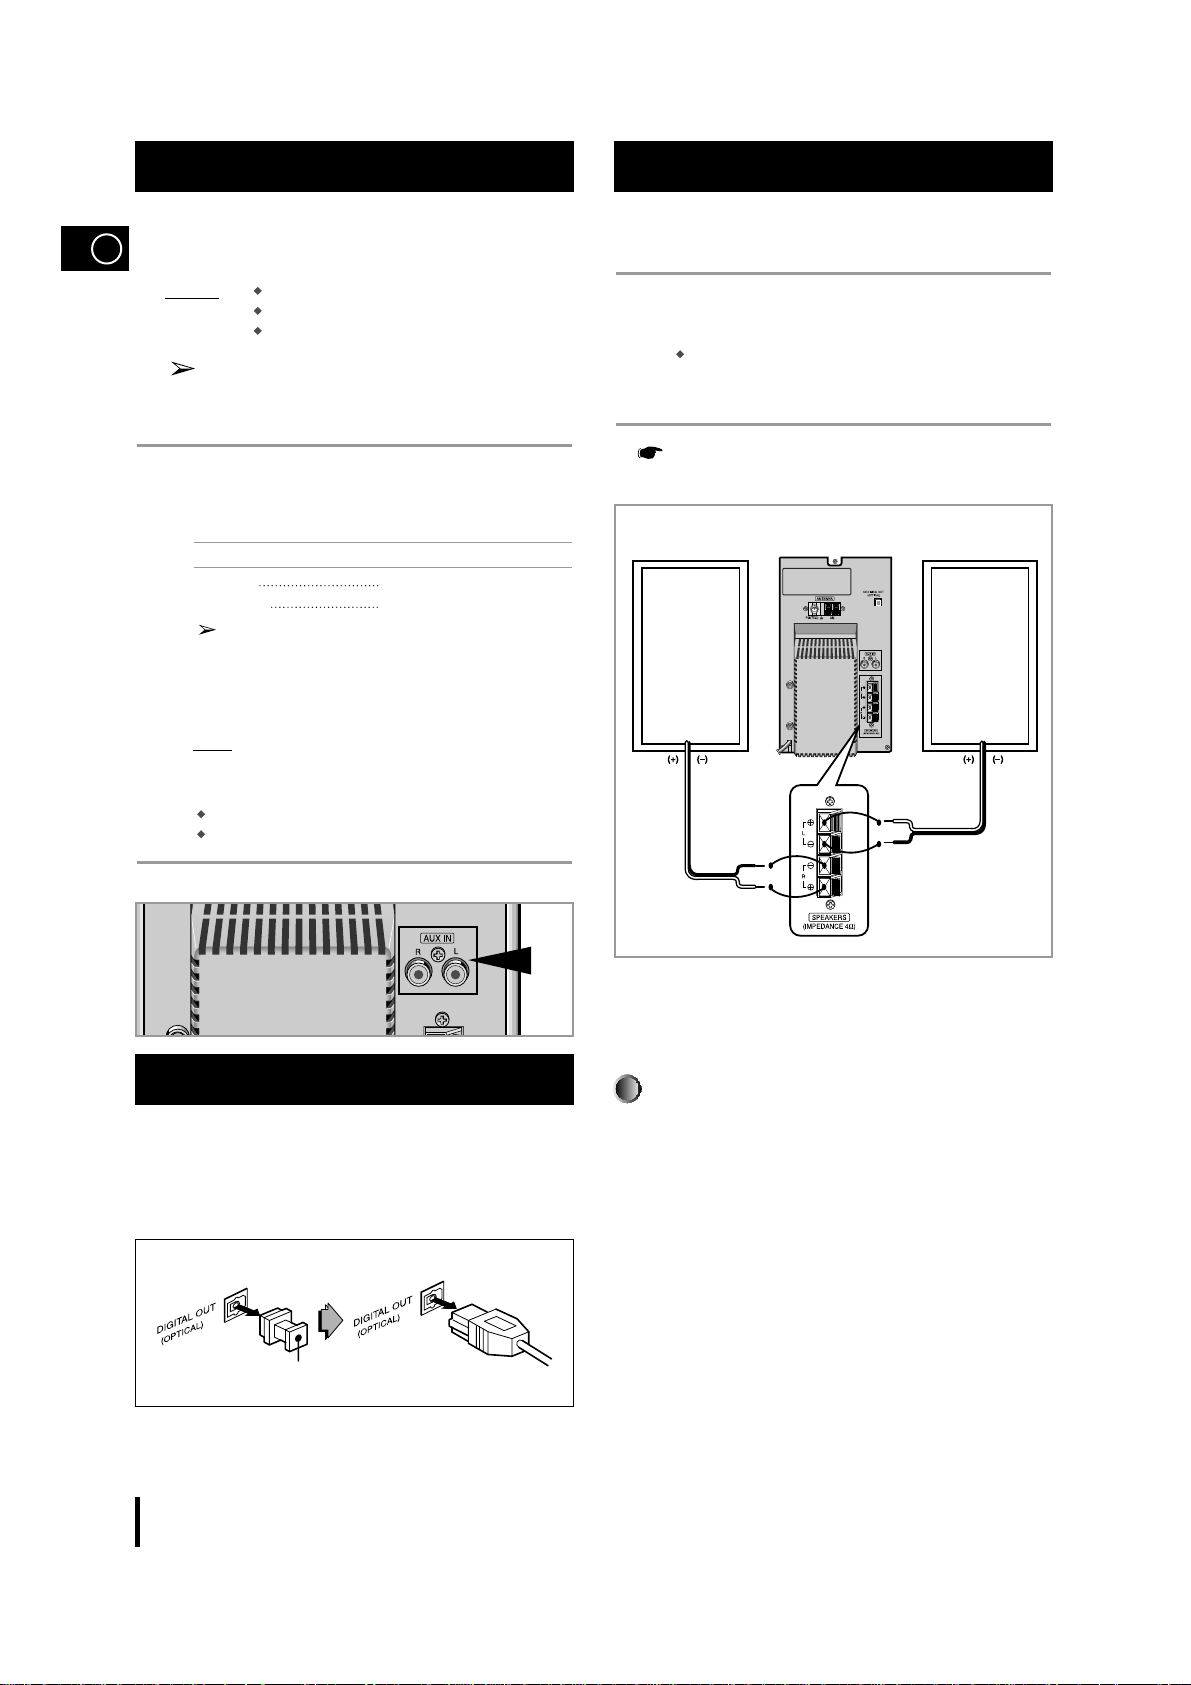
Подсоединение акустических систем
Клеммы для подключения акустических систем
расположены на задней панели вашей системы.
Нажмите и удерживайте нажатым язычок фиксатора
провода на клемме для подключения акустических систем
на задней панели системы.
Вставьте конец провода в отверстие клеммы для
подключения акустических систем.
♦ При подсоединении соблюдайте полярность сигнала
(указанную цветовой маркировкой): Красный провод (+)
соедините с красной клеммой (+) и черный провод (-) с
черной клеммой (-)
Снимите палец с язычка фиксатора.
Используйте только акустические системы с таким же
сопротивлением, которое указано под клеммами для
подключения акустических систем на задней панели
системы.
1 ^Righit Spikier)
2 (Lilt Speaker)
1-Правая акустическая система; 2-Левая акустическая система
Л
Указания по установке акустических
систем
♦ Установка вблизи от нагревательных приборов, под
прямыми солнечными лучами или в местах с высокой
влажностью может ухудшить эксплуатационные
характеристики акустических систем.
♦ Не вешайте акустические системы на стену и не
устанавливайте их на вершину стойки, или на иную
неустойчивую поверхность во избежание падения
акустических систем, которое может привести к травме
или повреждению акустической системы.
♦ Не устанавливайте акустические системы вблизи от
телевизора или монитора компьютера. При установке
акустической системы рядом с телевизором или
монитором компьютера может ухудшиться качество
изображения на экране.
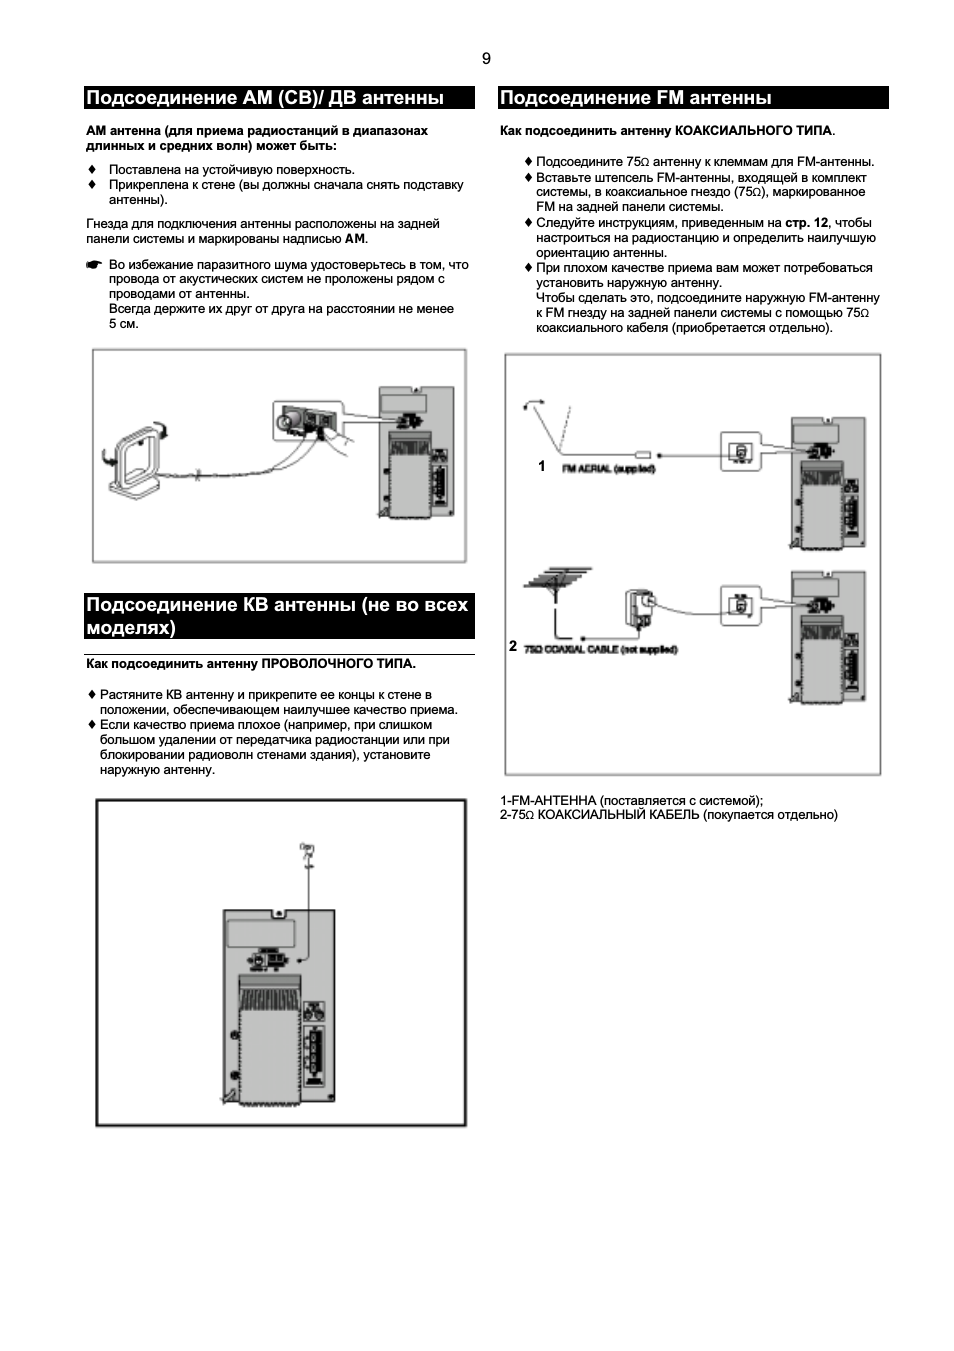
Подсоединение АМ (СВ)/ ДВ антенны
Подсоединение *М антенны
АМ антенна (для приема радиостанций в диапазонах
длинных и средних волн) может быть:
♦
Поставлена на устойчивую поверхность.
♦
Прикреплена к стене (вы должны сначала снять подставку
антенны).
Гнезда для подключения антенны расположены на задней
панели системы и маркированы надписью АМ.
Во избежание паразитного шума удостоверьтесь в том, что
провода от акустических систем не проложены рядом с
проводами от антенны.
Всегда держите их друг от друга на расстоянии не менее
5 см.
Подсоединение КВ антенны (не во всех
моделях)
Как подсоединить антенну ПРОВОЛОЧНОГО ТИПА.
♦ Растяните КВ антенну и прикрепите ее концы к стене в
положении, обеспечивающем наилучшее качество приема.
♦ Если качество приема плохое (например, при слишком
большом удалении от передатчика радиостанции или при
блокировании радиоволн стенами здания), установите
наружную антенну.
Как подсоединить антенну КОАКСИАЛЬНОГО ТИПА.
♦ Подсоедините 75п антенну к клеммам для РМ-антенны.
♦ Вставьте штепсель РМ-антенны, входящей в комплект
системы, в коаксиальное гнездо (75п), маркированное
РМ на задней панели системы.
♦ Следуйте инструкциям, приведенным на стр. 12, чтобы
настроиться на радиостанцию и определить наилучшую
ориентацию антенны.
♦ При плохом качестве приема вам может потребоваться
установить наружную антенну.
Чтобы сделать это, подсоедините наружную РМ-антенну
к РМ гнезду на задней панели системы с помощью 75п
коаксиального кабеля (приобретается отдельно).
1-
РМ-АНТЕННА (поставляется с системой);
2- 75П КОАКСИАЛЬНЫЙ КАБЕЛЬ (покупается отдельно)
10
Установка часов
■
Воспроизведение компакт-диска/диска
1
MP3-CD
в вашей системе имеются встроенные часы, которые
позволяют вам автоматически включать и выключать
систему. Вы должны установить часы:
♦ Когда вы только что приобрели
микрокомпонентную систему
♦ После сбоя питания в сети переменного тока
♦ После того, как вы отсоединяли систему от
сетевой розетки
При выполнении каждого шага у вас имеется несколько
секунд для установки требующихся значений. Если вы
превысите это время, вам придется начать всю процедуру
снова.
1
Включите систему нажатием кнопки On/Standby (Питание/
Готовность).
2 Дважды нажмите кнопку Timer/Clock (Таймер/ Часы).
Результат: Появляется сообщение CLOCK (Часы).
3
Нажмите кнопку Program/Set (Программа/ Установка).
Результат: Цифры часов на дисплее мигают.
Чтобы…
Нажмите кнопку…
Перевести часы вперед.
Перевести часы назад.
5 Когда дисплей покажет правильный час, нажмите кнопку
Program/Set.
Результат: Цифры минут на дисплее мигают.
Чтобы…
Нажмите кнопку…
Перевести минуты вперед.
Перевести минуты назад…
7 Когда будет установлено точное время, нажмите кнопку
Program/Set.
Результат: Часы начинают идти и показывают время, даже
когда система находится в режиме готовности
_____________ (Standby)._________________________________
^ Вы можете вывести на дисплей текущее время, даже когда
вы пользуетесь другой функцией системы, один раз нажав
кнопку Timer/Clock.
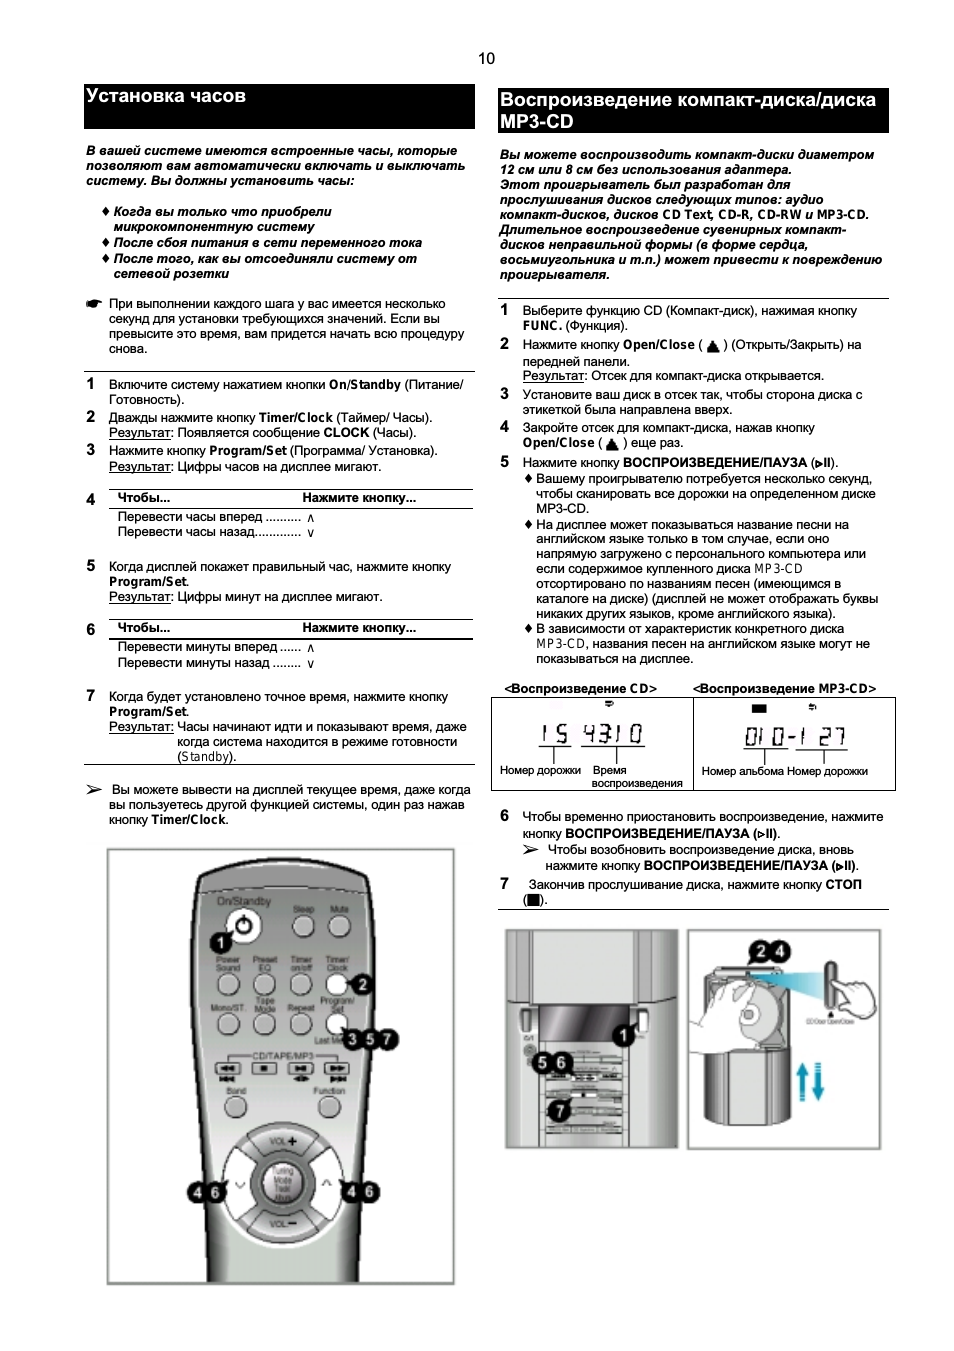
Вы можете воспроизводить компакт-диски диаметром
12 см или 3 см без использования адаптера.
Этот проигрыватель был разработан для
прослушивания дисков следующих типов: аудио
компакт-дисков, дисков CD Text, CD-R, CD-RW и MP3-CD.
Длительное воспроизведение сувенирных компакт
дисков неправильной формы (в форме сердца,
восьмиугольника и т.п.) может привести к повреждению
проигрывателя.
1
Выберите функцию CD (Компакт-диск), нажимая кнопку
FUNC. (Функция).
2
Нажмите кнопку Open/Close ( ^ ) (Открыть/Закрыть) на
передней панели.
Результат: Отсек для компакт-диска открывается.
3 Установите ваш диск в отсек так, чтобы сторона диска с
этикеткой была направлена вверх.
4
Закройте отсек для компакт-диска, нажав кнопку
Open/Close ( ^ ) еще раз.
5
Нажмите кнопку ВОСПРОИЗВЕДЕНИЕ/ПАУЗА (>11).
♦ Вашему проигрывателю потребуется несколько секунд,
чтобы сканировать все дорожки на определенном диске
MP3-CD.
♦ На дисплее может показываться название песни на
английском языке только в том случае, если оно
напрямую загружено с персонального компьютера или
если содержимое купленного диска MP3-CD
отсортировано по названиям песен (имеющимся в
каталоге на диске) (дисплей не может отображать буквы
никаких других языков, кроме английского языка).
♦ В зависимости от характеристик конкретного диска
MP3-CD, названия песен на английском языке могут не
показываться на дисплее.
<Воспроизведение СР>_____ <Воспроизведение МРЗ-СР>
Номер дорожки Время
________________ воспроизведения
Чтобы временно приостановить воспроизведение, нажмите
кнопку ВОСПРОИЗВЕДЕНИЕ/ПАУЗА (>М).
^ Чтобы возобновить воспроизведение диска, вновь
нажмите кнопку ВОСПРОИЗВЕДЕНИЕ/ПАУЗА (>М).
Закончив прослушивание диска, нажмите кнопку СТОП
(■).
25:25
Samsung MM-C430D/ C530D /C550D нет звука, не работает DVD и USB
07:31
Ремонт музыкального центра Samsung MM-39
16:36
ремонт музыкального центра
05:19
WIEŻA SAMSUNG MM L7 FILM POGLĄDOWY
12:00
Hifi Samsung MM-D530D cd-rom stuk
00:46
Samsung MM-E430D (Sound Bass Test)
Нажмите на кнопку для помощи
MICRO COMPONENT
SYSTEM
MP3-CD/CD-R/RW PLAYBACK
MM-ZL7
Instruction Manual
Safety W arnings
GB
2
CAUTION:
TO REDUCE THE RISK OF ELECTRIC
SHOCK, DO NOT REMOVE REAR COVER,
NO USER SERVICEABLE PARTS INSIDE,
REFER SERVICING TO QUALIFIED SERVICE
PERSONNEL.
RISK OF ELECTRIC
SHOCK. DO NOT OPEN
CAUTION
Wiring the Mains Power Supply Plug (UK only)
IMPORTANT NOTICE
The main lead on this equipment is supplied with a moulded plug incorporating a fuse. The value of the fuse is indicated on the pin
face of the plug and if it requires replacing, a fuse approved to BS1362 of the same rating must be used.
Never use the plug with the fuse cover removed. If the cover is detachable and a replacement is required, it must be of the same
colour as the fuse fitted in the plug. Replacement covers are available from your dealer. If the fitted plug is not suitable for the power
points in your house or the cable is not long enough to reach a power point, you should obtain a suitable safety approved extension
lead or consult your dealer for assistance. However, if there is no alternative to cutting off the plug, remove the fuse and then safely
dispose of the plug. Do not connect the plug to a main socket as there is a risk of shock hazard from the bared flexible cord.
Never attempt to insert bare wires directly into a main socket. Aplug and fuse must be used at all times.
IMPORTANT
The wires in the main lead are coloured in accordance with the following code:–
BLUE = NEUTRAL BROWN = LIVE
As these colours may not correspond to the coloured markings identifying the terminals in your plug, proceed as follows:–
The wire coloured BLUE must be connected to the terminal marked with the letter N or coloured BLUE or BLACK. The wire
coloured BROWN must be connected to the terminal marked with the letter L or coloured BROWN or RED.
WARNING: DO NOT CONNECT EITHER WIRE TO THE EARTH TERMINAL WHICH IS MARKED WITH THE LETTER E OR BY
THE EARTH SYMBOL , OR COLOURED GREEN OR GREEN AND YELLOW.
CLASS 1 LASER PRODUCT
KLASSE 1 LASER PRODUKT
LUOKAN 1 LASER LAITE
KLASS 1 LASER APPARAT
PRODUCTO LASER CLASE 1
CLASS 1 LASER PRODUCT
This Compact Disc player is classified as a
CLASS 1 LASER product.
Use of controls, adjustments or performance of procedures
other than those specified herein may result in hazardous
radiation exposure.
CAUTION-INVISIBLE LASER RADIATION WHEN OPEN
AND INTERLOCKS DEFEATED, AVOID EXPOSURE TO
BEAM.
WARNING: To reduce the risk of fire or electric shock, do
not expose this appliance to rain or moisture.
CAUTION: TO PREVENT ELECTRIC SHOCK, MATCH
WIDE BLADE OF PLUG TO WIDE SLOT, FULLY
INSERT.
This symbol indicates that dangerous voltage
which can cause electric shock is present inside
this unit.
This symbol alerts you to important operating
and maintenance instructions accompanying the
Contents
GB
3
◆ INSTALLING YOUR MICRO COMPONENT SYSTEM
Safety Warnings
……………………………………………………………………………………………………………
2
Front Panel View
…………………………………………………………………………………………………………..
4
Remote Control
…………………………………………………………………………………………………………….
5
Rear Panel View
……………………………………………………………………………………………………………
6
Where to Install Your Micro-Component System
……………………………………………………………….
7
Connecting Your System to the Power Supply
………………………………………………………………….
7
Inserting Remote Control Batteries
………………………………………………………………………………….
7
Connecting to an External Source
…………………………………………………………………………………..
8
CD Digital Out Jack
……………………………………………………………………………………………………….
8
Connecting the Loudspeakers
…………………………………………………………………………………………
8
Connecting the AM (MW)/LW Aerial
…………………………………………………………………………………
9
Connecting the FM Aerial
……………………………………………………………………………………………….
9
Setting the Clock
…………………………………………………………………………………………………………
10
◆ CD PLAYER
To replay the CD/MP3-CD
…………………………………………………………………………………………….
10
Selecting a Track
…………………………………………………………………………………………………………
11
To select the MP3-CD album and track
……………………………………………………………………………
11
Searching for a Specific Music Passage on a CD
…………………………………………………………….
12
Function to skip through 10 tracks at a time
…………………………………………………………………….
12
Last Memory Function
…………………………………………………………………………………………………..
12
Precautions When Using Compact Discs
……………………………………………………………………….
12
CD Repeat Function
…………………………………………………………………………………………………….
12
Programming the Order of Playback
………………………………………………………………………………
13
Checking and Changing Programmed Tracks
…………………………………………………………………
13
◆ TUNER
Searching for and Storing the Radio Stations
………………………………………………………………….
13
Selecting a Stored Station
…………………………………………………………………………………………….
14
Improving Radio Reception
…………………………………………………………………………………………..
14
About RDS broadcasting………………………………………………………………………………………………..15
About RDS DISPLAY function…………………………………………………………………………………………15
PTY(Program Type) indication and PTY-SEARCH function…………………………………………………16
◆ TAPE DECK
Listening to a Cassette
…………………………………………………………………………………………………
17
Selecting the Cassette Playback Mode
…………………………………………………………………………..
17
Maintaining the Sound Quality
………………………………………………………………………………………
17
Recording a Radio Programme
……………………………………………………………………………………..
18
Recording a CD with the CD Synchro Feature
………………………………………………………………..
18
Repeat (A↔B) Function
……………………………………………………………………………………………….
18
Recommendations for Recording
…………………………………………………………………………………..
18
◆ OTHER FEATURES
Timer Function
…………………………………………………………………………………………………………….
19
Cancelling the Timer
…………………………………………………………………………………………………….
19
Setting the System to Switch Off Automatically
……………………………………………………………….
20
Mute Function
……………………………………………………………………………………………………………..
20
Equalizer
…………………………………………………………………………………………………………………….
20
Power Sound function
………………………………………………………………………………………………….
21
Connecting Headphones
………………………………………………………………………………………………
21
◆ RECOMMENDATIONS FOR USE
Safety Precautions…………………………………………………………………………………………………………22
Before Contacting the After-Sales Service ………………………………………………………………………..22
Technical Specifications………………………………………………………………………………………………….23
You have just purchased
a SAMSUNG micro component system.
Please take the time to read these
instructions, as they will enable you to set up
your player easily and take full advantage
of its features.
Press
Push
Symbols
Important Note
1
9
10
11
12
13
14
15
16
2
3
4
5
6
7
8
Volume
FUNC.
CD/TAPE/TUNING
R
Tuning Mode Display
PTY
CD Repeat
Preset EQ +10 (CD)
Record
Start/Stop
Band
PROG./Set
Last Memory
CD Synchro
Tape Repeat A<—>B
Track/Album
MP3
1. CD Door Open/Close( )
2. On / Standby
3. Multi-Function(CD/TAPE/TUNING)
4. CD Repeat
5. Tuning Mode(Stop)
6. Band
7. PROG./Set / Last Memory
8. CD Synchro
9. Push Eject( )
10. Phones jack
11. Function
12. Volume control
13. Tape Repeat A<–>B /
MP3 Track / Album /
RDS Display
14. +10(CD) /RDS PTY
15. Preset EQ
16. Record Start/Stop
1
9
10
11
12
13
14
15
16
17
2
3
4
5
6
7
8
On/Standby
Sleep
CD/TAPE/MP3
Mono/ST
Band Function
Tape
Mode
Program/
Set
Last Memory
Repeat
Timer
on/off
Timer/
Clock
Preset
EQ
Power
Sound
Mute
VOL.
VOL.
Tuning
Mode
Track/
Album
1. On/Standby
2. Preset EQ
3. Power Sound
4. Mono / ST.
5. Tape Mode
6. Multi-Function (CD / TAPE / MP3)
7. Band
8. Volume Control
9. Sleep
10. Mute
11. Timer on / off
12. Timer / Clock
13. Program/Set / Last Memory
14. Repeat
15. Function
16. Radio station search
17. Tuning Mode / MP3 Track / Album
Rear Panel View
1. FM AERIAL CONNECTOR TERMINAL
2. CD DIGITALOUT JACK
3. AM(MW)/LW AERIALCONNECTOR TERMINALS
4. AUX INPUT
5. LOUDSPEAKERS CONNECTOR TERMINALS
GB
7
To take full advantage of your new MICRO component system,
follow these installation instructions before connecting the unit.
◆ Install the system on a flat, stable surface.
◆ Never place this unit on carpeting.
◆ Never locate this unit in an outdoor area.
◆ Maintain an open space of approximately 6 inches
(15 cm) on the sides and rear of the system, for
ventilation purposes.
◆ Make sure that you have enough room to open the
compact disc compartment easily.
◆ Place the loudspeakers at a reasonable distance on either
side of the system to ensure good stereo sound.
◆ Direct the loudspeakers towards the listening area.
◆ For optimum performance, make sure that both speakers
are placed at an equal distance above the floor.
Insert or replace remote control batteries when you:
Purchase the Micro component system
Find that the remote control is no longer operating
correctly
When replacing the batteries, use a new set of batteries
and never mix alkaline and manganese batteries.
1 Place your thumb on the position marked on the battery
compartment cover (rear of the remote control) and push the
cover in the direction of the arrow.
2 Insert two AAA, LR03 or equivalent batteries, taking care to
respect the polarities:
+ on the battery against + on the remote control
– on the battery against – on the remote control
3 Replace the cover by sliding it back until it clicks into position.
The main lead must be plugged into an appropriate socket.
Before plugging your system into a main socket, you must
check the voltage.
1 Plug the main lead (marked AC CORD on the rear of the
system) into an appropriate socket.
2 Press the On/Standby button to switch your Micro component
system on.
Where to Install Your Micro-Component System
Inserting Remote Control Batteries
Volume
FUNC.
CD/TAPE/TUNING
R
Tuning Mode
CD Repeat
Preset EQ +10 (CD)
Record
PTY
Display
Start/Stop
Band
PROG./Set
Last Memory
CD Synchro
Tape Repeat A<—>B
Track/Album
MP3
Connecting Your System to the Power Supply
GB
8
Connecting to an External Source
When the CD DIGITAL OUT jack is not being used
Attach the supplied dust cap.
CD Digital Out Jack
(1)
This unit can output CD digital sound signals through this jack.
Use an optical cable to connect digital audio equipment. (DAT
deck, MD recorder, etc.).
Remove the dust cap (1) from the CD DIGITAL OUT jack.Then,
connect an optical cable plug to the CD DIGITAL OUT jack.
The auxiliary input can be used to take advantage of the sound
quality of your MICRO component compact system when listening
to other sources.
Example: A television
A video disc player
A Hi-Fi stereo video cassette recorder
To connect the external source, the source must have an
audio output. In addition, you need an RCA connection
cable.
1 Set the system to standby mode and disconnect it and the external
source from the main.
2 Connect the audio cable to the rear of the micro component
compact system.
Connect the… To the connector marked…
Red jack R (right)
White jack L (left)
For optimum sound quality, do not invert the right and left
channels.
3 Plug the system back into the main socket and press On/Standby
to switch it on.
4 Select the AUX function by pressing FUNC. button.
Result
:
AUX is displayed.
5 Switch the external source on.
6 Adjust the volume and balance as required:
Volume
Equalizer
The loudspeaker connector terminals are located on the rear of
the system.
1 Press and hold the clamp of the speaker terminal on the rear of
the unit.
2 Insert the end of the speaker cord into the terminal.
Match the polarity (colors): Red (+) to red (+) and black
(–) to black (–).
3 Release the finger from the clamp.
Use only speakers with the same speaker impedance as
indicated by the speaker terminals on the rear of the unit.
Connecting the Loudspeakers
(Right Speaker)
(Left Speaker)
Directions in Installing Speaker
◆ Installation in a place near heating apparatus, under direct lay
of light or with high humidity may cause performance
degradation of the speaker.
◆ Do not install on the wall or on a high place of pole or other
unstable place to prevent any safety accident caused by falling
of the speaker.
◆ Do not take the speaker apart from TV or computer monitor.
The speaker near the TV or computer monitor may influence
the quality of the screen display.

GB
9
The AM aerial (for long and medium waves) can be:
◆ Placed on a stable surface
◆ Fixed to the wall (you must first remove the base)
The AM aerial connector terminals are located on the rear of the system and are marked AM.
To avoid noise interference, check that the loudspeaker wires do not run close to the aerial wires.
Always keep them at least 2 inches (5 cm) away.
How to connect a COAXIAL TYPE aerial.
◆ Connect a 75Ω antenna to the FM antenna terminal.
◆ Plug the connector on the FM aerial supplied into the coaxial socket (75Ω) marked FM on the rear of the system.
◆ Follow the instructions given on Pag e 1 3 to tune into a radio station, and determine the best position for the aerial.
◆ If reception is poor, you may need to install an outdoor aerial.
To do so, connect an outdoor FM aerial to the FM socket on the rear of the system using a 75Ω coaxial cable (not supplied).
Connecting the AM (MW)/LW Aerial
Connecting the FM Aerial

GB
10
Your system is equipped with a clock which allows you to turn
your system on and off automatically. You should set the clock:
When you purchase the Micro component system
After a power failure
After unplugging the unit
For each step, you have a few seconds to set the required
options. If you exceed this time, you must start again.
1 Switch the system on by pressing On/Standby.
2 Press Timer/Clock twice.
Result: CLOCK is displayed.
3 Press Program/Set.
Result: The hour flashes.
4 To… Press…
Increase the hours
ö
Decrease the hours
õ
5 When the correct hour is displayed, press Program/Set.
Result: The minutes flash.
6 To… Press…
Increase the minutes
ö
Decrease the minutes
õ
7 When the correct time is displayed, press Program/Set.
Result: The clock starts and is displayed, even when the
system is in standby mode.
You can display the time, even when you are using another
function, by pressing Timer/Clock once.
You can play 12 cm or 8 cm compact discs without an adapter.
This unit has been designed to playback the CDs: Audio CD, CD
Text, CD-R and CD-RW.
Continued use of irregular shape CDs (heart-shape, octagonal,
etc.) can damage the unit.
1 Select the CD function by pressing FUNC. button.
2 Press the Open/Close ( ) button on the front panel.
Result
: The compartment opens.
3 Place your disc in the compartment, with the label on the disc
facing upwards.
4 Close the compartment by pressing the Open/Close ( )
button again.
5 Press the PLAY/PAUSE (ˆ¨) button.
Your CD Player will take a few moments to scan through all
the tracks recorded on a particular MP3-CD.
The English name of the song may be indicated on the
display only if directly downloaded from the PC or if the
purchased MP3-CD is sorted according to titles(directory).
(Other languages besides English may not be indicated.)
The English name of the track may not be indicated
depending on the characteristics of the MP3-CD.
6 To stop playback temporarily, press the PLAY/PAUSE (ˆ¨)
button.
Press
PLAY/PAUSE (ˆ¨) again to continue playing the
disc.
7 Press the STOP (■) button when you have finished.
Setting the Clock To replay the CD/MP3-CD
On/Standby
Sleep
CD/TAPE/MP3
Mono/ST.
Band Function
Tape
Mode
Program/
Set
Last Memory
Repeat
Timer
on/off
Timer/
Clock
Preset
EQ
Power
Sound
Mute
VOL.
VOL.
Tuning
Mode
Track/
Album
2
1
7
446
6
35
<CD Playback> <
During the MP3-CD playback
>
Track Indicator
Playtime Indicator
Track Indicator
Album Indicator
Volume
FUNC.
CD/TAPE/TUNING
R
Tuning Mode
CD Repeat
Preset EQ +10 (CD)
Record
PTY
Display
Start/Stop
Band
PROG./Set
Last Memory
CD Synchro
Tape Repeat A<—>B
Track/Album
MP3
CD Door Open/Close

Volume
FUNC.
CD/TAPE/TUNING
R
Tuning Mode
CD Repeat
Preset EQ +10 (CD)
PTY
Display
Band
Tape Repeat A<—>B
Track/Album
MP3
You can select the track you wish to listen to, either when the
compact disc player is stopped or when a disc is playing.
To start playback at the beginning of the… Press…
Next track ………………………………………….
I once
Current track ……………………………………..
I once
Previous track ……………………………………
I twice
Track of your choice ……………………………
I or I
the appropriate
number of times.
To select the MP3-CD album and track
The album and track of the MP3-CD desired to listen may be
selected on stopping or during playbacks.
1
Press the Track/Album button to select «ALBUM» on the
display.
Press the , button to select Album no.
It moves by the unit of album(directory).
2
Press the Track/Album button to select «TRACK» on the display
Press the , button to select Track no.
Moves the track within the album.
If the , button is pressed more than the
number of tracks within the album, it moves to the
Main Unit
Volume
FUNC.
CD/TAPE/TUNING
R
Tuning Mode
CD Repeat
Preset EQ +10 (CD)
PTY
Display
Band
Tape Repeat A<—>B
Track/Album
MP3
Press the Track/Album button, then select ‘TRACK’ or ‘ALBUM’ and
press the , button.
If ‘TRACK’ is selected in the display, the track moves.
If ‘
ALBUM’ is selected in the display, the album moves.
Remote Control
CD/TAPE/MP3
Band Function
VOL.
VOL.
Tuning
Mode
Track/
Album
What is MP3?
Playback sequence of albums and tracks
In case of Window Explorer display.
The arrows indicates playback sequence of albums and
tracks.
Tracks with jpg, wav or doc only are not audio files and
therefore will be skipped.
MP3 means MPEG1 Layer 3, the global standard for audio
signal compression technology. It uses digital compression
technology to compress original sound data by up to 12 times
without sound quality degradation.
File Compatibility
The unit will playback files created in MP3 format
(Mpeg1.Layer3) with *.mp3 as their extension.
Files created in MP2 format (Mpeg1.Layer2) with
*
.mp2 as their extension can also be played back.
How many MP3 files can a CD-R or CD-RW disc record?
The maximum capacity of one CD-R or CD-RW disc is
680MB.
Normally, one MP3 file has a capacity of 4MB, therefore
approximately 170 files can be recorded on a single disc.
Regarding the playback of CD-R/RW
In the case of an original CD-R(Recordable) recorded in
audio CD format, CD-RW(Rewritable) and editing by
the user, playback is processed on the respective
completed status. (The player may not be played back
according to the characteristics of the CD or recorded
status.)
The CD-RW is comparably less reflexive than CD which
causes more time delay to read.
Kevin01.mp3
Album 01
(E) CD-ROM drive
Kevin02.mp3
Kevin03.mp3
Kevin04.mp3
Kevin.jpg
Life.doc
Skipped
Album 02
Summer05.mp3
Summer06.mp3
Garden.mp3
Garden.mp3
Album 04
Album 03
Michael07.mp3
Michael08.mp3
Water.mp3
Water.mp3
Album 05
Skipped
Kenny01.wav
Kenny02.wav
Butterfly.mp3
Album 06
Piano14.mp3
John15.mp3
Album 07
Tape Repeat A<—>B
Tuning
Mode
Track/
Album

GB
12
Precautions When Using Compact Discs
CD Repeat Function
To guarantee hours of enjoyable listening with your compact discs:
Always hold them by the edges to avoid leaving
fingerprints on the shiny surface
Always replace them in their cases after listening to them
Do not fix paper or adhesive tape to the discs and do not
write on the label
Clean the player with a special cleaning disc
You can repeat:
A specific track on a compact disc
All tracks on the compact disc
1 Press the Repeat button.
To repeat the… Press Repeat…
Current track indefinitely
Once (REPEAT 1 is displayed)
Disc
Twice (REPEAT ALL is displayed)
2 When you wish to stop the Repeat function, press Repeat
a third time.
Result: REPEAT is no longer displayed and the function is
cancelled.
On/Standby
Sleep
CD/TAPE/MP3
Mono/ST.
Tape
Mode
Program/
Set
Last Memory
Repeat
Timer
on/off
Timer/
Clock
Preset
EQ
Power
Sound
Mute
Volume
FUNC.
CD/TAPE/TUNING
R
Tuning Mode
CD Repeat
Preset EQ +10 (CD)
PTY
Display
Band
Tape Repeat A<—>B
Track/Album
MP3
Searching for a Specific Music Passage on a CD
When listening to a compact disc, you can quickly search for a
specific music passage on a track.
To search through the tracks… Press and hold down…
Forwards …………………………………………..
for at least one second
Backwards …………………………………………
for at least one second
It is recommended that you turn the volume down before using
this function.
Function to skip through 10
tracks at a time
Press the +10 button briefly while playing back a CD.
The track 10 tracks after the current one will then be
played back.
Example:
If you want to select track 43 during playback of track
15, press the +10 button three times, and then press
the Ibutton three times.
15 ➝20 ➝30 ➝40 ➝41 ➝42 ➝43
CD/TAPE/MP3
Mono/ST.
Tape
Mode
Program/
Set
Last Memory
Repeat
Timer
on/off
Timer/
Clock
Preset
EQ
Power
Sound
Last Memory Function
*This function is only available during playback of a MP3-CD.
When CD playback is selected again after your CD player has been
stopped or turned off, this function allows playback from the start of
the track that you last listened to.
Press the Last Memory button while your
MP3-CD
is being played
back. The
Last ON and OFF may be repeatedly selected.

GB
13
You can store up to:
15 FM stations
8 MW stations
7 LW stations
1 Switch the system on by pressing On/Standby.
2 Select the TUNER function by pressing FUNC. button.
3 Select the required frequency band by pressing Band button.
Result: The appropriate indication is displayed:
FM Frequency Modulation
AM(MW) Medium Wave
LW Long Wave
4 To search for a Press Tuning Mode button
station… on the front panel….
Manually
One or more times until MANUAL is displayed.
Automatically
One or more times until AUTO is displayed
.
5 Select the station to be stored by:
Pressing Tuningõor öon the front panel
or
Pressing Tuningõor öon the remote control
To scroll through the frequencies faster when searching
manually, hold down the Tuningõor öbuttons.
The automatic search procedure may stop on a frequency
that does not correspond to a radio station. If this happens,
use the manual search mode.
You can check and change your selection of tracks at any time.
You must have selected at least one track.
1 Press STOP (
■
) once if you have started listening to the
selection.
2 Press Program/Set.
Each time you press
Program/Set, the next selection
is displayed.
3 Press Program/Set one or more times until the track to be
changed is displayed.
4 Press SKIP I or I to select the new track and press
Program/Set .
5 Press CD (ˆ¨) to start listening to the selection.
Result
: The first track selected is played.
You can change one or more tracks in your initial selection.
Checking and Changing Programmed Tracks
Searching for and Storing the Radio Stations
CD/TAPE/MP3
Band Function
Last Memory
Volume
FUNC.
CD/TAPE/TUNING
R
Tuning Mode
CD Repeat
Preset EQ +10 (CD)
Record
PTY
Display
Start/Stop
Band
PROG./Set
Last Memory
CD Synchro
Tape Repeat A<—>B
Track/Album
MP3
2
3
1
5
4
5
Programming the Order of Playback
*This function dose not operate in the MP3-CD.
You can decide for yourself:
The order in which you listen to the tracks
The tracks to which you do not wish to listen
This feature can be combined with the Repeat function.
1 If necessary, stop the player by pressing STOP (
■
).
2 Press Program/Set.
Result: PROGRAM and P — 0 1 —- are displayed.
3 Select the required track by pressing the SKIP buttons:
I to move backwards through the tracks
I to move forwards through the tracks
4 Press Program/Set.
Result: P — 0 2—- is displayed.
5 To select other tracks, repeat Steps 3 and 4.
You can programme up to 24 tracks.
6 When you have finished selecting the tracks, press CD (
ˆ¨
)
to start listening to the selection, in the order in which the
tracks were programmed.
7 Press STOP (
■
) twice to cancel the selection when the disc is
playing.
CD/TAPE/MP3
Mono/ST.
Band Function
Tape
Mode
Program/
Set
Last Memory
Repeat
Band

GB
14
6 Adjust the volume by:
Pressing Volume + or -on the front panel
or
Pressing the VOL. + or -buttons on the remote control
7 Select the stereo or mono mode by pressing Mono/ST.
Result:
The STEREO indicator is displayed when selected.
8 If you do not want to store the radio station found, revert to Step
4 and search for another station.
Otherwise:
a Press Program/Set.
Result: The program number and PROGRAM are displayed
for a few seconds.
b Press Tuningõand öto assign a program number
between 1 and 15.
c Press Program/Set to store the radio station.
Result: PROGRAM is no longer displayed and the station is
stored.
9 To store any other radio frequencies required, repeat Steps 3 to 8.
The PROGRAM function can be used to assign a new
station to an existing program number.
You can listen to a stored radio station as follows:
1 Switch the system on by pressing On/Standby.
2 Select the TUNER function by pressing FUNC. button.
3 Select the required frequency band by pressing Band button.
4 Select the radio station as follows.
To listen to … Press …
A stored station a Press the Tuning Mode button until
“PRESET” is displayed.
b Tuningõand öto select the
required program.
Another station Tuningõand öuntil the
required frequency is displayed.
Press Tuning Mode again to exit the stored station
selection function.
You can improve the quality of radio reception by:
Rotating the FM or AM(MW) aerial
Testing the positions of the FM and AM(MW) aerials
before fixing them permanently
If reception from a specific FM radio station is poor,
press Mono/ST. to switch from stereo mode to mono.
The quality of the sound will be improved.
Selecting a Stored Station
Improving Radio Reception
Searching for and Storing the Radio Stations(continued)
CD/TAPE/MP3
Mono/ST.
Band Function
Tape
Mode
Program/
Set
Last Memory
Repeat
Timer
on/off
Timer/
Clock
Preset
EQ
Power
Sound
VOL.
VOL.
Tuning
Mode
Track/
Album
On/Standby
Sleep
CD/TAPE/MP3
Mono/ST.
Band Function
Tape
Mode
Program/
Set
Last Memory
Repeat
Timer
on/off
Timer/
Clock
Preset
EQ
Power
Sound
Mute
CD/TAPE/MP3
Mono/ST.
Band Function
Tape
Mode
Program/
Set
Last Memory
Repeat
Timer
on/off
Timer/
Clock
Preset
EQ
Power
Sound
Band Function
VOL.
Tuning
Tuning
Mode
Mode
Track/
Track/
Album
Album
VOL.
R
CD Repeat
Band
Last Memory
PROG./Set
VOL.
VOL.
Volume
CD/TAPE/TUNING
Tuning Mode
Preset EQ +10 (CD)
CD Synchro
Display
Tape Repeat A<—>B
Track/Album
PTY
Record
Start/Stop
FUNC.
MP3

GB
15
This unit has the RDS (Radio Data System) function, which enables for
the various information such as broadcasting station, radio text, time and
30 types of programs (News, Rock, Classic, etc.) to be received from the
FM RDS station together with normal radio signal.
1 Press the On/Standby button.
2 Receive the FM radio.
See the radio receiving method on the page 13.
FM and frequency are shown on the display
If the received station transfers the RDS information, ‘RDS’
appears automatically on the display.
3 Press the RDS Display button to select the desired RDS
mode.
Whenever the button is pressed, RDS mode changes as
follows.
The RDS function is available only in FM broadcasting.
Description on RDS function
1. PTY(Program Type) : Displays the type of programme
currently being broadcast
2. PS NAME(Program Service Name) : Indicates the name of
broadcasting station and is composed of 8 characters.
3. RT(Radio Text) : Decodes the text broadcast by a station (if
any) and is composed of maximum 64 characters.
4.
CT(Clock Time) : Decodes the real time clock from the FM
frequency.
Some stations may not transmit PTY, RT or CT
information therefore this may not be displayed in all
cases.
5.
TA(Traffic Announcement) : When this symbol flashes it
shows that the traffic announcement is in progress.
6. EON(Enhanced Other Networks Information) : Offers the
RDS information on other networks.
About RDS broadcasting
PS NAME RT CT Current FM frequency
Volume
FUNC.
CD/TAPE/TUNING
R
Tuning Mode
CD Repeat
Preset EQ +10 (CD)
Record
PTY
Display
Start/Stop
Band
PROG./Set
Last Memory
CD Synchro
Tape Repeat A<—>B
Track/Album
MP3
1
About «PS NAME» MODE
Displays the name of broadcasting station.
Press the RDS Display button to select the PS NAME.
«PS NAME» appears on the display.
If the PS information is being received, the PS name (BBC, AFO,
NDR, etc.) is shown on the display.
If the PS information isn’t received, the original FM frequency is shown.
Even though no RDS Display button is pressed, the reception
of PS information ensues the PS name is displayed.
About ‘RT’ MODE
Displays the character transmitted from the
broadcasting station.
Press the RDS Display button to select the RT MODE.
«RT» appears on the display.
If the RT information is being received, the received information is
shown on the display.
If the RT information isn’t received, the «NO RT» is shown.
On the display.
About CT(Clock Time)
Sets the time of RDS clock.
To select the CT time, set the RDS Display button to CT MODE.
The CT information will take up to 2 minutes to be decoded
therefore the clock isn’t displayed immediately.
If there is no received CT information, «
NO CT» is displayed.
Volume
CD/TAPE/TUNING
R
Tuning Mode
CD Repeat
Preset EQ +10 (CD)
Record
PTY
Display
Start/Stop
Band
PROG./Set
Last Memory
CD Synchro
Tape Repeat A<—>B
Track/Album
MP3
About RDS DISPLAY function
CD Repeat
Band
Last Memory
PROG./Set
Volume
CD/TAPE/TUNING
Tuning Mode
Preset EQ +10 (CD)
CD Synchro
Display
Tape Repeat A<—>B
Tape Repeat A<—>B
Track/Album
PTY
Record
Start/Stop
MP3
R
Tape Repeat A<—>B
CD Repeat
Band
Last Memory
PROG./Set
Volume
CD/TAPE/TUNING
Tuning Mode
Preset EQ +10 (CD)
CD Synchro
R
Display
Tape Repeat A<—>B
Tape Repeat A<—>B
Track/Album
MP3
PTY
Record
Start/Stop

GB
16
◆
The PTY information is composed of an identification symbol, which
helps the FM radio to recognize the program type of each FM
station.
◆
The below 30 PTY information is shown on the display by pressing
the Pty button.
If the PTY MODE which agrees with the PTY MODE selected in
the course of auto-search, isn’t received, it is returned to the
first frequency at beginning the PTY SEARCH and the
auto-search and PTY SEARCH are suspended.
About PTY-SEARCH
Searches the same PTY as the program type of broadcasting
station.
1 Receive the FM radio.
See the radio receiving method on the page 8~9.
The FM and frequency appear on the display.
If the received station is transmitting the RDS information,
“RDS” lights up.
2 Press the PTY button.
The PTY MODE(NEWS, AFFAIRS, etc.) appears on the
display.
Press the TUNINGõor öbutton to select the desired
PTY MODE.
If the station is transmitting no PTY information, ‘NO PTY’
lights on the display.
When the PTY MODE is selected(The PTY MODE is
shown on the display), press the PTY KEY once again to
convert into PTY-SEARCH MODE and auto-search the
station sequentially.
If the PTY MODE received in the course of auto-search
agrees with the selected PTY MODE, the auto-search
stops and the PTY-SEARCH is finished.
PTY(Program Type) indication and
PTY-SEARCH function
Display
NEWS
AFFAIRS
INFO
SPORT
EDUCATE
DRAMA
CULTURE
SCIENCE
VARIED
POP M
ROCK M
M.O.R.M
LIGHT M
CLASSIC
OTHER M
WEATHER
FINANCE
CHILDREN
SOCIAL A
RELIGION
PHONE IN
TRAVEL
LEISURE
JAZZ
COUNTRY
NATIONAL M
OLDIES
FOLK M
DOCUMENT
TEST
Program Type
• News including an announced opinion and report
• Several matters including a current incident, documentary,
discussion and analysis.
• Information including weights and measures, returns and fore-
cast, matters interesting the customer, medical information, etc.
• Sports
• Education
• Drama-Radio serial, etc.
• Culture-National or local culture including the religious problem,
social science, language, theater,etc.
• Natural science and technology
• Others-Speech, amusing program (quiz, game), interview,
comedy and satirical play, etc.
• Pop music
• Rock music
• M.O.R- Comfortable music, occasionally vocal or piece
• Light classical music- Classical music and instrumental
and chorus music
• Heavy classical music-Orchestra music, symphony, chamber
music and opera
• Other music — Jazz, R&B country music
• Weather
• Finance
• Children’s programmes
• Social affairs
• Religion
• Phone in
• Travel
• Leisure
• Jazz Music
• Country Music
• National Music
• Oldies Music
• Folk Music
• Documentary
• Alarm Test
Volume
FUNC.
CD/TAPE/TUNING
R
Tuning Mode
CD Repeat
Preset EQ +10 (CD)
Record
PTY
Display
Start/Stop
Band
PROG./Set
Last Memory
CD Synchro
Tape Repeat A<—>B
Track/Album
MP3
+10 (CD)

GB
17
1 Switch the system on by pressing On/Standby.
2 Select the TAPE function by pressing FUNC. on the front panel.
3 Open the cassette deck by pushing on the corner of the cover
marked Push Eject until you hear a click and then releasing it.
4 Insert the pre-recorded cassette with the open edge of the
tape facing downwards.
5 Close the deck by pushing on it until it clicks into place.
6 To listen to… Press…
Side A
ˇˆ
Side B
ˇˆ
Result: The cassette starts playing.
7 To… Press…
Adjust the volume VOL.+ or – (or the
Volume + or – buttons
on the front panel)
Stop the playback or search STOP (■)
8 When the cassette is stopped, select one of the following
functions as required.
To… Press…
Rewind the cassette
Fast-forward the cassette
The cassette player stops automatically when the
beginning or end of the cassette is reached.
Your micro audio system has three cassette playback modes which
enable you to listen to both sides of a cassette automatically.
You can select this function during playback or when the
cassette is stopped.
Press Tape Mode one or more times to display the required symbol.
When the display The system plays back…
indicates…
One side of the cassette and then stops.
One side of the cassette
The other side of the cassette and then stops
Both sides of the cassette indefinitely (both sides
are played one after the other until you stop the
player).
◆ Heads (
①
)
◆ Roller (
②
)
◆ Drive capstan (
③
)
To guarantee hours of enjoyable listening with your cassettes:
◆
Check that the tape in the cassette is always sufficiently taut.
◆
Store your cassettes in a clean place, out of direct sunlight,
where they will not be exposed to high temperatures.
◆
Avoid using 120-minute cassettes as they are extremely fragile.
Listening to a Cassette
Selecting the Cassette Playback Mode
Maintaining the Sound Quality
CD/TAPE/MP3
Mono/ST.
Band Function
Tape
Mode
Program/
Set
Last Memory
Repeat
Timer
on/off
Timer/
Clock
Preset
EQ
Power
Sound
Volume
R
CD/TAPE/TUNING
Tuning Mode
CD Repeat
Preset EQ +10 (CD)
Band
Last Memory
CD Synchro
PROG./Set
FUNC.
Display
Tape Repeat A<—>B
Track/Album
MP3
PTY
Record
Start/Stop
Tape
Mono/ST.
Repeat
Mode
CD/TAPE/MP3
Band Function
Program/
Set
Last Memory
VOL.
VOL.
Tuning
Mode
Track/
Album
VOL.
VOL.

GB
18
Record on normal bias cassettes only.
To prevent erasing a cassette that you wish to keep,
remove the safety tabs on the upper edge of the
cassette. To re-record a cassette, where the tabs
have been broken, simply cover the openings with
adhesive tape.
It is an infringement of copyright laws to copy
records and pre-recorded cassettes or to re-record
them in any form without the permission of the
owners of the corresponding copyright.
You can record a radio programme of your choice and listen to it
at a later date.
1 Insert a blank cassette in the cassette deck.
2 Select the TUNER function by pressing FUNC. button.
3 Select the radio station that you wish to record by pressing
Tuningõor ö.
4 To start recording, press the Record Start/Stop button.
Result: Recording starts immediately.
5 When you wish to stop recording, press the Record Start/Stop
button.
You can record a compact disc on a cassette.
1 Insert a blank cassette in the cassette deck.
2 Select the CD function by pressing FUNC. button.
3 Load a compact disc.
4 Press the CD Synchro button.
Result
: The first track on the disc is played and the player
starts recording automatically (synchronised
recording).
5 When you have finished recording, press the STOP (
■
) button.
Recording a Radio Programme
Recording a CD with the CD Synchro Feature
Recommendations for Recording
Volume
FUNC.
CD/TAPE/TUNING
R
Tuning Mode
CD Repeat
Preset EQ +10 (CD)
Record
PTY
Display
Start/Stop
Band
PROG./Set
Last Memory
CD Synchro
Tape Repeat A<—>B
Track/Album
MP3
Volume
FUNC.
CD/TAPE/TUNING
R
Tuning Mode
CD Repeat
Preset EQ +10 (CD)
Record
PTY
Display
Start/Stop
Band
PROG./Set
Last Memory
CD Synchro
Tape Repeat A<—>B
Track/Album
MP3
5
2
4
When you select TAPE Repeat (A↔B) playback, the music
passages to which you were listening is repeated 3 times.
1 Press TAPE(ˇˆ) button.
Result
: The TAPE player starts playing.
2 Press Tape Repeat (A↔B) button.
Result: The indications appear: START
The flashes appear: A↔B
A Time is memorized.
3 Press Tape Repeat (A↔B) button.
Result
: The indications appear:
END
B Time is memorized.
Your selected passages are repeated 3 times.
4 When you have finished the Repeat playback,
Press Tape Repeat (A↔B) .
Tape Repeat (A↔B) Function
Volume
FUNC.
CD/TAPE/TUNING
R
Tuning Mode
CD Repeat
Preset EQ +10 (CD)
Record
PTY
Display
Start/Stop
Band
PROG./Set
Last Memory
CD Synchro
Tape Repeat A<—>B
Track/Album
MP3
1
423
*This function dose not operate in the MP3-CD.
CD/TAPE/MP3
Band Function
VOL.
Tuning
Mode
Track/
Album
VOL.
Start/Stop
Tape Repeat A<—>B
CD Synchro

GB
19
The timer enables you to switch the system on or off at specific times.
Example: You wish to wake up to music every morning.
If you no longer want the system to be switched on or off
automatically, you must cancel the timer.
Before setting the timer, check that the current
time is correct.
For each step, you have a few seconds to set
the required options. If you exceed this time,
you must start again.
1 Switch the system on by pressing On/Standby.
2 Press Timer/Clock until TIMER is displayed.
3 Press Program/Set.
Result: ON TIME is displayed (instead of the equalizer
symbols) for a few seconds, followed by any
switch-on time already set; you can set the timer
switch-on time.
4 Set the timer switch-on time.
a Set the hour by pressing Tuning
õ
and ö.
b Press Program/Set.
Result: The minutes flash.
c Set the minutes by pressing Tuning
õ
and ö.
d Press Program/Set.
Result: OFF TIME is displayed (instead of the equalizer
symbols) for a few seconds, followed by any
switch-off time already set; you can now set the
timer switch-off time.
5 Set the timer switch-off time.
a Set the hour by pressing Tuning
õ
and ö.
b Press Program/Set.
Result: The minutes flash.
c Set the minutes by pressing Tuning
õ
and ö.
d Press Program/Set.
Result:VOL XX is displayed, where XX corresponds to
the volume already set.
6 Press Tuning
õ
and öto adjust the volume level and press
Program/Set.
Result: The source to be selected is displayed.
7 Press Tuning
õ
and öto select the source to be played
when the system switches on.
If you select… You must also…
TAPE (cassette) Insert a recorded cassette in one of
the decks before setting the system
to standby.
TUNER (radio) a Press Program/Set.
b Select a preset station by pressing
T uning õand ö.
CD (compact disc) a Load a compact disc.
8 Press On/Standby to set the system to standby mode.
Result
:
is displayed to the bottom left of the time, indicating
that the timer has been set. The system will switch on
and off automatically at the required times.
If the timer switch on and off times are identical, the word
ERROR is displayed.
After having set the timer, it will start automatically as shown by
the indication on the display. If you no longer wish to use the
timer, you must cancel it.
You can stop the timer at any time (system on or in standby
mode).
To… Press Timer On/Off…
Cancel the timer Once.
Result
: is no longer displayed.
Restart the timer Twice.
Result: is displayed again.
Timer Function
Cancelling the Timer
On/Standby
Sleep
CD/TAPE/MP3
Mono/ST.
Band Function
Tape
Mode
Program/
Set
Last Memory
Repeat
Timer
on/off
Timer/
Clock
Preset
EQ
Power
Sound
Mute
VOL.
VOL.
Tuning
Mode
Track/
Album
On/Standby
Sleep
CD/TAPE/MP3
Mono/ST.
Tape
Mode
Program/
Set
Last Memory
Repeat
Timer
on/off
Timer/
Clock
Preset
EQ
Power
Sound
Mute

GB
20
While listening to a compact disc or a cassette, you can set the
system to switch off automatically.
Example
: You wish to go to sleep to music.
1 Press Sleep.
Result: The following indications are displayed:
2 Press Sleep one or more times to indicate how long the
system should continue playing before it switches off:
At any time, you can:
Check the remaining time by pressing Sleep.
Change the remaining time by repeating steps 1 and 2.
3 To cancel SLEEP function, press Sleep one or more times
until OFF is displayed.
You can turn the sound off temporarily on your system.
Example
:You wish to answer a telephone call
1 Press Mute.
2 To switch the sound back on(at the same volume as before),
press Mute again or the Volume buttons.
Your micro audio system is equipped with a preset equalizer that
enables you to choose the most appropriate balance between treble
and bass frequencies, according to the type of music to which you
are listening.
Press the Preset EQ button one or more times until the required option
is selected.
To obtain a… Select…
Standard balance (linear) PASS
Balance suitable for Dance club D. CLUB
Balance suitable for Hall HALL
Balance suitable for Stadium STADIUM
Balance suitable for rock music ROCK
Balance suitable for pop music POP
Balance suitable for classical music CLASSIC
Result: The corresponding indication is displayed.
Setting the System to Switch Off Automatically
Mute Function
Equalizer
90 MIN 60 MIN 45 MIN
OFF 15 MIN 30 MIN
On/Standby
Sleep
Mono/ST.
Tape
Mode
Program/
Set
Last Memory
Repeat
Timer
on/off
Timer/
Clock
Preset
EQ
Power
Sound
Mute
On/Standby
Sleep
Mono/ST.
Tape
Mode
Program/
Set
Last Memory
Repeat
Timer
on/off
Timer/
Clock
Preset
EQ
Power
Sound
Mute
Volume
FUNC.
CD/TAPE/TUNING
R
Tuning Mode
CD Repeat
Preset EQ +10 (CD)
Record
PTY
Display
Start/Stop
Band
PROG./Set
Last Memory
CD Synchro
Tape Repeat A<—>B
Track/Album
MP3
Preset EQ

GB
21
This machine is equipped with the function of Power Sound which
amplifies bass treble output to twice as much for powerful real
sound.
1 Press the Power Sound button.
Result: P, SOUND is displayed for a few seconds.
A more powerful resonant sound is diffused.
2 To cancel this function, press Power Sound button again.
You can connect a set of headphones to your micro component
system so that you can listen to music or radio programs without
disturbing other people in the room. The headphones must have a
3.5 ø connector or appropriate adapter.
Connect the headphones to the Phones connector on the front panel
(bottom left corner).
Result: The loudspeakers are no longer used for sound output .
Prolonged use of headphones at a high volume may damage
your hearing.
Power Sound function Connecting Headphones
On/Standby
Power
Sound
Mono/ST.
Preset
EQ
Tape
Mode
Sleep
Timer
on/off
Repeat
Mute
Timer/
Clock
Program/
Set
Last Memory

GB
22
The following diagrams illustrate the precautions to be taken
when using or moving your Micro component system.
Safety Precautions
Volume
FUNC.
CD/TAPE/TUNING
R
Tuning Mode
CD Repeat
Preset EQ +10 (CD)
Record
PTY
Display
Start/Stop
Band
PROG./Set
Last Memory
CD Synchro
Tape Repeat A<—>B
Track/Album
MP3
Volume
FUNC.
CD/TAPE/TUNING
R
Tuning Mode
CD Repeat
Preset EQ +10 (CD)
Record
PTY
Display
Start/Stop
Band
PROG./Set
Last Memory
CD Synchro
Tape Repeat A<—>B
Track/Album
MP3
Ambient operating conditions:
Ambient temperature 5°C-35°C
Humidity 10-75%
Do not expose the unit to direct sun
radiation or other heat sources.
This could lead to overheating and
malfunction of the unit.
Do not place potted plants or vases on
top of the unit. Moisture entering the
unit could lead to dangerous electric
shock and cause equipment damage.
In such events immediately disconnect
the power cord from the socket.
During thunderstorms, disconnect
the power cord from the socket.
A voltage surge due to lightning
could damage the unit.
Remove the batteries from the
remote control, if not used for any
extended periods.
Leaking batteries can cause serious
damage to the remote control.
When using headphones, take care
not to listen at excessive volumes.
Extended use of headphones at
high volumes will lead to hearing
damage.
Do not remove any equipment panels.
The inside of the unit contains live
components, which cause electric
shock.
Do not place heavy items on the
power cord. Power cord damage
can lead to damage of the
equipment (fire hazard) or cause
electric shock.
Before Contacting the After-Sales Service
It always takes a little time to become familiar with a new appliance.
If you have any of the problems listed below, try the solutions given.
They may save you the time and inconvenience of an unnecessary
service call.
If the above guidelines do not allow you to solve the problem, take
a note of:
The model and serial numbers, normally printed on
the rear of the system
Your warranty details
A clear description of the problem
Then contact your local dealer or SAMSUNG after-sales service.
Problem
The system does not work
There is no sound
The Timer does not work
Incase it is not worked, even
the action is taken as above.
The compact disc player does not
start playing
The mp-3 CD player cannot be
played.
The tape does not start playing
The volume falls off
The cassette is not erased correctly
There is excessive wow and flutter
Reception is poor or no radio stations
are received at all
G
E
N
E
R
A
L
C
D
/
M
P
3
C
D
R
A
D
I
O
C
A
S
S
E
T
T
E
S
Checks/Explanation
• T
he power cord is not correctly plugged into a wall
socket or the wall socket is not switched on
.
• The remote control batteries need replacing or
the polarity has not been respected.
• The On/Standby button has not been pressed.
• The volume has been completely turned down.
• The correct function (TUNER, CD, TAPE, AUX)
has not been selected.
• You have connected a set of earphones.
•
The loudspeaker wires have been disconnected.
• The timer has been stopped by pressing Timer
On/Off.
Press the Preset EQ button on the front
Panel for 5 seconds in power ‘OFF’(standby), then it is returned the original position
(RESET).
• The CD function has not been selected.
• The disc has been inserted face down or is either
dirty or scratched.
• The laser sensor is dirty or dusty.
• The system has not been installed on a flat, hori-
zontal surface.
• Condensation has formed in the player; leave the
system in a warm, airy room for at least one hour.
• Use the PC to confirm if the extension is *.mp3.
• The TAPE function has not been selected.
• The cassette has not been inserted correctly.
• The cassette player has not been closed.
• The tape is either slack or broken.
• The audio heads are dirty.
• The rollers or drive capstans are dirty.
• The tape is worn.
• The TUNER function has not been selected.
• The radio frequency has not been correctly
selected.
• The aerial has been disconnected or is not facing
the right way. Turn it until you find the best orientation.
• You are in a building that blocks radio waves; you
must use an outside aerial.
FUNC.
Volume
R
CD/TAPE/TUNING
Tuning Mode
Display
CD Repeat
Tape Repeat A<—>B
Track/Album
MP3
PTY
Preset EQ +10 (CD)
Band
Last Memory
Record
CD Synchro
Start/Stop
PROG./Set
FUNC.
Volume
R
CD/TAPE/TUNING
Tuning Mode
Display
CD Repeat
Tape Repeat A<—>B
Track/Album
MP3
PTY
Preset EQ +10 (CD)
Band
Last Memory
Record
CD Synchro
Start/Stop
PROG./Set
Volume
R
CD/TAPE/TUNING
Tuning Mode
Display
CD Repeat
Tape Repeat A<—>B
Track/Album
PTY
Band
Preset EQ +10 (CD)
Last Memory
Record
CD Synchro
Start/Stop
PROG./Set
FUNC.
MP3

GB
23
Technical Specifications
SAMSUNG strives to improve its products at all times. Both the design specifications and these user
instructions are thus subject to change without notice.
RADIO
LW
Usable sensitivity 60 dB
FM
Signal/noise ratio 60 dB
Usable sensitivity 6 dB
Total harmonic distortion 1.5%
AM (MW)
Signal/noise ratio 40 dB
Usable sensitivity 54 dB
Total harmonic distortion 2%
COMPACT DISC PLAYER
Frequency range 20 Hz — 20 KHz (±1 dB)
Signal/noise ratio 90 dB (at 1 KHz) with filter
Distortion 0.05 % (at 1 KHz)
Channel separation 80 dB
Disc sizes Diameter: 120 or 80 mm. Thickness: 1.2 mm
TAPE DECK
Frequency range 125 Hz ~ 12 KHz
Signal/noise ratio 40 dB
Channel separation 35 dB
Erasing effect 60 dB
GENERAL
Output power 2×20 Watts (total harmonic distortion:10%)
Dimensions 180(W)x265(H)x270(D)mm.

THIS APPLIANCE IS MANUFACTURED BY:
AH68-00772B
Loading…
Раздел: Бытовая, кухонная техника, электроника и оборудование
Тип: Музыкальный Центр
Характеристики, спецификации
Тип загрузки дисков:
фронтальный
Экранное меню:
не русифицир.
Потребляемая мощность:
50 Вт
Разъем для наушников 3.5 мм:
1 шт
Вход оптический (Toslink):
1 шт
Тип управления:
электронный
Текстовые сообщения RDS:
Да
Цифровой тюнер:
УКВ+FM/MW/LW
Фиксированные настройки тюнера:
15 FM/8 MW/7 LW
Материал фронт. панели:
пластик
Габаритные размеры (В*Ш*Г):
28*17*32 см
Размер фронт. АС (В*Ш*Г):
28*16*24 см
Количество полос фронт. АС:
2
Акустич. оформ. фронт. АС:
фазоинвертор
Материал корпуса фронт. АС:
металл/MDF
Цвет фронтальных АС:
серый
Мощность фронтальных АС:
2 x 20 Вт
Дистанционное управление:
полное
Воспроизведение CD/-R/-RW:
Да
Инструкция к Музыкальному Центру Samsung MM-ZL7
MP3-CD/CDRRW
MM
ZL7
$%&'()&*+,-.&/0+,&*1%/+*’.,-2/.01′-/&*3--‘-
*4%&’,.,-.%/&5.61/,.&%-$+,,47*6+,,&8
,$9/135—:&;.9%/-*.$9-3&%+$,&:1&<‘1=.,->
‘+)./&:
9&9$-:*&’13+)4*+.9=9&*,19/-6+,,&0&
-)6.’-2-:..9$2&%+$,&.,+%/2;.,-.
3&9&/&.:&;.9%/-*.$9-3%&/+;.,->
?’.39/-=.$3-:9&3&:
$%&’
!
$%(
»##
)($(%*
+$)*#
9&<41:.,(@-9(/-$3
*&)0&/+,-2-‘-%&/+;.,-2
?’.39/-=.$3-:9&3&:,.
6&%1$3+89.%&%+6+,-26+,,&0&
!!»#
-)6.’-2%&66&;6(-‘-*
1$’&*-2*4$&3&8*’+;,&$9-
#
,
Samsung
!
♦
♦ ♦
♦ !»#$ # %&’()$*»$»(+»!&!!»‘)&(,
/.61%/.;6.,-2%&9.7,-3.<.)&%+$,&$9- A
-6%./.6,.8%+,.’-B
1′(96-$9+,5-&,,&0&1%/+*’.,-2 C
-6)+6,.8%+,.’- D
6.1$9+,+*’-*+9(*+@1:-3/&3&:%&,.,9,1>$-$9.:1 E
&6$&.6-,.,-.*+@.8$-$9.:43$.9-%./.:.,,&0&9&3+E
$9+,&*3+<+9+/.8*%1′(96-$9+,5-&,,&0&1%/+*’.,-2 E
&6$&.6-,.,-.3*,.@,.:1-$9&=,-31$-0,+’+ F
&6$&.6-,.,-.+31$9-=.$3-7$-$9.: F
&6$&.6-,.,-.GHIJK+,9.,,4 L
&6$&.6-,.,-.+,9.,,4I,.*&*$.7:&6.’27J L
&6$&.6-,.,-.MH+,9.,,4 L
$9+,&*3+=+$&* NO
♦
♦ ♦
♦ *»)-*,# &./$»(+ $0)$»#
&$%/&-)*.6.,-.3&:%+39P6-$3+K6-$3+MP3-CD NO
4<&/6&/&;3-,+3&:%+39P6-$3. NN
4<&/+'(<&:+-6&/&;3-,+6-$3.MP3-CD NN
&-$33&,3/.9,&0&:.$9+,+3&:%+39P6-$3. NA
«1,35-2%/&%1$3+NO6&/&;.3)+&6-,/+) NA
«1,35-2%&*9&/+%&$’.6,.8*&$%/&-)*&6-*@.8$26&/&;3- NA
./4%/.6&$9&/&;,&$9-%/--$%&'()&*+,—3&:%+39P6-$3&* NA
«1,35-2Q&*9&/3&:%+39P6-$3+Q NA
/&0/+::-/&*+,-.%&/263+*&$%/&-)*.6.,-2 NR
&,9/&'(-‘--):.,.,-.)+%/&0/+::-/&*+,,476&/&;.3 NR
♦ 1!&*
♦
♦ ♦
&-$3/+6-&$9+,5-8-)+%&:-,+,-.,+$9/&83-,+,-7*%+:29-$-$9.:4 NR
4<&/)+%&:,.,,&8/+6-&$9+,5— NB
’1=@.,-.3+=.$9*+%/-.:+ NB
♦
♦ ♦
♦ &! 20&$
/&$’1@-*+,-.3+$$.94 NC
4<&//.;-:+*&$%/&-)*.6.,-23+$$.94 NC
&66./;+,-.3+=.$9*+)*1=+,-2 NC
+%-$(%./.6+=-/+6-&$9+,5— ND
-,7/&,-)-/&*+,,+2)+%-$(3&:%+39P6-$3+ ND
«1,35-2Q&*9&/IG↔SJQ ND
.3&:.,6+5—%&)+%-$-3+$$.9 ND
♦ *3-)&43!$5))
♦ ♦
♦
«1,35-29+8:./+ NE
9:.,+6.8$9*-29+8:./+ NE
$9+,&*3+$-$9.:4,++*9&:+9-=.$3&.*43′>=.,-. NF
/.:.,,&.&93′>=.,-.)*13+IMuteJ NF
3*+’+8)./ NF
«1,35-2 Power Sound…………………………………………………………………………………………….. NL
&6$&.6-,.,-.,+1@,-3&* NL
«1,35-2:-3/&T&,+I,.*&*$.7:&6.’27J NL
♦
♦ ♦
♦ &$»(&!0 5))+»)+»./6″# !)1
./4%/.6&$9&/&;,&$9- AO
/.;6.=.:&</+U+9($2*5.,9/%&$’.%/&6+;,&0&&<$’1;-*+,-2 AO
.7,-=.$3-.7+/+39./-$9-3- AN
7 / ».$!3/ 7!» *)(&8 !)&
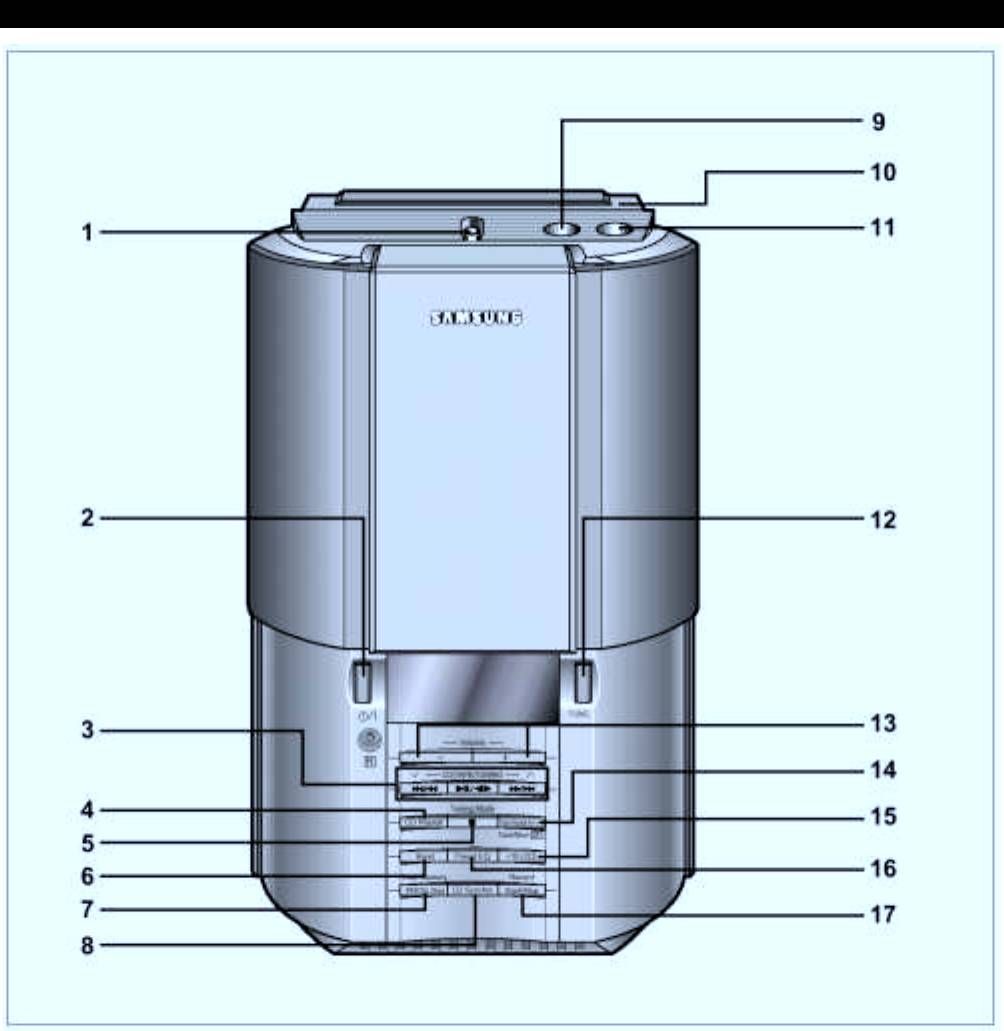
—
,&%3+&93/49-2&9$.3+6’23&:%+39P6-$3&*
A ,&%3+PushEjectI+;:-9.6’2*4</&$+3+$$.94J
9 ,&%3+-9+,-.K &9&*,&$9(
,.)6&6’2%&6$&.6-,.,-2,+1@,-3&*
: ,&0&T1,35-&,+'(,4.3,&%3-I6’2&:%+39P6-$3+K
9 ,&%3+*4<&/+T1,35-8$-$9.:4
+$$.94K>,./+J
: ,&%3-/.01′-/&*3-0/&:3&$9-
; ,&%3+Q&*9&/3&:%+39P6-$3+Q
; ,&%3+Q&*9&/IG↔SJQK&/&;3+K'(<&:6’2
< ,&%3+Q.;-:,+$9/&83-,+/+6-&$9+,5—QI9&%J
6-$3+MP3-CD
= ,&%3+*4<&/+6-+%+)&,+=+$9&99>,./+
< ,&%3+QVNOQ (3&:%+39P6-$3J
> ,&%3+/&0/+::+K$9+,&*3+K&*9&/%&$’.6,.8
= ,&%3+*4<&/+%/.61$9+,&*’.,,47,+$9/&.3
*&$%/&-)*&6-*@.8$26&/&;3-
?3*+’+8)./+
? ,&%3+$-,7/&,-)-/&*+,,&8)+%-$-3&:%+39P6-$3+
> ,&%3+,+=+’+K&$9+,&*+)+%-$-
@ ,.)6&6’2%&6$&.6-,.,-2:-3/&T&,+I,.*&*$.7
:&6.’27J
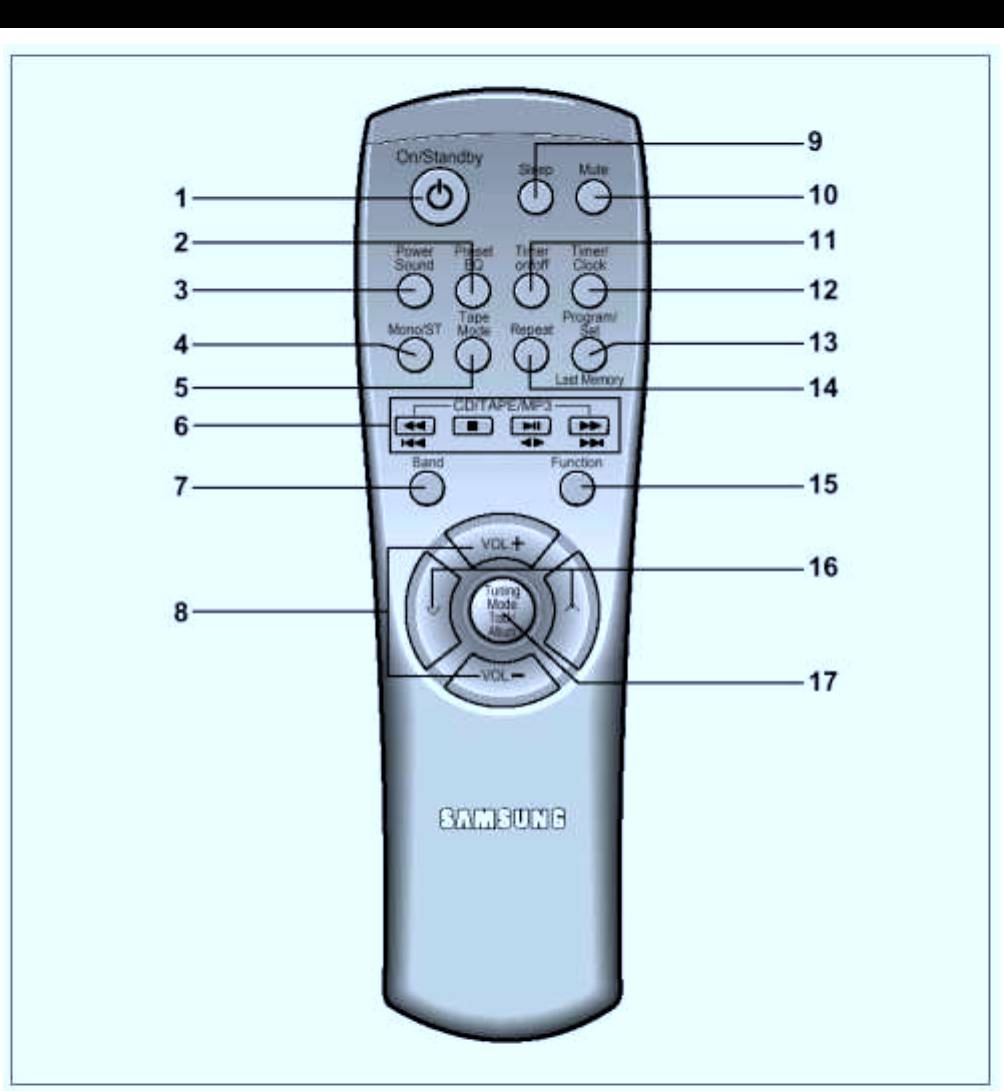
.
,&%3+-9+,-.K &9&*,&$9(
A ,&%3+*/.:.,,&0&&93′>=.,-2)*13+
9 ,&%3+*4<&/+,+$9/&.3?3*+’+8)./+
,&%3+3′>=.,-2K43′>=.,-29+8:./+
: ,&%3+ T1,35— Power Sound
9 ,&%3+1$9+,&*3-+8:./+K+$&*
; ,&%3+*4<&/+/.;-:+&,&K9./.&
: ,&%3+/&0/+::+K$9+,&*3+K&*9&/%&$’.6,.8
< ,&%3+*4<&/+/.;-:+/.*./$+3+$$.94
*&$%/&-)*&6-*@.8$26&/&;3-
= ,&0&T1,35-&,+'(,4.3,&%3-I6’2&:%+39P6-$3+K
; ,&%3+Q&*9&/Q
+$$.94K>,./+J
< ,&%3+*4<&/+T1,35-8$-$9.:4
> ,&%3+*4<&/+6-+%+)&,+=+$9&99>,./+
= ,&%3+%&-$3+/+6-&$9+,5-8
? ,&%3-/.01′-/&*3-0/&:3&$9-
> ,&%3+Q.;-:,+$9/&83-,+/+6-&$9+,5—QK
@ ,&%3+Q&,Q
&/&;3+K'(<&:6’26-$3+MP3-CD
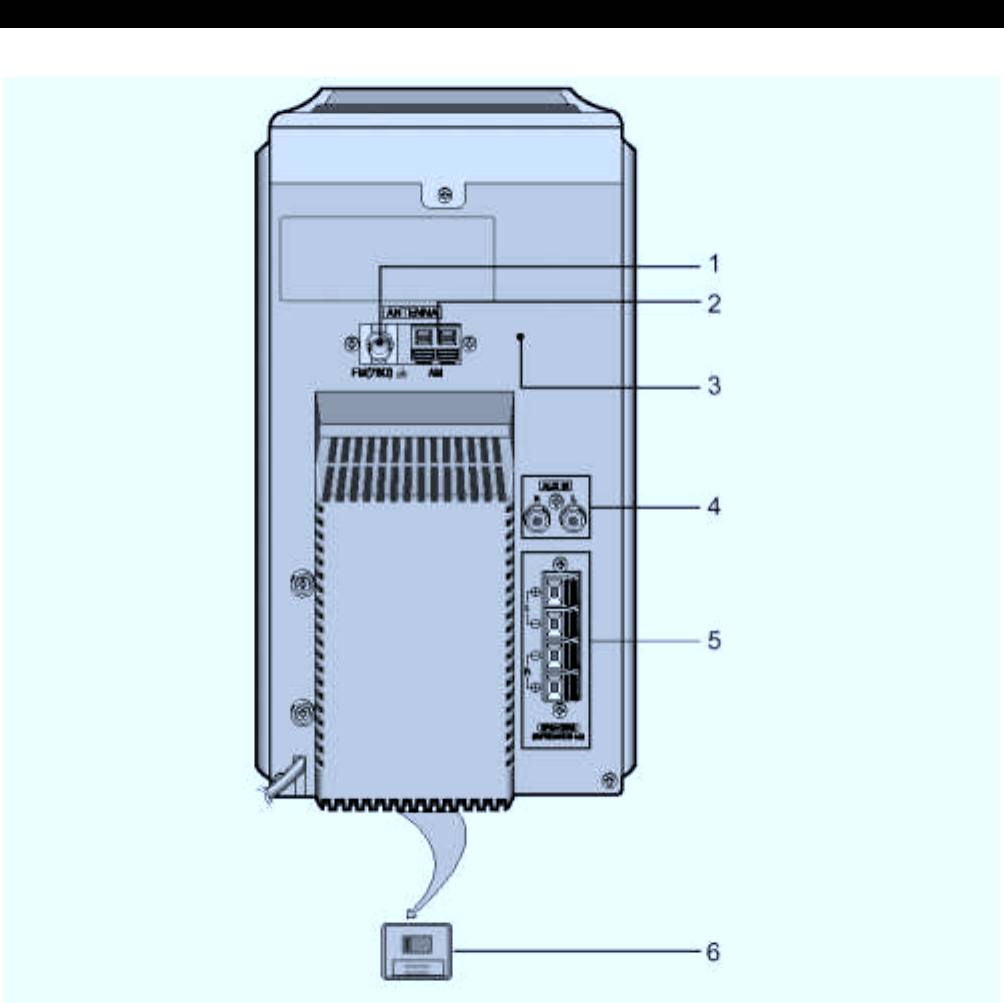
/
FM
9 GHIJK
: FMIJ
;
<
= IJPPPPPPPPP!
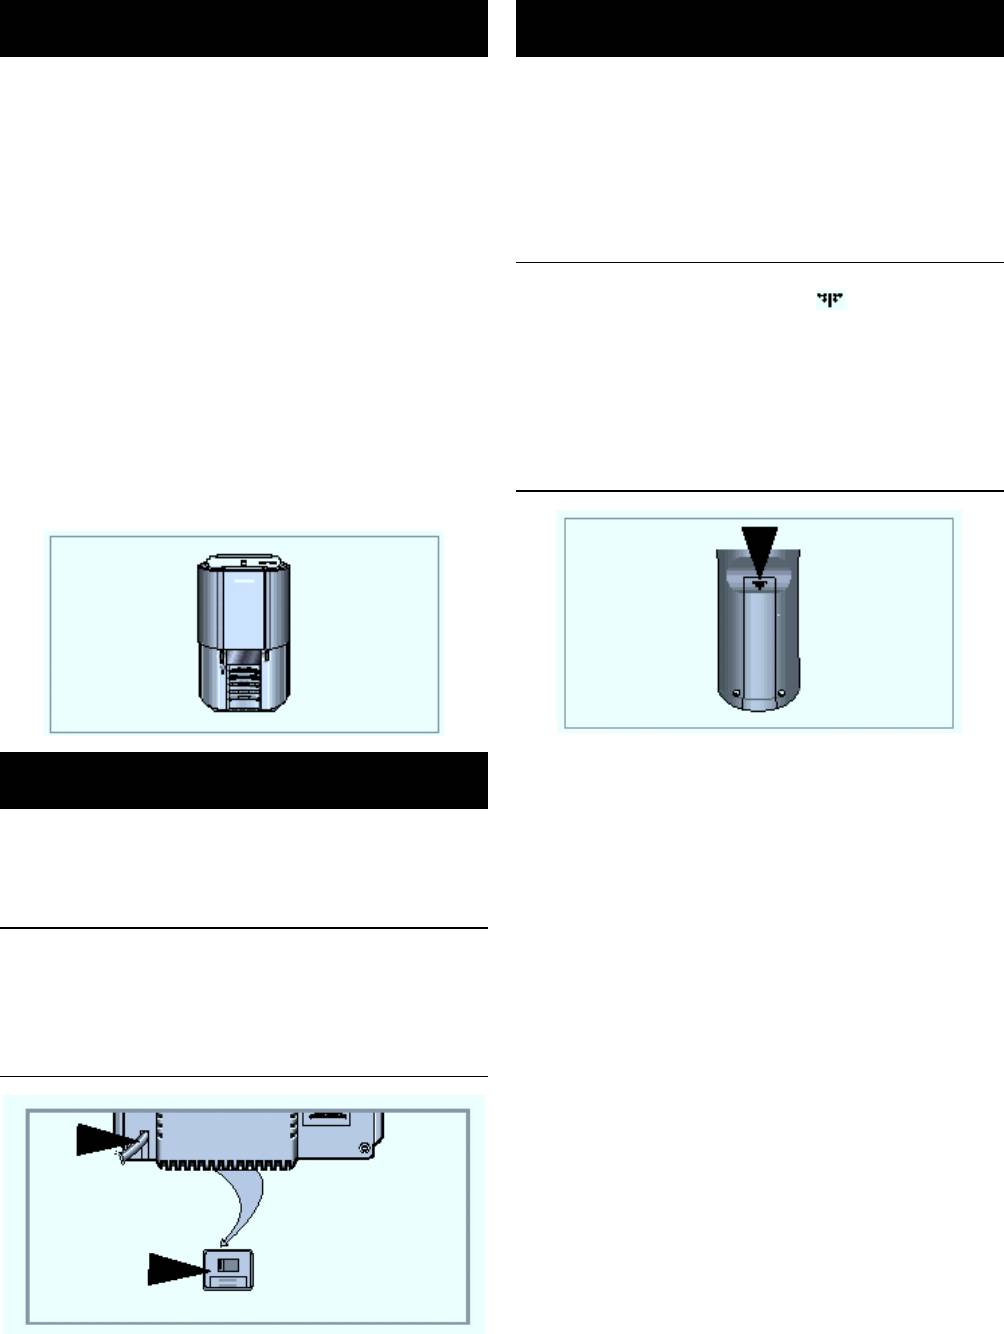
0
!
«#
$
.
#
♦
♦
♦ ♦
/’
!
♦
♦ ♦
♦
0
♦ $
♦ ♦
♦
%!
/**,
♦ ♦
♦ &’!
♦
/**
♦
♦
♦ ♦
&’#!
Alkaline)0/
♦ ♦
♦ (
♦
)*%
/*0
%!
/* *
♦
♦ ♦
♦ $
,)
*
+!
1/2223456
♦ ,
♦
♦ ♦
7//
%%
8
% -!
♦ 9/*:9:
♦ &
♦
♦ ♦
♦ ;/*<;=
!
!
♦ (
♦ ♦
♦
!
!
!»!# $%»& ‘($)
!*
ACCord+
)),
On/Standby -.)/
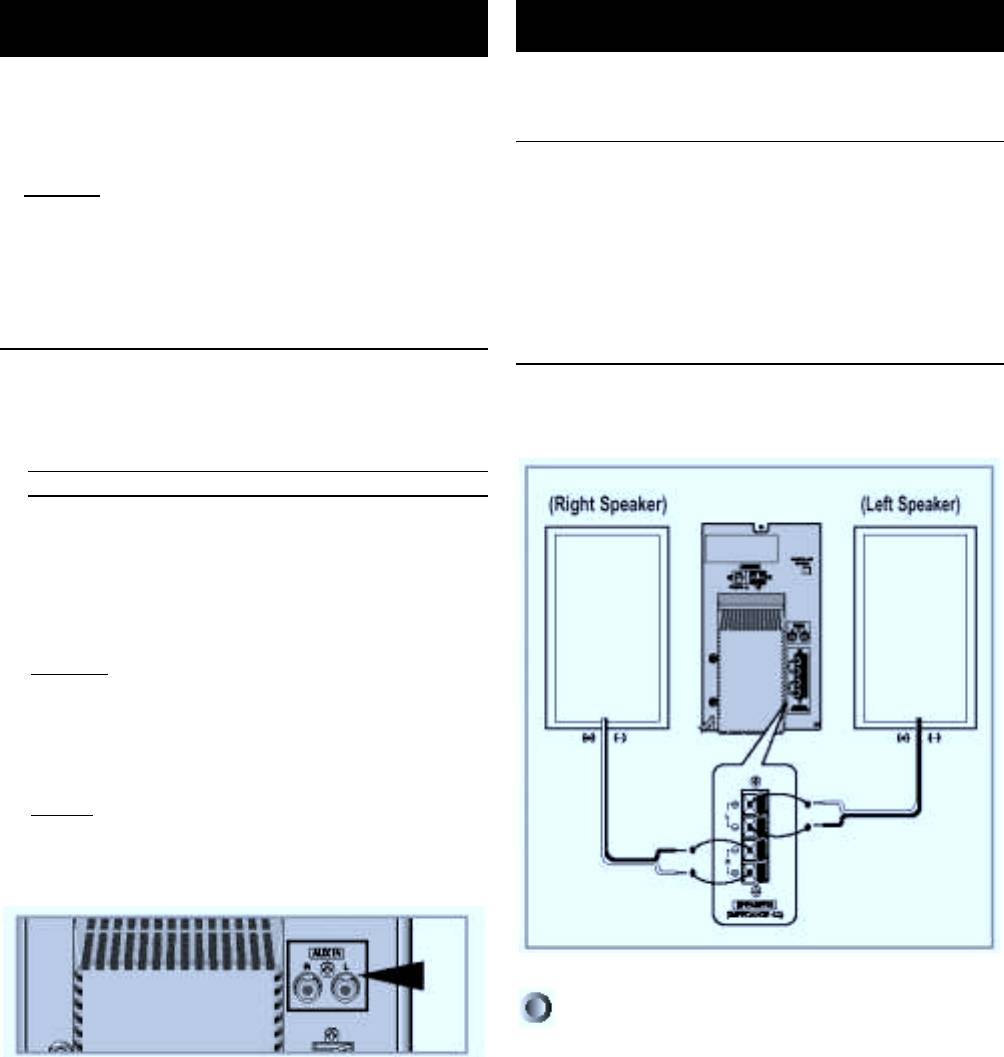
1
»
»
1%
#%
!
#
%!
*G
,
♦ /
*
♦
!0
♦ -HI+FIstereo
,
♦ /*
>//*
0**)8?*9)
,?
**9)*;)
/*/@
**;)
4AB<=)
#0G
H*
*
/
,*
**
?* !*)
9
C* «*)
&
***
!
On/Standby -.)/
!/,
FUNC D0)
E8&*/#$%
!*
*/,,
/8
♦ E
♦ F*
8!G
/
/
)
I;JK;’
! »
#
♦ 1/,/
,*
,70
,,
♦ *
*,*
*,/
,
*
♦ */
*
,
/7
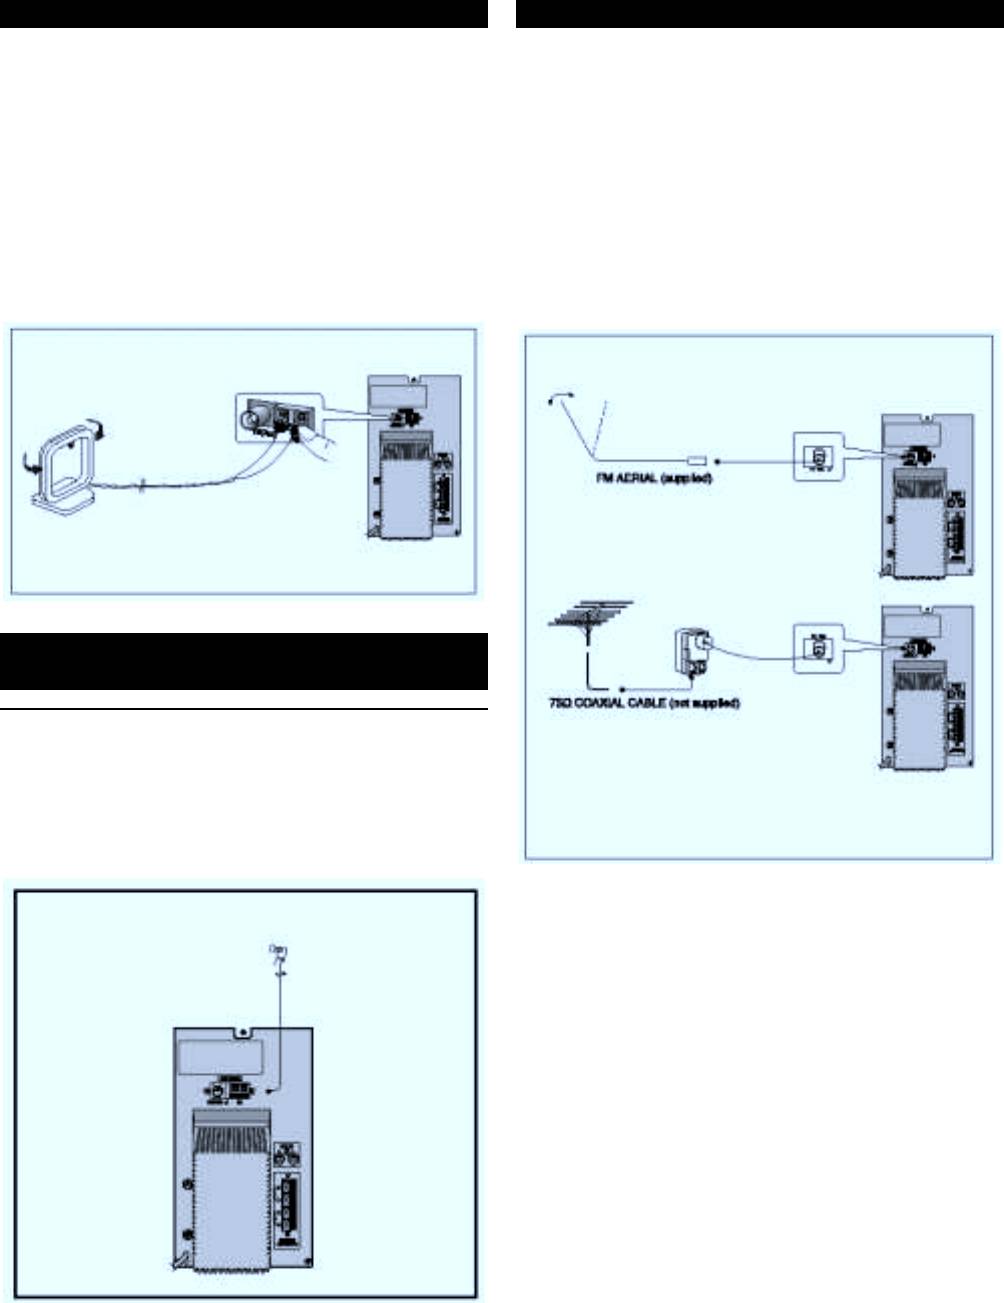
2
#$%&’(
*$
&’()
-&43&.50-1-23&
*+
♦ ML
ΩNO;
♦ *,
♦ !NO;,*
♦
MLΩ)
)
NO*
.*
♦ #*067/
AM
0
0
!/
♦ ,/
,
>/7NO;
!,
NO*ML
Ω
L
//)
)%
&
9
,--.-/0-1-23&
♦ E?!0
/
♦ ,
/0
/)
I;NO;2P 2*)J
K;MLΩ?»2?#H2’QRS?2C ‘Q)
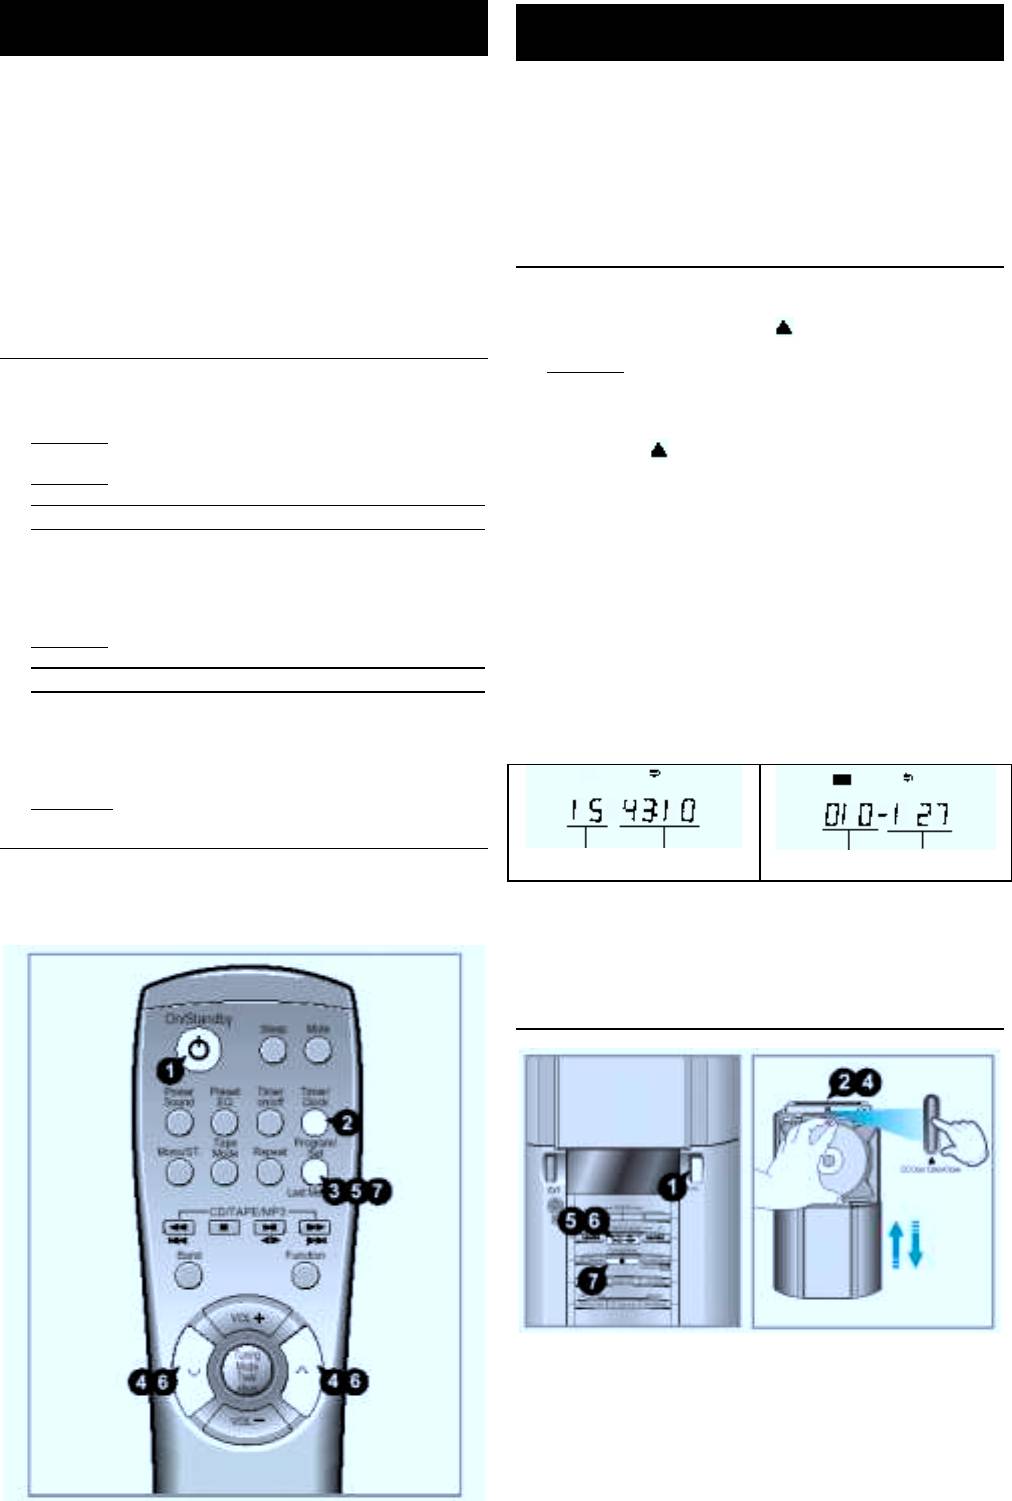
«3
!»
+’
$,-+./
+
)23!
!.
4
#%.
♦ 1
+CDTextCD+RCD+RWMP3-CD!
(%+
♦
-5-
♦
!!6
!
!/G0AU?;)
/,*
FUNC.D0)
70
Open8Close
)»-V)
*
E8»;
! On/Standby -
1/
.)
7*/,
&Timer8ClockP*->)
V*;
E8/9″:9;>)
Open8Close
)
Program8Set-1)
E8TG
-4,-3<=>=03=8&?<&
II)
♦ !/
/
/+ 0
OW6;AU
∧
♦
∨
*
?**
MP3-CD
Program8Set
E8TG
)*//
,,*)
/+ 0
♦ !,
∧
MP3-CD*
∨
<CD> <MP3-CD>
$ ?/
Program8Set
E8>
,
Standby)
!*
*G0*
Timer8Clock
>/
-4,-3<=>=03=8&?<&(
II*
>//
-4,-3<=>=03=8&?<&(
II*
$ V42-
)
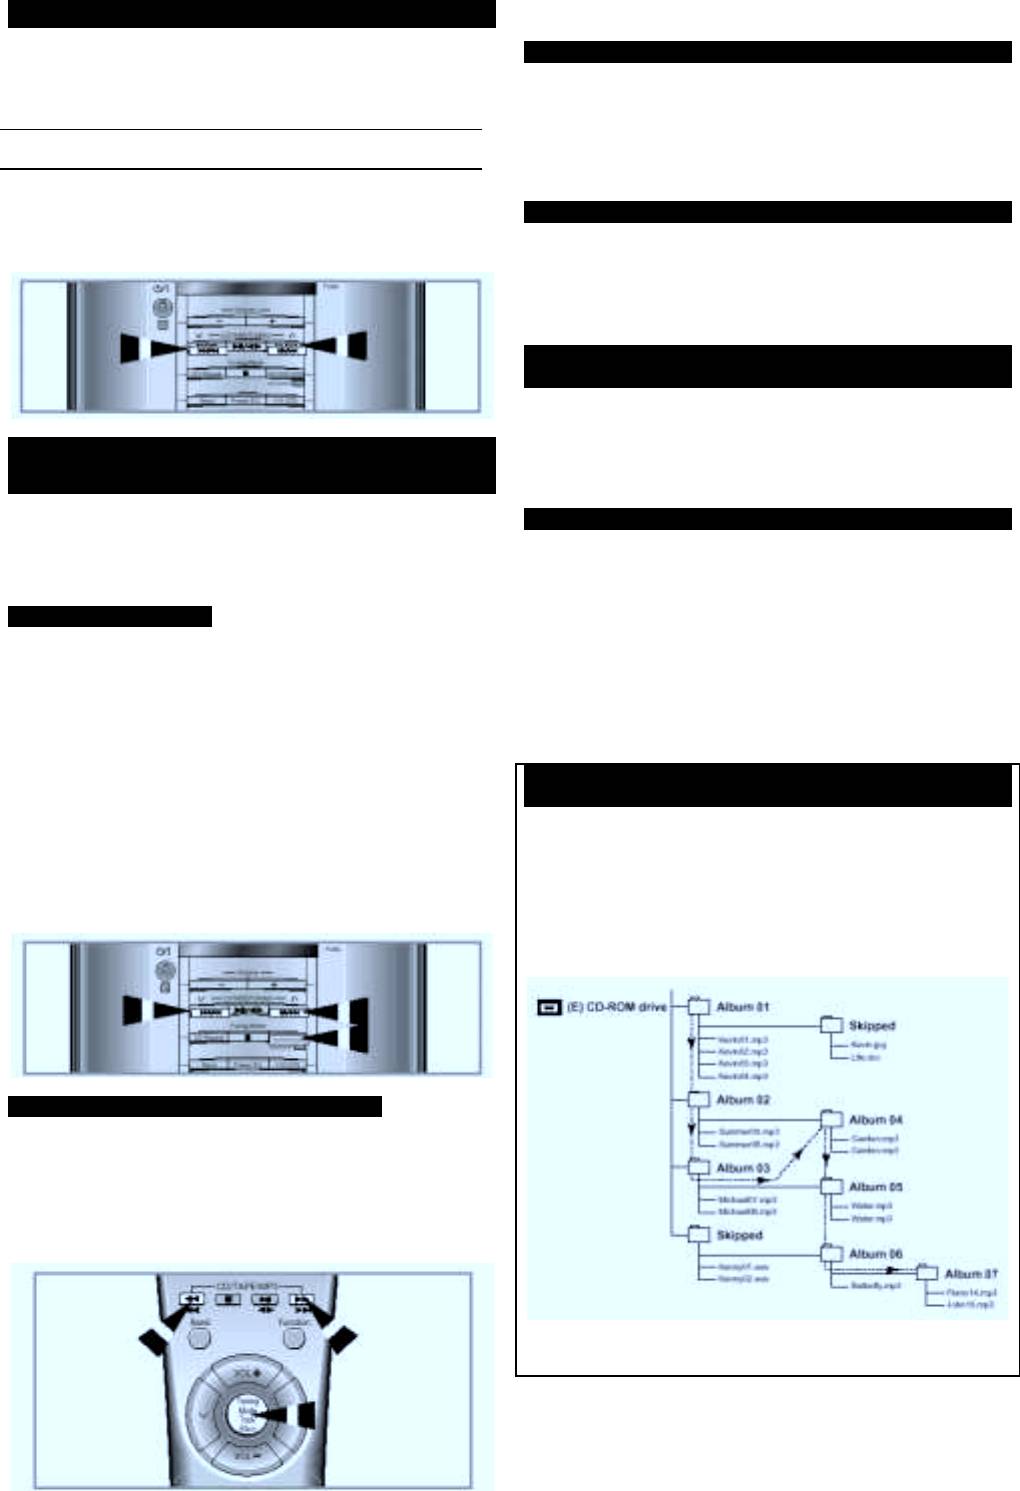
«»
+
+
» $»&CD:E
56
OW6OWXYI3ayer6*
+%
,!7
789!
0G,,
/+@
0
/
@
IK;,,,/
#*
I
P*
I
»#(&)(«/4 ‘.»#
*
I
&/
I
I
♦ FG*
GOW6OWXYI3Z[\]6)^_`6
♦ «G*
GOWKOWXYI3Z[\]K)
^_`K
$»./$»4 ‘.»#4″*( CD:(«7!»6 +) /!
0)$FGH).)FGHIE
%AU;4AU;4a
bc5%/*
«/G*GOW6
d%/*/
$,-+./
/IM5G*
MP3-CD
»+*»)6#&0&!)&0)$»#FGH).)GHI
♦ &CD;R*)#D;RW
+%
)
789!
G,;
!»#!»‘B.»$
::,
,,
*Track/Album &-2/)
*)
*//ALBUM 2/)
♦ «/#D;RW
*I
I/
*//,;
/
7G0
0
//
/)
* Track/Album*/
».&0″# &./!»/#»+*»)6#&0&!)2 ./B»(«#)
/TRACK &)
0″*»7&$0)$
*I
I/
♦ #aefghij
♦ ,
aefghijXk`lh]\])
,/
♦ #
♦ *I
I
/
/,
♦ ,G*
,/
^m`n^iZo^ghpG*
,G
6
7
G
F
3./0) !5)»!!»-«3+* #.&!)2
D
*Track/Album&-2/)/
/«TRACK»&)«ALBUM»2/)
E
C
*I
I
♦ /«TRACK»
G
♦ /«ALBUM»
B
//
A
I;&AU;4OME)JK;2/5IJ6;J
d;2/5KJL;2/56Jb;2/5dJM;2/5LJ
c;2/5bJq;2/5M
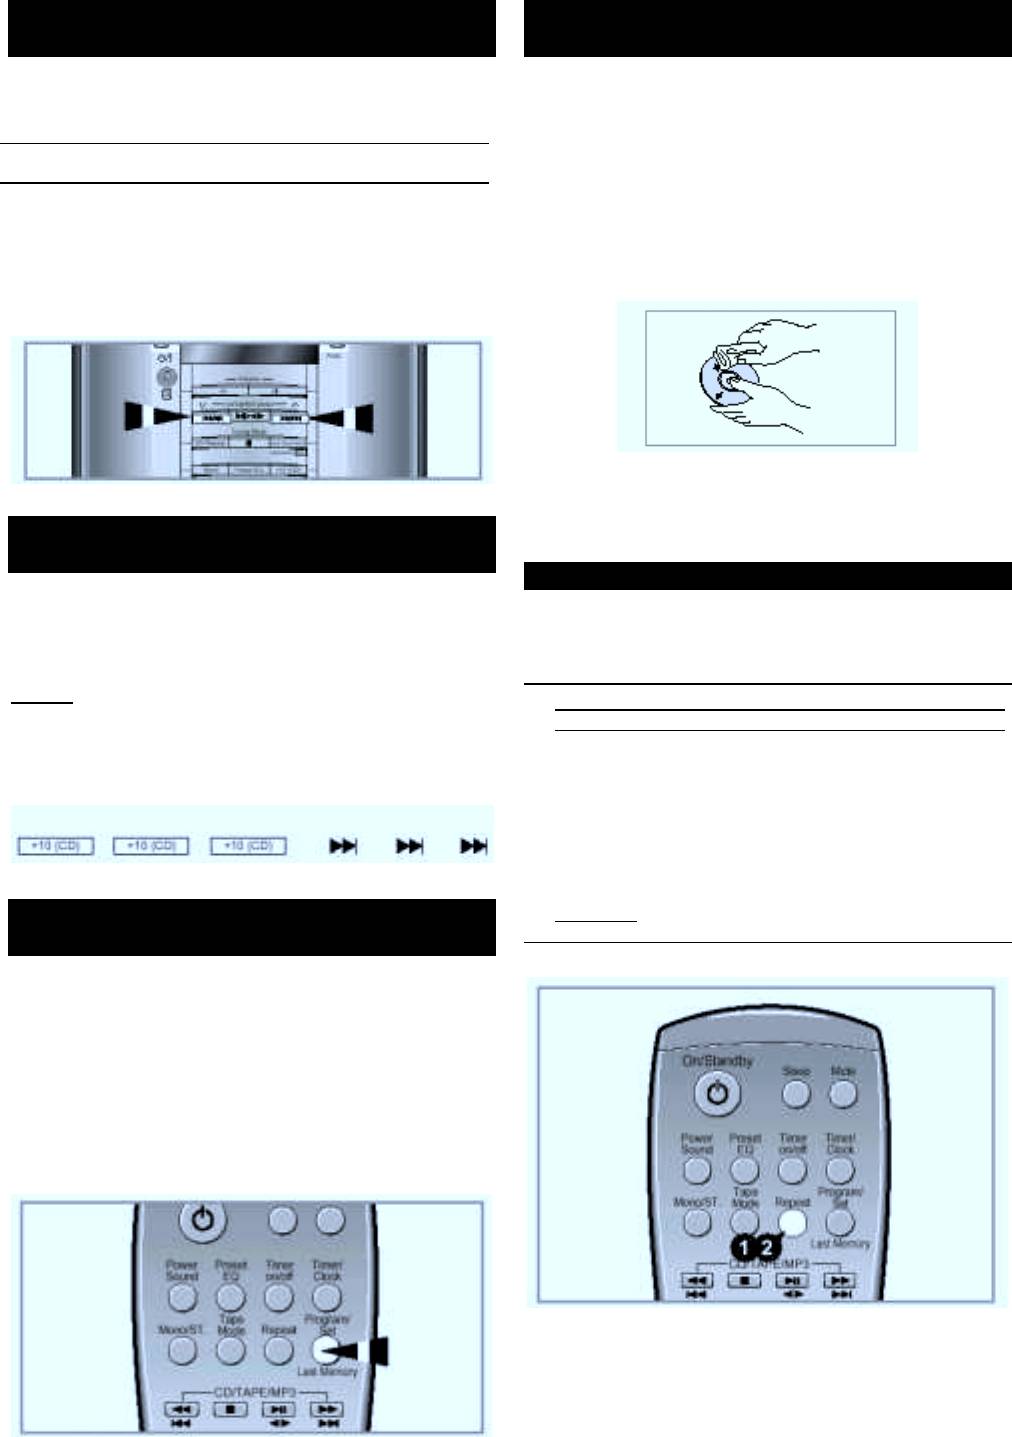
«
+
3
+
+
«
’!
+.
♦
♦
♦ ♦
/+
0
#%!
♦
♦ ♦
♦ +
C0 ?
H
#!
***
♦ &
♦
♦ ♦
C?H
%!
***
♦ «+#
♦ ♦
♦
#!
%
7*G0*
012
04+4
IJ6KI
L0@
.
++
♦ ♦
♦
♦ 1+
6K
♦ #+
♦ ♦
♦
8 IL
!STSUV)
,/d6
/+ 0Repeat
:J6K:
P
I
«*
/REPEAT6)
→
→→
→%→
→%→
→→
→%→
→→
→→
→→
→→
→→
→→
→
&
&*
/REPEATALL
,))
,;
!STSUV*
0
E8 &*//
REPEAT
MNO)
PQGL9R
/
//OW6;
AU7G0/
**
♦ Last Memory *)
OW6;AU?*
7(ON)
(OFF)G0*
*
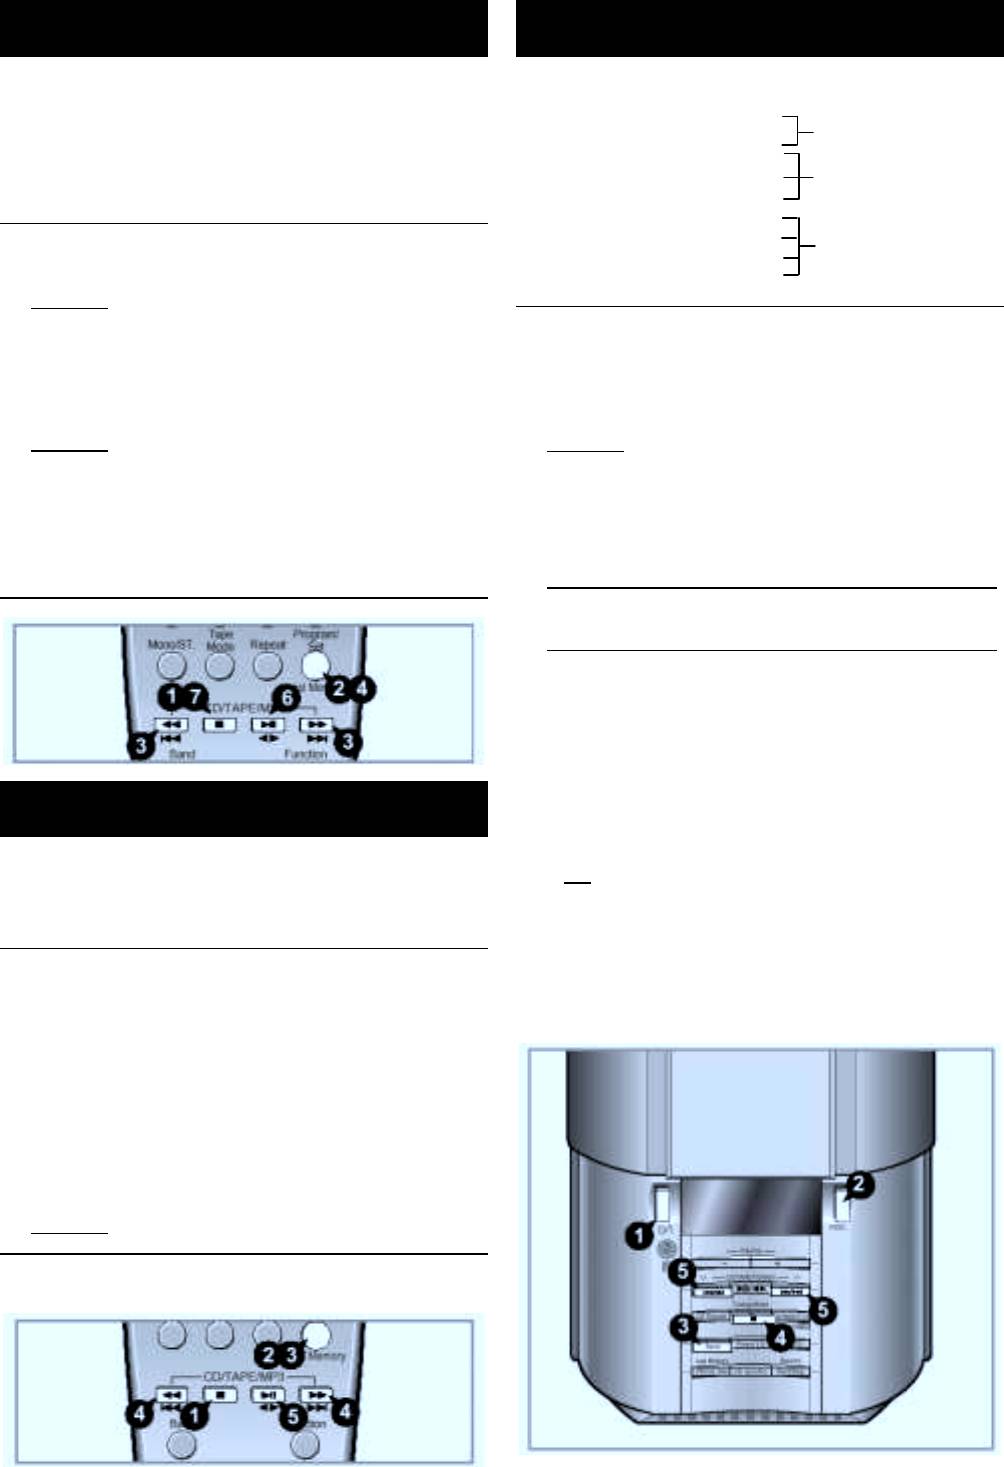
«,
.
%.
♦ ♦
♦
♦
♦ ILFM0*
♦ ♦
♦ (%
♦
♦ ILAM0*
)
♦ ILFM0*
FG0
♦ cOa#!)0*
G0*4\`\Zr)
♦ M3a&!)0*
)
♦ ILFM0*
/,
♦ LOa#!)0*
42-)
♦ L?!0*saI
)
QWXYWUZ8[SV-1)
♦ L?!0*saK
E8/ PROGRAM
PLLK6LLLL
!On/Standby -
!//
.)
,-?48
!/G0tuvX4P)FUNC.
♦ H
/
D0)
♦
H/
!/*
4
Program/Set.
Band &)
E8/PLK7LLLL
E8
&/,*+GF
8
!Kd
♦ ♦
♦
♦ FM
>0
♦
♦ ♦
♦ AM (MW)
#
V/9R
HH)/
♦ ♦
♦ «\)
&
/
♦
♦
♦ SW6 [\7
?
/
♦ ♦
)
$ >//
42-)
>
0]^_`_YPXaS
)
(,*
!
«
*/
P#b$#»E*)
2
«
*/
AUTO2*)
)
!/0*,
,8
♦ ]^_`_Y*)∨∧*
!
♦ ]^_`_Y*)∨∧
,/
0
♦ >//
/
*]^_`_Y∨∧
42-)
♦ !
*0
Program8[SV-1)
7*
Program8[SV*
/
QWXYWUZ8[SV
,
,-?4H
I/*
Program8[SV
9R
HH)/
/
E8!/
!
/,
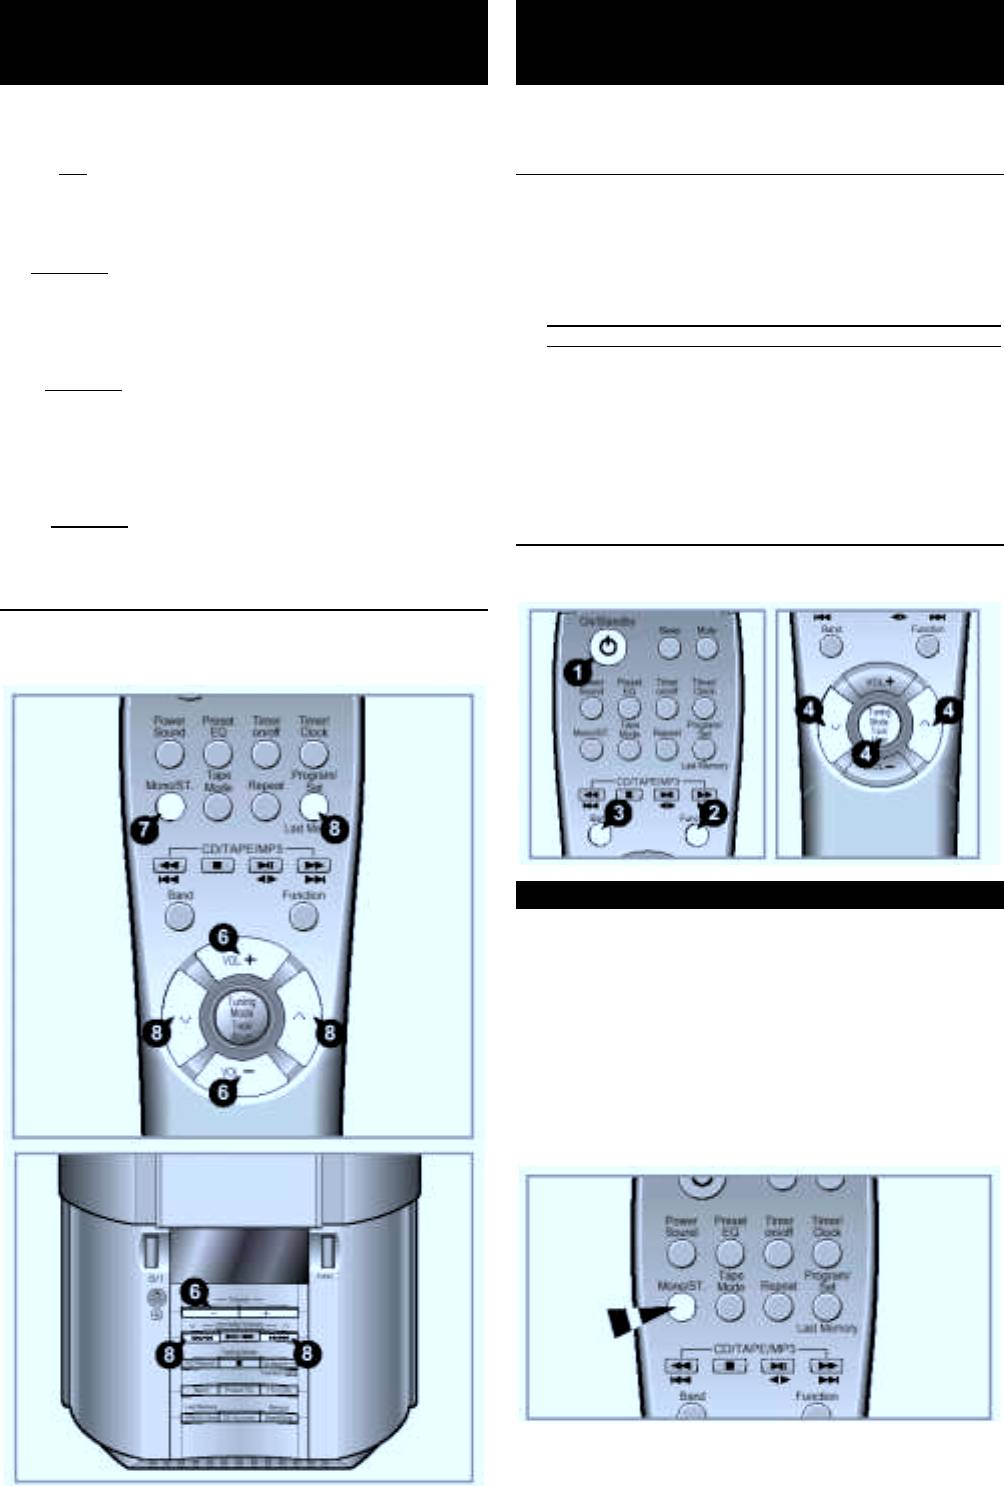
«-
%&
«*8
#
♦ Volume.)9;
#
*
♦ VOL9;0
!On/Standby -
.)
$ !/<=<=
!/G0tuvX4P)FUNC.
Mono8ST%-#)
D0)
E8?/::
!/*
STEREO#)
Band &)
& ,,**
!/0/8
0+d*0
/+ 0
!8
#0*
?]^_`_YPXaS
Program8Set-1)
*
E8!,*
/:Q!c[c]:
/
0)
PROGRAM)
+?Tuning
∨∧
+Tuning
∨∧/
/*0
IIL
&0
Program8Set/,
?Tuning∨∧
*0
E8&*//
*0
PROGRAM*0
,
&,/0**
‘ &,*/
/0+6c
]^_`_YPXaS
♦ D0W4wY4BO//
0
!»»
.
♦
♦ ♦
♦ #56:;<;586
!
♦
♦ ♦
♦
:;<;586%
!
*0NO
,PX_X8[]
%-#)<=
<=F
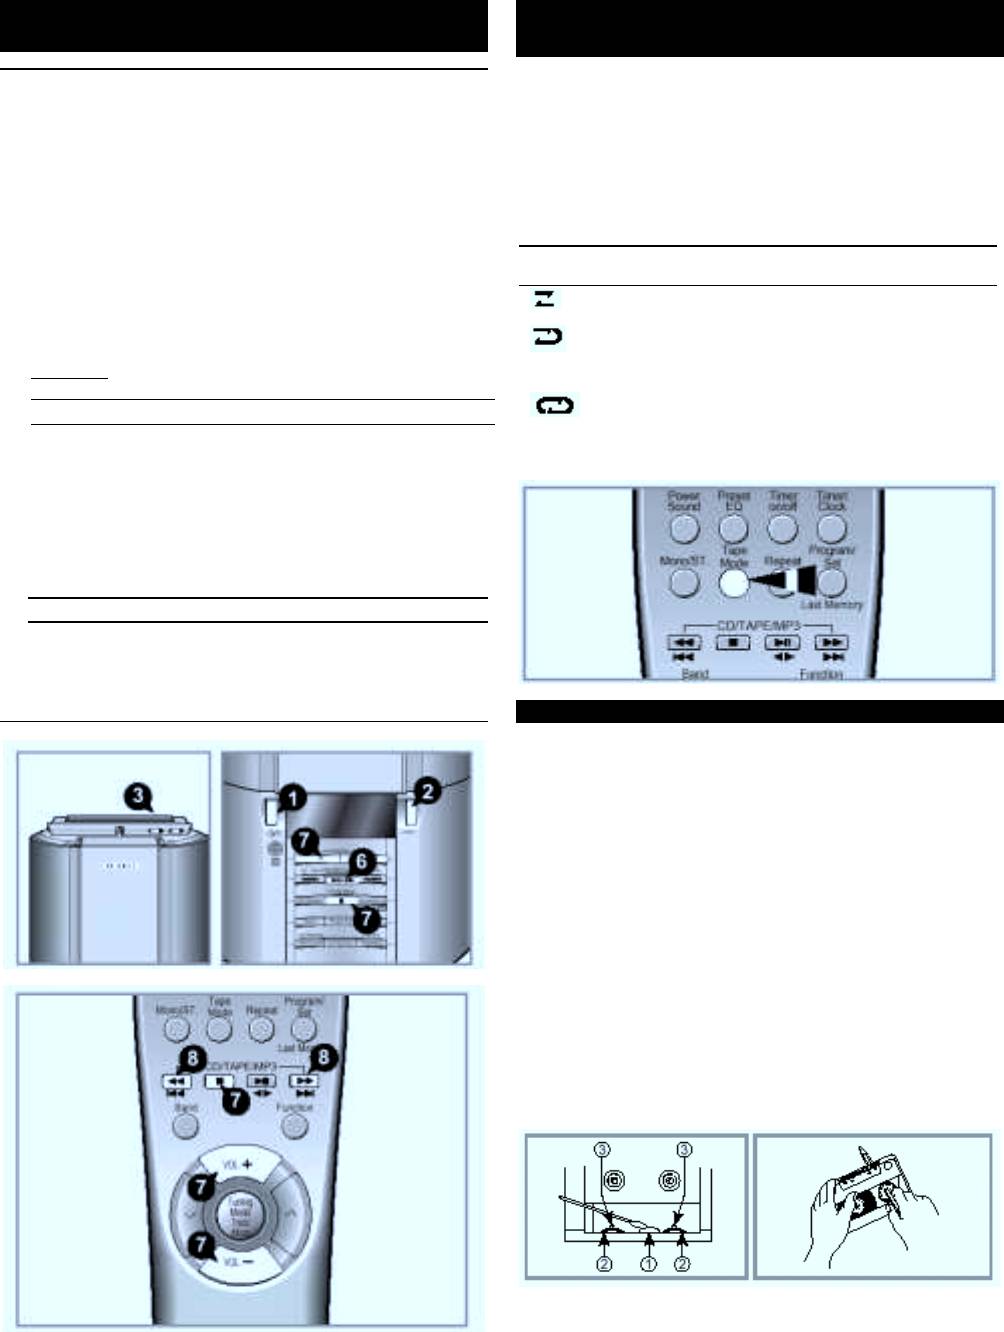
«.
!On/Standby -
.)
!
!/G0tBWX&)FUNC.
D0)
FG0//
«*
Q^decfSgV/)
TapePXaSE)
*
!/**
/
4
V*,
«/*
/+h 0
#2
♦ «
#!
♦ &
E8?
«/
7
/+ 0
/
«
?VOL.9x (/
*
Volume9;*
)
)
«
?42-)
& ?/,
G0*/8
/+ 0
?
0
()) *+ !
( %%
5
#6!
«*
WyjzXm\prH0
08
♦ .
)
♦ *)
♦ !*)
«
%.
♦
♦
♦ ♦
% !
♦
♦ ♦
♦ =
%!
♦
♦ ♦
♦ )2>%
%!
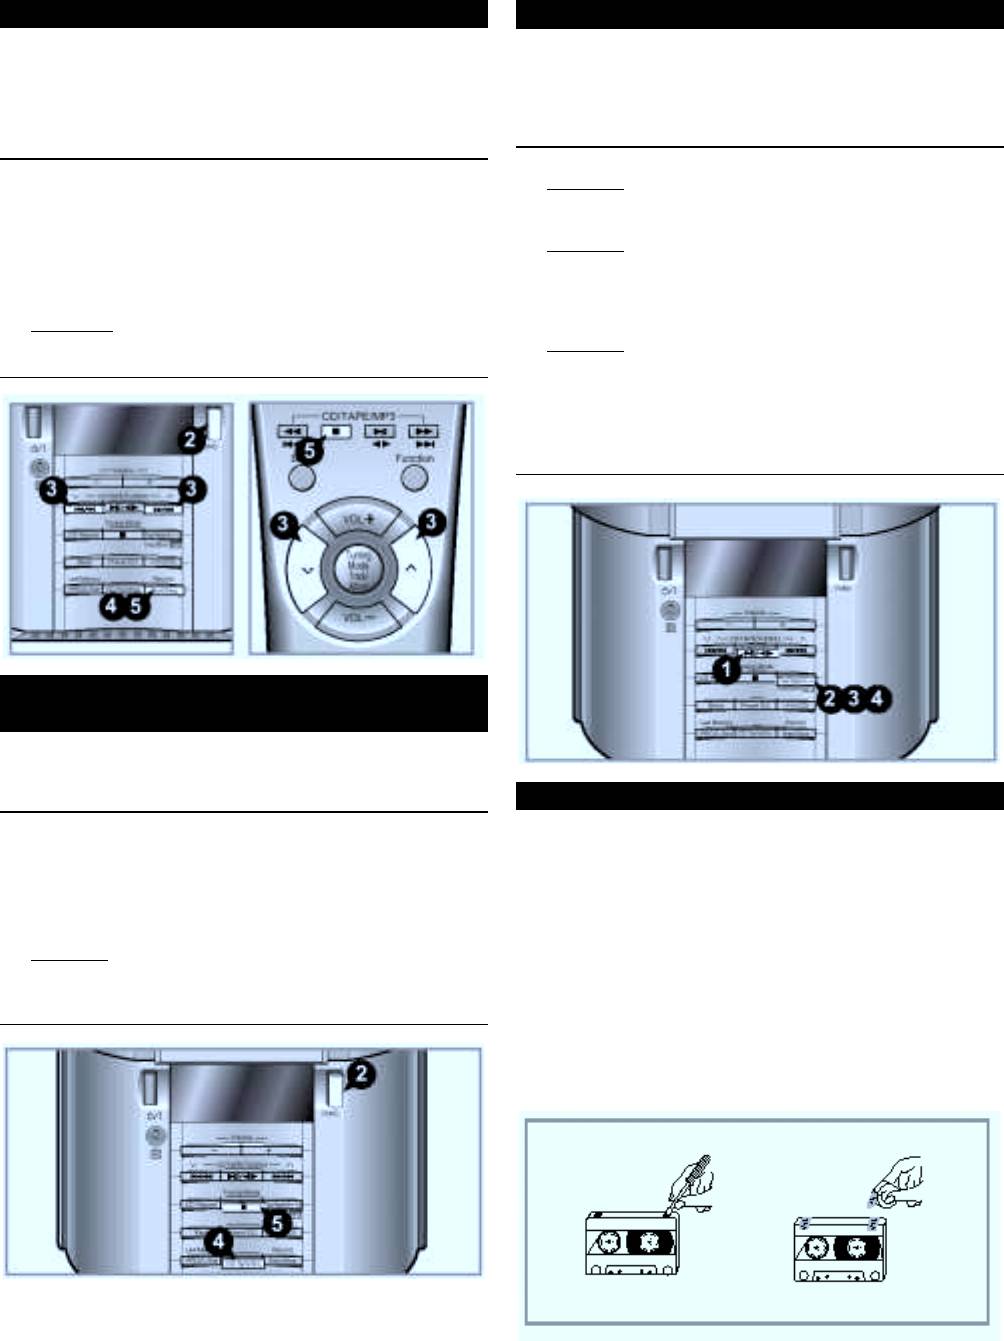
«/
5»
04%#↔
↔6&4
↔↔
+@
1
i) @+
?5@
↔
↔↔
↔
A6?
-
♦ !/
B
#
]#Qc
HH)
1/
E8
!/G0tuvX4P)FUNC.
Tape Repeat(&↔
↔↔
↔* G2
D0)
↔{))
!/0*
E8/START
Tuning*)∨∧
)
>/Record Start/Stop
/&↔
↔↔
↔
#-#)
♦
♦ ♦
♦ V2
E8V
Tape Repeat(&↔
↔↔
↔*
>/Record
E8/END
Start/Stop
?0)
♦ V{
♦ ♦
♦ !/*G6
♦
?
Tape Repeat(#↔
↔↔
↔j*
+
MNO)+@PQGL9R
+!
7
1/
0#
!/G0AU?;)
!
FUNC.D0)
V;
(#
9RSynchro#,0;
%%
)
#%!»
E8
;
!
,)
?/42-)
1-
%-
#%%
%
!
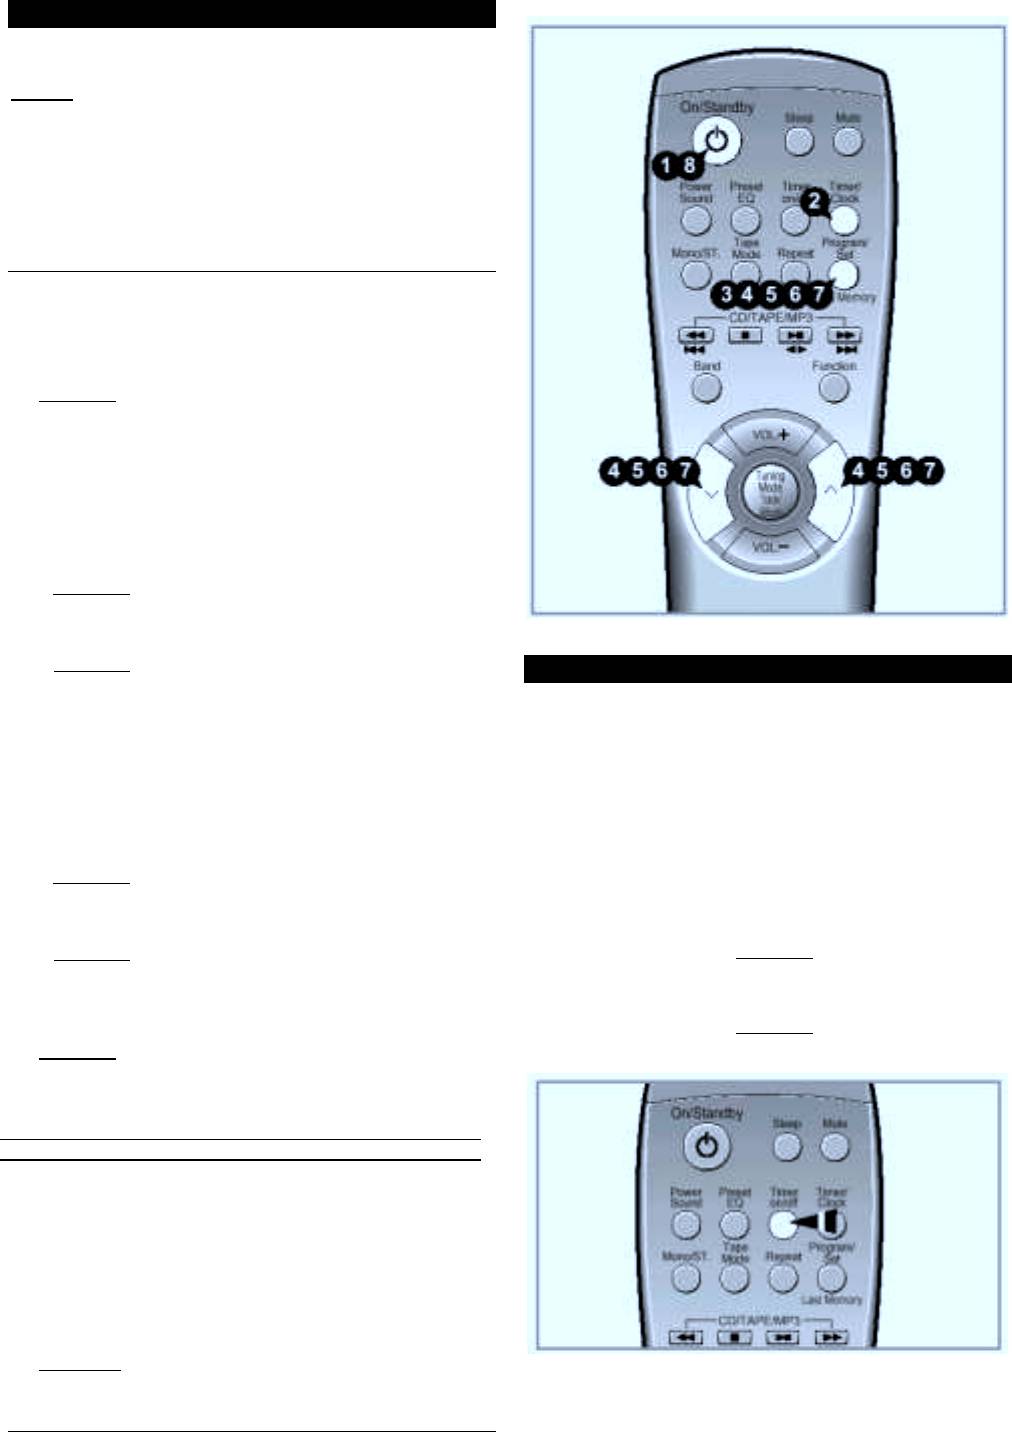
«0
0
#
!
%
!
/,/
*
♦ */
♦
/,
** 7
!On/Standby -
.)
*Timer8ClockP*->)
*/TIMERP*)
Program8Set-1)
E8!,*/
/ONTIME!
)7*)
J
1*
1Tuning∨
∧*)
+ Program/Set.
E8TG
1Tuning∨
∧
Program/Set.
E8!,*/
8
/:kk]HPc!
)7*)
J
!C %
!
1*
!*/
1Tuning∨
∧
,)
+ Program/Set.
E8TG
/+ 0TimerOn8Off
1Tuning∨
(i@8i@
∧
*
Program/Set.
«* «
E8&*/l:»%%
E8#/
.$$)mm
!* &
Tuning∨∧*
E8
Program8Set
E8&*/
/
$ Tuning∨∧/
*//
*
=+
TAPE) 1
TUNER)
Program/Set
+!/
0
Tuning∨∧
CD;)
V;
& On/Standby
E8 !*
**
#
*
ERROR»/)
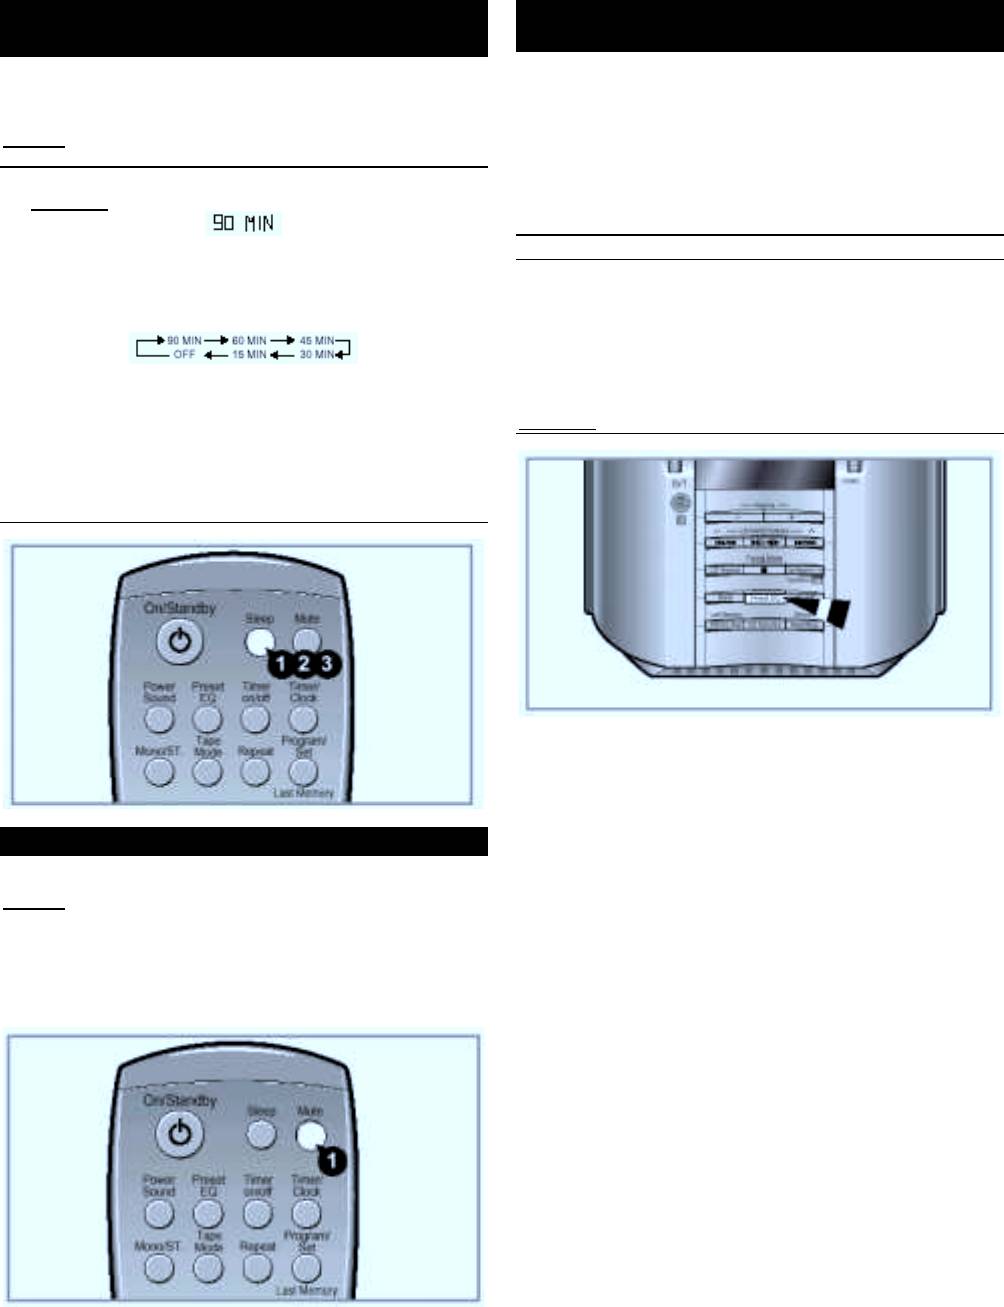
«1
!»
<
«
+
‘
!
%#
.% !
%%#
!
Sleep#)
*QWSdSVco*
E8&*/8
7*)//*
q5)
/+@ +
Sleep/
«/*/**)PASS
/
C,* D.CLUB
C,*0 HALL
C,*0STADIUM
C,*; !:9;
C,*;Q:Q
C,**9″#[[H9
!/8
♦
E8&*/
[nSST
♦ H+IK
>/G0
[nSST
*/:kk!)
«%$9:;&
i@
O
P^VS!)
>/*/
)P^VSVolume
.)
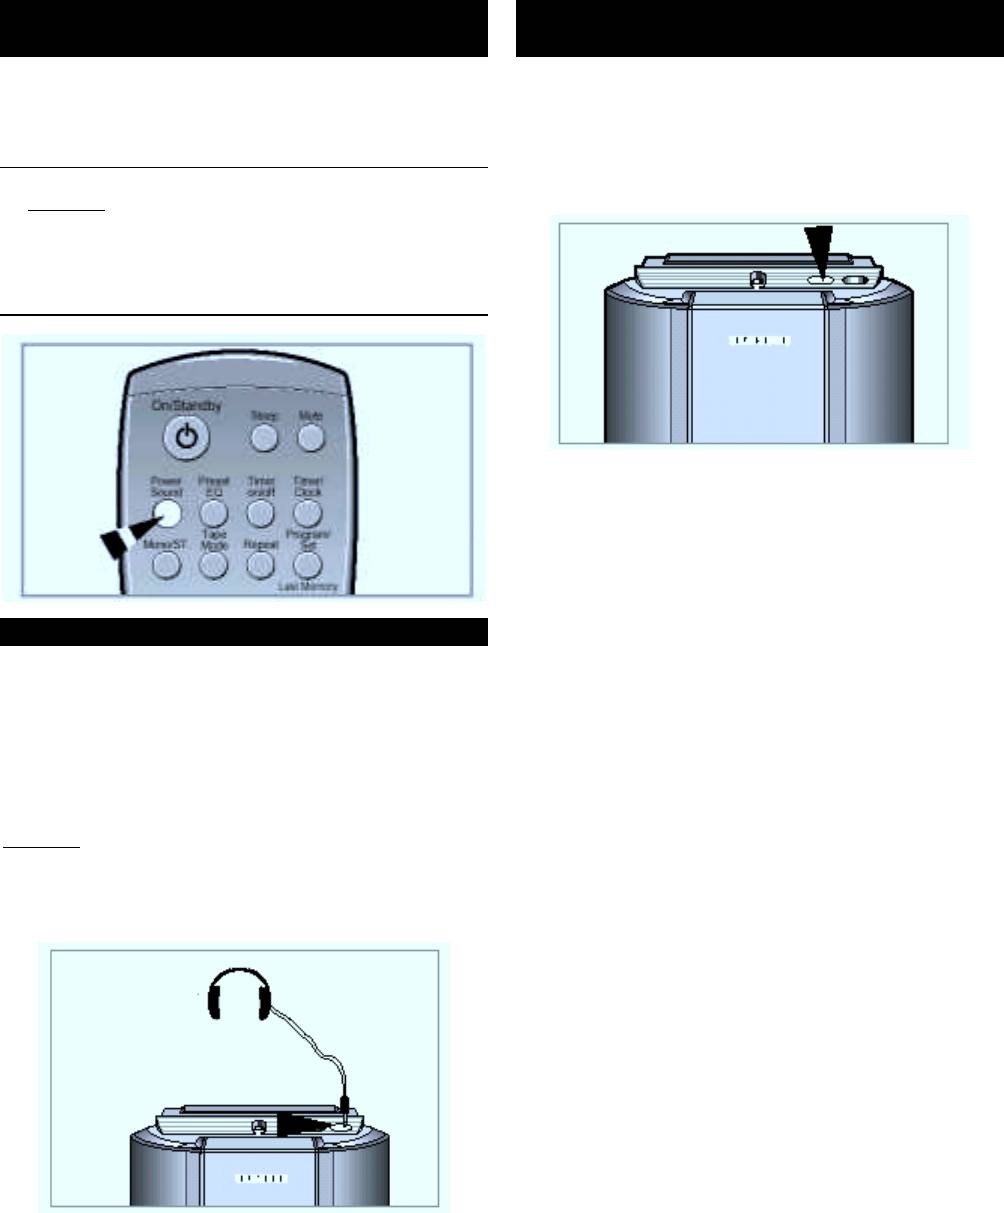
«2
0PowerSound
0=%
&
-PowerSound5D#
‘Oi
6
@+
#
E!
G@6L
G
Power
Sound
E8
♦
/
P
SOUND
♦ V/
&*7*G0
Power
Sound
%#!
& EB*
#!
Phones)
*)
E82
/*,
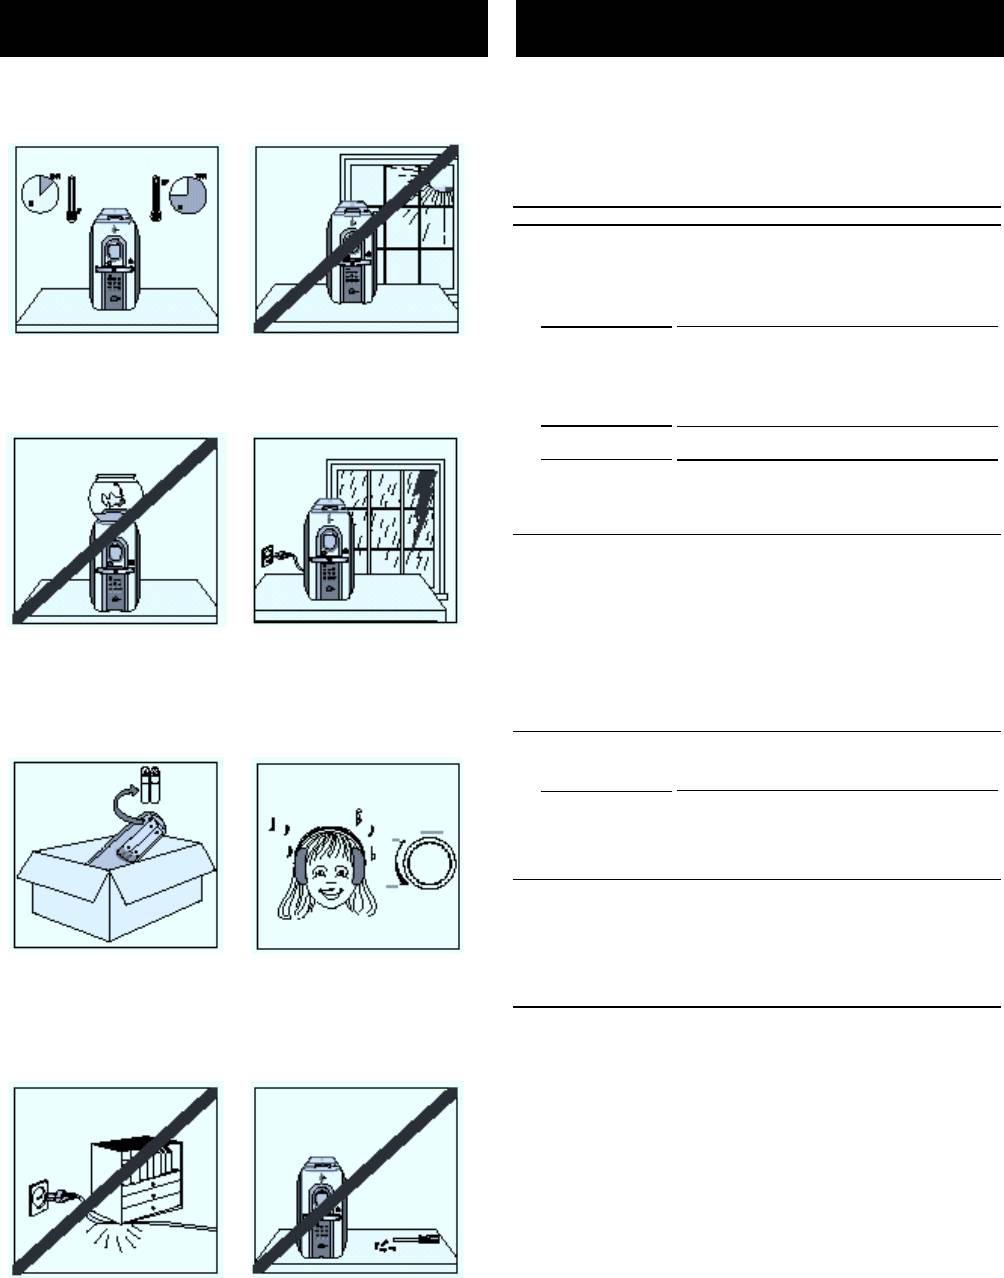
3
3
>»?
&
‘
!C
!
+%
!0
’
!
•
•
•
!»#$%&»‘()*+#
,-
5
•
,
‘(
6
•
./
((
7
*01 23456+740894:2 07
° !»°
()*+
‘
5+5: 902:; <=905> 94-
#$!%&
(
•
?@
1
,
•
A
@
*
•
0@BCDEF
!»#!GG*?@#@-
……………….
Preset EQ
8
•
./HI*8-
5
•
JKLM
L/
9
•
:L
—
L
:
•
8
LK
(
;
•
+/L
(,)*
,*
<
LN
-
/(0
@@
=
0(
‘
.
*
/
*.)
8
)
•
./BOPQ*:-
*
8
•
4
:
•
4
•
:K
/
•
,L
/
1
•
+AL
;
>
•
:
!»
•
./BRSQT*0-
•
@
#
/
:
$
•
7
=
/+@
1
‘
-,
@/
(
5
•
?
,
N
0
,(*
2(
-
*
,,(
-.
C
,)*
%
*
.
♦ ♦
♦ &
♦
♦ ♦
♦ F-
♦
♦ «
♦ ♦
♦
G
SAMSUNG
!
,
)
*-
,)*
(,
0
)
)0
34
(
.
.*
*

»
@»
!»#!$%%$#
!
(,
JK
&’.),+2=1*$9*-9.'(,&$9( 6O6
JK
&’.),+2=1*$9*-9.'(,&$9( BO6
LC
9,&@.,-.$-0,+’K@1: DO6
&’.),+2=1*$9*-9.'(,&$9( D6
&’,483&?TT-5-.,90+/:&,-3 NCW
MCIJ
9,&@.,-.$-0,+’K@1: BO6
&’.),+2=1*$9*-9.'(,&$9( CB6
&’,483&?TT-5-.,90+/:&,-3 AW
(-./01,(02/
-+%+)&,=+$9&9 AO 5PAO3 5I±N6J
9,&@.,-.$-0,+’K@1: LO6I,+=+$9&9.N3 5J$T-‘(9/&:
$3+;.,-2 OOCWI,+=+$9&9.N3 5J
./.7&6,&.)+917+,-.:.;613+,+’+:- FO6
+):./46-$3&* -+:.9/NAO-‘-FO::&’U-,+NA::
03
-+%+)&,=+$9&9 NAC 5XNA3 5
9,&@.,-.$-0,+’K@1: BO6
./.7&6,&.)+917+,-.:.;613+,+’+:- RC6
9-/+>U-8?TT.39 DO6
45600
47&6,+2:&U,&$9( A7AO9I%&’,483&?TT-5-.,90+/:&,-3NOWJ
+<+/-9,4./+):./4 NFOIJ7ADCIJ7AEOI J::
Аннотации для Музыкального Центра Samsung MM-ZL7 в формате PDF
Топ 10 инструкций
Другие инструкции
Samsung MM-ZL7
MP3-CD/CDRRW
MM
ZL7
View the manual for the Samsung MM-ZL7 here, for free. This user manual comes under the category hi-fi systems and has been rated by 1 people with an average of a 8.8. This manual is available in the following languages: English. Do you have a question about the Samsung MM-ZL7?
Ask your question here
Product Images (1)
Samsung MM-ZL7 specifications
Below you will find the product specifications and the manual specifications of the Samsung MM-ZL7.
The Samsung MM-ZL7 is a hi-fi system that offers a range of features for music lovers in New Zealand. It includes a CD player and FM radio tuner, allowing users to enjoy their favorite music in different formats. The system also has a USB port for connecting external devices like smartphones or USB flash drives.
In terms of design, the Samsung MM-ZL7 sports a sleek and compact look that can easily fit into any room or space. The system is designed to deliver clear and crisp sound quality, making it suitable for listening to music, watching movies, or even playing games.
The Samsung MM-ZL7 also comes with a remote control for convenient operation from a distance. Users can easily adjust the volume, switch between different modes, or navigate through their music collection with just a press of a button.
Overall, the Samsung MM-ZL7 is a versatile hi-fi system that offers a range of features for music enthusiasts in New Zealand. With its compact design, clear sound quality, and convenient remote control, it provides an enjoyable listening experience for users.
General
Frequently asked questions
Can’t find the answer to your question in the manual? You may find the answer to your question in the FAQs about the Samsung MM-ZL7 below.
Can bluetooth devices of different brands be connected to each other?
Yes, bluetooth is a universal method that allows different devices equipped with bluetooth to connect to each other.
What is bluetooth?
Bluetooth is a way of exchanging data wirelessly between electronic devices via radio waves. The distance between the two devices that exchange data can in most cases be no more than ten metres.
What is HDMI?
HDMI stands for High-Definition Multimedia Interface. An HDMI cable is used to transport audio and video signals between devices.
When is my volume too loud?
A volume above 80 decibels can be harmful to hearing. When the volume exceeds 120 decibels, direct damage can even occur. The chance of hearing damage depends on the listening frequency and duration.
How can I best clean my hi-fi system?
A slightly damp cleaning cloth or soft, dust-free cloth works best to remove fingerprints. Dust in hard-to-reach places is best removed with compressed air.
Wat is Dolby Atmos?
Dolby Atmos is a technology that ensures that the sound is reflected from the ceiling to where you are listening. This makes it possible to create a 5.1 effect with only 1 speaker.
Is the manual of the Samsung MM-ZL7 available in English?
Yes, the manual of the Samsung MM-ZL7 is available in English .
Is your question not listed? Ask your question here