
Husqvarna Viking H-Class E20
View the manual for the Husqvarna Viking H-Class E20 here, for free. This manual comes under the category sewing machines and has been rated by 22 people with an average of a 8.7.
This manual is available in the following languages: English. Do you have a question about the Husqvarna Viking H-Class E20 or do you need help?
Ask your question here
Product Images (8)

Husqvarna Viking H-Class E20 specifications
Below you will find the product specifications and the manual specifications of the Husqvarna Viking H-Class E20.
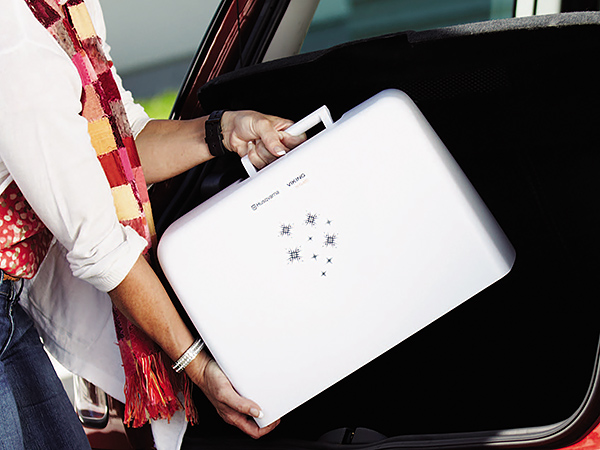
The Husqvarna Viking H-Class E20 sewing machine is a versatile and functional sewing machine designed for a variety of sewing projects. It features a user-friendly design and a range of stitch patterns to suit different sewing needs.
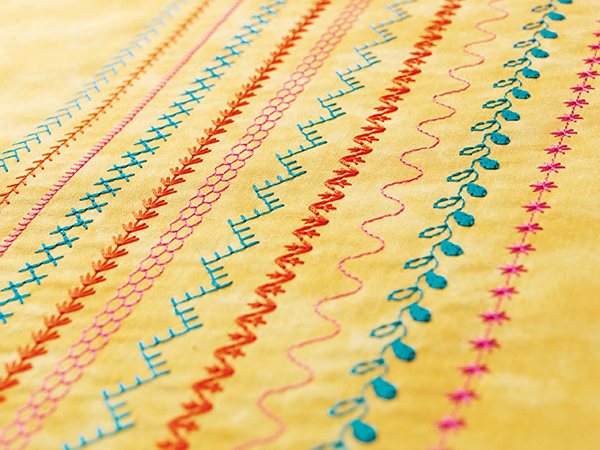
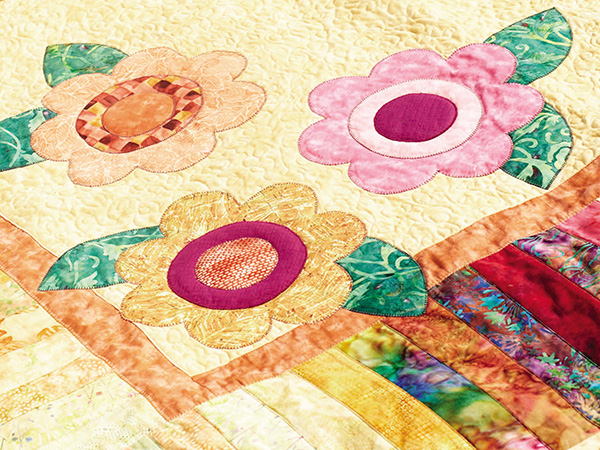
With its 1 Step Buttonhole type, the H-Class E20 allows for easy and efficient buttonhole sewing. It offers 32 stitch patterns, providing a wide selection of options for different sewing techniques and styles. The adjustable stitch length feature allows users to customize the length of their stitches, providing flexibility and precision in their sewing projects.
The H-Class E20 sewing machine is primarily designed for sewing functions, making it suitable for a range of sewing tasks such as garment construction, alterations, and crafts. Its 4 mm stitch length ensures neat and accurate stitching results.
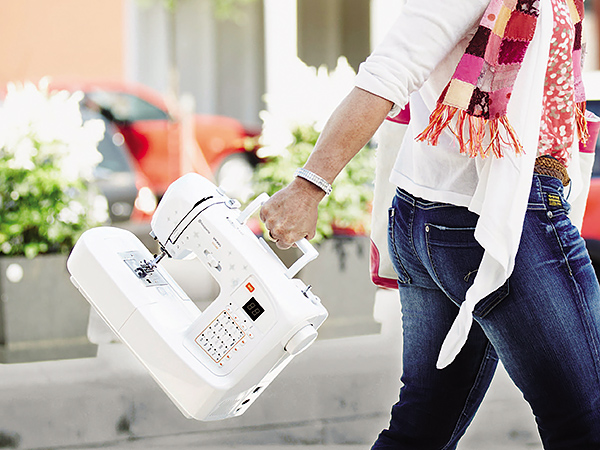
Featuring an automatic needle threader, the H-Class E20 simplifies the threading process, saving users time and effort. Additionally, this sewing machine comes with a carrying case, offering convenient storage and portability.
Included accessories with the H-Class E20 are the blind stitch foot, buttonhole foot, and zipper foot. These accessories enhance the versatility of the machine, allowing users to easily sew different types of stitches and techniques.
Overall, the Husqvarna Viking H-Class E20 sewing machine provides an efficient and reliable solution for a range of sewing projects. Its user-friendly features, adjustable stitch length, and variety of stitch patterns make it suitable for both beginners and experienced sewers.
General
| Brand | Husqvarna |
| Model | Viking H-Class E20 | VIKING H|CLASS E20 |
| Product | sewing machine |
| EAN | 2099000237330, 7393033079123 |
| Language | English |
| Filetype | User manual (PDF) |
Features
| Buttonhole type | 1 Step |
| Number of stitch patterns | 32 |
| Adjustable stitch length | Yes |
| Product color | White |
| Type | — |
| Sewing machine functions | Sewing |
| Free arm | — |
| Automatic buttonhole | — |
| Number of programs | — |
| Stitch length | 4 mm |
| Automatic needle threader | Yes |
| Stitch width | 5 mm |
Power
Packaging content
| Carrying case | Yes |
| Sewing machine accessories included | Blind stitch foot, Buttonhole foot, Zipper foot |
| Additional accessories | All purpose foot, Satin stitch foot, Quilting foot, Free-Motion/Darning foot, L-screwdriver, Seam ripper/ brush, Oil bottle, Pack of needles, Bobbins (3x), Seam guide, Spool pin felt (2x) |
Weight & dimensions
show more
Frequently Asked Questions
Can’t find the answer to your question in the manual? You may find the answer to your question in the FAQs about the Husqvarna Viking H-Class E20 below.
Does the Husqvarna Viking H-Class E20 have a 1 Step buttonhole type?
Yes, the Husqvarna Viking H-Class E20 has a 1 Step buttonhole type. This means that it is easy and convenient for the user to create buttonholes while sewing.
How do I thread the machine properly?
Start by placing the thread on the spool pin, then follow the threading path indicated on the machine, making sure to pass it through all the necessary guides and tension discs until it reaches the needle.
Why is the machine not sewing properly?
Check if the needle is inserted correctly, ensure that it is the appropriate size and type for your fabric. Also, make sure the thread tension is properly adjusted and that the bobbin is correctly inserted.
How can I adjust the stitch length and width?
To adjust the stitch length, use the stitch length dial, usually located on the front panel. To adjust the stitch width, use the stitch width dial, allowing you to modify the distance between needle positions.
How do I change the needle?
First, raise the needle to its highest position using the handwheel. Loosen the needle clamp screw, remove the old needle, and insert the new needle with the flat side facing the back. Finally, tighten the needle clamp screw securely.
What can I do if the machine keeps jamming or the thread keeps breaking?
Begin by checking the thread tension and adjust it as needed. Also, make sure the bobbin is properly wound and inserted. Additionally, examine the threading path to ensure there are no obstructions or tangles causing the issue.
How many stitch patterns does the Husqvarna Viking H-Class E20 have?
The Husqvarna Viking H-Class E20 has 32 stitch patterns. This provides a wide variety of options for the user to choose from, allowing for greater creativity and versatility in sewing projects.
What sewing machine functions does the Husqvarna Viking H-Class E20 have?
The Husqvarna Viking H-Class E20 has sewing machine functions. This means that it is specifically designed for sewing purposes and does not have additional features or functions outside of sewing.
Does the Husqvarna Viking H-Class E20 have an automatic needle threader?
Yes, the Husqvarna Viking H-Class E20 has an automatic needle threader. This makes it easier for the user to thread the needle, saving time and effort.
Does the Husqvarna Viking H-Class E20 come with a carrying case and sewing machine accessories?
Yes, the Husqvarna Viking H-Class E20 comes with a carrying case and sewing machine accessories including a blind stitch foot, buttonhole foot, and zipper foot. This provides convenience and allows for easy storage and transportation of the sewing machine, as well as additional options for different sewing techniques.
What is the weight of the Husqvarna Viking H-Class E20?
The Husqvarna Viking H-Class E20 has a weight of 7000 g.
What size needle should I use?
Which size of needle you can best use depends on the thickness of the fabric you use. With a thick fabric you should use a thick needle. The packaging of your needle states for which substances your needle is suitable.
Why does the needle break while sewing?
There can be several causes for needle breakage:
— Not using the right needle for the right fabric
— The needle is set too low
— The fabric is not properly guided
— The bobbin case is not inserted correctly
How long does a sewing needle last?
Generally, a sewing needle lasts about 7 to 9 hours.
Is the manual of the Husqvarna Viking H-Class E20 available in English?
Yes, the manual of the Husqvarna Viking H-Class E20 is available in English .
Is your question not listed? Ask your question here
Husqvarna Viking H-Class E10
View the manual for the Husqvarna Viking H-Class E10 here, for free. This manual comes under the category sewing machines and has been rated by 31 people with an average of a 8. This manual is available in the following languages: English. Do you have a question about the Husqvarna Viking H-Class E10 or do you need help?
Ask your question here
Product Images (8)

Husqvarna Viking H-Class E10 specifications
Below you will find the product specifications and the manual specifications of the Husqvarna Viking H-Class E10.
The Husqvarna Viking H-Class E10 sewing machine is a versatile and functional device that allows for a seamless sewing experience. With its 21 stitch patterns and adjustable stitch length of up to 4mm, users can easily customize their sewing projects to meet their desired specifications. Whether it’s basic sewing or intricate designs, this machine has the capability to handle a variety of tasks.
Designed with convenience in mind, the H-Class E10 features an automatic needle threader, making threading the needle quick and effortless. This saves time and reduces the frustration often associated with manual threading. Additionally, the machine includes a blind stitch foot, buttonhole foot, and zipper foot as accessories, allowing for greater flexibility and precision in various sewing techniques.
For those looking to achieve professional-looking finishes, the H-Class E10 offers a 4-step buttonhole type. This feature enables users to create buttonholes of consistent and accurate sizes, ensuring secure and neat closures on garments.
The machine also incorporates blind hem stitching, allowing for discreet and virtually invisible hems on clothing and other fabric projects. This feature is particularly useful for those seeking a polished and refined appearance.
Constructed with high-quality materials, the H-Class E10 sewing machine provides reliability and durability over time. With its sturdy structure and efficient operation, this machine can withstand rigorous use and deliver consistent results without compromising on performance.
In summary, the Husqvarna Viking H-Class E10 is a reliable and versatile sewing machine that offers a wide range of stitch patterns, adjustable stitch length, automatic needle threading, and various accessories. It is designed to provide professional-looking results and withstand the test of time, making it an ideal choice for both beginner and experienced sewers.
Sewing machine accessories included
Blind stitch foot, Buttonhole foot, Zipper foot
General
| Brand | Husqvarna |
| Model | Viking H-Class E10 | VIKING H|CLASS E10 |
| Product | sewing machine |
| EAN | 2099000237354 |
| Language | English |
| Filetype | Manual (PDF) |
Features
| Product colour | White |
| Type | — |
| Sewing machine functions | Sewing |
| Free arm | — |
| Automatic buttonhole | — |
| Buttonhole type | 4 Step |
| Number of programs | — |
| Number of stitch patterns | 21 |
| Stitch length | 4 mm |
| Adjustable stitch length | Yes |
| Automatic needle threader | Yes |
| Blind hem stitching | Yes |
Power
Packaging content
| Sewing machine accessories included | Blind stitch foot, Buttonhole foot, Zipper foot |
| Additional accessories | All purpose foot, Satin stitch foot, L-screwdriver, Seam ripper/ brush, Oil bottle, Second spool pin, Spool holders (2x), Pack of needles, Seam guide, Bobbins (3x), Darning plate, Felt pad |
Weight & dimensions
show more
Frequently Asked Questions
Can’t find the answer to your question in the manual? You may find the answer to your question in the FAQs about the Husqvarna Viking H-Class E10 below.
How to Properly Oil Your Husqvarna Viking H-Class E10 Sewing Machine
How can I adjust the tension on my sewing machine?
To adjust the tension, find the tension control dial and turn it right to increase tension or left to decrease tension. It is best to check the sewing on a small piece of fabric before making any changes to get the desired stitch quality.
Does the Husqvarna Viking H-Class E10 have an automatic needle threader?
Yes, the Husqvarna Viking H-Class E10 has an automatic needle threader. This feature makes threading the needle easier and faster for the user.
What type of buttonhole does the Husqvarna Viking H-Class E10 have?
The Husqvarna Viking H-Class E10 has a 4 Step buttonhole type. This allows for precise and professional-looking buttonholes.
Why does the sewing machine not switch on when I press the power button?
Ensure that the power cord is firmly inserted into a functional electrical socket, and make sure that the power switch is in the ‘on’ position.
How can I thread the bobbin properly?
Begin by placing the bobbin onto the bobbin spindle, and then follow the thread path indicated on the machine. Pass the thread through the bobbin winding tension disc and wind the bobbin until it stops automatically. Remember to trim the thread tail once you finish winding.
Why is the needle breaking frequently?
Check if the needle is correctly installed with the flat side facing the back and securely tightened. Also, ensure that you are using the correct type and size of needle for the fabric you are sewing. Additionally, examine the needle for any burs or damage that may be causing it to break.
Why is the stitching uneven or skipping stitches?
First, check that the needle is inserted correctly and not damaged. Next, ensure that the thread is threaded through all guides and the tension discs properly. Adjusting the tension as mentioned earlier may also help resolve uneven stitching. Additionally, using a suitable thread for your fabric and adjusting the stitch length and width settings can improve stitch quality.
How many stitch patterns does the Husqvarna Viking H-Class E10 have?
The Husqvarna Viking H-Class E10 has 21 stitch patterns. This provides the user with a variety of options for different sewing projects.
Does the Husqvarna Viking H-Class E10 come with sewing machine accessories?
Yes, the Husqvarna Viking H-Class E10 comes with sewing machine accessories. Some accessories included are the blind hem foot, buttonhole foot, and zipper foot. This allows the user to easily tackle different sewing tasks.
Can the Husqvarna Viking H-Class E10 do blind hem stitching?
Yes, the Husqvarna Viking H-Class E10 can do blind hem stitching. This feature is helpful for creating invisible hems on garments or home decor items.
What is the weight of the Husqvarna Viking H-Class E10?
The Husqvarna Viking H-Class E10 has a weight of 6300 g.
What size needle should I use?
Which size of needle you can best use depends on the thickness of the fabric you use. With a thick fabric you should use a thick needle. The packaging of your needle states for which substances your needle is suitable.
Why does the needle break while sewing?
There can be several causes for needle breakage:
— Not using the right needle for the right fabric
— The needle is set too low
— The fabric is not properly guided
— The bobbin case is not inserted correctly
How long does a sewing needle last?
Generally, a sewing needle lasts about 7 to 9 hours.
Is the manual of the Husqvarna Viking H-Class E10 available in English?
Yes, the manual of the Husqvarna Viking H-Class E10 is available in English .
Is your question not listed? Ask your question here
-
Page 1
E10 USER’S GUIDE[…]
-
Page 2
This houshold sewing machine is designed to comply with IEC/EN 60335-2-28 and UL1594 IMPORT ANT SAFETY INSTRUCTIONS When using an electrical appliance, basic safety precautions should always be followed, including the following: Read all instructions before using this household sewing machine. DANGER — T o reduce the risk of electric shock: • A s[…]
-
Page 3
Congratulations! As the owner of a new sewing machine, you will enjoy precision quality stitching on all types of fabrics, from multiple layers of denim to delicate silks. Y our sewing machine offers the ultimate in simplicity and ease of operation. For your safety and to fully enjoy the many advantages and ease of operation of your sewing machine,[…]
-
Page 4
4 LIST OF CONTENTS PRINCIP AL P ARTS OF THE MACHINE …………………………………………………………..5 ACCESSORIES…………………………………………………………………………………………… 7 FITTING THE SNAP-IN ACCESSORY BOX ……………………………………………………. 8 CONNECTING […]
-
Page 5
5 PRINCIP AL P ARTS OF THE MACHINE 1. Thread tension dial 2. Presser foot pressure 3. Thread take-up lever 4. Thread cutting 5. Presser foot 6. Needle plate 7. Accessories box 8. Bobbin stop 9. Stitch length dial 10. Stitch display 1 1. Reverse sewing lever[…]
-
Page 6
6 12. Spool pin 13. Bobbin winder 14. Hole for second spool pin 15. Hand wheel 16. Stitch selector dial 17. Power switch 18. Main plug socket 19. Bobbin thread guide 20. Upper thread guide 21. Handle 22. Presser foot lever[…]
-
Page 7
7 12 3 4 56 7 89 1 0 1 1 12 14 13 15 ACCESSORIES 1. All purpose foot 2. Zipper foot 3. Satin stitch foot 4. Blind hem foot 5 Buttonhole foot 6. L-screwdriver 7. Seam ripper/ brush 8. Oil bottle 9. Second spool pin 10. Spool holders (2x) 1 1. Pack of needles 12. Seam guide 13. Bobbins (3x) 14. Darning plate 15. Felt pad[…]
-
Page 8
8 FITTING THE SNAP-IN ACCESSOR Y BOX Keep the snap-in accessory box horizontal, and push it in the direction of the arrow . (1) T o open, lift up at the point of the arrow . (2)[…]
-
Page 9
9 1 3 CONNECTING THE MACHINE TO POWER SOURCE Connect the machine to a power source as illustrated. (1) A polarized plug must be used with the appropriate polarized outlet. (2) Attention: Unplug power cord when machine is not in use. Foot control Foot control regulates the sewing speed. (3) Attention: Consult a quali ¿ ed electrician if in doubt as[…]
-
Page 10
10 CHANGING THE BULB Attention: Disconnect the machine from the power supply by removing the plug from the main socket! Replace bulb with same type rated 10 watts (1 10-120V) or 15 watts (220-240V). — Loosen screw (A) as illustrated. (1) — Remove the cover (B). — Unscrew the bulb and ¿ t new one (C). (2) — Replace the cover and tighten screw . Sho[…]
-
Page 11
11 + — TWO-STEP PRESSER FOOT LEVER When sewing several layers or thick fabrics, the presser foot can be raised to extra high for easy positioning of the work. (A) The presser foot pressure of the machine has been pre-set and usually requires no readjustment for most fabrics (light-or-heavy weight). However , if you need to adjust the presser foot p[…]
-
Page 12
12 A TT ACHING THE PRESSER FOOT SHANK/ ANKLE Attaching the presser foot holder Raise the presser foot bar (a). (1) Attach the presser foot shank/ankle (b) as illustrated. Attaching the presser foot Lower the presser foot shank/ankle (b) until the cut-out (c) is directly above the pin on the foot (d). (2) Raise the lever (e). Lower the presser foot […]
-
Page 13
13 WINDING THE BOBBIN Place thread and spool holder onto spool pin (1). — For smaller spools of thread place spool holder with small side next to spool (2). — Wind thread clockwise around bobbin winder tension discs (3). — Thread bobbin as illustrated and place on spindle (4). — Push bobbin to right (5). — Hold thread end (6). — Step on foot contro[…]
-
Page 14
14 INSERTING THE BOBBIN When inserting or removing the bobbin, the foot and needle must be fully raised. 1. Open the hinged cover . 2. Hold the bobbin case with one hand. Insert the bobbin so that the thread runs in a clockwise direction (arrow). 3. Put the thread under the tension spring. 4. Hold the bobbin case by the hinged latch. 5. Insert it i[…]
-
Page 15
15 INSERTING THE NEEDLE Change the needle regularly , especially if it is showing signs of wear and causing problems. Insert the needle following the illustrated instructions. A. Loosen the needle clamp screw and tighten again after inserting the new needle. (1) B. The À at side of the needle shaft should be towards the back. C/D.Insert the needle[…]
-
Page 16
16 THREADING THE UPPER THREAD Threading is simple but it is important to thread correctly to prevent sewing problems could result. — Start by raising the needle to its highest point (1), and also raise the presser foot to release the tension discs. (2) Attention: For safety , it is strongly suggested you turn off the power before threading. — Lift […]
-
Page 17
17 THREAD TENSION Basic thread tension setting: “4” T o increase the tension, turn the dial to the next number up. T o reduce the tension, turn the dial to the next number down. A. Normal thread tension — upper and bobbin thread join in fabric B. Upper thread tension too loose — upper thread “loops” on the underside of fabric C. Upper threa[…]
-
Page 18
18 BRINGING UP THE BOBBIN THREAD Hold the upper thread with the left hand. T urn the handwheel towards you until the needle is raised. (1) Pull on the upper thread to bring the bobbin thread up through the stitch plate hole. Place both threads to the back under the presser foot. (2)[…]
-
Page 19
19 REVERSE SEWING At the end of a seam, press down the reverse sewing lever . Sew a few reverse stitches to “the tie off” the thread ends. Release the lever and the machine will sew forwards again. (1/A) REMOVING THE F ABRIC T urn the handwheel toward you to bring the thread take up lever to its highest position, raise the presser foot and remo[…]
-
Page 20
20 MA TCHING NEEDLE / F ABRIC / THREAD NEEDLE, F ABRIC SELECTION NEEDLE SIZE F ABRICS THREAD 9-1 1(65-75) Lightweight fabrics-thin cottons, voile, silk , muslin, interlocks, cotton knits, tricots, jerseys, crepes, woven polyester , shirt & blouse fabrics. Light-duty thread in cotton, nylon or polyester . 12(80) Medium weight fabrics-cotton, sat[…]
-
Page 21
21 STRAIGHT STITCHING Straight stitching center needle position T urn the stitch selector dial so that the “A” appears in the stitch display window . Snap on the standard presser foot. Adjust the stitch length by turning the stitch length dial to the desired stitch length. 2.5 is standard stitch length. T o get the reinforced triple straight st[…]
-
Page 22
22 ZIGZAG STITCHING T urn the stitch selector dial so that the stitch display shows “C”-zig- zag. T urning the stitch selector dial will increase or decrease the zig zag width. Snap on the standard foot. Function of stitch length dial while zigzaging The density of zigzag stitches increase as the setting of stitch length dial approaches “0”[…]
-
Page 23
23 HOW TO SEW BUTT ONHOLES Preparation Select buttonhole with the stitch Selection dial. Snap on The buttonhole foot. Adjust the stitch length dial between “0.5” — “1”. The density of the stitch depends on thickness of the fabric. Note: Always test sew a buttonhole. T o prepare the fabric Measure the diameter of the button and add 0.3 cm (1[…]
-
Page 24
24 Tips — Slightly reduce upper thread tension to produce a satin stitch on top. — Place stabilizer underneath for ¿ ne and stretchy fabrics. — It is best to sew a cord for a buttonhole on a stretch or knit fabrics. The buttonhole colomns should sew over the cord. (5)[…]
-
Page 25
25 BLIND HEM For hems, curtains, trousers, skirts, etc. Select Blind hem for stretch fabrics. Select Blind hem for woven fabrics. Snap on Blind hem foot. (1) Stitch length 1.5-2.5 Note: It takes practice to sew blind hems. Always make a sewing test ¿ rst. Fold the fabric as illustrated with the wrong side up. (2) Place the fabric under the foot. T[…]
-
Page 26
26 ZIPPERS AND PIPING Set the machine as illustrated. (1) The zipper foot can be snapped onto the right or left, depending on which side of the foot you are going to place against the zipper or piping. (2) T o sew past the zipper pull, lower the needle into the fabric, raise the presser foot and push the zipper pull behind the presser foot. Lower t[…]
-
Page 27
27 3-STEP ZIG-ZAG Sewing on lace and elastic, darning, mending, ¿ nishing edges. Set the machine as illustrated. (1) Patching: Place the patch in position and stitch around edges. The stitch length can be shortened to produce very close stitches. (A) When mending tears, it is advisable to use a piece of backing fabric to reinforce. The stitch dens[…]
-
Page 28
28 STITCH SELECTION T riple straight stitch: (1) For reinforced seams. T urn the stitch length dial to “S1”. The machine sews two stitches forwards and one stitch backwards. This gives triple reinforcement. T riple zig-zag: (2) For hardwearing seams, hems and decorative seams. T urn the stitch length dial to “S1”. T riple zig-zag is suitabl[…]
-
Page 29
29 Attention: Disconnect the machine from the electricity supply by removing the plug from the main socket. When cleaning the machine, it must always be disconnected from the electricity supply . Remove the stitch plate T urn the handwheel until the needle is fully raised. Open the hinged front cover and unscrew the needle plate screw withe the scr[…]
-
Page 30
30 TROUBLE SHOOTING GUIDE Problem Cause Correction Upper thread breaks 1. The machine is not threaded correctly . 2. The thread tension is too tight. 3. The thread is too thick for the needle. 4. The needle is not inserted correctly . 5. The thread is wound around the spool holder pin. 6. The needle is damaged. 1. Rethread the machine. 2. Reduce th[…]
-
Page 31
Please note that on disposal, this product must be safely recycled in accordance with relevant National legislation relating to electrical/electronic products. If in doubt please contact your retailer for guidance[…]
-
Page 32
VSM Group AB • SE-561 84 Huskvarna • SWEDEN www .husqvarnaviking.com 412 97 80 — 26C • English • Inhouse production • © 2005 VSM Group AB • All statements valid at time of printing • Printed in Sweden on environmental-friendly paper •[…]
Производитель: Husqvarna
1 обзор:
5.0 (Отличный товар)
Швейная машина с микропроцессорным управлением Хускварна Викинг 100Q
Швейная машина H|Class 100Q является наиболее бюджетным вариантом среди машин с микропроцессорным управлением компании Husqvarna. Ее преимущество — компактность и небольшой вес, Вы можете легко брать ее с собой при необходимости. Машина обладает основным набором стандартных и декоративных строчек, а также рядом функций, присущих электронным машинам. Долговечное светодиодное освещение препятствует образованию теней на рабочей поверхности. Модель Husqvarna 100Q прекрасно подойдет тем, кто увлекается шитьем и любит время от времени порадовать себя и близких изделиями, созданными своими руками.
Особенности:
Компактная и легкая
Маленкий вес 7 кг и небольшие размеры модели 100Q позволяют с легкостью переносить машину, брать на обучающие курсы и мастер-классы.
Выбор строчек
Машина оснащена оптимальным набором как рабочих, так и декоративных строчек, а также может автоматически выполнять петлю. Выбор нужной строчки на машине как никогда удобен. При выборе определенного вида строчки длина и ширина устанавливаются автоматически. После этого при необходимости Вы можете их изменить.
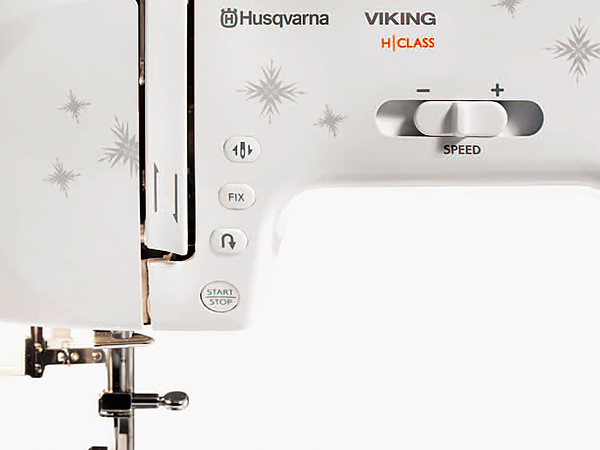
Старт/Стоп и Скорость
Машина 100Q обладает множеством функций, экономящих ваше время и облегчающих процесс шитья. Беспедальное шитье поможет вам при выполнении длинных прямых швов, декоративных строчек и шитье в свободной технике. Регулировка скорости поможет выбрать оптимальную скорость шитья в зависимости от сложности.
Положение иглы и закрепка
Кнопка верхнего/нижнего положения иглы необходима при выполнении поворота ткани для шитья в другом направлении, при аппликационных работах. Кнопка FIX позволяет выполнить точечную закрепку и автоматически остановить шитье.

Давление лапки
Функция регулировки давления лапки позволяет добиваться максимально хороших результатов при шитье как легких, так и тяжелых тканей, а также при квилтинге или выполнении эластичных швов.
Жесткий чехол
Жесткий чехол защитит вашу машину от нежелательных повреждений как дома, так и при ее перевозке.
Инструкции для Husqvarna Viking H|Class 100Q:
Инструкция по эксплуатации Husqvarna H|Class 100Q (PDF, 5.4MB, рус)
Характеристики Husqvarna Viking H|Class 100Q:
- Тип челнока
- Горизонтальный вращающийся челнок
- Максимальная ширина строчки
- 7 мм
- Максимальная длина стежка
- 4,5 мм
- Макси-узоры
- нет
- Количество строчек
- 20
- Режим вымётывания петли
- 2 вида петель. Выметывание автоматическое в соответствии с размером пуговицы
- Алфавит
- нет
- Верхний транспортёр
- нет
- Длина платформы
- 14,5 см
- Размеры рукавной платформы (длина/обхват)
- 7,5/27,5 см
- Ширина гребёнки транспортера
- 16 мм
- Высота подъема лапки (нормальная/максимальная)
- 5/9
- Электронный стабилизатор усилия прокола
- есть
- Регулятор (ограничитель) максимальной скорости
- есть
- Программируемая остановка иглы в верхнем/нижнем положении
- есть
- Нитевдеватель
- есть
- Автоматическая обрезка нитей
- нет
- Горизонтальное расположение катушки
- есть
- Регулятор давления лапки
- есть
- Потребляемая мощность
- 70 Вт
- Тип освещения
- Светодиодное
- Органайзер
- нет
- Автостоп при намотке нитки на шпульку
- есть
- Линейка на корпусе
- нет
- Чехол
- Жесткий
- Дисплей
- 2 символа
- Швейный советник
- нет
- Память
- нет
- Зеркальное отображение образца строчки
- нет
- Клавиша шитья без педали
- есть
- Коленный рычаг подъема лапки
- нет
- Стандарт игл
- 130/705H
- Страна разработки
- Швеция
- Страна производства
- Китай
- Гарантия
- 3 года
- Вес без упаковки
- 6,7 кг
- Вес с упаковкой
- 9,2 кг
Строчки Husqvarna Viking H|Class 100Q:
Строчки Husqvarna H|Class 100Q и рекомендации по их использованию (PDF)
Комплектация
- Педаль
- Шнур
- Жесткий чехол
- Лапка стандартная (A)
- Лапка для декоративных строчек (B)
- Лапка для автоматической петли (C)
- Лапка для невидимой подгибки (D)
- Лапка для вшивания молнии (E)
- Лапка для прямой строчки с разметкой 1/4″ (P)
- Стержень для второй катушки
- Отвертка для игольной пластины
- Линейка-направитель
- Распарыватель с щеточкой
- Фетровая подкладка под катушку
- Ограничитель для катушки большой
- Шпульки
- Иглы
Популярные аксессуары для Husqvarna Viking H|Class 100Q
Наличие:
есть
Наличие:
есть
Обратите внимание!
«Швейный Мир» является официальным дистрибьютором швейных машин фирмы Husqvarna Viking. Покупая продукцию Husqvarna Viking в наших магазинах, Вы получите качественную машину, обеспеченную гарантийным и сервисным обслуживанием.
Отзывы о товаре Husqvarna Viking H|Class 100Q
-
Федорова Надежда
-
Отличный товар
Отзывы о товаре могут оставлять только зарегистрированные покупатели.
FAQ: Types of Manuals and Their Contents
Husqvarna Viking H Class E10 Manuals come in various types, each serving a specific purpose to help users effectively operate and maintain their devices. Here are the common types of Husqvarna Viking H Class E10 User Guides and the information they typically include:
- User Manuals: Provide comprehensive instructions on how to use the device, including setup, features, and operation. They often include troubleshooting tips, safety information, and maintenance guidelines.
- Service Instructions: Designed for technicians and repair professionals, these manuals offer detailed information on diagnosing and repairing issues with the device. They include schematics, parts lists, and step-by-step repair procedures.
- Installation Guides: Focus on the installation process of the device, providing detailed instructions and diagrams for proper setup. They are essential for ensuring the device is installed correctly and safely.
- Maintenance Manuals: Provide guidance on routine maintenance tasks to keep the device in optimal condition. They cover cleaning procedures, part replacements, and regular servicing tips.
- Quick Start Guides: Offer a concise overview of the essential steps needed to get the device up and running quickly. They are ideal for users who need immediate assistance with basic setup and operation.
Each type of Husqvarna Viking H Class E10 instruction is designed to address specific needs, ensuring users have the necessary information to use, maintain, and repair their devices effectively.
Related Instructions for Husqvarna Viking H Class E10:
1
Platinum 755
60
685
131
2
HUSKYSTAN C10
72
150
35
3
Oscar
Operation & user’s manual Husqvarna Viking Sewing Machine Operation & user’s manual (File: husqvarna-viking-oscar-operation-user-s-manual-36, 18.02.2025)
36
1201
241
4
Huskylock s21
48
622
94
5
Lily 535
Instruction book PDF User Manual (@E64X98), Husqvarna Viking Lily 535 Sewing Machine (15.03.2025)
52
196
40
6
Designer Diamond Royale
142
270
46
7
DESIGNER RUBY deLuxe
Step-by-step handbook #T4VO2B: DESIGNER RUBY deLuxe Sewing Machine Step-by-step handbook
30
148
32
9
Designer Jade 35
84
1378
331
10
H Class 200S
64
692
146
Sewing Machine Devices by Other Brands:
|
AMF ES-505 Parts And Service Manual #91SW29: ES-505 Sewing Machine Parts and service manual ELECTRONIC EYELET BUTTONHOLE 08 Feb 2025 | 146 |
|
|
UnionSpecial 3100A Instructions And Parts List Sewing Machine #78IW33 INSTRUCTIONS AND ILLUSTRATED 26 May 2025 | 24 |
|
|
Brother b831 Service Manual User Guide: Brother b831 (J6V7C2, Upd.Sun 01.2025) 9|plrT»«* 05 Jan 2025 | 84 |
|
|
Duerkopp Adler 367 Installation Instructions Manual Sewing Machine #E24L3Q 367 18 Apr 2025 | 41 |
Categories:
Sewing Machine
Lawn Mower