

s
HiPath 3000
HiPath AllServe
Hicom 150 E /H
optiPoint 500 economy
optiPoint 500 basic
optiPoint 500 standard
optiPoint500 advance
Инструкция по
эксплуатации
Введение
Введение
В этой инструкции по эксплуатации описывается работа с телефонными аппаратами
optiPoint500 economy, optiPoint 500 basic, optiPoint 500 standardиoptiPoint 500 advance,
подключенными к
В инструкции описываются все функци телефонов.Возможно,некоторые функции
которыми вы захотите воспользоваться,будут недоступны на вашем телефоне.Это может
произойт и по сл еду ющ им пр ичина м
•
Функция не сконфигурирована на вашем телефоне—обратитесь в службу обслуживания
•
Ваша коммуникационная платформа не поддерживает эту функцию—обратитесь в
представительство фирмы
Рекомендации
HiPath 3000/HiPath AllServe.
,
:
Siemens
Не пользу йтесь телефоном в помещениях,где существует опасность
взрыва
!
для модернизации вашей системы
.
.
Используйте только оригинальные принадлежности
Использование принадлежностей других изготовителей опасно и ведет к
отмене гарантии и маркировки
Не разбирайте телефон.При возникновении проблем обратитесь к
Маркировка
специалистам
Не допускайте контакта телефона с красящими или агрессивными
жидкостями
напитками
Уход за телефоном,см.стр
CE
Устройство соответствует требованиям директивы ЕС
подтверждено маркировкой
,
обслуживающим систему
,
например,кофе,чаем,соком или безалкогольными
.
Символ экологичности
Устройство было изготовлено в соответствии с нашей
сертифицированной системой контроля экологичности
процесс гарантирует минимизацию расхода энергии и сырья
следовательно
,
уменьшение отходов
. 104.
CE.
CE.
Siemens.
.
1999/5/EG,
(ISO 14001).
.
как это
Этот
,
и
2
Содержание
Что нужно знать пользователю
Панель
optiPoint500economy/basic/standard……………………..9
Панель
optiPoint 500 advance
Пользование инструкцией
Индикация на дисплее
Выбор функции
…
в диалоговом режиме
…
через сервисное меню
…
с помощью функциональной клавиши
Какие функции можно использовать
Базовые и комфортные функции
Допол ните льны е функции дл я або не нтс ких гр упп и сис те м ы ше ф
секретарь
Как эффективно использовать телефон
Базовые и комфортные функции
…………………………………………12
……………………………………………13
Входящая и исходящая связь
Прием вызова—разговор через трубку
Прием вызова через громкоговоритель(громкая связь
Прослушивание в помещении во время разговора
Переключение на громкую связь
Переключение на трубку
Второй вызов
Прием второго вызова
Разреше ние и запр ет(автоматической)сигнализации второго вызова
Вкл./выкл.сигнализации второго вызова
Целевой перехват вызова
Целевой перехват вызова
Отказ от приема вызовов
Использование почтовых ящиков
Использование громкой связи
Включение/блокировка функции«Ответ по громкой связи
Включение/блокировка функции«Ответ по громкой связи
Прием вызова с использованием гарнитуры
Включение и выключение функции«Блокировка вызова
Включить/выключить функцию«Не беспокоить
Идентификация анонимных абонентов(злонамеренных вызовов)(не для
США
)…………………………………………………22
Включение и выключение микрофона
Прием вызовов с домофона и открывание двери
Перехват вызова с автоответчика
Просмотр количества ожидающих вызовов и индикация перегрузки
…………………………………………..16
с приставкой
………………………………….11
………………………………….11
…………………………………12
………………………………..12
optiPointkeymodule……..10
……………………12
?…………………………13
…………………………. 13
………………………..13
……………14
…………………………14
……………………………. 16
…………………………………..16
………………………………….16
……………………18
………………………………….18
………………………………….19
…………………………………..19
…………………………….19
………………………………20
…………………….21
«………………..22
…………………………23
…………………………….25
……….9
—
)……………14
………………..15
«…………20
«…………21
«………….21
…………………24
….26
17
3
Содержание
Исходящие вызовы
Набор номера со снятой трубкой
Набор номера,не снимаятрубки
Блочный набор/исправление номеров
Подавление индикации номера вызывающего абонента
Селекторная связь
Активизация тонального донабора(многочастотныйдонабор
Автоматическое соединени(горячая линия
Резервирование линии
Присвоение абонентского номера(не для США
Посылка сигнала в сеть
Ассоциированный набор/помощь при наборе
………………………………………..29
…………………..27
…………………………… 27
……………………………..27
………………………28
……………29
) ………30
)…………………….30
…………………………………….31
)…………………31
……………………………………32
……………………33
Одновременный разговор с несколькими
абонентами
Вызов второго абонента(наведение справки
Переключение на удерживаемое соединение(попеременный разговор по
двум линиям
Конференц—связь
Конференц связь с участием до пяти абонентов
(
только организатор
Просмотр абонентов,участвующих в конференции(только
организатор
Отключение абонентов от конференц—связи(только организатор
Выход из конференц—связи
Завершение конференц—связи(только организатор
Отключение абонента АТС
(
только для США
Переключение соединения
…
После вызова по селекторной связи(объявления)в группе
Парковка вызова
Прием запаркованного вызова
Перев о д внеш них в ызо во в на удержание
Прием удерживаемого вызова
………………………..34
)………………….. 34
)…………………………………………34
…………………………………………35
) …………………………………..35
)…………………………………………36
………………………………36
)……………36
ISDN
от конференц—связи
)…………………………………….36
………………………………37
……..37
…………………………………………38
……………………………38
…………………….39
…………………………….39
)…36
Вызов по сохраненным номерам
Использо ва ние с писк а позв о нивш их
Просм о тр с писк а позв о нивш их
Завершение просмотра списка позвонивших
Просмотр времени вызова и дополнительной информации
Набор ном е р а с испо л ьзов ан ием с пис ка по зво нивших
Удаление записи из спис ка позвонивших
4
………………………… 40
……………………………40
…………40
…………………40
……….41
………….41
……………………41
Содержание
Сохранение номера абонента,с которым вы разговариваете,в списке
позвонивших
Повторный набор номера
Использовние именных клавиш
Набор номера через индивидуальн.или центральный сокращ.набор
(
повтор набора номера
………………………………….43
……………………………..44
)………………………42
….44
Просмотр/закрепление стоимости соединений
Просмотр стоимости соединений(не для США
Просмотр информации о стоимости соединений для другого телефона(не
для США
Набор с закреплением стоимости соединений
Если вы не дозвонились
Использование обратногол вызова
Сигнализация второго вызова–обратить на себя внимание
Подключение к соединению–вклиниться в разговор
Настройка телефона
Изменение громкости звонка
Изменение мелодии звонка
Регулировка громкости спецсигнала
Настройка громкой связи под акустику помещения
Регулировка громкости во время разговора
Регулировка у гла наклона дисплея
Выбор языка дисплейных сообщений
Блокировка телефона от несанкционированного использования
Сохранение личного кода
)……………………………………………..46
………………..48
…………………………… 48
Заказ обратного вызова
Прием обратного вызова
Проверка/удаление заказа на обратный вызов
…………………………………48
………………………………..48
………………….51
……………………………….51
…………………………………51
…………………………. 51
…………………………… 52
…………………………52
………………………………….55
)…………………45
…………………..47
………………..48
…………49
……………..50
………………52
…………………….52
……..54
45
Сохранение абонентских номеров,функций
процедур и напоминаний
Сохра нение но м ер о в по д именны ми кл ав иш ам и
Сохранение индивидуальных номеров сокращенного набора
Закрепле ние функций за клавиш ам и
Закрепле ние за кл ав иш е й проц едуры(этапов операции
Сохранение напоминаний
………………………………….64
………………56
…………………56
……….57
…………………………. 58
) …………..62
,
5
Содержание
Проверка телефона
Проверка работоспособности телефона
Проверка назначения клавиш
Переадресация вызовов
Использование временной переадресации
Использование ночного режима
Переадресация вызовов в сеть оператор а
переадресация множественных абонентских номеров
(MSN) (
не для США
) ……………………………………..68
Использование других функций
Передача сообщений
Просмотр и удаление отправленных сообщений
Ответ на сообщения
Оставить сообщение/текст ответа
Удаление текста ответа
Использование другого телефона как своего собственного
Поменять абонентский номер(замена аппарата
передислокация абонента
Info
при приеме телефакса/сообщения на автоответчик
Отмена услуг и функций(общесистемная отмена функций телефона
Скрытое прослушивание
Контроль помещения
Активизация функций для другого телефона
Блокировка другого телефона от использования другими лицами
Использо ва ние с ист ем ных ф у нк ций с внеш них т ел ефо но в
DISA(DirectInwardSystemAccess) …………………………..76
Использование функций в сетях
(
клавиш ный набо р
Управление подключенными компьютерами или программами/телефонная
служба данных
Управление реле
…………………………………….. 69
……………………………………..74
) ………………………………………78
(
только для
…………………………………………80
…………………..65
………………………. 65
……………………………….65
……………….66
…………………….. 66
……………………………..67
/
…………69
………………….69
……………………………………69
………………………….70
…………………………………66
………….71
/
)………………………………… 72
…………….73
)…73
…………………………………..74
……………………75
…….76
ISDN
с помощью набора кодов
HiPath 3500/3550/3700/3750) . …………79
6
Содержание
Датчики(только
Радиопейджинг(не для США
Простое оборудование для пейджинга
Расшир енно е о бор удование дл я пейджинга(только
Функции группы и системы шеф—секретарь
Группа
HiPath 3300/3350/3500/3550) …………………..80
)………………………………81
……………………..81
Hipath 3700/3750)81
/
шеф—секретарь с выделенными линиями
83
Использование линейных клавиш
Прием вызовов с помощью линейных клавиш
Вызовы с использованием линейных клавиш
Использование линейных клавиш для удержания и повторного приема
вызовов
Попеременный разговор по нескольким линиям
Переадресация вызовов для линии
Использование клавиш прямого вызова
Использование клавиш
Прямой вызов абонентов группы
Переключение соединения
Прием вызова для другого абонента
Подключение или отключение от группового вызова
(
не для телефона шефа в группе шеф—секретарь
Перекл ючение вы зов о в непо с ре дс тв енно на аппарат ш еф а(только в группе
—
шеф
…………………………………………….84
секретарь
)………………………………………….89
…………………………… 83
………………..84
…………………84
………………85
………………………..85
(DSS)…………………..87
DSS
для приема вызовов
…………………………. 87
…………………………………88
…………………………. 88
……………..87
))………………..88
Использование других функций в группе
Включение и выключение группового вызова
Прием вызова,адресо в анно г о другому абоненту ва ш ей гр уппы
Подключение вызова
Равномерное распределение вызовов
……………………………………..92
(UCD) ……………………93
…………………..90
….90
……..92
7
Содержание
Объединение систем в сеть
LAN (
сеть ПК
)
Специальные функции в компьютерной сети
(LAN)…………………………….95
Отключение от общего абонентского ввода/группы вызова
Переадресация«Следуй за мной
Использование ночного режима
Подключение вызова
Управление реле
Открывание двери
О телефоне
……………………………………..98
…………………………………………99
……………………………………….100
«…………………………….96
……………………………..97
……….. 95
Надписи для клавиш и документация
Надписи для клавиш
Крепление таблички с абонентскими номерами
Документация
Принадлежности
Рекомендации
Уход за телефоном
Устранение неисправностей
Сообщения об ошибках,выводимые на дисплей
Помощ ь в ре ш ении пр обл е м
Алфавитный указатель
……………………………………. 101
…………………102
………………………………………….102
………………………………………..103
……………………..104
…………………………………….. 104
……………………………….104
………………..105
……………………………….105
……………….106
……101
8
Что нужно знать пользователю
Что нужно знать пользователю
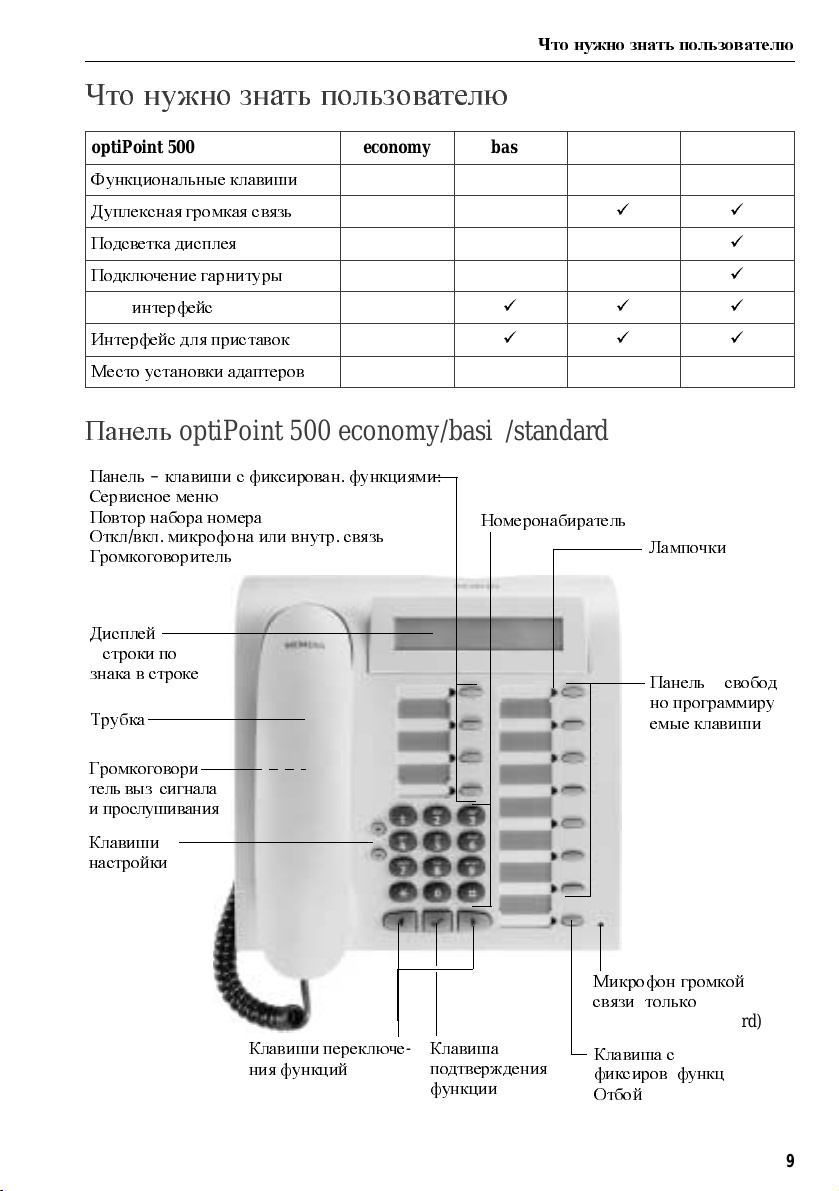
optiPoint 500 economy basic standard advance
Функциональные клавиши
Дуплексная громкая связь
Подсветка дисплея
Подключение гарнитуры
USB-
интерфейс
Интерфейс для приставок
Место установки адаптеров
12 12 12 19
—
—
—
—
—
0112
Панель
Панель
Сервисное меню
Повтор набора номера
Откл
Громкоговоритель
Дисплей
2
строкипо
знака в строке
Трубка
Громкоговори
тель выз.сигнала
и прослушивания
Клавиши
настройки
optiPoint 500 economy/basic/ standard
–
клавиши с фиксирован.функциями
/
вкл.микрофона или внутр.связь
,
24
—
Клавиши переключе
ния функций
:
Клавиша
—
подтверждения
функции
Номеронабиратель
Микрофон громкой
связи
optiPoint500 standard)
Клавиша с
фиксиров
Отбой
Лампочки
Панель
но программиру
емые клавиши
(
только
.
функц
–
свобод
:
—
—
9
Что нужно знать пользователю
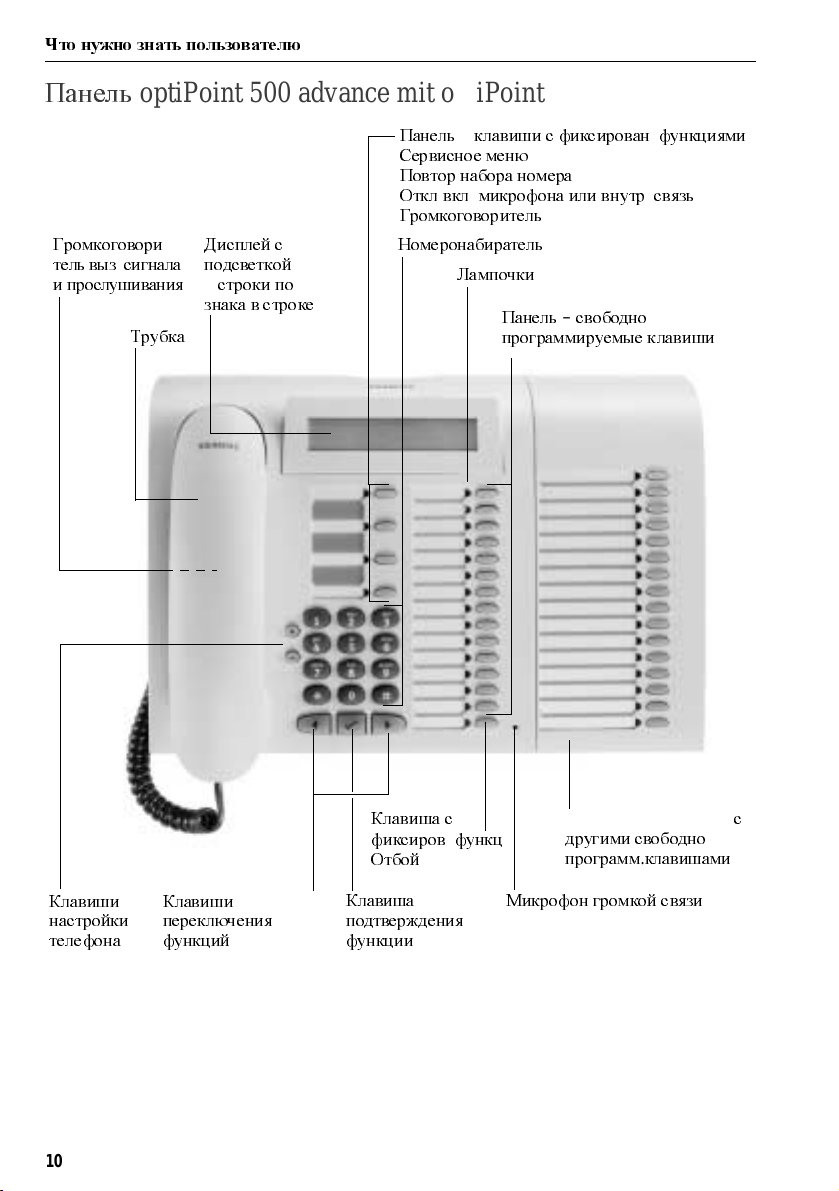
Панель
Громкоговори
тель выз.сигнала
и прослушивания
optiPoint 500 advance mit optiPoint key module
Трубка
Дисплей с
—
подсветкой
2
знака в строке
строки по
24
Панель
–
клавиши с фиксирован.функциями
Сервисное меню
Повтор набора номера
Откл
/
вкл.микрофона или внутр.связь
Громкоговоритель
Номеронабиратель
Лампочки
Панель–свободно
программируемые клавиши
:
Клавиши
настройки
телефона
10
Клавиши
переключения
функций
Клавиша с
фиксиров
Отбой
Клавиша
подтверждения
функции
.
optiPointkey module
функц
:
другими свободно
программ
Микрофон громкой связи
.
клавишами
с
Шаг за шагом
Сервисное меню
Громкоговоритель
Наведение справки
Тепбр звонка
?
Что нужно знать пользователю
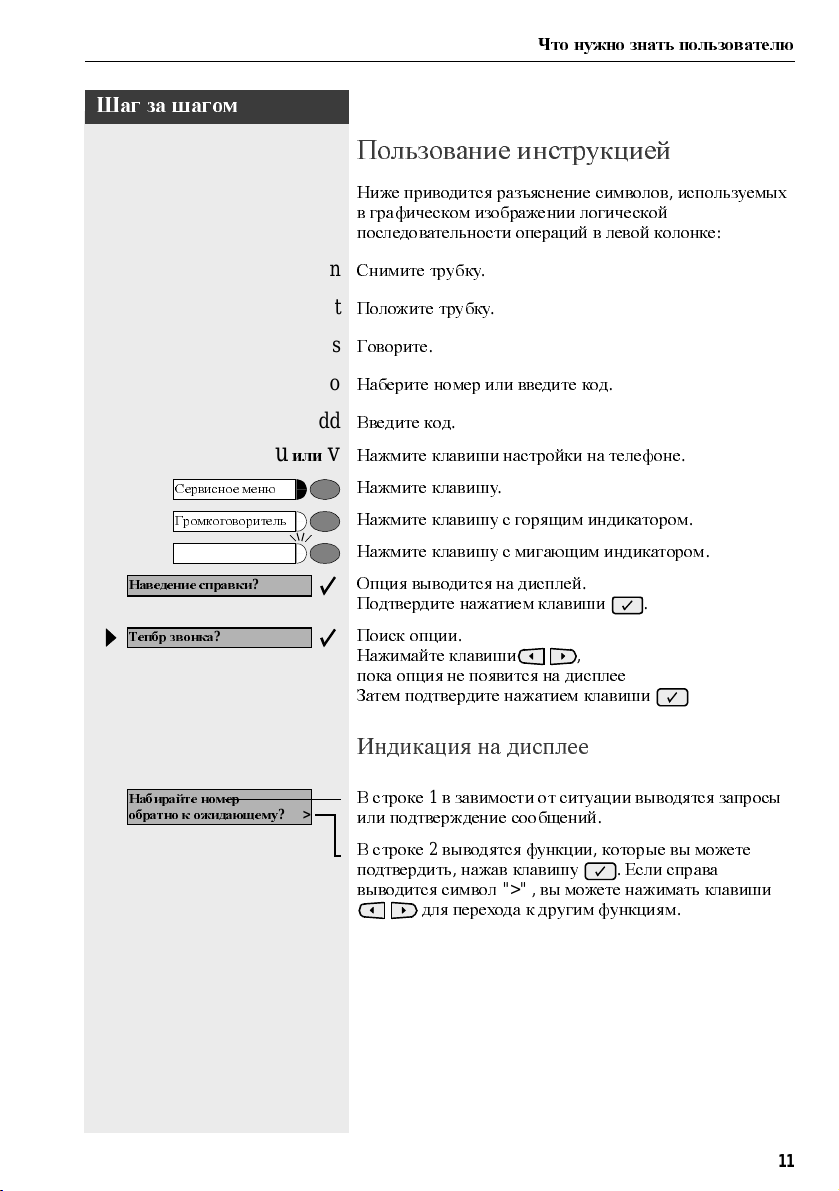
Пользование инструкцией
Ниже приводится разъяснение символов,используемых
в графическом изображении логической
последовательности операций в левой колонке
n
Снимите трубку
t
Положите трубку
s
Говорите
o
Наберите номер или введите код
dd
Введите код
u
илиvНажмите клавиши настройки на телефоне
Нажмите клавишу
Нажмите клавишу с горящим индикатором
Нажмите клавишу с мигающим индикатором
?
Опция выводится на дисплей
Подтвердите нажатием клавиши
Поиск опции
Нажимайте клавиши
пока опция не появится на дисплее
Затем подтвердите нажатием клавиши
.
.
.
.
.
.
.
,
:
.
.
.
.
.
.
.
Набирайте номер
обратно к ожидающему
? >
Индикация на дисплее
В строке1в завимости от ситуации выводятся запросы
или подтверждение сообщений
В строке2выводятся функции,которые вы можете
подтвердить
выводится символ
,
нажав клавишу
«>» ,
для перехода к другим функциям
.
.
Если справа
вы можете нажимать клавиши
.
11

Что нужно знать пользователю
Шаг за шагом
Выбор функции
…
в диалоговом режиме
Переадресация вкл
Обратный вызов
Послать
Info
Сервисное меню
#0=
Отключить службы
Некоторые функции
сотоянии
.
Выберите клавишами и подтвердите выбор
клавишей
Другие функции
установленного соединения
но линия занята
Подтвердите клавишей
или
Выберите клавишами и подтвердите клавишей
…
Dazu drьckenSiezuerstdieTaste»
schlie
z. B: «#0=Dienste zur
Нажмите клавишу
?
Выберите клавишами и подтвердите клавишей
или
rd
Введите код
Коды указаны в краткой инструкции,но они
отображаются также на дисплее вместе с названием
функции
,
напр
.
через сервисное меню
Я
end werden Ihnen Auswahlmцglichkeiten angeboten,
.
.
.
можно выбрать в исходном
.:
.
можно выбратьпо ситуации во время
:
ь
cksetzen» ‡ Seite 73.
.
Напр.вы набрали номер
.
Сервисное меню
,
«. An-
12
…
с помощью функциональной клавиши
Функцию,сохраненнную вами под клавишей(см.стр
58),
вы можете вызвать напрямую,напр
Нажмите клавишу«Вкл./выкл.блокировки вызова
Функция активизируется
.
.:
«.
.

Что нужно знать пользователю
Какие функции можно использовать
?
Базовые и комфортные функции
Вы можете пользоваться всеми базовыми и комфортными функциями вашей
телекоммуникационной платформы
режиме на дисплее
,
в сервисном меню и на функциональных клавишах
,
которые предлагаются в диалоговом
.
Дополнительные функции для абонентских групп и
системы шеф—секретарь
См.стр
.83f.
В целях повышения эффективности телефонной связи для рабочих и
проектных групп администратор системы может сконфигурировать
дополнительные функции коллективного пользования
требованиям повседневной жизни абонентской группы
пользоваться наряду с базовыми и комфортными функциями
Кроме групп перехвата вызова,групп с общим номером(групповой вызов
и групп с распределением вызововможносформировать еще и абонентские
группы с подключением нескольких линий к каждому телефону
Телефон с линейными клавишами отличается тем,что на них вы найдете как
свойномер
и можете звонить одновременно по нескольким линиям
К другому ряду коллективных функций принадлежат функции системы
шеф
Эти функции конфигурируются администратором системы.Вы можете
пользоваться шеф
наряду с базовыми и комфортными,а также другими коллективными
функциями
Телефон системы шеф—секретарь располагает клавишами прямой связи с
шефом или секретарем
клавишами переключения вызова
,
—
секретарь
.
таки номерасвоих коллег.Вы получаете доступ ко всем линиям
.
—
секретарскими функциями(функциями секретариата
,
линейными клавишами для шефа или секретаря и
.
,
отвечающие
.
Ими можно
.
.
.
)
)
Как эффективно использовать телефон
•
Наверняка у вас есть коллеги или внешние абоненты,которым вы
особенно часто звоните
определенными клавишами
(
Запись номера под именной клавишей см.стр
•
Набираемый номер часто бывает занят.В суете рабочего дня быс тро
забываешь перезвонить еще раз
«
Обратный вызов«(см.стр
Basis- und Komfortfunktionen
.
Их номера вам нужно записать под
,
чтобы быстро и удобн о набрать их
. 56).
.
Поэтому пользуйтесь функцией
. 48).
?
13
Входящая и исходящая связь
Шаг за шагом
Вхо д ящая и исх о дящая связь
Телефон настроен на специальную сигнализацию
вызовов
•
•
•
•
вызывающего абонента
Прием вызова—разг овор через трубку
Телефон звонит.На дисплей выв одитс я информ ация о
вызывающем абоненте
:
При поступлении внутреннего вызова каждые четыре
секунды звучит одиночный звонок
последовательность
При поступлении внешнего вызова каждые четыре
секунды звучит последовательность из двух звонков
(
двухтональная последовательность
При поступлении вызова от дверного переговорного
устройства каждые четыре секунды звучит
последовательность из трех звонков
последовательность
Ожидающий вызов сигнализируется коротким
сигналом
На дисплей выв одится а боне нтс кий ном е р ил и имя
(
гудком),звучащим каждые шесть секунд
).
).
.
.
(
однотональная
).
(
трехтональная
.
14
Отбой
Громкоговоритель
n
Снимите трубку
u
илиvДля увеличения или уменьшения громкости
удерживайте клавиши нажатыми
ус та но вл е ну жна я гро м ко ст ь
Завершение разговора
t
Положите трубку
или
Нажмите клавишу
.
,
пока не будет
.
:
.
.
Прием вызова через
(
громкоговоритель
Данная функция отсутствует на аппаратах
optiPoint500 economyиoptiPoint500 basic.
Телефон звонит.На дисплей выводится информация о
вызывающем абоненте
Нажмите клавишу.Лампочка загорается
Режим громкой связи
.
громкая связь
.
)
.
Шаг за шагом
Входящая и исходящая связь
u
илиvНажмите для увеличения или у м е ньш ения гр о мк ос ти
Удержива йте кл ав иш и нажатым и,поканебудет
уст а нов л ена нужная гром ко ст ь
.
.
Громкоговоритель
Отбой
Завершение разговора
Нажмите кла в иш у.Лампочка га сне т
или
Нажмите кла в иш у
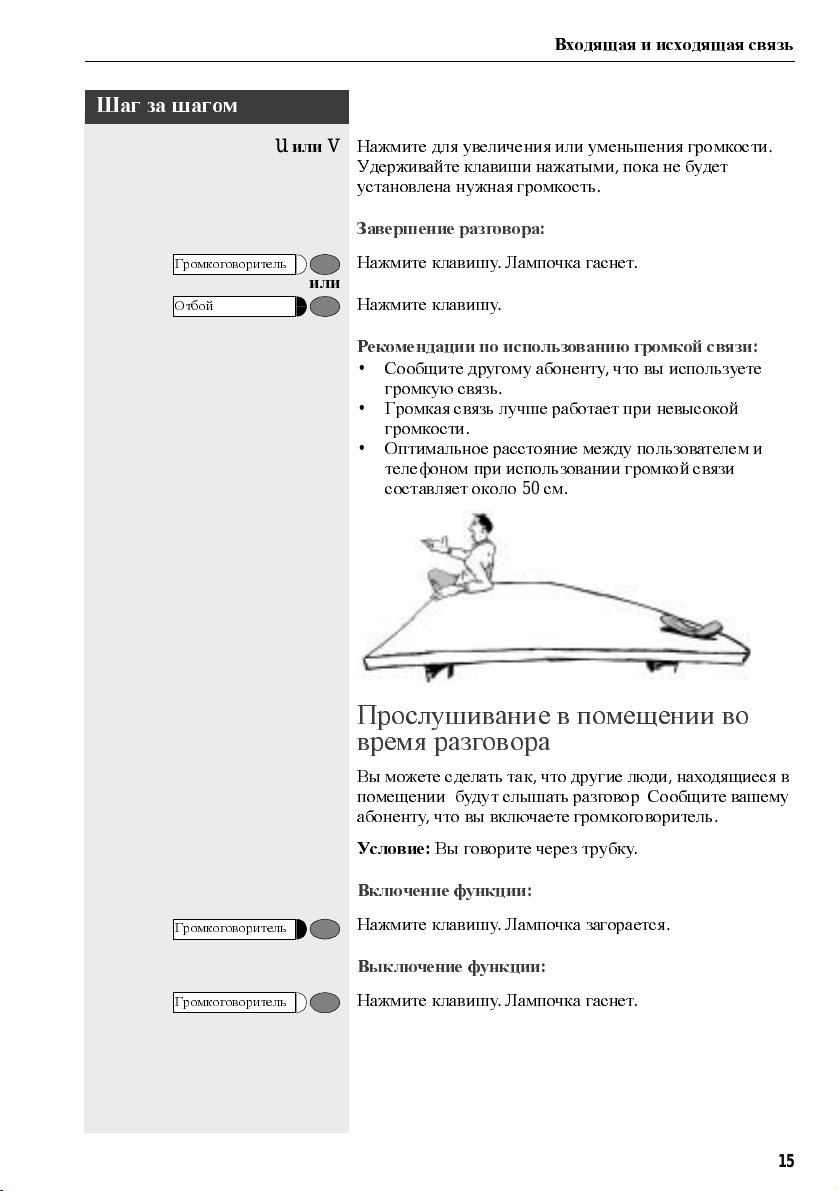
Рекомендации по использованию громкой связи
•
Сообщит е другому а бо нент у,что вы используете
громкую связь
•
Гром ка я связь лучше рабо та е т при нев ыс ок ой
громкости
•
Оптималь но е ра с ст ояние м ежду пользователем и
телефоном при использов ании гр ом ко й свя зи
составляет около
.
:
.
.
.
50см.
Прослушивание в помещении во
время разговора
Вы м ожете сде лать та к,что другие люди,находящиеся в
помещении
абоненту
Условие:Вы говорите через трубку
,
будут слышать разговор.Сообщит е ваш ем у
,
что вы включаете гр о м ко гово р ите л ь
.
:
.
Громкоговоритель
Громкоговоритель
Включение функции
Нажмите кла в иш у.Лампочка загор а ет ся
Выключение функции
Нажмите кла в иш у.Лампочка га сне т
:
:
.
.
15
Входящая и исходящая связь
Шаг за шагом
Переключение громкую связь
Данная функция отсутствует на аппаратах
optiPoint500 economyиoptiPoint500 basic.
Громкоговоритель
Условие:Вы говорите через трубку
иtУдерживая клавишу нажатой,положите трубку,затем
отпустите клавишу
положить трубку
Продолжайте разговор
(
вСША:только нажать клавишу и
).
.
.
Переключение трубку
Данная функция отсутствует на аппаратах
optiPoint500 economy und optiPoint500 basic.
Условие:вы говорите по телефону,используя функцию
гром ко й связи
nиs
Снимите трубку.Продолжайте разговор
.
.
Второй вызов
Вызывающие а боне нты м ог у т с о единит ься с ва ми,даже
если вы ведете другой телефонный разговор
ожидающем вызове вам сообщается специальным
сигналом
Вы можете проигнорировать или принять ожидающий
вызов
При приеме ожидающего вызова вы можете завершить
первый разговор или переве сти его удержание и
продолжить позже
функцию ожидания вызова или сигнализацию
поступления второго вызова
.
.
.
Также вы можете заблокировать
,см.
стр
. 17.
.
Об
16
Прием второго вызова
Условие:вы говорите по телефону и слышите гудок
(
каждые шесть секунд
Завершение первого разговора и прием второго
Положите трубку.Ваш телефон звонит
t
n
Ответьте на второй вызов.Снимите трубку
).
.
:
.

Шаг за шагом
Принять2-йвызов
Сервисное меню
Входящая и исходящая связь
Удержание1-го разговора и прием2-го вызова
?
Выберите и подтвердите
.
или
Нажмите кла в иш у.Лампочка загор а ет ся.Введите код
.
qii
Завершить и о братно
Сервисное меню
C
ервисное меню
#490=
авт.сигнализ.выкл
490=
авт.сигнализ.вкл
*
?
или
или
или
?
или
?
или
rhmd
qhmd
Осуществляется соединение со вторым абонентом
Первый абонент переводится удержание
.
Завершение2-го соединения и продолжение первого
Подтвердите
qd
Нажмите кла в иш у.Лампочка загор а ет ся.Введите код
tn
Положите трубку.На дисплее появляется«Повтор
набора
.
:…».
Снимите трубку
.
Разрешение и запрет(автоматической
сигнализации второго вызова
Если эта функция сконфигурирова(узнайте у
специалиста по обслуживанию
или разреш ать ав то м атиче с кую с игна л изацию вт ор о го
вызова
(см.
стр
. 16)
во время разговора по телефону
Нажмите кла в иш у.Лампочка загор а ет ся
и
Выберите и подтвердите
Введите код для«выкл.»или«вкл
),
вы можете запрещать
.
.
.».
.
:
.
)
.
17
Входящая и исходящая связь
Шаг за шагом
Сигнализация без тона
Сигнализация с тоном
rlk
C
ервисное меню
59=
Перехват,целевой
*
Возможно
Пролистать
?
?
?
или
?
Разрешение и запрет(автоматической
сигнализации второго вызова
Вы можете запретить сигнал второго вызова(через
каждые шесть секунд
поступает одиночный специальный с игнал приглашения
к набору
Выберите и подтвердите
или
или
qlk
Введите код для«без«или«с
.
).
В этом случае при второмвызове
.
«.
Целевой перехват вызова
Вы слышите,как звонит другой телефон
Нажмите клавишу.Лампочка загорается
Выберите и подтвердите
или
qim
Введите код
На дисплее появляется вызываемый абонент
Выберите и подтвердите как т олько появится нужный
абонент
.
.
.
.
.
)
.
Перехватить вызов
18
?
Подтвердите
или
o
Если изве ст ен ном е р зво нящ е го тел е фо на,то наберите
.
его
или
Нажмите мигающую клавишу
.
.
Перехват вызова в группе,см.стр
. 92.
Шаг за шагом
Отбой
Входящая и исходящая связь
Отказ от приема вызовов
Вы м ожете о тк азатьс я от при ем а вызо ва.В этом случае
вызов будет сигнализироваться на другом телефоне
(
обратитесь к системному администратору
Телефон звонит.дисплей выв одитс я информ ация о
вызывающем абоненте
Нажмите кла в иш у
Если отказаться от приема вызова нельзя,телефон будет
продолжать звонить
в настоящий момент
.
.
.
Выводится сообщение«невозможно
«(
наприме р,при возврате вызова
).
).
Использование почтовых ящиков
Показать
Текст
?
Опросить
Время
Infos?
Phone-Mail?
:
Если вы запрограммировали клавишу«Почтовый ящик
(
см.стр
.58),
соотв ет ст вующая лам почка
подключен к системе речевой почты
«
Почтовый ящик«также загорается для сигнализации
поступления сообщений
при поступлении соо бщ е ния мига е т
.
Если ваш телефон
,
.
то клавиша
Опрос почтового ящика
Нажмите подсвечен ну ю кла в иш у«Почтовый ящик
или
Подтвердите
Выберите и подтвердите
или
Следуйте подсказкам на дисплее
.
.
!
Использование таймеров
напоминаний
Условие:вы должныбыли сохранить тайме р напо мина
ния(см.стр
Телефон звонит.На дисплей выв одитс я вр ем я
напоминания
.64).
Наступило врем я напо мина ния
.
«
«.
—
.
Громкоговоритель
Нажмите кла в иш у дважды
.
19
Входящая и исходящая связь
Шаг за шагом
Микрофон вкл
?
Микроф.вкл./выкл
или
nt
Снимите трубку и положите е е с нов а
Если вы не подтверди те напо м инание,оно
повторяется
5
раз,а затем стирается
.
Использование громкой связи
Ваш кол ле га в ызыва е т вас по г ро м ко й связи.Перед
объявлением звучит сигнал
абонентский номер или имя абонента
Вы можете ответить,воспользовавшись трубкой или
систем о й гро м ко й связи
гром ка я связь отсутстует на аппаратах
optiPoint500 economyиoptiPoint500 basic.
n
Снимите трубку и отве тьте
или
Подтвердите и ответьте
или
Нажмите клавишу и ответьте
.
На дисплей выводится
.
.
.
.
.
.
20
Если включена функция«Ответ по гром ко й связи
(см.
ниже),то вам не нужно включать микрофон
вы можете сразу ответить
Если эта функция выключена(настройка по
ум ол чан ию
процедуру
Вызов по гро м кой св язи,см.стр
),
выполните описанную выше
.
.
.30.
—
Шаг за шагом
Входящая и исходящая связь
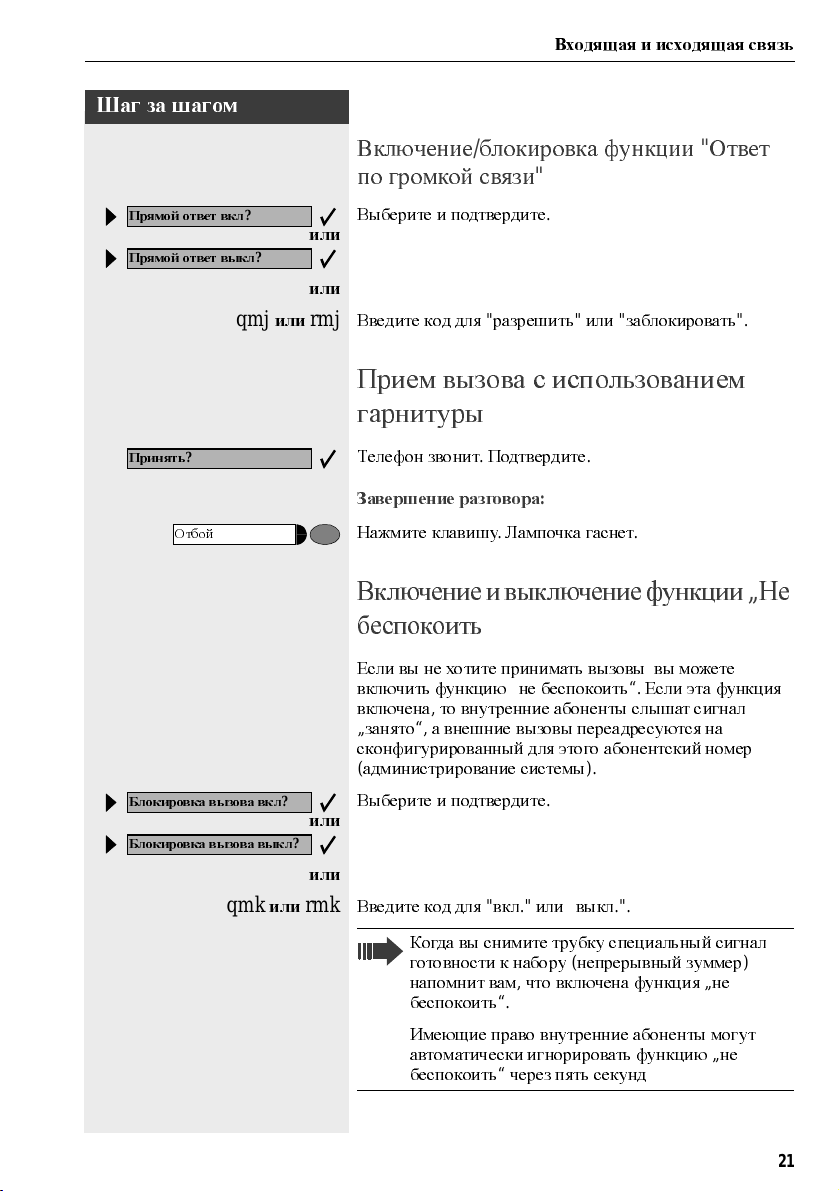
Включение/блокировка функции«Ответ
по громкой связи
«
Прямой ответ вкл
Прямой ответ выкл
Принять
Отбой
Блокировка вызова вкл
Блокировка вызова выкл
?
?
qmj
или
?
qmk
или
Выберите и подтвердите
или
или
rmj
Введите код для«разрешить«или«заблокировать
.
«.
Прием вызова с использованием
гарнитуры
Телефон звонит.Подтвердите
Завершение разговора
Нажмите кла в иш у.Лампочка га сне т
.
:
.
Включениеи выключениефункции„Не
беспокоить
Если вы не хотите приним ать вызо вы,вы можете
включить функцию
включена
„
занято“,а внешние вызовы переадресуются на
сконфигурирова нный для это го або не нтс кий ном ер
(
админист р иро ва ние с ист ем ы
?
?
Выберите и подтвердите
или
или
rmk
Введите код для«вкл.»или«выкл
,
то внутренние абоненты слышат сигнал
„
не беспокоить“.Если эта функция
).
.
.».
Когда в ы сним ите тр убку спе циа льны й сигна л
готовности к набору
напомнит вам,что включена функция„не
беспокоить
Имеющие пр ав о в нутренние або не нты мо гут
автом атиче с ки игно рир о вать функ цию
беспокоить
“.
“
черезпять секунд
(
непрер ыв ный зу м ме р
„
)
не
21
Входящая и исходящая связь
Шаг за шагом
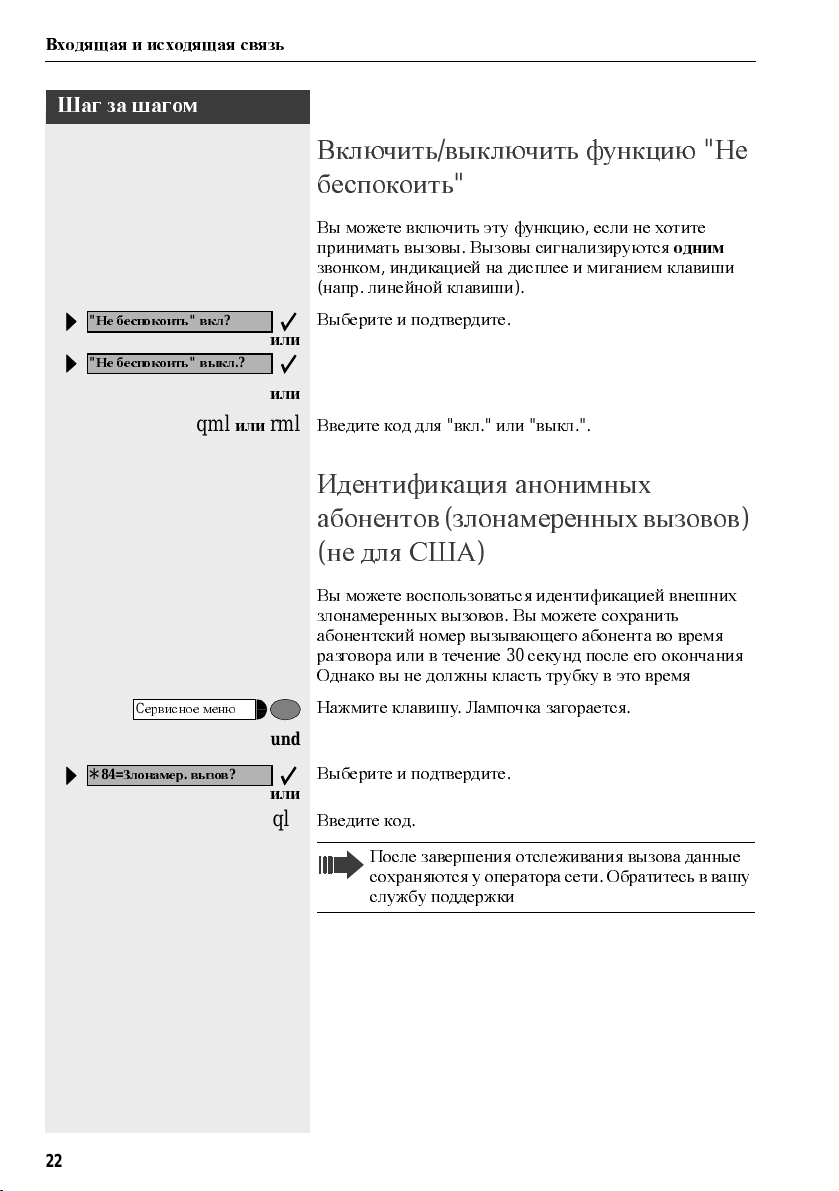
Включить/выкл ю ч ить функц ию«Не
«
Не беспокоить«вкл
«
Не беспокоить«выкл
qml
C
ервисное меню
84=
Злонамер.вызов
*
?
.?
или
?
беспокоить
Вы можете включить эту функцию,если не хотите
принимать вызов ы
звонком
(
Выберите и подтвердите
или
или
rml
Введите код для«вкл.»или«выкл
,
индикацией на диспле е и мига ние м кл ав иш и
напр.линейной клавиши
«
.
Вызовы сигнализируются
).
.
.».
Идентификация анонимных
(
абонентов
не для США
(
Вы можете воспользоваться идентификацией внешних
злонам ер е нных в ызов о в
абонентский номер вызывающего абонента во время
разговора или в течение
Однако вы не дол жны кла с ть трубку в это в ре м я
Нажмите клавишу.Лампочка загорается
und
Выберите и подтвердите
или
qlh
Введите код
злонамеренных вызовов
)
.
Вы можете сохранить
30
секунд после его окончания
.
.
.
одним
)
.
.
22
После завершения отслеживания вызова данные
сохраняются у оператора сети
службу поддержки
!
.
Обратитесь в вашу
Шаг за шагом
Входящая и исходящая связь
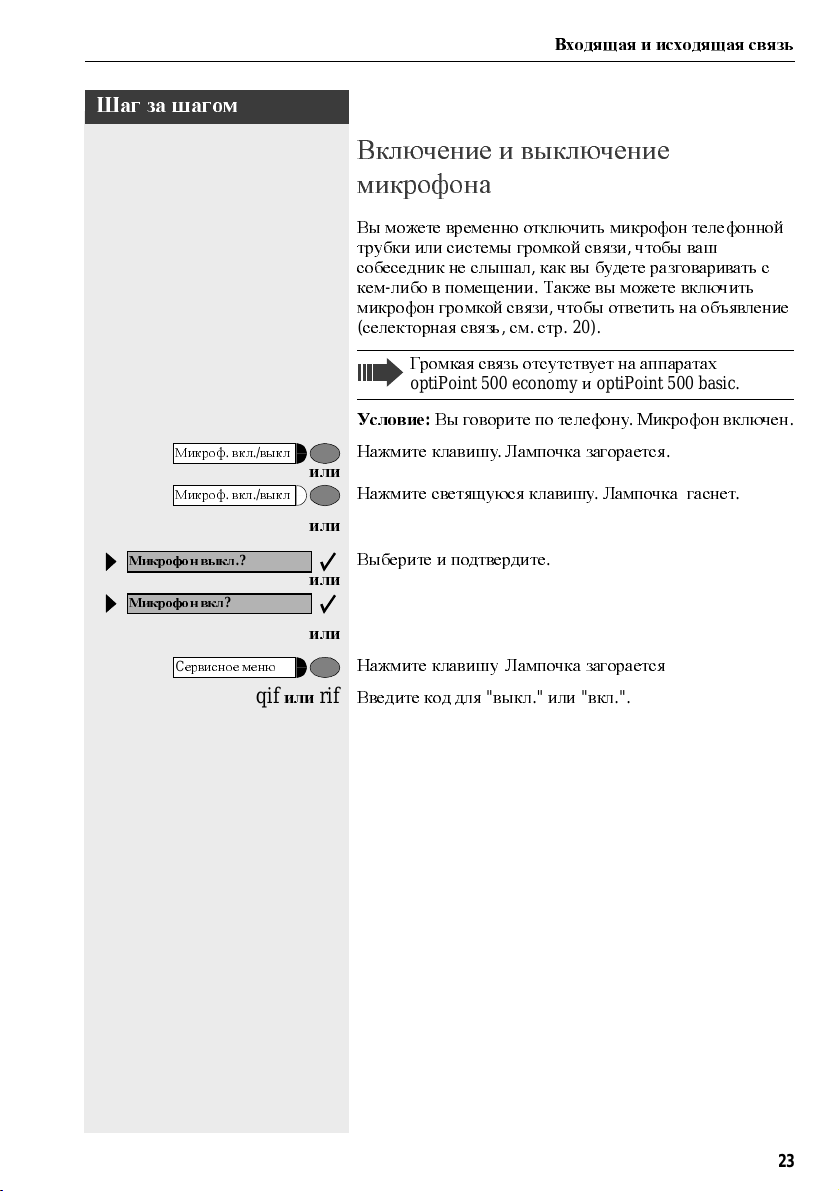
Включение и выключение
микрофона
Вы м ожете в р ем е нно от кл ючить м икр оф он те лефонной
трубки или системы громкой связи
собеседник не слышал
кем
—
либо в помещении.Также вы можете вкл ючить
микроф он гро мк ой связи
(
селекторная связь,см.стр
Гром кая с вязь отсутствует на аппаратах
optiPoint 500 economyиoptiPoint500 basic.
,
как вы будете разговаривать с
,
чтобы ответить на объявление
.20).
,
чтобы ваш
Микроф.вкл./выкл
Микроф.вкл./выкл
Микрофон выкл
Микрофон вкл
C
ервисное меню
Условие:Вы говорите по телефону.Микрофон включен
Нажмите кла в иш у.Лампочка загор а ет ся
или
Нажмите св етящ уюся клавиш у
или
.?
?
qif
или
Выберите и подтвердите
или
или
Нажмите кла в иш у
rif
Введите код для«выкл.»или«вкл
.
Лампочка загор а ет ся
.
Лампочка гасне т
.
.
.
.».
.
.
23
Входящая и исходящая связь
Шаг за шагом
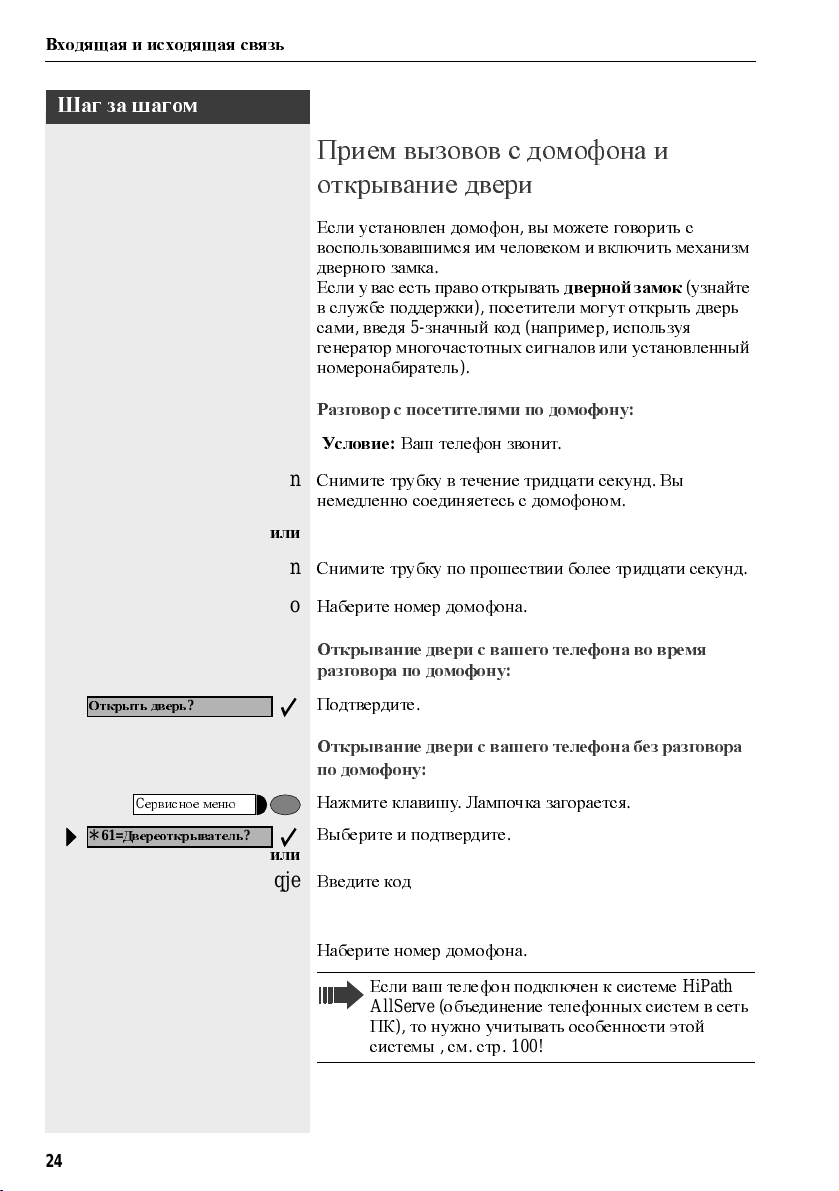
Прием вызовов с домофона и
открывание двери
Если установлен домофон,вы можете говор ить с
воспользовавшимся им человеком и включить механизм
дверного замка
Если у вас есть право открывать
в службе поддержки
,
введя5-значный код(например,используя
сами
генерато р многочас то тных сиг на ло в или ус т ано в ле нный
номер о набир ате л ь
.
дверной замок(узнайте
),
посетители могут открыть дверь
).
Открыть дверь
C
ервисное меню
61=
Двереоткрыватель
*
Раз говор с посетител я ми по домофону
Условие:Ваш телефон звонит
n
Снимите трубку в течение тр идцати с ек у нд.Вы
немедле нно с о единя етесь с домофоном
или
n
Снимите трубку по про ш ествии бол е е тр идцати се кунд
o
Наберите но м ер домофона
Открывание двери с вашего телефона во время
разговора по домофону
?
?
Подтвердите
Открывание двери с вашего телефона без разговора
по домофону
Нажмите клавишу.Лампочка загорается
Выберите и подтвердите
или
qje
Введите код
o
Наберите но м ер домофона
.
:
.
Если ваш те лефон подключен к сис те м е
AllServe (
ПК
систем ы
объединение телефонных систем в сеть
),
то нужно учитывать особенности этой
,см.
стр
.
.
:
.
.
.100!
:
.
.
.
HiPath
24
Шаг за шагом
Входящая и исходящая связь
C
ервисное меню
89=
Открыть дверь
*
3=
Изменить пароль
1=
Открыть со звонком
2=
Открыть без звонка
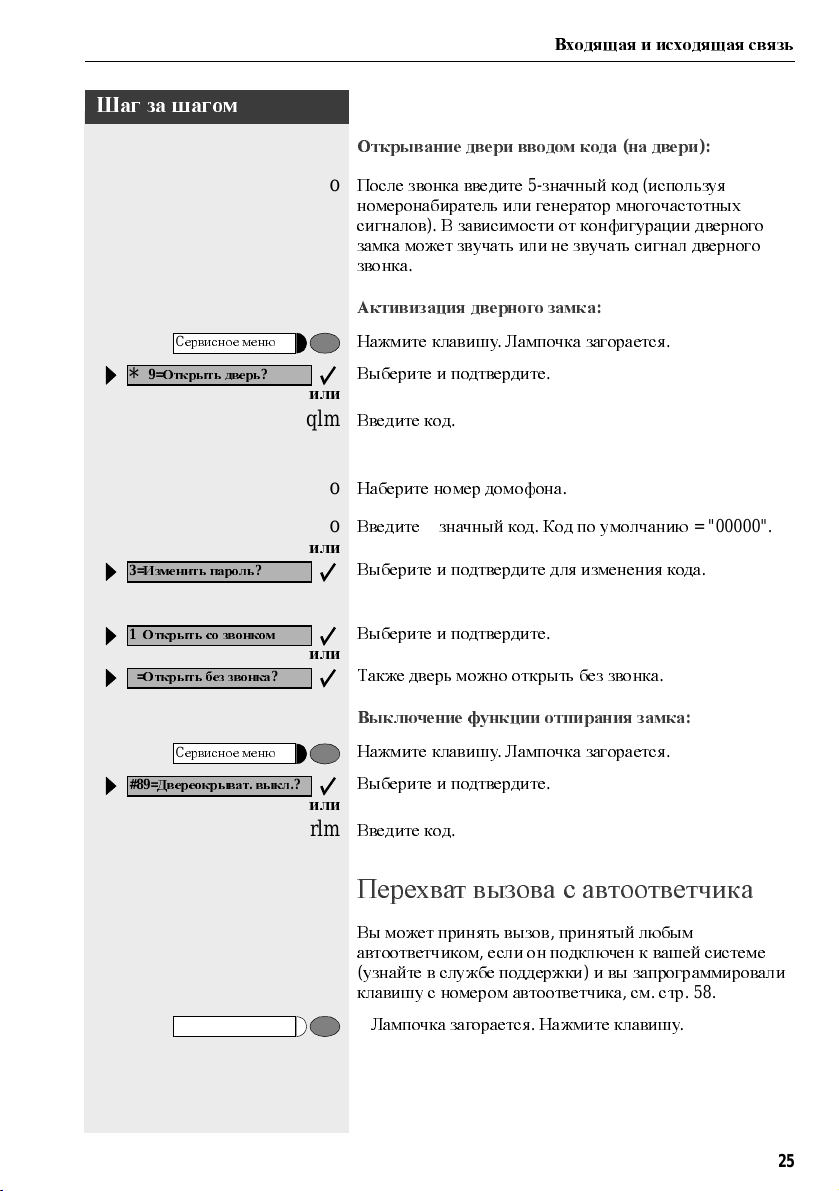
Открывание двери вводом кода(на двери
o
После звонка введите5-значный код(используя
):
номеронабиратель или генератор многочастотных
сигналов
).
В зависимо ст и от ко нфигурации двер ного
замка может звучать ил и не зву чать сиг на л две рн ого
звонка
.
Активизация дверного замка
Нажмите кла в иш у.Лампочка загор а ет ся
?
Выберите и подтвердите
:
.
.
или
qlm
Введите код
o
Наберите номер домофона
o
Введите5-значный код.Код по умолча нию
.
.
= «00000».
или
?
?
Выберите и подтвердите для изменения кода
Выберите и подтвердите
.
.
или
?
Также дверь можно от кр ыть без зво нка
.
Выключение функции отпирания замка
:
C
ервисное меню
#89=
Двереокрыват.выкл
Нажмите кла в иш у.Лампочка загор а ет ся
.?
Выберите и подтвердите
.
.
или
rlm
Введите код
.
Перехват вызова с автоответчика
Вы м ожет приня ть вызо в,принятый любым
автоответчиком
(
узнайте в службе поддержки)и вы запрограммировали
клавишу с номером автоответчика
Лампочка загорается.Нажмите клавишу
,
есл и он подключен к вашей сис те м е
,см.
стр
. 58.
.
25
Входящая и исходящая связь
Шаг за шагом
Просмотр количества ожидающих
вызовов и индикация перегрузки
Нажав клавишу с функцией«Показать число вызовов
(
см.стр
. 58),
внешних ожидающих вызовов
Нажмите клавишу«Ожидающие вызовы
Если во время установленного соединения количество
ожидающих вызовов превышает заданный порог
(
перегрузка;узнайте в службеподдержки),то на клавише
загорается лампочка
•
Лампочка не гор ит
ожидающих вызовов нет
•
Лампочка ме дле нно м ига е т
Достигнут запрограммированный порог
•
Лампочка быс тр о м ига ет
Превышено пороговое значение(перегрузка
вы можете вывести на дисплей ко личество
.
.
«.
:
.
:
.
:
).
«
26
Шаг за шагом
Исходящие вызовы
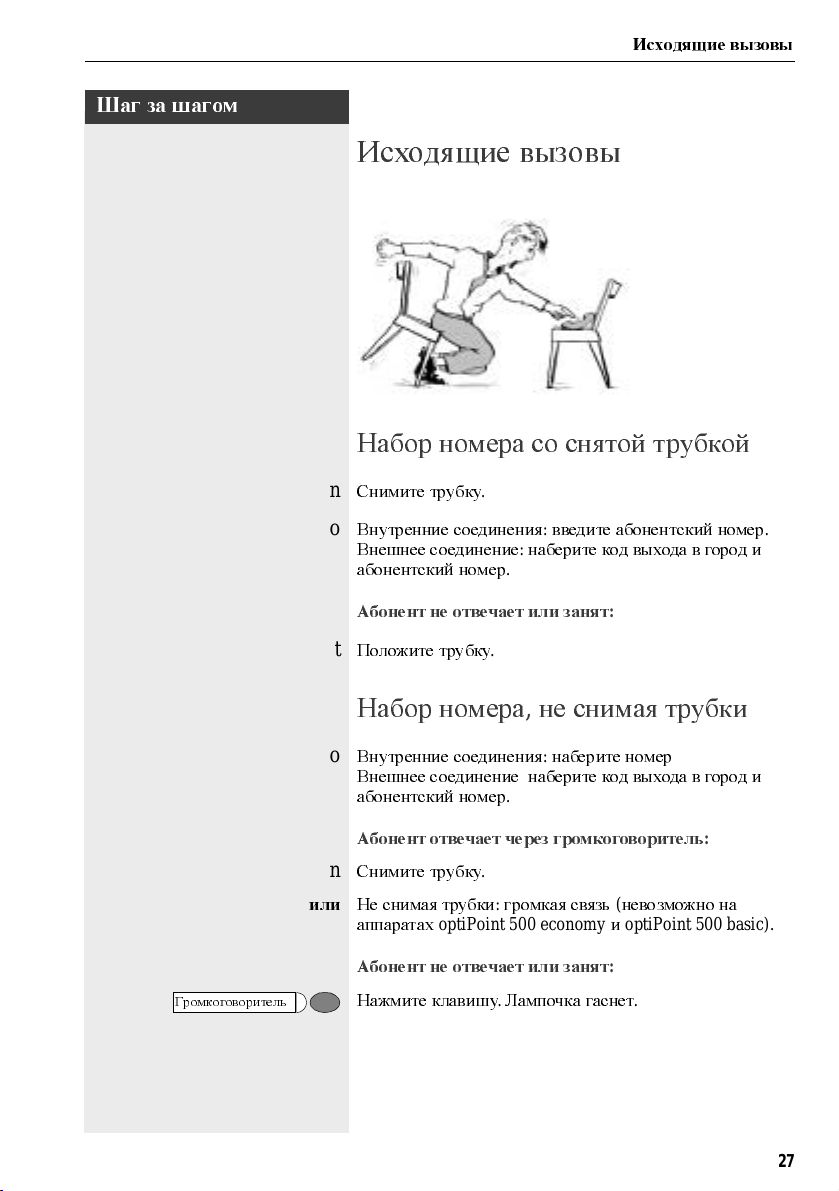
Исходящие вызовы
Набор номера со снятой трубкой
n
Снимите трубку
o
Внутренние соединения:введите а боне нтс кий ном е р
Внешнее соединение:наберите код выхода в город и
абонентс кий ном е р
.
.
.
Громкоговоритель
Абонент не отвечает или занят
t
Положите трубку
.
:
Набор номера,не снимая трубки
o
Внутренние соединения:наберите но м ер
Внешнее соединение:наберите код выхода в город и
абонентс кий ном е р
Абонент отвечает через громкоговоритель
n
Снимите трубку
или
Не снимая трубки:гром кая с вязь(невозможно на
аппаратах
Абонент не отвечает или занят
Нажмите кла в иш у.Лампочка га сне т
optiPoint500 economyиoptiPoint 500 basic).
.
.
:
.
.
:
27

Исходящие вызовы
Шаг за шагом
Система может быть запрограммирована так,что
перед установлением внутреннего соединения
нужно будет нажать клавишу внутренней связи
При внешних соединениях вы должны ввести код
выхода в город перед абонентским номером
(
главная линия не активна;узнайте в службе
поддержки
).
.
28

Шаг за шагом
Исходящие вызовы
Блочный набор/исправление номеров
Если эта функция сконфигурирована(узнайте в службе
поддержки
после в вода а боне нтс ко го ном е ра
при необходимости можете исправить абонентский
номер
Або нент ск ий ном е р набирает ся по с пе циа льно й ко м анд е
o
Внутреннее соединение:наберите но м ер а бо нент а
Внешнее соединение:введите код выхода в город и
абонентс кий ном е р
),
соединение не устанавливается немедленно
.
Это означает,что вы
.
.
.
.
Набрать номер
Стереть цифру
Завершить
?
Громкоговоритель
Громкоговоритель
Набор введенных/выведенных на дисплей номеров
n
Снимите трубку
.
:
или
?
Подтвердите
Исправление набранного номера
?
Выберите и подтвердите
При каждом нажатии стирается последняя цифра
o
Введите нужную цифру(ы
Отмена блочного набора
Выберите и подтвердите
.
:
.
.
)..
:
.
или
Нажмите кла в иш у
.
Лампочка га сне т
.
или
Нажмите кла в иш у
.
29
Исходящие вызовы
Шаг за шагом
Подавить индикацию ном
Передать номер
?
C
ервисное меню
qlj
?
или
Подавление индикации номера
вызывающего абонента
Вы можете запретить индикацию вашего абонентского
номера или именина дисплее телефонов внешних
абонентов
пока вы ее не отключите
Выберите и подтвердите
или
или
rlj
Введите код для«подавить«или«передать
,
которым вы звоните.Эта функция активна
Слу жба поддержки систе м ы может включить или
отключить функцию подавления индикации
номера для всех телефонов
.
.
.
Селекторная связь
Вы можетеделать объявлениячерез громкоговоритель
(
если он подключен—узнайте в службе поддержки)или
обращаться к внутренним абонентам
телефонными аппаратами
действий с их стороны не требуется
Нажмите клавишу.Лампочка загорается
optiset E.
,
пользующимся
При этом никаких
.
.
,
«.
30
80=
Селекторная связь
*
?
Выберите и подтвердите
или
qld
Введите код
o
Наберите но м ер
Ответ на вызовы по селекторной связи см.стр
.
.
.
. 20.
Loading…
Содержание
- 1 Benefits
- 2 optiPoint 500 entry
- 3 optiPoint 500 economy
- 4 optiPoint 500 basic
- 5 optiPoint 500 standard
- 6 optiPoint 500 advance
- 7 optiPoint 500 entry
- 8 optiPoint 500 economy
- 9 optiPoint 500 basic
- 10 optiPoint 500 standard
- 11 optiPoint 500 advance
- 12 16 key module
- 13 90 key module
- 14 optiPoint 500 privacy module
- 15 Adapters
- 16 optiPoint 500 phone adapter
- 17 optiPoint 500 ISDN adapter
- 18 optiPoint 500 acoustic adapter
- 19 optiPoint 500 analogue adapter
- 20 optiPoint 500 recorder adapter
- 21 optiPoint 500 PNT-E ISDN adapter
- 22 USB interface
- 23 Accessories
- 24 Headsets
- 25 Desk microphone
- 26 Active loudspeaker
- 27 Second earphone
- 28 ACD working
- 29 Overview of features
На этой странице содержится инструкция проводного телефона Siemens optiPoint 500 advance(basic)(economy)(standart). Электронное руководство от изготовителя Вы можете бесплатно скачать и всегда иметь под рукой. Чтобы открыть сохраненный файл, нужна программа Adobe Reader, ссылка на которую находиться ниже, на этой странице. Документ, который предложен изготовителем, позволит правильно понять функции техники, а соблюдение правил эксплуатации увеличит продолжительность ее работы.
Для просмотра содержания инструкции Вам понадобится программа Adobe Reader или DjVu.
Если на Вашем компьютере они не установлены, то Adobe Reader можно скачать с сайта Adobe , а DjVu с сайта DjVu
Смотрите также другие инструкции раздела Проводные:
Смотрите также другие инструкции раздела Siemens:
Вы можете бесплатно скачать PDF-инструкции для optiPoint 500 economy Siemens Телефоны.
У нас есть 1 бесплатных инструкций в PDF для Siemens optiPoint 500 economy Телефоны.
optiPoint 500 workpoints
The optiPoint 500 telephones are a family of digital terminals in a modern and attractive style for use on the HiPath DX, Realitis DX and iSDX, at software Revision 8, Universality . Ranging from the simple digital phone to sophisticated feature phones, these telephones are positioned to satisfy a wide range of business needs.
A series of options are presented to the user in an easy to manage way via the display and the three menu keys, thus enabling fast and easy access to the DX telephony features.
Benefits
• Improved staff productivity
• Comprehensive range of telephones
• Comprehensive range of add-ons
• Two wire digital interface
• USB interface for data and TAPI applications
The following optiPoint 500 telephones are available:
optiPoint 500 entry
Cost effective entry in to digital telephony.
optiPoint 500 economy
Low cost display phone with user programmable feature keys.
optiPoint 500 basic
Mid range feature phone with support for additional key units, an adapter and USB port.
optiPoint 500 standard
Full duplex audio transmission for high quality conference calls.
optiPoint 500 advance
The professional choice for voice and data communications.
Each telephone offers different levels of complexity:
optiPoint 500 entry
• 8 feature keys with LEDs
• Open listening (monitor)
• 2 keys for setting ringer volume/pitch and handset/speaker receive volume
• Colours: arctic, manganese
This is an entry level digital telephone for general use. The standard keypad is complemented by eight pre-defined feature keys including message waiting LED.
optiPoint 500 economy
• 12 feature keys with LEDs
• Open listening (monitor)
• 2 keys for setting ringer volume/pitch and handset/speaker receive volume
• 3 dialogue keys for easy menu navigation and selection
• 2 by 24 adjustable display
• Colours: arctic, manganese
This is a low cost display phone allowing the user to personalise the LED keys via an interactive menu system. The keys may be used for keysystem manager/ secretary working or for frequently dialled numbers and other DX features. The display provides information such as caller’s name or number and is used to guide the user through the menu system.
optiPoint 500 basic
• 12 feature keys with LEDs
• Open listening (monitor)
• Additional key module support
• 2 keys for setting ringer volume/pitch and handset/speaker receive volume
• 3 dialogue keys for easy menu navigation and selection
• 2 by 24 adjustable display
• Colours: arctic, manganese
Extra functionality is available through the range of optiPoint 500 adapters and USB port. For instance, you could connect an additional optiPoint 500 phone, fax device or headset. Additional keys can be added via
the 16 or 90 key modules.
optiPoint 500 standard
• 12 feature keys with LEDs
• Full duplex handsfree
• Additional key module support
• 2 keys for setting ringer volume/pitch and handset/speaker receive volume
• 3 dialogue keys for easy menu navigation and selection
• 2 by 24 adjustable display
• Colours: arctic, manganese
Offers the same functionality as the basic model plus full duplex handsfree talking.
optiPoint 500 advance
• 19 feature keys with LEDs
• Full duplex handsfree
• Additional key module support
• 2 keys for setting ringer volume/pitch and handset/speaker receive volume
• 3 dialogue keys for easy menu navigation and selection
• 2 by 24 adjustable display with background lighting
• Colours: arctic, manganese
This is a top of the range feature phone with 19 programmable keys, built-in headset port, an option for two adapters and a backlit display.
16 key module
The optiPoint 500 16 key module is an add on device with 16 keys each with an LED. It provides 32 additional number/feature stores using the shift key on the phone. Up to two modules may be connected to the optiPoint 500 basic, standard or advance.
90 key module
The optiPoint 500 90 key module is an add on device with 90 keys each with an LED. It provides 180 additional number/feature stores using the shift key on the phone. A single module may be connected to the optiPoint 500 basic, standard or advance.
optiPoint 500 privacy module
The privacy module provides protection against telephone tapping. Also suitable for use on numerous digital and analogue handsets.
Adapters
The optiPoint 500 adapters are fully encapsulated, slide-in modules which can be installed and removed easily on the underside of the basic, standard and advance telephones. This enables the terminals to be adapted quickly and easily to accommodate specific workplace and organisational changes.
optiPoint 500 phone adapter
The optiPoint 500 phone adapter enables an additional optiPoint 500 telephone to be connected to the system without the need for additional cabling. The telephones can be reached
simultaneously via independent numbers.
optiPoint 500 ISDN adapter
The optiPoint 500 ISDN adapter enables standard basic rate ISDN terminals (e.g. PC with ISDN S0 card or video card) to be connected.
optiPoint 500 acoustic adapter
The optiPoint 500 acoustic adapter allows the following telephone accessories to be connected:
• Active loud speaker and desk microphone
• Busy display/door opener
• Secondary bell/visual paging
optiPoint 500 analogue adapter
The optiPoint 500 analogue adapter allows the connection of an additional analogue terminal (e.g. group three fax machine, PC with modem card, cordless phone).
optiPoint 500 recorder adapter
Offers a connection for a recording device for recording important calls, plus an earphone interface for monitoring of calls.
optiPoint 500 PNT-E ISDN adapter
The ISDN adapter box PNT-E (Private Network Termination Evolution) enables remote data terminals, PCs, video equipment, group four fax and ISDN telephones to be connected at competitively low cost.
USB interface
The basic, standard and advance have a built-in USB port that may be used for CTI and data applications.
Accessories
The following accessories may be added to the optiPoint 500 telephones to enhance their performance and to tailor them for personal use.
Headsets
The headset replaces the telephone handset leaving both hands free when making a call. This is particularly important for users with high calling rates. The following headsets can be
connected to the optiPoint 500 acoustic adapter and the optiPoint 500 advance:
Desk microphone
The desk microphone replaces the microphone integrated in the telephone. It helps make optimum use of ‘hands free talking’ under difficult acoustic conditions and allows greater freedom of movement while using the telephone. An illuminated LED indicates that the microphone is activated. The microphone can be deactivated by pressing the mute key.
Dimensions: (HxWxD) in mm 25x68x77
Active loudspeaker
The active loudspeaker supplements the loudspeaker integrated in the telephone. It improves the acoustic quality and is particularly suitable for telephone conferences. The loudspeaker is also
a popular accessory for individual offices of senior staff.
Dimensions: (HxWxD) in mm 160x100x95
Second earphone
A second earphone (listen only) can be connected to the recorder adapter to enable a second person to listen to a conversation.
ACD working
An alternative key layout for ACD working can be configured on the optiPoint 500.
Overview of features
optiPoint 500 telephone
Feature keys with LED
12 key dial keypad
2 audio control keys
Full duplex hands-free
USB 1.1 interface
Interface for key modules
Hearing aid compatible
Siemens Communications is one of the largest players in the global telecommunications industry. Siemens is the only provider in the market that offers its customers a full-range portfolio, from devices for end users to complex network infrastructures for enterprises and carriers as well as related services. Siemens Communications is the world’s innovation leader in convergent technologies, products and services for wireless, fixed and enterprise networks. It is the largest Group within Siemens and operates in more than 160 countries around the world. In fiscal 2003 (year-end September 30), its 60,000-strong workforce posted sales of about 17 billion euros.
Freephone 0800 512412
Brickhill Street, Willen Lake, Milton Keynes. MK15 0DJ Tel. 01908 855000 • Fax. 01908 855001
Publication No. 1QHA 50575 AAA-CAA • Issue 02
The information provided in this document contains merely general descriptions or characteristics of performance which in case of actual use do not always apply as described or which may change as a result of further development of the products. An obligation to provide the respective characteristics shall only exist if expressly agreed in the terms of contract. Availability and technical specifications are subject to change without notice. © Siemens plc 2004. All rights reserved. Siemens Communications — a division of Siemens plc. Siemens and HiPath are registered trademarks of Siemens AG. HiPath DX
is a trademark of Siemens AG. Realitis and iSDX are registered trademarks of Siemens plc. Realitis DX is a trademark of Siemens plc.
- Manuals
- Brands
- Siemens Manuals
- Telephone
- optiPoint 500 entry
Manuals and User Guides for Siemens optiPoint 500 entry. We have 6 Siemens optiPoint 500 entry manuals available for free PDF download: Operating Instructions Manual, Reference Manual, Specification
Siemens optiPoint 500 entry Operating Instructions Manual (72 pages)
Brand: Siemens
|
Category: Digital phone
|
Size: 1.92 MB
Table of Contents
-
Basic Operating Instructions
8
-
Optipoint 500 Entry Control Panel
8
-
How to Use These Operating Instructions
9
-
Making Calls — Basic Functions
11
-
Making and Answering Calls
11
-
Open Listening in the Room During a Call
11
-
Dialing Numbers/Making Calls
12
-
Answering a Call with the Handset
12
-
Turning the Microphone on and off
13
-
Calling a Second Party (Consultation Hold)
13
-
Switching to the Party on Hold (Toggle)
14
-
Using Variable Call Forwarding
14
-
Call Forwarding in the Carrier Network and Forwarding Multiple Subscriber Numbers (MSN) (Not for U.S.)
15
-
Deleting (All) Stored Callbacks
16
-
Adjusting the Ring Volume
17
-
Adjusting the Ring Tone
17
-
Adjusting the Receiving Volume During a Call
17
-
Making Calls — Convenience Functions
18
-
Accepting a Specific Call for Your Colleague
18
-
Using the Speakerphone
18
-
Answering Calls from the Entrance Telephone and Opening the Door
19
-
Dialing Numbers/Making Calls
21
-
Talking to Your Colleague with a Speaker Call
22
-
Automatic Connection Setup (Hotline)
22
-
Assigning a Station Number (Not for U.S.)
24
-
Associated Dialing/Dialing Aid
24
-
Accepting a Waiting Call (Camp-On)
25
-
Preventing and Allowing Call Waiting (Automatic Camp-On)
26
-
Turning the Call Waiting Tone on and off
26
-
Picking up (Retrieving) a Held Call
27
-
Conducting a Conference
27
-
Activating Tone Dialing/Dtmf Suffix-Dialing
28
-
After a Speaker Call (Announcement) in a Group
29
-
Trunk Flash (Not for Hipath 500)
29
-
If You Cannot Reach a Destination
30
-
Call Waiting (Camp-On)
30
-
Busy Override — Joining a Call in Progress
30
-
Saving Function, Procedures and Appointment
32
-
Displaying and Assigning Call Charges
33
-
Dialing with Call Charge Assignment
33
-
Private Sphere/Security
34
-
Turning Do Not Disturb on and off
34
-
Trace Call: Identifying Anonymous Callers (Not for U.S.)
36
-
Locking the Telephone to Prevent Unauthorized Use
36
-
Locking Another Telephone to Prevent Unauthorized Use
37
-
Using Other Functions/Services
38
-
Deleting Sent Messages
38
-
Using Another Telephone Like Your Own for a Call
39
-
Change Call Number (Relocate)
40
-
Resetting Services and Functions (System-Wide Cancellation for a Telephone)
41
-
Activating Functions for Another Telephone
42
-
Using System Functions from the Outside (DISA: Direct Inward System Access)
42
-
Controlling Connected Computers or Other Programs and Telephone Data Service (Not for Hipath 500)
44
-
Controlling Relays (Not for Hipath 500)
45
-
Radio Paging (Not for U.S., Not for Hipath 500)
45
-
Simple Paging Equipment
45
-
Enhanced Paging Equipment (Hipath 3700/3750/3800 Only)
46
-
Turning Group Call on and off
47
-
Accepting a Call for Another Member of Your Team
48
-
Activating and Deactivating a Ringing Group
48
-
Uniform Call Distribution (UCD)
49
-
Team and Executive/Secretary Functions with
50
-
Forwarding Calls on Lines
50
-
Transferring Calls Directly to the Executive
51
-
Testing the Telephone Functions
51
-
Special Functions in the LAN
52
-
Leaving a Hunt Group/Group Call
52
-
Transferring Call Forwarding
53
-
Activating and Deactivating a Ringing Group
55
-
Overview of Functions and Codes (Alphabetical)
63
-
FCC and Industry Canada Compliance
69
-
FCC Certification and Requirements
69
-
Equipment Attachment Limitations
71
Advertisement
Siemens optiPoint 500 entry Operating Instructions Manual (72 pages)
Brand: Siemens
|
Category: Telephone
|
Size: 1.97 MB
Table of Contents
-
Basic Operating Instructions
7
-
Optipoint 500 Entry Control Panel
7
-
How to Use These Operating Instructions
8
-
-
Making Calls — Basic Functions
10
-
Making and Answering Calls
10
-
Open Listening in the Room During a Call
10
-
Dialing Numbers/Making Calls
11
-
Answering a Call with the Handset
11
-
-
Turning the Microphone on and off
12
-
Calling a Second Party (Consultation Hold)
12
-
Switching to the Party on Hold (Toggle)
13
-
-
-
Using Variable Call Forwarding
13
-
Call Forwarding in the Carrier Network and Forwarding Multiple Subscriber Numbers (MSN) (Not for U.S.)
14
-
-
-
Deleting (All) Stored Callbacks
15
-
-
Adjusting the Ring Volume
16
-
Adjusting the Ring Tone
16
-
Adjusting the Receiving Volume During a Call
16
-
-
-
Making Calls — Convenience Functions
17
-
-
Accepting a Specific Call for Your Colleague
17
-
Using the Speakerphone
17
-
Answering Calls from the Entrance Telephone and Opening the Door
18
-
-
Dialing Numbers/Making Calls
19
-
Talking to Your Colleague with a Speaker Call
20
-
Automatic Connection Setup (Hotline)
21
-
Assigning a Station Number (Not for U.S.)
21
-
Associated Dialing/Dialing Aid
22
-
-
Accepting a Waiting Call (Camp-On)
23
-
Preventing and Allowing Call Waiting (Automatic Camp-On)
24
-
Turning the Call Waiting Tone on and off
24
-
Picking up (Retrieving) a Held Call
25
-
Conducting a Conference
25
-
Activating Tone Dialing (DTMF Suffix Dialing)
27
-
After a Speaker Call (Announcement) in a Group
28
-
If You Cannot Reach a Destination
29
-
Call Waiting (Camp-On)
29
-
Busy Override — Joining a Call in Progress
29
-
-
-
Displaying and Assigning Call Charges
32
-
Dialing with Call Charge Assignment
32
-
-
Private Sphere/Security
33
-
Turning Do Not Disturb on and off
33
-
Trace Call: Identifying Anonymous Callers (Not for U.S.)
35
-
Locking the Telephone to Prevent Unauthorized Use
35
-
Locking Another Telephone to Prevent Unauthorized Use
36
-
-
Using Other Functions/Services
37
-
-
Deleting Sent Messages
37
-
-
Using Another Telephone Like Your Own
38
-
Change Call Number (Relocate)
39
-
Resetting Services and Functions (System-Wide Cancellation for a Telephone)
40
-
Activating Functions for Another Telephone
41
-
Using System Functions from the Outside (DISA: Direct Inward System Access)
41
-
Controlling Connected Computers or Other Programs and Telephone Data Service (for Hipath 3500/3550/3700/3750 Only)
43
-
Radio Paging (Not for U.S.)
44
-
Simple Paging Equipment
44
-
Enhanced Paging Equipment (Hipath 3700/3750 Only)
45
-
-
-
-
Turning Group Call on and off
46
-
Accepting a Call for Another Member of Your Team
47
-
Activating and Deactivating a Ringing Group
47
-
Uniform Call Distribution (UCD)
48
-
-
Team and Executive/Secretary Functions with
49
-
-
Forwarding Calls on Lines
49
-
Transferring Calls Directly to the Executive
50
-
-
-
Testing the Telephone Functions
50
-
-
Special Functions in the LAN (PC Network)
51
-
Leaving a Hunt Group/Group Call
51
-
Transferring Call Forwarding
52
-
Activating and Deactivating a Ringing Group
54
-
-
Overview of Functions and Codes (Alphabetical)
63
-
FCC and Industry Canada Compliance
69
-
FCC Certification and Requirements
69
-
Equipment Attachment Limitations
71
-
Siemens optiPoint 500 entry Operating Instructions Manual (58 pages)
Brand: Siemens
|
Category: Telephone
|
Size: 2.94 MB
Table of Contents
-
About These Operating Instructions
2
-
Basic Operating Instructions
7
-
Optipoint 500 Entry Control Panel
7
-
How to Use These Operating Instructions
8
-
How to Access a Function
9
-
-
Basic and Enhanced-Convenience Functions
9
-
-
-
Taking Calls and Setting up Calls
10
-
Open Listening Within the Room During a Call
10
-
Taking a Call on a Line Key (Keysystem Working)
11
-
Holding a Call on a Line Key (Not for UK)
11
-
Continuing a Call on a Line Key (Not for UK)
11
-
-
Activating/De-Activating Call Waiting
12
-
Answering a Waiting Call
12
-
-
Using the Mailbox (Not for UK)
13
-
Retrieval from Mailbox
13
-
Answering a Callback Request
13
-
-
Activating/Deactivating Do Not Disturb
14
-
-
Dialling with the Handset Off-Hook
15
-
Dialling with the Line Key (Keysystem Working)
15
-
Dialling with the Handset On-Hook
15
-
Suppressing the Number Display at the Called Party
16
-
Entering Commands with Tone Dialling (DTMF Suffix Dialling)
16
-
-
Calling Several Persons Simultaneously
17
-
Making a Second Call (Consultation)
17
-
Making a Conference Call
18
-
Setting up an Add-On Conference
18
-
-
Using the Switchover Key (Hipath 4000)
20
-
-
System-Wide Parking (Hipath 4000)
21
-
-
Parking Via the Keypad
21
-
Parking Via «System Parking
21
-
-
-
Parking Via «System Parking
22
-
Parking Is Not Possible
22
-
-
Using Stored Numbers to Make Calls
23
-
Dialling with Individual Speed Dialling Numbers
24
-
Dialling with System Speed Dialling Numbers
24
-
If You Don’t Get through
25
-
Using the Callback Facility
25
-
Storing a Callback Request
25
-
Answering a Callback Request
25
-
Cancelling a Stored Callback Request
26
-
-
-
-
Adjusting the Volume of the Ringing Tone
27
-
Adjusting the Pitch of the Ringing Tone
27
-
Setting the Volume of the Alerting Tone
28
-
Setting the Receiving Volume During a Call in Progress
28
-
Preventing Misuse of the Telephone
29
-
-
-
Storing a Number for Redialling
31
-
Storing a Caller’s Number or a Number Which Has Been Dialled
31
-
-
Storing Individual Speed Dialling Numbers
32
-
-
-
Using Forwarding (Hicom 300 E/300 H)
33
-
Using Fixed Call Forwarding
33
-
Forwarding Calls Automatically
35
-
Using Variable Call Forwarding
35
-
-
Using Forwarding (Hipath 4000)
36
-
Call Forwarding Via Code Numbers
36
-
Call-Forwarding Via Call-Forwarding Key
38
-
-
Delayed Call-Forwarding (Hipath 4000)
38
-
Forwarding Calls for a Different Terminal
39
-
Storing a Destination for Another Telephone/Activating Call Forwarding
39
-
Storing a Destination for Fax, PC or «Busy»/Activating Call Forwarding
40
-
Deactivating Call Forwarding for Another Telephone
41
-
Deactivating Call Forwarding for Fax, PC or «Busy
42
-
Changing Call Forwarding for Another Terminal
42
-
-
-
Using a Different Telephone in the same Way as Your Own
43
-
Logging on to a Different Telephone
43
-
Deactivating Identification at the Other Telephone
44
-
-
Relocating with the Telephone
45
-
Disconnecting the Telephone from Its Present Station Line
45
-
Reconnecting the Telephone at the New Station Line
45
-
-
Using Hipath 4000 as a Intercommunication System
46
-
System-Wide Voice-Calling
47
-
Voice Calling in a Group
48
-
Announcement to All Members of a Line Group
49
-
-
Making Calls in a Team
50
-
Taking a Call for a Colleague
50
-
Parking a Call and Picking It up Within the Team
50
-
Taking a Call in a Hunt Group
51
-
Removing Station from Hunt Group/Adding Station to Hunt Group
51
-
-
Labelling and Documentation
52
-
Attaching the Number Label
52
-
-
-
How to Deal with Malfunctions
53
-
Who to Contact if a Problem Occurs
53
-
Important Functions at a Glance
55
Advertisement
Siemens optiPoint 500 entry Operating Instructions Manual (50 pages)
HiPath 4000
Hicom 300 E/300 H
Brand: Siemens
|
Category: IP Phone
|
Size: 0.52 MB
Table of Contents
-
About These Operating Instructions
2
-
Basic Operating Instructions
3
-
Optipoint 500 Entry Control Panel
3
-
Basic and Enhanced-Convenience Functions
3
-
-
-
How to Use These Operating Instructions
4
-
How to Access a Function
5
-
Taking Calls and Setting up Calls
9
-
Open Listening Within the Room During a Call
9
-
Taking a Call on a Line Key (Keysystem Working)
10
-
Holding a Call on a Line Key (Not for UK)
10
-
Continuing a Call on a Line Key (Not for UK)
10
-
Using the Mailbox (Not for UK)
11
-
Retrieval from Mailbox
11
-
Answering a Callback Request
11
-
-
Activating/Deactivating Do Not Disturb
12
-
-
Dialling with the Handset Off-Hook
13
-
Dialling with the Line Key (Keysystem Working)
13
-
Dialling with the Handset On-Hook
13
-
Suppressing the Number Display at the Called Party
14
-
Entering Commands with Tone Dialling (DTMF Suffix Dialling)
14
-
-
Calling Several Persons Simultaneously
15
-
Making a Second Call (Consultation)
15
-
Making a Conference Call
15
-
Setting up an Add-On Conference
15
-
-
-
Using Stored Numbers to Make Calls
18
-
Dialling with Individual Speed Dialling Numbers
19
-
Dialling with System Speed Dialling Numbers
19
-
If You Don’t Get through
20
-
Using the Callback Facility
20
-
Storing a Callback Request
20
-
Answering a Callback Request
20
-
Cancelling a Stored Callback Request
21
-
-
-
-
Adjusting the Volume of the Ringing Tone
22
-
Adjusting the Pitch of the Ringing Tone
22
-
Setting the Volume of the Alerting Tone
23
-
Setting the Receiving Volume During a Call in Progress
23
-
Preventing Misuse of the Telephone
24
-
-
-
Storing a Number for Redialling
25
-
Storing a Caller’s Number or a Number Which Has Been Dialled
25
-
-
Storing Individual Speed Dialling Numbers
26
-
-
-
Using Fixed Call Forwarding
27
-
Storing/Changing a Destination
27
-
Cancelling a Destination
27
-
Deactivating Call Forwarding
28
-
Activating Call Forwarding
28
-
-
Forwarding Calls Automatically
29
-
Using Variable Call Forwarding
29
-
Storing a Destination/Activating Call Forwarding
29
-
Deactivating Call Forwarding
30
-
-
Forwarding Calls for a Different Terminal
30
-
Storing a Destination for Another Telephone/Activating Call Forwarding
30
-
Storing a Destination for Fax, PC or «Busy»/Activating Call Forwarding
31
-
Deactivating Call Forwarding for Another Telephone
31
-
Deactivating Call Forwarding for Fax, PC or «Busy
32
-
Changing Call Forwarding for Another Terminal
32
-
-
-
Using a Different Telephone in the same Way as Your Own
33
-
Logging on to a Different Telephone
33
-
Deactivating Identification at the Other Telephone
34
-
-
Relocating with the Telephone
35
-
Disconnecting the Telephone from Its Present Station Line
35
-
Reconnecting the Telephone at the New Station Line
35
-
-
Making Calls in a Team
36
-
Taking a Call for a Colleague
36
-
Parking a Call and Picking It up Within the Team
36
-
Taking a Call in a Hunt Group
37
-
Removing Station from Hunt Group/Adding Station to Hunt Group
37
-
All about the Telephone
37
-
-
-
Labelling and Documentation
38
-
Attaching the Number Label
38
-
-
-
To Look at the Operating Instructions in HTML Format You Need a Computer with a Www Browser, E.g. Microsoft Internet Explorer
38
-
-
-
How to Deal with Malfunctions
39
-
Who to Contact if a Problem Occurs
39
-
-
Important Functions at a Glance
47
-
Siemens optiPoint 500 entry Reference Manual (27 pages)
hipath 3000
Brand: Siemens
|
Category: Telephone
|
Size: 1.74 MB
Table of Contents
Siemens optiPoint 500 entry Specification (4 pages)
Brand: Siemens
|
Category: Telephone
|
Size: 2.99 MB
Advertisement
Related Products
-
Siemens HiPath 5000 RSM
-
Siemens optiPoint 500 basic
-
SIEMENS Profiset 51isdn
-
SIEMENS Gigaset 5030
-
Siemens OpenStage 5
-
Siemens Hipath 5000
-
Siemens euroset 5040
-
Siemens Euroset 5010
-
Siemens Euroset 5020
-
Siemens optiPoint 410 S
Siemens Categories
Controller
Control Unit
Industrial Equipment
Washer
Switch
More Siemens Manuals
Summary of Contents for Siemens optiPoint 500 entry
-
Page 1
HiPath 4000 Hicom 300 E/300 H Operating Instructions optiPoint 500 entry… -
Page 2: About These Operating Instructions
About these Operating Instructions These Operating Instructions describe the use of the optiPoint 500 entry telephone in con- junction with the HiPath 4000 Communication Server, Version 1.0 and Hicom 30 0 E/300 H, all Versions. They describe all functions you can use from your telephone. You may find that some func- tions you wish to use are not available on your telephone.
-
Page 3: Basic Operating Instructions
Basic operating instructions Basic operating instructions optiPoint 500 entry control panel Loudspeaker for Keys for open listening telephone settings Hand- Lamp function keys (variable) function keys (fixed) Dialling key- T wo keys with Six keys with variable functions: fixed functions:…
-
Page 4: How To Use These Operating Instructions
How to use these Operating Instructions Step by Step How to use these Operating Instructions T he o perat in g p ro ced ures are pres ented in a lo gic al s equ enc e in t he «co lo ured » c olumn . The s ymbo ls u sed h ave t he fo llow ing mean in gs: Lift the handset.
-
Page 5: How To Access A Function
The Appendix to these Operating Instructions contains an overview of the p ossib le cod es. If your optiPoint 500 entry does not have a «store» key, storage of a call forwarding destination can be initiated by lifting the handset and dialling the special code.
-
Page 6: Table Of Contents
Basic operating instructions ….3 optiPoint 500 entry control panel……. 3 Ø…
-
Page 7
Contents Last number redial ……… 18 Dialling with individual speed d ialling numbers . -
Page 8
Contents Using a different telephone in the same way as your own ….33 Logging on to a different telep hone ……33 Deactivating identification at the other telephone . -
Page 9: Taking Calls And Setting Up Calls
Taking calls and setting up calls Step by Step Taking calls and setting up calls Taking a call The telephone rings. Lift the handset. Terminating a call: Replace the hand set. Open listening within the room during a call You can allow other persons in the room to listen in on the call.
-
Page 10: Taking A Call On A Line Key (Keysystem Working)
Taking calls and setting up calls Step by Step Taking a call on a line key (keysystem working) Precondition: There is a line key with its own number on your telephone. The telephone rings. The line key lamp flashes rapidly. Lift the handset.
-
Page 11: Using The Mailbox (Not For Uk)
Taking calls and setting up calls Step by Step Using the mailbox (not for UK) Precondition: The «mailbox» and «output» keys have been configured on your telephone. Callers who dialled your number during your ab sence can leave a callback request in your mailbox. You will also find mail server voice/fax messages in your mailbox (if this facility is available).
-
Page 12: Activating/Deactivating Do Not Disturb
Taking calls and setting up calls Step by Step Activating/deactivating do not disturb Precondition: System Support has enabled the do not d isturb facility for all Hicom users in your system. If you d o not wish to receive incoming calls, you can ac- tivate the do not disturb facility.
-
Page 13: Setting Up Calls
Setting up calls Step by Step Setting up calls Dialling with the handset off-hook Lift the handset. Internal: Enter the number. External: Enter the external code and the number. The called party is busy or does not answer: Replace the hand set. Dialling with the line key (keysystem working) Precondition: There is a line key with its own number…
-
Page 14: Suppressing The Number Display At The Called Party
Setting up calls Step by Step The called party is busy or does not answer: Press the key. The lamp goes out. S peaker Suppressing the number display at the called party Suppression of the number indication only applies to the next call and is not stored together with the redial function.
-
Page 15: Calling Several Persons Simultaneously
Calling several persons simultaneously Step by Step Calling several persons simultaneously Making a second call (consultation) You can set up a second call during a call in progress. The first party waits. Press the key. The lamp lights up. Consultation Make your call to the second party.
-
Page 16
Calling several persons simultaneously Step by Step ýFB F< Enter the UK code or Standard code for conference. If your telephone d oes not have a «conference» key: Enter the code for conference. A tone indicates that all three users have been intercon- nected to form a conference circuit. -
Page 17: Extending A Call
Calling several persons simultaneously Step by Step Extending a call If the person you are conversing with wishes to be for- warded to another user, you can pass on the connection to this third person. The connection can be passed on with or without prior announcement.
-
Page 18: Using Stored Numbers To Make Calls
Using stored numbers to make calls Step by Step Using stored numbers to make calls Saved number redial Precondition: The «redial» key is configured on your telephone. If your telephone is configured for this type of redialling, you can store a number and then dial it at a later point in time (Æ…
-
Page 19: Dialling With Individual Speed Dialling Numbers
Using stored numbers to make calls Step by Step Dialling with individual speed dialling numbers Precondition: You have stored individual speed dialling numbers (Æ page 26). Lift the handset. F?< UK code or Standard code/Euro code Enter the code which has been programmed for you Ente r th e code ! Enter the special code (not for UK).
-
Page 20: If You Don’t Get Through
If you don’t get through… Step by Step If you don’t get through… Using the callback facility If an internal station which you have called is busy or there is no reply, you can place a request for callback. This also applies to external calls via ISDN switching centres.
-
Page 21: Cancelling A Stored Callback Request
If you don’t get through… Step by Step Cancelling a stored callback request Precondition: You have stored a callback request. Lift the handset. UK code or Standard code Enter the code which has been programmed for you. Ente r th e code ! Replace the hand set.
-
Page 22: Telephone Settings
Telephone settings Step by Step Telephone settings Adjusting the volume of the ringing tone Press one of the keys when the telephone is in the idle state. Press the key. To increase/decrease the volume: keep pressing the keys until the required volume level has b een reached. together Store.
-
Page 23: Setting The Volume Of The Alerting Tone
Telephone settings Step by Step Setting the volume of the alerting tone You hear aler ting tone if a call has not been picked up in your team. Press one of the keys when the telephone is in the idle state.
-
Page 24: Preventing Misuse Of The Telephone
Telephone settings Step by Step Preventing misuse of the telephone You can prevent unauthorised persons from using your telephone during your absence. Precondition: You have been assigned a personal iden- tification number (PIN) by System Support. Preventing unauthorised dialling: UK code or Stand ard code Euro code Enter the code which has b een programmed for you.
-
Page 25: Storing Numbers
Storing numbers Step by Step Storing numbers Storing a number for redialling Precondition: Your telephone is programmed for «Saved number redial» not «Last number redial». Storing a caller’s number or a number which has been dialled You have set up a call and are still engaged in this call. Or you have been called by — and are still conversing with — a user whose number has also been communi- cated to you.
-
Page 26: Storing Individual Speed Dialling Numbers
Storing numbers Step by Step Storing individual speed dialling numbers You can store a number on each of digit keys 0 to 9 and then dial these numbers at the push of a button (Æ page 19). An existing number is overwritten. Press the key.
-
Page 27: Forwarding Calls
Forwarding calls Step by Step Forwarding calls Using fixed call forwarding Fixed call forwarding can be activated in a matter of sec- onds. It is advisable to use this type of call forwarding in order to reroute calls to the mailbox or to a permanent deput y, for example.
-
Page 28: Deactivating Call Forwarding
Forwarding calls Step by Step Euro code. If the «store» and «call forwarding» keys are not config- ured on your telephone: Lift the handset and enter the UK code. G>? Special code (not for UK). Press the key. Disconnect/Clear Press the key. The lamp goes out. Store If you have already lifted the handset and entered the special code:…
-
Page 29: Forwarding Calls Automatically
Forwarding calls Step by Step Forwarding calls automatically A call is diver ted to the fixed call forward ing destination even if you have not activated fixed call forwarding (and provided that your system is configured for this facility). If «forwarding ring no answer» (transfer of ringing) has been programmed, calls are rerouted automatically if, for example, they are not answered after several rings or they arrive when you are already engaged in a call.
-
Page 30: Deactivating Call Forwarding
Forwarding calls Step by Step Deactivating call forwarding Press the key. The lamp goes out. Call forwarding If your telephone d oes not have a «call forward ing» key: Lift the handset and enter the UK code or St andard cod e Replace the handset.
-
Page 31: Storing A Destination For Fax, Pc Or «Busy»/Activating Call Forwarding
Forwarding calls Step by Step Press the key. The lamp goes out. Store Call forward ing is thus activated. Storing a destination for fax, PC or «busy»/activating call forwarding Press the key. The lamp lights up. Store Enter the code for the type of call forwarding required. The codes are defined by System Suppor t.
-
Page 32: Deactivating Call Forwarding For Fax, Pc Or «Busy
Forwarding calls Step by Step Press the square key only (if your own station has the «Call forwarding for remote terminal» class of service). Enter the number of the destination and confirm your inp ut with the square key. Press the square key only (the telephone on which you are storing call forwarding thus b ecomes the call forwarding d estination).
-
Page 33: Using A Different Telephone In The Same Way As Your Own
Using a different telephone in the same way as your own Step by Step Using a different telephone in the same way as your own You can log on to another telephone belonging to the Hi- com system by means of a personal identification num- ber (PIN) (as of software status HiPath 40 00, Version 1 .0 und Hicom 300 E/300 H, and also telephones of net- worked HiPath 40 00 systems, e.g .
-
Page 34: Deactivating Identification At The Other Telephone
Using a different telephone in the same way as your own Step by Step Dialling after (successful) identification: You hear dial tone. Press the key. The lamp goes out. Speaker ýE Enter a number immediately. Call forwarding — follow me after successful identi- fication Press the key.
-
Page 35: Relocating With The Telephone
Relocating with the telephone Step by Step Relocating with the telephone Enquire with System Support whether this is possible with your telep hone system. After consulting with System Support, you can de- register your telep hone from its present station line and then re-register it at the new station line.
-
Page 36: Making Calls In A Team
Making calls in a team Step by Step Making calls in a team Taking a call for a colleague If a member of a team d oes not answer a call within 15 seconds (depending on the system), the other mem- b ers of the team hear an alerting tone.
-
Page 37: Taking A Call In A Hunt Group
Making calls in a team Step by Step Taking a call in a hunt group Precondition: A hunt group has been configured in the team. You — and all the members of the team — can be accessed by way of a hunt group number. Your telephone rings.
-
Page 38: Labelling And Documentation
CD-ROM (ask System Supp ort) in HTML and PDF format. The CD-Rom (7 languages) or a printout of these operating instructions can be ordered from the details of the article number from Siemens’ Sales Or- ganisation of via the following Internet address.
-
Page 39: Advice For Users
Advice for users Advice for users Care of the telephone • Use either a damp cloth or an antistatic cloth to clean the telephone set. Never use a dry cloth! • If the telephone set needs to be cleaned thoroughly, use a neutral, di- luted, surface-active cleaning agent.
-
Page 40: Index
Index Index Lampen=Leuchdiode LED ……3 Add -on conference ……..15 Mailbox …………11 Automatic call forwarding ……29 callback request ……..11 retrieving ……….11 Malfunctions ……….39 Call pickup (team) ……..36 Callback …………20 answering ……….20 Number label ……….
-
Page 44
-43$643360+;7330%638040:94<- 1P A31003-H8400-B305-1-7619 The inform ation in this docum ent contains general descriptions of the technical options available, which do not always have to be present in individual cases. The required features should therefore be specified in each individual case at the time of closing the contract. -
Page 45
HiPath 4000 Hicom 300 E/300 H Quick-Reference Operating Instructions optiPoint 500 entry… -
Page 46
Quick-reference operating instructions (appendix) -
Page 47: Important Functions At A Glance
Important functions at a glance Making a call: Either: + when the other party answers Making a call with a line key: Line Redial (saved number): Store: Either: The connection has been set up: Redial Or: Any number: Store Redial Store Repeat: Redial…
-
Page 48
Without prior announcement: Consultation Setting up a conference call: First call Consultation Conference In the case of a telephone with no «conference» key: First call for UK or *3. Consultation Expanding conference (to includ e up to 8 users): Add-on conference for UK or *3 etc. -
Page 49
Dialling with individual speed dialling numbers: F?< for UK or *8 (not for UK) + (0..9). -
Page 50: List Of Codes
List of codes For information on the use of codes please refer to Æ page 5. Functio n UK code Stan dard code Euro co de Special code Camp-on/override * 6 0 * 1 9 * 1 9 Do not disturb on/off * 5 1 / # 5 1 * 4 0 / # 4 0 * 9 3 / # 9 3…
инструкцияSiemens OptiPoint 500 entry

Communication for the open minded
Siemens Enterprise Communications
www.siemens.com/open
Documentation
HiPath 500, HiPath 3000, HiPath 5000
optiPoint 500 entry
Operating Instructions
Посмотреть инструкция для Siemens OptiPoint 500 entry бесплатно. Руководство относится к категории офисные телефоны, 1 человек(а) дали ему среднюю оценку 7. Руководство доступно на следующих языках: английский. У вас есть вопрос о Siemens OptiPoint 500 entry или вам нужна помощь? Задайте свой вопрос здесь
- Before You Begin
- Basic operating instructions
- Making Calls — Basic Functions
- Making Calls — Convenience Functions
- Saving Function, Procedures and Appointment
- Displaying and Assigning Call Charges
- Private Sphere/Security
- Using Other Functions/Services
- Using Team Functions
- Team and Executive/Secretary Functions With Assigned Trunk Lines
- Testing the Telephone
- Special Functions in the LAN (Not for HiPath 500)
- Documentation in Internet
- Fixing Problems
- Index
- Overview of Functions and Codes (Alphabetical)
- FCC and Industry Canada Compliance
Нужна помощь?
У вас есть вопрос о Siemens а ответа нет в руководстве? Задайте свой вопрос здесь Дай исчерпывающее описание проблемы и четко задайте свой вопрос. Чем детальнее описание проблемы или вопроса, тем легче будет другим пользователям Siemens предоставить вам исчерпывающий ответ.
Количество вопросов: 0
Главная
| Siemens | |
| OptiPoint 500 entry | |
| офисный телефон | |
| английский | |
| Руководство пользователя (PDF) |
Не можете найти ответ на свой вопрос в руководстве? Вы можете найти ответ на свой вопрос ниже, в разделе часто задаваемых вопросов о Siemens OptiPoint 500 entry.
Инструкция Siemens OptiPoint 500 entry доступно в русский?
Не нашли свой вопрос? Задайте свой вопрос здесь
Нет результатов
Gigaset Comfort 500
инструкция100 страниц(ы)
Polycom VVX 500
инструкция163 страниц(ы)
Polycom VVX 300
инструкция230 страниц(ы)
Polycom VVX 400
инструкция89 страниц(ы)
Gigaset Comfort 500A IP flex
инструкция162 страниц(ы)
Polycom VVX 1500
инструкция230 страниц(ы)
Polycom SoundStation IP 5000
инструкция29 страниц(ы)
Polycom VoiceStation 300
инструкция16 страниц(ы)
Konftel 100
инструкция12 страниц(ы)
Argus 125
инструкция146 страниц(ы)
Посмотреть все Siemens руководства Посмотреть все Siemens офисный телефон руководства
- Home
- Brands
- Siemens Manuals
- Digital phone
- optiPoint 500 entry
|
|
Related Devices:
|
Types of Manuals:
The main types of Siemens optiPoint 500 entry instructions:
- User guide — rules of useing and characteristics
- Service manual — repair, diagnostics, maintenance
- Operation manual — description of the main functions of equipment
Digital phone, IP Phone, Telephone User Guides by Siemens:
Similar to Siemens optiPoint 500 entry Manuals, User Guides and Instructions:
-
NEC 535
Copyright Ó 2004 by NEC America, Inc. All rights reserved.NEC is a registered trademark of NEC Corporation.All other company or product names are the trademarks of their respective owners.Manual Part Number: 621-0353Version 1****This may include features not available in all NEC 535 phones, or may not include features …
535 Telephone, 66
-
mPTech Hammer Patriot+
© mPTech 2019. All rights reserved. HAMMER PATRIOT+Quick Start GuideHAMMER PATRIOT+Lot number: 201901USER MANUALThis manual includes the different colour versions of the device.The actual product, accompanying accessories and some of its features may differ from the presented in this manual images and descriptions. Th …
Hammer Patriot+ Cell Phone, 5
-
LG E900
用户手册LG-E900该指南可帮助您学习使用手机。如果需要更多信息, 请访问 www.lg.com。简 体 中 文BAHASA MELAYUE N G L I S HP/NO : MFL66983350 (1.0) Hwww.lg.com用户手册 LG-E900LG-E900_SEA.indb 1 2/1/11 4:14 PM …
E900 Cell Phone, 274
-
TANDBERG TDKIT
TDkit — The Configuration And Test ToolTDkitUSER’s GUIDECONFIGURATION AND TEST TOOL FORTANDBERG TAPE DRIVESPart No. 43 33 28 — 01August 2005TANDBERG DATA ASAP.O. Box 134 KjelsåsN-0411 OSLO, NORWAYPhone +47 22 18 90 90Telefax +47 22 18 95 50© Tandberg Data ASATandberg Data …
TDKIT Telephone, 11
-
Lucent Technologies 6201
16201 and 6210 Telephones Quick ReferenceIssue 1, June 1998Document Ordering No. 555-230-709Comcode 108171083Figure 1. The 6201 Telephone, Top ViewFigure 2. The 6210 Telephone, Top ViewThe 6201 and 6210 telephones are single-line sets capable of operating behind any Lucent Technologies Business Communications System (B …
6201 Telephone, 8
View a manual of the Siemens OptiPoint 500 entry below. All manuals on ManualsCat.com can be viewed completely free of charge. By using the ‘Select a language’ button, you can choose the language of the manual you want to view.
Page: 1
Communication for the open minded
Siemens Enterprise Communications
www.siemens.com/open
Documentation
HiPath 500, HiPath 3000, HiPath 5000
optiPoint 500 entry
Operating Instructions
Page: 2
Before You Begin
2
Before You Begin
These operating instructions describe the optiPoint 500 entry telephone on your
HiPath 500 and HiPath 3000 / 5000.
They describe all functions you can use from your telephone. You may find that some func-
tions you wish to use are not available on your telephone. This may be due to one of the
following reasons:
• The function has not been configured for your telephone — please contact your service
personnel.
• Your communications platforms does not support this function — please contact your
service personnel.
Important Notes
CE (customer equipment) does not continue to support emergency dialing after loss of
mains power, if battery back up and power fail switchover to emergency analogue phones
is not available.
Never allow the telephone to come into contact with staining or aggressive liquids such as
coffee, tea, juice, or soft drinks.
For information on telephone maintenance Æ Page 64.
The information provided in this document contains merely general descriptions or charac-
teristics of performance which in case of actual use do not always apply as described or
which may change as a result of further development of the products.
An obligation to provide the respective characteristics shall only exist if expressly agreed
in the terms of contract.
Do not operate the telephone in environments where there is a danger of
explosions.
Use only original Siemens accessories. Using other accessories may cause
a hazard and will invalidate the warranty and the CE mark.
Never open the telephone or a key module. If you encounter any problems,
contact the service personnel.
Page: 3
Before You Begin
3
Marks
The device conforms to the EU guideline 1999/5/EG, as attested by the CE
mark.
This device has been manufactured in accordance with our certified environ-
mental management system (ISO 14001). This process ensures that energy
consumption and the use of primary raw materials are kept to a minimum,
thus reducing waste production.
All electrical and electronic products should be disposed of separately from
the municipal waste stream via designated collection facilities appointed by
the government or the local authorities.
The correct disposal and separate collection of your old appliance will help
prevent potential negative consequences for the environment and human
health. It is a precondition for reuse and recycling of used electrical and elec-
tronic equipment.
For more detailed information about disposal of your old appliance, please
contact your city office, waste disposal service, the shop where you pur-
chased the product or your sales representative.
The statements quoted above are only fully valid for equipment which is in-
stalled and sold in the countries of the European Union and is covered by
the directive 2002/96/EC. Countries outside the European Union may have
other regulations regarding the disposal of electrical and electronic equip-
ment.
Page: 4
Contents
4
Contents
Before You Begin. . . . . . . . . . . . . . . . . . . . . . . . . . . . . .2
Important Notes . . . . . . . . . . . . . . . . . . . . . . . . . . . . . . . . . . . . . . . . . . . 2
Marks . . . . . . . . . . . . . . . . . . . . . . . . . . . . . . . . . . . . . . . . . . . . . . . . . . . 3
Basic operating instructions . . . . . . . . . . . . . . . . . . . .8
optiPoint 500 entry control panel. . . . . . . . . . . . . . . . . . . . . . . . . . . . . . . 8
How to Use these Operating Instructions. . . . . . . . . . . . . . . . . . . . . . . . 9
Accessing Functions . . . . . . . . . . . . . . . . . . . . . . . . . . . . . . . . . . . . . . . 10
… With Codes . . . . . . . . . . . . . . . . . . . . . . . . . . . . . . . . . . . . . . . . . 10
… With Function Keys . . . . . . . . . . . . . . . . . . . . . . . . . . . . . . . . . . . 10
Making Calls – Basic Functions . . . . . . . . . . . . . . . .11
Making and Answering Calls . . . . . . . . . . . . . . . . . . . . . . . . . . . . . . . . . 11
Answering a Call . . . . . . . . . . . . . . . . . . . . . . . . . . . . . . . . . . . . . . . 11
Open Listening in the Room During a Call . . . . . . . . . . . . . . . . . . . . . . 12
Dialing Numbers/Making Calls. . . . . . . . . . . . . . . . . . . . . . . . . . . . . . . . 13
Answering a Call With the Handset. . . . . . . . . . . . . . . . . . . . . . . . . 13
On-Hook Dialing. . . . . . . . . . . . . . . . . . . . . . . . . . . . . . . . . . . . . . . . 13
Ending the call . . . . . . . . . . . . . . . . . . . . . . . . . . . . . . . . . . . . . . . . . . . . 13
Redialing a Number . . . . . . . . . . . . . . . . . . . . . . . . . . . . . . . . . . . . . . . . 14
Turning the Microphone On and Off . . . . . . . . . . . . . . . . . . . . . . . . . . . 14
Calling a Second Party (Consultation Hold) . . . . . . . . . . . . . . . . . . . . . . 14
Switching to the Party on Hold (Toggle) . . . . . . . . . . . . . . . . . . . . . 15
Transferring a Call . . . . . . . . . . . . . . . . . . . . . . . . . . . . . . . . . . . . . . 15
Call Forwarding . . . . . . . . . . . . . . . . . . . . . . . . . . . . . . . . . . . . . . . . . . . 16
Using Variable Call Forwarding . . . . . . . . . . . . . . . . . . . . . . . . . . . . 16
Using Call Forwarding No Reply (CFNR) . . . . . . . . . . . . . . . . . . . . . 17
Call Forwarding in the Carrier Network
and Forwarding Multiple Subscriber Numbers (MSN) (Not for U.S.) 18
Using Callback . . . . . . . . . . . . . . . . . . . . . . . . . . . . . . . . . . . . . . . . . . . . 19
Storing a Callback . . . . . . . . . . . . . . . . . . . . . . . . . . . . . . . . . . . . . . 19
Answering a Callback. . . . . . . . . . . . . . . . . . . . . . . . . . . . . . . . . . . . 19
Deleting (All) Stored Callbacks. . . . . . . . . . . . . . . . . . . . . . . . . . . . . 19
Telephone Settings . . . . . . . . . . . . . . . . . . . . . . . . . . . . . . . . . . . . . . . . 20
Adjusting the Ring Volume . . . . . . . . . . . . . . . . . . . . . . . . . . . . . . . 20
Adjusting the Ring Tone . . . . . . . . . . . . . . . . . . . . . . . . . . . . . . . . . 20
Adjusting the Receiving Volume During a Call. . . . . . . . . . . . . . . . . 20
Page: 5
Contents
5
Making Calls – Convenience Functions . . . . . . . . .21
Making Calls . . . . . . . . . . . . . . . . . . . . . . . . . . . . . . . . . . . . . . . . . . . . . 21
Accepting a Specific Call for Your Colleague . . . . . . . . . . . . . . . . . . 21
Rejecting Calls . . . . . . . . . . . . . . . . . . . . . . . . . . . . . . . . . . . . . . . . . 21
Using the Speakerphone . . . . . . . . . . . . . . . . . . . . . . . . . . . . . . . . . 21
Answering Calls from the Entrance Telephone
and Opening the Door . . . . . . . . . . . . . . . . . . . . . . . . . . . . . . . . . . . 22
Dialing Numbers/Making Calls. . . . . . . . . . . . . . . . . . . . . . . . . . . . . . . . 24
Speed-Dial . . . . . . . . . . . . . . . . . . . . . . . . . . . . . . . . . . . . . . . . . . . . 24
Using Mailboxes . . . . . . . . . . . . . . . . . . . . . . . . . . . . . . . . . . . . . . . 25
Talking to Your Colleague With a Speaker Call . . . . . . . . . . . . . . . . 25
Talking to Your Colleague with Discreet Calling
(Not for HiPath 500) . . . . . . . . . . . . . . . . . . . . . . . . . . . . . . . . . . . . . 25
Automatic Connection Setup (Hotline). . . . . . . . . . . . . . . . . . . . . . . 26
Reserve Trunk . . . . . . . . . . . . . . . . . . . . . . . . . . . . . . . . . . . . . . . . . 26
Assigning a Station Number (Not for U.S.) . . . . . . . . . . . . . . . . . . . 27
Associated Dialing/Dialing Aid . . . . . . . . . . . . . . . . . . . . . . . . . . . . . 27
During a Call . . . . . . . . . . . . . . . . . . . . . . . . . . . . . . . . . . . . . . . . . . . . . 28
Using Call Waiting . . . . . . . . . . . . . . . . . . . . . . . . . . . . . . . . . . . . . . 28
Accepting a Waiting Call (Camp-On) . . . . . . . . . . . . . . . . . . . . . . . . 28
Preventing and Allowing Call Waiting (Automatic Camp-On). . . . . . 29
Turning the Call Waiting Tone On and Off. . . . . . . . . . . . . . . . . . . . 29
Parking a Call . . . . . . . . . . . . . . . . . . . . . . . . . . . . . . . . . . . . . . . . . . 29
Picking up (Retrieving) a Held Call . . . . . . . . . . . . . . . . . . . . . . . . . . 30
Conducting a Conference . . . . . . . . . . . . . . . . . . . . . . . . . . . . . . . . 30
Activating Tone Dialing/DTMF Suffix-Dialing . . . . . . . . . . . . . . . . . . 31
Recording Calls . . . . . . . . . . . . . . . . . . . . . . . . . . . . . . . . . . . . . . . . 32
After a Speaker Call (Announcement) in a Group . . . . . . . . . . . . . . 33
Trunk Flash (Not for HiPath 500) . . . . . . . . . . . . . . . . . . . . . . . . . . . 33
If You Cannot Reach a Destination . . . . . . . . . . . . . . . . . . . . . . . . . . . . 34
Call Waiting (Camp-On) . . . . . . . . . . . . . . . . . . . . . . . . . . . . . . . . . . 34
Busy Override — Joining a Call in Progress . . . . . . . . . . . . . . . . . . . . 34
Using Night Answer . . . . . . . . . . . . . . . . . . . . . . . . . . . . . . . . . . . . . . . 35
Saving Function, Procedures and Appointment . .36
Appointments Function . . . . . . . . . . . . . . . . . . . . . . . . . . . . . . . . . . . . . 36
Saving Appointments. . . . . . . . . . . . . . . . . . . . . . . . . . . . . . . . . . . . 36
Using Timed Reminders . . . . . . . . . . . . . . . . . . . . . . . . . . . . . . . . . 36
Displaying and Assigning Call Charges . . . . . . . . .37
Dialing with Call Charge Assignment. . . . . . . . . . . . . . . . . . . . . . . . . . . 37
Page: 6
Contents
6
Private Sphere/Security . . . . . . . . . . . . . . . . . . . . . . .38
Turning Do Not Disturb On and Off. . . . . . . . . . . . . . . . . . . . . . . . . . . . 38
Caller ID Suppression . . . . . . . . . . . . . . . . . . . . . . . . . . . . . . . . . . . . . . 38
Silent Monitor (Not for HiPath 500) . . . . . . . . . . . . . . . . . . . . . . . . . . . . 38
Monitoring a Room . . . . . . . . . . . . . . . . . . . . . . . . . . . . . . . . . . . . . . . . 39
Trace Call: Identifying Anonymous Callers (Not for U.S.) . . . . . . . . . . . 40
Locking the Telephone to Prevent Unauthorized Use. . . . . . . . . . . . . . 40
Locking Another Telephone to Prevent Unauthorized Use . . . . . . . . . . 41
Saving Your PIN. . . . . . . . . . . . . . . . . . . . . . . . . . . . . . . . . . . . . . . . . . . 41
Using Other Functions/Services . . . . . . . . . . . . . . . .42
Sending a Message. . . . . . . . . . . . . . . . . . . . . . . . . . . . . . . . . . . . . . . . 42
Deleting Sent Messages . . . . . . . . . . . . . . . . . . . . . . . . . . . . . . . . . 42
Answering Messages . . . . . . . . . . . . . . . . . . . . . . . . . . . . . . . . . . . 43
Delete received messages . . . . . . . . . . . . . . . . . . . . . . . . . . . . . . . 43
Using Another Telephone Like Your Own for a Call . . . . . . . . . . . . . . . 43
Change call number (relocate). . . . . . . . . . . . . . . . . . . . . . . . . . . . . . . . 44
Resetting Services and Functions
(System-Wide Cancellation for a Telephone). . . . . . . . . . . . . . . . . . . . . 45
Activating Functions for Another Telephone . . . . . . . . . . . . . . . . . . . . . 46
Using System Functions from the Outside
(DISA: Direct Inward System Access) . . . . . . . . . . . . . . . . . . . . . . . . . . 46
Controlling Connected Computers or Other Programs and Telephone
Data Service . . . . . . . . . . . . . . . . . . . . . . . . . . . . . . . . . . . . . . . . . . . . . 48
Communicating with PC Applications over a CSTA Interface . . . . . . . . 49
Controlling Relays (only for HiPath 3000) . . . . . . . . . . . . . . . . . . . . . . . 50
Radio Paging (Not for U.S., Not for HiPath 500) . . . . . . . . . . . . . . . . . . 51
Using Team Functions. . . . . . . . . . . . . . . . . . . . . . . . .52
Turning Group Call On and Off . . . . . . . . . . . . . . . . . . . . . . . . . . . . . . . 52
Accepting a Call for Another Member of Your Team . . . . . . . . . . . . . . 53
Activating and Deactivating a Ringing Group. . . . . . . . . . . . . . . . . . . . . 53
Uniform Call Distribution (UCD). . . . . . . . . . . . . . . . . . . . . . . . . . . . . . . 54
Team and Executive/Secretary Functions With
Assigned Trunk Lines . . . . . . . . . . . . . . . . . . . . . . . . .55
Forwarding Calls on Lines . . . . . . . . . . . . . . . . . . . . . . . . . . . . . . . . . . . 55
Transferring Calls Directly to the Executive (Only in an Executive/Secretary
Group) . . . . . . . . . . . . . . . . . . . . . . . . . . . . . . . . . . . . . . . . . . . . . . . . . . 56
Page: 7
Contents
7
Testing the Telephone . . . . . . . . . . . . . . . . . . . . . . . .56
Testing the Telephone Functions . . . . . . . . . . . . . . . . . . . . . . . . . . . . . 56
Special Functions in the LAN
(Not for HiPath 500) . . . . . . . . . . . . . . . . . . . . . . . . . . .57
Leaving a Hunt Group/Group Call . . . . . . . . . . . . . . . . . . . . . . . . . . . . . 57
Transferring Call Forwarding . . . . . . . . . . . . . . . . . . . . . . . . . . . . . . . . . 58
Using Night Answer . . . . . . . . . . . . . . . . . . . . . . . . . . . . . . . . . . . . . . . 59
Activating and Deactivating a Ringing Group. . . . . . . . . . . . . . . . . . . . . 60
Controlling Relays (only for HiPath 3000) . . . . . . . . . . . . . . . . . . . . . . . 61
Opening the Door . . . . . . . . . . . . . . . . . . . . . . . . . . . . . . . . . . . . . . . . . 62
Documentation in Internet. . . . . . . . . . . . . . . . . . . . .63
Fixing Problems . . . . . . . . . . . . . . . . . . . . . . . . . . . . . .64
Telephone Maintenance . . . . . . . . . . . . . . . . . . . . . . . . . . . . . . . . . . . . 64
Troubleshooting. . . . . . . . . . . . . . . . . . . . . . . . . . . . . . . . . . . . . . . . . . . 64
Index . . . . . . . . . . . . . . . . . . . . . . . . . . . . . . . . . . . . . . .65
Overview of Functions and Codes (Alphabetical).68
FCC and Industry Canada Compliance. . . . . . . . . . .75
FCC Certification and Requirements . . . . . . . . . . . . . . . . . . . . . . . . . . . 75
Equipment Attachment Limitations. . . . . . . . . . . . . . . . . . . . . . . . . . . . 77
Page: 8
Basic operating instructions
8
Basic operating instructions
optiPoint 500 entry control panel
Keys for
telephone settings
Keypad
Handset
Speaker
for ring tones
Eight fixed function keys:
Consultation
Redial
Message Waiting
Callback
Speed Dial
Mute
Speaker
Release
LEDs
Your service personnel can customize the default assignment to meet your
preferences and requirements following order placement.
Page: 9
Basic operating instructions
9
Step by Step
How to Use these Operating
Instructions
You will find a graphic representation of the steps in log-
ical sequence in the left column. Below is an explana-
tion of the symbols:
n Lift the handset (off-hook).
t Replace the handset (on-hook).
s Conduct a call.
o Enter a telephone number or code.
dd Enter the PIN.
u or v Press volume controls on the telephone.
w You hear a tone.
A long tone (positive confirmation tone) confirms that
you have successfully activated a function or procedure.
A short tone (negative confirmation tone) indicates that
the function or procedure was rejected.
Press the key.
Press the illuminated key.
Press the flashing key.
Page: 10
Step by Step
Basic operating instructions
10
Accessing Functions
… With Codes
You can activate the functions of your system by enter-
ing codes such as:
qmk DND (do not disturb) on.
rmk DND (do not disturb) off.
All codes to activate or enable functions are always in-
troduced by pressing the star key, and all codes to de-
activate, disable or delete functions are always entered
starting with the pound key.
An alphabetically ordered overview of all functions and
their corresponding codes can be found in the
Appendix («Overview of Functions and Codes
(Alphabetical)» Æ Page 68 = Quick-Reference Operating
Instructions).
… With Function Keys
Functions for which a key has been set up can be ac-
cessed directly as follows.
Press the «consultation hold» key. The function is exe-
cuted, provided this is possible in the current situation.
If your service personnel has changed the default
assignments and saved functions on keys in ac-
cordance with your requests or requirements,
you can execute these functions by pressing the
appropriate keys.
Consultation
Page: 11
Making Calls – Basic Functions
11
Step by Step
Making Calls – Basic Functions
Making and Answering Calls
Special default ring signaling is set for your telephone:
• When you receive an internal call, your telephone
rings once every four seconds (single-tone se-
quence).
• When you receive an external call, your telephone
rings twice in rapid succession every four seconds
(dual-tone sequence).
• When you receive a call from the entrance tele-
phone, your telephone rings three times in rapid
succession every four seconds (triple-tone se-
quence).
• If a call is waiting, you hear a short tone (beep) every
six seconds.
Answering a Call
The telephone rings.
n Lift the handset.
u or v To raise or lower the volume, keep pressing the keys un-
til the desired volume is set.
Your service personnel can adjust the ring ca-
dence for external and internal calls for you. In
other words, different ring cadences can be set
for different internal callers.
Page: 12
Step by Step
Making Calls – Basic Functions
12
Open Listening in the Room During a
Call
You can let other people in the room join in on the call.
Let the other party know that you have turned on the
speaker.
Precondition: You are conducting a call with the hand-
set.
Activating this function:
Press the key. The LED lights up.
Deactivating this function:
Press the key. The LED goes out.
Speaker
Speaker
Page: 13
Making Calls – Basic Functions
13
Step by Step
Dialing Numbers/Making Calls
Answering a Call With the Handset
n Lift the handset.
o Internal calls: Enter the station number.
External calls: Enter the external code and the station
number.
The called party does not answer or is busy:
t Replace the handset.
or
Press the key.
On-Hook Dialing
o Internal calls: Enter the station number.
External calls: Enter the external code and the station
number.
The other party answers with speaker:
n Lift the handset.
The called party does not answer or is busy:
Press the key. The LED goes out.
or
Press the key.
Ending the call
t Replace the handset.
or
Press the key.
Release
Speaker
Release
Release
Page: 14
Step by Step
Making Calls – Basic Functions
14
Redialing a Number
The last three external telephone numbers dialed are
stored automatically.
You can redial them simply by pressing a key.
n Lift the handset.
Press this key.
Turning the Microphone On and Off
To prevent the other party from listening in while you
consult with someone in your office, you can temporari-
ly switch off the handset microphone or the handsfree
microphone.
Precondition: You are conducting a call. The
microphone is switched on.
Press the key. The LED lights up.
Turning off the mute:
Press the illuminated key. The LED goes out.
Calling a Second Party
(Consultation Hold)
You can call a second party while engaged in a call. The
first party is placed on hold.
Press the key. LED flashes.
o Call the second station.
Return to the first party:
Press this key and wait two seconds.
or (depending on the configuration)
Press the key twice.
Redial
If this feature is configured (contact the service
personnel), accounts codes entered are also
saved Æ Page 37.
Mute
Mute
Consultation
Consultation
Consultation
Page: 15
Making Calls – Basic Functions
15
Step by Step
Switching to the Party on Hold (Toggle)
qf Press the key. Enter the code. LED continues to flash.
Combining the calling parties into a three-party
conference
qg Press the key. Enter the code. The LED goes out.
Connecting the other parties to each other
t Replace the handset.
Transferring a Call
If the person you are speaking to wants to talk to anoth-
er colleague of yours, you can transfer the call that col-
league.
Press the key. LED flashes.
o Enter the number of the party to which you want to
transfer the call.
s Announce the call, if necessary.
t Replace the handset.
Consultation
Consultation
Consultation
Page: 16
Step by Step
Making Calls – Basic Functions
16
Call Forwarding
Using Variable Call Forwarding
You can immediately forward internal or external calls to
different internal or external telephones (destinations).
(External destinations require special configuration in
the system).
n Lift the handset.
qe Enter the code.
e or f or g Enter the line type you wish to use: 1 = all calls,
2 = external calls only, 3 = internal calls only
o w Enter the destination number (without the external code).
Deactivating call forwarding:
n Lift the handset.
re w Enter the code.
Special features must be taken into consider-
ation if your telephone operates with
HiPath 5000 (system networking via PC net-
work) Æ Page 58!
When call forwarding is active, a special dial tone
sounds when you lift the handset.
If DID DTMF is active (contact the service per-
sonnel), you can also forward calls to this desti-
nation. Destinations: fax = 870, DID = 871,
fax DID = 872.
Page: 17
Making Calls – Basic Functions
17
Step by Step
Using Call Forwarding No Reply (CFNR)
Calls that are not answered after three rings (=default,
can be adjusted by service personnel) or that are re-
ceived while another call is ongoing can be automatical-
ly forwarded to a specified telephone.
n Lift the handset.
qhmi Enter the code.
o w Enter the destination number.
• Enter the internal station number for internal desti-
nations
• Enter the external code and the external station
number for external destinations
t Replace the handset.
Deactivating Call Forwarding No Reply:
n Lift the handset.
rhmi w Enter the code.
t Replace the handset.
Page: 18
Step by Step
Making Calls – Basic Functions
18
Call Forwarding in the Carrier Network
and Forwarding Multiple Subscriber Num-
bers (MSN) (Not for U.S.)
If this function has been configured (contact the service
personnel), you can forward calls to your assigned
multiple subscriber number (MSN) (DID number)
directly within the carrier network.
For example, you can forward your phone line to your
home phone after business hours.
n Lift the handset.
qjh Enter the code.
e or f or g Enter the line type you wish to use:
1= immediate, 2 = on no answer, 3 = on busy
o Enter your DID number.
o w Enter the destination number (without the external
code).
Deactivating call forwarding:
n Lift the handset.
rjh Enter the code.
e or f or g Enter the activated call forwarding type.
1= immediate, 2 = on no answer, 3 = on busy
o w Enter your DID number.
Page: 19
Making Calls – Basic Functions
19
Step by Step
Using Callback
If a user is busy or is not answering, you can store an
automatic callback. This feature saves you from having
to make repeated attempts to reach the user.
You receive a callback,
• When the other party is no longer busy
• When the user who did not answer has conducted
another call.
Storing a Callback
Precondition: You have reached a busy line or noone
answers.
Press the key. The LED lights up.
or
qil
Press the key. LED flashes. Enter the code.
Answering a Callback
Precondition: A callback was saved. Your telephone
rings. The Callback key lights up (if present).
n Lift the handset. You hear a ring tone.
Deleting (All) Stored Callbacks
n Lift the handset.
ril w Enter the code.
When configured (contact your service person-
nel), all callback requests are automatically delet-
ed overnight.
Callback
Consultation
Page: 20
Step by Step
Making Calls – Basic Functions
20
Telephone Settings
Adjusting the Ring Volume
u or v Press one of these keys while the phone is idle.
e Press the key.
u or v To raise or lower the volume, keep pressing the keys un-
til the desired volume is set.
u v simultaneously Save.
Adjusting the Ring Tone
u or v Press one of these keys while the phone is idle.
f Press the key.
u or v To adjust the ring tone, keep pressing the keys until the
desired ring tone is set.
u v simultaneously Save.
Adjusting the Receiving Volume During a Call
You are engaged in a call.
u or v To raise or lower the volume, keep pressing the keys un-
til the desired ring tone is set.
u v simultaneously Save.
Page: 21
Making Calls – Convenience Functions
21
Step by Step
Making Calls – Convenience
Functions
Making Calls
Accepting a Specific Call for Your Colleague
You hear another telephone ring.
n Lift the handset.
qim Enter the code.
o Enter the number of the telephone that is ringing.
Rejecting Calls
You can reject calls which you do not wish to take. The
call is then signaled at another definable telephone
(contact the service personnel).
The telephone rings.
Press the key.
If a call cannot be rejected, your telephone will continue
to ring.
Using the Speakerphone
A colleague addresses you directly over the speaker
with a speaker call. You hear a tone before the an-
nouncement.
You can respond with the handset or in speakerphone
mode.
n Lift the handset and answer the call.
Accepting calls in a team Æ Page 53.
Release
Placing a speaker call to a colleague Æ Page 25.
Page: 22
Step by Step
Making Calls – Convenience Functions
22
Answering Calls from the Entrance Telephone
and Opening the Door
If an entrance telephone has been programmed, you
can use your telephone to speak to someone at the
entrance telephone and to activate a door opener.
If you are authorized to activate a door opener (contact
the service personnel), visitors can open the door them-
selves by entering a 5-digit code (e.g. using a DTMF
transmitter or installed keypad).
Speaking to visitors via the entrance telephone:
Precondition: Your telephone rings.
n Lift the handset within thirty seconds. You are connect-
ed to the entrance telephone immediately.
or
n Lift the handset after more than thirty seconds.
o Dial the entrance telephone number.
Opening the door from your telephone during a call
from the entrance telephone:
qje
Press the key. LED flashes. Enter the code.
o w Dial the entrance telephone number.
Opening the door with a code (at the door):
o After ringing the bell, enter the five-digit code (using the
keypad or a DTMF transmitter). Depending on how the
door opener has been programmed, a doorbell call sig-
nal may or may not be forwarded.
Consultation
Special features must be taken into consider-
ation if your telephone operates with
HiPath 5000 (system networking via PC net-
work) Æ Page 62!
Page: 23
Making Calls – Convenience Functions
23
Step by Step
Activating the door opener:
n Lift the handset.
qlm Enter the code.
o Dial the entrance telephone number.
o w Enter the five-digit code. Default code = «00000» (con-
tact the service personnel).
e or f Enter the type of door opener. 1 = enable with ring,
2 = enable w/o ring = You can also open the door with-
out a doorbell ring.
Deactivating the door opener:
n Lift the handset.
rlm Enter the code.
o w Dial the entrance telephone number.
Page: 24
Step by Step
Making Calls – Convenience Functions
24
Dialing Numbers/Making Calls
Speed-Dial
Using Station and System Speed-Dial Numbers
Precondition: You have stored station speed-dial num-
bers Æ Page 24 or the service personnel has stored
system speed-dial numbers.
n Lift the handset.
Press the key.
or
qk Enter the code.
o Enter a speed-dial number.
«*0» to «*9» = station speed-dialing.
«000» to «999» = system speed-dialing (contact the ser-
vice personnel).
If applicable Suffix-dialing
o If necessary, you can suffix-dial additional digits (for ex-
ample, the user’s extension) at the end of the saved sta-
tion number.
If this feature is configured, a suffix is automatically di-
aled (for example, «0» for the exchange) if no entries are
made within 4 or 5 seconds.
Storing Station Speed-Dial Numbers
You can store the ten numbers which you use the most
and dial them using your own station speed-dial num-
bers: *0 through *9 Æ Page 24.
n Lift the handset.
qmf Enter the code.
o w Enter the speed-dial number you wish to use (*0 to
*9).
o w First enter the external code and then the external sta-
tion number (wait approx. 5 seconds).
Speed-dial
Page: 25
Making Calls – Convenience Functions
25
Step by Step
Using Mailboxes
If there are messages waiting for you, you will hear a
special dial tone (continuous buzzing) when you lift the
handset.
n w Lift the handset.
rjlg Enter the code.
or
Press the illuminated key.
This connects you to the sender of the message or the
mailbox system.
Talking to Your Colleague With a Speaker Call
You can make a loudspeaker announcement through a
loudspeaker if connected (ask the service personnel), or
to an internal user with an system telephone without
any action on their part.
n Lift the handset.
qld Enter the code.
o w Enter the station number.
Talking to Your Colleague with Discreet
Calling
(Not for HiPath 500)
If this function has been configured (ask your service
personnel), you can join an ongoing call conducted by
an internal user at a system telephone with display. You
can listen in unnoticed and speak to the internal user
without being overheard by the other party (discreet
calling).
n Lift the handset.
qmhi Enter the code.
o Enter your internal station number.
Message Waiting
Your service personnel can protect your tele-
phone against discreet calling.
Page: 26
Step by Step
Making Calls – Convenience Functions
26
Automatic Connection Setup (Hotline)
If this function is configured (contact the service per-
sonnel), the system automatically sets up a connection
to a preset internal or external destination.
n Lift the handset.
Depending on the setting, the connection is either set
up immediately or only after a preset period of time
(hotline after a timeout).
Reserve Trunk
If this feature is configured (contact the service person-
nel), you can reserve a busy trunk for your own use.
When the trunk is free, you receive a call.
n Lift the handset.
o Enter the external code. The external trunk is busy; you
hear a busy signal tone. Wait about 5 seconds until the
busy tone ends.
The trunk is reserved.
t Replace the handset.
When the reserved trunk becomes free:
Your telephone rings.
n Lift the handset. You hear the CO dial tone.
o Enter the number of the external station.
Page: 27
Making Calls – Convenience Functions
27
Step by Step
Assigning a Station Number (Not for U.S.)
If this function has been configured (contact the service
personnel), you can selectively assign a specific num-
ber (DID number) to your telephone before making an
external call. The assigned number then appears on the
called party’s display.
n Lift the handset.
qhe Enter the code.
o Enter the DID number you wish to use.
o Dial the external number.
Associated Dialing/Dialing Aid
If this function has been configured (contact the service
personnel), you can use your telephone as a dialing aid
for other telephones.
n Lift the handset.
qjk Enter the code.
o w Enter the internal station number of the party for whom
you want to dial.
o Enter the number you wish to dial (external number
with external code).
Page: 28
Step by Step
Making Calls – Convenience Functions
28
During a Call
Using Call Waiting
Callers can still reach you while you are engaged in an-
other call. A signal alerts you to the waiting call.
You can either ignore or accept the waiting call.
When you accept the waiting call, you can either end
the first call or place it on hold and resume the call later
on.
You can also bar call waiting or the call waiting tone
Æ Page 29.
Accepting a Waiting Call (Camp-On)
Precondition: You are engaged in a phone call and hear
a tone (every six seconds).
Ending the first call and answering the waiting call:
t Replace the handset. Your telephone rings.
n Answer the second call. Lift the handset.
Placing the first call on hold and answering the sec-
ond call:
qii
Press the key. LED flashes. Enter the code.
You are connected to the call waiting party immediately.
The first party is placed on hold.
Ending the second call and resuming the first one:
Press this key and wait two seconds.
or (depending on the configuration)
Press the key twice.
Consultation
Consultation
Consultation
Page: 29
Making Calls – Convenience Functions
29
Step by Step
Preventing and Allowing Call Waiting
(Automatic Camp-On)
If this function has been configured (ask the service per-
sonnel), you can prevent or allow a second call
Æ Page 28 from being signaled by automatic camp-on
during an ongoing call.
n Lift the handset.
rhmd
or qhmd
w
Enter the code to «prevent» or «allow» call waiting.
Turning the Call Waiting Tone On and Off
You can suppress the call waiting tone every six sec-
onds for external calls. A one-time special dial tone then
alerts you to the waiting call.
n Lift the handset.
qlk or rlk w Enter code for «tone off» or «tone on».
Parking a Call
You can park up to ten calls, either internal, external, or
both. Parked calls can be displayed on and picked up
from another telephone. This feature is useful if you
want to continue a call at another phone.
Precondition: You are conducting a call.
qij
Press the key. LED flashes. Enter the code.
d … m w Enter the number of the park slot (0 — 9) and make a note
of it.
If the park slot number you entered is already being
used, you will hear the negative confirmation tone.
Please enter another number.
t Replace the handset.
Consultation
Page: 30
Step by Step
Making Calls – Convenience Functions
30
Retrieving a Parked Call
Precondition: One or more calls have been parked. The
telephone is idle.
n Lift the handset.
rij Enter the code.
d … m Enter the park slot number you noted earlier.
If the park slot number you enter is not in use, you can-
not retrieve the call.
Picking up (Retrieving) a Held Call
Precondition: One or more calls have been parked. The
telephone is idle.
n Lift the handset.
qjg Enter the code.
o Enter the line number you noted earlier.
Conducting a Conference
In a conference call, you can talk to as many as four oth-
er parties at the same time. These may be internal or
external users.
n Lift the handset.
o Call the first party.
Press the key. LED flashes.
o Call the second station. Announce the conference.
qg Press the key. Enter the code. The LED goes out.
A tone sounds every 30 seconds to indicate that a con-
ference is in progress. Contact the service personnel for
instructions on how to turn it off.
If a parked call is not picked up, after a specific
period of time the call is returned to the tele-
phone from where it was parked (recall).
Consultation
Consultation
Page: 31
Making Calls – Convenience Functions
31
Step by Step
If the second party does not answer:
Press this key and wait two seconds.
or (depending on the configuration)
Press the key twice.
Adding Up to Five to the Conference (Initiator Only)
Press the key. LED flashes.
o Call the new party. Announce the conference.
qg Press the key. Enter the code. The LED goes out,
etc.
Leaving a Conference
t Replace the handset.
Ending a Conference (Initiator Only)
rg Press the key. LED flashes. Enter the code.
Removing the ISDN Central Office Party
From the Conference
Press the key. LED flashes.
qhme Enter the code.
Activating Tone Dialing/DTMF Suffix-Dialing
You can transmit dual-tone multifrequency (DTMF)
signals to control devices such as an answering
machine or automatic information system.
s You have set up a connection.
qig
Press the key. LED flashes. Enter the code.
o You can use the keys «0» through «9», «*», and «#» to
transmit DTMF signals.
Consultation
Consultation
Consultation
Consultation
Consultation
Consultation
Consultation
Ending the call also deactivates DTMF suffix
dialing.
Your system may be configured so that you can
start DTMF suffix-dialing immediately after
setting up a connection.
Page: 32
Step by Step
Making Calls – Convenience Functions
32
Recording Calls
If configured (contact the service personnel), you can
record calls.
Precondition: You are conducting a call.
Press the key. LED flashes.
qhmg Enter the code.
An announcement notifies you and the person you are
speaking with that recording has begun. A beep will
also sound every 15 seconds until recording has con-
cluded.
Ending Recording
Press the key. LED flashes.
Press the key. The LED goes out.
Playback
The steps required for playing back a recording depend
on the voice memory system (see the corresponding
Operating Manual or Æ Page 25).
Consultation
While a call is being recorded, a third party can-
not be added to the call.
Consultation
Consultation
Page: 33
Making Calls – Convenience Functions
33
Step by Step
After a Speaker Call (Announcement) in a
Group
If this function has been configured (contact the service
personnel), you can use a speaker call (announcement,
Æ Page 25) to announce a call in progress to a group of
users Æ Page 52.
After a member of the group has accepted the call re-
quest, you can transfer the waiting party.
Precondition: You are conducting a call.
qld
Press the key. LED flashes. Enter the code.
o w Enter the group’s station number.
s Announce the call.
When a member of the group accepts the call, you are
connected to this party.
t Replace the handset.
Trunk Flash (Not for HiPath 500)
To activate ISDN-type services and features through the
network carrier’s analog trunks or those of other com-
munications platforms (such as «consultation hold»), you
must send a signal to the trunks before dialing the ser-
vice code or telephone number.
Precondition: You have set up an external connection
via an analog line.
qie
Press the key. LED flashes. Enter the code.
o Enter the service code and/or telephone number.
Consultation
If the connection between the two other parties
is not established within 45 seconds, the call
from the first party returns to you (recall).
Consultation
Page: 34
Step by Step
Making Calls – Convenience Functions
34
If You Cannot Reach a Destination
Call Waiting (Camp-On)
It is important that you reach the called party, but the
number is busy.
n Lift the handset.
o Enter the internal station number.
Wait (approx. 5 seconds) until the busy tone is followed
by the ring tone.
The called party can then respond Æ Page 28.
Busy Override — Joining a Call in Progress
This function is only available if it has been configured
by the service technician (contact the service person-
nel).
Precondition: You have dialed an internal number and
hear a busy signal. It is important that you reach the
called party.
qjf w
Press the key. LED flashes. Enter the code.
The called party and person to whom this party is talk-
ing hear an alerting tone every two seconds.
If the called party has a system telephone with display,
the following appears on the screen: «Override: (station
no. or name)».
You can now start talking.
The called party can prevent automatic call wait-
ing Æ Page 29.
If this feature is configured (contact the service
personnel), you will hear the ring tone immedi-
ately.
Consultation
Page: 35
Making Calls – Convenience Functions
35
Step by Step
Using Night Answer
When night answer mode is active, for example during
a lunch break or after office hours, all external calls are
immediately forwarded to a specific internal telephone
(night station). The night station can be defined by the
service personnel ( standard night answer service) or by
you (temporary night answer service).
Activating this function:
n Lift the handset.
qhh Enter the code.
o w Enter the destination number (= temporary night an-
swer service) within 5 seconds.
or
q w Enter the code or use the default (= standard night an-
swer service).
Deactivating this function:
rhh w Enter the code.
Special features must be taken into consider-
ation if your telephone operates with
HiPath 5000 (system networking via PC net-
work) Æ Page 59!
Page: 36
Step by Step
Saving Function, Procedures and Appointment
36
Saving Function, Procedures and
Appointment
Appointments Function
Saving Appointments
You can tell your telephone to give you a call when you
want to be reminded of an appointment Æ Page 36.
To do this, you need to save the time you want the call
to be made. The appointment can be set for any time
within the next 24 hours.
n Lift the handset.
qhj Enter the code.
o Enter a 4-digit time, such as 0905 for 9:05 (= 9.05 a.m.)
or 1430 for 14.30 (= 2.30 p.m.).
f or k If the selected language is «US English» (ask the service
personnel) enter the code 2 for «am» or 7 for «pm».
w
Deleting and checking a saved appointment
n Lift the handset.
rhj w Enter the code.
Using Timed Reminders
Precondition: You must have saved a timed reminder
Æ Page 36. The current time is the time stored.
n t Your telephone rings.
Lift the handset and replace it again.
If you fail to answer the timed reminder, it re-
peats five times and is then erased.
Page: 37
Displaying and Assigning Call Charges
37
Step by Step
Displaying and Assigning Call
Charges
Dialing with Call Charge Assignment
You can assign external calls to certain projects.
Precondition: The service personnel has set up
account codes for you.
n Lift the handset.
qjd Enter the code.
o Enter the account code.
If applicable
r w Press this key (may be needed, depending on the con-
figuration; contact the service personnel).
o Enter the number of the external station.
You can also enter the account code during an
external call.
Page: 38
Step by Step
Private Sphere/Security
38
Private Sphere/Security
Turning Do Not Disturb On and Off
You can activate the do not disturb function if you do not
want the receive any calls. When do not disturb is acti-
vated, internal callers hear a busy signal and external
callers are rerouted to a telephone assigned for this pur-
pose (contact the service personnel).
n Lift the handset.
qmk or rmk w Enter the code for «on» or «off».
Caller ID Suppression
You can prevent your station number or name from ap-
pearing on the displays of external parties you call. The
feature remains active until you deactivate it.
n Lift the handset.
qlj or rlj w Enter code for «suppress» or «restore».
Silent Monitor (Not for HiPath 500)
If this function has been configured (contact the service
personnel), you can join a call already in progress at an
internal station and listen in unnoticed.
n Lift the handset.
qmhh Enter the code.
o Enter the internal station number.
When you lift the handset, a special dial tone
(continuous buzzing) reminds you that «do not
disturb» is active.
Authorized internal callers can automatically
override the «do not disturb» function after five
seconds.
The service personnel can turn caller ID suppres-
sion on and off for all telephones.
Page: 39
Private Sphere/Security
39
Step by Step
Monitoring a Room
A telephone can be used to monitor a room. The func-
tion must be activated on the telephone that you want
to monitor.
Calling this telephone lets you hear what is going on in
the room.
Activating the telephone to be monitored:
n Lift the handset and direct it towards the noise source.
qll w Enter the code.
Deactivating the telephone to be monitored:
t Replace the handset.
Monitoring the room:
n Lift the handset.
o Enter the internal number of the telephone in the room
you wish to monitor.
Page: 40
Step by Step
Private Sphere/Security
40
Trace Call: Identifying Anonymous
Callers (Not for U.S.)
You can have the carrier identify malicious external call-
ers. You can save the caller’s station number during the
call or for 30 seconds after the call ends. However, it is
essential that you do not replace your handset during
this time.
s You are engaged in an external call.
qlh
Press the key. LED flashes. Enter the code.
Locking the Telephone to Prevent
Unauthorized Use
You can prevent unauthorized persons from using your
telephone during your absence.
Precondition: You must have configured a personal
identification number (PIN) for your telephone
Æ Page 41.
To lock and unlock the telephone:
n Lift the handset.
qjj or rjj Enter the code for «lock» or «unlock».
o w Enter the telephone lock PIN Æ Page 41.
Consultation
After you have finished tracing the call, the data
is stored on the carrier’s system. Now contact
the service personnel.
While the telephone is locked, a special dial tone
sounds when you lift the handset. You can con-
tinue to dial internal numbers as usual.
An authorized party Æ Page 41 can also lock and
unlock your telephone.
Page: 41
Private Sphere/Security
41
Step by Step
Locking Another Telephone to Prevent
Unauthorized Use
If this function has been configured (contact the service
personnel), you can lock other telephones to prevent
unauthorized use, and later unlock them again.
You can use this function to unlock the telephone for us-
ers who have locked their telephones and then forgot-
ten their PINs.
n Lift the handset.
qmhg Enter the code.
o Enter the internal number of the telephone that you
want to lock or unlock.
q Enter the code for «Changeover on».
or
r Enter the code for «Changeover off».
Saving Your PIN
To use the functions
• to prevent unauthorized persons from using your
telephone Æ Page 40
• to use another telephone like your own Æ Page 43
• to change your call number Æ Page 44
you need to enter a personal identification number,
which you can save yourself.
n Lift the handset.
qmg Enter the code.
o Enter the current five-digit PIN.
If you have not yet assigned a PIN, use the PIN «00000»
the first time you enter it.
o Enter the new PIN.
o Repeat the new PIN.
If you forget your PIN, contact the service per-
sonnel, who can reset your PIN to «00000».
An authorized party Æ Page 41 can also lock and
unlock your telephone.
Page: 42
Step by Step
Using Other Functions/Services
42
Using Other Functions/Services
Sending a Message
You can send short text messages (infotexts) to single
users or groups of users who have system telephones.
On system telephones with no display (e.g.
optiPoint 500 entry), on ISDN, pulse or tone dialing tele-
phones, transmitted text messages will be saved as a
callback request.
n Lift the handset.
qjl Enter the code.
o Enter the internal station number of the recipient or
group.
d … m w Select the preprogrammed message (which can be
changed by the service personnel). Enter the code. For
example:
Deleting Sent Messages
You can delete messages that have already been sent
so the recipient does not get them.
n Lift the handset.
rjle w Enter the code.
0 = Please callback 5 = Fax waiting
1 = Someone is waiting 6 = Dictation please
2 = Appointment 7 = Please come see me
3 = Urgent call 8 = Please make copies
4 = Do not disturb 9 = Ready to depart
Texts sent to groups can be deleted only by the
originator.
Page: 43
Using Other Functions/Services
43
Step by Step
Answering Messages
If you have received any messages, the button «mes-
sages/info» will light up. After lifting the receiver you will
hear a special dial tone or an announcement.
n w Lift the handset.
rjlg Enter the code.
or
Press the illuminated key.
This connects you to the sender of the message or the
mailbox system.
Delete received messages
You can delete messages sent to you; no callback is ini-
tiated.
If messages for you have arrived, you will hear a special
dial tone or an announcement when you lift the hand-
set. If configured, a mailbox LED will light up on special
tone-dialing telephones.
n w Lift the handset.
rjld w Enter the code.
The received messages are deleted.
Using Another Telephone Like Your
Own for a Call
Other people can temporarily use your telephone for
outgoing calls as though it were their own.
n Lift the handset.
qidl Enter the code.
o Enter the other user’s station number.
o w Enter the other user’s telephone lock PIN.
o Dial the external number.
This state is canceled at the end of the call.
Message Waiting
Page: 44
Step by Step
Using Other Functions/Services
44
Change call number (relocate)
You can put your call number on every other available
telephone when it is set up (contact the service person-
nel).
Your previous telephone then receives the old call num-
ber of your new telephone. The call number together
with the settings (e.g. programmed keys) of the tele-
phone are changed.
Precondition: Your old and new telephone are the first
telephones at each connection. The telephone are in
idle state.
The following procedure is carried out on the new tele-
phone.
n Lift the handset.
qmhem Enter the code.
o Enter your own call number.
o Enter code (telephone lock) Æ Page 41.
(This is not necessary if you have not determined a code
yet).
rmhem Enter the code.
You can, however, connect your telephone to an-
other connection and carry out the procedure.
Page: 45
Using Other Functions/Services
45
Step by Step
Resetting Services and Functions
(System-Wide Cancellation for a
Telephone)
There is a general reset procedure for activated func-
tions. The following functions are canceled, if they were
activated:
• Forwarding on
• Advisory msg. on
• Ringing group on
• Hunting group off
• Suppress call ID
• Waiting tone off
• DND on
• Ringer cutoff on
• Messages received:
• View callbacks
n Lift the handset.
rd w Enter the code.
Page: 46
Step by Step
Using Other Functions/Services
46
Activating Functions for Another
Telephone
If this function has been configured (contact the service
personnel), you can turn the following functions on and
off for other telephones. This feature is also known as
associated service.
• Do not disturb, code: *97/#97 Æ Page 38
• Call forwarding, code *11, *12, *13/#1 Æ Page 16
• Lock and unlock all phones,
code: *66/#66 Æ Page 40
• Group ringing, code: *81/#81 Æ Page 53
• Group call,
code: *85/#85 Æ Page 52
• Reset services and functions,
code #0 Æ Page 45
• Control relay,
code: *90/#90 Æ Page 50
• Night service, code *44/#44 Æ Page 35
• Timed reminders,
code *46/#46 Æ Page 36
n Lift the handset.
qlg Enter the code.
o Enter the internal number of the telephone for which
you want to activate the function.
o w Enter the code – e.g. *97 for DND on – and procedure
(if relevant).
Using System Functions from the
Outside
(DISA: Direct Inward System Access)
If this function has been configured (contact the service
personnel), you can set up external outgoing calls from
outside the system, just like an internal user. You can
also activate and deactivate the following functions in
your system:
• Reset services and functions,
code: #0 Æ Page 45
• Call forwarding, code: *1/#1 Æ Page 16
Page: 47
Using Other Functions/Services
47
Step by Step
• Lock and unlock all phones,
code: *66/#66 Æ Page 40
• Save PIN,
code: *93 Æ Page 41
• Send a message,
code: *68/#68 Æ Page 42
• Group ringing, code: *81/#81 Æ Page 53
• Group call, code: *85/#85 Æ Page 52
• Suppress caller ID,
code: *86/#86 Æ Page 38
• Open door, code: *61 Æ Page 22
• Door opener on/off, code: *89/#89 Æ Page 23
• Control relay, code *90/#90 Æ Page 50
• Do not disturb, code: *97/#97 Æ Page 38
• Speed-dialing, code: *7 Æ Page 24
• Associated service, code: *83 Æ Page 46
Precondition: You have a telephone that uses tone di-
aling (DTMF dialing) or you can switch your telephone
to tone dialing. The telephone is not connected to the
system.
o Set up a call to the system. Enter the station number
(contact the service personnel).
o Wait for a continuous tone (if necessary switch the tele-
phone to tone dialing), then enter the internal number
that has been assigned to you and the associated PIN.
r Enter the code (necessary only if programmed in the
system).
o Wait for a dial tone and then enter the code, such as
*97 for Do not disturb on. Make other inputs as
necessary; (refer to the operating instructions for pulse
and DTMF telephones).
or
o Dial the external number.
You can only execute one function at a time, or
set up only one outgoing connection.
The connection is immediately released after
successful activation of a function.
In the case of an external-external call, the
connection is released as soon as either of the
parties ends the call.
Page: 48
Step by Step
Using Other Functions/Services
48
Controlling Connected Computers
or Other Programs and Telephone
Data Service
If this function has been configured (contact the service
personnel), you can control connected computers or
programs running on them, such as hotel services or in-
formation systems, from your telephone.
Precondition: You have set up a connection.
qhf
Press the key. LED flashes. Enter the code.
The connected computer now prompts you to enter the
data, which you can do in one of two ways. Contact the
service personnel to find out which option is pro-
grammed in your system:
• Input in en-bloc mode
d … m Enter data.
r Press this key at the end of the entry.
or • Input in online mode:
The connected computer processes your entries di-
rectly.
r Enter the code.
d … m Enter data.
Consultation
Page: 49
Using Other Functions/Services
49
Step by Step
Communicating with PC Applications
over a CSTA Interface
If this function has been configured (ask your service
personnel), you can use your telephone to communi-
cate with PC applications (CSTA = Computer Supported
Telecommunications Applications). You send informa-
tion to the application and receive information from the
application via an acoustic signal.
qhmh Enter the code.
o Enter the three-digit ID for the application you want to
operate.
u v d … m Use the relevant keys to communicate with the applica-
tion.
Ending communication with the application:
n t Lift and replace the handset.
Page: 50
Step by Step
Using Other Functions/Services
50
Controlling Relays
(only for HiPath 3000)
If this feature is configured (contact the service person-
nel), you can turn up to four relays on and off to control
different facilities (such as a door opener).
Depending on how they are programmed, you can
switch the relays on and off or switch them on and have
them switched off automatically after a timeout.
n Lift the handset.
qmd or rmd Enter the code for «on» or «off».
e … h w Enter the relay.
Special features must be taken into consider-
ation if your telephone operates with
HiPath 5000 (system networking via PC net-
work) Æ Page 61!
-
Page 1
HiPath 4000 Hicom 300 E/300 H Operating Instructions optiPoint 500 entry… -
Page 2: About These Operating Instructions
About these Operating Instructions These Operating Instructions describe the use of the optiPoint 500 entry telephone in con- junction with the HiPath 4000 Communication Server, Version 1.0 and Hicom 30 0 E/300 H, all Versions. They describe all functions you can use from your telephone. You may find that some func- tions you wish to use are not available on your telephone.
-
Page 3: Basic Operating Instructions
Basic operating instructions Basic operating instructions optiPoint 500 entry control panel Loudspeaker for Keys for open listening telephone settings Hand- Lamp function keys (variable) function keys (fixed) Dialling key- T wo keys with Six keys with variable functions: fixed functions:…
-
Page 4: How To Use These Operating Instructions
How to use these Operating Instructions Step by Step How to use these Operating Instructions T he o perat in g p ro ced ures are pres ented in a lo gic al s equ enc e in t he «co lo ured » c olumn . The s ymbo ls u sed h ave t he fo llow ing mean in gs: Lift the handset.
-
Page 5: How To Access A Function
The Appendix to these Operating Instructions contains an overview of the p ossib le cod es. If your optiPoint 500 entry does not have a «store» key, storage of a call forwarding destination can be initiated by lifting the handset and dialling the special code.
-
Page 6: Table Of Contents
Basic operating instructions ….3 optiPoint 500 entry control panel……. 3 Ø…
-
Page 7
Contents Last number redial ……… 18 Dialling with individual speed d ialling numbers . -
Page 8
Contents Using a different telephone in the same way as your own ….33 Logging on to a different telep hone ……33 Deactivating identification at the other telephone . -
Page 9: Taking Calls And Setting Up Calls
Taking calls and setting up calls Step by Step Taking calls and setting up calls Taking a call The telephone rings. Lift the handset. Terminating a call: Replace the hand set. Open listening within the room during a call You can allow other persons in the room to listen in on the call.
-
Page 10: Taking A Call On A Line Key (Keysystem Working)
Taking calls and setting up calls Step by Step Taking a call on a line key (keysystem working) Precondition: There is a line key with its own number on your telephone. The telephone rings. The line key lamp flashes rapidly. Lift the handset.
-
Page 11: Using The Mailbox (Not For Uk)
Taking calls and setting up calls Step by Step Using the mailbox (not for UK) Precondition: The «mailbox» and «output» keys have been configured on your telephone. Callers who dialled your number during your ab sence can leave a callback request in your mailbox. You will also find mail server voice/fax messages in your mailbox (if this facility is available).
-
Page 12: Activating/Deactivating Do Not Disturb
Taking calls and setting up calls Step by Step Activating/deactivating do not disturb Precondition: System Support has enabled the do not d isturb facility for all Hicom users in your system. If you d o not wish to receive incoming calls, you can ac- tivate the do not disturb facility.
-
Page 13: Setting Up Calls
Setting up calls Step by Step Setting up calls Dialling with the handset off-hook Lift the handset. Internal: Enter the number. External: Enter the external code and the number. The called party is busy or does not answer: Replace the hand set. Dialling with the line key (keysystem working) Precondition: There is a line key with its own number…
-
Page 14: Suppressing The Number Display At The Called Party
Setting up calls Step by Step The called party is busy or does not answer: Press the key. The lamp goes out. S peaker Suppressing the number display at the called party Suppression of the number indication only applies to the next call and is not stored together with the redial function.
-
Page 15: Calling Several Persons Simultaneously
Calling several persons simultaneously Step by Step Calling several persons simultaneously Making a second call (consultation) You can set up a second call during a call in progress. The first party waits. Press the key. The lamp lights up. Consultation Make your call to the second party.
-
Page 16
Calling several persons simultaneously Step by Step ýFB F< Enter the UK code or Standard code for conference. If your telephone d oes not have a «conference» key: Enter the code for conference. A tone indicates that all three users have been intercon- nected to form a conference circuit. -
Page 17: Extending A Call
Calling several persons simultaneously Step by Step Extending a call If the person you are conversing with wishes to be for- warded to another user, you can pass on the connection to this third person. The connection can be passed on with or without prior announcement.
-
Page 18: Using Stored Numbers To Make Calls
Using stored numbers to make calls Step by Step Using stored numbers to make calls Saved number redial Precondition: The «redial» key is configured on your telephone. If your telephone is configured for this type of redialling, you can store a number and then dial it at a later point in time (Æ…
-
Page 19: Dialling With Individual Speed Dialling Numbers
Using stored numbers to make calls Step by Step Dialling with individual speed dialling numbers Precondition: You have stored individual speed dialling numbers (Æ page 26). Lift the handset. F?< UK code or Standard code/Euro code Enter the code which has been programmed for you Ente r th e code ! Enter the special code (not for UK).
-
Page 20: If You Don’t Get Through
If you don’t get through… Step by Step If you don’t get through… Using the callback facility If an internal station which you have called is busy or there is no reply, you can place a request for callback. This also applies to external calls via ISDN switching centres.
-
Page 21: Cancelling A Stored Callback Request
If you don’t get through… Step by Step Cancelling a stored callback request Precondition: You have stored a callback request. Lift the handset. UK code or Standard code Enter the code which has been programmed for you. Ente r th e code ! Replace the hand set.
-
Page 22: Telephone Settings
Telephone settings Step by Step Telephone settings Adjusting the volume of the ringing tone Press one of the keys when the telephone is in the idle state. Press the key. To increase/decrease the volume: keep pressing the keys until the required volume level has b een reached. together Store.
-
Page 23: Setting The Volume Of The Alerting Tone
Telephone settings Step by Step Setting the volume of the alerting tone You hear aler ting tone if a call has not been picked up in your team. Press one of the keys when the telephone is in the idle state.
-
Page 24: Preventing Misuse Of The Telephone
Telephone settings Step by Step Preventing misuse of the telephone You can prevent unauthorised persons from using your telephone during your absence. Precondition: You have been assigned a personal iden- tification number (PIN) by System Support. Preventing unauthorised dialling: UK code or Stand ard code Euro code Enter the code which has b een programmed for you.
-
Page 25: Storing Numbers
Storing numbers Step by Step Storing numbers Storing a number for redialling Precondition: Your telephone is programmed for «Saved number redial» not «Last number redial». Storing a caller’s number or a number which has been dialled You have set up a call and are still engaged in this call. Or you have been called by — and are still conversing with — a user whose number has also been communi- cated to you.
-
Page 26: Storing Individual Speed Dialling Numbers
Storing numbers Step by Step Storing individual speed dialling numbers You can store a number on each of digit keys 0 to 9 and then dial these numbers at the push of a button (Æ page 19). An existing number is overwritten. Press the key.
-
Page 27: Forwarding Calls
Forwarding calls Step by Step Forwarding calls Using fixed call forwarding Fixed call forwarding can be activated in a matter of sec- onds. It is advisable to use this type of call forwarding in order to reroute calls to the mailbox or to a permanent deput y, for example.
-
Page 28: Deactivating Call Forwarding
Forwarding calls Step by Step Euro code. If the «store» and «call forwarding» keys are not config- ured on your telephone: Lift the handset and enter the UK code. G>? Special code (not for UK). Press the key. Disconnect/Clear Press the key. The lamp goes out. Store If you have already lifted the handset and entered the special code:…
-
Page 29: Forwarding Calls Automatically
Forwarding calls Step by Step Forwarding calls automatically A call is diver ted to the fixed call forward ing destination even if you have not activated fixed call forwarding (and provided that your system is configured for this facility). If «forwarding ring no answer» (transfer of ringing) has been programmed, calls are rerouted automatically if, for example, they are not answered after several rings or they arrive when you are already engaged in a call.
-
Page 30: Deactivating Call Forwarding
Forwarding calls Step by Step Deactivating call forwarding Press the key. The lamp goes out. Call forwarding If your telephone d oes not have a «call forward ing» key: Lift the handset and enter the UK code or St andard cod e Replace the handset.
-
Page 31: Storing A Destination For Fax, Pc Or «Busy»/Activating Call Forwarding
Forwarding calls Step by Step Press the key. The lamp goes out. Store Call forward ing is thus activated. Storing a destination for fax, PC or «busy»/activating call forwarding Press the key. The lamp lights up. Store Enter the code for the type of call forwarding required. The codes are defined by System Suppor t.
-
Page 32: Deactivating Call Forwarding For Fax, Pc Or «Busy
Forwarding calls Step by Step Press the square key only (if your own station has the «Call forwarding for remote terminal» class of service). Enter the number of the destination and confirm your inp ut with the square key. Press the square key only (the telephone on which you are storing call forwarding thus b ecomes the call forwarding d estination).
-
Page 33: Using A Different Telephone In The Same Way As Your Own
Using a different telephone in the same way as your own Step by Step Using a different telephone in the same way as your own You can log on to another telephone belonging to the Hi- com system by means of a personal identification num- ber (PIN) (as of software status HiPath 40 00, Version 1 .0 und Hicom 300 E/300 H, and also telephones of net- worked HiPath 40 00 systems, e.g .
-
Page 34: Deactivating Identification At The Other Telephone
Using a different telephone in the same way as your own Step by Step Dialling after (successful) identification: You hear dial tone. Press the key. The lamp goes out. Speaker ýE Enter a number immediately. Call forwarding — follow me after successful identi- fication Press the key.
-
Page 35: Relocating With The Telephone
Relocating with the telephone Step by Step Relocating with the telephone Enquire with System Support whether this is possible with your telep hone system. After consulting with System Support, you can de- register your telep hone from its present station line and then re-register it at the new station line.
-
Page 36: Making Calls In A Team
Making calls in a team Step by Step Making calls in a team Taking a call for a colleague If a member of a team d oes not answer a call within 15 seconds (depending on the system), the other mem- b ers of the team hear an alerting tone.
-
Page 37: Taking A Call In A Hunt Group
Making calls in a team Step by Step Taking a call in a hunt group Precondition: A hunt group has been configured in the team. You — and all the members of the team — can be accessed by way of a hunt group number. Your telephone rings.
-
Page 38: Labelling And Documentation
CD-ROM (ask System Supp ort) in HTML and PDF format. The CD-Rom (7 languages) or a printout of these operating instructions can be ordered from the details of the article number from Siemens’ Sales Or- ganisation of via the following Internet address.
-
Page 39: Advice For Users
Advice for users Advice for users Care of the telephone • Use either a damp cloth or an antistatic cloth to clean the telephone set. Never use a dry cloth! • If the telephone set needs to be cleaned thoroughly, use a neutral, di- luted, surface-active cleaning agent.
-
Page 40: Index
Index Index Lampen=Leuchdiode LED ……3 Add -on conference ……..15 Mailbox …………11 Automatic call forwarding ……29 callback request ……..11 retrieving ……….11 Malfunctions ……….39 Call pickup (team) ……..36 Callback …………20 answering ……….20 Number label ……….
-
Page 44
-43$643360+;7330%638040:94<- 1P A31003-H8400-B305-1-7619 The inform ation in this docum ent contains general descriptions of the technical options available, which do not always have to be present in individual cases. The required features should therefore be specified in each individual case at the time of closing the contract. -
Page 45
HiPath 4000 Hicom 300 E/300 H Quick-Reference Operating Instructions optiPoint 500 entry… -
Page 46
Quick-reference operating instructions (appendix) -
Page 47: Important Functions At A Glance
Important functions at a glance Making a call: Either: + when the other party answers Making a call with a line key: Line Redial (saved number): Store: Either: The connection has been set up: Redial Or: Any number: Store Redial Store Repeat: Redial…
-
Page 48
Without prior announcement: Consultation Setting up a conference call: First call Consultation Conference In the case of a telephone with no «conference» key: First call for UK or *3. Consultation Expanding conference (to includ e up to 8 users): Add-on conference for UK or *3 etc. -
Page 49
Dialling with individual speed dialling numbers: F?< for UK or *8 (not for UK) + (0..9). -
Page 50: List Of Codes
List of codes For information on the use of codes please refer to Æ page 5. Functio n UK code Stan dard code Euro co de Special code Camp-on/override * 6 0 * 1 9 * 1 9 Do not disturb on/off * 5 1 / # 5 1 * 4 0 / # 4 0 * 9 3 / # 9 3…
-
Page 1
HiPath 1220 optiPoint 500 economy optiPoint 500 basic optiPoint 500 standard optiPoint 500 advance User Guide… -
Page 2: Before You Begin
Before You Begin Before You Begin These operating instructions describe the optiPoint 500 economy, optiPoint 500 basic, optiPoint 500 standard and optiPoint 500 advance telephones on your HiPath HiPath 1220. They describe all functions you can use from your telephone. You may find that some func- tions you wish to use are not available on your telephone.
-
Page 3: Table Of Contents
Characteristics and Ways to Connect Your optiPoint 500 … . 7 Control Panel optiPoint 500 economy/basic/standard ….8 Control Panel optiPoint 500 advance with optiPoint key module .
-
Page 4
Contents Using Callback ……….25 Storing a Callback . -
Page 5
Contents Saving Functions and Procedures ….49 Assigning Functions to Keys ……. . . 49 Assigning a Procedure (Operating Steps) to a Key . -
Page 6
Contents System Administration/ Software Update ……72 Enable Remote Administration and Software Update ……..72 Service Call . -
Page 7: Basic Operating Instructions
Basic Operating Instructions Basic Operating Instructions Characteristics and Ways to Connect Your optiPoint 500 optiPoint 500 economy basic standard advance function keys Full-duplex speakerphone fea- ture Display backlight Headset page 78 connected with • built-in interface • adapter • handset interface USB interface Interface for add-on equipment Option bays…
-
Page 8: Control Panel Optipoint 500 Economy/Basic/Standard
Basic Operating Instructions Control Panel optiPoint 500 economy/basic/standard Key field fixed function keys: Program/Service Redial Mute or Internal Speaker Speaker Display, Keypad for open listening 2 lines with LEDs and ring tones 24 chars – Key field Handset freely programmable keys…
-
Page 9: Control Panel Optipoint 500 Advance With Optipoint Key Module
Basic Operating Instructions Control Panel optiPoint 500 advance with optiPoint key module Key field fixed function keys: Program/Service Redial Mute or Internal Speaker Speaker Iluminated Dis- Keypad for open listening play, LEDs and ring tones 2 lines with 24 chars –…
-
Page 10: How To Use These Operating Instructions
Basic Operating Instructions Step by Step How to Use these Operating Instruc- tions This symbol indicates special notices and addi- tional information. You will find a graphic representation of the steps in log- ical sequence in the left column. Below is an explana- tion of the symbols: Lift the handset.
-
Page 11: Service Personnel
Basic Operating Instructions Step by Step Service personnel References to service personnel usually mean the per- son responsible for programming your HiPath 1220. Service personnel have access to appropriate PC tools.
-
Page 12: Accessing Functions
Basic Operating Instructions Step by Step Accessing Functions … Interactively You can select some functions while the telephone is idle, for example: > < > to scroll to a function and press to ex- Forwarding on? ecute it. You can select other functions directly depending on the situation.
-
Page 13: With Function Keys
Basic Operating Instructions Step by Step … With Function Keys If you saved a function on a key page 49, you can ac- cess it directly as follows: Press the Mute key to execute the function.
-
Page 14: Making Calls — Basic Functions
Answering a Call with the Speaker (Speaker- phone Mode) This function is not available with optiPoint 500 economy and optiPoint 500 basic. The telephone rings. The caller is displayed. Press the key. The LED lights up. Speaker…
-
Page 15
Making Calls – Basic Functions Step by Step To raise or lower the volume, keep pressing the keys un- til the desired call volumeis set. • Tell the other party that you are using speak- erphone mode. • The speakerphone works bests at a low re- ceiving volume. -
Page 16: Dialing/Making Calls
The other party answers with speaker: Lift the handset. or On-hook dialing: use speakerphone mode (not available with optiPoint 500 economy and optiPoint 500 basic). The called party does not answer or is busy: Press the key. The LED goes out.
-
Page 17: Switching To Speakerphone Mode
Switching to Speakerphone Mode This function is not available with optiPoint 500 economy and optiPoint 500 basic. Precondition: You are conducting a call with the hand- set. Hold down the key and replace the handset. Then re- Speaker lease the key and continue the call.
-
Page 18: Ending A Call
Making Calls – Basic Functions Step by Step Ending a Call Replace the handset. Press the key. The LED goes out. Speaker Press the key. Release Redialing a Number The last ten telephone numbers dialed are stored auto- matically. By pressing a key, you can redial the last external station number dialed.
-
Page 19: Turning The Microphone On And Off
(speaker call, page 32). Speakerphone mode is not available with optiPoint 500 economy and optiPoint 500 basic. Precondition: You are conducting a call. The micro- phone is switched on. Press the key. The LED lights up.
-
Page 20: Calling A Second Party (Consultation Hold)
Making Calls – Basic Functions Step by Step Calling a Second Party (Consultation Hold) You can call a second party while engaged in a call. The first party is placed on hold. Confirm. Consult? Call the second party. Return to the first party: Confirm.
-
Page 21: Transferring A Call
Making Calls – Basic Functions Step by Step Transferring a Call If the person you are speaking to wants to talk to anoth- er colleague of yours, you can transfer the call that col- league. Confirm. Consult? > Start transfer? Enter the number of the party to which you want to transfer the call.
-
Page 22: Call Forwarding
Making Calls – Basic Functions Step by Step Call Forwarding Using Variable Call Forwarding You can forward calls immediately to different internal or external telephones (destinations). > Select and confirm. Forwarding on? Enter the code. Enter the destination number. • For internal destinations, enter the internal station number.
-
Page 23: Call Forwarding In The Carrier Network And Forwarding Multiple Subscriber Numbers (Msn)
Making Calls – Basic Functions Step by Step Call Forwarding in the Carrier Network and Forwarding Multiple Subscriber Num- bers (MSN) If this function has been configured (consult service personnel), you can forward calls to your HiPath 1220 multiple subscriber numbers (MSN) (DID number) di- rectly within the carrier network.
-
Page 24: Using Call Forwarding — No Answer (Cfna)
Making Calls – Basic Functions Step by Step When call forwarding is active, “MSN to:..“ ap- pears on the display and a special dial tone sounds when you lift the handset. Using Call Forwarding — No Answer (CFNA) Calls that you do not answer after six rings (=default, can be set by service personnel) or that arrive while you are busy can be forwarded to a telephone of your choice.
-
Page 25: Using Callback
Making Calls – Basic Functions Step by Step Using Callback If a user is busy or is not answering, you can store an automatic callback. This feature saves you from having to make repeated attempts to reach the user. You receive a callback, •…
-
Page 26: Checking And Canceling A Saved Callback
Making Calls – Basic Functions Step by Step Checking and Canceling a Saved Callback > Select and confirm. View callbacks? Enter the code. Deleting a displayed entry: Confirm. Delete? Ending callback display: > Select and confirm. Exit? Press the key. The LED goes out. Program/Service Press the key.
-
Page 27: Saving Repertory Dialing Numbers On A Key
Making Calls – Basic Functions Step by Step Saving Repertory Dialing Numbers on a Key You can save a frequently dialed number on any free key of your phone or accompanying equipment. Press the key. The LED lights up. Program/Service >…
-
Page 28: Using Repertory Dialing Keys
Making Calls – Basic Functions Step by Step Using Repertory Dialing Keys Precondition: You have saved a station number on a repertory dialing key page 27. Press the key on which the number is saved. You can also press the repertory dial key during a call.
-
Page 29: Telephone Settings
Adjusting the Speakerphone to the Room Acoustics This function is not available with optiPoint 500 economy and optiPoint 500 basic. To help the other party understand you clearly while you are talking into the microphone, you can adjust the tele- phone to the acoustics in your environment: «Quiet…
-
Page 30: Adjusting The Receiving Volume During A Call
Making Calls – Basic Functions Step by Step Adjusting the Receiving Volume During a Call Precondition: You are conducting a call. To raise or lower the volume, keep pressing the keys un- til the desired volume is set. simultaneously Save. Adjusting the Display to a Comfortable Read- ing Angle You can swivel the display unit.
-
Page 31: Making Calls — Convenience Functions
Making Calls – Convenience Functions Step by Step Making Calls – Convenience Functions Answering Calls Accepting a Specific Call for Your Colleague You hear another telephone ring. Press the key. The LED lights up. Program/Service > Select and confirm. 59=Pickup — directed? Enter the code.
-
Page 32: Using The Speakerphone
You can conduct the call with the handset or in speaker- phone mode. Speakerphone mode is not available with optiPoint 500 economy and optiPoint 500 basic. Lift the handset and answer the call. Press the «OK» key to confirm your selection and answer Mute off? the call.
-
Page 33: Answering A Call With A Headset
The following procedures require that the en- trance telephone be connected via a Siemens- TFE-Adapter. If you use other adapters, consult their manufac- turer’s documentation.
-
Page 34: Accepting A Call From An Answering Machine
Making Calls – Convenience Functions Step by Step Accepting a Call From an Answering Ma- chine You can accept a call from any answering machine if the machine is connected to your system (consult service personnel) and you have programmed the answering machine number on a key page 49.
-
Page 35: Dialing/Making Calls
Making Calls – Convenience Functions Step by Step Dialing/Making Calls Using a Caller List If this feature is activated, the following calls will be stored in three caller lists: • 1=Not answered calls • 2=Answered calls • 3=Originated calls The service personnel can specify whether only exter- nal or external and internal calls can be saved.
-
Page 36
Making Calls – Convenience Functions Step by Step Displaying the Call Time and Additional Call Infor- mation Precondition: You have retrieved the caller list and the selected call is displayed. > Select and confirm. Time/date sent? > View station no.? >… -
Page 37: Using Speed-Dial
Making Calls – Convenience Functions Step by Step Using Speed-dial You can assign station or system speed-dial numbers to frequently called destinations. • You can set up your own station speed-dialing num- bers (max. 10) which are available only from your telephone.
-
Page 38
Making Calls – Convenience Functions Step by Step Enter the speed-dial number you wish to use ( 0 to Confirm. Next? Confirm until the desired speed-dial number is dis- Next? played. If a telephone number is already stored, the name (if en- tered) or the number will be displayed with the speed- dial number. -
Page 39: Select From Directory (Alphanumeric Search)
Making Calls – Convenience Functions Step by Step or Delete all entries for the speed-dial number. > Select and confirm. Delete? > Select and confirm. Exit? Select from Directory (Alphanumeric Search) The internal directory contains all station numbers, and the station and system speed-dial numbers assigned to a name (consult service personnel).
-
Page 40: Talking To Your Colleague With A Speaker Call
Making Calls – Convenience Functions Step by Step If applicable > Select and confirm each letter to be deleted. The last Delete Character? letter entered is deleted. When you have deleted all let- ters, the first entry in the directory will be displayed again.
-
Page 41: Automatic Connection Setup/Immediate Connection/Hotline
Making Calls – Convenience Functions Step by Step Automatic Connection Setup/Immediate Con- nection/Hotline If this feature is activated (consult service personnel), a connection to a specified internal or external destination will be set up when you lift the handset. Lift the handset. Depending on the setting, the connection is either set up immediately or only after a preset period of time.
-
Page 42: During A Call
Making Calls – Convenience Functions Step by Step During a Call Using Call Waiting Callers can still reach you while you are engaged in an- other call. A signal alerts you to the waiting call. You can either ignore or accept the waiting call. When you accept the waiting call, you can either end the first call or place it on hold and resume the call later You can also bar call waiting…
-
Page 43: Preventing And Allowing Call Waiting (Automatic Camp-On) (Date Transmission Protection (Camp-On Protection))
Making Calls – Convenience Functions Step by Step Preventing and Allowing Call Waiting (Auto- matic Camp-On) (Date transmission protection (camp-on pro- tection)) You can prevent or allow a second call page 42 from being signaled by automatic camp-on during an ongoing call.
-
Page 44: Parking A Call
Making Calls – Convenience Functions Step by Step Parking a Call You can park up to ten calls, either internal, external, or both. Parked calls can be displayed on and picked up from another telephone. This feature is useful if you want to continue a call at another phone.
-
Page 45: Conducting A Conference
Making Calls – Convenience Functions Step by Step Conducting a Conference In a conference call, you can talk to as many as two oth- er parties at the same time. These may be internal or external users. Call the first party. >…
-
Page 46: Activating Tone Dialing/Dtmf Suffix Dialing)
Making Calls – Convenience Functions Step by Step Activating Tone Dialing/DTMF Suffix Dialing) You can transmit dual-tone multifrequency (DTMF) sig- nals to control devices such as an answering machine or automatic information system. You can use the keys «0» through «9», «*», and «#» to trans- mit DTMF signals.
-
Page 47: If You Cannot Reach A Destination
Making Calls – Convenience Functions Step by Step If You Cannot Reach a Destination Call Waiting (Camp-On) Precondition: You have dialed an internal number and hear a busy signal. It is important that you reach the called party. Wait (approx. 6 seconds) until «Camp-on» appears on the Camp-on display and the busy tone is followed by the ring tone.
-
Page 48: Using Night Answer
Making Calls – Convenience Functions Step by Step Using Night Answer When night answer mode is active, for example during a lunch break or after office hours, all external calls are immediately forwarded to a specific internal telephone (night station). The night station and the password for activating/deac- tivating it can be set by the service personnel.
-
Page 49: Saving Functions And Procedures
Saving Functions and Procedures Step by Step Saving Functions and Procedures You can save a frequently-dialed number page 27, or frequently-used functions/procedures (comprising sev- eral operating steps) to any free key on your telephone or add-on device. Assigning Functions to Keys Press the key.
-
Page 50
Saving Functions and Procedures Step by Step Meaning of LED Signals for Saved Functions: Call forwarding, Forwarding — trunk, Call Fwd No Reply, Night answer, Do not disturb, Changeover, HF answerback on/off, Campon prot. on, Caller ID suppression, Busy by Busy: Saved function is not active. -
Page 51
Saving Functions and Procedures Step by Step Error message: No error messages present. Error messages present. Press the key. The system error is displayed. When you confirm “Acknowledge ?” the LED goes out. The following functions are assigned to keys which have no LED: Repdial key (extern), Trunk group key, Procedure key, Trace call, Speed dial, Release call, Directory, Call wait-… -
Page 52: Assigning A Procedure (Operating Steps) To A Key
Saving Functions and Procedures Step by Step Assigning a Procedure (Operating Steps) to a Key Station numbers and functions which require additional inputs, i.e. comprise several operating steps, can be saved to a single key on your telephone. Using the “Account code“ page 62 function, for ex- ample, you can save all the remaining required inputs (station number of the calling party + the station num-…
-
Page 53: Checking The Key Assignments
Saving Functions and Procedures Step by Step Select the stored procedure by pressing a key. Procedures containing functions which can be switched on/off can be activated by pressing the key, and deactivated by pressing the same key again. You can also press a procedure key during a call. The stored digits are automatically sent as DTMF signals page 46.
-
Page 54: Using Other Team Functions
Using Other Team Functions Step by Step Using Other Team Functions Turning Group Call On and Off If this function has been configured (consult service personnel), you belong to one or more groups of users who can each be reached under a hunt group or group call number.
-
Page 55
Using Other Team Functions Step by Step You belong to several groups: > Select and confirm. Leave group? > Join group? Enter the code for «leave» or «join». Press the «Hunt group join/leave» key. If an “X“ appears after the group number(e. g. 770) Group: 770 X then group call is activated for this group. -
Page 56: Accepting A Call For Another Member Of Your Team
Using Other Team Functions Step by Step Accepting a Call for Another Member of Your Team You can accept calls for other telephones in your team from your telephone. To do this, consult your service personnel to find out if a pickup group has been config- ured.
-
Page 57: Privacy/Security
Privacy/Security Step by Step Privacy/Security Turning Do Not Disturb On and Off You can activate the do not disturb function if you do not want the receive any calls. When do not disturb is acti- vated, callers hear a busy signal. >…
-
Page 58: Monitoring A Room
Privacy/Security Step by Step Monitoring a Room A telephone can be used to monitor a room. The func- tion must be activated on the telephone that you want to monitor. Calling this telephone from outside lets you hear what is going on in the room. Activating the telephone to be monitored: Press the key.
-
Page 59: Trace Call: Identifying Anonymous Callers
Privacy/Security Step by Step Trace Call: Identifying Anonymous Callers You can have the carrier identify malicious external call- ers. You can save the caller’s station number during the call or for 30 seconds after the call ends. However, it is essential that you do not replace your handset during this time.
-
Page 60: Saving Your Pin
Privacy/Security Step by Step Saving Your PIN To prevent unauthorized persons from using your tele- phone, you need to enter a personal identification num- ber, which you can save yourself. Press the key. The LED lights up. Program/Service > Confirm. 93=Change PIN? Enter the code.
-
Page 61: Checking And Assigning Call Charges
Checking and Assigning Call Charges Step by Step Checking and Assigning Call Charges Displaying Call Charges For the current call: The display usually shows call charges at the end of a call (default setting). If you wish to display charges continuously during a call in progress, the service personnel must request this feature from your carrier.
-
Page 62: Dialing With Call Charge Assignment
Checking and Assigning Call Charges Step by Step Dialing with Call Charge Assignment You can assign external calls to certain projects. Precondition: The service personnel has set up ac- count codes for you. Press the key. The LED lights up. Program/Service >…
-
Page 63: Using Other Functions/Services
Using Other Functions/Services Step by Step Using Other Functions/Services Appointments Function You can tell your telephone to give you a call when you want to be reminded of an appointment page 64. To do this, you need to save the time you want the call to be made.
-
Page 64: Using Timed Reminders
Using Other Functions/Services Step by Step Enter a 4-digit time, such as 0905 for 9:05 (= 9.05 a.m.) or 1430 for 14.30 (= 2.30 p.m.). Confirm. Save? If you make a mistake: > Select and confirm. This deletes all entered digits. Previous? Deleting and checking a saved appointment: Press the key.
-
Page 65: Music On Hold
Using Other Functions/Services Step by Step Music on Hold If Music on Hold has been set up for your HiPath 1220, waiting callers will hear the selected music. You can listen to this music (as background music, for example) using the speaker in your telephone. >…
-
Page 66: Using System Functions From Outside (Disa: Direct Inward System Access)
Using Other Functions/Services Step by Step Using System Functions from Outside (DISA: Direct Inward System Access) If this function has been configured (consult service personnel), you can set up external outgoing calls from outside the system, just like an internal user. You can also activate and deactivate the following functions in your system: •…
-
Page 67
Using Other Functions/Services Step by Step You can only execute one function at a time, or set up only one outgoing connection. The connection is immediately released after successful activation of a function. In the case of an external-external call, the con- nection is released as soon as either of the par- ties ends the call. -
Page 68: Using Functions In Isdn Via Code Dialing (Keypad Dialing)
Contact your network provider to find out which ISDN functions can be code-controlled in your country (contact the service personnel). Siemens AG shall not be liable for damages/ costs which may be incurred by fraudulent activ- ities or remote operation (e. g. toll fraud).
-
Page 69: Operating A Switch (Relay)
Using Other Functions/Services Step by Step Operating a Switch (Relay) If this feature is configured (contact service personnel), you can activate/deactivate certain devices (e.g. door opener) via switches (relays, max. 2). Depending on their programming, the switches can be activated/deactivated manually or automatically (ac- cording to time).
-
Page 70: Confirm/Turn Off Alarm
Using Other Functions/Services Step by Step Confirm/Turn off alarm If the service personnel have activated the alarm feature on your telephone, you will receive an alarm call when your HiPath 1220 recognizes an alarm situation .To acknowledge the alarm call, you must answer it. If you do not answer the alarm call, it will be repeated (de- pending on how it is programmed).
-
Page 71: Reject On Busy, Switching Telephone To Busy
Using Other Functions/Services Step by Step Reject on busy, Switching Telephone to Busy All telephones in a specified group are automatically set to busy when a member is engaged in a call. External calls cause no ring tone (caller hears busy signal) and are rejected.
-
Page 72: System Administration
System Administration/ Software Update Step by Step System Administration/ Software Update The following sections describe features for system ad- ministration that you can use from your telephone. Enable Remote Administration and Software Update Your HiPath 1220 can be configured remotely. To allow that, you must enable remote administration for your HiPath 1220.
-
Page 73: Software Update
System Administration/ Software Update Step by Step Software Update If you are authorized, you can start a software update. Press the key. The LED lights up. Program/Service > Select and confirm. More features? > Select and confirm. Remote update ? qmhei Enter the code.
-
Page 74: Set Language/Country
System Administration/ Software Update Step by Step Set Language/Country Enter the corresponding country code to make the country-specific settings for your HiPath 1220. The cor- responding language and currency will also be set for your telephone display. Precondition: You must have authorization to use this function on your telephone.
-
Page 75: Setting Date And Time
System Administration/ Software Update Step by Step Setting Date and Time If authorized, you can set the date and time for your HiPath 1220. The date and time are always shown on your telephone’s display. Press the key. The LED lights up. Program/Service Select and confirm.
-
Page 76: Labeling, Documentation And Accessories
• with a computer via the Internet: You will find the “Online Key Labelling Tool“ along with the user inter- face under http://www.siemens.com/hipath (Downloads/Software) . Put the labeled strips in the rele- vant key pad on your optiPoint and place the transparent cover over…
-
Page 77: Attaching A Station Number Label
Using PC-based Telephony Applications A PC can be connected using the optiPoint 500 system telephone’s (not optiPoint 500 economy) built-in USB interface and a USB cable. With the TAPI driver on the HiPath 1220 system CD, you can run on your…
-
Page 78: Accessories
For detailed information about these and other products and their availability for your telephone, see the data sheets for your optiPoint 500 telephone and accessories in the Internet at http://www.siemens.com/hipath (Downloads/Data sheets). For a summary describing ways to connect them to your telephone,…
-
Page 79: Fixing Problems
Fixing Problems Fixing Problems Telephone Maintenance • Always use a damp or antistatic cloth to clean the telephone. Never use a dry cloth. • If the telephone is very dirty, clean it with a diluted neutral cleaner con- taining surfactants, such as a dish detergent. Afterwards remove all traces of the cleaner with a damp cloth (using water only).
-
Page 80: Responding To Error Messages On The Screen
Step by Step Responding to Error Messages on the Screen Possible cause: Invalid entry Wrong number/code. Possible response: Enter the correct number/code. Possible cause: Not authorized You tried to use a disabled function. Possible response: Ask the service personnel to enable the function. Possible cause: Not possible Wrong number/code.
-
Page 81
Step by Step Possible cause: Vacant No number or function is assigned to a key. Possible response: Program the key for the number or function page 27 page 49. Possible cause: No names entered The internal phone book has no entries. Possible response: Store the name with station and speed-dial number page 39. -
Page 82: Index
Index Index call charges for your telephone ….61 call forwarding ……….22 MSN in CO ……….23 call forwarding — no answer …… 24 call signal …………. 14 accessories ……….78 call transfer ……….21 account code ……….62 call volume ……..
-
Page 83
Index data transmission protection group call ….43 …………. 54 date ………….. 75 desk microphone ……..78 dialing handsfree answerback ……32 internal/external calls ……16 ………….. 32 on-hook dialing ……..16 ………….. 32 stored destinations …….. 35 headset ……….33, 78 using redial ………. -
Page 84
Index malfunctions recall ……….79 …………. 44 meaning of LED indications receiving volume ….. 50 ……14, 15, 30 microphone for speakerphone mode redialing a number … 8, 9 ……..18 MSN busy from the caller list ……….. 71 ……..36 music on hold reject on busy ………. -
Page 85
Index telephone cleaning ………… 79 locking …………59 locking/unlocking ……..59 maintaining ……….79 operating ……….12 settings ………… 29 telephone busy ……….. 71 telephone maintenance ……79 three-party conference ……20 time ………….. 75 toggle …………20 tone dialing ………. -
Page 86
Index… -
Page 87: Overview Of Functions And Codes
Overview of Functions and Codes Overview of Functions and Codes The table below lists all available functions as they appear on the display. Functions that have been configured (consult service personnel) can be activated interactively (select + save) via the Program/Service menu (select + save or enter a code), or by pressing function keys, provided that the functions have been configured (consult service personnel).
-
Page 88: Open Door, Code: *61
Overview of Functions and Codes Functions … Inter- … Via the Program/ … With (display) actively Service menu function keys Program/Service < > < > Code Forwarding on Forwarding off Trunk FWD on Trunk FWD off Headset Call Answer HF answerback on HF answerback off Hotline Join group…
-
Page 89: Room Monitor
Overview of Functions and Codes Functions … Inter- … Via the Program/ … With (display) actively Service menu function keys Program/Service < > < > Code Relay status 9414 Reserve trunk Reset system passw. Room monitor Set country code 9412 Show call charges Speaker call Suppress call ID…
-
Page 90
© Siemens AG 2004 Information and Communication Networks Hofmannstr. 51 • D-81359 Munich The information provided in this document contains merely general de- scriptions or characteristics of performance which in case of actual use Ref. No.: A31003-H1100-B100-3-7619 do not always apply as described or which may change as a result of fur- ther development of the products.