
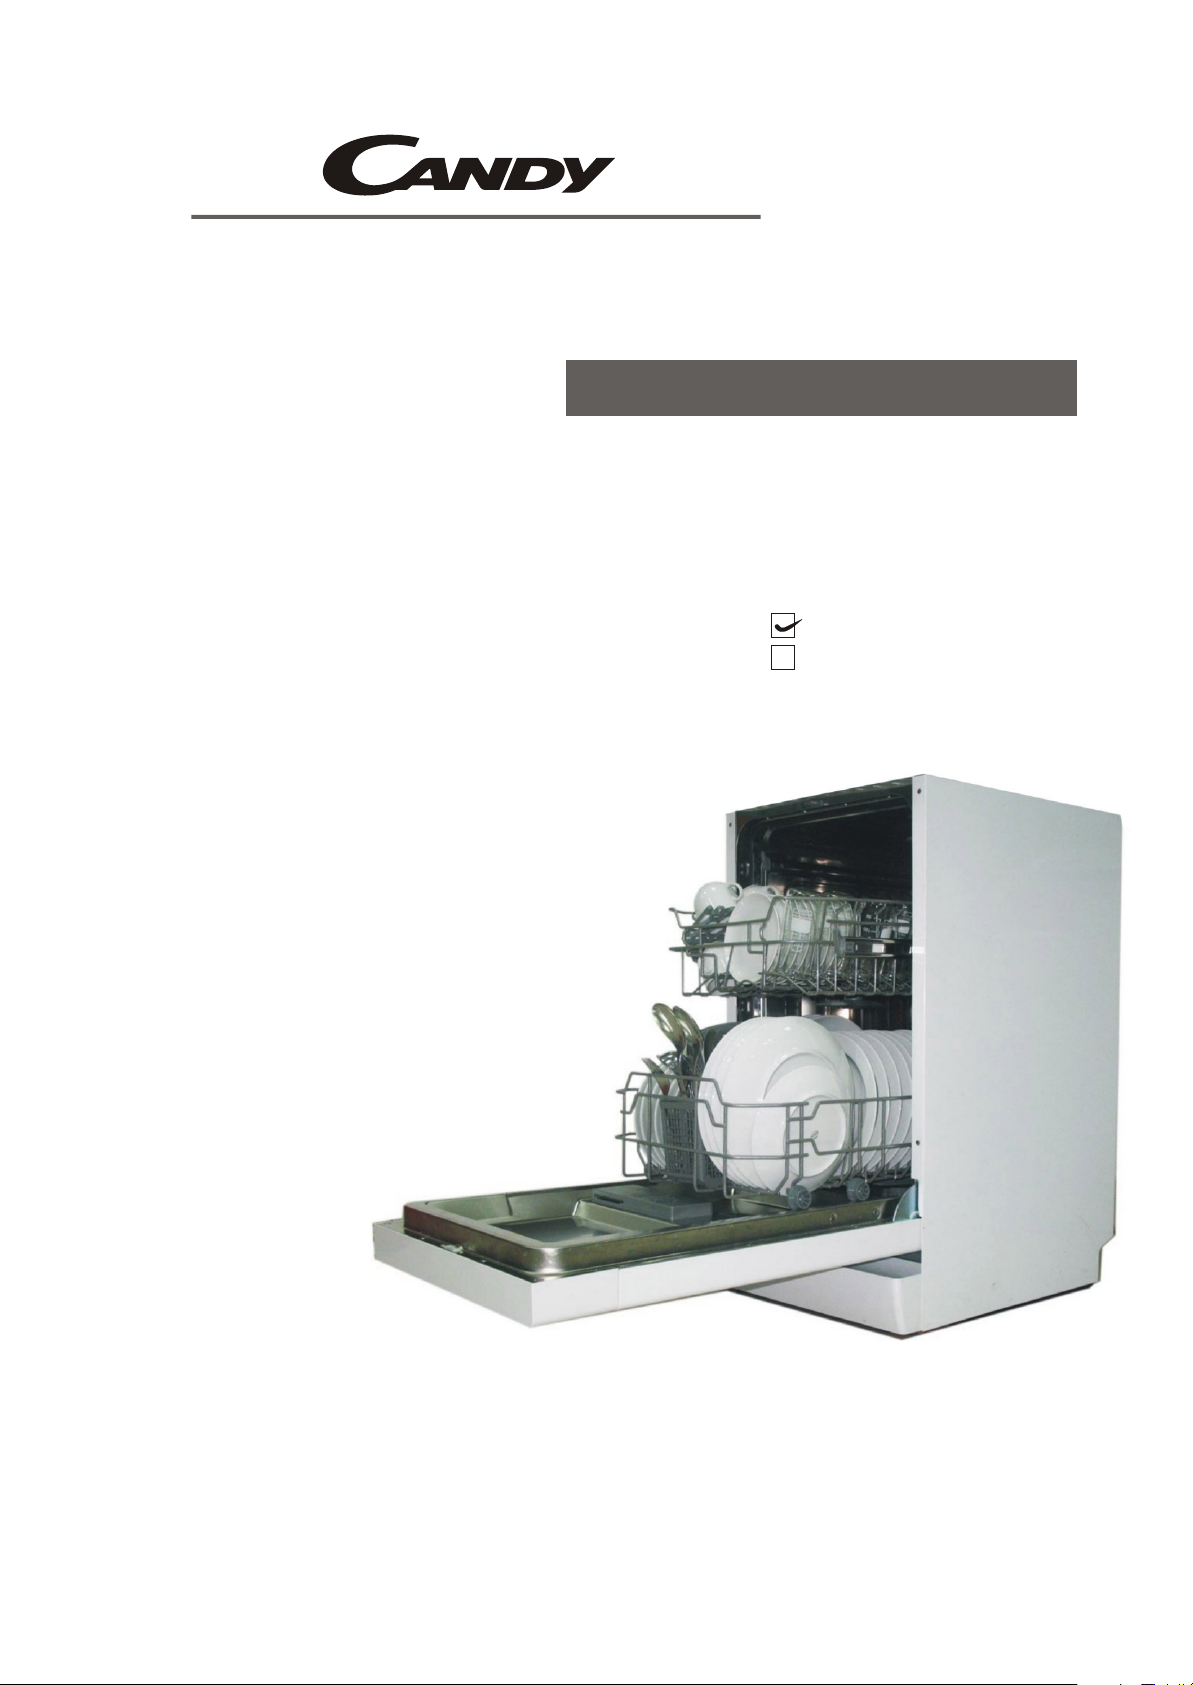
Instruction ManualInstruction Manual
CDI 1L949
9 place settings
10 place settings
DishwasherDishwasher

Read this Manual
1) Safety Information……………………………………11) Safety Information……………………………………1
Dear Customer,
Please carefully read this manual before using the
dishwasher, it will help you to use and maintain the
dishwasher properly.
Keep it as a refer in the later days.
Pass it on to any subsequent owner of the appliance.
This manual contains sections on safety Instructions,
Operating Instructions, Installation Instructions and
Troubleshooting Tips, etc.
Before Calling for Service
To review the section on troubleshooting Tips
will help you to solve some common problems
by yourself .
If you can not solve the problems by yourself ,
please ask for the help of professional technicians.
2) Quick operation guide………………………………. 42) Quick operation guide………………………………. 4
3) Operation Instructions……………………………….53) Operation Instructions……………………………….5
Control Panel……………………………………………5
Dishwasher Features……………………………… …5
4) Prior using for the first time………………………….64) Prior using for the first time………………………….6
A Water Softener…………………………………….6
B Loading the Salt into the Softener……………..7
C Fill the Rinse Aid Dispenser…………………….7
D Function of Detergent ……………………………8
5) Loading the Dishwasher Basket…………………..115) Loading the Dishwasher Basket…………………..11
Attention before or after loading the Dishwasher
Baskets……………………………………………….. 11
Loading the upper Basket………………………….12
Loading the Lower Basket………………………….12
6) Starting a washing programme……………………136) Starting a washing programme……………………13
Wash Cycle Table…………………………………….13
Turning on the Appliance…………………………..13
Change the Programme…………………………….14
At the end of the Wash Cycle………………………14
7) Maintenance and cleaning…………………………157) Maintenance and cleaning…………………………15
Filtering System………………………………………15
Caring for the Dishwasher………………………….16
NOTE:
The manufacturer, following a policy of constant
development and updating of the product, may
make modifications without giving prior notice.
 Installation instruction………………………………17 Installation instruction…………………. …………17..
……………………………. 17Installation preparation
Aesthetic panel’s dimensions and installation…18
…………..20Tension adjustment of the door spring
………………………… 20Connection of drain hoses
……………………. 21Dishwasher installation steps
About Electricity Connecting………………………22
Cold Water Connection……………………………. 23
9) Troubleshooting Tips………………………………..249) Troubleshooting Tips………………………….. ….24..
Before calling for service……………………………24
Error codes……………………………………………25
Technical information……………………………….26
Loading the baskets according to En50242Loading the baskets according to En50242

1.IMPORTANT SAFETY INFORMATION1.IMPORTANT SAFETY INFORMATION
WARNING! WARNING!
When using your dishwasher,
follow the precautions listed below:
This appliance is intended to be used in household and similar
applications such as:
-staff kitchen areas in shops, offices and other working environments;
-farm houses;
-by clients in hotels, motels and other residential type environments;
-bed and breakfast type environments.
This appliance can be used by children aged from 8 years and above and
persons with reduced physical, sensory or mental capabilities or lack of
experience and knowledge if they have been given supervision or
instruction concerning use of the appliance in a safe way and understand
the hazards involved. Children shall not play with the appliance. Cleaning
and user maintenance shall not be made by children without supervision.
For EN60335-1
This appliance is not intended for use by persons(including children )with
reduced physical, sensory or mental capabilities, or lack of experience and
knowledge ,unless they have been given supervision or instruction
concerning use of the appliance by a person responsible for their safety.
For IEC60335-1
This appliance is for indoor use only, for household use only. To protect
against the risk of electrical shock, do not immerse the unit, cord or plug in
water or other liquid.
Please unplug before cleaning and maintenance the appliance .Use a soft
cloth moisten with mild soap, and then use a dry cloth to wipe it again .
EARTHING INSTRUCTIONS
This appliance must be earthed. In the event of a malfunction or breakdown,
earthing will reduce the risk of an electric shock by providing a path of least
resistance of electric current. This appliance is equipped with a cord having
an equipment-earthing conductor and a earthing plug.
The plug must be plugged into an appropriate outlet that is installed and
earth ed in accordance with all local codes and ordinances.
Improper connection of the equipment-earthing conductor can result
in the risk of an electric shock. Check with a qualified electrician or service
representative if you are in doubt whether the appliance is properly earthed.
Do not modify the plug provided with the appliance; If it does not fit the outlet.
Have a proper outlet installed by a qualified electrician.
1

Do not abuse, sit on, or stand on the door or dish rack of the dishwasher.
Do not operate your dishwasher unless all enclosure panels are properly in place.
Open the door very carefully if the dishwasher is operating, there is a risk of water
squirting out.
Do not place any heavy objects on or stand on the door when it is open. The
appliance could tip forward.
When loading items to be washed:
1) Locate sharp items so that they are not likely to damage the door seal;
2) Warning: Knives and other utensils with sharp points must be loaded in the
basket with their points down or placed in a horizontal position.
Check that the detergent powder is empty after completion of the wash cycle.
Do not wash plastic items unless they are marked dishwasher safe or the
equivalent. For plastic it ems n check th e m anufacturer’s
ot so marked,
recommendations.
Use only det ergent and rins e add itives des igned for an aut omatic dish washer.
Never use soap, laundry detergent, or hand washing detergent in your dishwasher.
Children should be supervised to ensure that they do not play with the appliance.
The door should not be left open, since this could increase the risk of tripping.
If the supply cord is damaged, it must be replaced by the manufacturer or
its service agent or a similarly qualified person in order to avoid a hazard.
During installation, the power supply must not be excessively or dangerously
bent or flattened.
Do not tamper with controls.
The appliance is to be connected to the water mains using new hose sets and
that old hose-sets should not be reused.
The maximum number of place settings to be washed is 9.
The maximum permissible inlet water pressure is 1MPa.
The minimum permissible inlet water pressure is 0.04MPa.
2
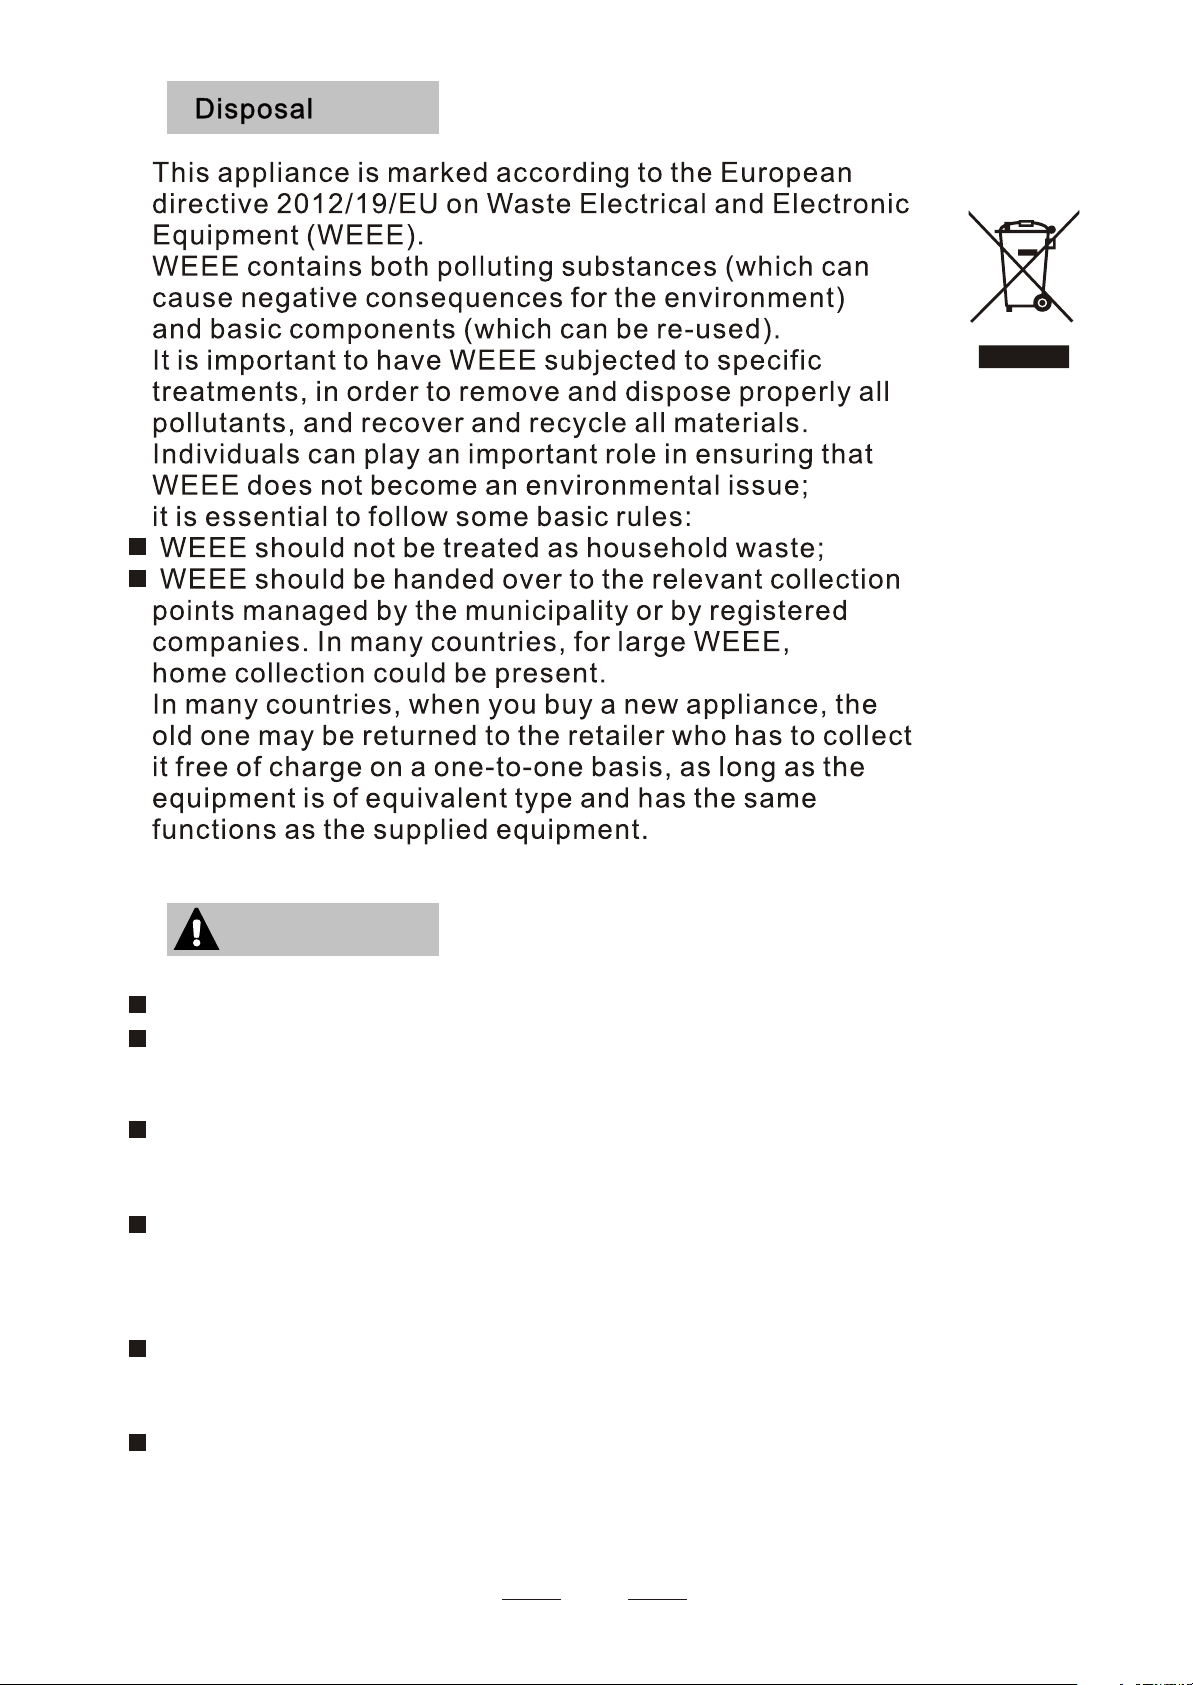
WARNING! WARNING!
Packaging material could be dangerous for children!
For disposing of package and the appliance please go to a
recycling centre. Therefore cut off the power supply cable
and make the door closing device unusable.
Cardboard packaging is manufactured from recycled paper
and should be disposed in the waste paper collection for
recycling.
By ensuring this product is disposed of correctly, you will
help prevent potential negative consequences for the
environment and human health, which could otherwise be
caused by inappropriate waste handling of this product.
For more detailed information about recycling of this
product, please contact your local city office and your
household waste disposal service.
DISPOSAL: Do not dispose this product as unsorted
municipal waste. Collection of such waste separately for
special treatment is necessary.
3
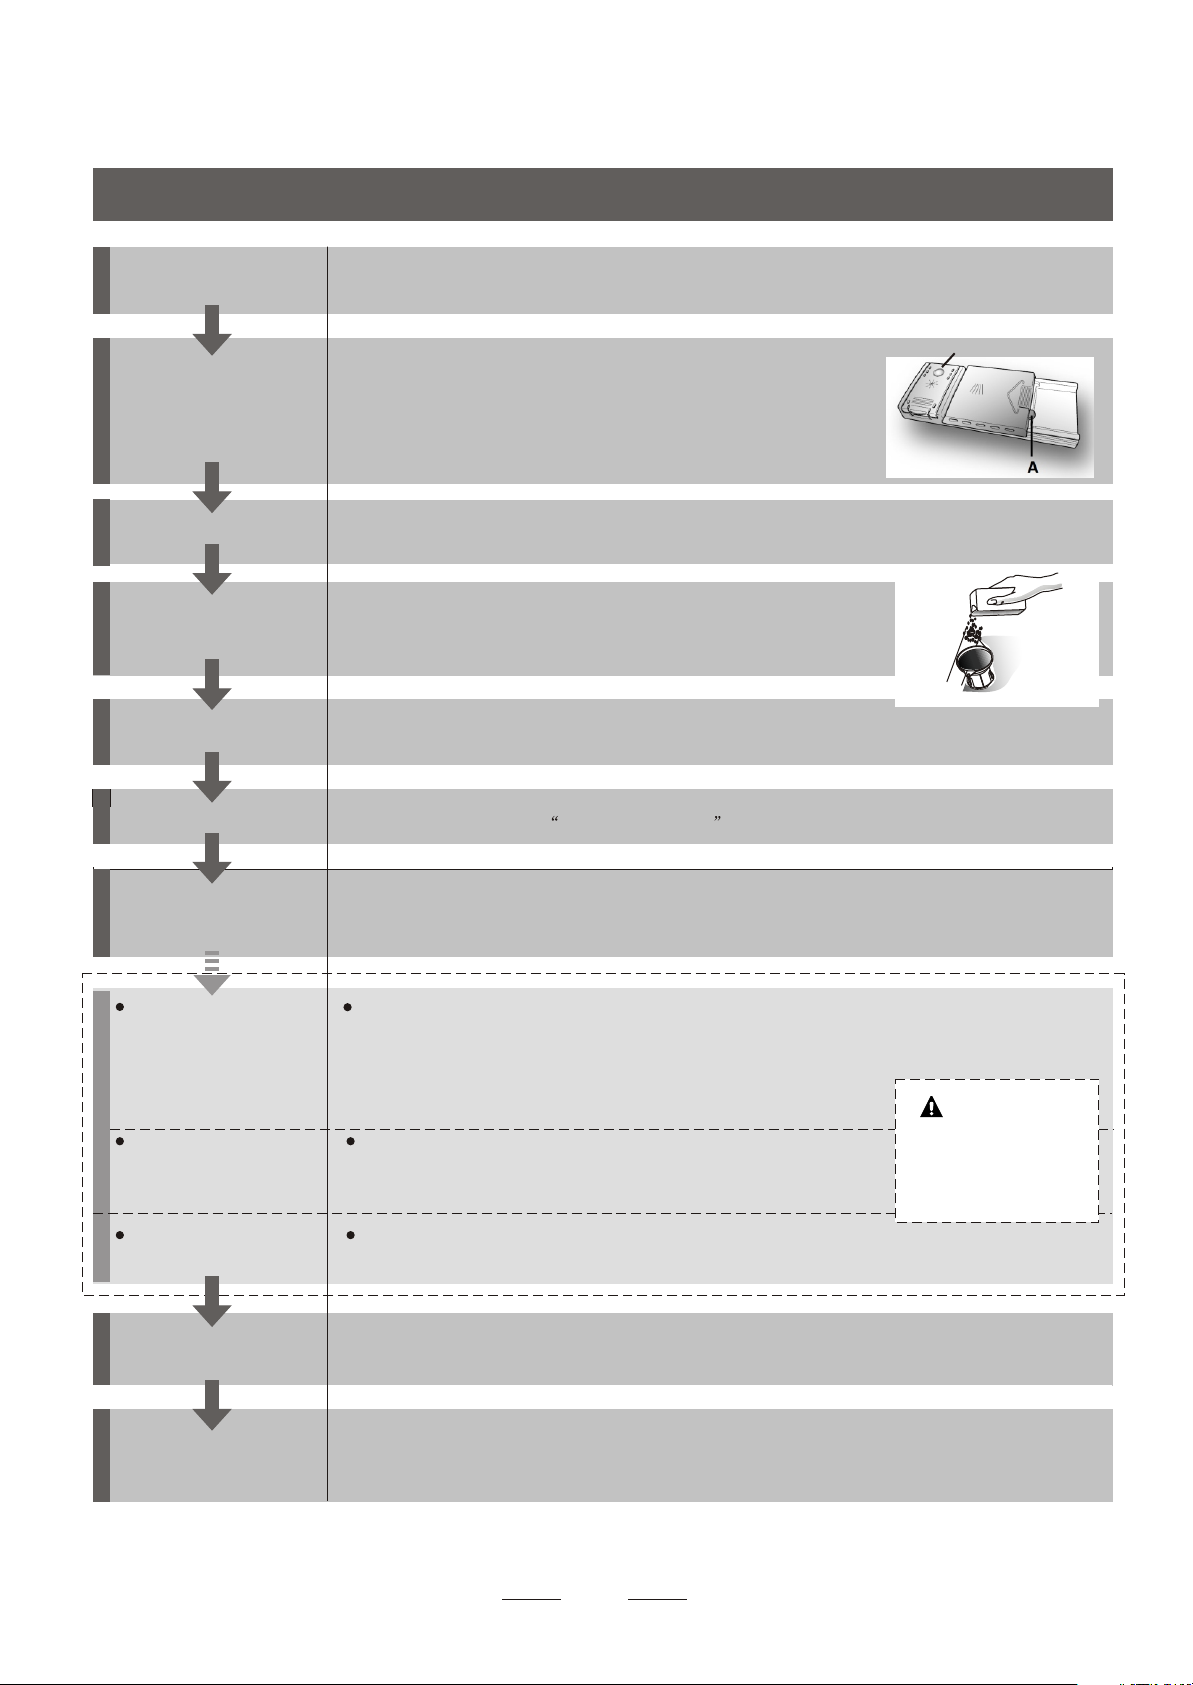
Quick operation guideQuick operation guide
For detailed operating method read the corresponding content on the instruction manual.
Switch on the appliance
Fill the detergent dispenser
Open the door,press the On/Off button to switch on the appliance .
The detergent container is inside the door.
If the lid of the container is closed, press
the button (A) to open.
At the end of every wash cycle the lid is
always open and ready for the next time
the dishwasher is used.
B.B.
Check the rinse aid level
Check the regeneration
salt level
Load the baskets
Select a programme
Running the dishwasher
Changing the programme
Add forgotten dishes in the
dishwasher.
Mechanical indicator B. Mechanical indicator B .
It is always advisable to use rinse aid that is specifically designed for dishwasher.
Check the rinse aid level through the indicator eye (B) which is located on the dispenser.
(On models with water softener system only.)
Electric indicator on control panel (if provided).
If there is no salt warning light in the control panel
(for some models), you can estimate when to fill the salt into
the softener by the number of cycles the dishwasher has run.
Scrape off any large amount of leftover food. Soften remnants of burnt food in pans,
then load the baskets. Refer to the dishwasher loading instructions.
Press the Programme Button until the selected programme lights up.
( See the section entitled Operation instruction )
T urn on the water tap ,close the door . The machine will start working after about 1 seconds.
1. A running cycle can only be modified if it has been running for a short time. Otherwise the detergent
may have already been released and the water already drained. If this is the case, the detergent
dispenser must be refilled.
2. Open the door.
3. Press the Programme Button for more than 3 seconds to cancel the running programme.
4. Select a new programme.
5. Restart the dishwasher.
1.Open the door a little to stop the dishwasher.
2.After the spray arms stop working, you can open the door completely.
3.Add the forgotten dishes.
4.Close the door, the dishwasher will start running again after 10 seconds.
WARNING!
Open the door carefully.
Hot steam may escape
when the door is opened!
If the appliance is switched
off during a wash cycle.
Switch off the appliance
Turn off the water tap,
unload the baskets
If the appliance is switched off during a wash cycle, when switched
on again, please re-select the washing cycle and operate the dishwasher
according to the original Power-on state ).
When the working cycle has finished, the buzzer of the
dishwasher will sound 8 times, then stop.
Turn off the appliance using the ON/OFF button.
Since the appliance is standing by, it will power off automaticly after 30 minutes without any operation
Warning: wait a few minutes (about 15 minutes) before unloading the dishwasher to avoid handling
the dishes and utensils while they are still hot and more susceptible to break.
They will also dry better.Unload the appliance, starting from the lower basket.
4
3.Operation Instruction3.Operation Instruction
IMPORTANTIMPORTANT
To get the best performance from your dishwasher, read all operating instructions
before using it for the first time.
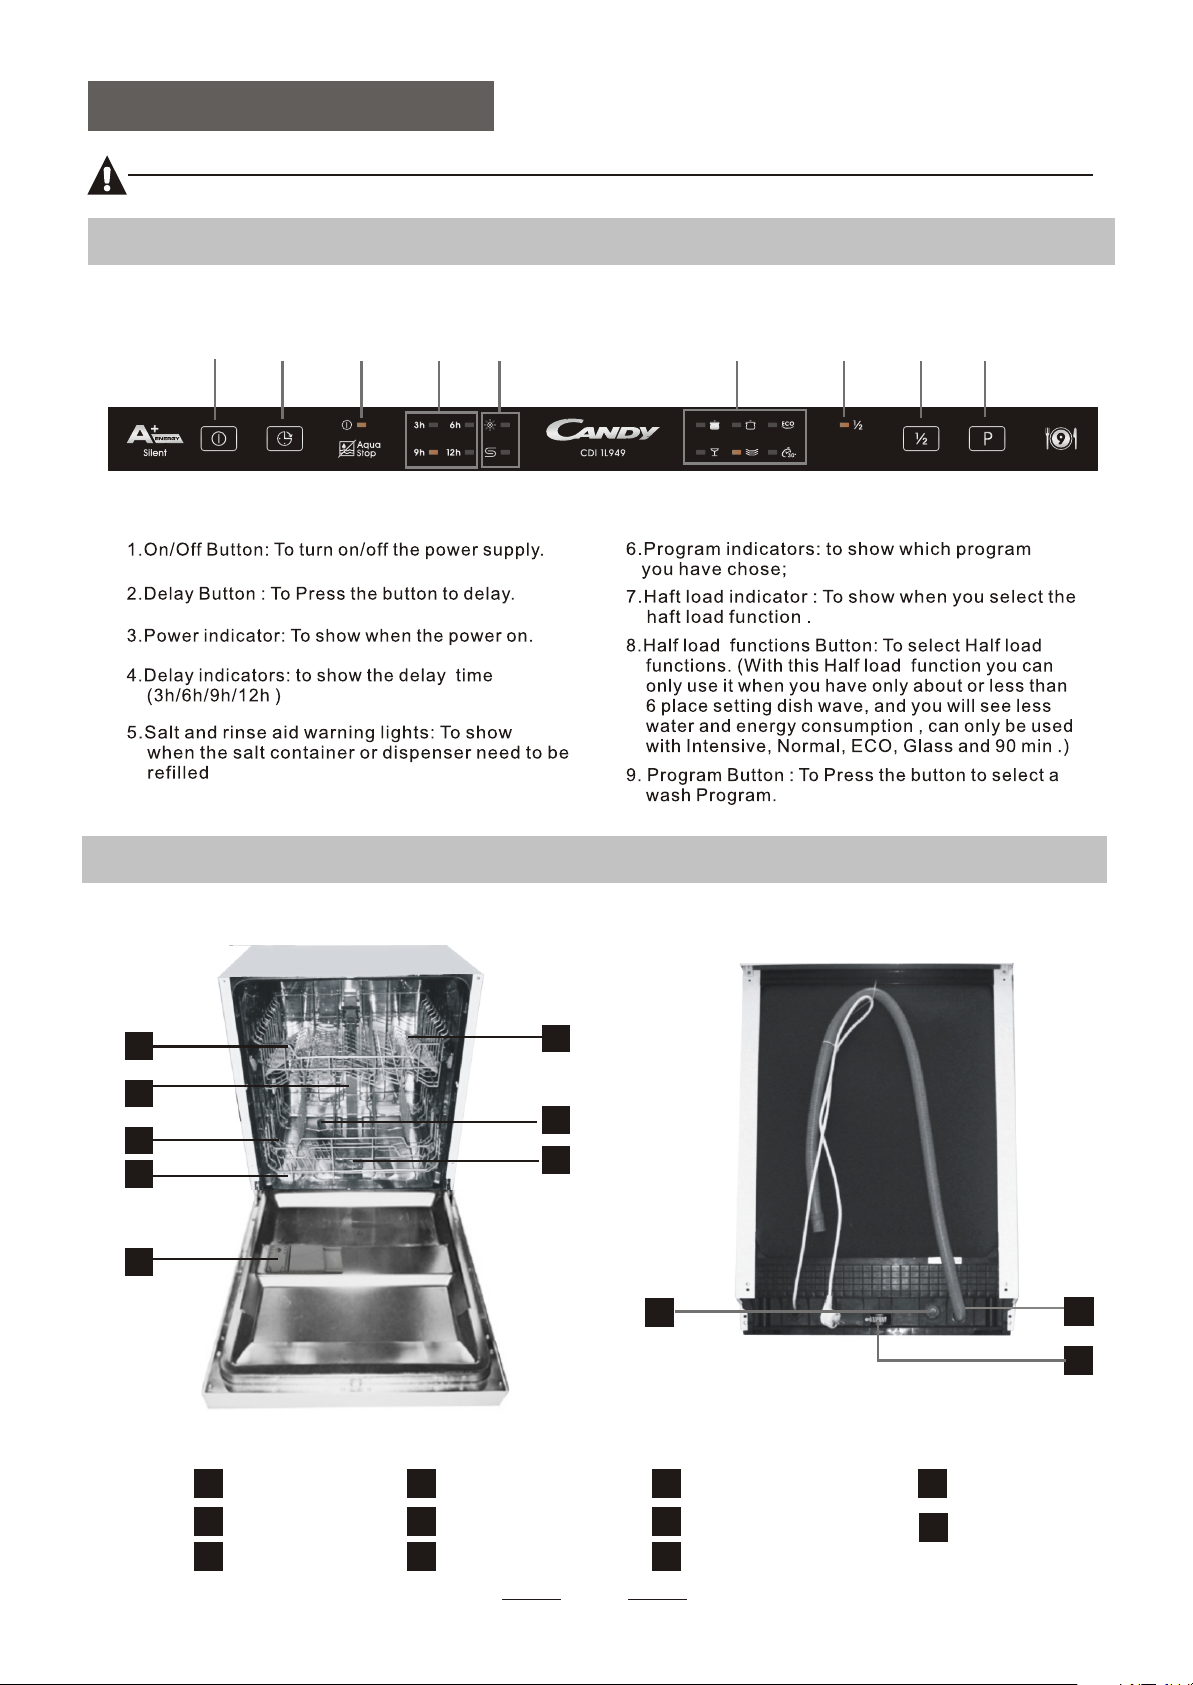
Control PanelControl Panel
11
22
33 44
55
66
7 7 88
99
Dishwasher FeaturesDishwasher Features
1
2
3
4
5
6
7
8
Back ViewFront view
9
10
11
Upper Basket
1
Inner pipe
2
Lower Basket
3
Salt Container
4
Dispenser
5
Cup Shelf
6
Spray arms
7
Filter assembly
8
Inlet pipe connector
9
5
10
11
Drain pipe
Adjuster
4.Prior using for the first time4.Prior using for the first time
Before using your dishwasher for the first time:
A. Set the water softener
B. Add 1.5Kg dishwasher salt and then full fill the salt container with water
C. Fill the rinse aid dispenser
D. Fill in detergent
A. Water SoftenerA. Water Softener
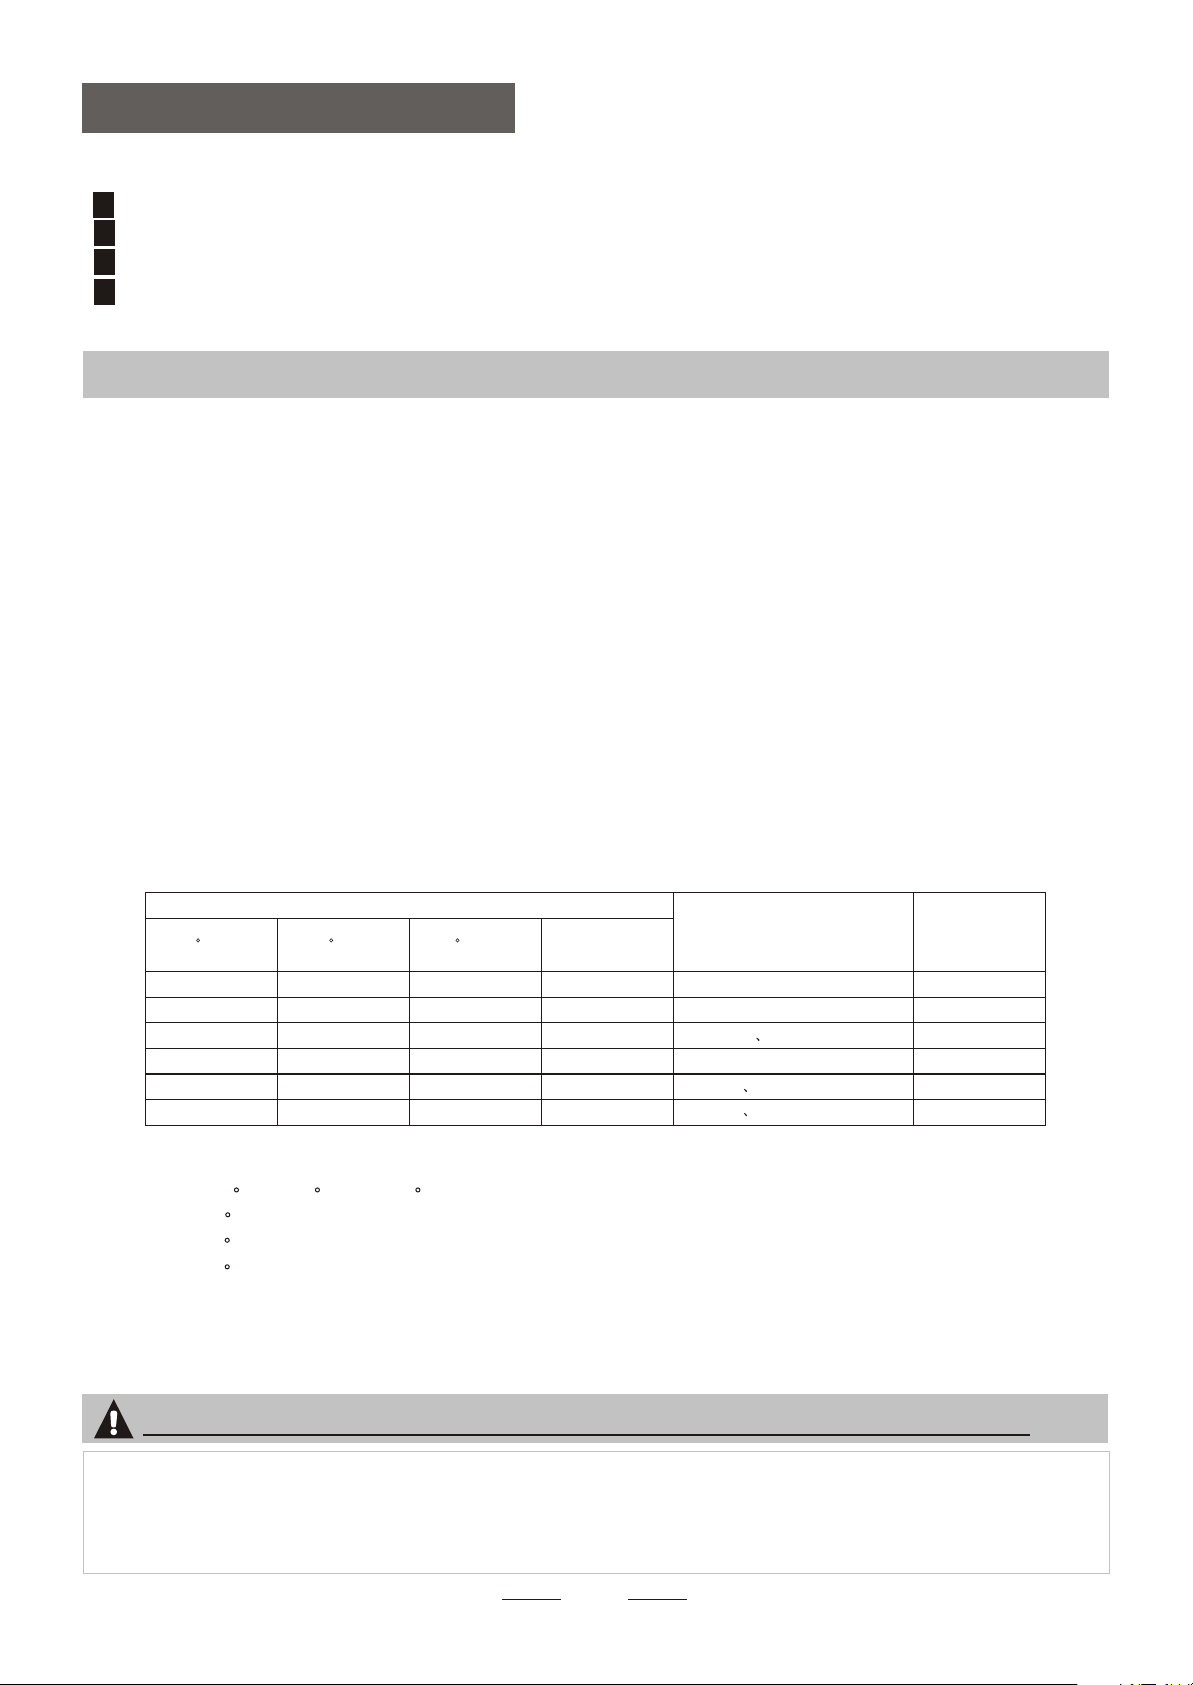
The water softener must be set manually, using the water hardness dial.
The water softener is designed to remove minerals and salts from the water, which would have
a detrimental or adverse effect on the operation of the appliance.
The higher the content of these minerals and salts, the harder your water is.
The softener should be adjusted according to the hardness of the water in your area. Your local Water Authority
can advise you on the hardness of the water in your area.
Adjusting Salt Consumption
The dishwasher is designed to allow for adjustment in the amount of salt consumed based on the hardness of
the water used. This is intended to optimise and customise the level o f salt consumption.
Please follow the steps below for adjustment in salt consumption.
1. Open the door ,Switch on the appliance;
2. Press the Program button for more than 5 seconds to start the water softener
set model within 60seconds after the appliance was switched on( The Salt and
Rinse aid warninglights will be on periodically when it get in the set model );
3. Press the Program button to select the proper set according to your local environment,
the sets will change in the following sequence: H1->H2->H3->H4->H5->H6;
4. Press the Power button to end the set up model.
WATER HARDNESS
dH
6-11
12-17 2.1-3.0
18-22 31-40 22-28 3.1-4.0
23-34 4.1-6.0
35-55 61-98 43-69 6.1-9.8
Note:1Note:1
¡ã
¡ã
dH=1.25 Clark=1.78 fH=0.178mmol/l
1
DH: German degree
¡ã
fH: French degree
Clark: British degree
¡ã
fH
0~90~5 0~0.94
10-20
21-30
41-60
¡ã
Clark
0~6
7-14
15-21
29-42
¡ã
Note:2Note:2
The manufactory setting: H4 (EN 50242)
mmol/l
1.0-2.0
Selector Position
H1( Rapid Light bright)
H2(90 Min Light bright)
*H3(90 Min Rapid Light bright)
H4(Glass Light bright)
H5(Glass Rapid Light bright)
H6(Glass 90 Min Light bright)
Salt c onsumption
(gram/cycle)
0
9
12
20
30
60
Contact your local water board for information on the hardness of your water supply.
NOTE:NOTE:
If your model does not have any water softener, you may skip this section.
WATER SOFTENER
The hardness of the water varies from place to place. If hard water is used in the dishwasher, deposits will
form on the dishes and utensils.
The appliance is equipped with a special softener that uses a salt container specifically designed to eliminate
lime and minerals from the water.
6
B. Loading the Salt Into the SoftenerB. Loading the Salt Into the Softener
Always use the salt intended for use with dishwasher.
The salt container is located beneath the lower basket and should be filled as explained
in the following:
Attention!
Only use salt specifically designed for the use in dishwashers! Every other type of
salt not specifically designed for the use in a dishwasher, especially table salt, will
damage the water softener. In case of damages caused by the use of unsuitable
salt the manufacturer does not give any warranty nor is liable for any damages caused.
Only fill with salt just before starting one of the complete washing programs.
This will prevent any grains of salt or salty water, which may have been spilled,
remaining on the bottom of the machine for any period of time, which may cause
corrosion.
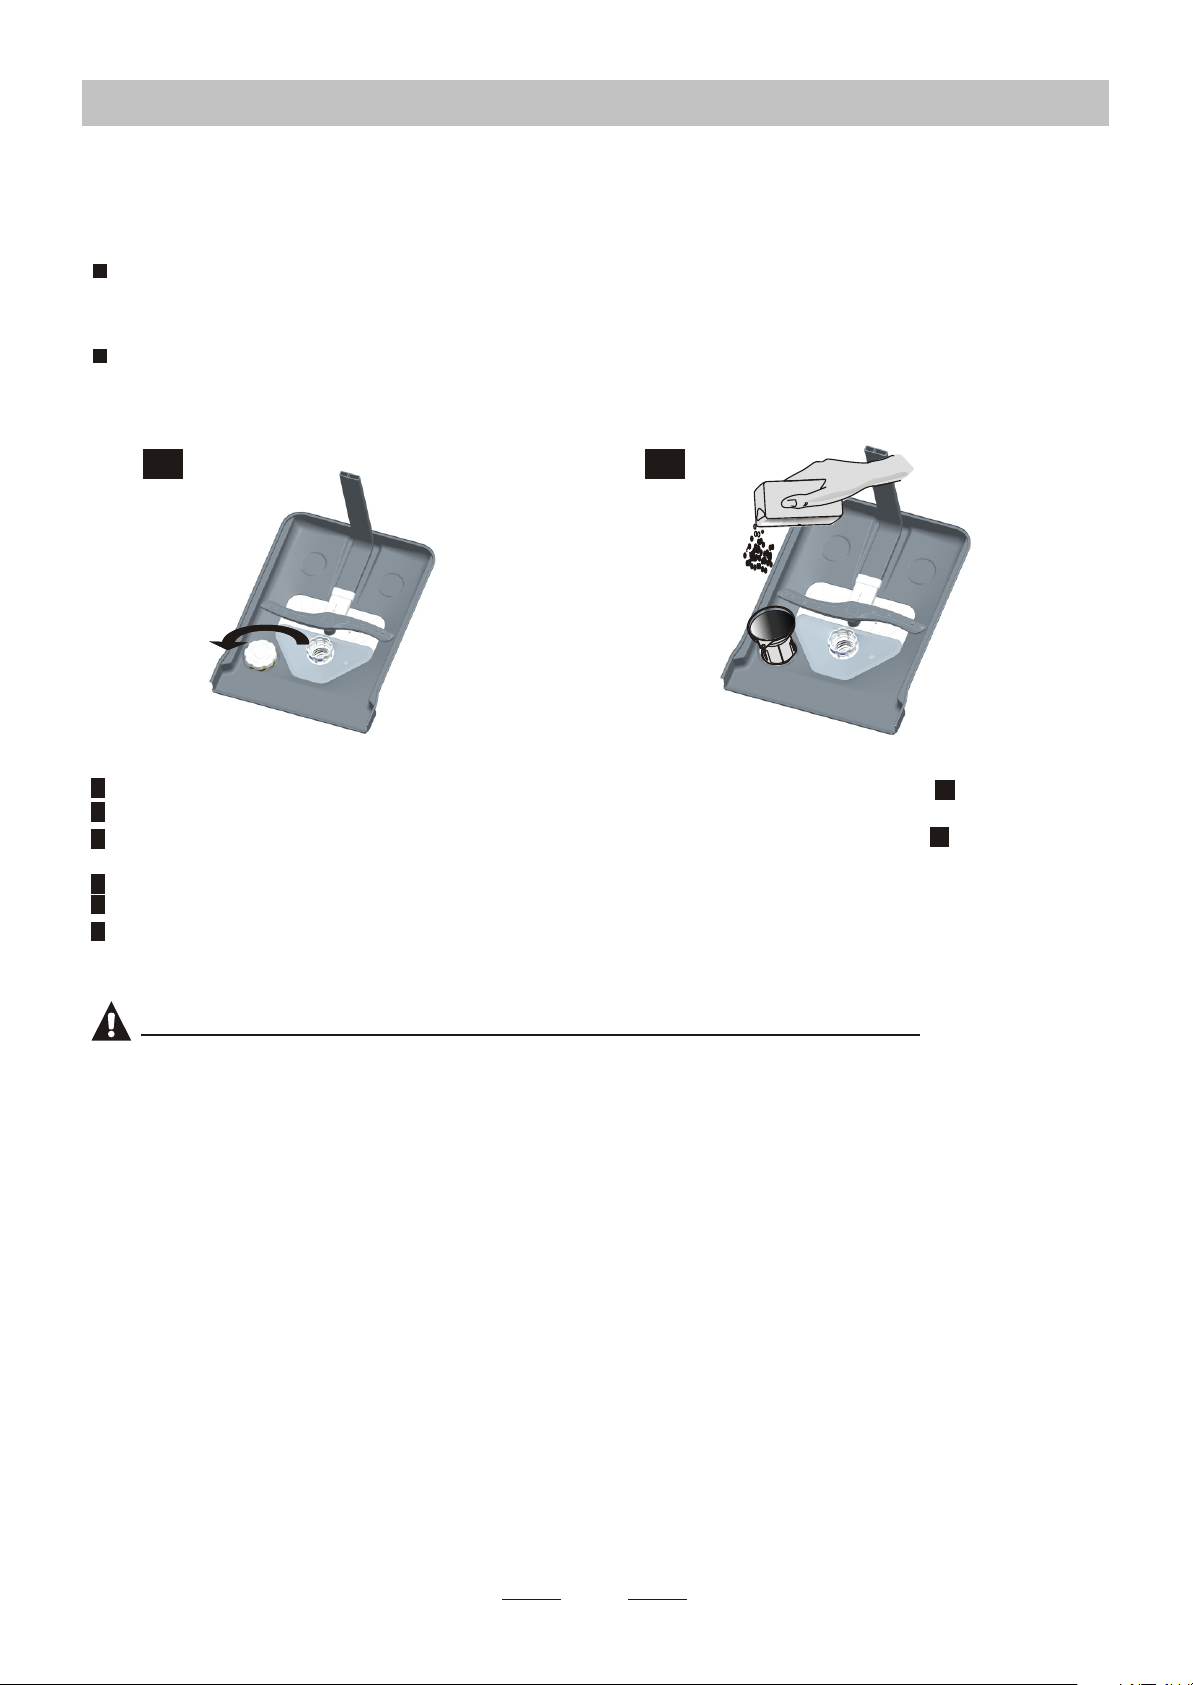
11 22
OpenOpen
A After the lower basket has been removed, unscrew and remove the cap from the salt container.
B Place the end of the funnel (supplied) into the hole and introduce about 1.5kg of dishwasher salt.
Full fill the salt container with water,It is normal for a small amount of water to come out of the
C
salt container.
D After filling the container , screw the cap tightly back clockwise.
E The salt warning light will stop being after the salt container has been filled with salt.
F Immediately after filling the salt into the salt container, a washing program should be started (We suggest to use a short
program). Otherwise the filter system, pump or other important parts of the machine may be damaged
by salty water. This is out of warranty.
11
22
NOTE:NOTE:
1. The salt container must only be refilled when the salt warning light in the control panel comes on.
Depending on how well the salt dissolves, the salt warning light may still be on even though the
salt container is filled.
If there is no salt warning light in the control panel (for some Models),you can estimate when to fill
the salt into the softener by the cycles that the dishwasher has run.
2. If there are spills of the salt, a soak or a rapid program should be run to remove the excessive salt.
7
Loading…
Candy CDI 1L949
Instruction ManualInstruction Manual
CDI 1L949
DishwasherDishwasher
9 place settings
10 place settings
View the manual for the Candy CDI 1L949 here, for free. This user manual comes under the category dishwashers and has been rated by 8 people with an average of a 8.7. This manual is available in the following languages: English. Do you have a question about the Candy CDI 1L949?
Ask your question here
Index
- Ò³Ãæ 1
- 2: Cover
- 3: Menu
- 4: ¾¯Óï1
- 5: ¾¯Óï2
- Ò³Ãæ 6
- 7: Quickly operating guide
- Ò³Ãæ 8
- 9: page 4
- 10: page 5
- 11: page 6
- 12: page 7
- 13: page 8
- 14: page 9
- 15: page 10
- 16: Ë«ËÙµç»ú
- Ò³Ãæ 17
- 18: page 15
- 19: page 16
- 20: page 17
- Ò³Ãæ 21
- Ò³Ãæ 22
- Ò³Ãæ 23
- Ò³Ãæ 24
- Ò³Ãæ 25
- Ò³Ãæ 26
- 27: page 20
- Ò³Ãæ 28
- 29: page 22
- Ò³Ãæ 30
- Ò³Ãæ 31
Product Images (3)

Candy CDI 1L949 specifications
Below you will find the product specifications and the manual specifications of the Candy CDI 1L949.
The Candy CDI 1L949 dishwasher is designed for households with a smaller number of place settings, accommodating up to 9. It does not have an automatic door opening or a self-cleaning filter. However, the upper basket of the dishwasher can be adjusted in height, giving users more flexibility when placing dishes.
The drying system used in the dishwasher is condensation, which means that it does not rely on external heating elements to dry dishes. The dishwasher does not come with a dirt sensor, and the door hinge is of the standard variety.
Users should note that the maximum hot water supply temperature for the dishwasher is 60 °C. The power plug type for the appliance is Type F (CEE 7/4), and the current required is 10 A. The dishwasher comes with 5 washing programs but does not have automatic programs. A half-load feature is also not available, but a buzzer feature is included.
In summary, the Candy CDI 1L949 dishwasher is a compact appliance that can accommodate up to 9 place settings. It comes with 5 different washing programs and requires a current of 10 A. While it does not have a self-cleaning filter or dirt sensor, users have the option to adjust the height of the upper basket. Additionally, the dishwasher uses the condensation drying system instead of heating elements to dry dishes.
Appliance placement
Fully built-in
Number of place settings
9 place settings
Automatic door opening
No
Power plug type
Type F (CEE 7/4)
Height under worktop
820 mm
General
| Brand | Candy |
| Model | CDI 1L949 | 32900605 |
| Product | dishwasher |
| EAN | 8016361928459 |
| Language | English |
| Filetype | User manual (PDF) |
Design
| Appliance placement | Fully built-in |
| Upper basket adjustable height | Yes |
| Door hinge | Standard |
| Control panel colour | Black |
| Door colour | Not applicable |
| Custom panel-ready | — |
| Built-in display | Yes |
| Lower basket safety stop | No |
| Product size | Slimline (45 cm) |
Performance
| Number of place settings | 9 place settings |
| Drying system | Condensation |
| Dirt sensor | No |
| Maximum hot water supply temperature | 60 °C |
| Number of washing programs | 5 |
| Automatic programs | No |
| Half-load | No |
| Delayed start timer | Yes |
| Overflow protection | No |
| AquaStop function | Yes |
| Noise level | 49 dB |
| Delay start (max) | 12 h |
| Noise emission class | — |
| Dishwashing programs | Eco 45°C, Glass/delicate, Intensive, Normal, Quick |
| Temperature (max) | 65 °C |
| Cycle time | — min |
| Built-in smart sensors | No |
| Minimum water flow pressure | 40 kPa |
| Maximum water flow pressure | 1000 kPa |
Ergonomics
| Automatic door opening | No |
| Self-cleaning filter | No |
| Buzzer | Yes |
| Salt indicator | Yes |
| Rinse aid indicator | Yes |
| Adjustable feet | Yes |
| Ready indicator | Yes |
| Feet adjustment type | Rear |
Power
| Power plug type | Type F (CEE 7/4) |
| Current | 10 A |
| Energy efficiency class | — |
| Energy efficiency scale | A to G |
| Water consumption per cycle | — L |
| Energy consumption per 100 cycles | — kWh |
| AC input voltage | 230 V |
Weight & dimensions
| Height under worktop | 820 mm |
| Width | 445 mm |
| Depth | 540 mm |
| Weight | 37780 g |
Packaging data
| Package weight | 42130 g |
| Package height | 885 mm |
| Package width | 485 mm |
| Package depth | 620 mm |
show more
Frequently asked questions
Can’t find the answer to your question in the manual? You may find the answer to your question in the FAQs about the Candy CDI 1L949 below.
What is the weight of the Candy CDI 1L949?
The Candy CDI 1L949 has a weight of 37780 g.
What is the width of the Candy CDI 1L949?
The Candy CDI 1L949 has a width of 445 mm.
What is the depth of the Candy CDI 1L949?
The Candy CDI 1L949 has a depth of 540 mm.
How do I add softening salt to my dishwasher?
Each dishwasher has a separate compartment for softening salt. It opens when you turn the knob on the compartment. The softening salt can then be poured into the compartment by means of a funnel.
What do I do about a smelly dishwasher?
In the case of a smelly dishwasher, you can take the following steps:
— Clean the filters
— Clean the spray arms
— Clean the door rubbers
— Run a hot wash program
— Run an empty machine with a dishwasher cleaner
What energy label does the Candy CDI 1L949 have?
The Candy CDI 1L949 has energy label -.
Do you have to pre-rinse the dishes?
It is not recommended to rinse dirty dishes before placing them in the dishwasher.
For the life cycle of the machine, it is better to put everything dirty in the dishwasher.
The grease on the dirty dishes is the lubrication for the pump in the machine.
How much dishwashing detergent should I use?
The average amount used is about 25 grams of dishwashing detergent. It is recommended to follow the advice on the packaging.
Is the manual of the Candy CDI 1L949 available in English?
Yes, the manual of the Candy CDI 1L949 is available in English .
Is your question not listed? Ask your question here
- Techno Pride. Бытовая техника
- Документация
- Посудомоечные машины
- Candy
Candy
- Все бренды
- AEG
- Asko
- Bauknecht
- BBK
- Beko
- Bertazzoni
- Bosch
- Candy
- Cata
- De Dietrich
- DeLonghi
- Electrolux
- Exiteq
- Franke
- Gorenje
- Graude
- Hiberg
- Hyundai
- Jacky`s
- Kaiser
- KitchenAid
- Korting
- Kuppersberg
- Kuppersbusch
- Maunfeld
- Midea
- Miele
- Neff
- Scandilux
- Schaub Lorenz
- Siemens
- Smeg
- Teka
- Vestel
- Vestfrost
- Weissgauff
- Zanussi
- Zigmund & Shtain
Посудомоечные машины
- Все категории
- Холодильники
- Стиральные машины
- Сушильные машины
- Посудомоечные машины
- Варочные панели
- Духовые шкафы
- Вытяжки
- Микроволновые печи
Инструкция для встраиваемой посудомоечной машины Candy CDI 2L10473-07 4,25 мб.
Инструкция для посудомоечной машины Candy CDCP 6/E-07 1,88 мб.
Инструкция для посудомоечной машины Candy CDCP 6/ES-07 1,88 мб.
Инструкция для посудомоечной машины Candy CDI 1L 949-07 5,38 мб.
Инструкция для посудомоечной машины Candy CDI 2D 10473-07 8,76 мб.
Инструкция для посудомоечной машины Candy CDI 2L11453-07 4,67 мб.
Инструкция для посудомоечной машины Candy CDP 2D 1149 W-07 1,23 мб.
Инструкция для посудомоечной машины Candy CDP 2D 1149 X-07 1,30 мб.
Инструкция для посудомоечной машины Candy CDP 2L 952 W-07 1,40 мб.
Инструкция для посудомоечной машины Candy CDP 2L 952 X-07 1,40 мб.
Информационная брошюра для посудомоечной машины Candy CDI 2L10473-07 0,08 мб.
Информационная брошюра для посудомоечной машины Candy CDI 2L11453-07 0,08 мб.
Схема встраивания для посудомоечной машины Candy CDI 2L10473-07 0,05 мб.
Схема для посудомоечной машины Candy CDI 5356-07 0,08 мб.
Схема для посудомоечной машины Candy CDIM 5366-07 0,08 мб.
Бесплатная доставка
Большинство товаров доставляем бесплатно по России
Бесплатная установка
Отмеченные товары устанавливаем бесплатно на готовые коммуникации
Простой возврат или обмен
Защищаем интересы покупателей, соблюдаем законодательство РФ
Фирменная гарантия
Фирменная гарантия производителей. Официальный дилер большинства брендов
Акции и скидки
Участвуем во всех официальных акциях
|
Код: 110500 Извините, товара сейчас нет в наличии
Бесплатная доставка Извините, товара сейчас нет в наличии Сравнить Услуги:Установка и подключение посудомоечной машины Новости интернет-магазина «Лаукар»:23.04.2025 26.02.2025 17.02.2025 Дополнительная информация в категории Встраиваемая посудомоечная машина:Встраиваемые посудомоечные машины — разбираемся в терминах Таблица Авторизованных сервисных центров по брендам. Описание Инструкция Отзывы (0) В интернет-магазине бытовой техники «Лаукар» Вы можете скачать инструкцию к товару Встраиваемая посудомоечная машина Candy CDI 1L949-07 совершенно бесплатно. Все инструкции, представленные на сайте интернет-магазина бытовой техники «Лаукар», предоставляются производителем товара. Для того чтобы скачать инструкцию, Вам необходимо нажать на ссылку «скачать инструкцию», расположенную ниже, а в случае, если ссылки нет, Скачать инструкцию Смотреть инструкцию 
Фирма-производитель оставляет за собой право на внесение изменений в конструкцию, дизайн и комплектацию товара: Встраиваемая посудомоечная машина Candy CDI 1L949-07. Пожалуйста, сверяйте информацию о товаре с информацией на |
Требуется руководство для вашей Candy CDI 1L949-07 Посудомоечная машина? Ниже вы можете просмотреть и загрузить бесплатно руководство в формате PDF. Кроме того, приведены часто задаваемые вопросы, рейтинг изделия и отзывы пользователей, что позволит оптимально использовать ваше изделие. Если это не то руководство, которое вы искали, – свяжитесь с нами.
Ваше устройство неисправно, и в руководстве отсутствует решение? Перейдите в Repair Café для получения бесплатных ремонтных услуг.
Руководство
Рейтинг
Сообщите нам, что вы думаете о Candy CDI 1L949-07 Посудомоечная машина, оставив оценку продукта. Хотите поделиться вашими впечатлениями от данного изделия или задать вопрос? Вы можете оставить комментарий в нижней части страницы.
Довольны ли вы данным изделием Candy?
Да Нет
Будьте первым, кто оценит это изделие
0 голоса
Часто задаваемые вопросы
Наша служба поддержки выполняет поиск полезной информации по изделиям и отвечает на часто задаваемые вопросы. Если вы заметили неточность в наших часто задаваемых вопросах, сообщите нам об этом с помощью нашей контактной формы.
После завершения цикла посудомоечной машины отсек с моющим средством не открылся. Почему? Проверенный
Данная проблема часто возникает, когда посуда блокирует отсек. Прежде, чем запускать машину, убедитесь, что отсек не заблокирован.
Это было полезно (7679)
Почему посудомоечная машина перестала нагревать воду? Проверенный
Скорее всего, нагревательный элемент неисправен. Его следует заменить. В случае сомнений обратитесь к производителю.
Это было полезно (6978)
Можно ли в посудомоечной машине использовать обычную соль? Проверенный
Нет, поваренная соль может содержать вещества, которые споcобны повредить ваше устройство.
Это было полезно (2994)
Нужно ли ополаскивать посуду, прежде чем поместить ее в посудомоечную машину? Проверенный
Ополаскивать посуду необязательно, однако следует удалить все крупные, твердые и жирные остатки пищи. Со временем они могут засорить слив.
Это было полезно (1190)
Могу ли я открыть посудомоечную машину во время ее работы? Проверенный
Большинство посудомоечных машин оснащены устройством остановки подачи воды, благодаря чему программа останавливается сразу же при открытии дверцы, что означает, что вода не будет вытекать. С некоторыми моделями со временем это может вызвать проблемы. При использовании встраиваемых посудомоечных машин частое открывание посудомоечной машины во время работы может привести к повреждению окружающих шкафов водой из-за выделяющегося пара.
Это было полезно (911)
Следует ли открывать посудомоечную машину после того, как она закончила работу, чтобы посуда высохла быстрее? Проверенный
Это зависит от типа посудомоечной машины и ее расположения. Некоторые посудомоечные машины оснащены функцией сушки посуды после программы мойки. В этом случае открытие посудомоечной машины не принесет никакой пользы. При использовании встраиваемых посудомоечных машин частое открывание посудомоечной машины во время работы может привести к повреждению окружающих шкафов водой из-за выделяющегося пара.
Это было полезно (728)
После того, как посудомоечная машина завершит свой цикл, пластиковая посуда еще влажная, а остальная — нет. Это почему? Проверенный
Пластик — плохой проводник тепла, позволяющий продуктам быстро остывать. Влага, которая остается на нем, испаряется гораздо меньше, чем, например, на керамике или металле.
Это было полезно (647)
Царапины на металле внутри посудомоечной машины — это проблема? Проверенный
Внутренняя часть большинства посудомоечных машин изготовлена из нержавеющей стали и не подвержена царапинам.
Это было полезно (582)
Можно ли подключить посудомоечную машину к удлинителю? Проверенный
Технику, требующую большого количества энергии, например посудомоечную машину, нельзя подключать ко всем удлинителям. Посмотрите, какова потребляемая мощность посудомоечной машины, которая указывается в ваттах, и проверьте, справится ли с этим удлинитель. Существуют удлинители с более толстыми кабелями, предназначенные для работы с более крупными приборами.
Это было полезно (581)
Можно ли мыть посуду с тефлоном в посудомоечной машине? Проверенный
Да, ты можешь. Однако сковорода изнашивается быстрее, чем при ручной очистке. При чистке сковороды тефлоном вручную никогда не используйте мочалку, а используйте мягкую губку или ткань.
Это было полезно (580)
Можно ли мыть в посудомоечной машине деревянные предметы, например, шпатели и разделочные доски? Проверенный
Нет. Деревянные предметы можно повредить или покоробить в посудомоечной машине. Кроме того, высвобождающиеся древесные волокна могут повредить посудомоечную машину. Деревянные разделочные доски часто изготавливаются с использованием клея, который может отслоиться после нескольких раз мытья в посудомоечной машине.
Это было полезно (580)
Встраиваемая посудомоечная машина Candy CDI 1L949 – надежный помощник для вашей кухни!
Особенности
За одну загрузку вы легко отмоете до 9 комплектов посуды. Внутренняя поверхность рабочей камеры выполнена из нержавеющей стали, что обеспечивает длительной срок службы прибора. Регулируемая по высоте корзина для посуды позволяет мыть даже крупногабаритную посуду.
Отложенный старт
Возможность задавать время начала выполнения программы, отложив старт с момента загрузки посуды и выбора программы мойки на несколько часов.
Управление
Удобная система электронного управления позволит вам с легкостью пользоваться этой посудомоечной машиной. Индикатор наличия соли и ополаскивателя всегда подскажет о необходимости пополнения.
Безопасность
Для безопасной работы этой посудомоечной машины предусмотрена защита от протечек воды.
Качественная мойка
Наличие 6 автоматических программ позволит вам без труда подобрать наиболее оптимальный вариант для мытья любой посуды. Также имеется специальная программа для мытья сильнозагрязненной и слабозагрязненной посуды. Режим половинной загрузки позволяет экономить воду и электроэнергию.
Класс энергопотребления А+
Устройство создано на основе современного компрессора с малым энергопотреблением и низким уровнем шума. Оно соответствует классу экономичности А+.
Посмотреть инструкция для Candy CDIH 1L949-08 бесплатно. Руководство относится к категории посудомоечные машины, 1 человек(а) дали ему среднюю оценку 7. Руководство доступно на следующих языках: русский. У вас есть вопрос о Candy CDIH 1L949-08 или вам нужна помощь? Задайте свой вопрос здесь
Не можете найти ответ на свой вопрос в руководстве? Вы можете найти ответ на свой вопрос ниже, в разделе часто задаваемых вопросов о Candy CDIH 1L949-08.
Что мне делать при появлении в посудомоечной машине неприятного запаха?
В случае появления в посудомоечной машине неприятного запаха вы можете предпринять следующие шаги: — Очистить фильтры — Очистить разбрызгиватели — Очистить резиновые прокладки — Запустить программу мытья горячей водой — Запустить программу мойки при пустой посудомоечной машине
Следует ли предварительно ополаскивать посуду?
Перед помещением посуды в посудомоечную машину не рекомендуется ее ополаскивать. Для продления срока службы посудомоечной машины лучше всего складывать в нее посуду грязной. Грязь на посуде является смазкой для насоса посудомоечной машины.
Сколько средства для мытья посуды следует использовать?
Среднее количество средства для мытья посуды составляет около 25 г. Рекомендуется следовать указанным на упаковке инструкциям.
Как добавлять в посудомоечную машину соль?
Каждая посудомоечная машина оснащена отдельным отсеком для соли. Такие отсеки открываются поворотом ручки на отделении. Соль можно засыпать в отсек при помощи воронки.
Какой вес Candy CDIH 1L949-08?
Candy CDIH 1L949-08 имеет вес 36000 g.
Какая ширина Candy CDIH 1L949-08?
Candy CDIH 1L949-08 имеет ширину 448 mm.
Какая толщина Candy CDIH 1L949-08?
Candy CDIH 1L949-08 имеет толщину 555 mm.
Какую маркировку энергоэффективности Candy CDIH 1L949-08 имеет?
Candy CDIH 1L949-08 имеет маркировку энергоэффективности F.
Инструкция Candy CDIH 1L949-08 доступно в русский?
Да, руководствоCandy CDIH 1L949-08 доступно врусский .
Не нашли свой вопрос? Задайте свой вопрос здесь
- Techno Pride. Бытовая техника
- Посудомоечные машины
- Candy
- Встраиваемая посудомоечная машина Candy CDI 1L 949-07
- Инструкция для посудомоечной машины Candy CDI 1L 949-07
Инструкция для посудомоечной машины Candy CDI 1L 949-07
Бесплатная доставка
Большинство товаров доставляем бесплатно по России
Бесплатная установка
Отмеченные товары устанавливаем бесплатно на готовые коммуникации
Простой возврат или обмен
Защищаем интересы покупателей, соблюдаем законодательство РФ
Фирменная гарантия
Фирменная гарантия производителей. Официальный дилер большинства брендов
Акции и скидки
Участвуем во всех официальных акциях
|
Код: 110500 Извините, товара сейчас нет в наличии Бесплатная доставка Извините, товара сейчас нет в наличии Сравнить Услуги:Установка и подключение посудомоечной машины Новости интернет-магазина «Лаукар»:28.03.2023 22.02.2023 13.02.2023 Дополнительная информация в категории Встраиваемая посудомоечная машина:Встраиваемые посудомоечные машины — разбираемся в терминах Таблица Авторизованных сервисных центров по брендам. Описание Инструкция Отзывы (0) В интернет-магазине бытовой техники «Лаукар» Вы можете скачать инструкцию к товару Встраиваемая посудомоечная машина Candy CDI 1L949-07 совершенно бесплатно. Все инструкции, представленные на сайте интернет-магазина бытовой техники «Лаукар», предоставляются производителем товара. Для того чтобы скачать инструкцию, Вам необходимо нажать на ссылку «скачать инструкцию», расположенную ниже, а в случае, если ссылки нет, Скачать инструкцию Смотреть инструкцию
Фирма-производитель оставляет за собой право на внесение изменений в конструкцию, дизайн и комплектацию товара: Встраиваемая посудомоечная машина Candy CDI 1L949-07. Пожалуйста, сверяйте информацию о товаре с информацией на |