


Table of Contents
1
Table of Contents
Table of Contents 1
Before You Begin 10
Related Documentation 10
Summary of Changes 11
Changes for Release V86, Guide Version V86.5 11
Getting Started 12
Hardware Overview 12
T48S/T48G Hardware 13
T46S/T46G/T42S/T42G/T41S/T41P/T40P/T40G Hardware 14
Power LED Indicator 15
Line Key LED 16
Screen and Icons 16
Idle Screen 16
Calls Screen 18
Icons in the Status Bar 18
T48S/T48G Icons in the Status Bar 19
T46S/T46G Icons in the Status Bar 19
T41S/T41P/T42S/T42G Icons in the Status Bar 20
T40P/T40G Icons in the Status Bar 20
Line Key Icons 21
T48S/T48G Line Key Icons 21
T46S/T46G Line Key Icons 21
T42S/T42G/T41S/T41P Line Key Icons 22
T40P/T40G Line Key Icons 22
Entering Characters on T48S/T48G 22
Using the Onscreen Keyboard 23
Using the Phone Keypad and Dial Pad 23
Entering Characters on T46S/T46G/T42S/T42G/T41S/T41P/T40P/T40G 24
Call Features 25
Changing the Default Account 25
Placing Calls 25
Placing a Call from the Dialer 25
Placing Multiple Calls 26
Placing a Call with a Speed Dial Key 26
Placing a Call Back to the Last Incoming Number 27
Redialing a Number 27
Dialing a Hotline Number 27
Placing an International Call 28
Placing a Call from the Call History 28
Placing a Call from the Directory 28

Yealink T4 Series IP Phones User Guide
2
Placing an Anonymous Call 28
Placing Calls to Google Contacts 29
Placing an Emergency Call from a Locked Phone 29
Answering Calls 30
Answering a Call 30
Answering a Call When in a Call 30
Answering a Call Automatically 31
Switching Among the Handset, Speakerphone and Headset Modes 32
Disabling Call Waiting 32
Silencing or Rejecting Incoming Calls 32
Silencing a Call 32
Rejecting a Call Manually 32
Rejecting Anonymous Calls 33
Rejecting Calls with Do Not Disturb (DND) 33
Rejecting Calls with DND on All Lines 33
Rejecting Calls with DND on a Specific Line 34
Deactivating DND 34
Ending Calls 34
Redialing a Call Automatically 35
Muting/Unmuting Audio 35
Keep Mute 36
Holding and Resuming Calls 36
Holding a Call 36
Resuming a Held Call 37
Redirecting Incoming Calls 37
Forwarding All Incoming Calls to a Contact 37
Forwarding All Incoming Calls on All Lines 37
Forwarding All Incoming Calls on a Specific Line 38
Deactivating Call Forward 39
Forwarding an Incoming Call Manually 39
Forwarding Incoming Calls with a Forward Key 39
Diverting Calls to a Contact 39
Transferring Calls 40
Performing a Blind Transfer 40
Performing a Semi-Attended/Attended Transfer 40
Performing Transfer with a Transfer Key 41
Setting a Transfer Key 41
Performing a Blind Transfer Using a Transfer Key 41
Performing a Semi-attended/Attended Using a Transfer Key 42
Performing a Call Transfer by Selecting a Transfer Mode 42
Conference Calls 42
Local Conference 43
Setting Up a Local Conference Call 43
Merging Two Calls into a Conference 43

Table of Contents
3
Inviting a Transfer Target and a Transferee into a Conference 44
Holding or Resuming a Conference Call 44
Muting or Unmuting a Conference Call 44
Splitting a Conference Call 44
Managing Conference Participants 44
Ending a Conference Call 45
Network Conference 45
Setting Up a Network Conference 45
Recording Using a USB Flash Drive 45
Recording a Call 46
Pausing/Resuming a Recording 46
Stopping a Recording 46
Managing the Recordings 47
Listening to a Recording 47
Pausing/Resuming a Playback 48
Fast Forwarding/Rewinding a Playback 48
Deleting a Recorded Call 48
Viewing the Available Recording Time 48
Multicast Paging 49
Sending Multicast Paging 49
Setting a Multicast Paging Key 49
Sending a Paging by a Multicast Paging Key 50
Setting a Paging List Key 50
Setting a Paging Group 51
Sending Pages by a Paging List Key 51
Deleting a Paging Group 51
Receiving Multicast Paging 52
Managing a Paging Call 52
Advanced Call Features 53
Using Call Completion 53
Call Pickup 54
Picking up a Call Directly 54
Picking up a Group Call Directly 54
Picking up a Call with a Pick Up Key 55
Picking up a Call with a Group Pickup Key 55
Call Park and Call Retrieve 56
Parking or Retrieving a Call in the FAC Mode 56
Parking a Call in the FAC Mode 56
Retrieving a Parked Call in the FAC Mode 57
Parking or Retrieving a Call in the Transfer Mode 57
Parking a Call in the Transfer Mode 57
Retrieving a Parked Call in the Transfer Mode 58
Parking or Retrieving a Call with a Park or Retrieve Key 58
State Indicator of the Park/Retrieve key 58

Yealink T4 Series IP Phones User Guide
4
Parking a Call using a Park Key 58
Retrieving a Parked Call using a Retrieve Key 59
Busy Lamp Field (BLF) 60
State Indicator of Remote Line by BLF Key 60
Audio Alert for BLF Pickup 60
Setting an Alert Tone for Monitored Lines 60
Visual Alert for BLF Pickup 61
Setting a BLF Key 61
Picking up a Remote Call by BLF Key 61
Transferring a Call by BLF Key 62
Performing a Blind Transfer 62
Performing a Semi-attended/Attended Transfer 62
Parking or Retrieving a Call by BLF Key 62
Parking a Call to a Monitored Line 63
Retrieving a Parked Call 63
BLF List 63
State Indicator of Remote Line by BLF List Key 63
Audio Alert for BLF Pickup 64
Setting an Alert Tone for Monitored Lines 64
Visual Alert for BLF Pickup 64
Ring Type for BLF Parked Call Monitor 65
Setting an Alert Tone for the BLF Parked Call Monitor 65
Visual Alert for BLF Parked Call Monitor 65
Picking up a Remote Call by BLF List Key 66
Transferring a Call by BLF List Key 66
Performing a Blind Transfer 66
Performing a Semi-attended/Attended Transfer 66
Parking a Call by a BLF List Key 66
Retrieving a Call by a BLF List Key 67
Barging in an Active Call by BLF List Key 67
Retrieving a Call Parked to the Monitored Line 67
Shared Line 68
State Indicator of Shared Line 68
Placing Calls on a Shared Line 68
Answering Calls on a Shared Line 69
Placing a Call on Public Hold 69
Placing a Call on Private Hold 69
Retrieving a Held Call on a Shared Line 69
Barging in an Active Call on a Shared Line 70
Pulling a Shared Call on a Shared Line 70
Intercom 71
State Indicator of the Intercom key 71
Placing an Intercom Call 71
Picking up an Incoming Call of the Target Extension 72

Table of Contents
5
Answering an Intercom Call 72
Short Message Service (SMS) 73
Reading a Text Message 74
Sending a Text Message 74
Replying to a Text Message 74
Deleting a Text Message 74
Voice Mail 75
Setting the Voice Mail Code 75
Leaving Voice Mails 75
Listening to Voice Mails 75
Using the Hot Desking 76
Automatic Call Distribution (ACD) 76
State Indicator of ACD User 76
Logging into the ACD System 77
Changing the ACD Status 77
Directory 78
Local Directory 78
Managing the Local Directory Groups 78
Adding Contact Groups 78
Editing Contact Groups 78
Deleting Contact Groups 79
Managing the Local Directory Contacts 79
Adding Contacts 79
Viewing Contacts 79
Editing Contacts 80
Deleting a Contact 80
Deleting All Contacts 80
Moving a Local Directory Contact to Blacklist 81
Searching for Contacts 81
Favorites 81
Adding Favorites 81
Adding an Existing Contact to Your Favorites 81
Adding a New Contact to Your Favorites 82
Viewing Favorites 82
Reordering Favorites 82
Deleting Favorites 82
Blacklist 83
Adding a Blacklist Contact 83
Viewing Blacklist Contacts 83
Editing a Blacklist Contact 83
Deleting Blacklist Contacts 83
Deleting a Blacklist Contact 84
Deleting All Blacklist Contacts 84
Moving a Blacklist Contact to the Local Directory 84

Yealink T4 Series IP Phones User Guide
6
Mobile Contacts 84
Saving a Mobile Contact to the Local Directory 85
Searching for Mobile Contacts 85
Updating the Mobile Contacts 85
Google Contacts 86
Viewing Google Contacts 86
Updating Google Contacts 86
Searching for Google Contacts 86
Remote Phone Book 87
Searching for Remote Phone Book Contacts 87
Viewing Remote Phone Book Contacts 87
Saving a Remote Phone Book Contact to the Local Directory 87
Saving a Remote Phone Book Contact to the Blacklist 87
Call History 89
Call History Icons 89
Viewing History Records 89
Saving a History Record to Local Directory 89
Saving a History Record to Blacklist 90
Deleting History Records 90
Deleting a Call Record 90
Deleting All Call Records 90
Disabling History Record 90
Customizing Your Phone 92
Changing the Administrator Password 92
Wallpaper 92
Changing Wallpaper on Idle Screen 93
Changing Wallpaper on Dsskey Screen 93
Adding a Wallpaper from a USB Flash Drive 93
Adding a Dsskey Screen Wallpaper from a USB Flash Drive 94
Adjusting Transparency 94
Screen Saver 94
Changing the Waiting Time for Screen Saver 95
Disabling Time & Date and Status Icons Display 95
Adding a Screen Saver from a USB Flash Drive 95
Setting the Screen Saver Type 96
Changing the Backlight and Time 96
Adjusting the Screen Contrast 97
Changing the Language 97
Time & Date 97
Setting the Time and Date Manually 97
Changing the Time and Date Format 98
Setting a Key as Send 98
Customizing the Soft Keys 98

Table of Contents
7
Phone Lock 99
Setting the Phone Lock 99
Locking Your Phone Manually 99
Unlocking Your Phone 100
Changing Your Phone Unlock PIN 100
Extending the Line Key Labels 100
Locking the Line Key 100
Audio Settings 102
Adjusting the Volume 102
Setting the Ring Tone 102
Setting a Ring Tone for the Phone 102
Setting a Ring Tone for an Account 102
Setting a Ring Tone for a Group 103
Setting a Ring Tone for a Contact 103
Disabling the Key Tone 103
Muting the Ringtone 103
Optional Accessories with Your Phone 105
Headset 105
Connecting the Analog Headset 105
Wireless Headset 106
Bluetooth Headset 106
USB Headset 106
Using Headsets 106
Bluetooth 106
Activating the Bluetooth Mode 107
Pairing and Connecting the Bluetooth Headset 107
Pairing and Connecting the Bluetooth-enabled Mobile Phone 108
Syncing the Mobile Contacts to the Phone 108
Enabling the Mobile Contacts Sync Feature 108
Viewing Your Mobile Contacts on the Phones 109
Disabling the Mobile Contacts Sync Feature 109
Viewing the Bluetooth Device Information 109
Editing Device Name of Your Phone 110
Deleting the Paired Bluetooth Device 110
Disconnecting the Bluetooth Device 110
Deactivating the Bluetooth Mode 111
Wireless Network 111
Activating the Wi-Fi Mode 111
Connecting to the Wireless Network 111
Connecting to an Available Wireless Network Manually 111
Connecting to the Wireless Network Using WPS 112
Adding a Wireless Network Manually 112
Viewing the Wireless Network Information 113

Yealink T4 Series IP Phones User Guide
8
Managing the Saved Wireless Network 113
Disconnecting the Wireless Network Connection 114
Deactivating the Wi-Fi Mode 114
Expansion Module and Your Phone 114
Connecting the Expansion Module 114
Assigning the Features for Ext Keys 115
Adjusting the Contrast of the Expansion Module 115
Adjusting the Backlight of the Expansion Module 115
Maintaining Your Phone 116
Warnings 116
Investigating Warnings 116
Re-provisioning Your Phone 116
Clearing Warnings 117
Diagnosing the Network 117
Rebooting Your Phone 117
Resetting to Factory Settings 117
Updating the Phone Configuration 118
Clearing User’s Personalized Configuration Settings 119
Appendix — Menu Structure 120
For the T48S/T48G Phone 120
For the T46S/T46G Phone 121
For the T42S/T42G/T41S/T41P/T40P/T40G Phone 122

Table of Contents
9

Before You Begin
10
Before You Begin
This guide provides information you need to quickly use your new phone.
Firstly, verify with your system administrator that the IP network is ready for phone configuration. Also, be sure to
read the Quick Start Guide which can be found in your phone package before you set up and use the phone. As
you read this guide, keep in mind that some features are only configurable by your system administrator or determ-
ined by your phone environment. As a result, some features may not be enabled or may be operated differently on
your phone. Additionally, the examples and graphics in this guide may not directly reflect what is displayed or is
available on your phone screen.
Note: This guide mainly takes T46S phones as an example.
This user guide contains information for the following Yealink products:
lT48S IP phones
lT48G IP phones
lT46S IP phones
lT46G IP phones
lT42S IP phones
lT42G IP phones
lT41S IP phones
lT41P IP phones
lT40P IP phones
lT40G IP phones
Related Documentation
You can view more types of documents to make the phone to perform more functions.
You can obtain additional information on the following phones from Yealink Support:
lUltra-elegant Gigabit IP Phone T48S
lUltra-elegant Gigabit IP Phone T48G
lUltra-elegant Gigabit IP Phone T46S
lUltra-elegant Gigabit IP Phone T46G
lUltra-elegant Gigabit IP Phone T42S
lUltra-elegant Gigabit IP Phone T42G
lUltra-elegant IP Phone T41S
lUltra-elegant IP Phone T41P
lEnterprise IP Phone T40P
lEnterprise IP Phone T40G
The following types of related documents are available on each support page on Yealink support page:
lRelease Notes, which details bug fixes and feature enhancements when an update is released.
lQuick Start Guide, which describes how to assemble your phone and configure the basic phone features.
lWall Mount Installation Guide, which provides detailed instructions on how to use an optional wall mount bracket
to mount your phone on the wall.
lAdministrator Guide, which provides detailed information on how to configure phone features for the system
administrator.
lRegulatory Notice, which provides information about all regulatory and safety guidance.

Yealink T4 Series IP Phones User Guide
11
You can also view other user documents which provide descriptions and examples for phone settings and features
on the Yealink support page.
Summary of Changes
This section describes the changes to this guide for each release and guide version.
Changes for Release V86, Guide Version V86.5
The following sections are new for this version:
lMuting the Ringtone
Major updates have occurred to the following sections:
lPlacing an Anonymous Call
You can select All On to turn on local anonymous for all lines.
Getting Started
12
Getting Started
Before you use your phone, take some time to get familiar with its features and user interface.
The terms «the phone» and «your phone« refer to any of the IP phones.
Topics
Hardware Overview
Screen and Icons
Entering Characters on T48S/T48G
Entering Characters on T46S/T46G/T42S/T42G/T41S/T41P/T40P/T40G
Hardware Overview
Understanding the phone hardware helps you easily use the phone’s features.
Yealink T4 series phones have distinct hardware types:
Hardware T42G/T41P/T40P/T40G T42S/T41S T46S/T46G T48S/T48G
Screen Grayscale Grayscale Color Color
Touch-sensitive
Line Keys and soft keys Yes Yes Yes No
USB Port No Yes Yes Yes
Topics
T48S/T48G Hardware
T46S/T46G/T42S/T42G/T41S/T41P/T40P/T40G Hardware
Power LED Indicator
Line Key LED
Yealink T4 Series IP Phones User Guide
13
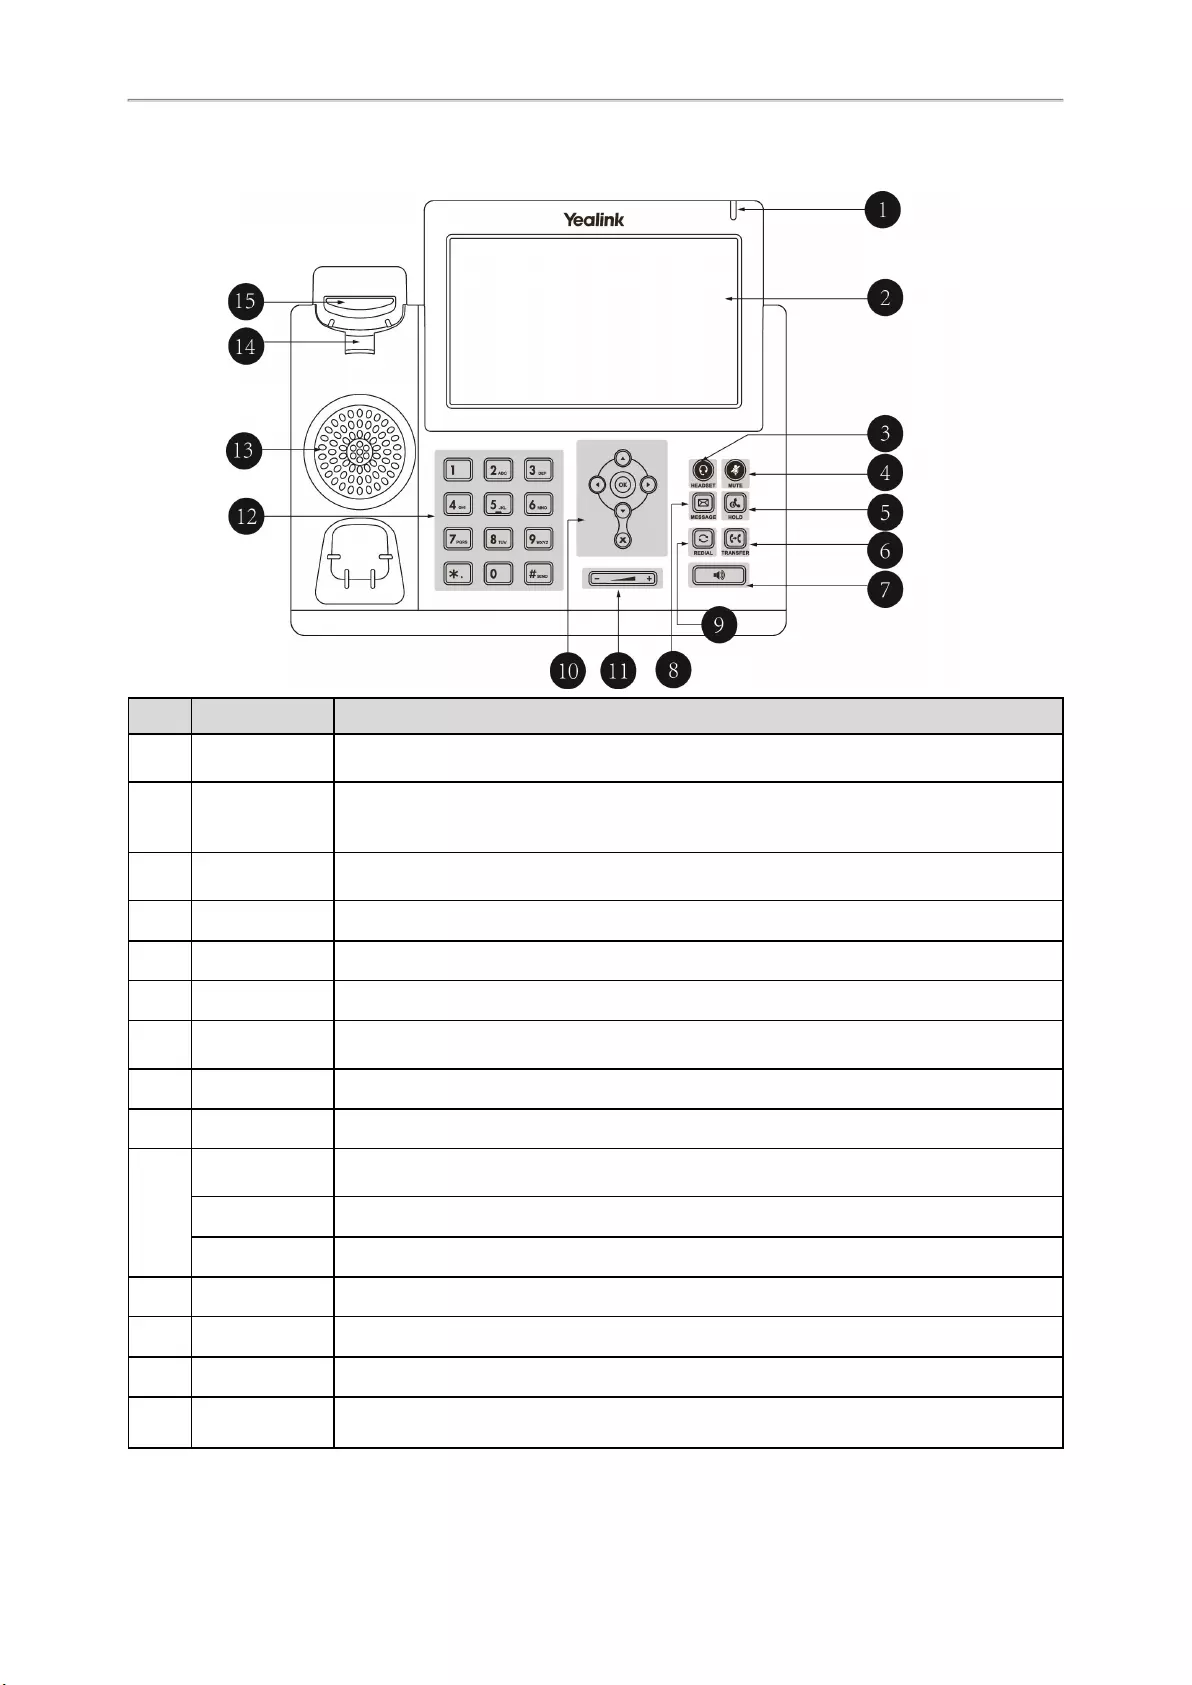
T48S/T48G Hardware
No. Item Description
1Power LED indic-
ator Indicates call status, message status, and phone’s system status.
2Touch Screen
Allows you to select items and navigate menus on the touch-sensitive screen. Tap to
select and highlight screen items.
Shows information about calls, messages, time, date and other relevant data.
3HEADSET Key Toggles and indicates the headset mode. The key LED glows green when the headset
mode is activated.
4MUTE Key Toggles and indicates the mute feature. The key LED glows red when the call is muted.
5HOLD Key Places a call on hold or resumes a held call.
6TRANSFER Key Transfers a call to another party.
7Speakerphone
Key
Toggles and indicates the hands-free (speakerphone) mode. The key LED glows green
when the hands-free (speakerphone) mode is activated.
8MESSAGE Key Accesses voice mails.
9REDIAL Key Redials a previously dialed number.
10
Navigation Keys • Scroll through information or options displayed on the screen.
• Access History and Directory respectively.
OK Key Confirms actions or answers incoming calls.
Cancel Key Cancels actions or rejects incoming calls.
11 Volume Key Adjusts the volume of the handset, headset, and speaker.
12 Keypad Provides the digits and special characters in context-sensitive applications.
13 Speaker Provides ringer and speakerphone audio output.
14 Reversible Tab Secures the handset in the handset cradle when the phone is mounted vertically. For
more information on how to adjust the reversible tab, refer to
Yealink Wall Mount Quick
Getting Started
14
No. Item Description
Installation Guide for Yealink IP Phones
.
15 Hookswitch
• Picking up the handset from the handset cradle, the hookswitch bounces and the phone
connects to the line.
• Laying the handset down on the handset cradle, the phone disconnects from the line.
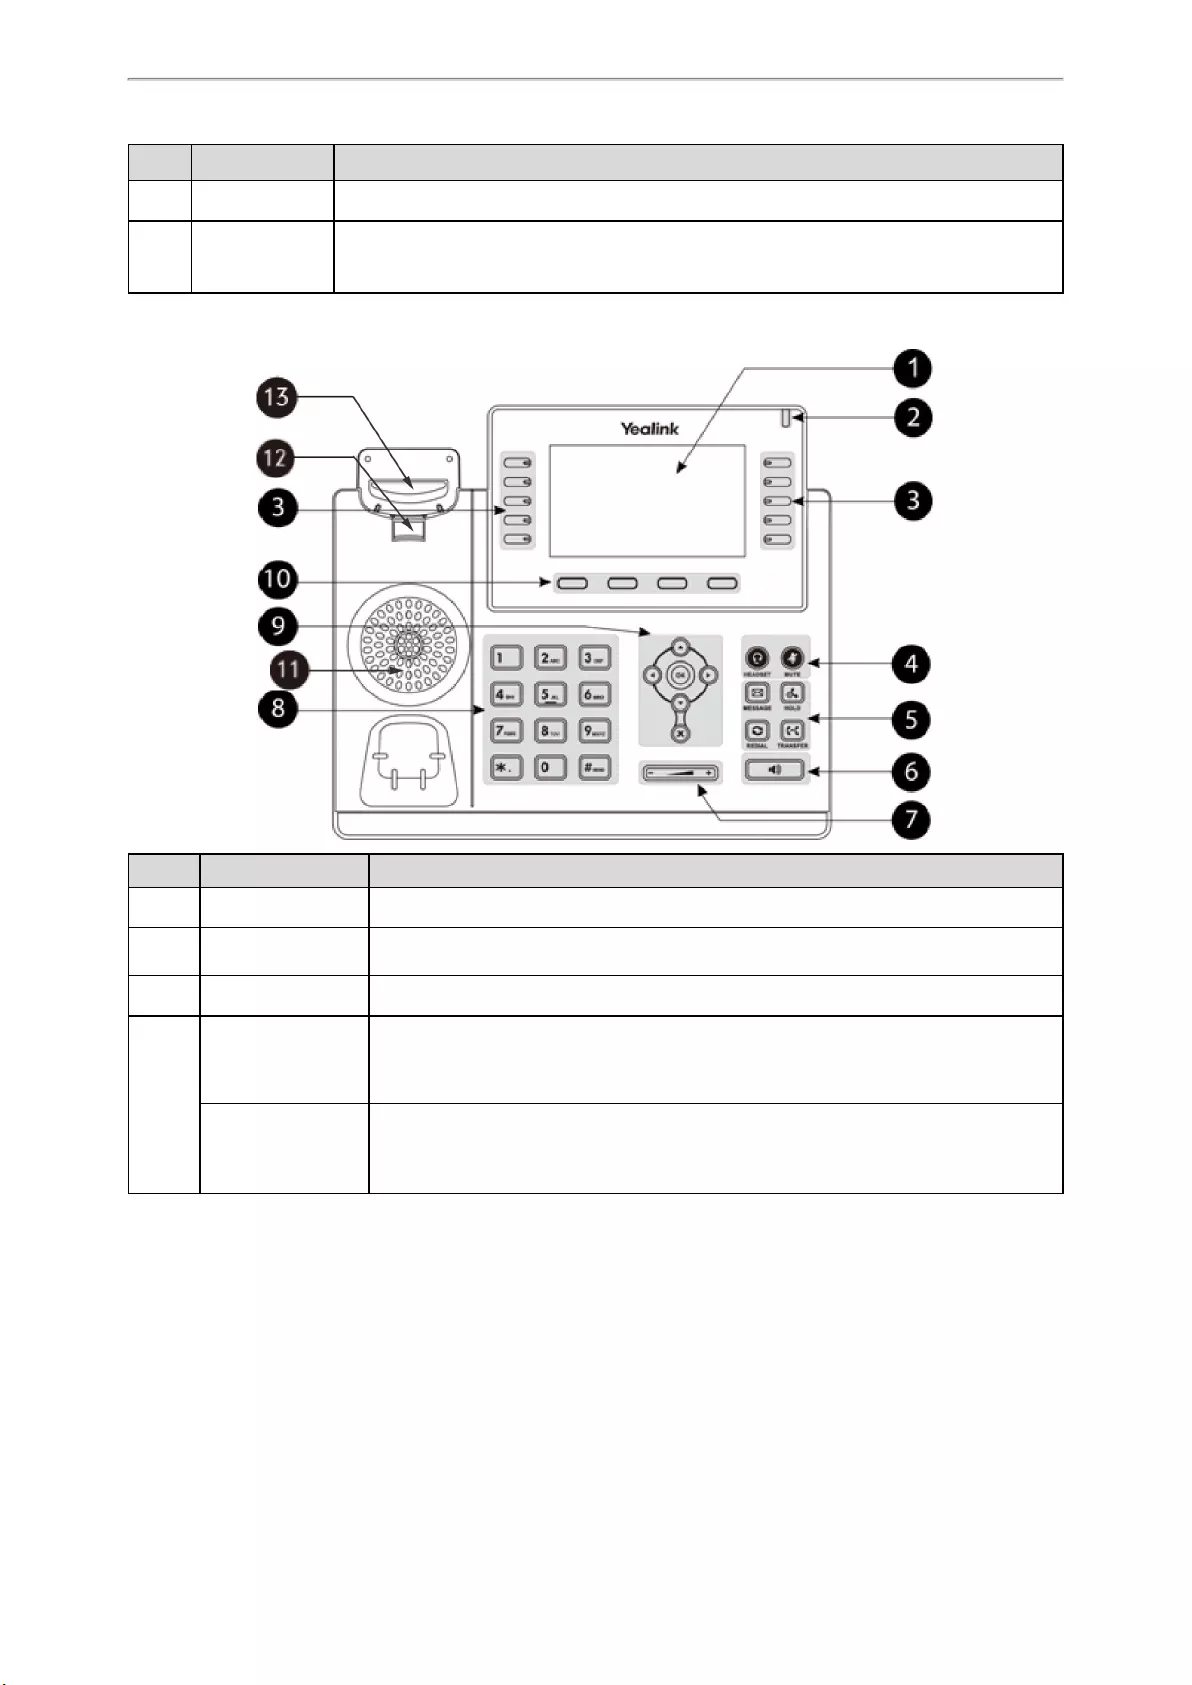
T46S/T46G/T42S/T42G/T41S/T41P/T40P/T40G Hardware
NO. Item Description
1Phone Screen Shows a screen with backlight that enables you to view menus and data.
2Power LED Indic-
ator Indicates call status, message status and system status of the phone.
3Line Keys Accesses your phone lines and features.
4
HEADSET Key
Toggles the headset on or off. The LED indicator glows green when the headset is
activated.
The T40P/T40G phones do not have key light.
MUTE Key
Toggles the microphone on or off. The LED indicator glows green when the mute fea—
ture is activated.
The T40P/T40G phones do not have key light.
Yealink T4 Series IP Phones User Guide
15
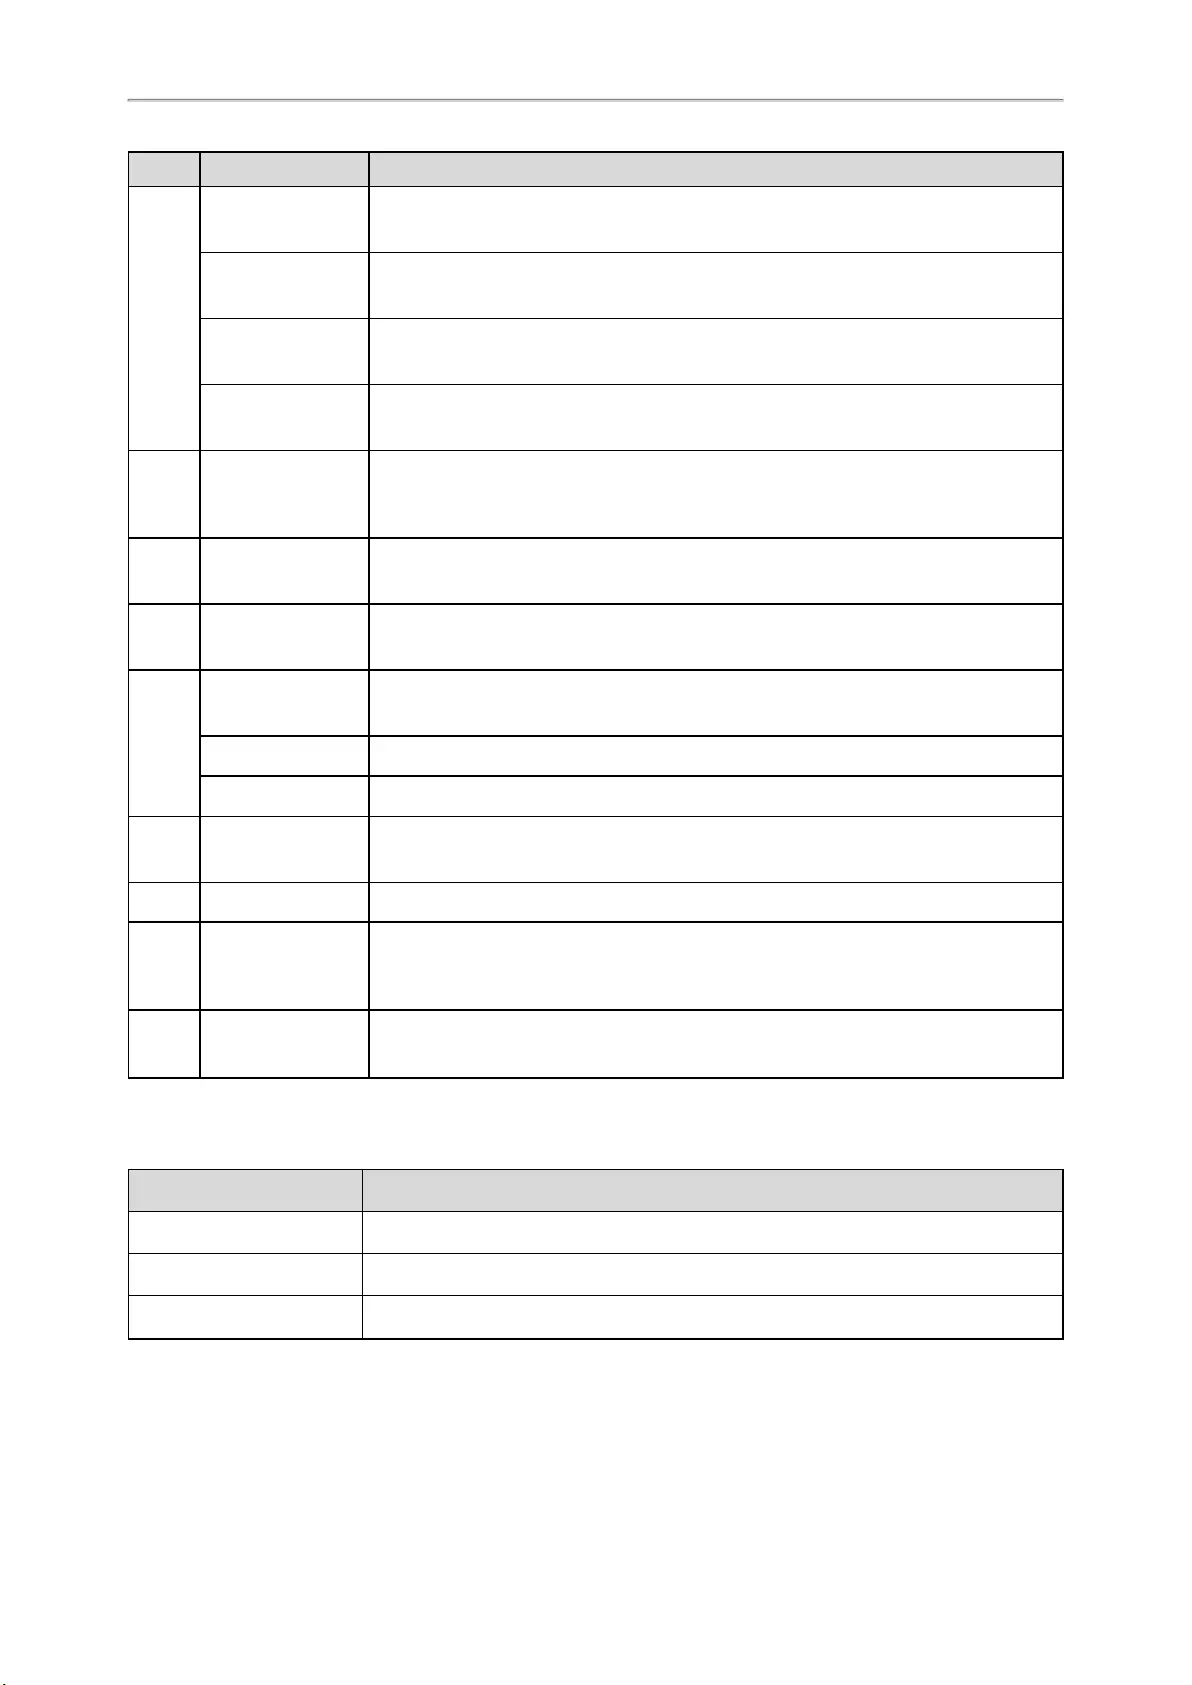
NO. Item Description
5
MESSAGE Key Accesses your voice messages.
HOLD Key Places a call on hold or resumes a held call.
Only the T46S/T46G phones have a HOLD key.
REDIAL Key Redials a previously dialed number.
TRANSFER Key Transfers a call.
Only the T46S/T46G phones have a TRANSFER key.
6Speakerphone Key
Toggles the speakerphone (hands-free) mode on or off. The LED indicator glows
green when the speakerphone is activated.
The T40P/T40G phone does not have key light.
7Volume Key Adjust the volume of the handset, headset, speaker.
8Keypad Keys Allow you to enter numbers, letters, and special characters. If a menu item has an
index number, you can use the keypad keys to select the item.
9
Navigation Keys • Scroll through information or options displayed on the screen.
• Access History and Directory respectively.
OK Key Confirms actions or answers incoming calls.
Cancel Key Cancels actions or rejects incoming calls.
10 Soft Keys Access the function displayed on the screen above the soft keys. The soft keys
change depending on what you are doing at the time.
11 Speaker Provides ringer and speakerphone audio output.
12 Reversible Tab
Secures the handset in the handset cradle when the phone is mounted vertically. For
more information on how to adjust the reversible tab, refer to
Yealink Wall Mount
Quick Installation Guide for Yealink IP Phones
.
13 Hookswitch Connects or disconnects the phone from the phone line. The hookswitch is auto-
matically activated when a user lifts the handset from the cradle to get a dial tone.
Power LED Indicator
The power LED indicator indicates the call, message and phone’s system status.
LED Status Description
Solid red The phone is initializing.
Fast-flashing red (0.3s) The phone is ringing.
Slowly-flashing red (1s) The phone receives a voice mail or text message.

Getting Started
16
LED Status Description
Solid red for 0.5s and off for
3s alternately
The phone enters the power-saving mode.
It is only available on the T48S/T48G/T46S/T46G phones.
Note: The above introduces the default LED status. Your system administrator can configure the status of the power LED
indicator.
Line Key LED
The line key LED indicators are associated with the status of phone lines and features. It is not available on
T48S/T48G phones.
Line key LED (associated with the phone line)
LED Status Description
Solid green The line is seized.
The line is in conversation.
Fast-flashing green The line receives an incoming call.
Slowly-flashing green The call is placed on hold.
Off The line is inactive.
Line key LED (configured as a page switch key)
LED Status Description
Solid red There is a call parked on the line, and the line key is not on the current
page.
Fast-flashing green The line receives an incoming call, and the line key is not on the current
page.
Fast-flashing red The monitored user whose line key is not on the current page receives an
incoming call.
Off The line keys are idle.
Screen and Icons
The user screens and icon indicators can help you navigate and understand the important information on the
phone’s status.
Topics
Idle Screen
Calls Screen
Icons in the Status Bar
Line Key Icons
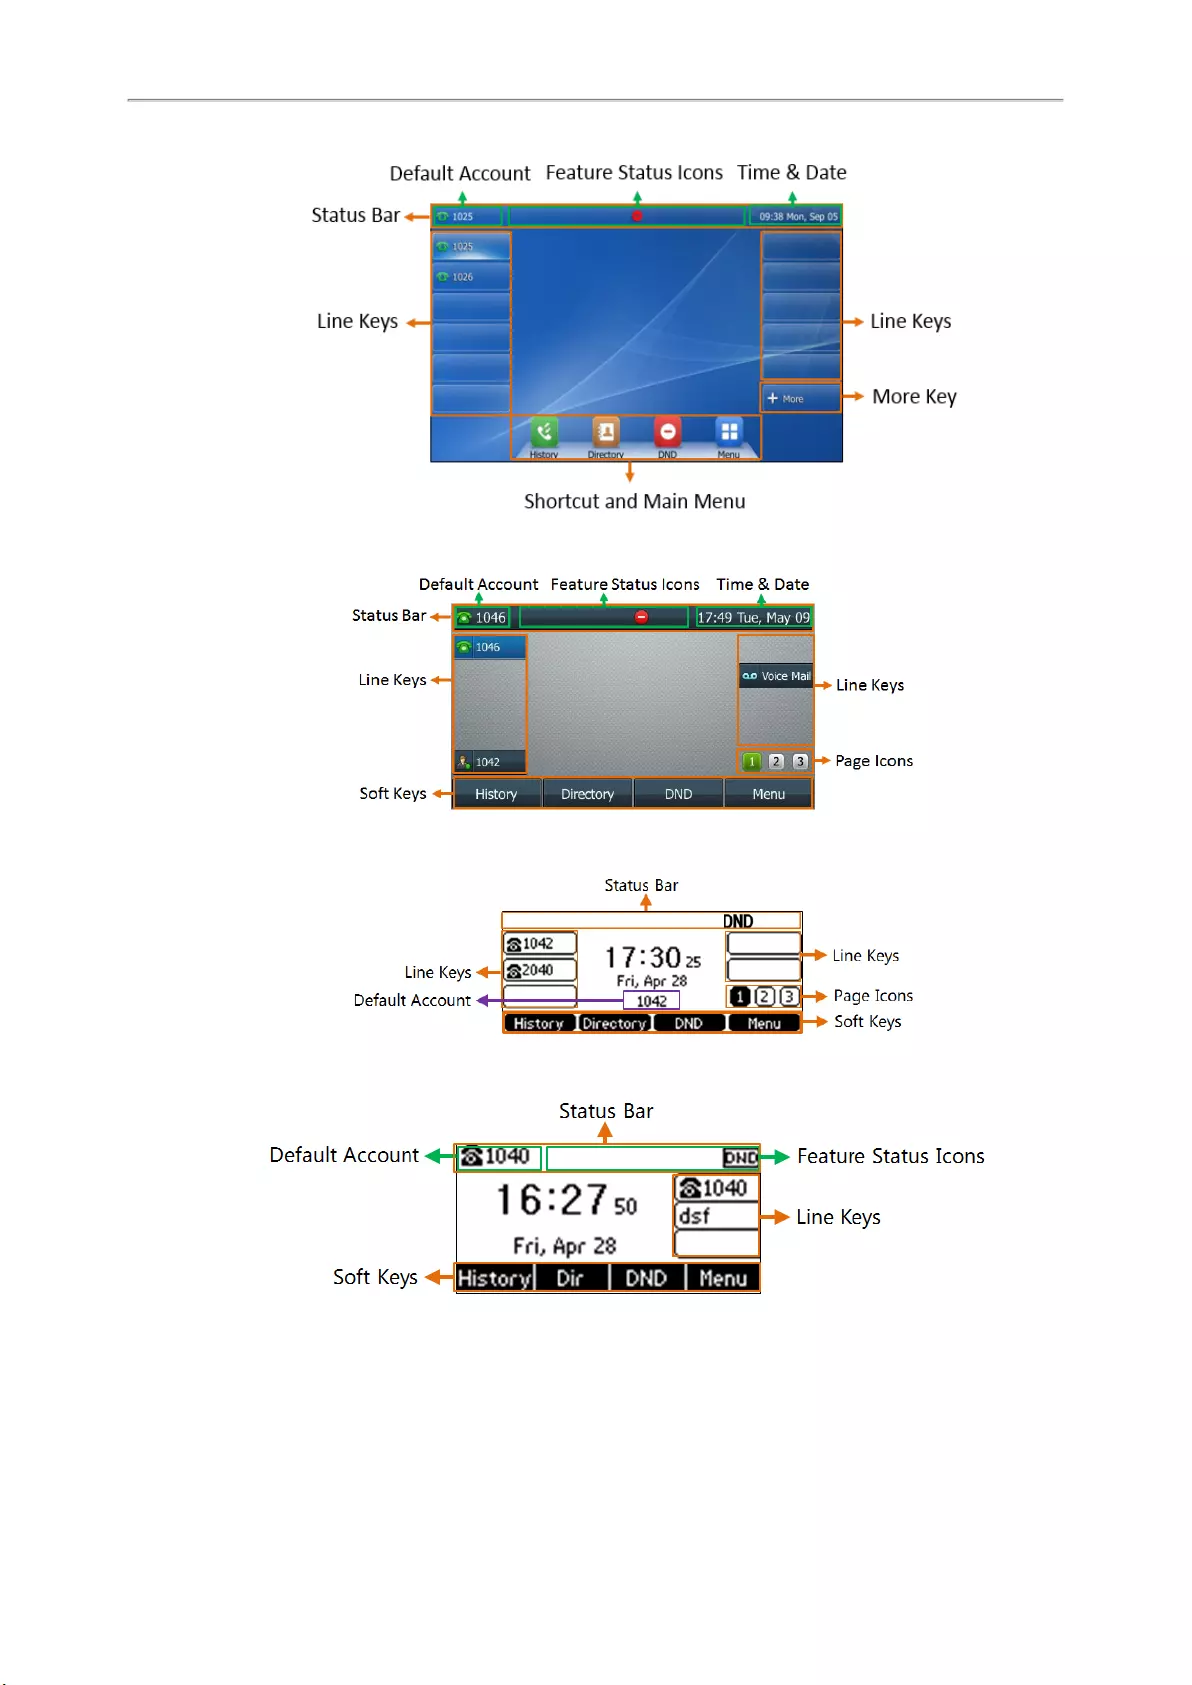
Idle Screen
The idle screen is made up of the status bar, line keys, and soft keys. The time & date in the status bar or middle of
the screen varies by phone models.
Yealink T4 Series IP Phones User Guide
17
T48S/T48G
T46S/T46G
T42S/T42G/T41S/T41P
T40P/T40G
lStatus Bar: Display the default account, feature status icons, and the time. The status icons are displayed when
features are activated.
lLine Keys: Display the information associated with the line keys and feature keys on the phone.
Getting Started
18
lPage Icons: The page icons appear only when you assign functionality to line key located in line key 11-27 on
the T46S/T46G phones, line key 7-15 on the T42S/T42G/T41S/T41P phones.
lSoft Keys: Each soft key label indicates the action for the soft key below the screen.
lMore Key: Tap to display more line keys on the T48S/T48G phones.
lShortcut and Main Menu: Tap to access the shortcut or enter the main menu on the T48S/T48G phones.
Related Topics
Icons in the Status Bar
Changing the Default Account
Customizing the Soft Keys
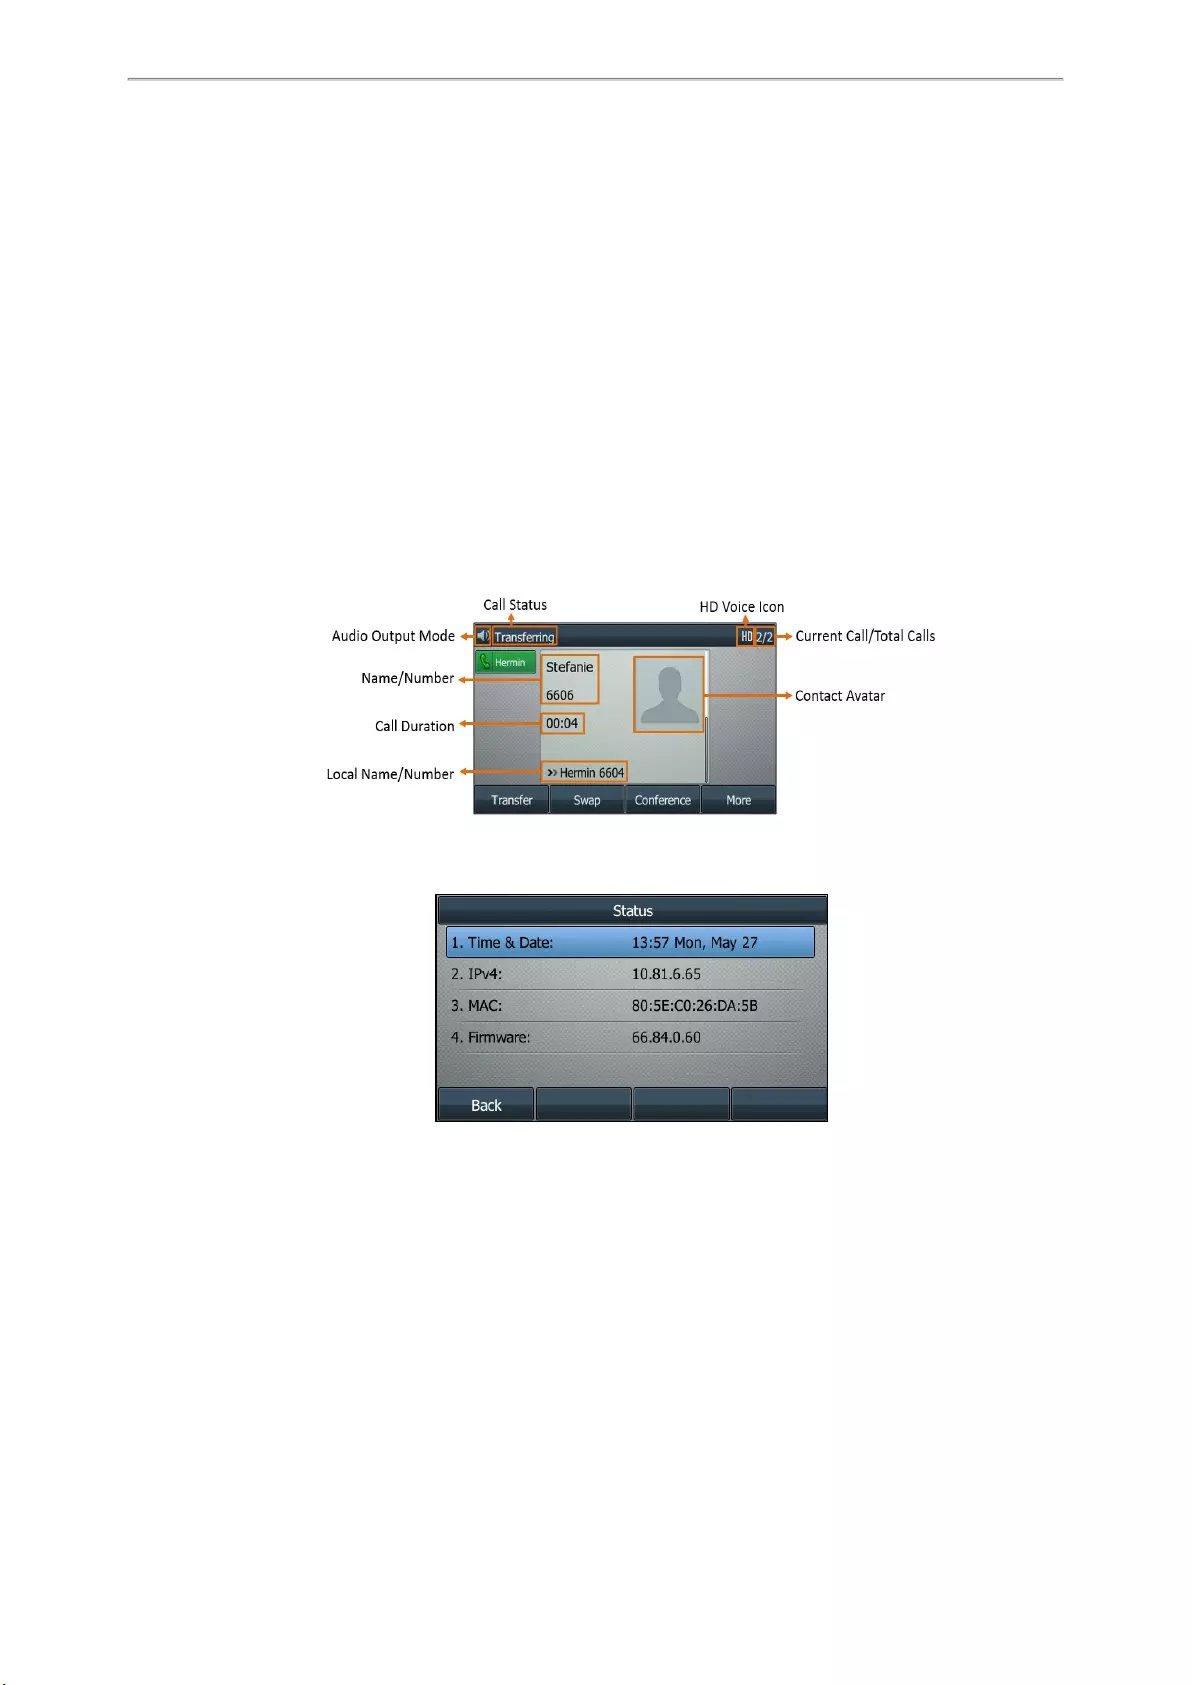
Calls Screen
All of your active and held calls are displayed on the calls screen. You can press up or down navigation key to
switch among calls.
For T48S/T46S/T42S/T41S/T40P/T40G, the calls screen can display the local name or number. Check with your sys-
tem administrator to find out if this feature is available on the phone. When there is an active call and a held call, the
calls screen is shown below:
During a call, you can press the OK key to view the current time & date and phone status. The phone screen is
shown below:
Icons in the Status Bar
The icons in the status bar help you easily get the current phone status, such as call and message status. Icons in
the status bar vary by phone models.
Topics
T48S/T48G Icons in the Status Bar
T46S/T46G Icons in the Status Bar
T41S/T41P/T42S/T42G Icons in the Status Bar
T40P/T40G Icons in the Status Bar
Yealink T4 Series IP Phones User Guide
19
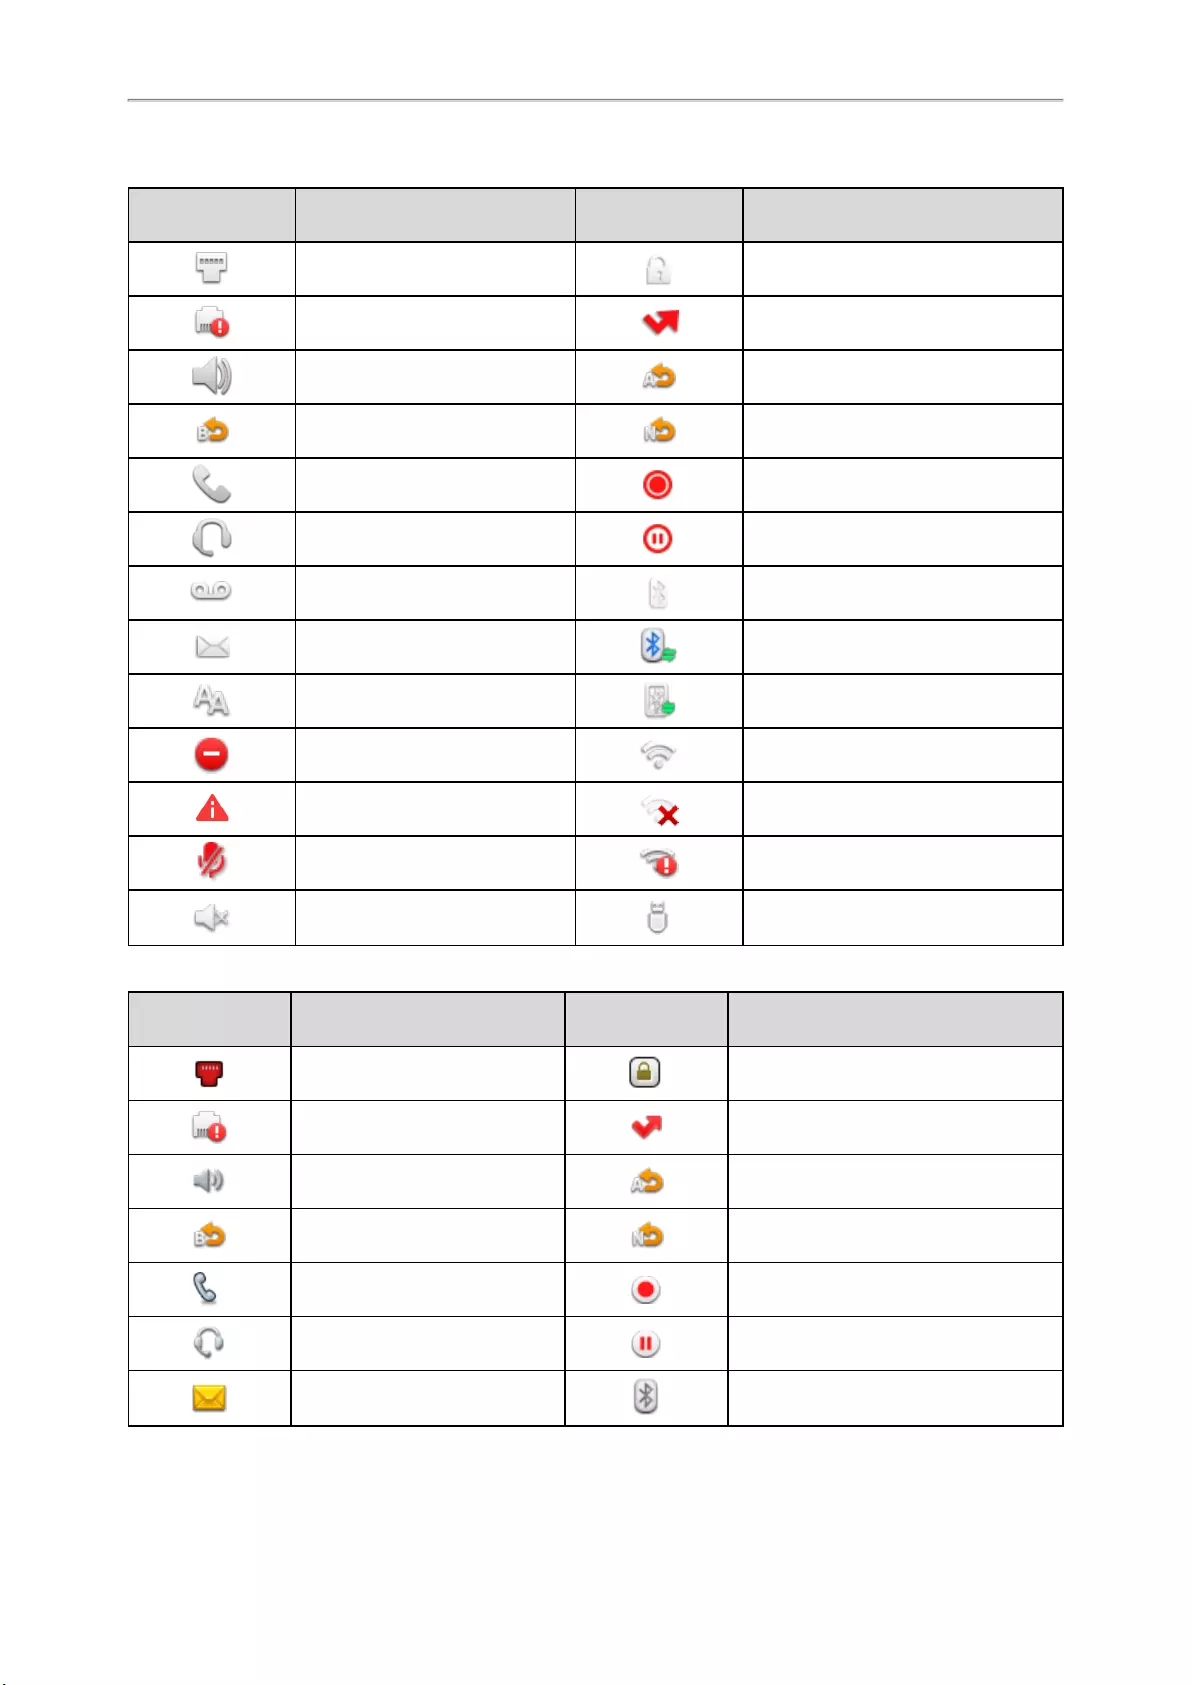
T48S/T48G Icons in the Status Bar
Icons Description Icons Description
Wired network is unavailable Phone Lock
Wired network is unreachable
(T48S only) Missed Calls
Speakerphone (hands-free)
mode Always Forward
Busy Forward No Answer Forward
Handset mode Recording starts successfully (Using a
USB flash drive)
Headset mode Recording is paused (Using a USB
flash drive)
Voice Mail Bluetooth mode is on
Text Message Bluetooth headset is both paired and
connected
Auto Answer Bluetooth-enabled mobile phone is
both paired and connected
Do Not Disturb (DND) Wi-Fi connection is successful
Phone Warning (T48S only) Wi-Fi connection fails
Keep Mute Wi-Fi connection is unreachable
(T48S only)
Ringer volume is 0 USB flash drive detected
T46S/T46G Icons in the Status Bar
Icons Description Icons Description
Wired network is unavailable Phone Lock
Wired network is unreachable
(T46S only) Missed Calls
Speakerphone (hands-free)
mode Always Forward
Busy Forward No Answer Forward
Handset mode Recording starts successfully (Using a
USB flash drive)
Headset mode Recording is paused (Using a USB flash
drive)
Voice Mail Bluetooth mode is on

Getting Started
20
Icons Description Icons Description
Text Message Bluetooth headset is both paired and
connected
Auto Answer Bluetooth-enabled mobile phone is both
paired and connected
Do Not Disturb (DND) Wi-Fi connection is successful
Phone Warning (T46S only) Wi-Fi connection is unreachable (T46S
only)
Keep Mute Wi-Fi connection fails
Ringer volume is 0
T41S/T41P/T42S/T42G Icons in the Status Bar
Icons Description Icons Description
Wired network is unavailable Ringer volume is 0
Speakerphone (hands-free)
mode Phone Lock
Handset mode Missed Calls
Headset mode Call Forward
Voice Mail (T42S/T41S only)
Recording starts successfully (Using a
USB flash drive)
Auto Answer (T42S/T41S only)
Recording is paused (Using a USB flash
drive)
Do Not Disturb (DND) (T42S/T41S only) Network is unreachable
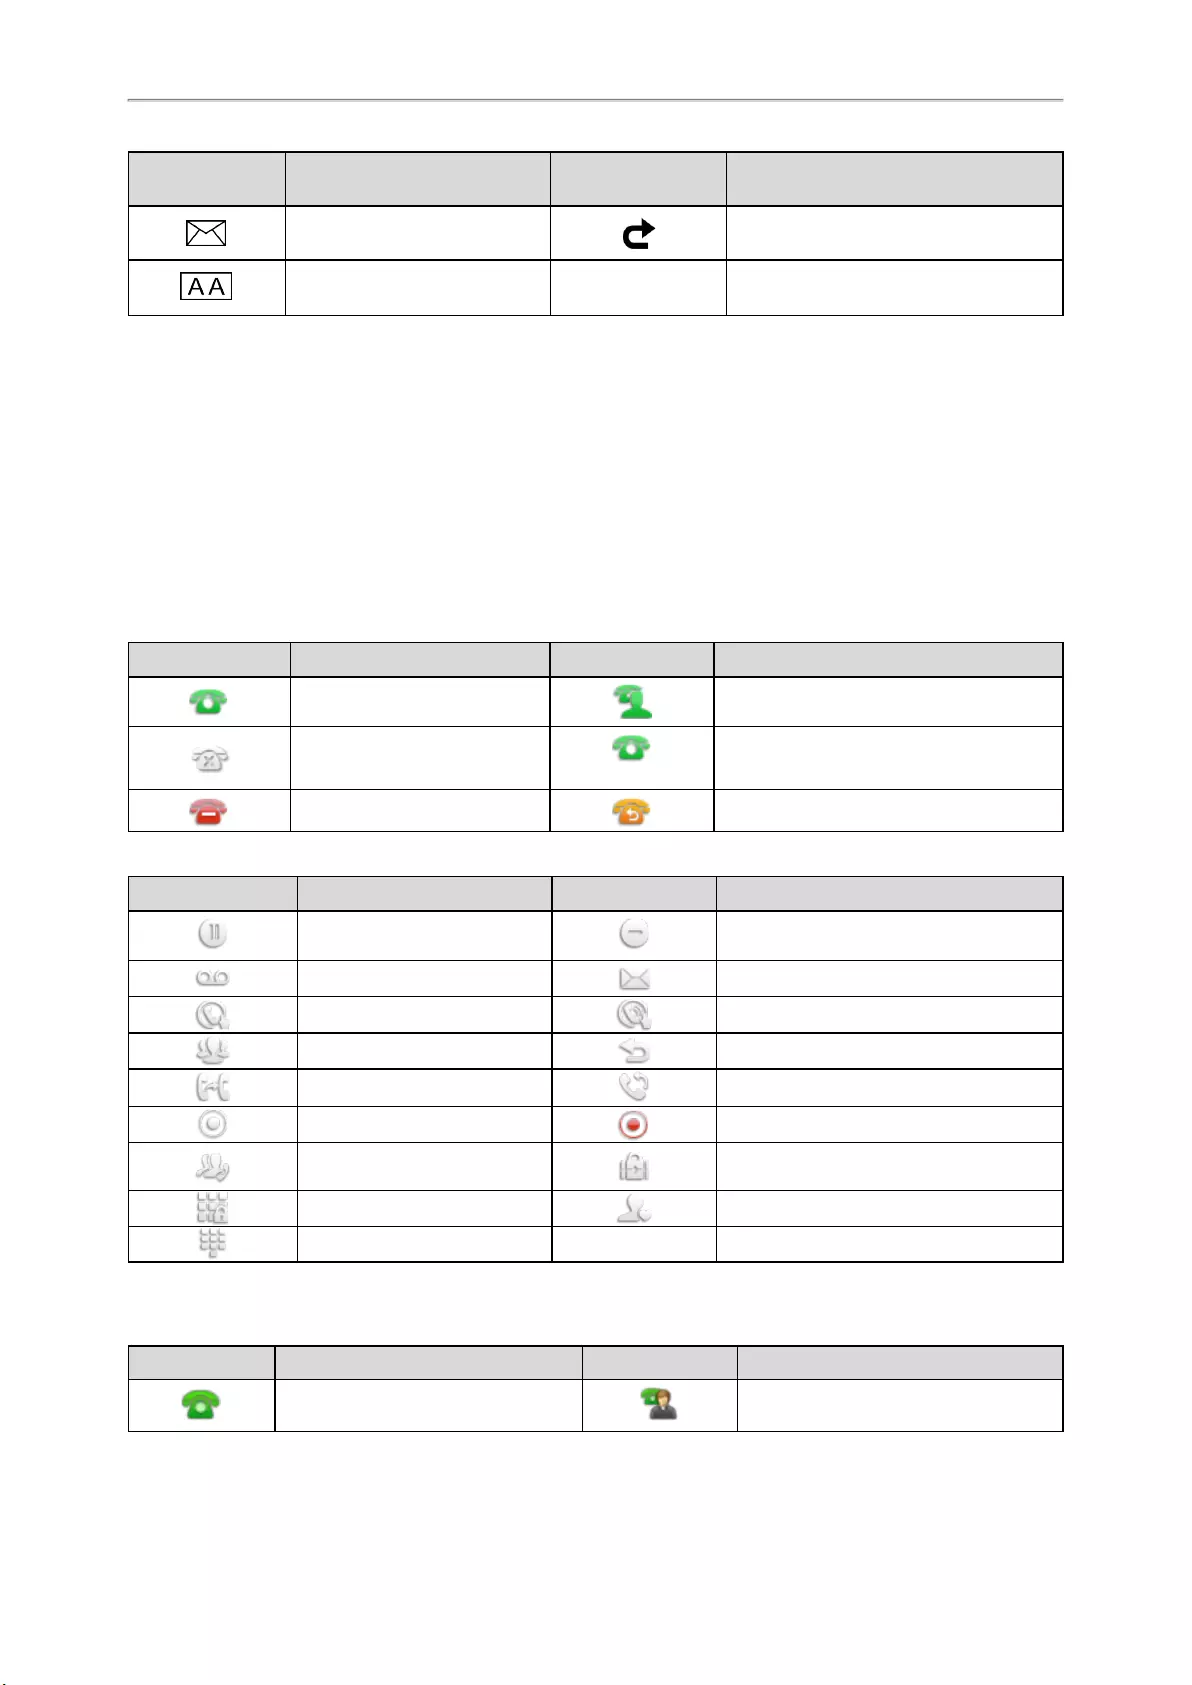
T40P/T40G Icons in the Status Bar
Icons Description Icons Description
Wired network is unavailable Do Not Disturb (DND)
Wired network is unreachable Phone Warning
Speakerphone (hands-free)
mode Keep Mute
Handset mode Ringer volume is 0
Headset mode Phone Lock
Voice Mail Missed Calls
Yealink T4 Series IP Phones User Guide
21
Icons Description Icons Description
Text Message Call Forward
Auto Answer
Line Key Icons
By viewing the line key icons, you can easily get the function of the line key. Icons in the line keys vary by phone
models.
Topics
T48S/T48G Line Key Icons
T46S/T46G Line Key Icons
T42S/T42G/T41S/T41P Line Key Icons
T40P/T40G Line Key Icons
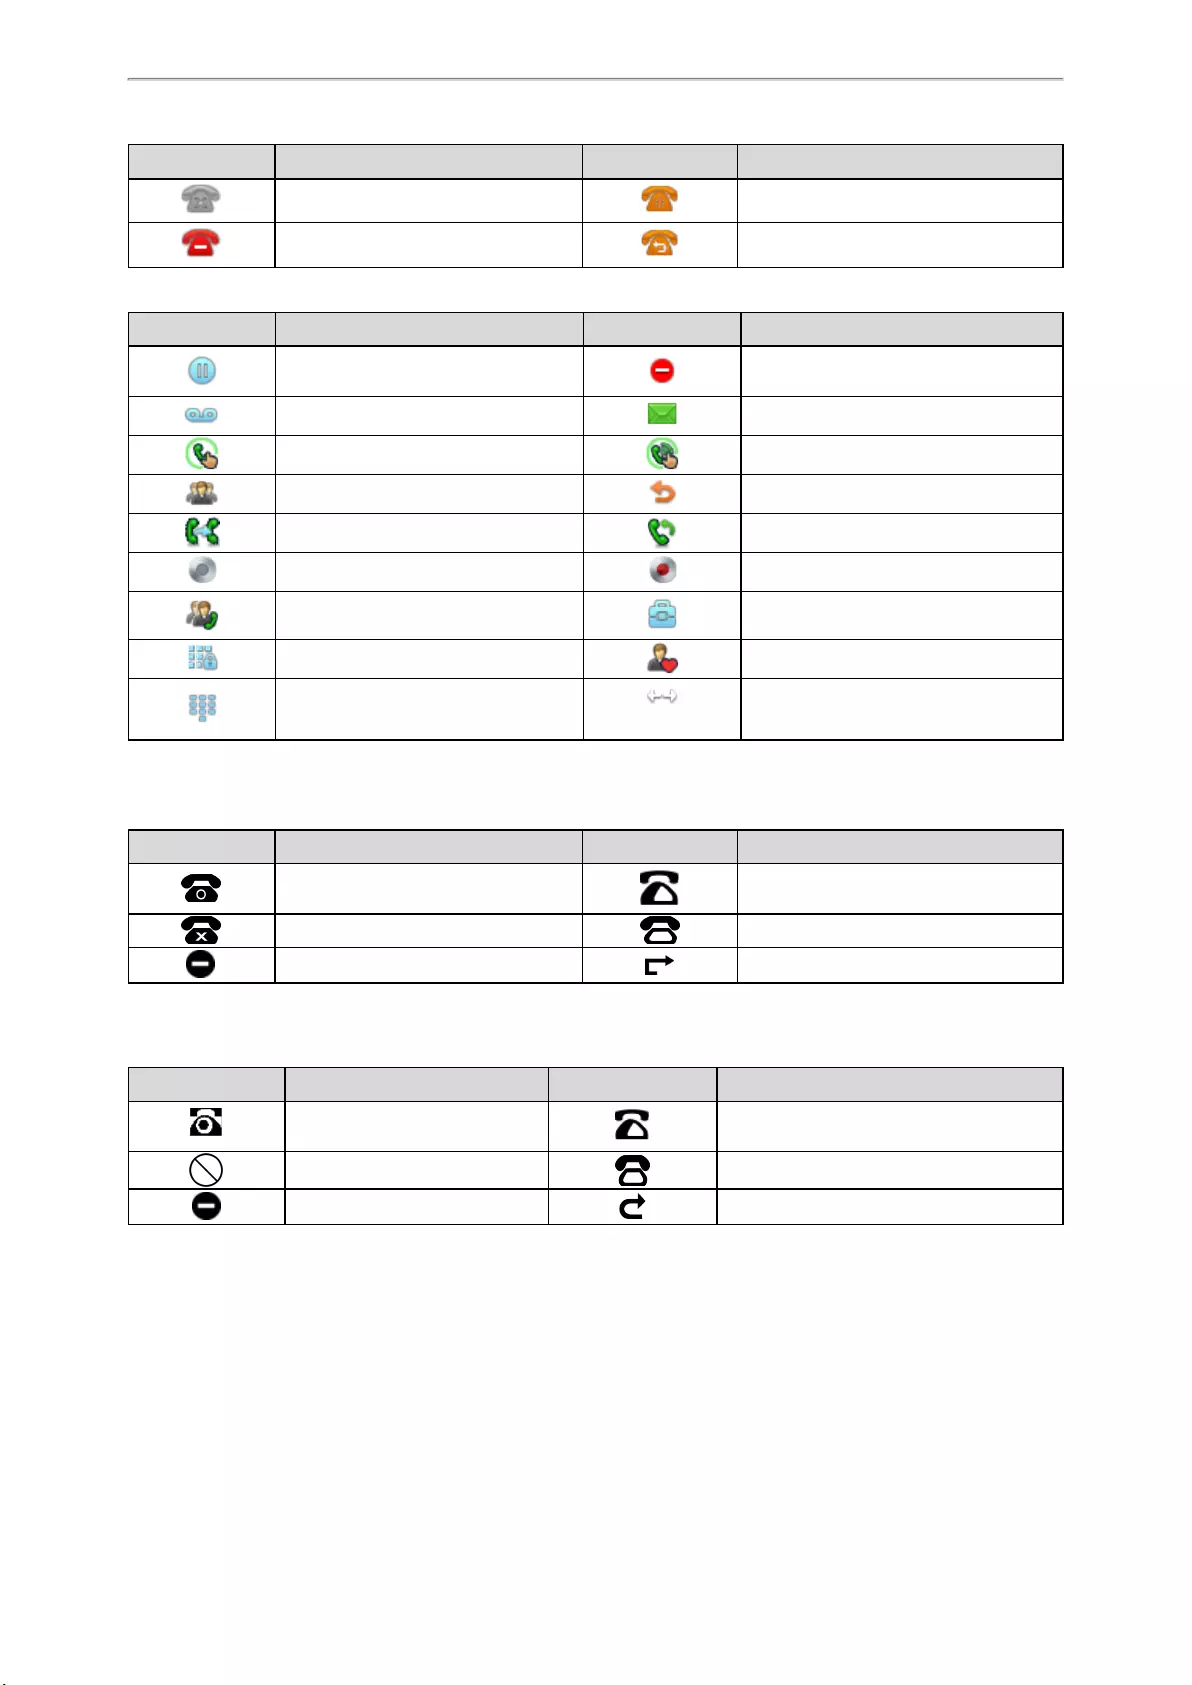
T48S/T48G Line Key Icons
Icon indicators (associated with line)
Icons Description Icons Description
The private line is registered
successfully.
The shared/bridged line is registered suc-
cessfully.
Register failed.
(Flashing)
Registering.
DND is enabled on this line. Call forward is enabled on this line.
Icon indicators (associated with line key features)
Icons Description Icons Description
Hold DND
Voice Mail SMS
Direct Pickup Group Pickup
Conference Forward
Transfer ReCall
Record Recording in process
Multicast Paging
Paging List Hot Desking
Phone Lock Directory
Speed Dial
T46S/T46G Line Key Icons
Icon indicators (associated with line)
Icons Description Icons Description
The private line is registered suc-
cessfully.
The shared/bridged line is registered
successfully.
Getting Started
22
Icons Description Icons Description
Register failed. Registering.
DND is enabled on this line. Call forward is enabled on this line.
Icon indicators (associated with line key features)
Icons Description Icons Description
Hold DND
Voice Mail SMS
Direct Pickup Group Pickup
Conference Forward
Transfer ReCall
Record Recording starts successfully
Multicast Paging
Paging List Hot Desking
Phone Lock Directory
Speed Dial (T46S) Extend
T42S/T42G/T41S/T41P Line Key Icons
Icon indicators (associated with line)
Icons Description Icons Description
The private line is registered suc-
cessfully.
The shared/bridged line is registered
successfully.
Register failed. Registering.
DND is enabled on this line. Call forward is enabled on this line.
T40P/T40G Line Key Icons
Icon indicators (associated with line)
Icons Description Icons Description
The private line is registered
successfully.
The shared/bridged line is registered suc-
cessfully.
Register failed. Registering.
DND is enabled on this line. Call forward is enabled on this line.
Entering Characters on T48S/T48G
The T48S/T48G phones provide an onscreen keyboard, phone keypad and dial pad to enter data. Keypad and dial
pad provide the standard key layout, which enables users to use existing or familiar key positions.
Topics
Using the Onscreen Keyboard
Using the Phone Keypad and Dial Pad
Yealink T4 Series IP Phones User Guide
23
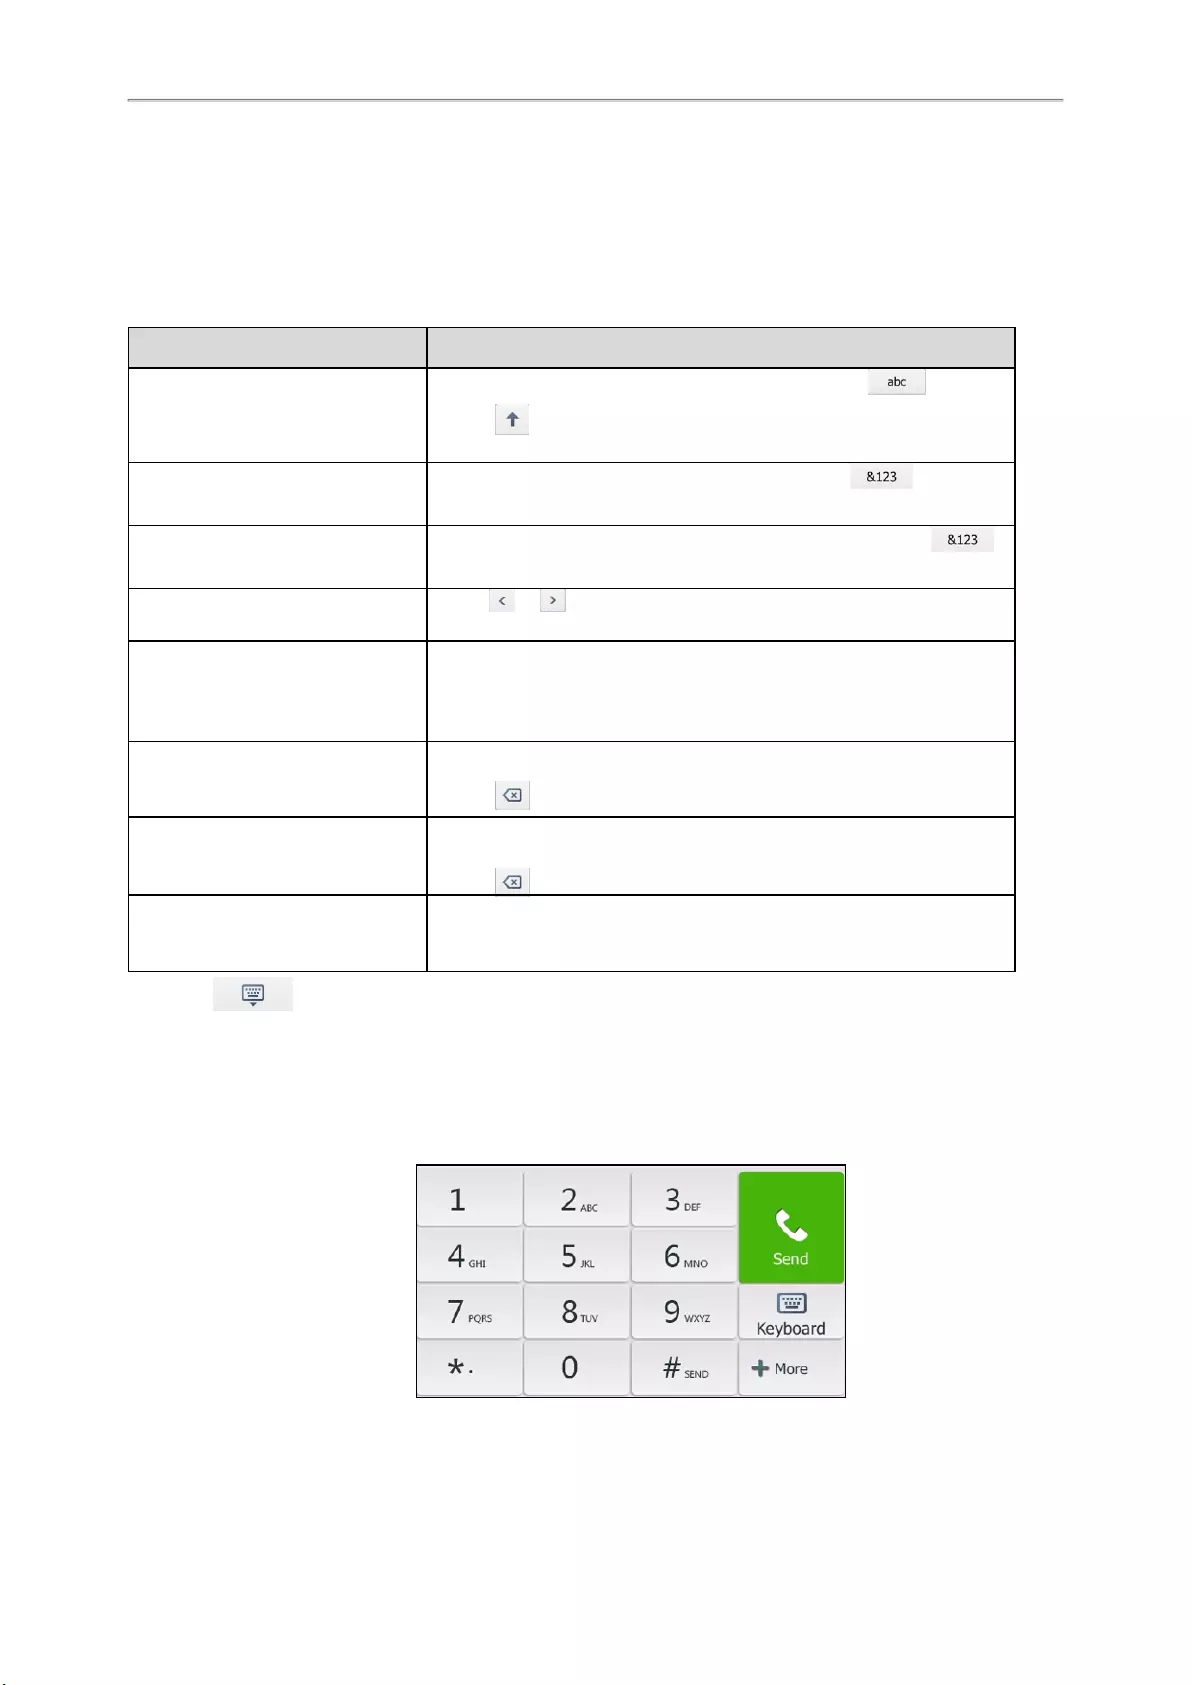
Using the Onscreen Keyboard
The onscreen keyboard on T48S/T48G enables you to enter information into text fields using the touch screen.
Procedure
1. Tap the field you want to edit, the onscreen keyboard displays on the touch screen.
2. Enter the information. Do the following:
Task Action
Enter uppercase (A) characters,
lowercase (a) characters, or a com-
bination of uppercase and lower-
case characters.
1. If a keyboard with characters does not display, tap .
2. Tap to toggle between uppercase or lowercase mode.
3. Tap the characters you want to enter.
Enter numbers.
1. If a keyboard with numbers does not display, tap .
2. Tap the numbers you want to enter.
Enter special characters.
1. If a keyboard with special characters does not display, tap .
2. Tap the special characters you want to enter.
Position the cursor. lTap or to position the cursor.
lTap to position.
Confirm the settings/Go to the next
field.
lIf there is only one field or the field you are editing is the last one of
the configuration, tapDone to confirm the setting.
lIf the field you are editing is not the last one of the configuration,
tapNext to go to the next field.
Delete characters one by one. 1. Position the cursor to the right side of the text you want to delete.
2. Tap .
Delete more characters at a time.
1. Drag your finger across the characters to highlight the characters
you want to delete.
2. Tap .
Replace characters.
1. Drag your finger across the characters to highlight the characters
you want to replace.
2. Tap the characters you want.
3. Select to hide the onscreen keyboard.
Using the Phone Keypad and Dial Pad
You can use the keypad on your phone or dial pad to enter data. The phone keypad only provides digit keys, # key,
and * key, and the dial pad provides digit keys and special characters.
The dial pad is shown below:

Getting Started
24
You can tap to switch to the onscreen keyboard.
Related Topic
Using the Onscreen Keyboard
Entering Characters on
T46S/T46G/T42S/T42G/T41S/T41P/T40P/T40G
On T46S/T46G/T42S/T42G/T41S/T41P/T40P/T40G phones, you can use the keypad keys on your phone to enter or
update field information.
The following table describes how to enter different characters using the keypad keys.
Task Action
Switch input modes Press the ABC,abc,Abc,2aB, or 123 soft key to switch the input modes.
Enter alphas
Select ABC,abc,2aB, or Abc mode. On the T42S/T42G/T41S/T41P/T40P/T40G phones,
press the keys labeled with letters until your desired letter appears. On the T46S/T46G
phones, press a keypad key repeatedly to view the character options and stop when the let-
ter you want to enter is displayed in the field. Wait one second, and then enter the next letter.
Enter numbers Select 123 mode, press the corresponding keys.
Enter special char-
acters
Select ABC,abc,2aB, or Abc mode, press *key or #key one or more times to enter one of
the following special characters:
* key: *.,‘?!\-()@/:_;+&%=<>£$¥¤[]{}~^¡¿§#«|
# key: #
In 123 mode, you can press the * key to choose the following special characters: .*:/@[].
Insert space Select ABC,abc,2aB, or Abc mode, press the 0key.
Move cursor Pressthe left or right navigation key to position the cursor.
Delete one or more
characters Position the cursor to the right of the character, and select the Delete soft key.

Call Features
25
Call Features
You can use the phone to place and answer calls, ignore incoming calls, transfer a call to someone else, conduct a
conference call and perform other basic call features.
Topics
Changing the Default Account
Placing Calls
Answering Calls
Switching Among the Handset, Speakerphone and Headset Modes
Disabling Call Waiting
Silencing or Rejecting Incoming Calls
Ending Calls
Redialing a Call Automatically
Muting/Unmuting Audio
Keep Mute
Holding and Resuming Calls
Redirecting Incoming Calls
Transferring Calls
Conference Calls
Recording Using a USB Flash Drive
Multicast Paging
Changing the Default Account
If there are multiple registered accounts on the phone, you can place a call with the default account by default.
Procedure
1. On the idle screen, press the left or right navigation key.
On the T48S/T48G phones, tap the label of the default account at the top left, and then tap the desired account
to be the new default account.
Placing Calls
You can use your phone like a regular phone to place calls in many ways easily.
Topics
Placing a Call from the Dialer
Placing Multiple Calls
Placing a Call with a Speed Dial Key
Placing a Call Back to the Last Incoming Number
Redialing a Number
Dialing a Hotline Number
Placing an International Call
Placing a Call from the Call History
Placing a Call from the Directory
Placing an Anonymous Call
Placing Calls to Google Contacts
Placing an Emergency Call from a Locked Phone
Placing a Call from the Dialer
The Dialer enables you to enter a number to place a call, and it displays a list of previously placed calls or contacts
in your directory.

Yealink T4 Series IP Phones User Guide
26
You can also select the desired contact from the search list, the placed call list or Directory. On the T48S/T48G
phones, you can select the desired contact from the left sidebar, or select a contact from the Directory or History.
Note: Your system administrator can configure the source list for searching and disable to display the placed call records.
Procedure
1. Do one of the following:
lStart typing a phone number.
lSelect the desired line key.
lPick up the handset, press the Speakerphone key or the HEADSET key.
2. Enter a number or highlight a contact.
3. Select Send.
Note: Your system administrator can enable live dialpad feature, which enables your phone to automatically dial out the
phone number after a period of time without selecting Send.
Related Topic
Switching Among the Handset, Speakerphone and Headset Modes
Placing Multiple Calls
When you are in a call, you can hold your current call and place a new call.
Procedure
1. Do one of the following:
lSelect a line key. The active call is placed on hold.
lPress the HOLD key or select Hold to place the original call on hold.
SelectNew Call (NewCall).
2. Enter the desired number or select a contact.
3. Select Send.
Placing a Call with a Speed Dial Key
You can quickly dial a number by using a Speed Dial key.
Before You Begin
If your system administrator has enabled the Favorites feature on the phone, you cannot manually set a Speed Dial
key.
Procedure
1. Go to Menu >Features >Dsskey.
2. Select the desired line key.
3. Select SpeedDial from the Type field.
4. Select the desired line from the Account ID field.
5. Do one of the following:
l(Optional.) Enter the string that will appear on the phone screen in the Label field.
Enter the contact number you want to dial out directly in the Value field.
You can also enter the contact number with the DTMF sequence that you want to send in the Value field. The
contact number and DTMF sequence are separated by commas. One comma stands for 500 milliseconds.
For example, 1234,,123# means the phone dials out the number 1234 first, then after the call is set up for 1
second, it sends the DTMF sequence 123# to the remote party.

Call Features
27
lOn the T46S/T46G phones, highlight the Label or Value field. Select Directory (Dir) and select the desired
contact from the Directory list.
On the T48S/T48G phones, select , and then select the desired contact.
6. Select Save.
Tip: By default, you can long press the desired line key to set it.
When the phone is idle, you can press the Speed Dial key to call a contact quickly. The phone calls a contact using
the configured line by default. If you want to call a contact using another line, you can first press the line key, and
then press the Speed Dial key.
Note: During a call, you can press the Speed Dial key to select a transfer mode. Check with your system administrator to find
out if this feature is available on the phone.
Placing a Call Back to the Last Incoming Number
You can redial the last incoming number quickly by using a Recall key.
Procedure
1. Go to Menu >Features >Dsskey.
2. Select the desired line key.
3. Select Key Event from the Type field.
4. Select Recall from the Key Type field.
5. (Optional.) Enter the string that will appear on the phone screen in the Label field.
6. Select Save.
Tip: By default, you can long press the desired line key to set it.
When the phone is idle, press the Recall key to quickly redial the last incoming number.
Redialing a Number
The phone keeps a record of all the placed calls. You can recall the contact you recently called.
Procedure
1. Press the REDIAL key .
A record of Placed Calls is displayed on the phone screen.
2. Highlight the desired record, select Send.
Tip: Press the REDIAL key twice to recall the contact you called.
Dialing a Hotline Number
When the phone is off-hook, it will dial out the hotline number automatically after the designated delay time.
Procedure
1. Go to Menu >Features >Others >Hot Line.
On the T48S/T48G/T42S/T42G/T41S/T41P/T40P/T40G phones, go to Menu >Features >Hot Line.
2. Do one of the following:
lEnter the desired number in the Hotline Number field.
lPress Directory (Dir) and select a desired contact from the Directory list.
On the T48S/T48G phones, select , and then select the desired contact.
3. Enter the desired delay time (0-10 seconds) in the Hotline Delay field.
4. Select Save.

Yealink T4 Series IP Phones User Guide
28
Placing an International Call
You can place calls to international phone numbers on your phone.
Procedure
1. Long press digit key 0 on the phone keypad until the plus sign (+) appears.
2. Enter the phone number with the country code.
3. Select Send.
Placing a Call from the Call History
You can place calls to contacts from the History list, which contains the calls that were recently placed, answered,
missed, or forwarded.
Procedure
1. Press History or go to Menu >History.
The phone screen displays all call records.
2. Select the desired call list.
3. Highlight a contact and select Send.
On the T48S/T48G phones, tap the desired contact.
Placing a Call from the Directory
You can place a call to a contact directly from your directory.
Procedure
1. Select Directory (Dir) or go to Menu >Directory >Local Directory.
On the T48S/T48G phones, select Directory or go to Menu >Directory.
2. Select the desired contact group or All Contacts.
3. Highlight the desired contact and select Send.
On the T48S/T48G phones, tap the desired contact.
If the selected contact has multiple numbers, highlight the desired number, and select Send.
Related Topic
Searching for Contacts
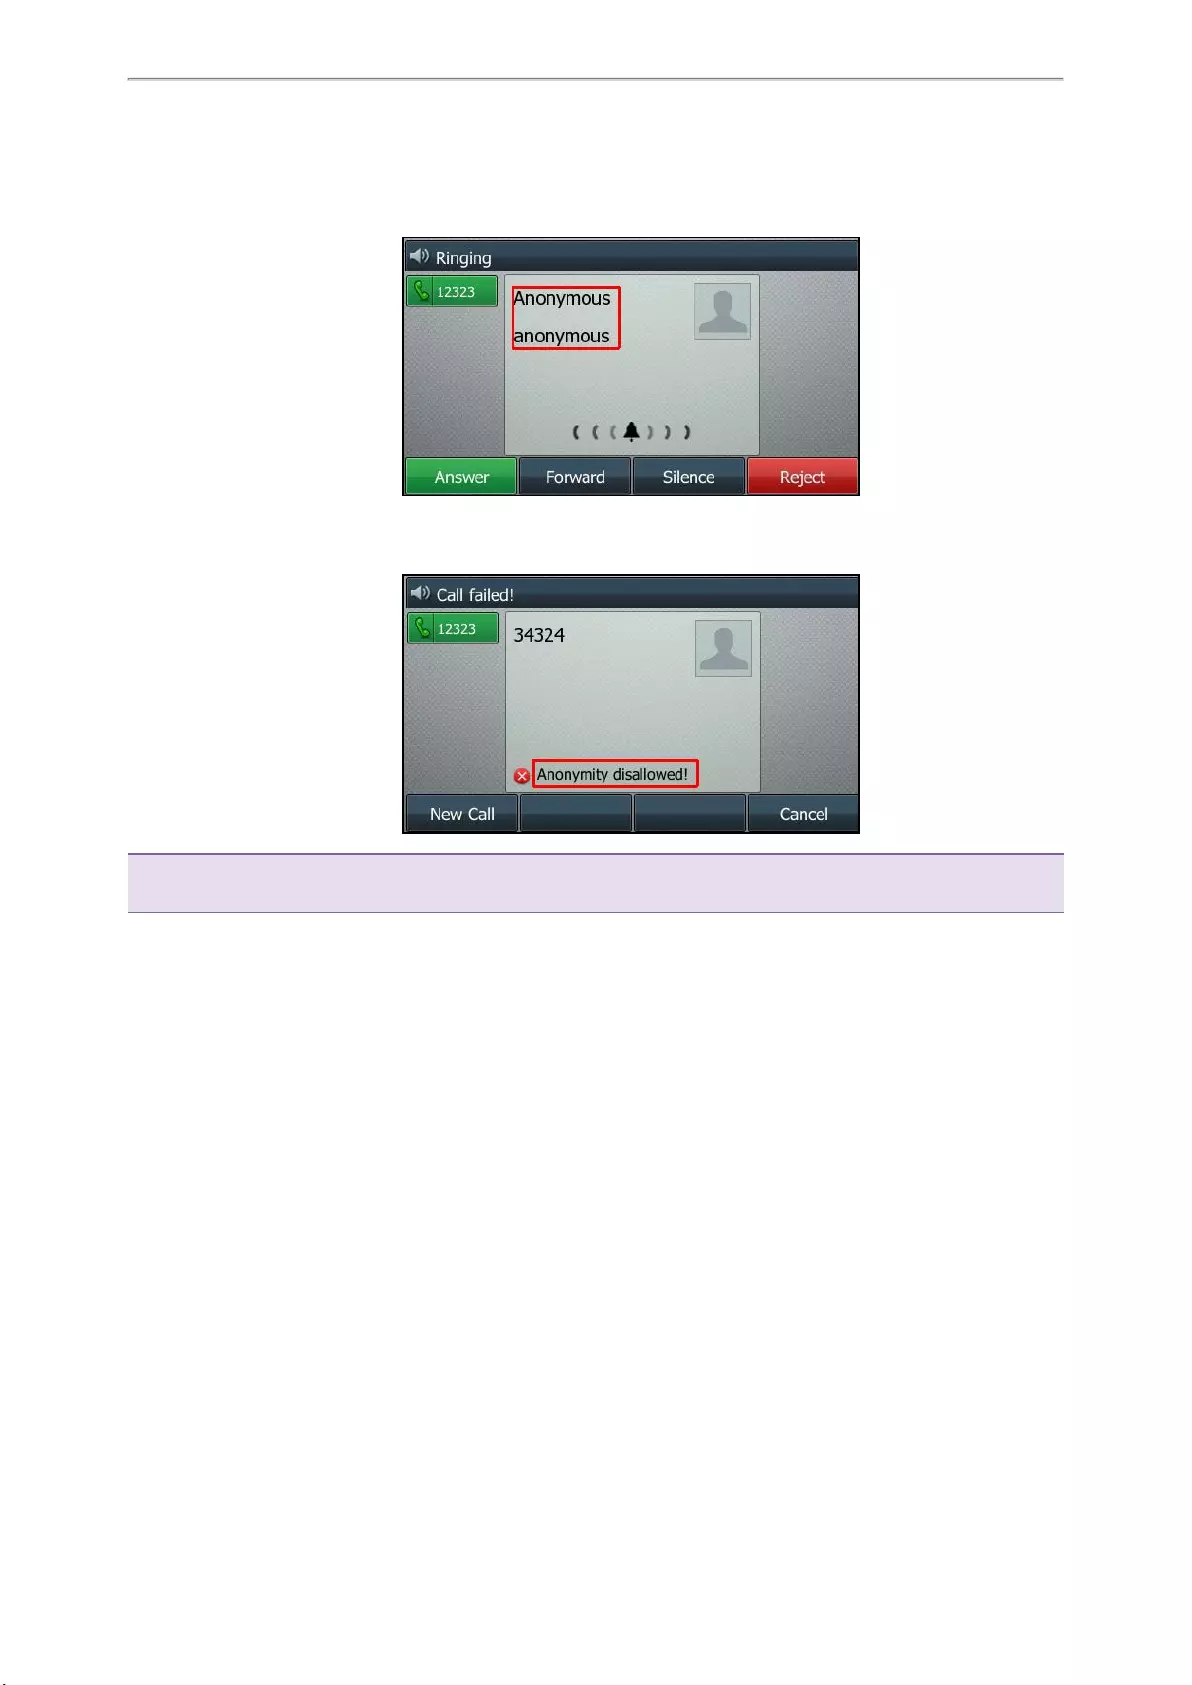
Placing an Anonymous Call
You can hide your name and number when you place a call. As a result, the callee receives an anonymous call
without caller identity.
Before You Begin
Contact your system administrator to find out if this feature is available on your phone, and to get the anonymous
call on code or off code if required.
Procedure
1. Go to Menu >Features >Anonymous (Anonymous Call).
2. Select the desired line.
3. Turn on Local Anonymous.
4. (Optional.) Select the desired value from the Send Anony Code (Send Anonymous Code) field.
5. (Optional.) Enter the anonymous call on code and off code respectively.
Call Features
29
6. Select Save.
7. Select the anonymous line to place a call.
The callee is prompted with an incoming call from anonymity.
If the callee enables anonymous rejection feature, you may be prompted that the callee does not accept calls
from an anonymous number.
Tip: You can select All On to turn on local anonymous for all lines.
Related Topic
Rejecting Anonymous Calls
Placing Calls to Google Contacts
You can call your Google Contacts from your phone.
Procedure
1. Go to Menu >Directory >Google Contact.
2. Highlight the desired contact and select Send.
On the T48S phones, tap the desired contact.
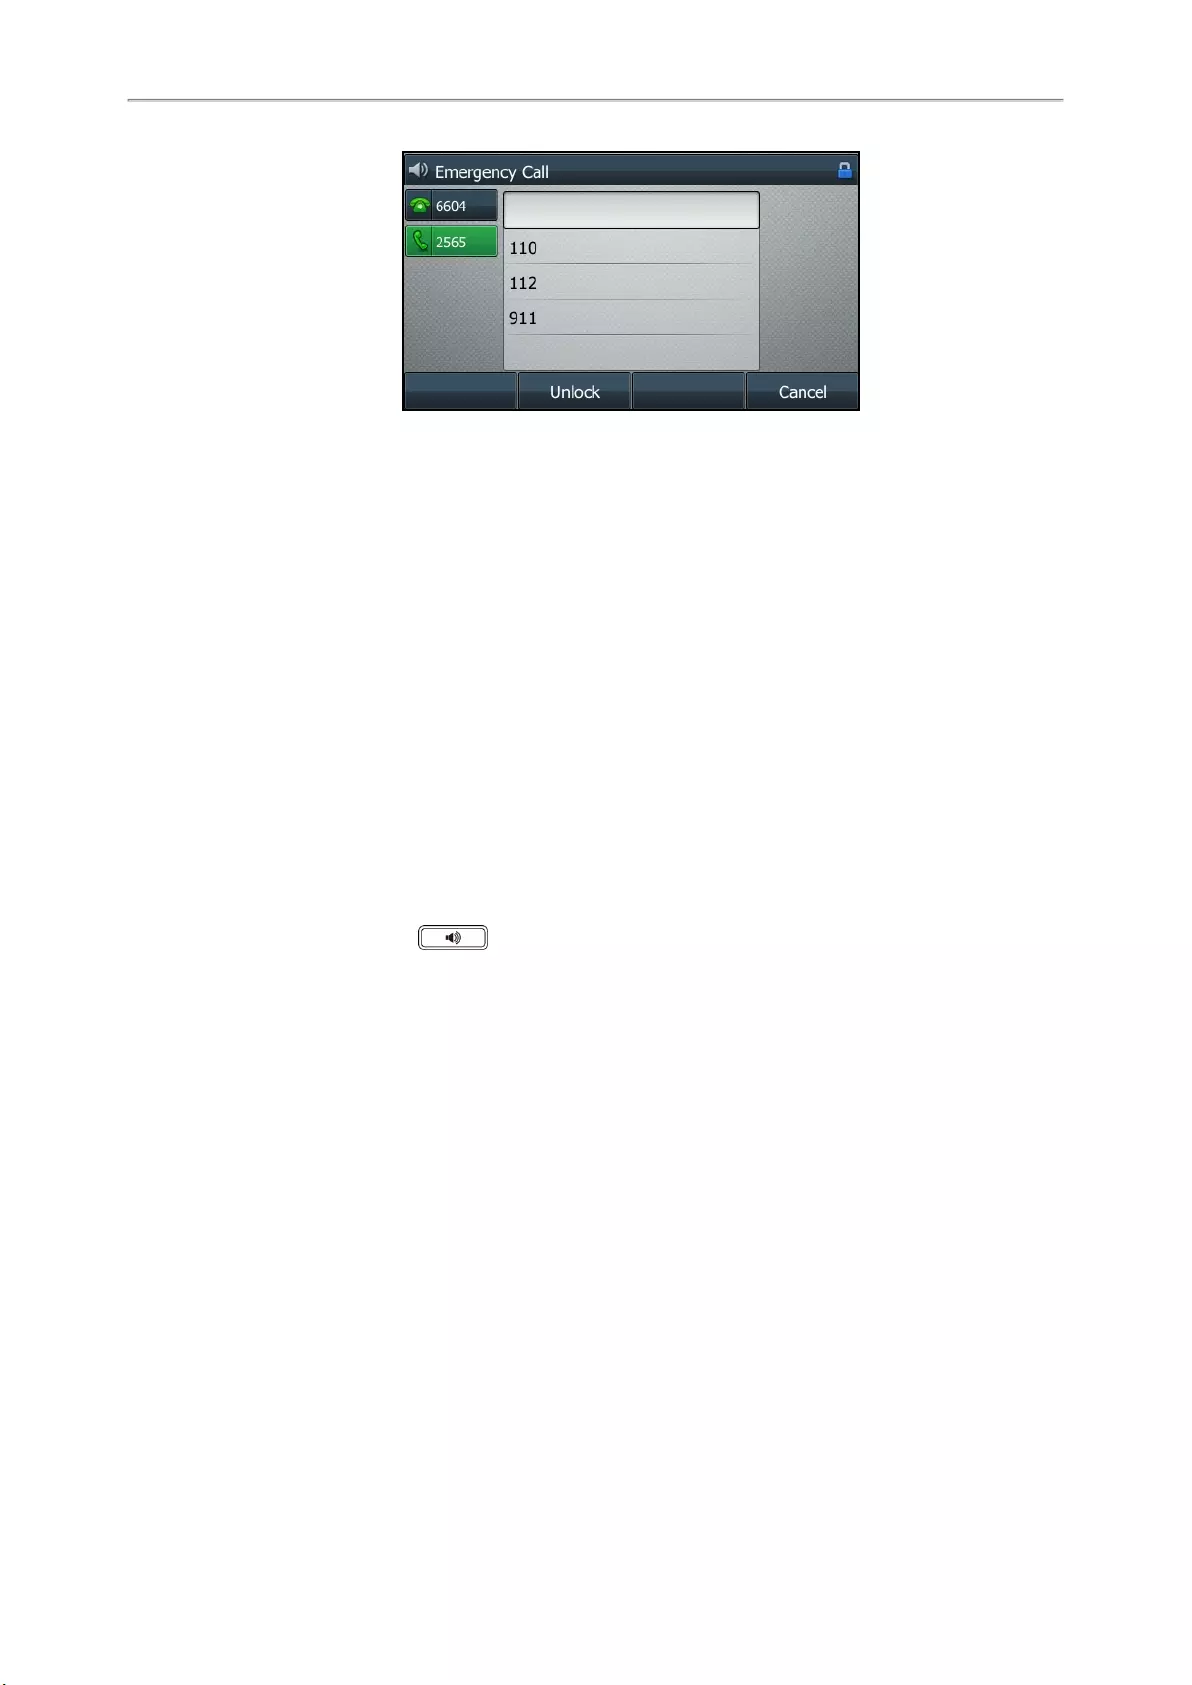
Placing an Emergency Call from a Locked Phone
Once all keys are locked on the phone, you can only dial emergency numbers or authorized numbers that are set
up by your administrator, such as 911.
Procedure
1. Do one of the following:
lSelect Emergency (not applicable to T48S/T48G phones).
The phone screen is shown below:
Yealink T4 Series IP Phones User Guide
30
Select an emergency number in the emergency number list.
lEnter an emergency number.
2. Select Send.
Answering Calls
When you receive a call, you can choose to answer it manually or automatically.
Topics
Answering a Call
Answering a Call When in a Call
Answering a Call Automatically
Answering a Call
When you receive an incoming call, the phone rings and the screen displays the information of the incoming call.
You can choose to answer the incoming call.
Procedure
1. Do one of the following:
lPick up the handset.
lPress the Speakerphone key .
lPress the HEADSET key .
lPress Answer or the line key that has the flashing green LED indicator.
The call is answered in the speakerphone (hands-free) mode by default.
Related Topic
Switching Among the Handset, Speakerphone and Headset Modes
Answering a Call When in a Call
You can answer a call when there is already an active call on your phone.
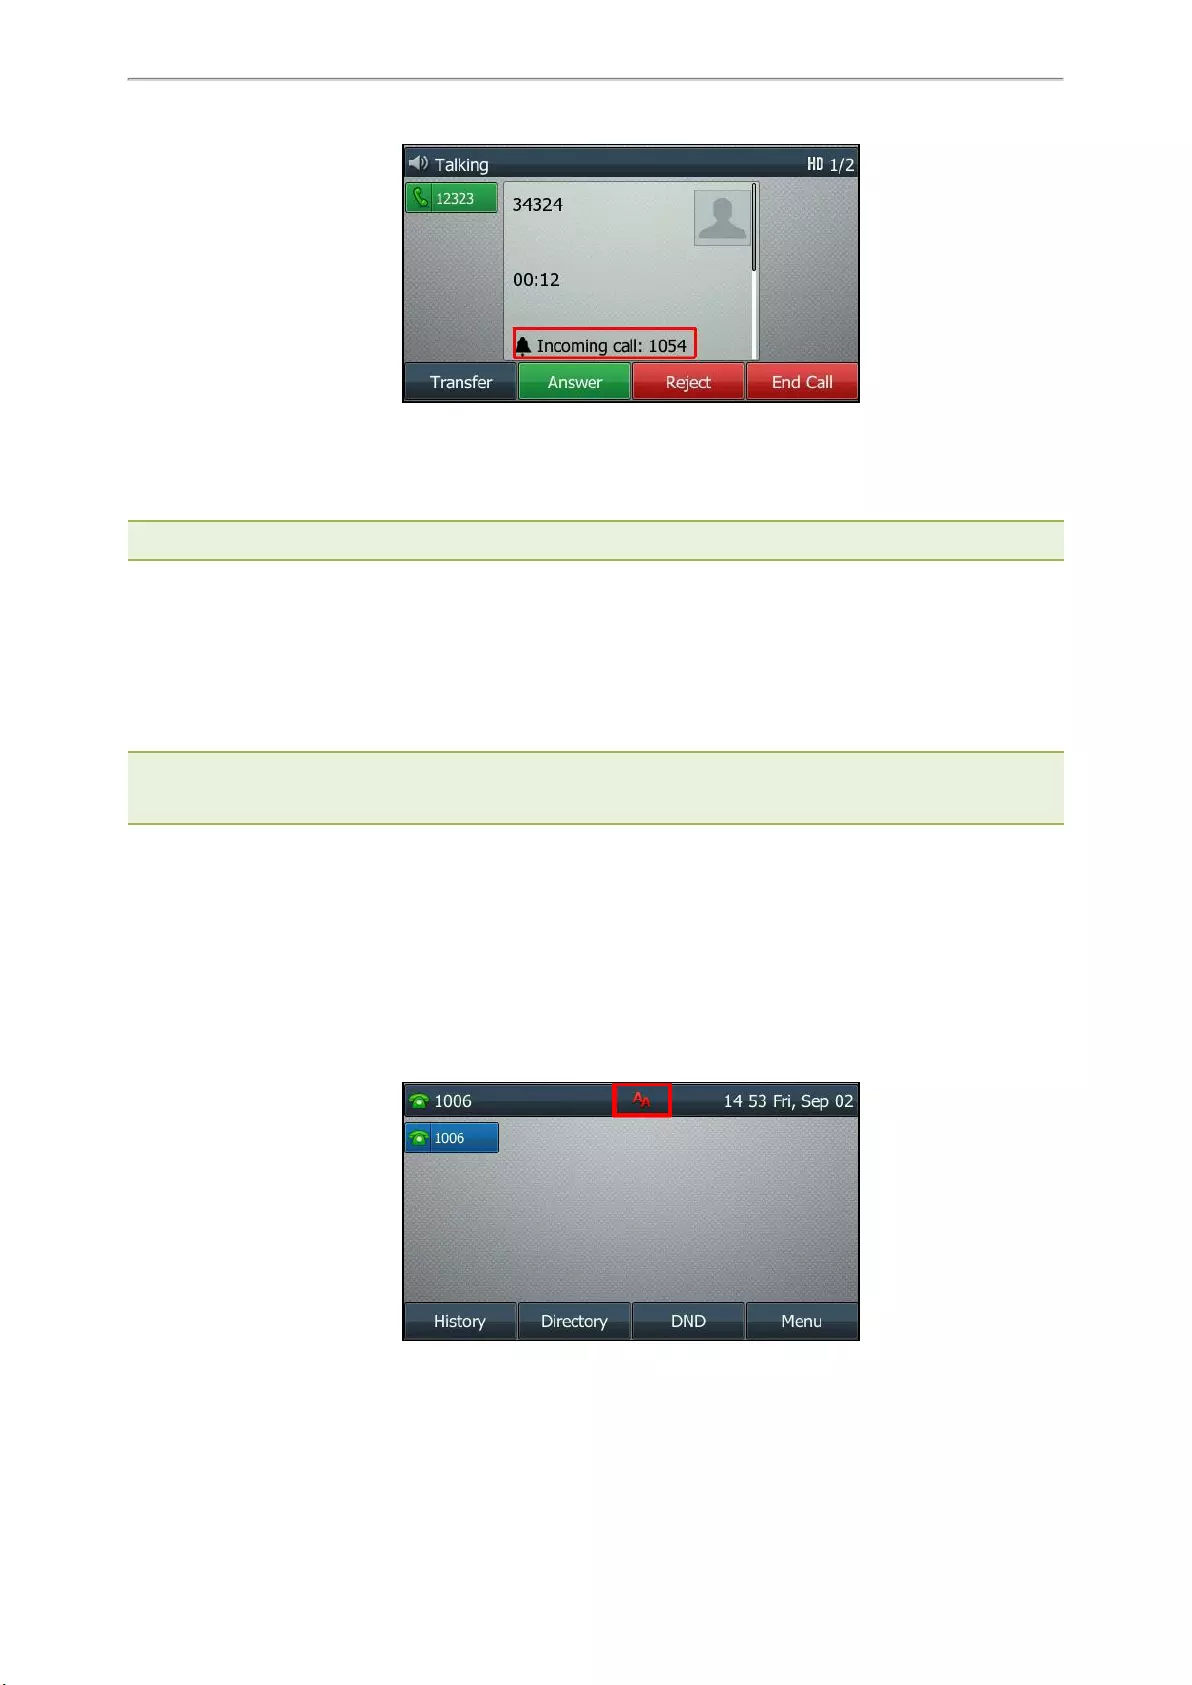
When you are in an active call and an incoming call arrives on the phone, a call waiting tone beeps, and the incom-
ing call information is displayed.
Call Features
31
Procedure
1. Select Answer.
The active call is placed on hold, and the incoming call becomes active.
Note: You can disable the call waiting feature to reject the incoming call automatically during a call.
Related Topic
Disabling Call Waiting
Answering a Call Automatically
Auto answer enables you to automatically answer an incoming call in speakerphone (hands-free) mode when your
phone is idle.
Note: When you are in an active call and an incoming call arrives on the phone, the incoming call will not be automatically
answered even if the auto answer is enabled.
Your system administrator can configure the phone to automatically answer the incoming call after ending all calls.
Procedure
1. Go to Menu >Features >Auto Answer.
2. Select the desired line.
3. Turn on Auto Answer.
4. Turn on Auto Answer Mute.
5. Select Save.
If the auto answer feature is enabled for the default account, the auto answer icon appears on the phone
screen.

Yealink T4 Series IP Phones User Guide
32
Switching Among the Handset, Speakerphone and Headset
Modes
You can select the desired mode before placing a call or can alternate among Speakerphone, headset, and hand—
set modes during a call.
Procedure
1. During the call, pick up the handset, press the Speakerphone key , or press the HEADSET key.
For example, if you’re using the handset, press the HEADSET key to switch to the headset, or press the Speak-
erphone key to switch to the speakerphone.
Note: Your system administrator can disable you to use the handset, speakerphone (Hands-free) or headset mode.
Disabling Call Waiting
If the call waiting feature is disabled, when there is already a call, the new incoming call will be rejected auto—
matically.
Before You Begin
Check with your system administrator if the call waiting off code is required. If required, get it from your system
administrator.
Procedure
1. Go to Menu >Features >Call Waiting.
2. Select Disabled or Off from the Call Waiting field.
3. (Optional.) Enter the call waiting off code in the Off Code field.
4. Select Save.
Silencing or Rejecting Incoming Calls
When you receive an incoming call, you can choose to silence or reject the call instead of answering.
Topics
Silencing a Call
Rejecting a Call Manually
Rejecting Anonymous Calls
Rejecting Calls with Do Not Disturb (DND)
Silencing a Call
You can silence a call to stop your phone from ringing. Even if you silence the call, the incoming call notification con—
tinues to be displayed on your phone.
Procedure
1. Select Silence.
Rejecting a Call Manually
You can reject a call manually, and the call may be sent to voice mail. The rejected calls are displayed in the
Received Calls list in your History list.
Procedure
1. Select Reject.

Call Features
33
Rejecting Anonymous Calls
You can reject incoming calls from the callers who have hidden their identities. As a result, your phone will not ring
and you will not be notified of an attempted call.
Before You Begin
Check with your system administrator if the anonymous call rejection on code or off code is required. If required, get
it from your system administrator.
Procedure
1. Go to Menu >Features >Anonymous (Anonymous Call).
2. Select the desired line .
3. Turn on Local Anonymous Rejection (Anonymous Rejection).
4. (Optional.) Select the desired value from the Send Rejection Code field.
5. (Optional.) Enter the anonymous call rejection on code and off code respectively in the On Code and Off Code
field.
6. Select Save.
Related Topic
Placing an Anonymous Call
Rejecting Calls with Do Not Disturb (DND)
You can enable DND to reject all incoming calls automatically when you do not want to be interrupted.
If you want to receive incoming calls from the specific numbers when DND is enabled, you can ask your system
administrator to set DND Authorized Numbers.
Note: Check with your system administrator to find out if the DND feature is available on your phone.
Topics
Rejecting Calls with DND on All Lines
Rejecting Calls with DND on a Specific Line
Deactivating DND
Rejecting Calls with DND on All Lines
If there are multiple lines on the phone, you can enable DND for all lines. After activating it, the phone will reject all
incoming calls automatically.
Note: If both DND and busy forward are activated on the phone, calls will be forwarded to the configured destination number.
Before You Begin
Check with your system administrator if the DND on code or off code is required. If required, get it from your system
administrator.
Procedure
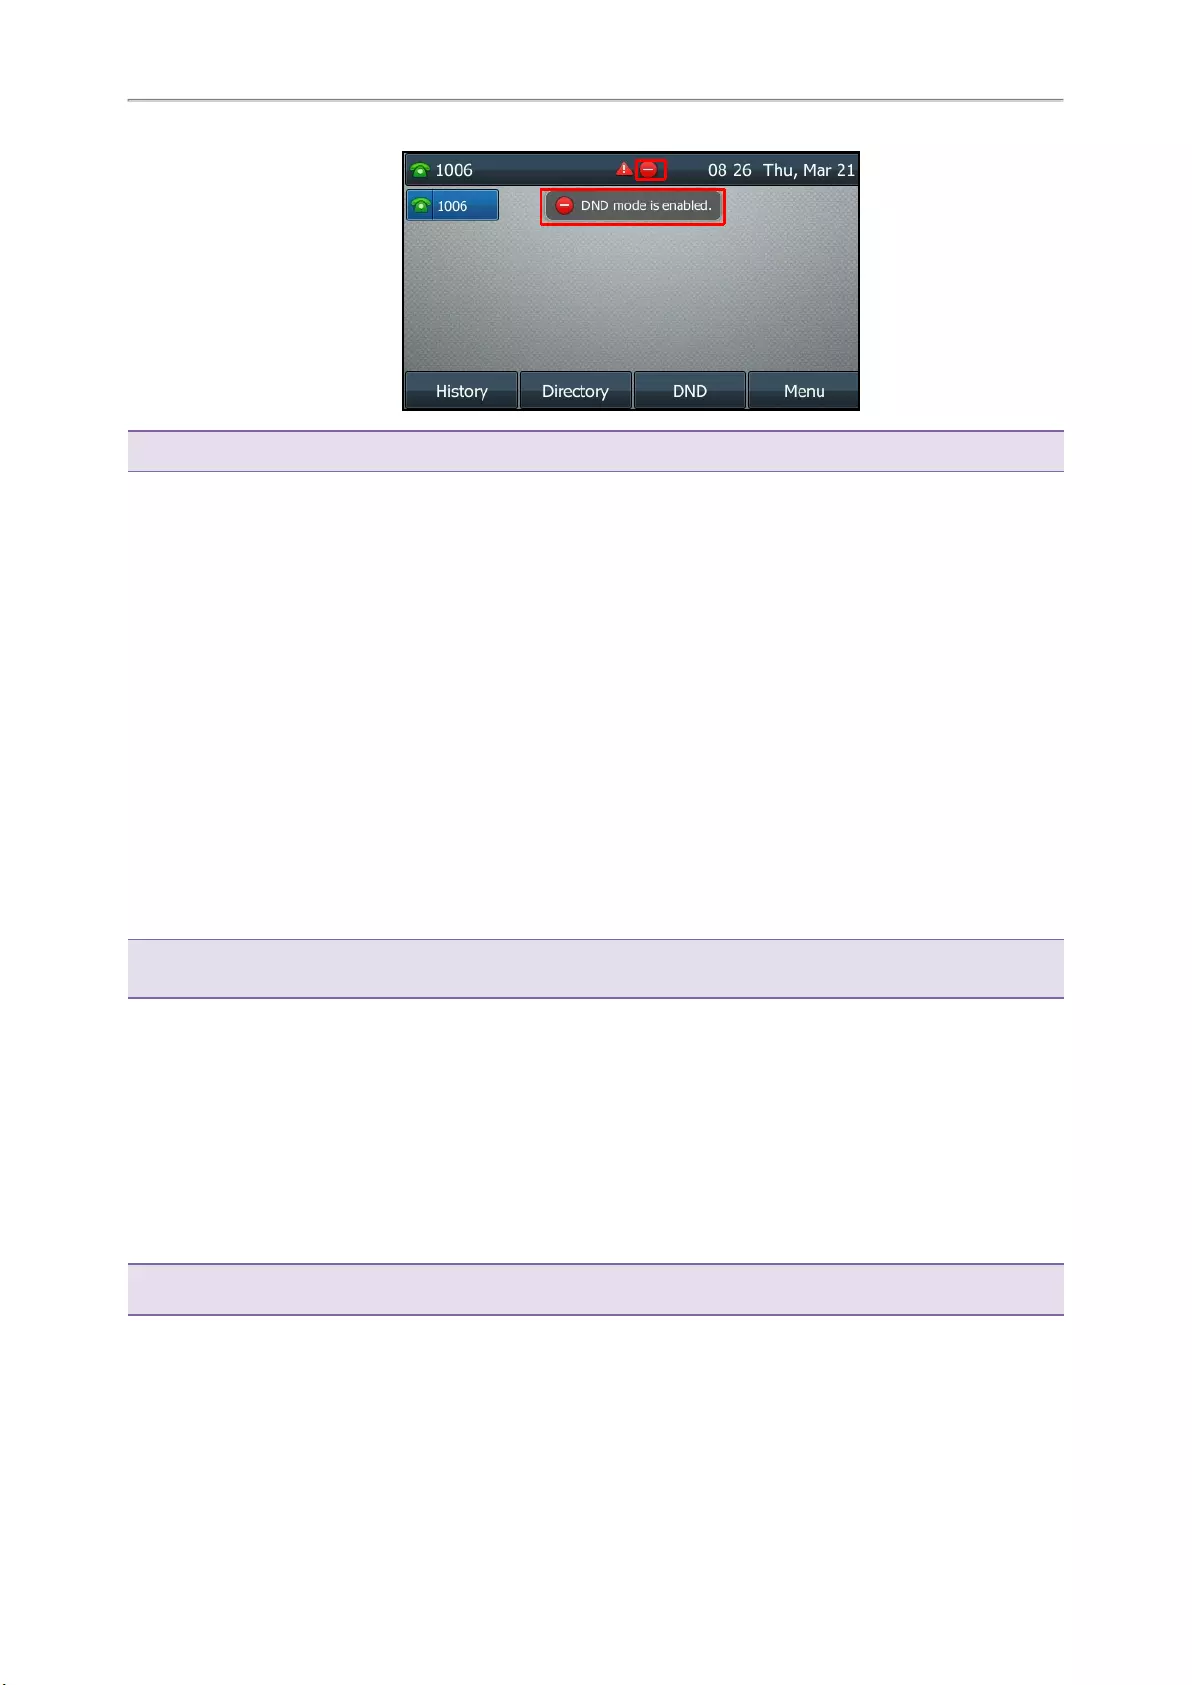
1. Go to Menu >Features >DND.
2. Turn on DND.
3. (Optional.) Enter the DND on code or off code respectively in the On Code or Off Code field.
4. Select Save.
The DND icon appears in the status bar. For T48S/T46S, the phone also prompts you that DND is enabled.
Yealink T4 Series IP Phones User Guide
34
Tip: To activate or deactivate DND quickly, press the DND soft key when the phone is idle.
Rejecting Calls with DND on a Specific Line
By default, the DND feature applies to all lines on your phone. Your system administrator can change the DND
mode to Custom so that you can enable DND for specific lines.
Before You Begin
The DND mode is set to Custom. Check with your system administrator if the DND on code or off code is required. If
required, get it from your system administrator.
Procedure
1. Go to Menu >Features >DND.
2. Select the desired line.
3. Turn on DND.
4. (Optional.) Enter the DND on code or off code respectively in the On Code or Off Code field.
5. Select Save.
The DND icon appears on the desired line.
If you activate DND on the default line, the DND icon will appear both on the line and in the status bar. For
T48S/T46S, the phone also prompts you that DND is enabled.
Tip: You can press the All On soft key to activate DND for all lines.
Deactivating DND
You can deactivate DND when you are ready to resume receiving calls again.
Procedure
1. Go to Menu >Features >DND.
2. (Optional.) If the DND is activated on a specific line, select the desired line.
3. Turn off DND.
4. Select Save.
The DND icon disappears from the status bar.
Tip: To deactivate DND quickly, press the DND soft key or Exit DND mode. when the phone is idle.
You can press the All Off soft key to deactivate DND for all lines.
Ending Calls
You can end the current call at any time.
Procedure
Call Features
35
1. Do one of the following:
lIf you are using the handset, press the Cancel key, End Call (EndCall) or hang up the handset.
lIf you are using the headset, press the Cancel key or End Call (EndCall).
lIf you are using the speakerphone, press the Cancel key, Speakerphone key or End Call (EndCall).
Tip: You can press the HEADSET key to end calls. Check with your system administrator to find out if it is available on your
phone.
Redialing a Call Automatically
You can set the phone to redial a phone number automatically when you call a contact and the contact’s line is
unavailable.
Procedure
1. Go to Menu >Features >Others >Auto Redial Setting.
On the T48S/T48G phones, go to Menu >Features >Auto Redial.
On the T42S/T42G/T41S/T41P/T40P/T40G phones, go to Menu >Features >Auto Redial Setting.
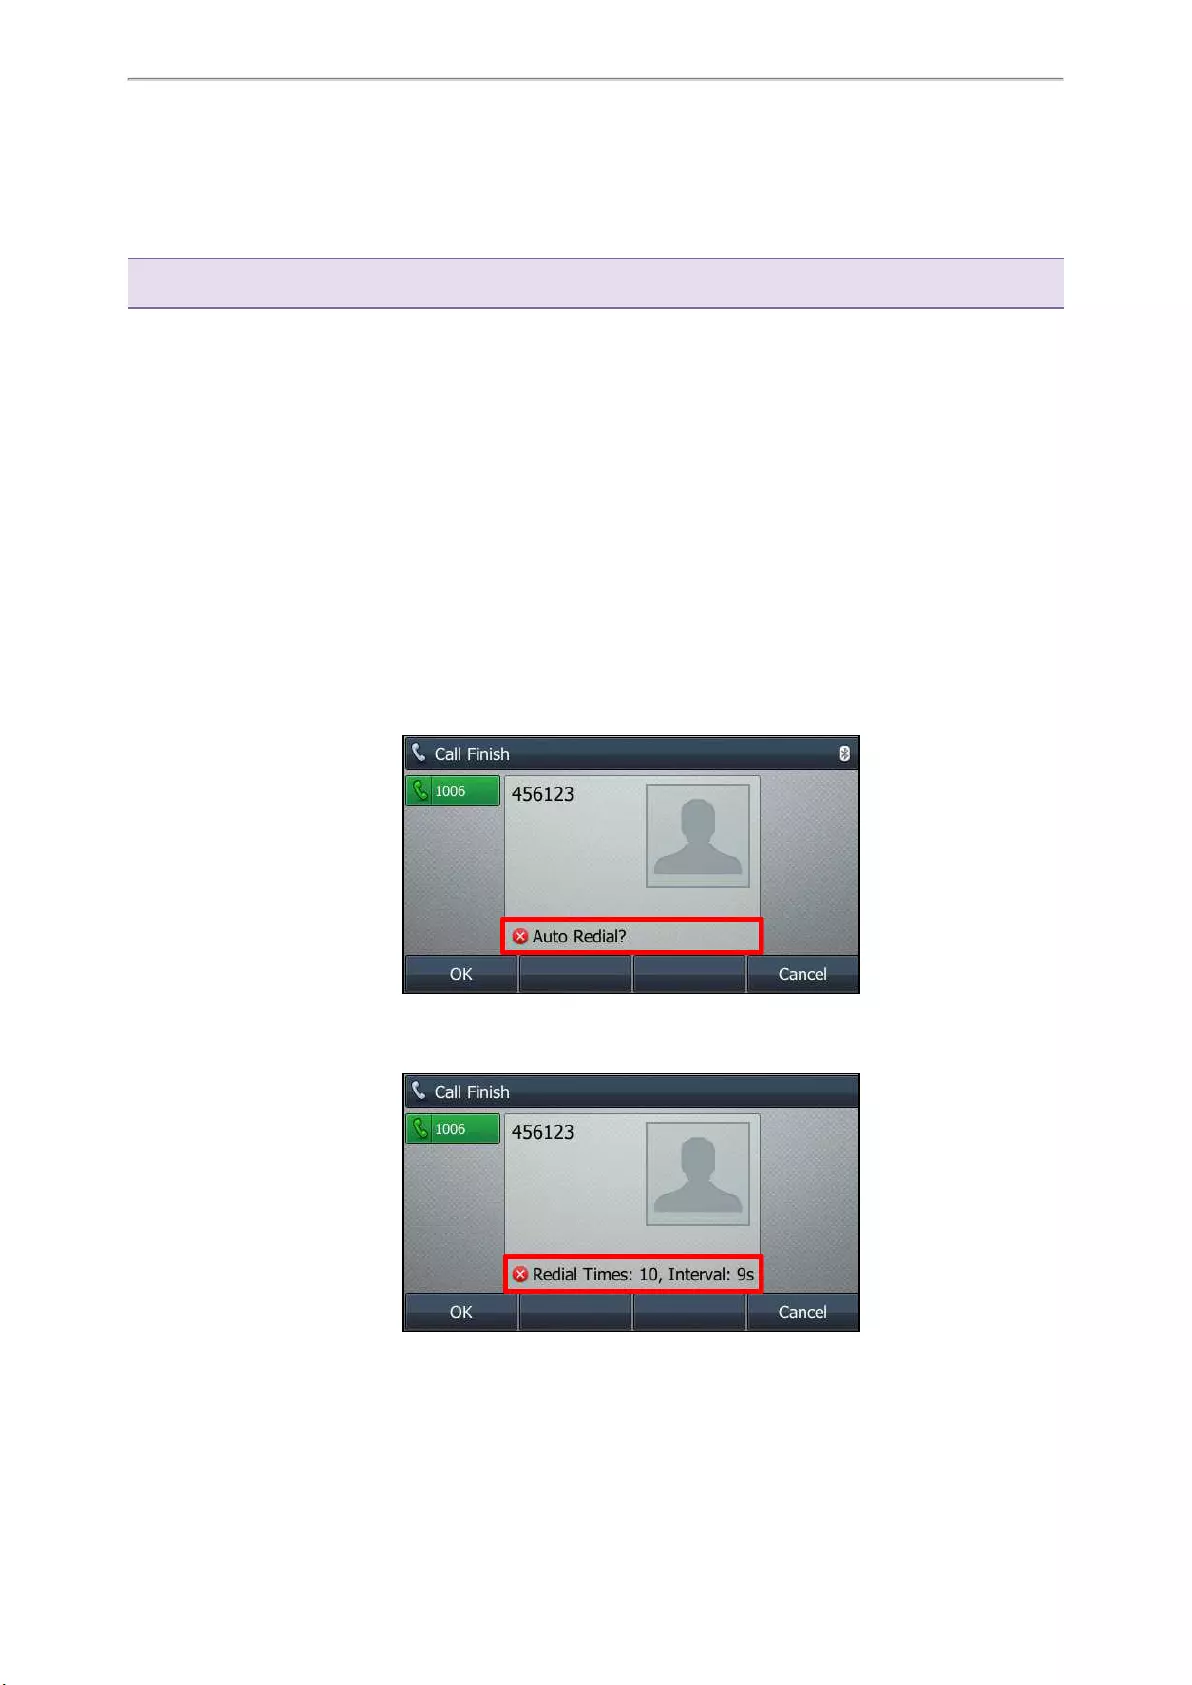
2. Select Enabled or On from the Auto Redial field.
3. Enter the desired time (between 1 and 300 seconds) in the Redial Interval field.
4. Enter the desired times (between 1 and 300) in the Redial Times field.
5. Select Save.
When you dial a number but fail to establish a call, the phone prompts the failure reason and then prompts whether
to auto redial the contact, select OK to activate auto redial.
The phone screen displays the redial times and interval. The phone will retry as many times as configured until the
callee answers the call.
Muting/Unmuting Audio
When you are in a call, you can mute the audio, so that you can hear the other person, but they cannot hear you.
Yealink T4 Series IP Phones User Guide
36
Procedure
1. Press the MUTE key during a call.
The mute key LED glows red on all phones except the T40P/T40G phones.
2. Press the MUTE key again to unmute the call.
The mute key LED goes out on all phones except the T40P/T40G phones.
Tip: You can also mute the microphone while the phone is dialing or ringing so that the other party cannot hear you when the
call is set up.
Keep Mute
In a meeting room, if incoming calls are answered automatically on your phone, callers may hear your discussion
with your colleagues. You can keep the phone in mute to prevent this unintended situation.
The mute state of your phone persists across calls. The phone stays in the mute state until you unmute the micro-
phone manually or until the phone restarts.
Before You Begin
Check with your system administrator if keep mute is configured on your phone.
Procedure
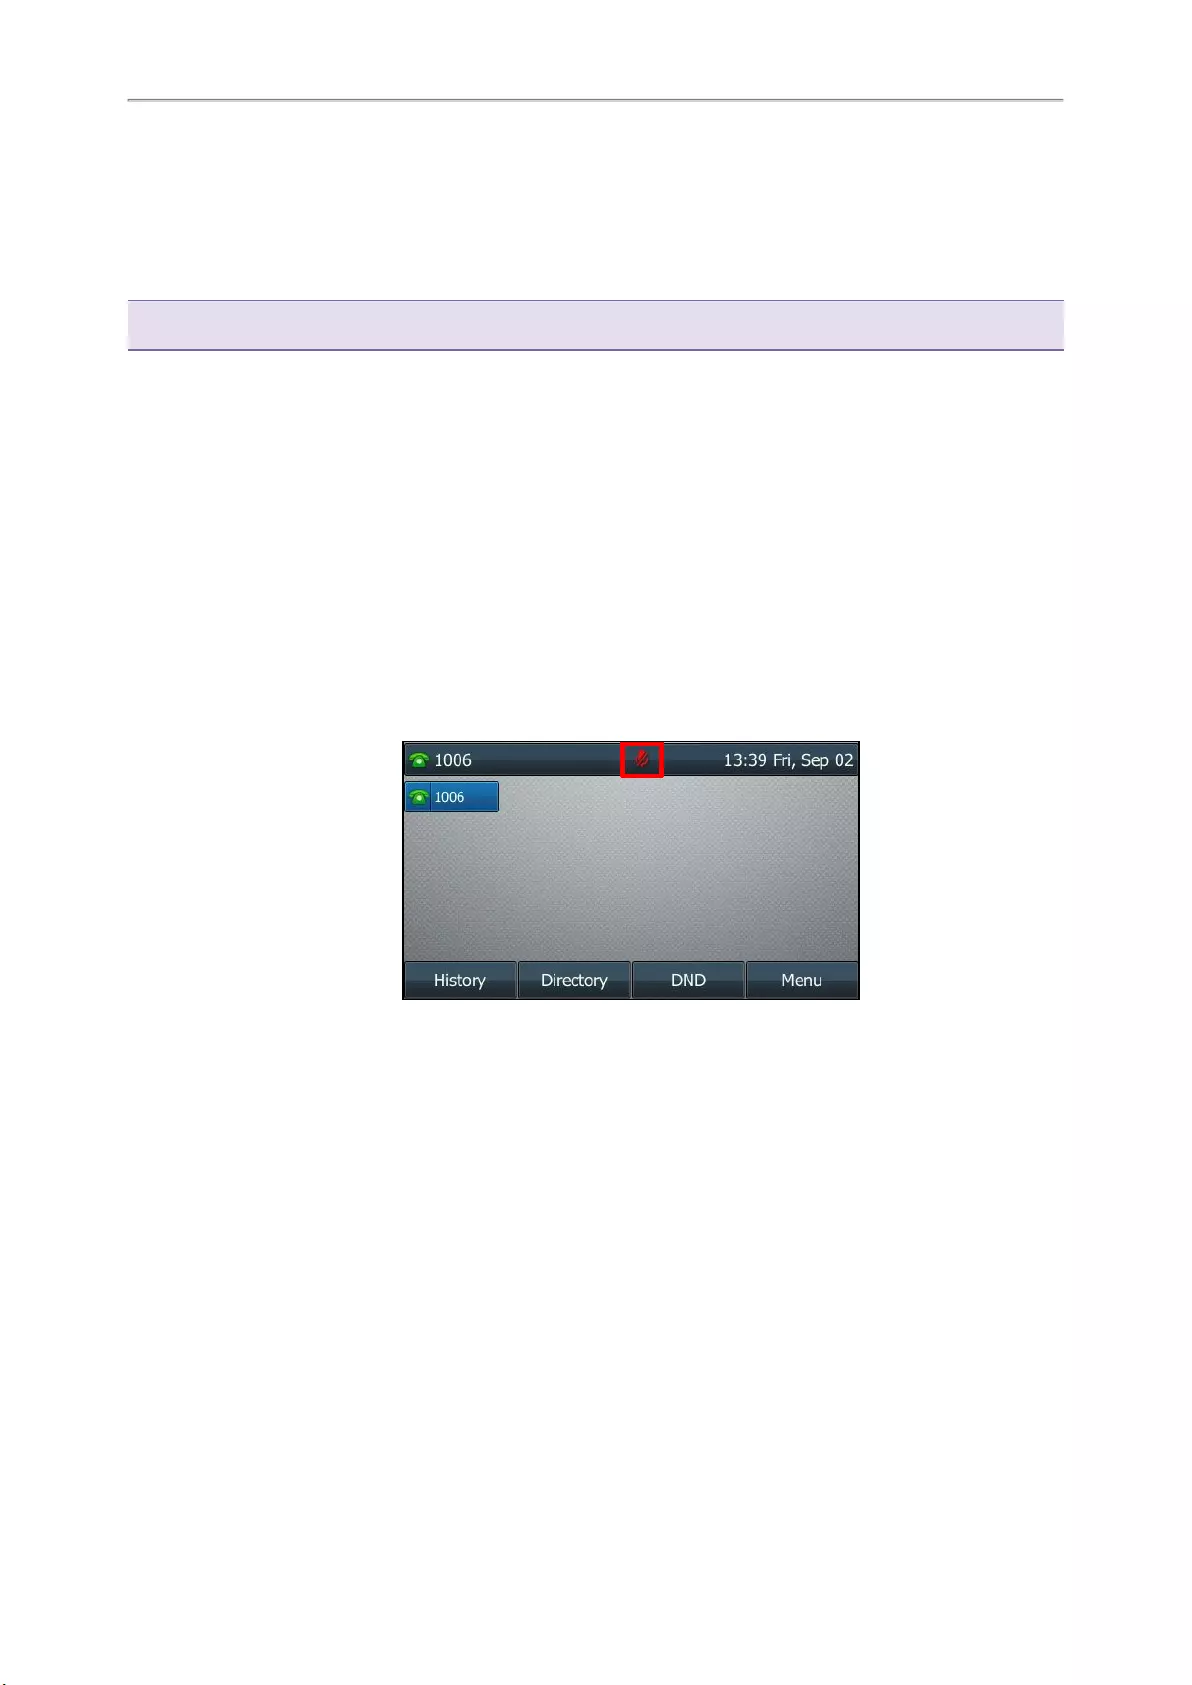
1. Press the MUTE key when the phone is idle.
The mute key LED glows red except on the T40P/T40G phones, and the mute icon appears on the idle screen
except for the T42S/T42G/T41S/T41P phones.
2. Press the MUTE key again to deactivate the mute state.
Holding and Resuming Calls
You can place an active call on hold and resume the call when you are ready. When you place a call on hold, the
held party may hear the music played by its sever.
Topics
Holding a Call
Resuming a Held Call
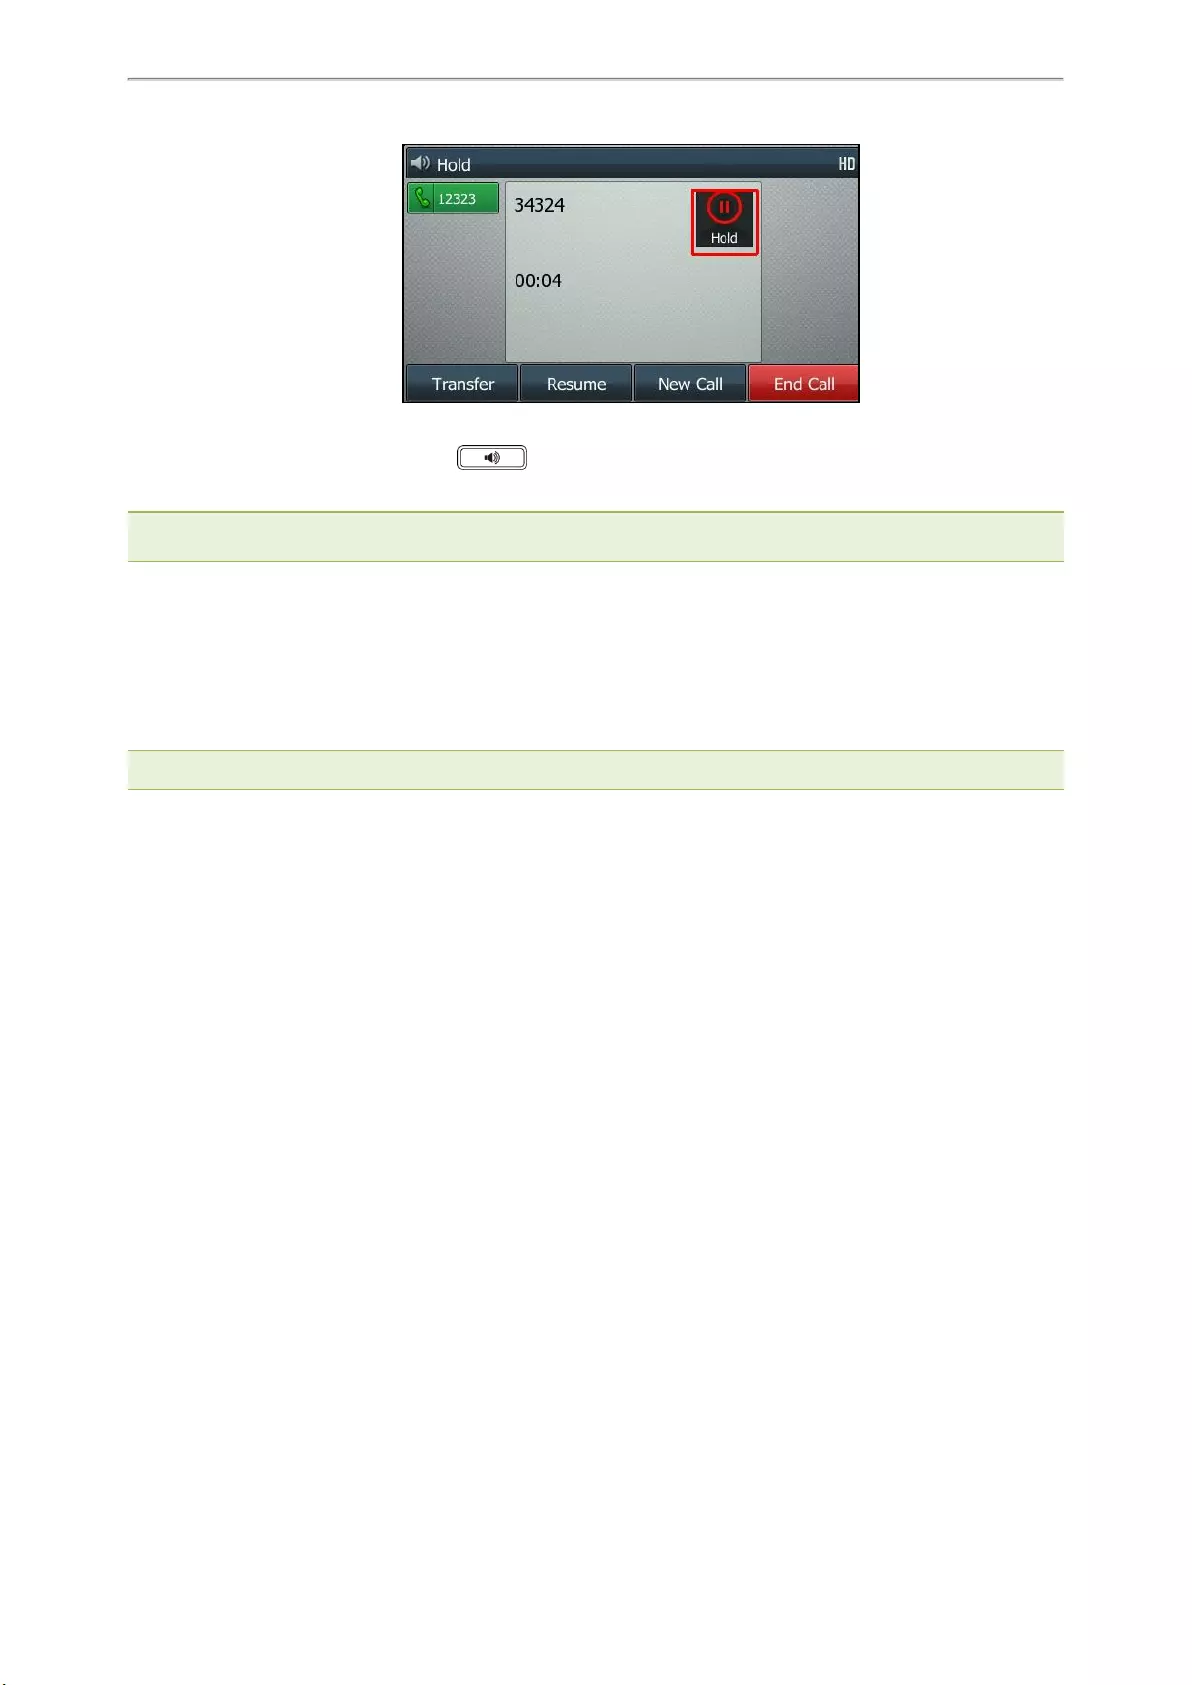
Holding a Call
You can place an active call on hold on your phone.
Procedure
1. Press the HOLD key or select Hold during a call.
Call Features
37
The phone ignores engaged audio device (handset or headset) and plays beep in the Speakerphone (hands-free)
mode by default. The Speakerphone key will always light up (except the T40P/T40G phone) and the phone
will beep softly every 30 seconds to remind you that you still have a call on hold.
Note: When you have multiple calls on the phone and the current call is held, you can press the corresponding line key to
swap to the active call.
Resuming a Held Call
You can view and resume a held call on the phone.
Procedure
1. Press the HOLD key again, corresponding line key or Resume.
If multiple calls are placed on hold, select the desired call first.
Note: When you have multiple calls on the phone and the current call is active, you can select Swap to swap to the held call.
Redirecting Incoming Calls
When you are not available to answer calls on your phone, you can forward the calls to another phone.
Topics
Forwarding All Incoming Calls to a Contact
Forwarding an Incoming Call Manually
Forwarding Incoming Calls with a Forward Key
Diverting Calls to a Contact
Forwarding All Incoming Calls to a Contact
You can set up the forwarding type which enables your phone to forward all incoming calls to a contact.
There are three types of forwarding:
lAlways Forward: Forwards all incoming calls immediately.
lBusy Forward: Forwards incoming calls when you are busy in a call.
lNo Answer Forward: Forwards incoming calls when no one answers the calls.
Topics
Forwarding All Incoming Calls on All Lines
Forwarding All Incoming Calls on a Specific Line
Deactivating Call Forward
Forwarding All Incoming Calls on All Lines
You can forward all incoming calls on the phone.

Yealink T4 Series IP Phones User Guide
38
Before You Begin
Check with your system administrator if the forward on code or off code is required. If required, get it from your sys-
tem administrator.
Procedure
1. Go to Menu >Features >Call Forward.
2. Select the desired forwarding type and select Enabled or On from the corresponding field.
3. Do one of the following:
lEnter the contact number you want to forward incoming calls to in the Forward to field.
lOn the T46S/T46G phones, highlight the Forward to field. Press Directory (Dir), and select the desired con-
tact from the Directory list.
On the T48S/T48G phones, select , and then select the desired contact.
4. If you select the No Answer Forward option, select the desired ring time to wait before forwarding from the
After Ring Time field.
5. (Optional.) Enter the always/busy/no answer forward on code or off code respectively in the On Code or Off
Code field.
6. Select Save.
The call forward icon appears in the status bar. For T48S/T46S, the phone also prompts you that call forward is
enabled.
Forwarding All Incoming Calls on a Specific Line
By default, the forwarding setting applies to all lines on your phone. Your system administrator can change the for-
ward mode to Custom so that you can forward all incoming calls for specific lines.
Before You Begin
Check with your system administrator if the forward on code or off code is required. If required, get the forward on
code or off code from your system administrator.
Procedure
1. Go to Menu >Features >Call Forward.
2. Select the desired line.
3. Select the desired forwarding type and select Enabled or On from the corresponding field.
4. Do one of the following:
lEnter the contact number you want to forward incoming calls to in the Forward to field.
lOn the T46S/T46G phones, highlight the Forward to field. Select Directory (Dir) and select the desired con-
tact from the Directory list.
On the T48S/T48G phones, select , and then select the desired contact.
5. If you select the No Answer Forward option, select the desired ring time to wait before forwarding from the
After Ring Time field.
6. (Optional.) Enter the always/busy/no answer forward on code or off code respectively in the On Code or Off
Code field.
7. Select Save.
The forward icon appears on the desired line.
If you activate forward on the default line, the forward icon will appear both on the line and in the status bar. For
T48S/T46S, the phone also prompts you that call forward is enabled.
Tip: You can press the All Lines soft key to activate forward for all lines.

Call Features
39
Deactivating Call Forward
You can deactivate the call forward when you no longer want to forward your calls.
Procedure
1. Go to Menu >Features >Call Forward.
2. (Optional.) If the forward is activated for a specific line, select the desired line.
3. Select the desired forwarding type and select Disabled or Off from the corresponding field.
4. Select Save.
Tip: For T48S, you can tap Close forward. to deactivate DND quickly when the phone is idle. You can press the All Lines
soft key to deactivate forward for all lines.
Forwarding an Incoming Call Manually
You can manually forward the call to another contact while your phone rings.
Procedure
1. When the phone is ringing, select Forward.
2. Enter the number you want to forward the incoming call to.
3. Press the OK key or select Send.
On the T48S/T48G phones, select Forward.
The phone prompts a call forward message.
Forwarding Incoming Calls with a Forward Key
When the phone receives an incoming call, you can easily press the Forward key to forward the incoming call to a
specific contact.
Procedure
1. Go to Menu >Features >Dsskey.
2. Select the desired line key.
3. Select Key Event from the Type field.
4. Select Forward (FWD) from the Key Type field.
5. If your system administrator has set the forward mode to Custom, select the desired line.
6. Do one of the following:
l(Optional.) Enter the string that will display on the phone screen in the Label field.
Enter the contact number you want to forward the incoming calls to in the Value field.
lOn the T46S/T46G phones, highlight the Label or Value field. Select Directory (Dir) and select the desired
contact from the Directory list.
On the T48S/T48G phones, select , and then select the desired contact.
7. Select Save.
Tip: By default, you can long press the desired line key to set it.
When the phone is ringing, press the forward key to quickly forward the call to the specific contact.
Diverting Calls to a Contact
You can divert all incoming calls from a particular contact to another contact. Auto divert has precedence over call forward.
Procedure
1. Select Directory (Dir) or go to Menu >Directory >Local Directory.
On the T48S/T48G phones, select Directory or go to Menu >Directory.

Yealink T4 Series IP Phones User Guide
40
2. Select the desired contact group or All Contacts.
3. Highlight the desired contact, and select Option >Detail.
On the T48S/T48G phones, tap after the desired entry.
4. Edit the contact information.
On the T48S/T48G phones, you can tap or to switch the contact you want to edit.
5. Enter a contact’s number you want to divert the call to in the Auto Divert field.
6. Select Save.
Transferring Calls
During a call, you can transfer the call to another contact.
You can use one of three ways:
lBlind Transfer: Transfer a call directly to the third party without consulting.
lSemi-Attended Transfer: Transfer a call when receiving ringback.
lAttended Transfer (Consultative Transfer): Transfer a call with prior consulting.
Topics
Performing a Blind Transfer
Performing a Semi-Attended/Attended Transfer
Performing Transfer with a Transfer Key
Performing a Blind Transfer
You can transfer a call to another contact immediately without consulting with her/him first.
Procedure
1. Press the TRANSFER key or Transfer (Trans) during a call.
2. Do one of the following:
lEnter the number or select a contact from the placed call list you want to transfer to.
lIf you have set a Speed Dial key, you can also press the Speed Dial key to transfer the call to the contact dir-
ectly.
lPress Directory (Dir). Select the desired contact from the Directory list.
On the T48S/T48G phones, tap the Directory or History. Tap the desired contact.
3. Press B Transfer (B Trans) or the TRANSFER key to complete the transfer.
Tip: If you are using a handset, the transfer can be completed by hanging up the handset.
Performing a Semi-Attended/Attended Transfer
You can transfer calls to other contacts immediately when receiving ringback or after consulting with them first.
Procedure
1. Press the TRANSFER key or Transfer (Trans) during a call.
2. Do one of the following:
lEnter the number or select a contact from the placed call list you want to transfer the call to.
lSelect Directory (Dir). Select the desired contact from the Directory list.
On the T48S/T48G phones, select Directory or History. Select the desired contact.
3. Press the OK key or select Send.
4. Do one of the following:

Call Features
41
lWhen you hear the ringback tone, press the TRANSFER key or Transfer (Trans) to finish a semi-attended
transfer.
lAfter the contact answers the call, press the TRANSFER key or Transfer (Trans) to finish an attended trans-
fer (consultative transfer).
Tip: If you are using a handset, the transfer can be completed by hanging up the handset.
Performing Transfer with a Transfer Key
By default, you can transfer a call to a specific contact directly using a Transfer key during a call.
Your system administrator can also set your phone to perform attended transfer when using a Transfer key.
Topics
Setting a Transfer Key
Performing a Blind Transfer Using a Transfer Key
Performing a Semi-attended/Attended Using a Transfer Key
Performing a Call Transfer by Selecting a Transfer Mode
Setting a Transfer Key
You can set a line key as a Transfer key, and specify a contact you want to transfer a call to for this key.
Procedure
1. Go to Menu >Features >Dsskey.
2. Select the desired line key.
3. Select Key Event from the Type field.
4. Select Transfer (Trans) from the Key Type field.
5. Do one of the following:
l(Optional.) Enter the string that will appear on the phone screen in the Label field.
Enter the contact number you want to transfer the call to in the Value field.
lOn the T46S/T46G phones, highlight the Label or Value field. Select Directory (Dir) and select the desired
contact from the Directory list.
On the T48S/T48G phones, select , and then select the desired contact.
6. Select Save.
Tip: By default, you can long press the desired line key to set it.
Performing a Blind Transfer Using a Transfer Key
After you have set a Transfer key with a specific contact, you can perform a blind transfer by using it.
Before You Begin
Confirm with your system administrator that the transfer mode has set to perform a blind transfer.
Procedure
1. Press the Transfer key during a call.
The call is transferred to the specific contact directly.
Related Topic
Setting a Transfer Key
Yealink T4 Series IP Phones User Guide
42
Performing a Semi-attended/Attended Using a Transfer Key
After you have set a Transfer key with a specific contact, you can perform a semi-attended/attended transfer by
using it.
Before You Begin
Confirm with your system administrator that the transfer mode has set to perform attended transfer.
Procedure
1. Press the Transfer key during a call.
The phone calls the specific contact first. Wait until you hear the ringback tone or until the contact answers the
call.
2. Press the Transfer key again.
Related Topic
Setting a Transfer Key
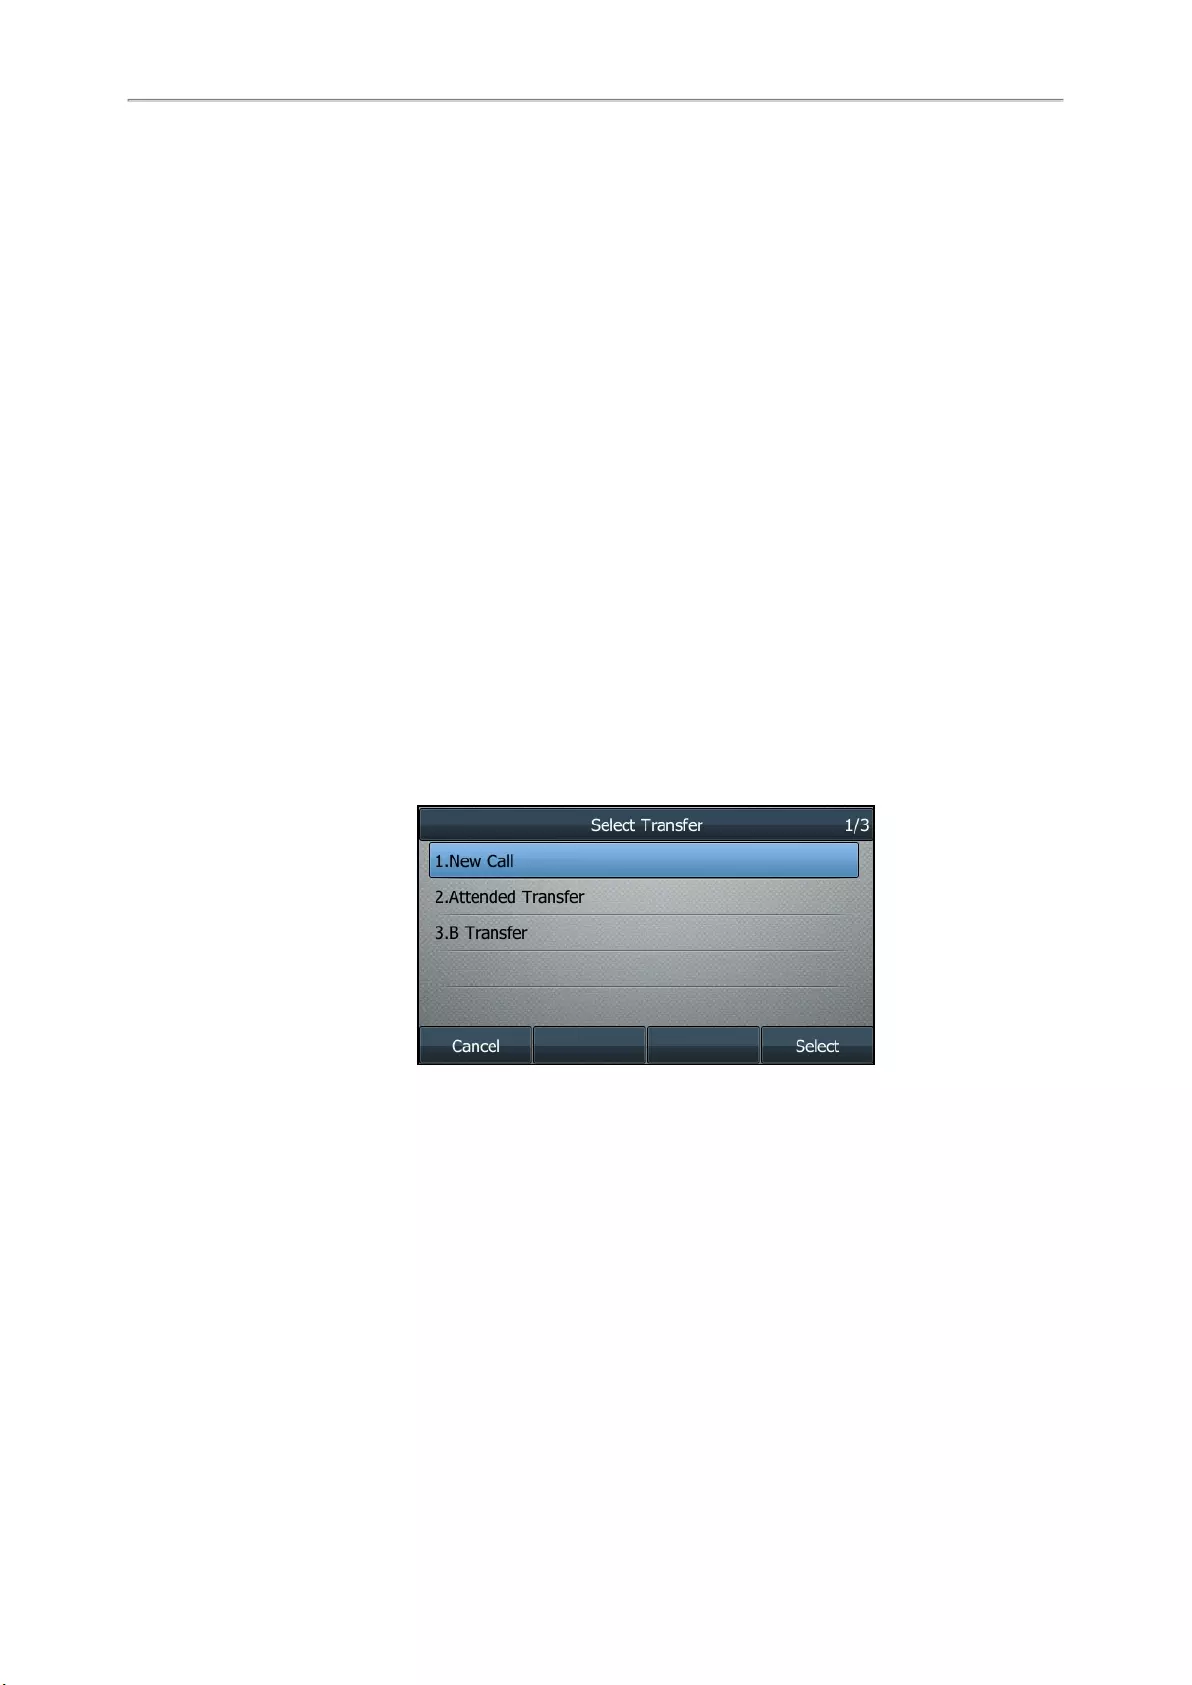
Performing a Call Transfer by Selecting a Transfer Mode
During the call, you can press the Transfer key to select a transfer mode.
Before You Begin
You need to set a Transfer key for a specific contact. Check with your system administrator to find out if this call
transfer feature is available on the phone.
Procedure
1. Press the Transfer key during a call, the phone screen is shown below:
2. Select the desired transfer mode.
Related Topic
Setting a Transfer Key
Conference Calls
The phone supports creating local conference and network conference.
During the conference, follow these tips:
lUse the handset or a headset if you’re in an open environment.
lMute your microphone when you are not speaking, especially in noisy environments.
lAvoid tapping or rustling papers near the microphone.
lSpeak in your normal voice without shouting.
Call Features
43
Topics
Local Conference
Network Conference
Local Conference
You can initiate a three-way (including yourself) conference calls with your contacts on the phone.
Note: Check with your system administrator to find out if the local conference is enabled on your phone.
Topics
Setting Up a Local Conference Call
Merging Two Calls into a Conference
Inviting a Transfer Target and a Transferee into a Conference
Holding or Resuming a Conference Call
Muting or Unmuting a Conference Call
Splitting a Conference Call
Managing Conference Participants
Ending a Conference Call
Setting Up a Local Conference Call
Procedure
1. Place a call to the first party.
2. Select Conference (Conf) to place a new call.
The active call is placed on hold.
3. Dial the second party’s number.
You can also select the desired contact from the search list, or select a contact from the placed call list or Dir-
ectory before you enter the number. On the T48S/T48G phones, you can select the desired contact from the left
sidebar, or select a contact from the Directory or History.
4. When the second party answers the call, selectConference (Conf) to add the second party to the conference.
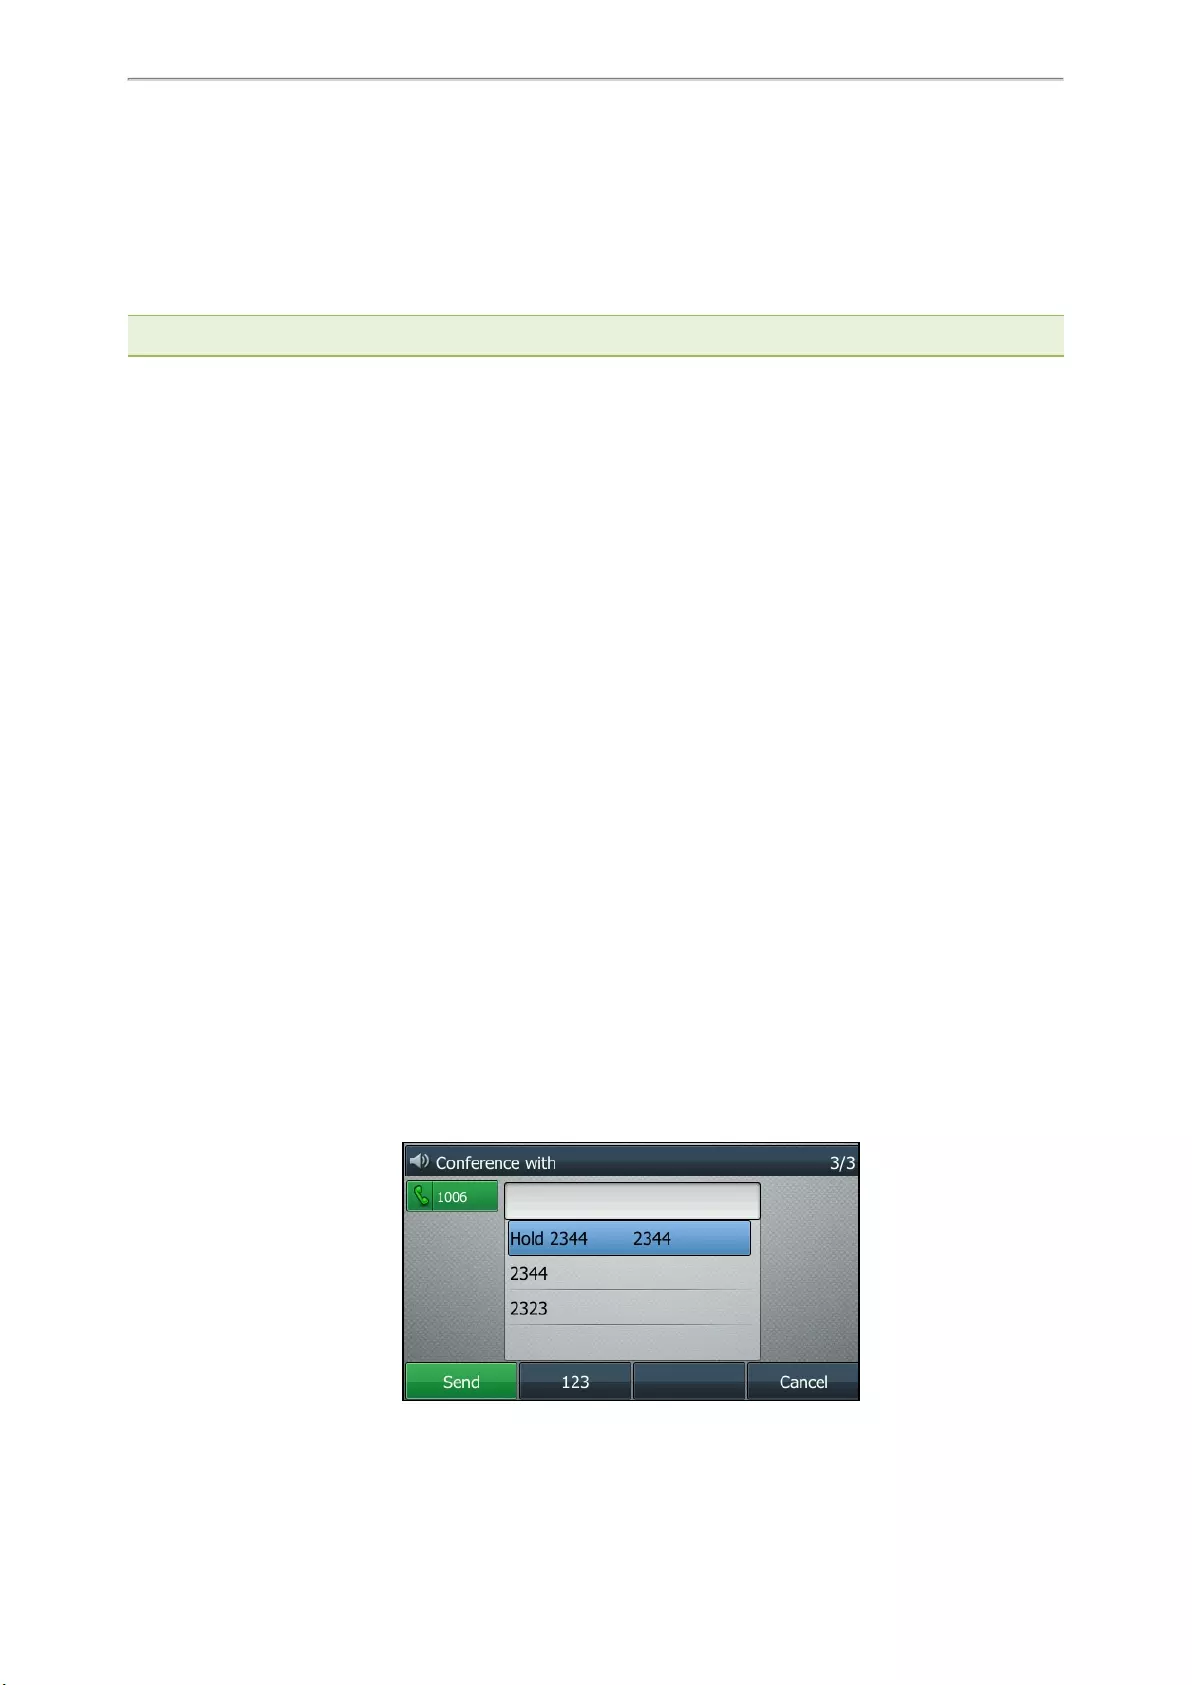
Merging Two Calls into a Conference
You can invite a held call into a conference call with the active call.
Procedure
1. Place two calls on the phone.
2. Select the desired call for a conference and ensure that the call is active.
3. Select Conference (Conf).
4. Highlight the desired hold call and select Send or Select.
On the T48S/T48G phones, tap the desired hold call from the left sidebar.

Yealink T4 Series IP Phones User Guide
44
The active call and the selected hold call are joined into a conference.
Inviting a Transfer Target and a Transferee into a Conference
After consulting with the contact you want to transfer a call to, you can invite two calls into a conference.
Procedure
1. Select Conference (Conf) after talking with the contact you want to transfer a call to.
The transferee and the transfer target join the conference.
Holding or Resuming a Conference Call
When you place a conference call on hold, other participants cannot hear each other until you resume the held con—
ference call.
Procedure
1. Press the HOLD key or Hold to place the conference on hold.
2. Press the HOLD key again or Resume to resume the held conference call.
Muting or Unmuting a Conference Call
When you mute the local microphone during a conference call, other participants can hear each other except you.
Procedure
1. Press the MUTE key to mute the conference.
2. Press the MUTE key again to unmute the conference.
Splitting a Conference Call
You can split the conference call into individual calls. After the split, the conference call ends, and other parties are
held.
Procedure
1. Select Split.
Managing Conference Participants
You can manage the conference participants to make the conference more flexible.
Procedure
1. During a conference call, on the T46S/T46G/T42S/T42G/T41S/T41P/T40P/T40G phones, select Manage.
2. Select the desired party, you can do the following:
lSelect Far Mute (FarMute) to mute the party. The muted party can hear everyone, but no one can hear the
muted party.
lSelect Far Hold (FarHold) to hold the party. The held party cannot hear anyone, and no one can hear the
held party.
lSelect Remove to remove the party from the conference call.
On the T48S/T48G phones, and you can do the following:
lTap to mute the party. The muted party can hear everyone, but no one can hear the muted party. The
icon changes to .
lTap Hold to hold the party. The held party cannot hear anyone, and no one can hear the held party. The icon
changes to .
lTap to remove the desired party from the conference call.
The phone prompts you to remove the party or not.
Tap OK to remove the party from the conference call.

Call Features
45
Ending a Conference Call
When you end the conference call, the other parties drop the call.
However, the system administrator can set up your phone so that the other two parties remain connected when you
end the conference call.
Procedure
1. Select End Call (EndCall).
Network Conference
If your system administrator has set a network conference feature on your phone, you can initiate a conference with
two or more contacts.
Topic
Setting Up a Network Conference
Setting Up a Network Conference
You can set up a network conference with two or more contacts.
Procedure
1. Place a call to the first party.
2. Select Conference (Conf).
The active call is placed on hold.
3. Dial the second party’s number.
4. When the second party answers the call, select Conference (Conf) to add the second party to the conference.
5. Select Conference to place a new call.
The conference call is placed on hold.
6. Enter the number of the new party, and then press the OK key or Send.
7. When the new party answers the call, select Conference (Conf) to add the new party to the conference.
8. Repeat steps 5 to 7 until you add all parties.
Note: The procedures for setting up a network conference call on specific servers may be different. Contact your system
administrator for more information.
Recording Using a USB Flash Drive
On the T48S/T48G/T46S/T46G/T42S/T41S phones, you can record active calls onto a USB flash drive connected to
your phones, and the recordings are saved as *.wav files.
Recording using a USB flash drive is not available by default. Contact your system administrator for enabling this
feature for you.
Note: The size of a single recording file should be less than 2G.
Topics
Recording a Call
Pausing/Resuming a Recording
Stopping a Recording
Listening to a Recording
Managing the Recordings
Viewing the Available Recording Time
Yealink T4 Series IP Phones User Guide
46
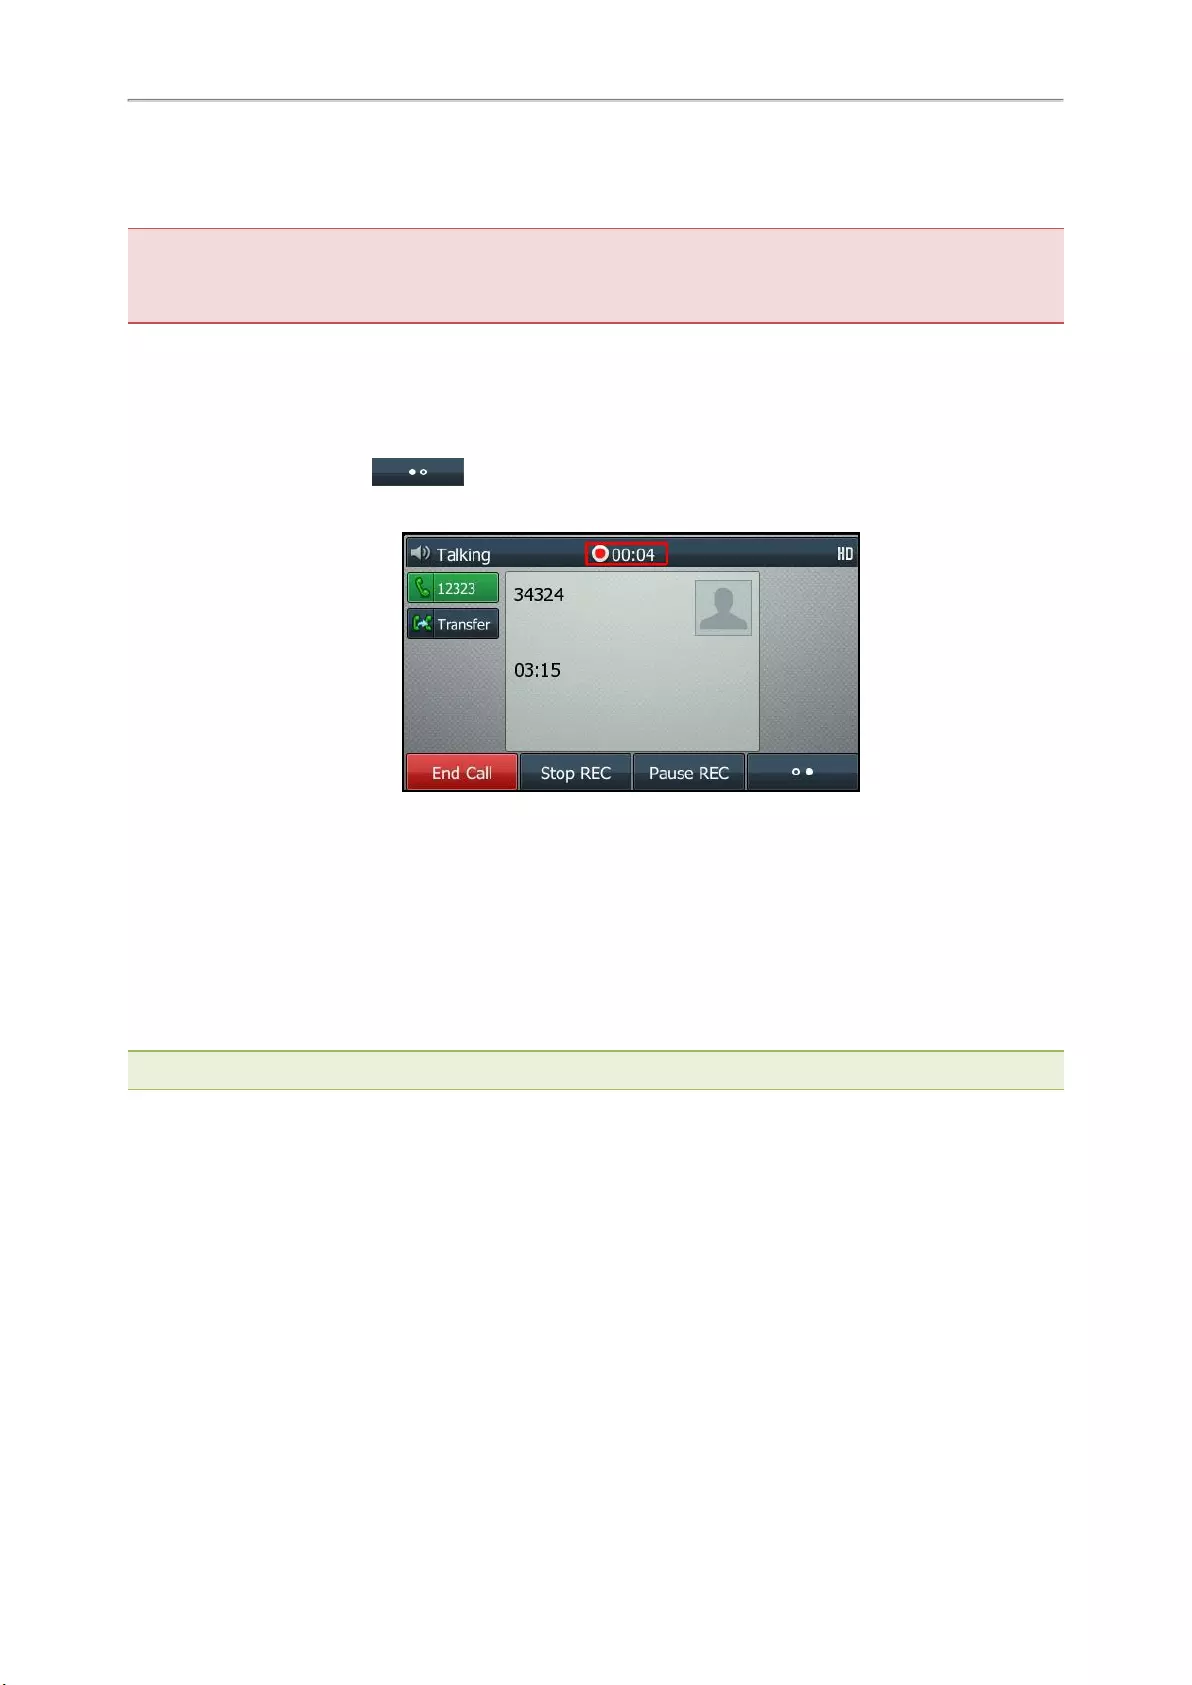
Recording a Call
You can record the important parts during an active call.
Important: Before call recording, especially those involving PSTN, it is necessary to know about the rules and restrictions of
call recording in the country where you are.
It is also very important to inform all the call parties that you are recording and ask for their consent before recording the con—
versation.
Before You Begin
Make sure that the USB flash drive has been connected to your phone.
Procedure
1. During a call, select More( ) > Start REC.
The phone screen displays a recording icon and recording duration.
Pausing/Resuming a Recording
When you do not want the current sensitive information to be recorded, you can pause the recording.
After pausing, you can resume it at any time and the recording continues and will be saved in the same file.
Procedure
1. Select Pause REC to pause a recording.
The pause recording icon appears on the phone screen and the duration stops counting.
2. Select Resume REC to resume a recording.
Note: If you hold the call during the recording, none of the parties will be recorded until you resume the call.
Stopping a Recording
You can stop recording a call before the call ends. The recording also stops when the active call ends. The record—
ing will be saved as a «*.wav» file in the USB flash drive automatically.
Procedure
1. Do one of the following:
lSelect Stop REC.
The recording icon and recording duration disappears. The screen prompts a message that the call is recor-
ded successfully.
lSelect End Call (EndCall).
The recording icon and recording duration disappears, and the phone returns to the idle screen. The screen
prompts a message that the call is recorded successfully.
Call Features
47
Managing the Recordings
After stopping recording, you can manage the recordings on your phone. Make sure the USB flash drive is still inser-
ted in the phone.
Topics
Listening to a Recording
Pausing/Resuming a Playback
Fast Forwarding/Rewinding a Playback
Deleting a Recorded Call
Listening to a Recording
You can browse and play back the recordings on your phone.
During the recording plays, you can switch among Speakerphone (hands-free) modes by pressing the Speak-
erphone key , Handset modes by pressing the HEADSET key or Handset mode by picking up the handset.
Tip: You can also play back the recordings on a PC using an application capable of playing the «*.wav» file.
Procedure
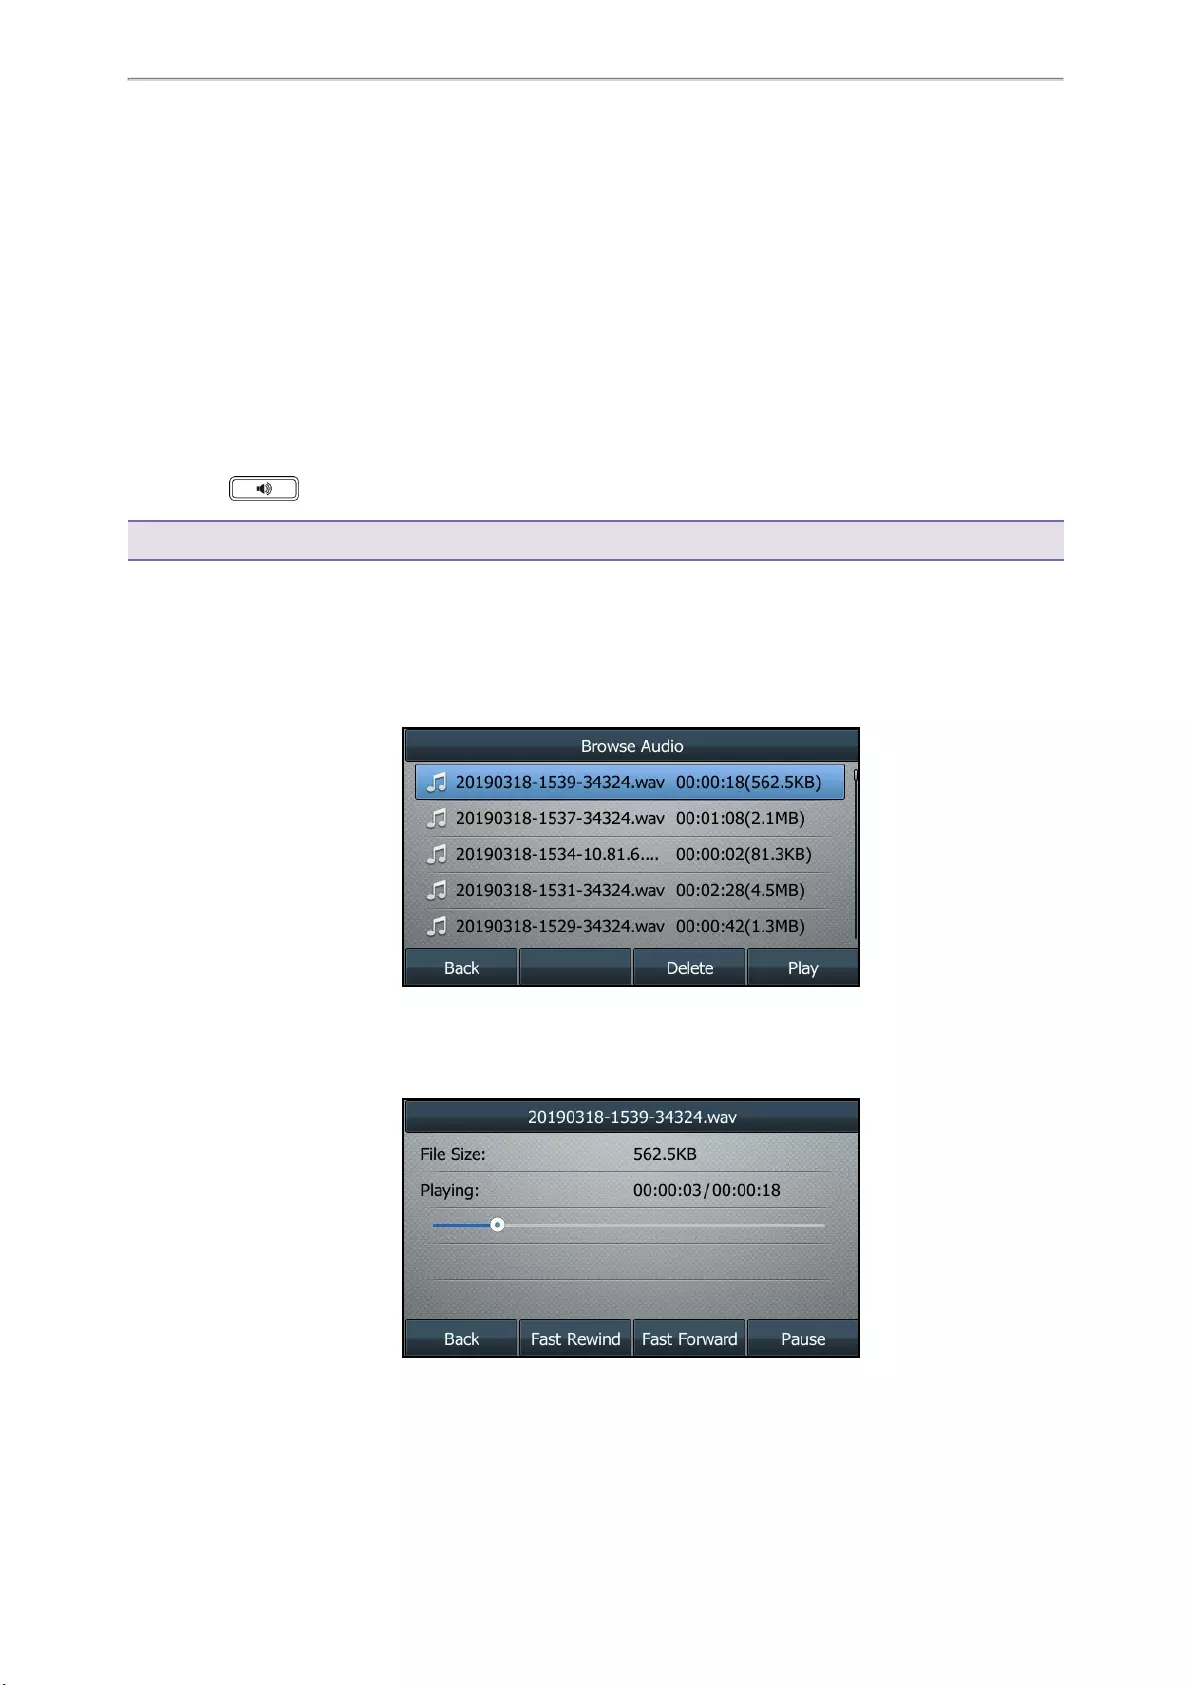
1. Go to Menu >USB >Browse Audio.
The phone screen shows all recorded files (filename, duration time and file size) in the Browse Audio list. The
filename consists of the recording time & date, the other party’s number/IP address/name (or the first person’s
number/IP address/name you called).
2. Highlight the desired file, and select Play.
On the T48S/T48G phones, tap the desired file.
The length of the recording and a progress bar are displayed as the recording plays.
Related Topics
Switching Among the Handset, Speakerphone and Headset Modes
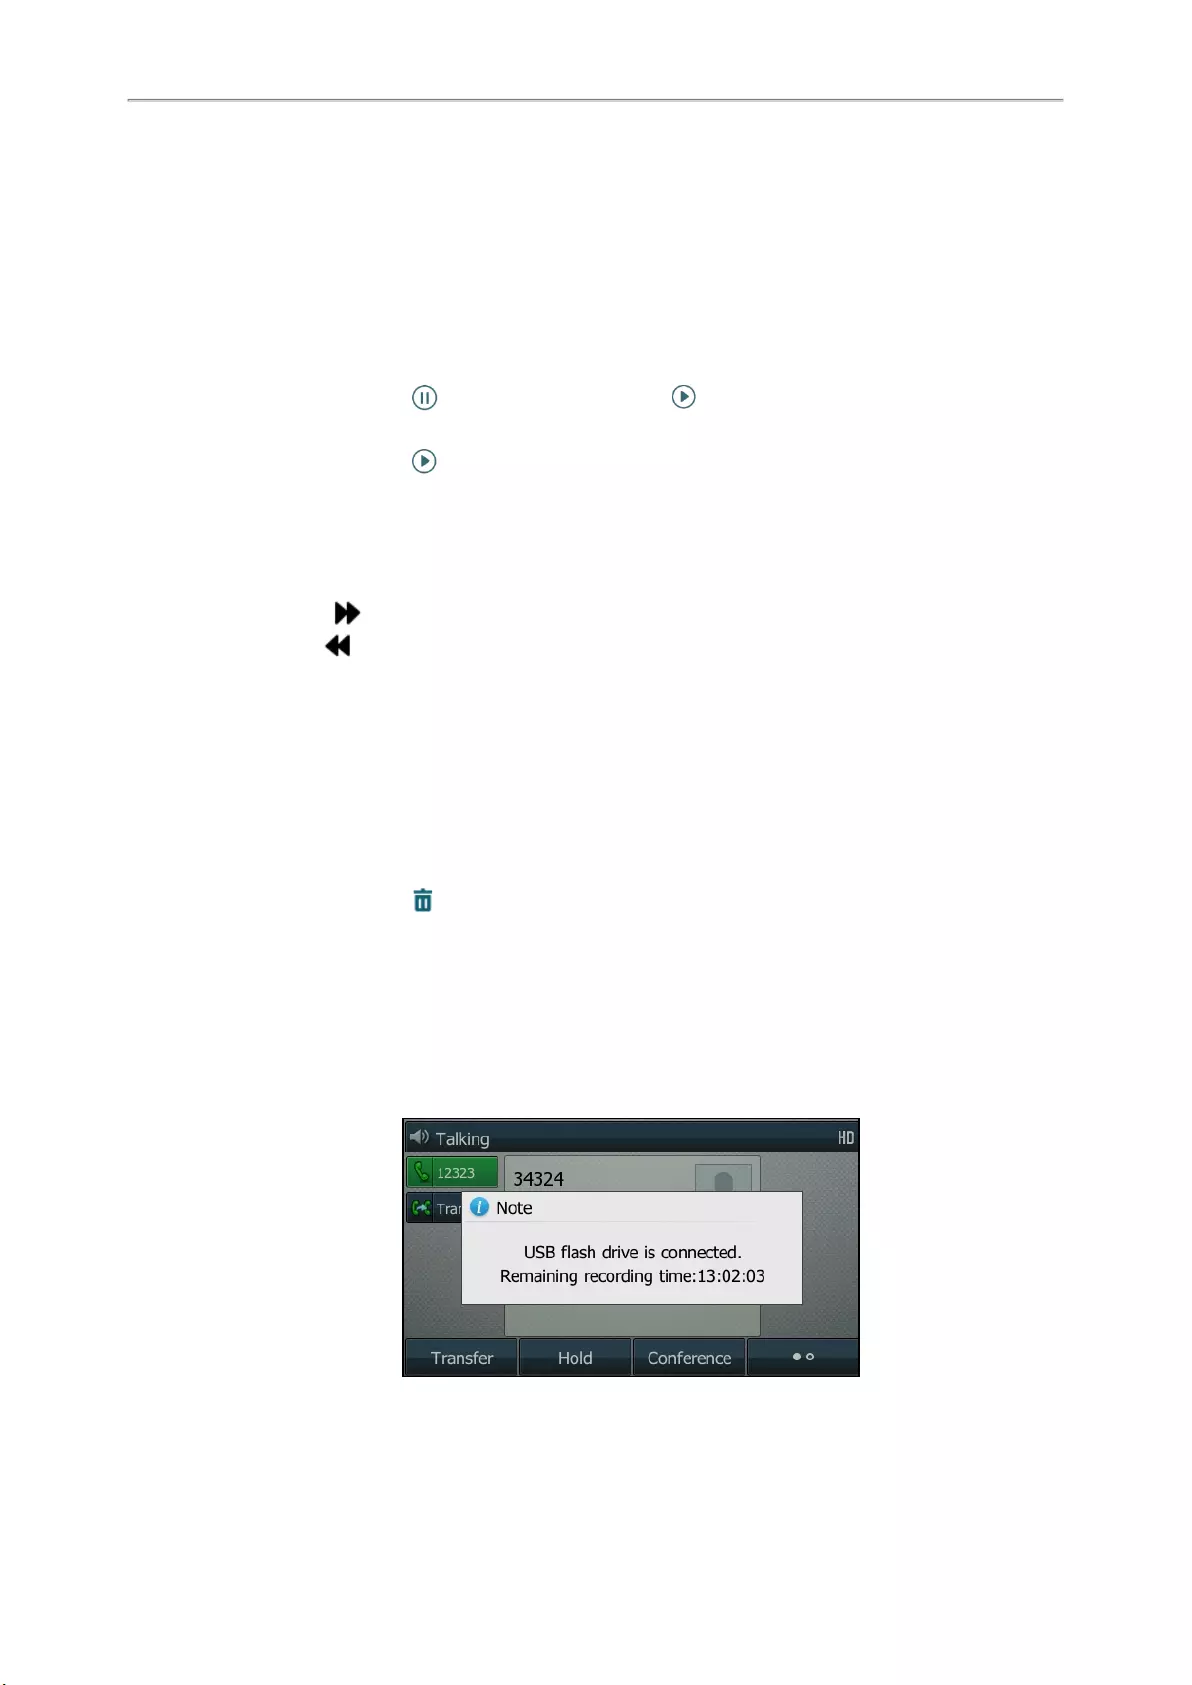
Yealink T4 Series IP Phones User Guide
48
Adjusting the Volume
Pausing/Resuming a Playback
When you are playing a recording, you can pause it manually to take note.
When you receive an incoming call while playing a recording, the recording is paused automatically. You can
resume the playback after handling the call.
Procedure
1. Select Pause to pause the playback. The Play soft key appears on the phone screen.
On the T48S/T48G phones, tap to pause the playback. Then appears on the touch screen.
2. Select Play to restart the playback.
On the T48S/T48G phones, tap .
Fast Forwarding/Rewinding a Playback
While a recording plays, you can fast forward or rewind the playback at any time.
Procedure
lSelect Fast Forward ( ) to skip forward the playback. Press once to skip forward 8 seconds.
lSelect Fast Rewind ( ) to rewind the playback. Press once to rewind 8 seconds.
On the T48S/T48G phones, drag the slider to skip forward the playback or rewind the playback.
Deleting a Recorded Call
You can delete the recordings when you need additional space on your USB flash drive or the recordings are use—
less.
Procedure
1. Go to Menu >USB >Browse Audio.
2. Highlight the desired recording, and select Delete.
On the T48S/T48G phones, tap after the desired recording.
The phone prompts you to delete the audio or not.
3. Select OK.
Viewing the Available Recording Time
You can view the available recording time on your phone, to avoid recording failure due to timeout.
When you insert a USB flash drive to the phone during a call, a message will pop up to tell you how much time is
available for recording.

Call Features
49
During a recording, if there is insufficient free space (30 minutes or 10 minutes left) on the USB flash drive, the
phone will prompt you a message (XX minutes left for call recording). If no free space on the USB flash drive during
recording, the recording is stopped and saved in the USB flash drive automatically.
You can also view the storage space of the USB flash drive, and check the available recording time before record—
ing.
Procedure
1. Go to Menu >USB >Storage Space.
Multicast Paging
Multicast Paging allows you to broadcast instant audio announcements to users who are listening to a specific mul-
ticast group on a specific channel.
The phone supports the following 31 channels:
l0: Broadcasts are sent to channel 0. Note that the Yealink IP phones running firmware version 80 or earlier can
be regarded as listening to channel 0. It is the default channel.
l1 to 25: Broadcasts are sent to channel 1 to 25. We recommend that you specify these channels when broad-
casting with Polycom IP phones which have 25 channels you can listen to.
l26 to 30: Broadcasts are sent to channel 26 to 30. We recommend that you specify these channels when broad—
casting with Yealink IP phones running firmware version 81 or later.
Note: All IP phones in the multicast paging group must be deployed in the same subnet since a broadcast is used. The phone
can only send/receive broadcasts to/from the listened channels. Other channels’ broadcasts will be ignored automatically by
the IP phone.
Topics
Sending Multicast Paging
Receiving Multicast Paging
Managing a Paging Call
Sending Multicast Paging
Your phone supports up to 31 groups for paging. You can assign a label to each group to identify the phones in the
group, such as All, Sales, or HR.
You can set a line key as Multicast Paging key or Paging List key on the phone, which allows you to send
announcements to the phones with pre-configured multicast address(es) on specific channel(s).
Note: Multicast RTP is one way only from the sender to the multicast address(es) (receiver). For outgoing RTP multicasts,
all other existing calls on the phone will be placed on hold.
Topics
Setting a Multicast Paging Key
Sending a Paging by a Multicast Paging Key
Setting a Paging List Key
Setting a Paging Group
Sending Pages by a Paging List Key
Deleting a Paging Group
Setting a Multicast Paging Key
You can set a Multicast Paging key for a paging group, which allows you to send announcements quickly on the
idle screen.
Before You Begin
Get the multicast IP address and port number from your system administrator.
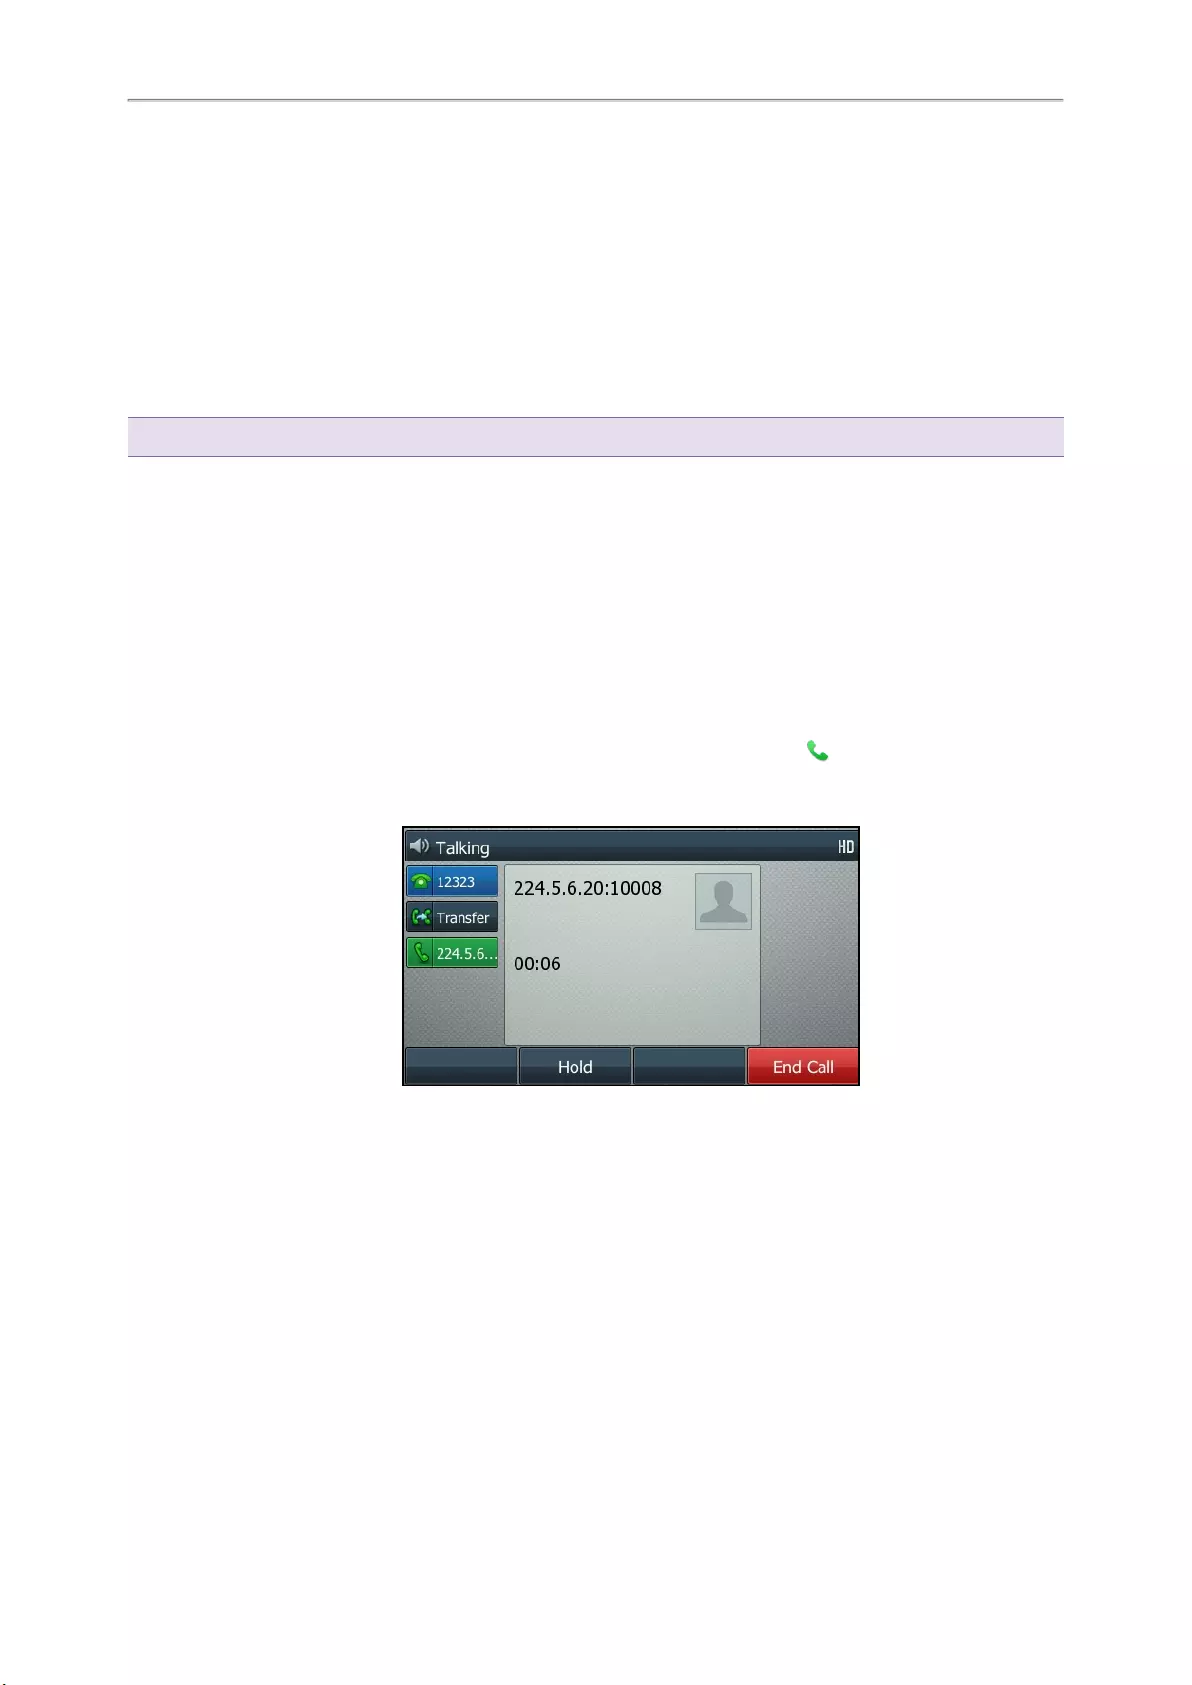
Yealink T4 Series IP Phones User Guide
50
Procedure
1. Go to Menu >Features >Dsskey.
2. Select the desired line key.
3. Select Key Event from the Type field.
4. Select Multicast Paging from the Key Type field.
5. (Optional.) Enter the paging group name in the Label field.
6. Enter the multicast IP address and port number (for example, 224.5.6.20:1000  in the Value field.
7. Enter the desired channel between 0 and 30 in the Channel field.
8. Select Save.
Tip: By default, you can long press the desired line key to set it.
Sending a Paging by a Multicast Paging Key
You can send a paging by using the Multicast Paging key when the phone is idle.
Before You Begin
You need to set a Multicast Paging key in advance.
Procedure
1. Press the Multicast Paging key when the phone is idle.
Both your phone and receiver’s phone play a warning tone and the multicast RTP session will be automatically
answered on the receiver’s phone in the speakerphone (hands-free) mode.
On the T48S/T48G phones, the multicast paging key icon indicator will become and green. On other IP
phones, the multicast paging key LED glows green.
The following figure shows a multicast RTP session on the phone:
Related Topic
Setting a Multicast Paging Key
Setting a Paging List Key
You can set a Paging List key to easily access the paging groups on the idle screen.
Procedure
1. Go to Menu >Features >Dsskey.
2. Select the desired line key.
3. Select Key Event from the Type field.
4. Select Paging List from the Key Type field.

Call Features
51
5. (Optional.) Enter the string that will display on the phone screen in the Label field.
6. Select Save.
Tip: By default, you can long press the desired line key to set it.
Setting a Paging Group
You can edit the information of the paging group.
Before You Begin
A Paging List key is set in advance. Get the multicast IP address and port number from your system administrator.
Procedure
1. Press the Paging List key when the phone is idle.
2. Select the desired paging group.
The default tag is Empty if it is not configured before.
3. Select Option >Edit.
On the T48S/T48G phones, tap Edit.
4. Enter the multicast IP address and port number (for example, 224.5.6.20:1000 in the Address field.
5. Enter the string that will display on the phone screen in the Label field.
6. Enter the desired channel between 0 and 30 in the Channel field.
7. Select Save.
8. To set more paging groups, repeat steps 2 to 7.
Sending Pages by a Paging List Key
You can send a paging by using the Paging List key when the phone is idle.
Before You Begin
You need to set a Paging List key in advance.
Procedure
1. Press the Paging List key when the phone is idle.
2. Select the desired paging group.
3. Select Paging to send RTP.
Both your phone and receiver’s phone play a warning tone and the multicast RTP session will be automatically
answered on the receiver’s phone in the speakerphone (hands-free) mode.
Related Topic
Setting a Paging List Key
Deleting a Paging Group
You can delete any group from the paging group list.
Procedure
1. Press the Paging List key when the phone is idle.
If the Paging List key is not set, you can also go to Menu >Features >Others >Paging List for the T46S/T46G
phone or Menu >Features >Paging List for other phones.
2. Select the desired paging group.
3. Select Option >Delete.
On the T48S/T48G phones, tap Delete.
The phone prompts you to delete the paging group or not.

Yealink T4 Series IP Phones User Guide
52
4. Select OK.
Receiving Multicast Paging
Your system administrator has set a listening paging group for you, you can automatically receive a paging call
when the phone is idle.
When there is a voice call or a paging call in progress, or when DND is activated on your phone, the phone handles
the new paging call differently according to the multicast listening settings configured by your system administrator.
Managing a Paging Call
During a paging call, you can manage it manually at any time.
Procedure
lSelect Hold to place the current paging call on hold.
The paging call is placed on hold and the receiver releases the session.
lSelect Resume to resume the held paging call.
The multicast RTP session is re-established.
lSelect End Call (EndCall) to end the paging call.
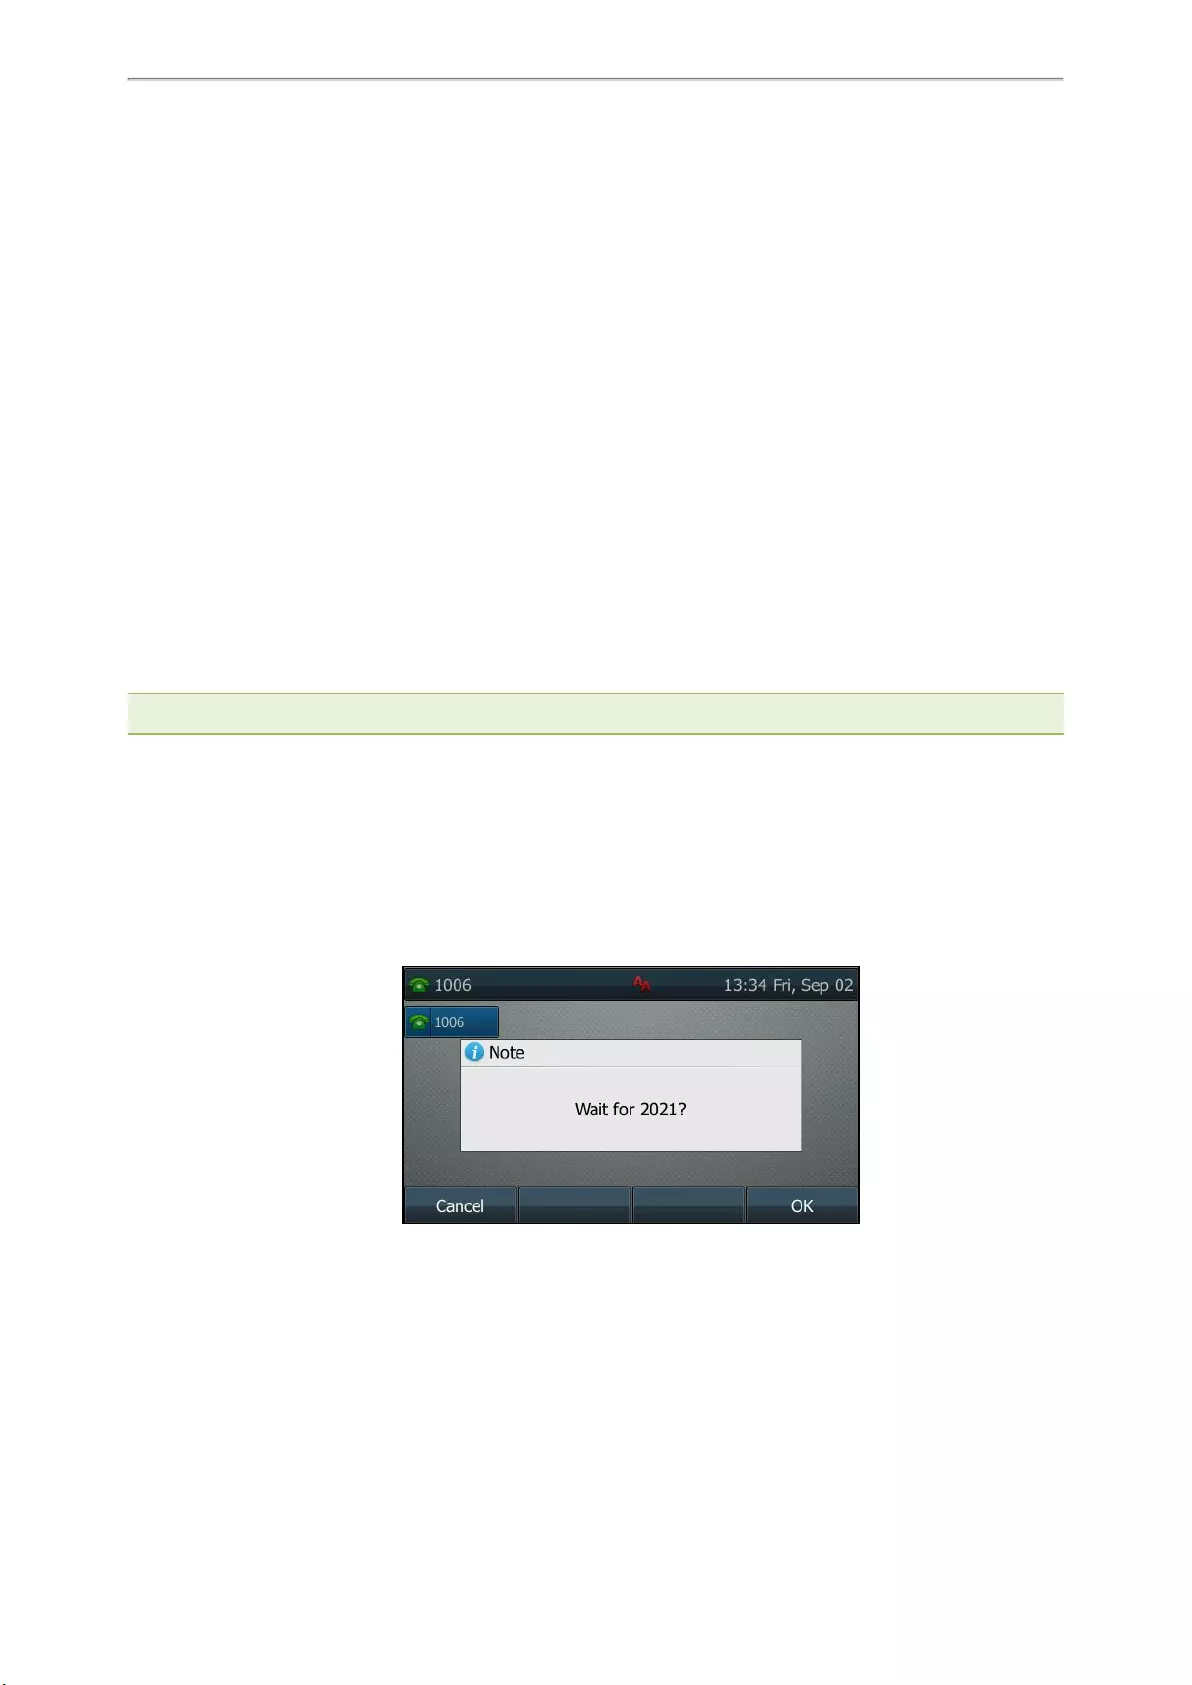
Advanced Call Features
53
Advanced Call Features
You can perform some server-dependent tasks on the phone. Contact your system administrator to find out if your
phone supports these advanced call features.
Topics
Using Call Completion
Call Pickup
Call Park and Call Retrieve
Busy Lamp Field (BLF)
BLF List
Shared Line
Intercom
Short Message Service (SMS)
Voice Mail
Using the Hot Desking
Automatic Call Distribution (ACD)
Using Call Completion
When you call someone who is temporarily unavailable to answer the call, you can monitor the busy party and
establish a call after the busy party becomes available to receive a call.
Note: Call completion is not available on all servers. For more information, contact your system administrator.
Procedure
1. Go to Menu >Features >Others >Call Completion.
On the T48S/T48G/T42S/T42G/T41S/T41P/T40P/T40G phones, go to Menu >Features >Call Completion.
2. Select Enabled or On in the Call Completion field.
3. Select Save.
When you place a call and the callee is temporarily unavailable to answer the call, the phone prompts whether to
wait for the callee, select OK to activate the call completion feature.
When the callee becomes idle, the phone prompts whether to dial the number, select OK to dial the number.
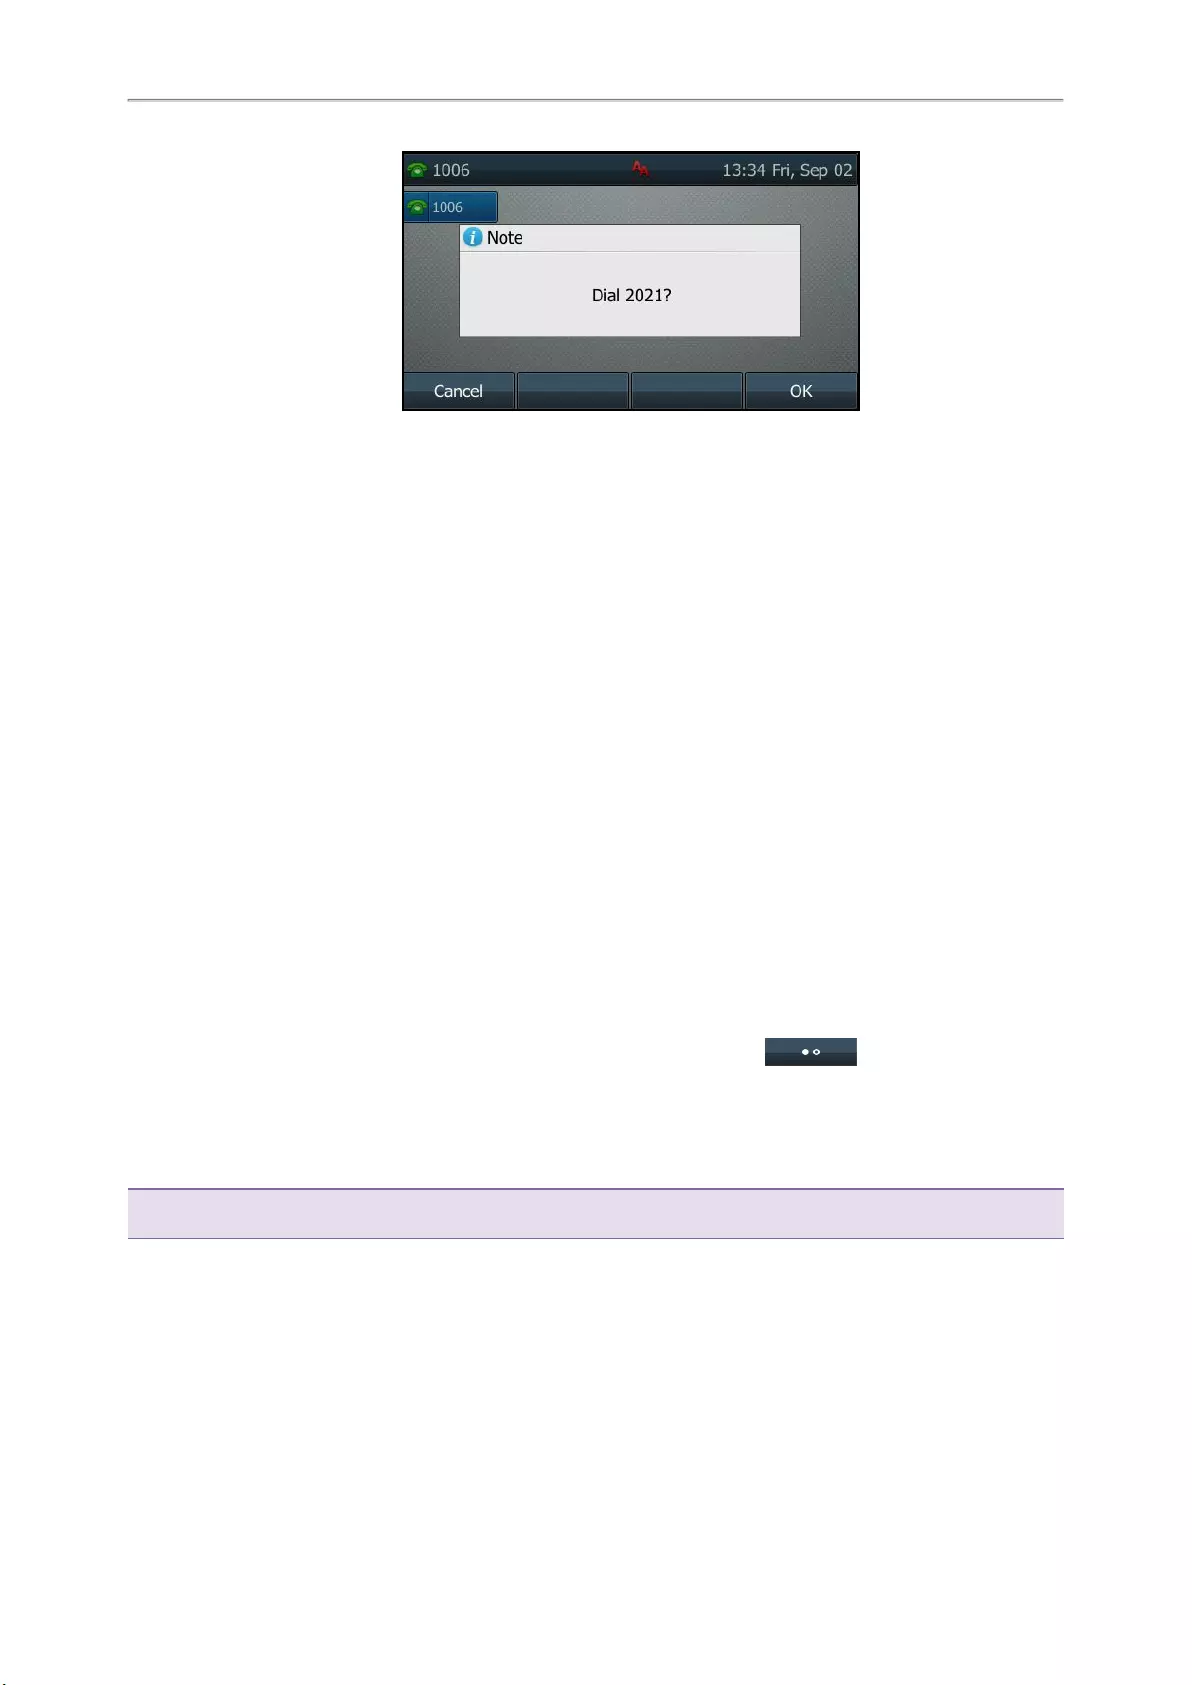
Yealink T4 Series IP Phones User Guide
54
Call Pickup
You can use call pickup to answer someone else’s incoming call on your phone.
The phone supports the following two call pickup features:
lDirected Call Pickup: allows you to pick up incoming calls to another phone.
lGroup Call Pickup: allows you to pick up incoming calls to any phone within a predefined group.
Check with your system administrator to find out if this feature is available on your phone.
Topics
Picking up a Call Directly
Picking up a Group Call Directly
Picking up a Call with a Pick Up Key
Picking up a Call with a Group Pickup Key
Picking up a Call Directly
You can answer a call that rings on another phone.
Before You Begin
The target phone receives an incoming call. Your system administrator has enabled the directed call pickup and set
the directed call pickup code.
Procedure
1. Pick up the handset, press the line key or the Speakerphone key.
The DPickup appears on the phone screen (You may need to select More( ) > DPickup).
2. Select DPickup on your phone.
3. Enter the phone number which is receiving an incoming call.
4. Select DPickup again.
The call is answered on your phone.
Tip: When the phone is idle, you can use a Directed Pickup or BLF/BLF List key to pick up a call to a specific contact dir—
ectly.
Related Topics
Picking up a Call with a Pick Up Key
Picking up a Remote Call by BLF Key
Picking up a Remote Call by BLF List Key
Picking up a Group Call Directly
When any phone within a predefined group receives an incoming call, you can pick up that call on your phone.

Advanced Call Features
55
If there are multiple incoming calls on the group at the same time, you can only pick up the first incoming call.
Before You Begin
Your system administrator has enabled the group call pickup and set the group call pickup code.
Procedure
1. Pick up the handset, press the line key or the Speakerphone key.
The GPickup appears on the phone screen.
2. SelectGPickup on your phone when any phone in the group receives an incoming call.
The call is answered on your phone.
Tip: When the phone is idle, you can use a Group Pickup key to pick up a group call directly.
Related Topic
Picking up a Call with a Group Pickup Key
Picking up a Call with a Pick Up Key
You can easily use a Pick Up key to pick up a call to a specific contact’s phone.
Before You Begin
Ask your system administrator for the directed call pickup code.
Procedure
1. Go to Menu >Features >Dsskey.
2. Select the desired line key.
3. Select Key Event from the Type field.
4. Select Pick Up from the Key Type field.
5. Select the desired line from the Account ID field.
6. Do one of the following:
l(Optional.) Enter the string that will display on the phone screen in the Label field.
Enter the directed call pickup code followed by the specific extension in the Value field.
lOn the T46S/T46G phones, highlight the Label or Value field. Select Directory (Dir) and select the desired
contact from the Directory list.
On the T48S/T48G phones, select , and then select the desired contact.
7. Select Save.
Tip: By default, you can long press the desired line key to set it.
When the target phone receives an incoming call, you can press the Pick Up key, and the call is answered on your
phone.
Picking up a Call with a Group Pickup Key
You can easily select a Group Pickup key to pick up a group call.
Before You Begin
Check with your system administrator if the group call pickup code is required for this key. If required, get the group
call pickup code from your system administrator.
Procedure

Yealink T4 Series IP Phones User Guide
56
1. Go to Menu >Features >Dsskey.
2. Select the desired line key.
3. Select Key Event from the Type field.
4. Select Group Pick Up from the Key Type field.
5. Select the desired line from the Account ID field.
6. Do one of the following:
l(Optional.) Enter the string that will appear on the phone screen in the Label field.
Enter group call pickup code in the Value field.
lOn the T46S/T46G phones, highlight the Label or Value field. Select Directory (Dir) and select the desired
contact from the Directory list.
On the T48S/T48G phones, select , and then select the desired contact.
7. Select Save.
Tip: By default, you can long press the desired line key to set it.
When any phone within a predefined group of phones receives an incoming call, you can press the Group Pickup
key, and the call is answered on your phone.
Call Park and Call Retrieve
You can park a call, and then retrieve the call either from your phone or another phone. After parked, the call is
placed on hold, you can continue the conversation after retrieving it.
Note: Call park is not available on all servers. Check with your system administrator to find out if it is available on your
phone.
Topics
Parking or Retrieving a Call in the FAC Mode
Parking or Retrieving a Call in the Transfer Mode
Parking or Retrieving a Call with a Park or Retrieve Key
Parking or Retrieving a Call in the FAC Mode
You can park the call to the local extension or the desired extension through dialing the park code.
Topics
Parking a Call in the FAC Mode
Retrieving a Parked Call in the FAC Mode
Parking a Call in the FAC Mode
You can park a call in the FAC mode directly. When you park a call to the local extension or the desired extension,
the call is held in the same network on your phone.
Before You Begin
Your system administrator has set call park in the FAC mode.
Procedure
1. During a call, select Park (You may need to select More( ) > Park).
The phone will dial the call park code which is pre-configured.

Advanced Call Features
57
2. Do one of the following:
lIf you want to park the call against the local extension, press the # key.
lIf you want to park the call against the desired extension, enter the extension (for example, 4606) where you
want to park the call and press the # key.
If the call is parked successfully, you will hear a voice prompt that the call is parked.
Tip: You can use a Park key or a BLF key to park a call to a specific contact directly.
Related Topics
Parking or Retrieving a Call with a Park or Retrieve Key
Parking or Retrieving a Call by BLF Key
Retrieving a Parked Call in the FAC Mode
You can retrieve a parked call in the FAC mode from any phone within your network.
Before You Begin
Your system administrator has set call park in the FAC mode. There is a call parked on the extension.
Procedure
1. Select Retrieve (You may need to select More( ) > Retrieve) on the dialing screen.
The phone will dial the park retrieve code which is configured in advance.
2. Follow the voice prompt to retrieve:
lPress the # key on the phone where the call is parked.
lEnter the desired extension followed by # (for example, 4606#) on any phone.
Tip: When the phone is idle, you can use a Retrieve key or a BLF key to retrieve a parked call directly.
Related Topics
Parking or Retrieving a Call with a Park or Retrieve Key
Parking or Retrieving a Call by BLF Key
Retrieving a Call by a BLF List Key
Parking or Retrieving a Call in the Transfer Mode
You can park the call to the shared parking lot through a blind transfer.
For some servers, the system will return a specific retrieve park number (park retrieve code) after parking suc-
cessfully.
Topics
Parking a Call in the Transfer Mode
Retrieving a Parked Call in the Transfer Mode
Parking a Call in the Transfer Mode
You can park a call in the transfer mode directly. When you park a call to the shared parking lot, the call is held on
your phone.
Before You Begin
Your system administrator has set call park in the Transfer mode.
Procedure
1. During a call, select Park (You may need to select More( ) > Park).
Yealink T4 Series IP Phones User Guide
58
The call will be directly transferred to the shared parking lot.
Tip: You can use a Call Park key to park a call to a specific shared parking lot directly.
Related Topic
Parking or Retrieving a Call with a Park or Retrieve Key
Retrieving a Parked Call in the Transfer Mode
You can retrieve a parked call in the transfer mode from any phone in the same network.
Before You Begin
Your system administrator has set call park in the Transfer mode. There is a call parked on the shared parking lot.
Procedure
1. Select Retrieve (You may need to select the More( ) > Retrieve) on the dialing screen.
The phone will retrieve the parked call from the shared parking lot.
Tip: When the phone is idle, you can use a Retrieve key to retrieve a parked call directly.
Related Topic
Parking or Retrieving a Call with a Park or Retrieve Key
Parking or Retrieving a Call with a Park or Retrieve Key
You can easily use a Park key to park a call to a specific extension (if the FAC mode is set) or shared parking lot (if
the Transfer mode is set), and quickly retrieve this parked call using a retrieve key.
Topics
State Indicator of the Park/Retrieve key
Parking a Call using a Park Key
Retrieving a Parked Call using a Retrieve Key
State Indicator of the Park/Retrieve key
On T48S/T48G/T46S/T46G phones, you can get the call park/retrieve status by viewing the icon indicator of the
Park/Retrieve key.
For T48S/T48G phones:
Icons Description Icons Description
Park successfully/Idle state. Park failed.
Ringing state. Retrieve parked call.
For T46S/T46G phones:
Icons Description Icons Description
Park successfully/Idle state. Park failed.
Ringing state. Retrieve parked call.
Parking a Call using a Park Key
You can set a line key as a Park key, and specify an extension or a shared parking lot you want to park a call to for
this key. By using the Park key you can park a call quickly.

Advanced Call Features
59
Before You Begin
Check with your system administrator if the FAC or Transfer mode is set on your phone, and if Account ID is neces-
sary for this key.
Procedure
1. Go to Menu >Features >Dsskey.
2. Select the desired line key.
3. Select Key Event from the Type field.
4. Select Call Park from the Key Type field.
5. (Optional.) Select the desired line from the Account ID field.
6. Do one of the following:
l(Optional.) Enter the string that will appear on the phone screen in the Label field.
Enter the park extension number or the shared parking lot you want to park the call to in the Value field.
lOn the T46S/T46G phones, highlight the Label or Value field. Select Directory (Dir) and select the desired
contact from the Directory list.
On the T48S/T48G phones, select , and then select the desired contact.
7. Select Save.
Tip: By default, you can long press the desired line key to set it.
During a call, you can press the Call Park key, and the call is parked to the desired extension or the shared parking
lot directly.
Retrieving a Parked Call using a Retrieve Key
You can set a line key as a Retrieve key, and specify a parked extension or retrieve lot you want to retrieve a
parked call from for this key. By using the Retrieve key you can retrieve a parked call quickly.
Before You Begin
Check with your system administrator if the FAC or Transfer mode is set on your phone, and if Account ID is neces-
sary for this key.
Procedure
1. Go to Menu >Features >Dsskey.
2. Select the desired line key.
3. Select Retrieve Park from the Type field.
4. (Optional.) Select the desired line from the Account ID field.
5. Do one of the following:
l(Optional.) Enter the string that will appear on the phone screen in the Label field.
Enter the parked extension or the retrieve lot in the Value field.
lOn the T46S/T46G phones, highlight the Label or Value field. Select Directory (Dir) and select the desired
contact from the Directory list.
On the T48S/T48G phones, select , and then select the desired contact.
6. Select Save.
Tip: By default, you can long press the desired line key to set it.
When there is a call parked on the extension or the shared parking lot, you can press the Retrieve key on the idle
screen, and the call is retrieved from the parked extension or shared parking lot directly.
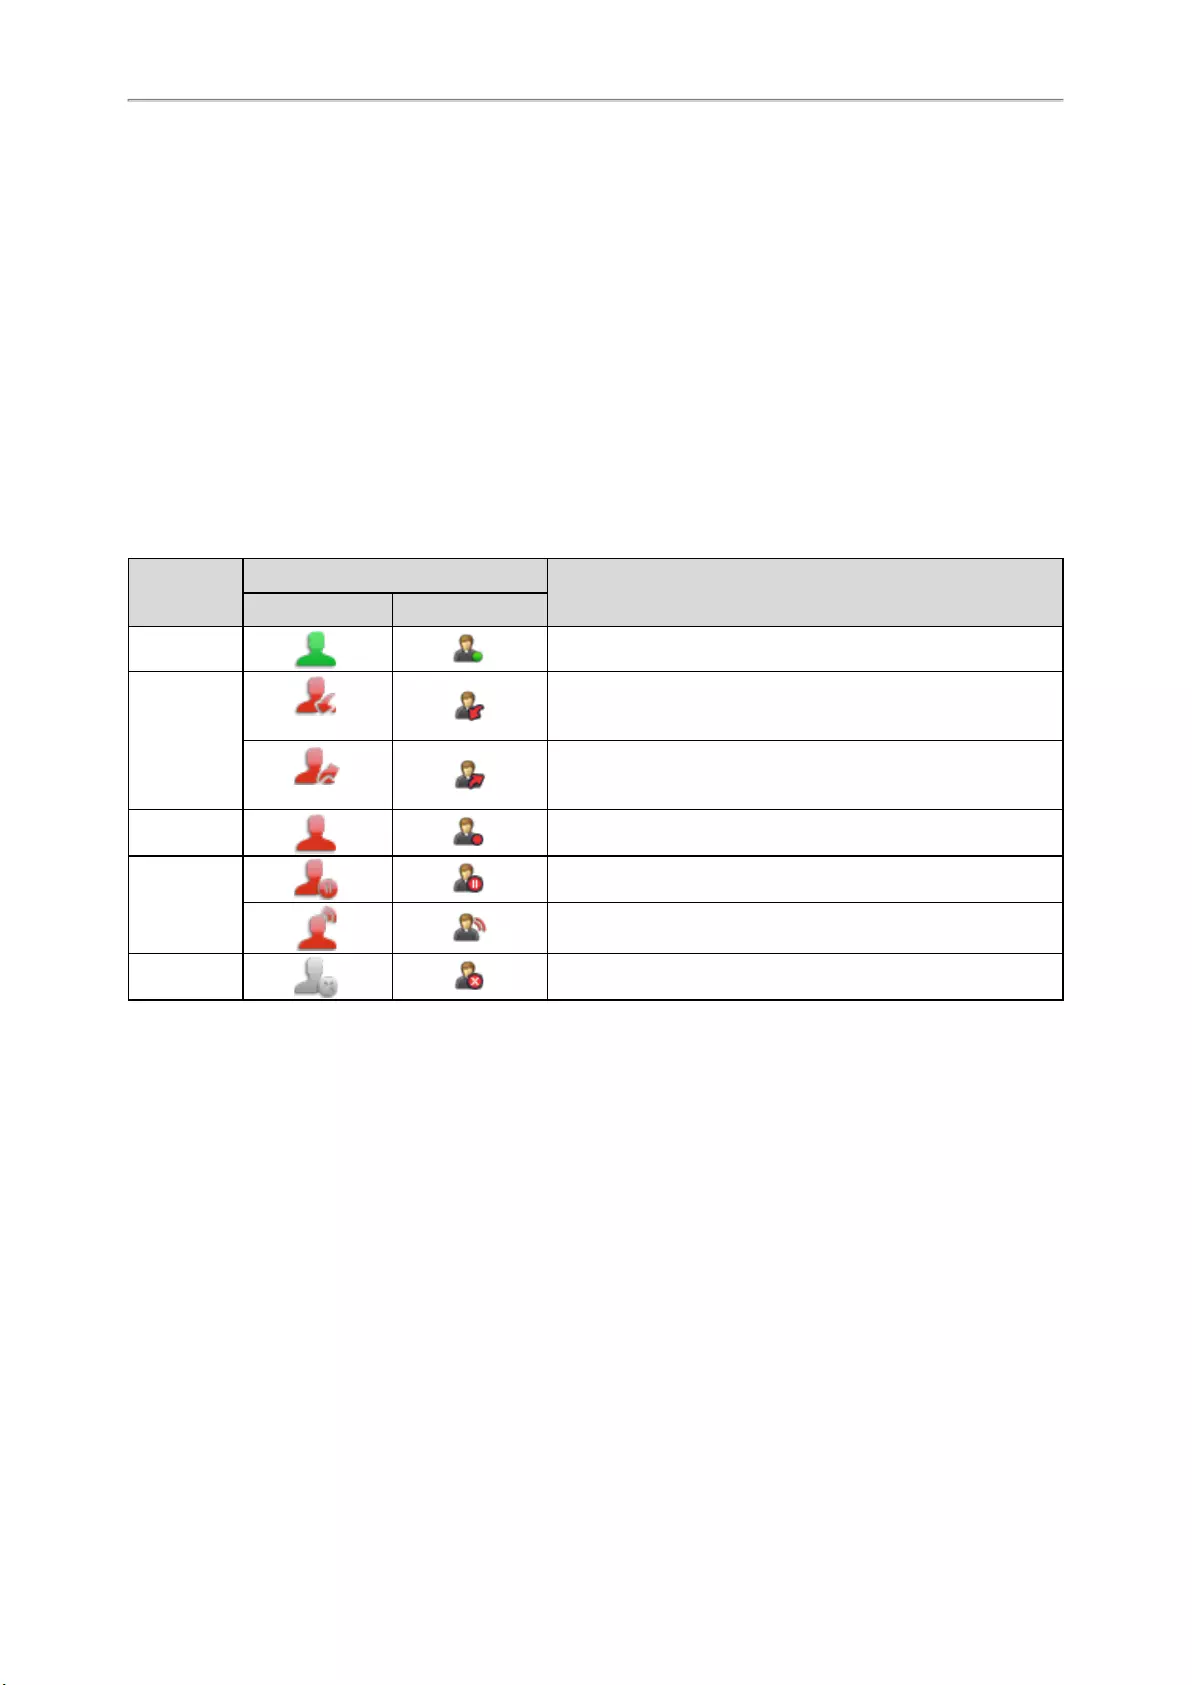
Yealink T4 Series IP Phones User Guide
60
Busy Lamp Field (BLF)
You can monitor a specific remote line using a BLF key for status changes on the phone.
Topics
State Indicator of Remote Line by BLF Key
Audio Alert for BLF Pickup
Visual Alert for BLF Pickup
Setting a BLF Key
Picking up a Remote Call by BLF Key
Transferring a Call by BLF Key
Parking or Retrieving a Call by BLF Key
State Indicator of Remote Line by BLF Key
You can get the monitored line’s status by viewing the LED and icon indicator of the BLF key.
The state indicator of the BLF key varies by phone models.
LED Status Icons Description
T48S/T48G T46S/T46G
Solid green The monitored line is idle.
Fast-flashing
red
(Flashing)
The monitored line is ringing.
(Flashing)
The monitored line is dialing.
Solid red The monitored line is busy or in a call.
Slowly-flash-
ing red
The monitored line places a call on hold.
A call is parked to the monitored line.
Off Monitored line fails to register or does not exist.
Audio Alert for BLF Pickup
The Audio Alert for BLF Pickup feature allows your phone to play a tone when the specified monitored line receives
an incoming call.
Setting an Alert Tone for Monitored Lines
You can set the alert ring type for the monitored lines to make it easier to recognize.
Before You Begin
Check with your system administrator to find out if the Audio Alert for BLF Pickup feature is available.
Procedure
1. Go to Menu >Basic >Sound >BLF Ring Type.
On the T42S/T42G/T41S/T41P/T40P/T40G phones, go to Menu >Settings >Basic Settings >Sound >BLF
Ring Type.
2. Select the desired ring tone.
3. Select Save.
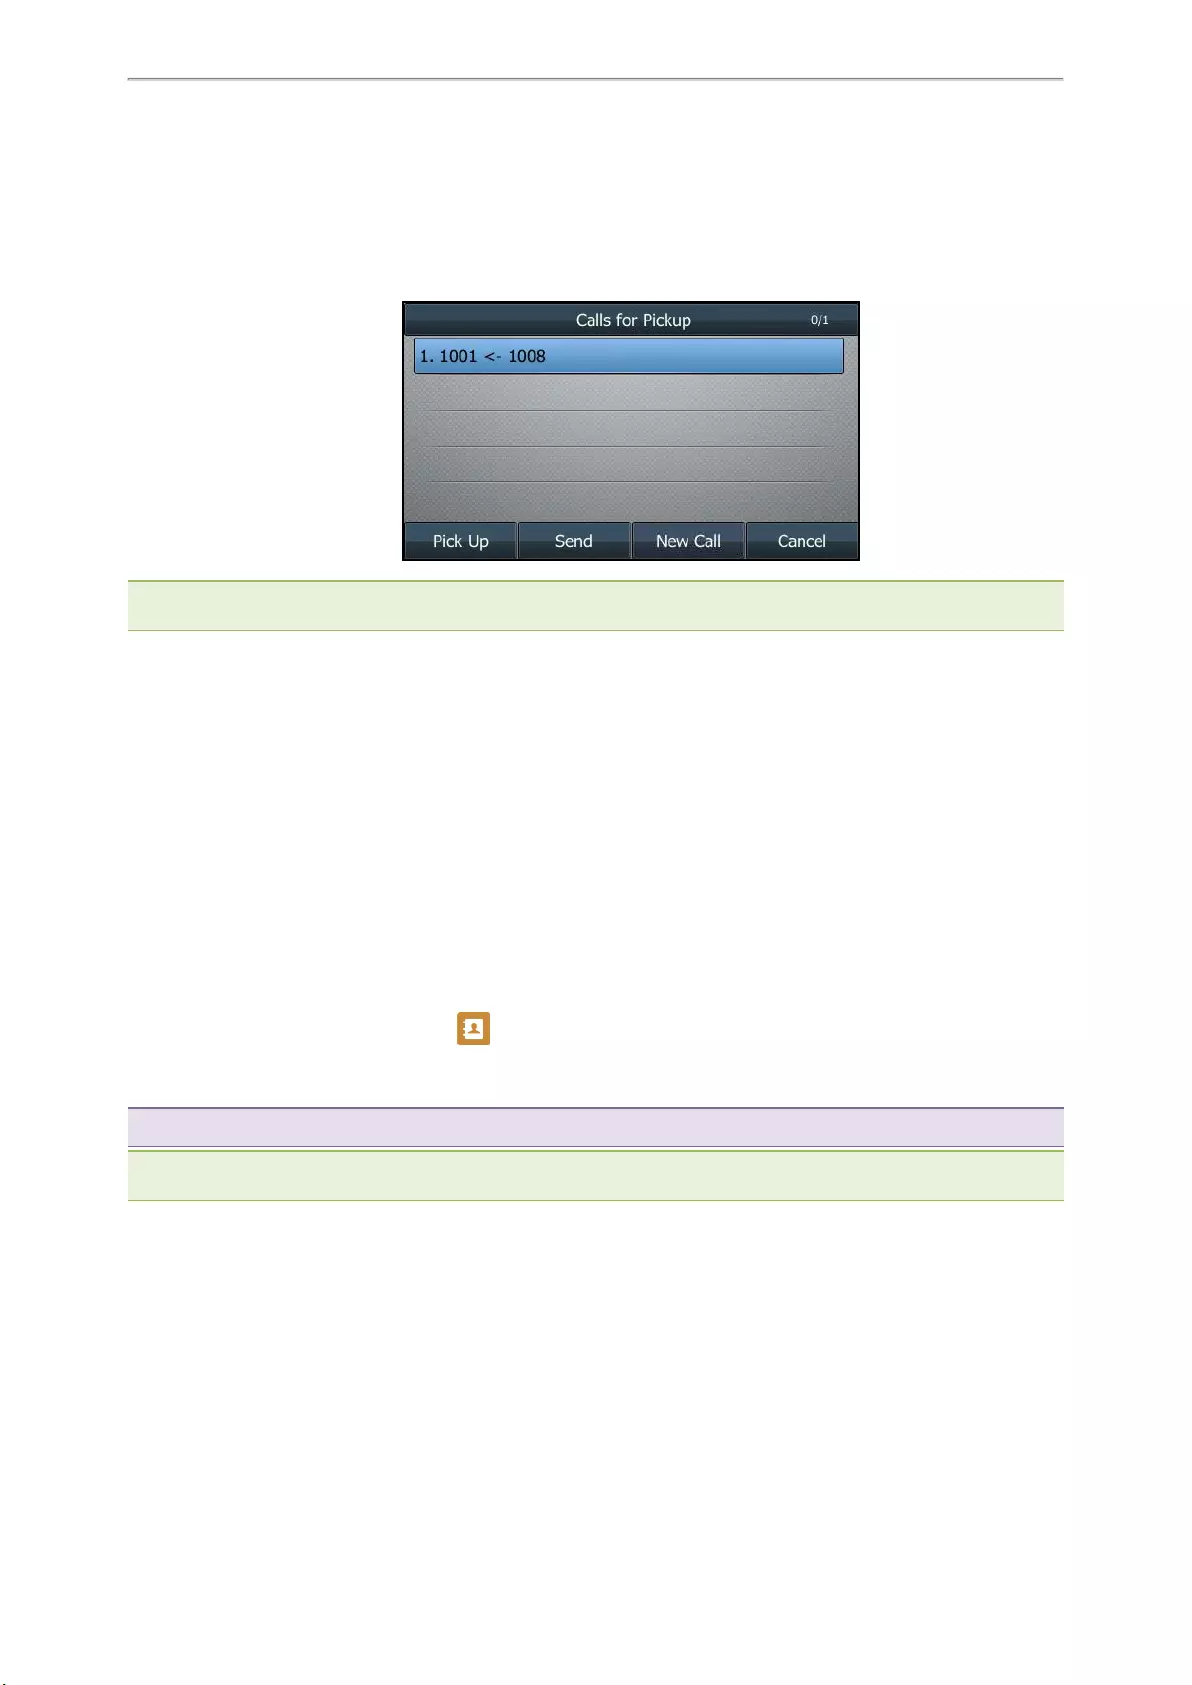
Advanced Call Features
61
Visual Alert for BLF Pickup
Your system administrator can configure your phone to display the call information when the specified monitored
line receives an incoming call.
You can select to pick up the call to the monitored line, place a call to the monitored line, place a new call or go
back to the idle screen.
Note: If you press Cancel to go back to the idle screen, you can long press the BLF key to enter the Calls for Pickup screen
again.
Setting a BLF Key
You can set a BLF key to monitor a specific line for status changes on the phone.
Procedure
1. Go to Menu >Features >Dsskey.
2. Select the desired line key.
3. Select BLF from the Type field.
4. Select the desired line from the Account ID field.
5. Do one of the following:
l(Optional.) Enter the string that will appear on the phone screen in the Label field.
Enter the phone number or the extension you want to monitor in the Value field.
lOn the T46S/T46G phones, highlight the Label or Value field. Select Directory (Dir) and select the desired
contact from the Directory list.
On the T48S/T48G phones, select , and then select the desired contact.
6. (Optional.) Enter the directed call pickup code in the Extension field.
7. Select Save.
Tip: By default, you can long press the desired line key to set it.
Note: During a call, you can press the BLF key to select a transfer mode. Check with your system administrator to find out if
this feature is available on the phone.
Picking up a Remote Call by BLF Key
When the monitored users are not at their desks and someone rings their lines, you can pick up the desired call
simply by pressing the flashing BLF key.
If your system administrator sets the directed call pickup code in advance, you can use the BLF key to pick up the
call directly. If not or if you want to set a pickup code for a specific BLF line, you can set a pickup code for the BLF
key manually.
Before You Begin

Yealink T4 Series IP Phones User Guide
62
You have edited the BLF key’s Extension field with the directed call pickup code from your system administrator.
Procedure
1. When the monitored line receives an incoming call, you can do one of the following:
lPress the BLF key to pick up the call for the monitored line directly.
lLong press the BLF key.
The Pick Up,Send,New Call and Cancel appear on the screen.
Select Pick Up to pick up the call.
If there are multiple incoming calls on the monitored line, select the desired call to pick up.
Related Topic
Setting a BLF Key
Transferring a Call by BLF Key
When there is already an active call on the IP phones, you can transfer the active call to the monitored line by press-
ing the BLF key.
The phone transfers the active call differently depending on the Transfer Mode via Dsskey feature configured by
your system administrator.
Topics
Performing a Blind Transfer
Performing a Semi-attended/Attended Transfer
Performing a Blind Transfer
During a call, you can transfer the call to the monitored contact in a blind-transfer way.
Before You Begin
Check with your system administrator if the Transfer Mode via Dsskey is set to Blind Transfer.
Procedure
1. During a call, press the BLF key of the monitored line which you want to transfer this call to.
Performing a Semi-attended/Attended Transfer
During a call, you can transfer the call to the monitored contact in the semi-attended/attended-transfer way.
Before You Begin
Check with your system administrator if the Transfer Mode via Dsskey is set to Attended Transfer.
Procedure
1. During a call, press the BLF key of the monitored line which you want to transfer this call to.
The phone will dial out the number of the monitored line.
2. Press the BLF key of the monitored line again or Transfer (Trans) to complete the transfer when the monitored
user receives ringback or after the monitored user answers the call.
Parking or Retrieving a Call by BLF Key
You can use the BLF key to park a call or retrieve a parked call directly.
Note: Check with your system administrator to find out if it is available on your phone.
Topics

Advanced Call Features
63
Parking a Call to a Monitored Line
Retrieving a Parked Call
Parking a Call to a Monitored Line
During the call, you can use the BLF key to park the current call to a monitored line directly.
Before You Begin
Your system administrator has set call park feature in the FAC mode in advance.
Procedure
1. During a call, selectPark (You may need to select the More( ) > Park).
2. Press the desired BLF key to park the call to the monitored line.
On the T48S/T48G phones, select to back to the idle screen, and then tap the desired BLF key to park the
call to the monitored line.
Retrieving a Parked Call
You can use the BLF key to retrieve a call that is parked to the monitored line.
Before You Begin
Your system administrator has set call park feature in the FAC mode.
Procedure
1. Select Retrieve on the dialing screen.
2. Press the desired BLF key to retrieve a call that is parked to the monitored line.
On the T48S/T48G phones, tap to back to the idle screen, and then tap the desired BLF key to retrieve a call
that is parked to the monitored line.
BLF List
BLF List feature enables you to monitor a list of users defined by your system administrator, and the respective key
LEDs or icons will either flash or glow depending on the status of monitored lines.
Check with your system administrator to find out if this feature is available on your phone.
Topics
State Indicator of Remote Line by BLF List Key
Audio Alert for BLF Pickup
Visual Alert for BLF Pickup
Ring Type for BLF Parked Call Monitor
Visual Alert for BLF Parked Call Monitor
Picking up a Remote Call by BLF List Key
Transferring a Call by BLF List Key
Parking a Call by a BLF List Key
Retrieving a Call by a BLF List Key
Barging in an Active Call by BLF List Key
Retrieving a Call Parked to the Monitored Line
State Indicator of Remote Line by BLF List Key
You can get the monitored line’s status by viewing the LED and icon indicator of the BLF List key.
The state indicator of the BLF list key varies by phone models.
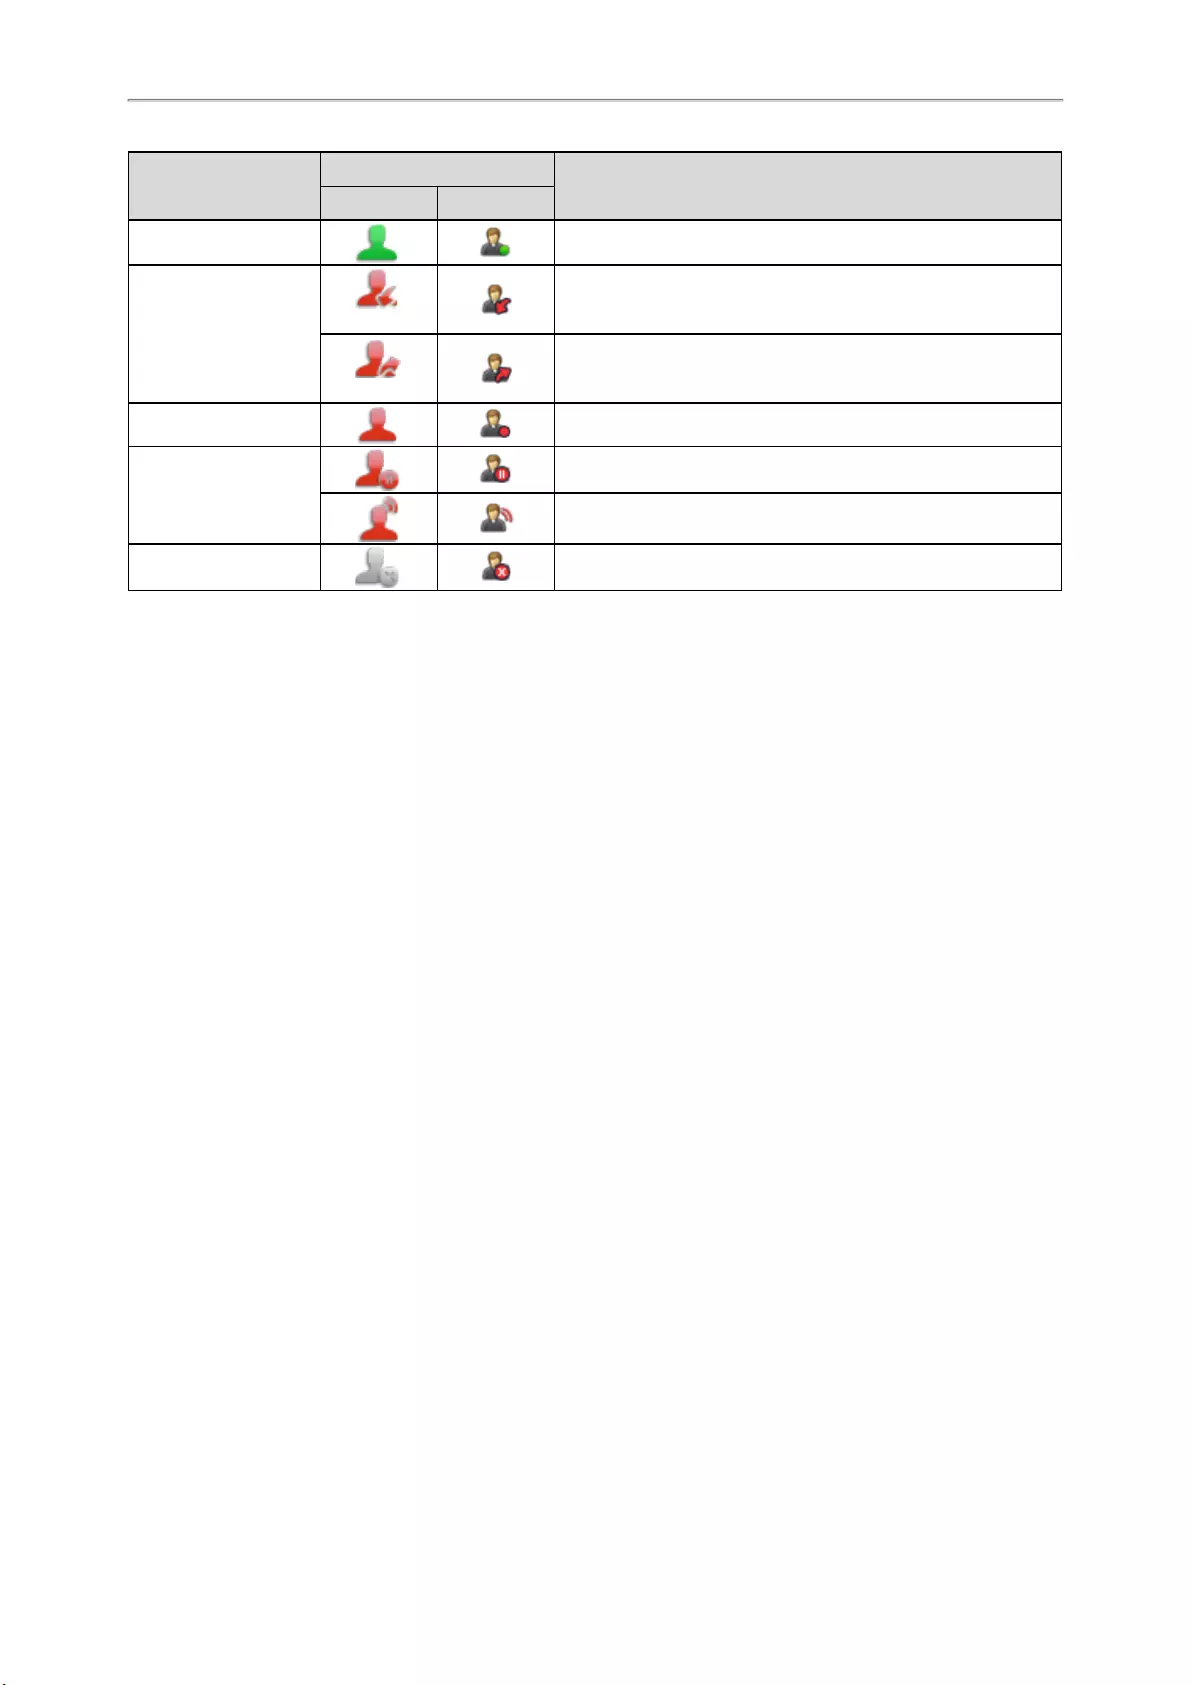
Yealink T4 Series IP Phones User Guide
64
LED Status Icons Description
T48S/T48G T46S/T46G
Solid green The monitored line is idle.
Fast-flashing red (Flashing)
The monitored line is ringing.
(Flashing)
The monitored line is dialing.
Solid red The monitored line is busy or in a call.
Slowly-flashing red
The monitored line places a call on hold.
A call is parked to the monitored line.
Off The monitored line fails to register or does not exist.
Audio Alert for BLF Pickup
The Audio Alert for BLF Pickup feature allows your phone to play a tone when the specified monitored line receives
an incoming call.
Setting an Alert Tone for Monitored Lines
You can set the alert ring type for the monitored lines to make it easier to recognize.
Before You Begin
Check with your system administrator to find out if the Audio Alert for BLF Pickup feature is available.
Procedure
1. Go to Menu >Basic >Sound >BLF Ring Type.
On the T42S/T42G/T41S/T41P/T40P/T40G phones, go to Menu >Settings >Basic Settings >Sound >BLF
Ring Type.
2. Select the desired ring tone.
3. Select Save.
Visual Alert for BLF Pickup
Your system administrator can configure your phone to display the call information when the specified monitored
line receives an incoming call.
You can select to pick up the call to the monitored line, place a call to the monitored line, place a new call or go
back to the idle screen.
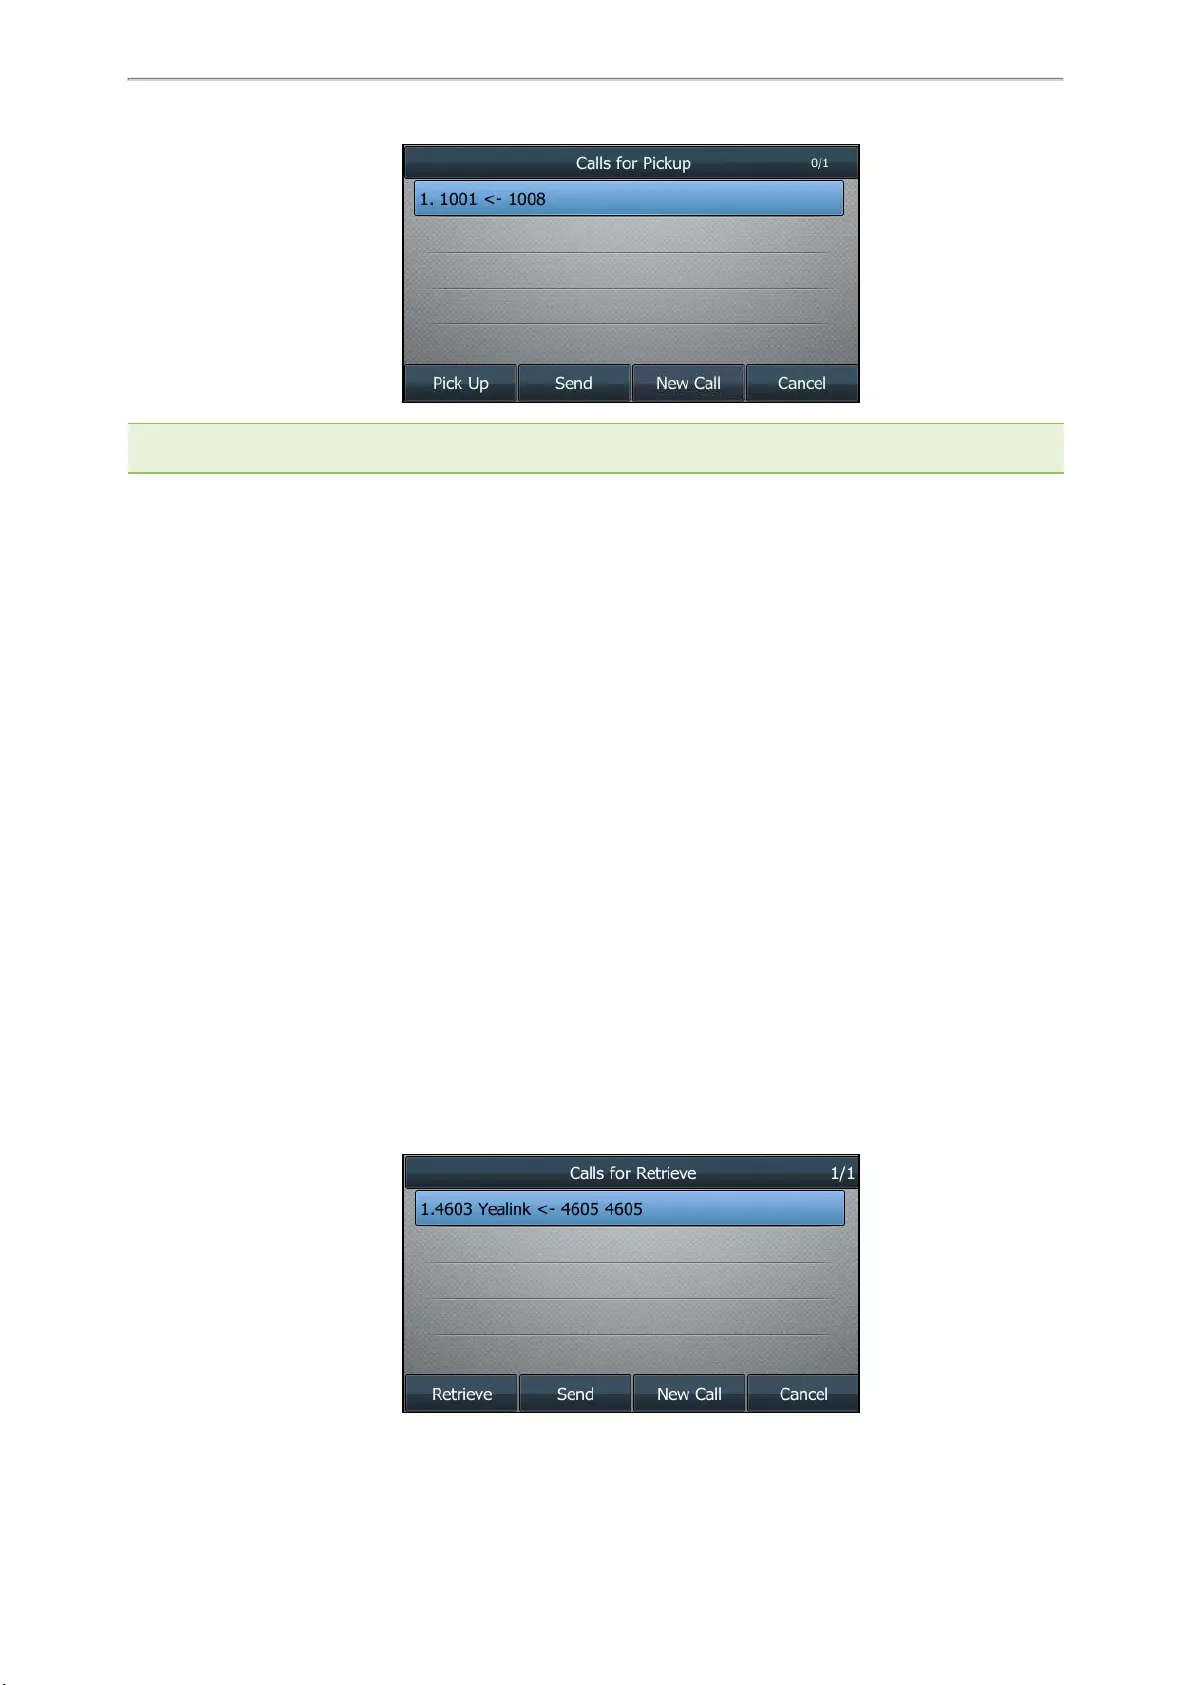
Advanced Call Features
65
Note: If you press Cancel to go back to the idle screen, you can long press the BLF List key to enter the Calls for Pickup
screen again.
Ring Type for BLF Parked Call Monitor
The Audio Alert for BLF Parked Call Monitor feature allows your phone to play a tone when a call is parked against
the monitored user’s phone number.
Topic
Setting an Alert Tone for the BLF Parked Call Monitor
Setting an Alert Tone for the BLF Parked Call Monitor
You can set the alert ring type when there is a call parked to the monitored lines.
Before You Begin
Check with your system administrator to find out if the Audio Alert for BLF Parked Call Monitor feature is available.
Procedure
1. Go to Menu >Basic >Sound >Ring Type for BLF Parked Call Monitor.
On the T42S/T42G/T41S/T41P/T40P/T40G phones, go to Menu >Settings >Basic Settings >Sound >Ring
Type for BLF Parked Call Monitor.
2. Select the desired ring tone.
3. Select Save.
Visual Alert for BLF Parked Call Monitor
Your system administrator can configure your phone to display the call information when the specified monitored
line receives an incoming call.
You can select to retrieve the call parked to the monitored line, place a call to the monitored line, place a new call or
go back to the idle screen.

Yealink T4 Series IP Phones User Guide
66
Picking up a Remote Call by BLF List Key
When the monitor user is not at his/her desk and someone rings his/her line, you can pick up the call simply by
pressing the flashing BLF List key. You can also check the caller ID first, and then pick up the incoming call.
Before You Begin
Check with your system administrator to find out if this feature is available on your phone.
Procedure
1. Do one of the following:
lPress the BLF List key to pick up the call for the monitored line directly.
lLong press the BLF List key.
The Pick Up,Send,New Call and Cancel appear on the screen.
Select Pick Up to pick up the call.
If there are multiple incoming calls on the monitored line, select the desired call to pick up.
Transferring a Call by BLF List Key
When there is already an active call on the IP phones, you can transfer the active call to the monitored user by
pressing the BLF List key.
The phone transfers (Blind Transfer or Attended Transfer) the active call differently depending on the Transfer Mode
via Dsskey feature configured by your system administrator.
Note: During a call, you can press the BLF List key to select a transfer mode. Check with your system administrator to find
out if this feature is available on the phone.
Topics
Performing a Blind Transfer
Performing a Semi-attended/Attended Transfer
Performing a Blind Transfer
During a call, you can use the BLF List key to perform a blind transfer to the monitored line.
Before You Begin
Check with your system administrator to make sure that the Transfer Mode via Dsskey is set to Blind Transfer.
Procedure
1. During a call, press the BLF List key of the monitored line which you want to transfer this call to.
Performing a Semi-attended/Attended Transfer
During a call, you can use the BLF List key to perform a semi-attended/attended transfer to the monitored line.
Before You Begin
Check with your system administrator if the Transfer Mode via Dsskey is set to Attended Transfer.
Procedure
1. During a call, press the BLF List key of the monitored line which you want to transfer this call to.
The phone will dial out the number of the monitored line.
2. Press the BLF List key of the monitored user again or Transfer (Trans) to complete the transfer when the mon-
itored user receives ringback or after the monitored user answers the call.
Parking a Call by a BLF List Key
You can use the BLF List key to park a call to the monitored user who is idle.

Advanced Call Features
67
Before You Begin
Check with your system administrator to find out if this feature is available on your phone.
Procedure
1. During a call, press the desired BLF List key.
Retrieving a Call by a BLF List Key
You can use the BLF List key to retrieve a call that is parked to the monitored line.
Before You Begin
Check with your system administrator to find out if this feature is available on your phone.
Procedure
1. Do one of the following:
lPress the desired BLF List key to retrieve a call that is parked to the monitored line.
On the T48S/T48G phones, tap to return to the idle screen, and then tap the desired BLF list key to
retrieve a call that is parked to the monitored line.
lLong press the BLF List key.
The Retrieve,Send,New Call and Cancel appear on the screen.
Select Retrieve to retrieve the call.
On the T48S/T48G phones, tap to return to the idle screen, long tap the desired BLF List key, and then tap
Retrieve to retrieve a call that is parked to the monitored line.
Barging in an Active Call by BLF List Key
You can use the BLF List key to barge in a conversation and set up a conference call.
Before You Begin
Check with your system administrator to find out if this feature is available on your phone.
Procedure
1. Do one of the following:
lPress the BLF List key.
lLong press the BLF List key.
The Barge In,Send,New Call and Cancel appear on the screen.
Select Barge In.
The phone dials out the barge-in code followed by the monitored line, and then you can join the call. Each of
the three parties can hear the other two parties.
Retrieving a Call Parked to the Monitored Line
When a call is parked to the monitored line, you can retrieve the parked call on the phone.
Before You Begin
Check with your system administrator to find out if Visual Alert for BLF Parked Call Monitor is enabled on your
phone.
Procedure
1. Select Retrieve.
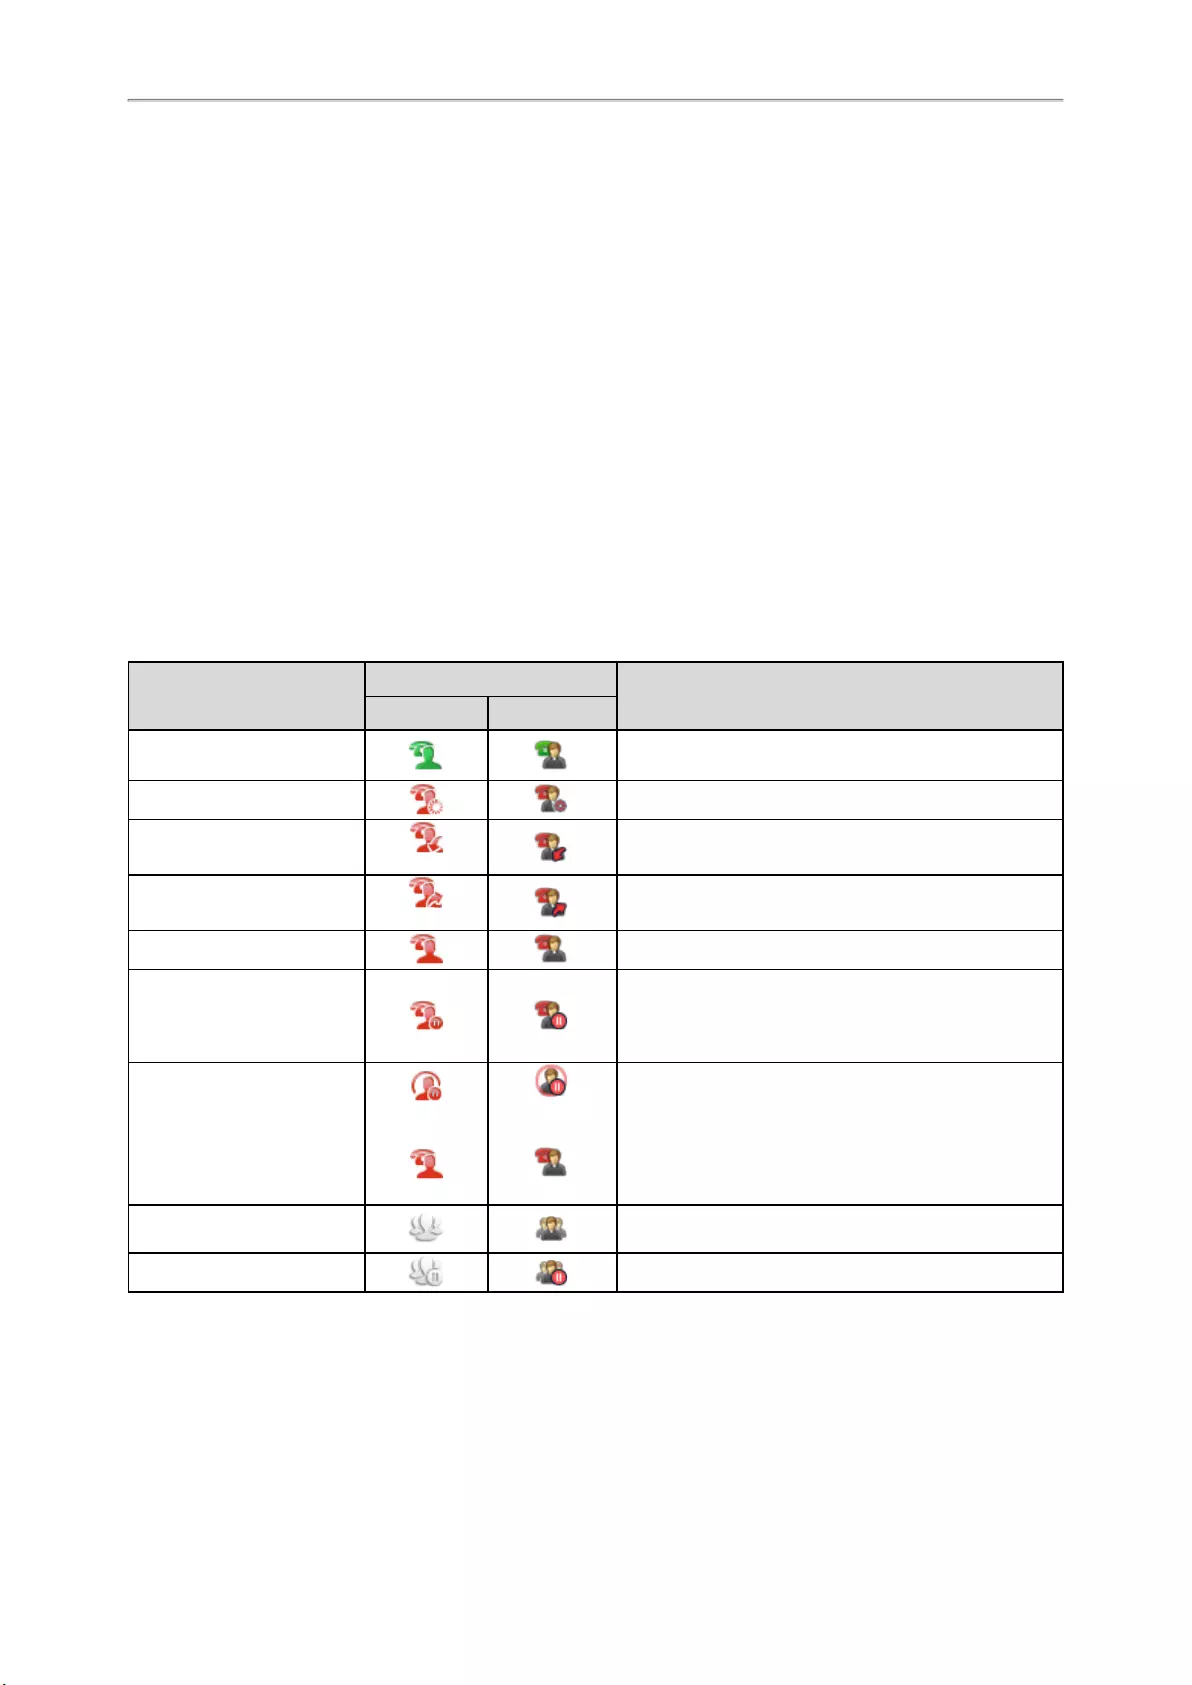
Yealink T4 Series IP Phones User Guide
68
Shared Line
Yealink phone supports using Shared Call Appearance (SCA) or Bridged Line Appearance (BLA) to share a line.
So that this line can be registered on more than one phone at the same time.
Your system administrator can set your phone to use the shared line.
Topics
State Indicator of Shared Line
Placing Calls on a Shared Line
Answering Calls on a Shared Line
Placing a Call on Public Hold
Placing a Call on Private Hold
Retrieving a Held Call on a Shared Line
Barging in an Active Call on a Shared Line
Pulling a Shared Call on a Shared Line
State Indicator of Shared Line
You can get the shared line’s status by viewing the LED and icon indicator of the shared line key.
The following table shows all kinds of LED and icon indicator associated with the shared line and the cor-
responding descriptions:
Line Key LED
except for T48S/T48G
Icons Description
T48S/T48G T46S/T46G
Off The shared line is idle.
Solid green The shared line is seized.
Fast-flashing green (Flashing) The shared line receives an incoming call.
Solid green (Flashing) The shared line is dialing.
Solid green The shared line is busy or is in a call.
Slowly-flashing green (local
phone)
Slowly-flashing red (other
phones)
The call on the shared line is placed on public hold.
Slowly-flashing green (local
phone)
Solid red (other phones)
(Local SCA
Phone)
(Other Phone)
(Local SCA
Phone)
(Other Phone)
The call on the shared line is placed on private hold.
Solid green The call on the shared line is barged in by the other
shared line user.
Slowly-flashing green In a multi-party call, place the call on hold locally.
Placing Calls on a Shared Line
You can place one or multiple calls on a shared line.
The phone places a call on the first shared line key automatically. You can select the desired shared line key first
and place a call using this key.

Advanced Call Features
69
Related Topic
Placing Calls
Answering Calls on a Shared Line
You can answer one or more calls on the shared line.
When an incoming call arrives on the shared line, all the registered phones will ring simultaneously, and the call
can be answered on any one of the phones. Incoming calls will be distributed evenly among the available shared
line keys.
Note: If the number of incoming calls is greater than the configured line keys, the line keys will be used by sequence cir-
culation. Contact your system administrator for more information.
Related Topic
Answering Calls
Placing a Call on Public Hold
You can place a call on public hold that any shared line phone can retrieve the held call.
Procedure
1. During a call, press the HOLD key or Hold.
The call is held on your phone, and all of the phones registered with a shared line show the call is in a held
state on the shared line key.
Placing a Call on Private Hold
In the SCA scenario, you can place a call on private hold that only you can retrieve the held call.
The PriHold soft key can be preset by your system administrator, you can also set a line key as the private hold key
manually if the PriHold soft key is not available on your phone. You need to configure a private hold key before you
place the call on private hold.
Procedure
1. Go to Menu >Features >Dsskey.
2. Select the desired line key.
3. Select Key Event from the Type field.
4. Select Private Hold from the Key Type field.
5. (Optional.) Enter the string that will display on the phone screen in the Label field.
6. Select Save.
Tip: By default, you can long press the desired line key to set it.
During an SCA call, press PriHold or Private Hold key on the phone (You may need to press the More ( )
soft key to see the PriHold soft key). Then the call is held on your phone, and the other phones registered with a
shared line show the call is in the busy state on the shared line key. Other users on the shared line cannot resume
your held call.
Retrieving a Held Call on a Shared Line
If you place a call on hold on a shared line, you can resume this call at any time. When the shared line key shows a
call that is in a held state, you can resume the held call remotely from other user’s phone.
Before You Begin
There is at least one call placed on public hold on the shared line.
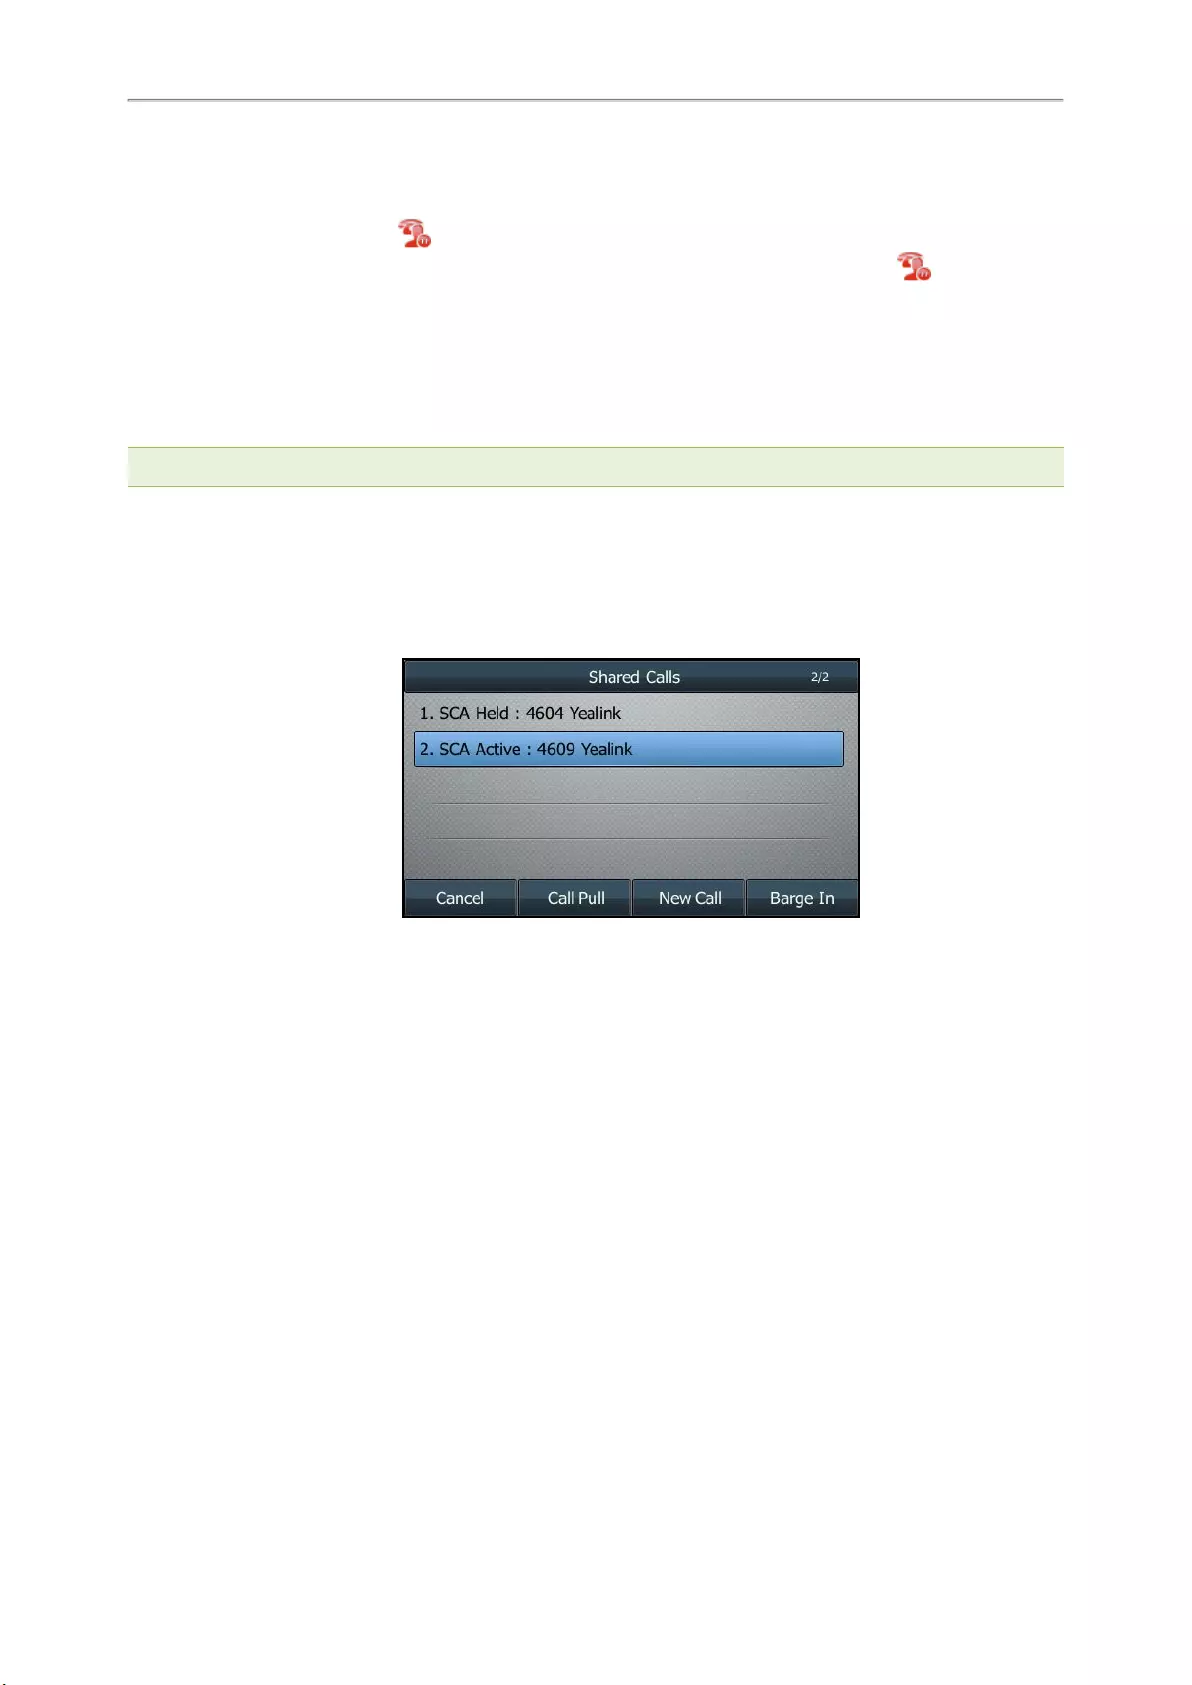
Yealink T4 Series IP Phones User Guide
70
Procedure
1. Do one of the following:
lPress the line key or select .
lIn the SCA scenario, long press the shared line key. On the T48S/T48G phones, long tap .
The Cancel,Call Pull (CallPull), New Call (NewCall) and Retrieve appear on the screen.
Select Retrieve to retrieve the call.
Barging in an Active Call on a Shared Line
In the SCA scenario, you can barge into an active call on the shared line. After you barge into a call, the call turns
into a three-party conference.
Note: Only one user can barge into an active call on the shared line at a time.
Before You Begin
There is at least one active call on the shared line.
Procedure
1. Long press the desired line key, and then select an active call.
The Cancel,Call Pull (CallPull), New Call (NewCall) and Barge In (BargeIn) appear on the phone screen.
2. Select Barge In (BargeIn) to interrupt the active call.
Pulling a Shared Call on a Shared Line
In SCA scenario, both you and other users can pull an existing call from another shared phone that is an active or
hold state.
Check with your system administrator to find out if this feature is available for your phone.
Before You Begin
There is an active or held call on the shared line.
Procedure
1. Long press the line key, and then select a call.
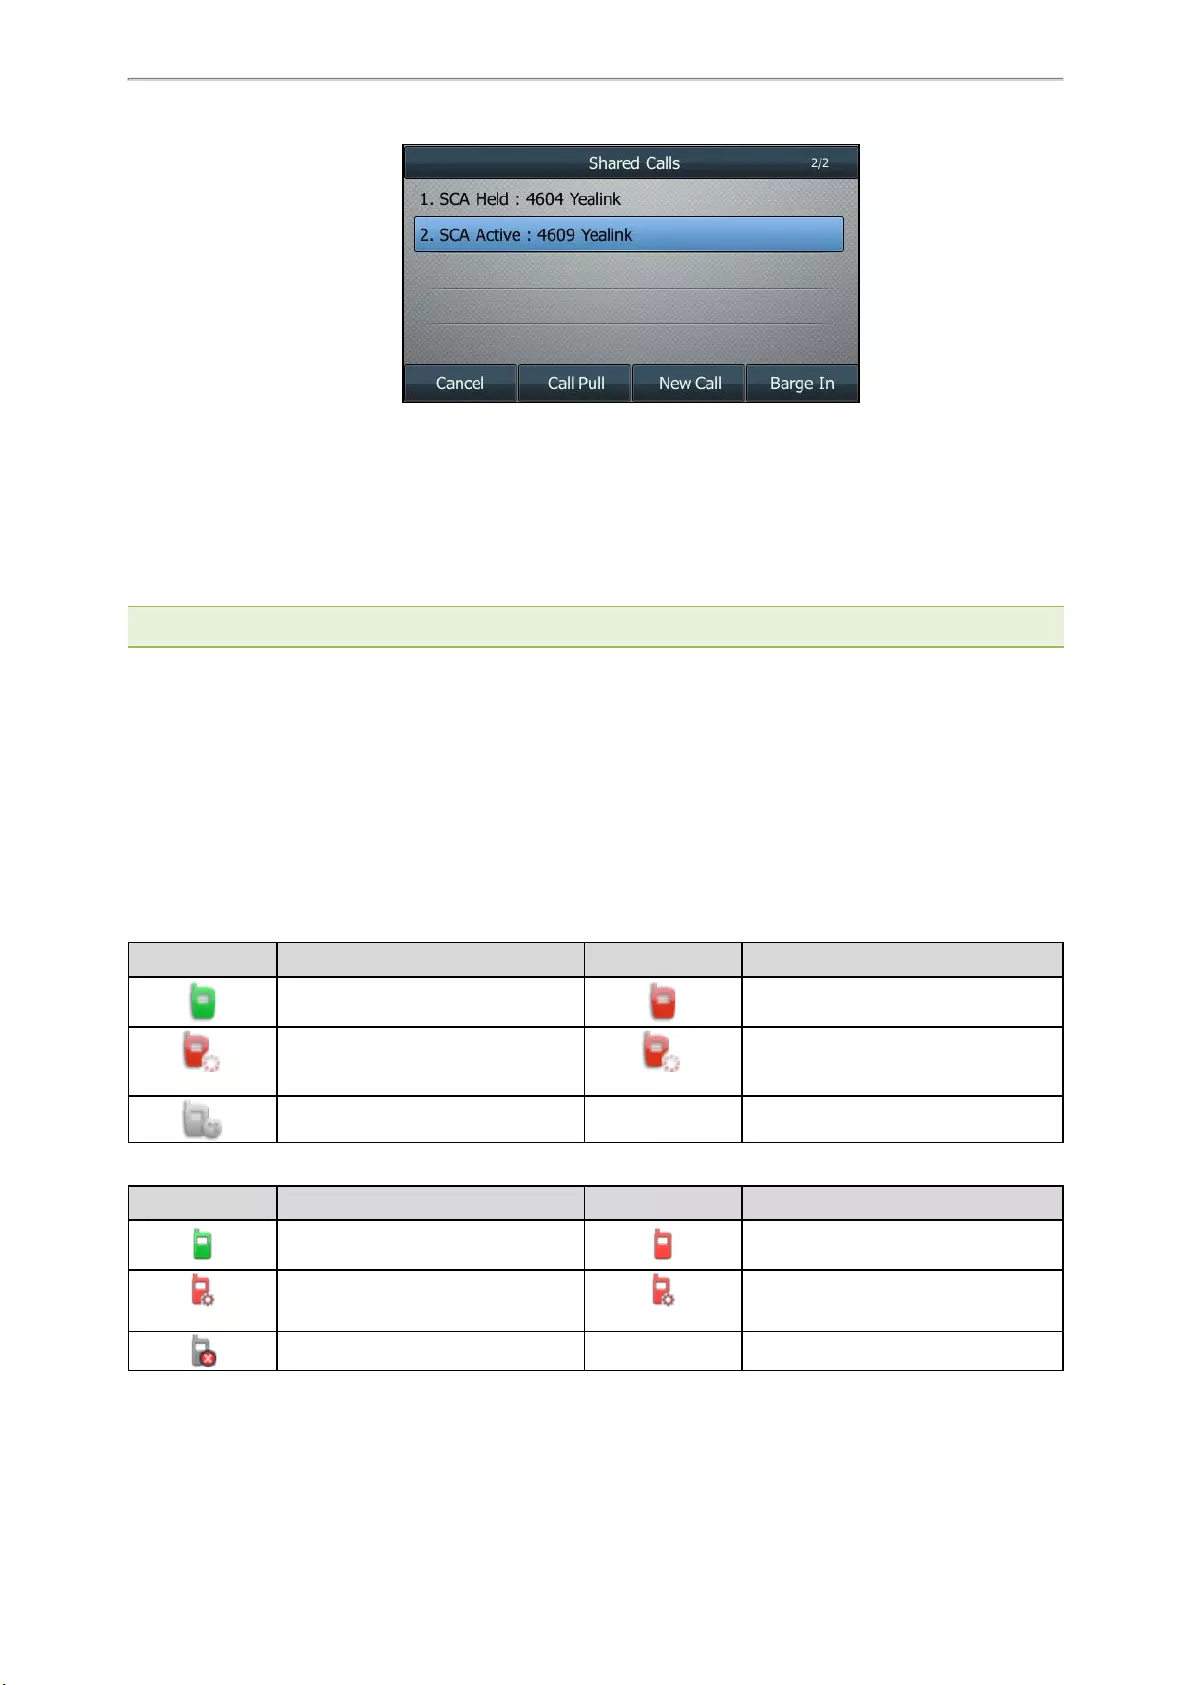
Advanced Call Features
71
2. Select Call Pull (CallPull) to pull the call.
Intercom
Intercom is a useful feature in an office environment to quickly connect with the operator or the secretary.
Intercom enables you to place an intercom call that is answered automatically on the contact’s phone as long as the
contact is not in an active call.
Note: Intercom is not available on all servers. Contact your system administrator for more information.
Topics
State Indicator of the Intercom key
Placing an Intercom Call
Picking up an Incoming Call of the Target Extension
Answering an Intercom Call
State Indicator of the Intercom key
On T48S/T48G/T46S/T46G phones, you can get the intercom status by viewing the icon indicator of the Intercom
key.
For T48S/T48G phones:
Icons Description Icons Description
Target extension is available. Target extension is ringing.
Callout
Target extension is dialing.
Talking
Target extension is busy or is in a call.
Target extension fails to register.
For T46S/T46G phones:
Icons Description Icons Description
Target extension is available. Target extension is ringing.
Callout Target extension is dialing. Talking Target extension is busy or is in a call.
Target extension fails to register.
Placing an Intercom Call
You can place an intercom call to quickly relay a message to a contact.

Yealink T4 Series IP Phones User Guide
72
The target phone plays a warning tone and automatically answers the call in speakerphone (hands-free) mode by
default. When the target phone has an active call, the intercom call is answered automatically after the active call
ends.
You can also press the BLF/BLF List key to initiate an outgoing intercom call to the monitored user. Check with your
system administrator to find out if it is available on your phone.
Procedure
1. Go to Menu >Features >Dsskey.
2. Select the desired line key.
3. Select Intercom from the Type field.
4. Select the desired line from the Account ID field.
5. Do one of the following:
l(Optional.) Enter the string that will appear on the phone screen in the Label field.
Enter the target extension number in the Value field.
lOn the T46S/T46G phones, highlight the Label or Value field. Select Directory (Dir) and select the desired
contact from the Directory list.
On the T48S/T48G phones, select , and then select the desired contact.
6. Select Save.
7. Press the Intercom key to place an intercom call.
Tip: By default, you can long press the desired line key to set it.
Related Topic
Setting a BLF Key
Picking up an Incoming Call of the Target Extension
You can pick up the target extension’s incoming call by pressing the Intercom key.
Before picking up an incoming call, make sure that the directed call pickup code has been configured either for an
Intercom key or for Call Pickup feature in advance.
Check with your system administrator to find out if this feature is available on your phone.
Note: If the directed call pickup code is not set, the phone will place a call to the target extension instead of picking up an
incoming call of the target extension when you press the Intercom key.
Before You Begin
Get the directed call pickup code from your system administrator.
Procedure
1. Long press the Intercom key.
2. Enter the directed call pickup code in the Extension field.
3. Select Save.
When the target extension receives an incoming call, the Intercom key icon of the target extension will change to
on the T48S/T48G phones, the Intercom key LED of the target extension will flash green on all other IP phones.
Press the Intercom key to pick up the incoming call directly.
Answering an Intercom Call
By default, when there is an incoming intercom call, the phone plays a warning tone and automatically answer the
incoming call.

Advanced Call Features
73
During the intercom call, you can switch among the Speakerphone (hands-free), Handset and headset modes. If
your phone is set to answer intercom calls with your microphone muted, you need to press the Mute key to unmute
your microphone before responding to the call.
You can configure the following behaviors when receiving an intercom call.
Intercom Allow
Intercom Allow feature allows the phone to automatically answer an incoming intercom call. If you disable this fea—
ture, the phone will handle an incoming intercom call like a normal incoming call.
Note: Your system administrator can set a period of delay time before the phone automatically answers intercom calls.
Intercom Mute
Intercom Mute feature allows the phone to mute the microphone when incoming intercom calls are answered auto-
matically.
Intercom Tone
Intercom Tone feature allows the phone to play a warning tone before answering an intercom call automatically.
Intercom Barge
Intercom Barge allows the phone to automatically answer an incoming intercom call while an active call is in pro-
gress. The active call will be placed on hold. If you disable this feature, the phone will handle an incoming intercom
call like a normal incoming call while there is already an active call on the phone.
Note: To enable the phone to receive a new incoming call when it already has an active call, make sure that the call waiting
feature is enabled on the phone in advance.
Procedure
1. Go to Menu >Features >Intercom.
2. Make the desired changes.
3. Select Save.
Related Topics
Switching Among the Handset, Speakerphone and Headset Modes
Muting/Unmuting Audio
Answering a Call When in a Call
Short Message Service (SMS)
Text messages can be stored in your phone’s Inbox, Sentbox, Outbox or Draftbox, and each box stores up to 100
text messages.
If there are more than 100 text messages in any one of the boxes, the phone will directly delete the oldest text mes-
sage in the box.
Note: SMS is not available on all servers. Contact your system administrator for more information.
Topics
Reading a Text Message
Sending a Text Message
Replying to a Text Message
Deleting a Text Message

Yealink T4 Series IP Phones User Guide
74
Reading a Text Message
You can read your text messages on the phone, to obtain text information sent by a contact.
Procedure
1. Go to Menu >Message >Text Message >Inbox.
2. Highlight the desired message and select View.
On the T48S/T48G phones, tap the desired text message to read.
Tip: If the phone prompts you there is a new text message, you can select the View soft key to read the new messages dir-
ectly. But your system administrator can disable the prompt box for the new message(s)
Sending a Text Message
The phones can send text messages.
Procedure
1. Go to Menu >Message >Text Message >New Message.
2. Compose the new text message.
3. On all phones except the T48S/T48G phones, select Send.
4. Select the desired account from the From field.
5. Do one of the following:
lEnter the number you want to send the message to in the To field.
lOn the T46S/T46G phones, highlight the To field. Select Directory (Dir) and select the desired contact from
the Directory list.
On the T48S/T48G phones, select , and then select the desired contact.
6. Send the message.
Replying to a Text Message
You can reply to a message after reading a text message.
Procedure
1. Go to Menu >Message >Text Message >Inbox.
2. Highlight the desired message and select Reply.
On the T48S/T48G phones, tap the desired message and tap Reply.
3. Compose the new text message.
4. Select Send or Send Message.
Deleting a Text Message
You can delete messages from your phone after reading.
Procedure
1. Go to Menu >Message >Text Message >Inbox (Sentbox,Outbox or Draftbox).
2. Highlight the desired message.
On the T48S/T48G phones, tap the desired message.
3. Select Option >Delete.
On the T48S/T48G phones, tap Delete.
On the T42S/T42G/T41S/T41P/T40P/T40G phones, press Delete.
The phone prompts you to delete the message or not.
4. Select OK.

Advanced Call Features
75
You can also delete all text messages by selecting the Delete All.
Voice Mail
Voice Mail feature allows you to leave voice mails for someone or listen to your voice mail messages on your IP
phones.
This feature is set up on the server-side and not all servers support this feature.
Topics
Setting the Voice Mail Code
Leaving Voice Mails
Listening to Voice Mails
Setting the Voice Mail Code
If you want to connect your phone to the message center, you need to set the voice mail code on your phone.
Before You Begin
Get the voice mail code from your system administrator.
Procedure
1. Go to Menu >Message >Voice Mail >Set Voice Mail Code.
You can also press the MESSAGE key when the voice mail code is not configured.
2. Enter the voice mail code (for example, *4) in the desired account field.
3. Select Save.
Leaving Voice Mails
You can leave a voice mail to someone who is busy or inconvenient to answer the call.
Procedure
1. Follow the voice prompts to leave a voice mail.
2. Hang up to complete the voice mail.
Listening to Voice Mails
You can listen to your voice mails on the phone, to obtain voice information sent by a contact.
Before You Begin
You need to set the voice mail code in advance.
Procedure
1. Go to Menu >Message >Voice Mail >View Voice Mail.
The phone screen displays the amount of new and old voice mails.
2. Highlight an account, and then select Connect.
On the T48S/T48G phones, tap the account.
3. Follow the voice prompt to listen to your voice mails.
Tip: When the phone prompts that the phone receives a new voice mail, you can press the MESSAGE key or Connect soft
key to dial out the voice mail access code directly.
Related Topic
Setting the Voice Mail Code
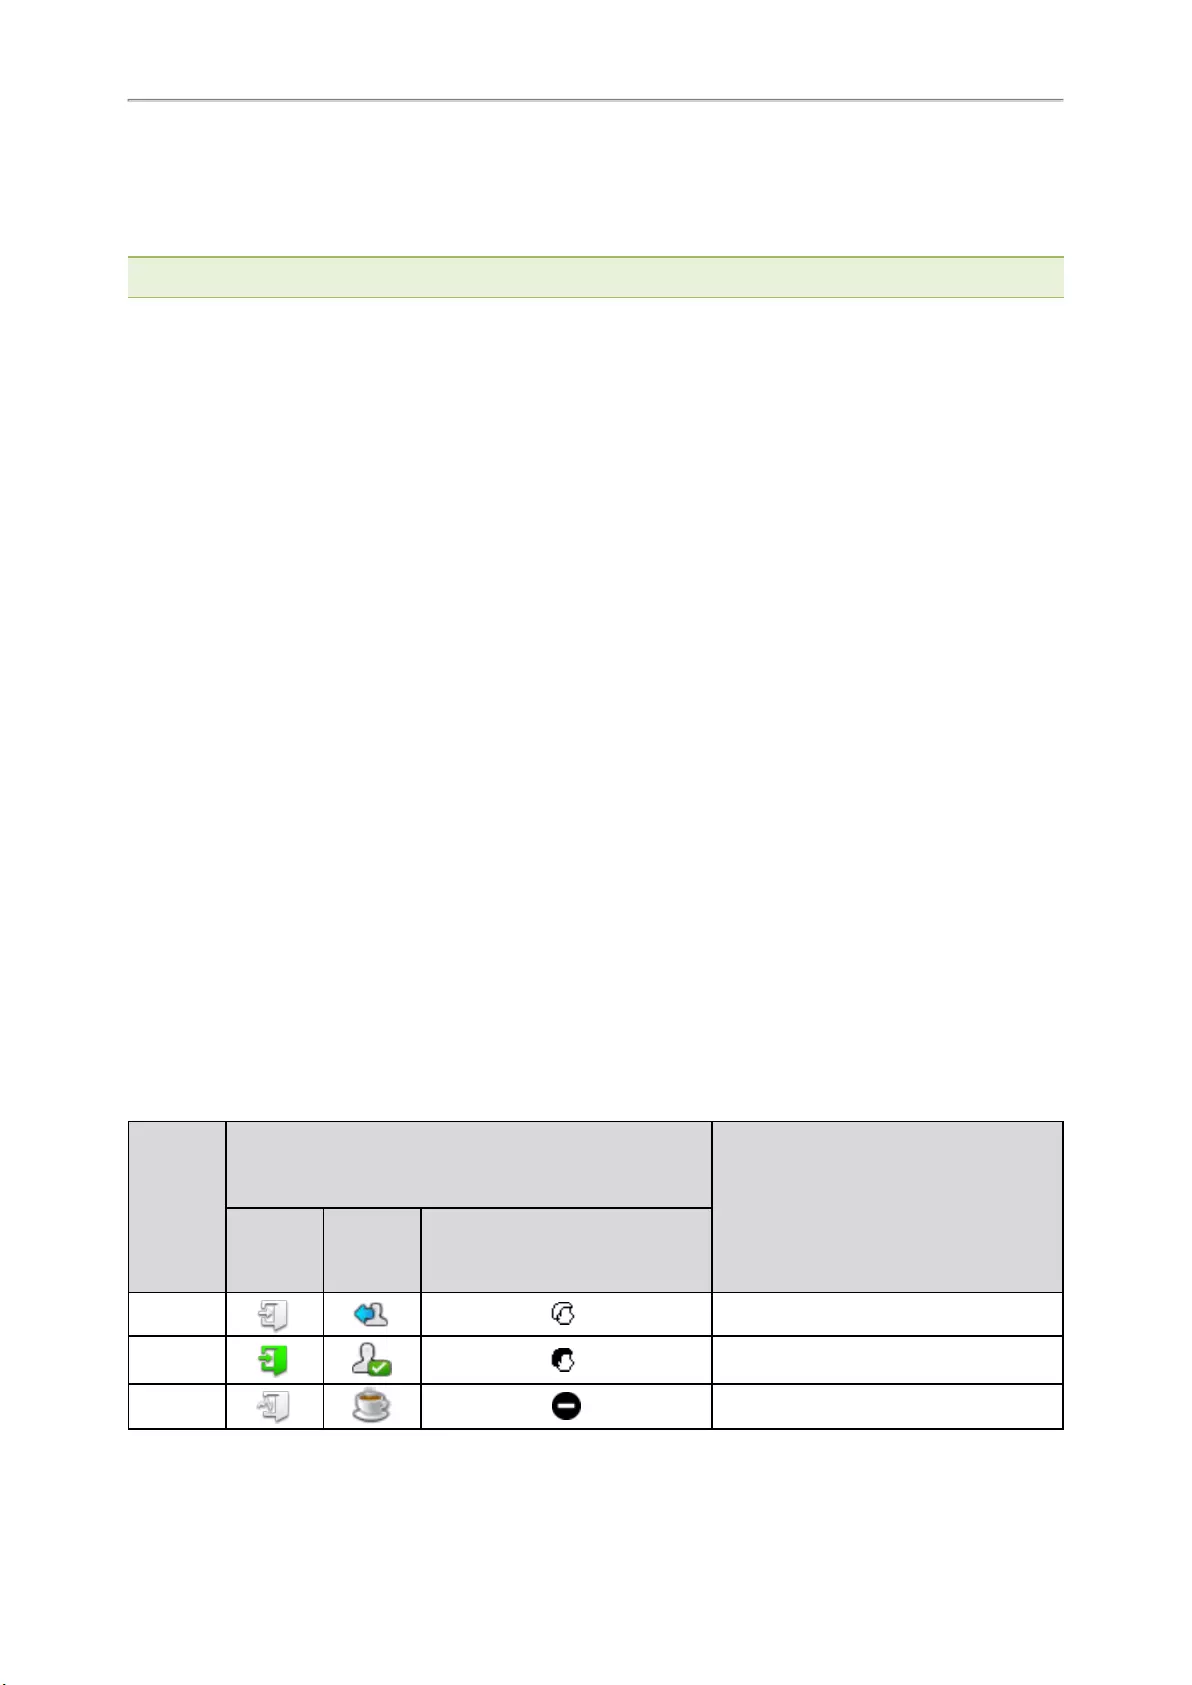
Yealink T4 Series IP Phones User Guide
76
Using the Hot Desking
You can use hot desking to log out from the current account and then log in to a new account. So many users can
share one phone resource at different times.
Note: Hot desking is not available on all servers. Contact your system administrator for more information.
Before You Begin
Your system administrator has set a Hot Desking key for you to use this feature. Get the login account information
from your system administrator.
Procedure
1. Press the Hot Desking key when the phone is idle.
The phone prompts you to clear the account configuration or not.
2. Select OK.
Registration configurations of all accounts on the phone will be cleared immediately.
The login wizard will be displayed.
3. Enter the login information.
4. Select Save.
Automatic Call Distribution (ACD)
ACD is often used in offices for customer service, such as call center.
The ACD system handles large volumes of incoming calls from callers who have no need to talk to a specific per-
son but who require assistance from any of multiple persons at the earliest opportunity. ACD on all IP phones
allows the ACD system to distribute large volumes of incoming calls to the registered ACD users.
ACD is not available by default. Check with your system administrator to find out if this feature is available on your
phone.
Topics
State Indicator of ACD User
Logging into the ACD System
Changing the ACD Status
State Indicator of ACD User
You can get the ACD user’s status by viewing the line key LED and icon indicator of the ACD key.
The state indicator of the ACD key varies by phone models.
Line key
LED
Status
(not sup-
port on
T48S/T48G
)
Icon
Description
T48S/T48G T46S/T46G T42S/T42G/T41S/T41P/T40P/T40G
Off Log out
Solid
green Available/Log in
Solid red Wrap up

Advanced Call Features
77
Line key
LED
Status
(not sup-
port on
T48S/T48G
)
Icon
Description
T48S/T48G T46S/T46G T42S/T42G/T41S/T41P/T40P/T40G
Fast-flash-
ing green × Unavailable
Logging into the ACD System
After logging into your ACD account, you are ready to receive calls from the ACD system.
Before You Begin
Your system administrator has set an ACD key for you to log into the ACD system. Get your ACD account inform-
ation from your system administrator.
Procedure
1. Press the ACD key when the phone is idle.
2. Enter your ACD account information.
3. Select Login.
Changing the ACD Status
You can press the ACD key to change your current ACD user status.
Procedure
1. Select Available (Avail)/Unavailable (Unavail).
ACD user status synchronizes on both the phone and ACD system.
2. To log out of the ACD system, select Logout.

Directory
78
Directory
The phone provides several types of phone directories, which can be customized by your system administrator.
Topics
Local Directory
Favorites
Blacklist
Mobile Contacts
Google Contacts
Remote Phone Book
Local Directory
You can store up to 1000 contacts and 48 groups in your local directory, you can search, add, edit and delete a con—
tact.
Note: You can back up the Local Directory to the provisioning server. For more information, contact your system admin-
istrator.
Topics
Managing the Local Directory Contacts
Moving a Local Directory Contact to Blacklist
Searching for Contacts
Managing the Local Directory Groups
You can manage the Local Directory groups when the phone is idle.
Topics
Adding Contact Groups
Editing Contact Groups
Deleting Contact Groups
Adding Contact Groups
To organize your contacts and make them easier to find, you can add additional groups in the Local Directory.
Procedure
1. Select Directory (Dir) or go to Menu >Directory >Local Directory.
On the T48S/T48G phones, select Directory or go to Menu >Directory.
2. Select Add Group (AddGr).
On the T48S/T48G phones, tap Settings >New Group.
3. Enter the desired group name.
4. Select Save.
On the T48S/T48G phones, tap .
On the T42S/T42G/T41S/T41P/T40P/T40G phones, press Add.
Editing Contact Groups
You can change or add the group’s information.
Procedure
1. Select Directory (Dir) or go to Menu >Directory >Local Directory.
On the T48S/T48G phones, select Directory or go to Menu >Directory.

Yealink T4 Series IP Phones User Guide
79
2. Highlight the desired group.
On the T48S/T48G phones, tap Settings, and select the desired group.
3. Select Option >Detail.
On the T48S/T48G phones, tap after the group name.
4. Edit the group information.
5. Select Save.
On the T48S/T48G phones, tap .
Deleting Contact Groups
When you delete a contact group, the contacts in the group will not be deleted. You can view the contacts in All
Contacts list.
Procedure
1. Select Directory (Dir) or go to Menu >Directory >Local Directory.
On the T48S/T48G phones, select Directory or go to Menu >Directory.
2. Highlight the desired group.
On the T48S/T48G phones, tap Settings, and select the desired group.
3. Select Option >Delete.
On the T48S/T48G phones, tap before the group name.
The phone prompts you to delete the group or not.
4. Select OK.
Managing the Local Directory Contacts
You can manage the Local Directory contacts when the phone is idle.
Topics
Adding Contacts
Viewing Contacts
Editing Contacts
Deleting a Contact
Deleting All Contacts
Adding Contacts
When you add a contact to your Local Directory, you can choose how much information you want to enter for your
contact. You are required to enter a contact name at least for each new contact.
Procedure
1. Select Directory (Dir) or go to Menu >Directory >Local Directory.
On the T48S/T48G phones, select Directory or go to Menu >Directory.
2. Select the desired contact group or All Contacts.
3. Select Add.
4. Enter your contact’s information.
5. Select the desired account from the Account field.
6. On the T48S/T48G/T46S/T46G phones, select the desired photo from the Photo field.
Viewing Contacts
You can view the local contacts from the Local Directory on your phone.
Procedure
1. Select Directory (Dir) or go to Menu >Directory >Local Directory.

Directory
80
On the T48S/T48G phones, select Directory or go to Menu >Directory.
2. Select the desired contact group or All Contacts.
The contact names are displayed in alphabetical order.
Editing Contacts
You can update your contacts’ information.
Procedure
1. Select Directory (Dir) or go to Menu >Directory >Local Directory.
On the T48S/T48G phones, select Directory or go to Menu >Directory.
2. Select the desired contact group or All Contacts.
3. Highlight the desired contact, and select Option >Detail.
On the T48S/T48G phones, tap after the desired entry.
4. Edit the contact information.
On the T48S/T48G phones, you can tap or to switch the contact you want to edit, and then edit the con-
tact information.
5. Select Save.
Deleting a Contact
You can delete any contact from the Local Directory.
Procedure
1. Select Directory (Dir) or go to Menu >Directory >Local Directory.
On the T48S/T48G phones, select Directory or go to Menu >Directory.
2. Select the desired contact group or All Contacts.
3. Highlight the desired contact, and select Option >Delete.
On the T48S/T48G phones, tap > Delete.
The phone prompts you to delete the contact or not.
4. Select OK.
Note: If the contact added to the Favorites directory is deleted in the Local Directory, it will be automatically deleted from the
Favorites directory.
Deleting All Contacts
You can delete all contacts from the Local Directory.
Procedure
1. Select Directory (Dir) or go to Menu >Directory >Local Directory.
On the T48S/T48G phones, select Directory or go to Menu >Directory.
2. Select the desired contact group or All Contacts.
3. Select Option >Delete All.
On the T48S/T48G phones, tap Settings >Select All >Delete.
The phone prompts you to delete all contacts or not.
4. Select OK.
Note: If the contact added to the Favorites directory is deleted in the Local Directory, it will be automatically deleted from the
Favorites directory.

Yealink T4 Series IP Phones User Guide
81
Moving a Local Directory Contact to Blacklist
You can move a contact in the Local Directory to blacklist. Incoming calls from this contact will be rejected auto-
matically.
Procedure
1. Select Directory (Dir) or go to Menu >Directory >Local Directory.
On the T48S/T48G phones, select Directory or go to Menu >Directory.
2. Select the desired contact group or All Contacts.
3. Highlight the desired contact, and select Option >Add to Blacklist.
On the T48S/T48G phones, tap > Blacklist.
The phone prompts you to move to the blacklist or not.
4. Select OK.
Searching for Contacts
In the Local Directory, you can enter search criteria to find your desired contact quickly.
Procedure
1. Select Directory (Dir) or go to Menu >Directory >Local Directory.
On the T48S/T48G phones, tap Directory or go to Menu >Directory.
2. Select Search.
3. Enter your search criteria in the search field.
Favorites
Favorites are the contacts in your Local Directory that you call most often.
If your system administrator has enabled this feature for you, you can add contacts as favorites, view favorites on
the idle screen, reorder favorites, and delete favorites.
Topics
Adding Favorites
Viewing Favorites
Reordering Favorites
Deleting Favorites
Adding Favorites
After adding a contact as a favorite, your phone will automatically assign a Speed Dial key for it. You can quickly
dial a contact using the Speed Dial key on the idle screen.
On all IP phones except the black-and-white screen phones, a star is displayed in the Local Directory for a contact
saved as the favorite.
Topics
Adding an Existing Contact to Your Favorites
Adding a New Contact to Your Favorites
Adding an Existing Contact to Your Favorites
You can add an existing contact as a favorite from the Local Directory.
Procedure
1. Select Directory (Dir) or go to Menu >Directory >Local Directory.
On the T48S/T48G phones, select Directory or go to Menu >Directory.

Directory
82
2. Select the desired contact group or All Contacts.
3. Highlight the desired contact and select Option.
On the T48S/T48G phones, tap after the desired entry.
4. Select Copy to Favorites or Favorites.
The phone prompts you to automatically accept the next available index number or manually enter your own.
5. Select OK to automatically accept an index number or select Edit or Cancel to enter an index number (1-
999999999).
Adding a New Contact to Your Favorites
You can add a new contact as a favorite by designating an index number.
Procedure
1. Select Directory (Dir) or go to Menu >Directory >Local Directory.
On the T48S/T48G phones, select Directory or go to Menu >Directory.
2. Select the desired contact group or All Contacts.
3. Select Add.
4. Enter the contact information.
5. Enter the desired index number (1-999999999) in the Favorite Index field.
6. Select Save or Add.
Tip: To quickly add a favorite, long press the desired line key to enter the Add Contact screen. Check with your system admin-
istrator to find out if this feature is available on your phone.
Viewing Favorites
You can view a list of favorites in the Favorites directory.
Procedure
1. Go to Menu >Directory >Favorites.
On the T48S/T48G phones, you can also tap Directory >Favorites.
Reordering Favorites
You can reorder favorites to change the display order in the Favorite.
Procedure
1. Go to Menu >Directory >Favorites.
On the T48S/T48G phones, you can also tap Directory >Favorites.
2. Highlight the desired contact, and select Option >Detail.
On the T48S/T48G phones, tap after the desired entry.
3. Enter a new index number in the Favorites Index field.
4. Select Save.
Deleting Favorites
You can delete favorites to make room for new favorites.
Procedure
1. Go to Menu >Directory >Favorites.
On the T48S/T48G phones, you can also tap Directory >Favorites.
2. Highlight the desired contact, and then select Option >Detail.
On the T48S/T48G phones, tap after the desired contact.

Yealink T4 Series IP Phones User Guide
83
3. Delete the favorite index number in the Favorites Index field.
4. Select Save.
The contact is removed from Favorites directory, while it still remains in your Local Directory.
Tip: You can also delete a favorite by selecting Option >Remove from Favorites.
Blacklist
Incoming calls from the Blacklist are rejected automatically. You can store up to 30 contacts in the blacklist to block
unwanted callers.
Topics
Adding a Blacklist Contact
Viewing Blacklist Contacts
Editing a Blacklist Contact
Deleting Blacklist Contacts
Moving a Blacklist Contact to the Local Directory
Adding a Blacklist Contact
You can add a blacklist contact on the phone to prevent someone from calling you.
Procedure
1. Go to Menu >Directory >Blacklist.
On the T48S/T48G phones, you can also tap Directory >Blacklist.
2. Select Add.
3. Enter the blacklist contact’s information.
4. Select Save or Add.
Viewing Blacklist Contacts
You can view the blacklist contacts from the Blacklist on your phone.
Procedure
1. Go to Menu >Directory >Blacklist.
On the T48S/T48G phones, you can also tap Directory >Blacklist.
Editing a Blacklist Contact
You can update your blacklist contacts’ information.
Procedure
1. Go to Menu >Directory >Blacklist.
On the T48S/T48G phones, you can also tap Directory >Blacklist.
2. Highlight the desired blacklist contact, and select Option >Detail.
On the T48S/T48G phones, tap after the desired entry.
3. Edit the blacklist contact information.
4. Select Save.
Deleting Blacklist Contacts
You can delete one or all blacklist contacts. If a contact is removed from the blacklist, you can answer the call from
the contact normally.
Topics

Directory
84
Deleting a Blacklist Contact
Deleting All Blacklist Contacts
Deleting a Blacklist Contact
If you want to answer a call from a specific contact, you need to remove it from the Blacklist.
Procedure
1. Go to Menu >Directory >Blacklist.
On the T48S/T48G phones, you can also tap Directory >Blacklist.
2. Select the desired blacklist contact.
On the T48S/T48G phones, tap after the desired blacklist contact.
3. Select Option >Delete.
On the T48S/T48G phones, tap Delete.
The phone prompts you to delete the contact or not.
4. Select OK.
Deleting All Blacklist Contacts
You can delete all contacts from the Blacklist when you are ready to answer calls from them again.
Procedure
1. Go to Menu >Directory >Blacklist.
On the T48S/T48G phones, you can also tap Directory >Blacklist.
2. Select Option >Delete All.
On the T48S/T48G phones, tap Settings >Select All >Delete.
The phone prompts you to delete all contacts or not.
3. Select OK.
Moving a Blacklist Contact to the Local Directory
You can move a blacklist contact to a Local Directory. Incoming calls from this contact will not be rejected auto-
matically.
Procedure
1. Go to Menu >Directory >Blacklist.
On the T48S/T48G phones, you can also tap Directory >Blacklist.
2. Highlight the desired contact, and then select Option.
On the T48S/T48G phones, tap after the desired entry.
3. Select Add to Contacts.
On the T48S/T48G phones, select All Contacts from the Group drop-down menu.
The phone prompts you to move to contact or not. (except the T48S/T48G phones).
4. Select OK or Save.
Mobile Contacts
On the T48S/T48G/T46S/T46G/T42S/T41S phones, you can synchronize the contacts on your mobile phone to your
IP phone. The mobile phone contacts will be imported to your IP phones and stored under the Mobile Contacts dir-
ectory.
You can save mobile contacts to the local directory, but you cannot save a local contact to the Mobile Contacts dir-
ectory.

Yealink T4 Series IP Phones User Guide
85
Note: If you disconnect the Bluetooth-enabled mobile phone from phone or disable the phone to synchronize phone contacts,
the mobile contacts will not be displayed.
Topics
Saving a Mobile Contact to the Local Directory
Searching for Mobile Contacts
Updating the Mobile Contacts
Saving a Mobile Contact to the Local Directory
You can save any mobile contact to the Local Directory, to conveniently call this contact after disconnecting the
mobile phone from the phone.
Before You Begin
Make sure your Bluetooth-enabled mobile phone has been paired with your IP phones, and mobile contact sync
feature is enabled.
Procedure
1. Go to Menu >Directory >Mobile Contacts.
On the T48S/T48G phones, you can also select Directory >Mobile Contacts.
2. Highlight the desired contact, and select Option >Add to Contacts.
On the T48S/T48G phones, select > Add.
3. Edit the contact information.
4. Select Save.
Related Topics
Pairing and Connecting the Bluetooth-enabled Mobile Phone
Syncing the Mobile Contacts to the Phone
Searching for Mobile Contacts
In Mobile Contacts, you can enter search criteria to find your desired mobile contact quickly.
Before You Begin
Make sure your Bluetooth-enabled mobile phone has been paired with and connected to your IP phones, and
mobile contact sync feature is enabled.
Procedure
1. Go to Menu >Directory >Mobile Contacts.
On the T48S/T48G phones, you can also select Directory >Mobile Contacts.
2. Select Search.
3. Enter your search criteria.
The contacts whose name or phone number matches the search string will be displayed in the result list.
Related Topics
Pairing and Connecting the Bluetooth-enabled Mobile Phone
Syncing the Mobile Contacts to the Phone
Updating the Mobile Contacts
You can update the Mobile Contact to synchronize the contacts you add, edit, and delete on the mobile phone to
your phone.
Before You Begin

Directory
86
Make sure your Bluetooth-enabled mobile phone has been paired with and connected to your phones, and mobile
contact sync feature is enabled.
Procedure
1. Go to Menu >Directory >Mobile Contacts.
On the T48S/T48G phones, you can also select Directory >Mobile Contacts.
2. Select Option >Update.
On the T48S/T48G phones, select Update.
The phone prompts “Updating, please wait…”.
Note: If you disconnect the mobile phone from the phone when the phone is updating the Mobile Contacts, the phone screen
will prompt “Fail to download mobile contacts!”, and the mobile contacts disappear from the phone directory list.
Related Topics
Pairing and Connecting the Bluetooth-enabled Mobile Phone
Syncing the Mobile Contacts to the Phone
Google Contacts
If the Google Contacts feature has been enabled by your system administrator, you can access the Google
Contacts, which lists contacts and groups within your Google account.
Topics
Viewing Google Contacts
Updating Google Contacts
Searching for Google Contacts
Viewing Google Contacts
You can view Google contacts on your phone.
Procedure
1. Go to Menu >Directory >Google Contact.
On the T48S phones, you can also tap Directory >Google Contact.
Updating Google Contacts
The Google contacts may be updated on the Google Contact Server, you can update Google contacts on your
phone to get the newest Google contacts.
Procedure
1. Go to Menu >Directory >Google Contact.
On the T48S phones, you can also select Directory >Google Contact.
2. Select Update.
Searching for Google Contacts
You can enter search criteria to find your desired Google contacts quickly.
Procedure
1. Go to Menu >Directory >Google Contact.
On the T48S phones, go to Directory >Google Contact >Search.
2. Enter the search criteria.
The contacts whose name or phone number matches the search criteria will be displayed in the result list.

Yealink T4 Series IP Phones User Guide
87
Remote Phone Book
If the Remote Phone Book feature has been enabled by your system administrator, you can access your corporate
directory directly from your phone.
Topics
Searching for Remote Phone Book Contacts
Viewing Remote Phone Book Contacts
Saving a Remote Phone Book Contact to the Local Directory
Saving a Remote Phone Book Contact to the Blacklist
Searching for Remote Phone Book Contacts
In the Remote Phone Book, you can enter search criteria to find your desired contact quickly.
Note: You can only search the contact name or contact numbers, search criteria do not include extra information on the con-
tact.
Procedure
1. Go to Menu >Directory >Remote Phone Book.
On the T48S/T48G phones, you can also tap Directory >Remote Phone Book.
2. Select the desired remote phone book.
3. Select Search.
4. Enter your search criteria in the search field.
Viewing Remote Phone Book Contacts
You can view the contact list of the remote phone book on your phone.
Procedure
1. Go to Menu >Directory >Remote Phone Book.
On the T48S/T48G phones, you can also tap Directory >Remote Phone Book.
Saving a Remote Phone Book Contact to the Local Directory
You can save any remote phone book contact to the Local Directory, to conveniently call this contact when you can-
not access the remote phone book.
Procedure
1. Go to Menu >Directory >Remote Phone Book.
On the T48S/T48G phones, you can also tap Directory >Remote Phone Book.
2. Select the desired remote phone book.
3. Highlight the desired contact, and then select Option >Add to Contacts.
On the T48S/T48G phones, select > Add.
4. Edit the corresponding fields.
5. Select Save.
Saving a Remote Phone Book Contact to the Blacklist
You can save any remote phone book contact to the Blacklist on the phone, to prevent this contact from calling you.
Procedure
1. Go to Menu >Directory >Remote Phone Book.
On the T48S/T48G phones, you can also tap Directory >Remote Phone Book.

Directory
88
2. Select the desired remote phone book.
3. Highlight the desired contact and select Option >Add to Blacklist.
On the T48S/T48G phones, select > Blacklist.
4. Edit the contact information.
5. Select Save.
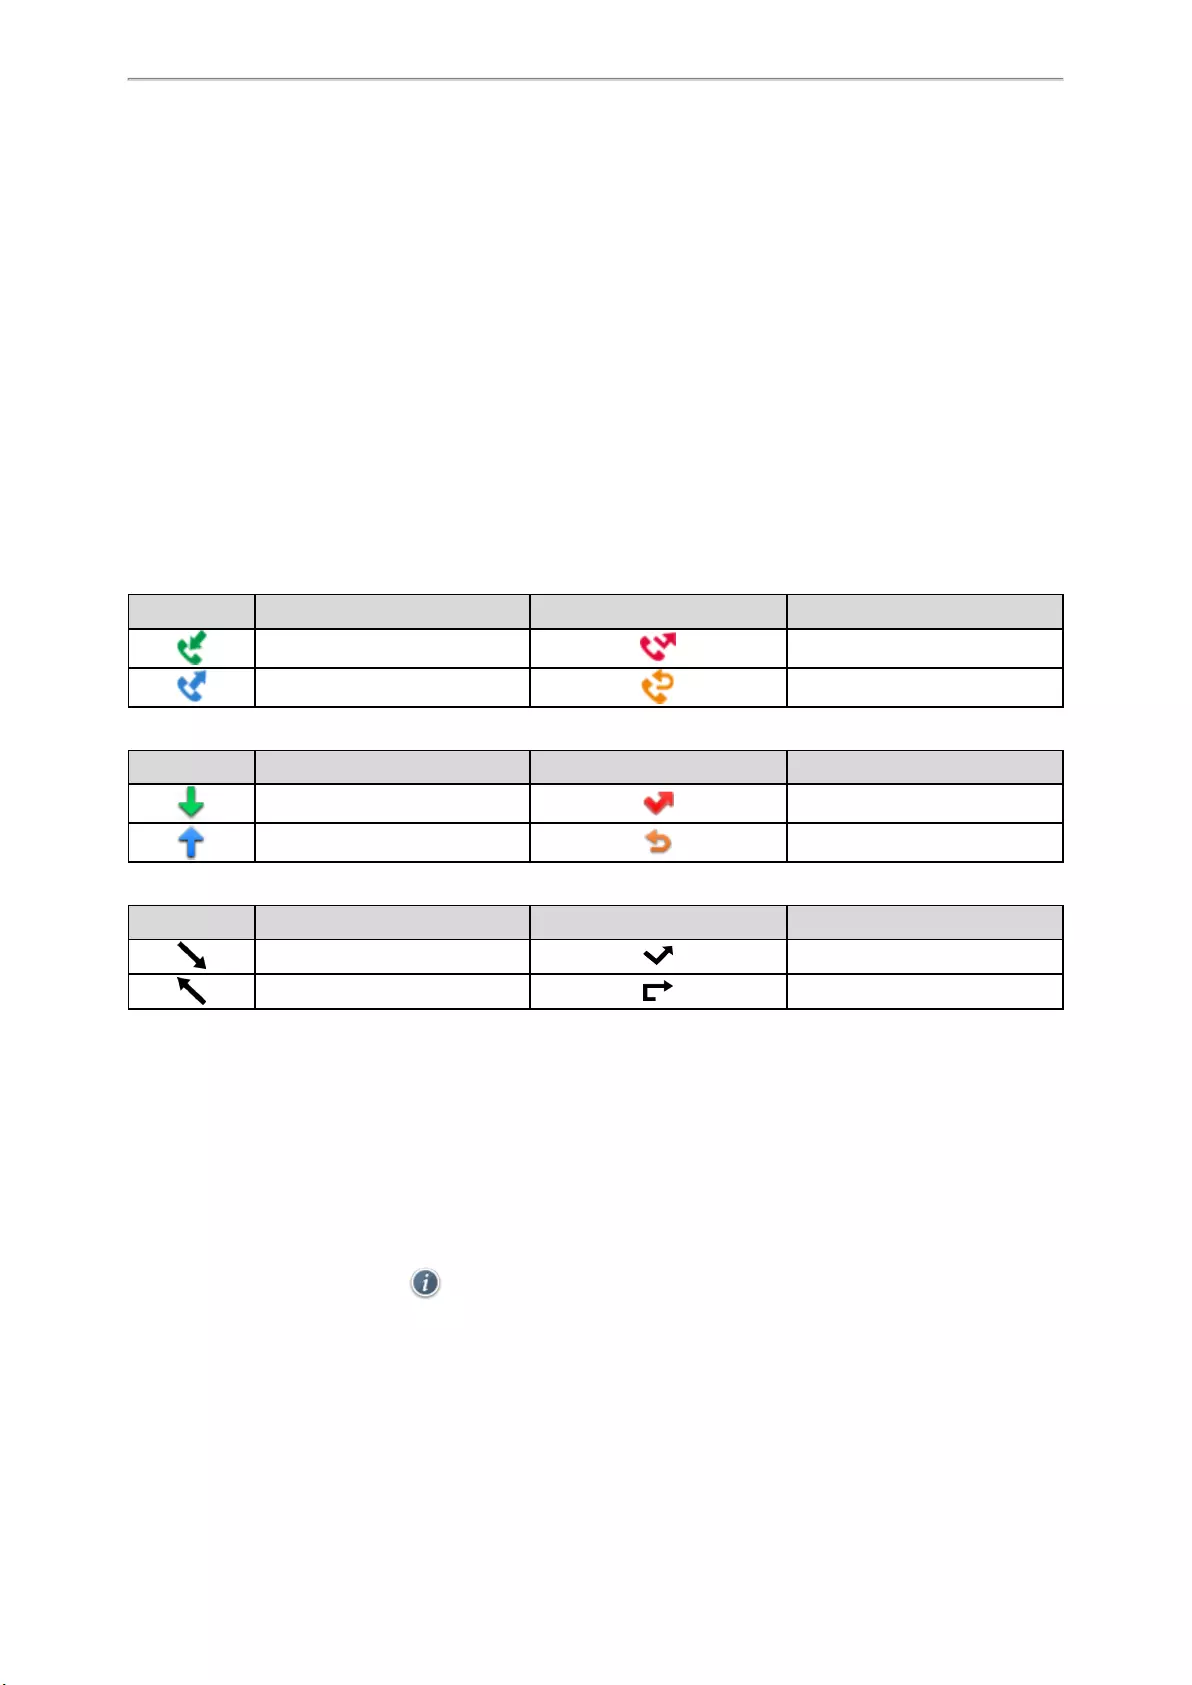
Call History
89
Call History
The call history list includes Missed Calls, Placed Calls, Received Calls and Forwarded Calls, and each list holds
100 entries.
Topics
Call History Icons
Viewing History Records
Saving a History Record to Local Directory
Saving a History Record to Blacklist
Deleting History Records
Disabling History Record
Call History Icons
Each icon in the Call History indicates the corresponding call history status.
For T48S/T48G phones:
Icons Description Icons Description
Received Call Missed Call
Placed Call Forwarded Call
For T46S/T46G phones:
Icons Description Icons Description
Received Call Missed Call
Placed Call Forwarded Call
For T42S/T42G/T41S/T41P/T40P/T40G phones:
Icons Description Icons Description
Received Call Missed Call
Placed Call Forwarded Call
Viewing History Records
The history record saves the call information such as the caller’s name and number, local line and call duration.
Procedure
1. Press History or go to Menu >History.
2. Select the desired list.
3. Select the desired entry.
4. Select Option >Detail.
On the T48S/T48G phones, tap after the desired entry.
Saving a History Record to Local Directory
To identify someone’s call the next time, you can save a history record to the Local Directory.
Procedure

Yealink T4 Series IP Phones User Guide
90
1. Select History or go to Menu > History.
2. Highlight the desired entry, and select Option >Add to Contacts.
On the T48S/T48G phones, select > Add.
3. Edit the contact information.
4. Select Save.
Saving a History Record to Blacklist
You can prevent someone from calling you again by saving a history record to Blacklist.
Procedure
1. Select History or go to Menu >History.
2. Select the desired list.
3. Highlight the desired entry, and select Option >Add to Blacklist.
On the T48S/T48G phones, select > Blacklist.
4. Edit the contact information.
5. Select Save.
Deleting History Records
You can delete one or all call records from the call history list.
Topics
Deleting a Call Record
Deleting All Call Records
Deleting a Call Record
You can delete any call record from the call history list.
Procedure
1. Press History or go to Menu >History.
2. Select the desired list.
3. Highlight the desired entry, and select Delete.
On the T48S/T48G phones, tap > Delete. The phone prompts whether to delete the record, tap OK.
Deleting All Call Records
You can delete all call records from the call history list.
Procedure
1. Press History or go to Menu >History.
2. Select the desired list.
3. Select Option >Delete All.
On the T48S/T48G phones, tap Settings >Select All >Delete.
The phone prompts you to delete all the records or not.
4. Select OK.
Disabling History Record
If you disable history record, you cannot save any call log on the phone.

Call History
91
Procedure
1. Go to Menu >Features >Others >General.
On the T48S/T48G phones, go to Menu >Features >General.
On the T42S/T42G/T41S/T41P/T40P/T40G phones, go to Menu >Features >History Settings.
2. Select Disabled or Off from the History Record field.
3. Select Save.

Customizing Your Phone
92
Customizing Your Phone
You can make your phone more personalized by customizing various settings.
Topics
Changing the Administrator Password
Wallpaper
Adjusting Transparency
Screen Saver
Changing the Backlight and Time
Adjusting the Screen Contrast
Changing the Language
Time & Date
Setting a Key as Send
Customizing the Soft Keys
Phone Lock
Extending the Line Key Labels
Locking the Line Key
Changing the Administrator Password
By default, you require an administrator password to access the Advanced/Advanced Settings menu. The default
password is “admin”. For security reasons, you should change the default password as soon as possible.
Note: If you do not change the default password, the phone displays a warning icon in the status bar. For T41S/T42S phone, it
displays the warning message on the idle screen.
Procedure
1. Go to Menu >Advanced >Change Password.
On the T42S/T42G/T41S/T41P/T40P/T40G phones, go to Menu >Settings >Advanced Settings >Change
Password.
2. Enter your old and new password information.
3. Select Save.
Related Topic
Warnings
Wallpaper
You can change the background picture that is displayed on your phone.
The phone comes with a default background picture, you can change it to another built-in picture. You can also add
personal pictures stored on a USB flash drive, or use a custom picture uploaded by your system administrator as
the wallpaper.
Only T48S/T48G/T46S/T46G phones support wallpaper.
Topics
Changing Wallpaper on Idle Screen
Changing Wallpaper on Dsskey Screen
Adding a Wallpaper from a USB Flash Drive
Adding a Dsskey Screen Wallpaper from a USB Flash Drive
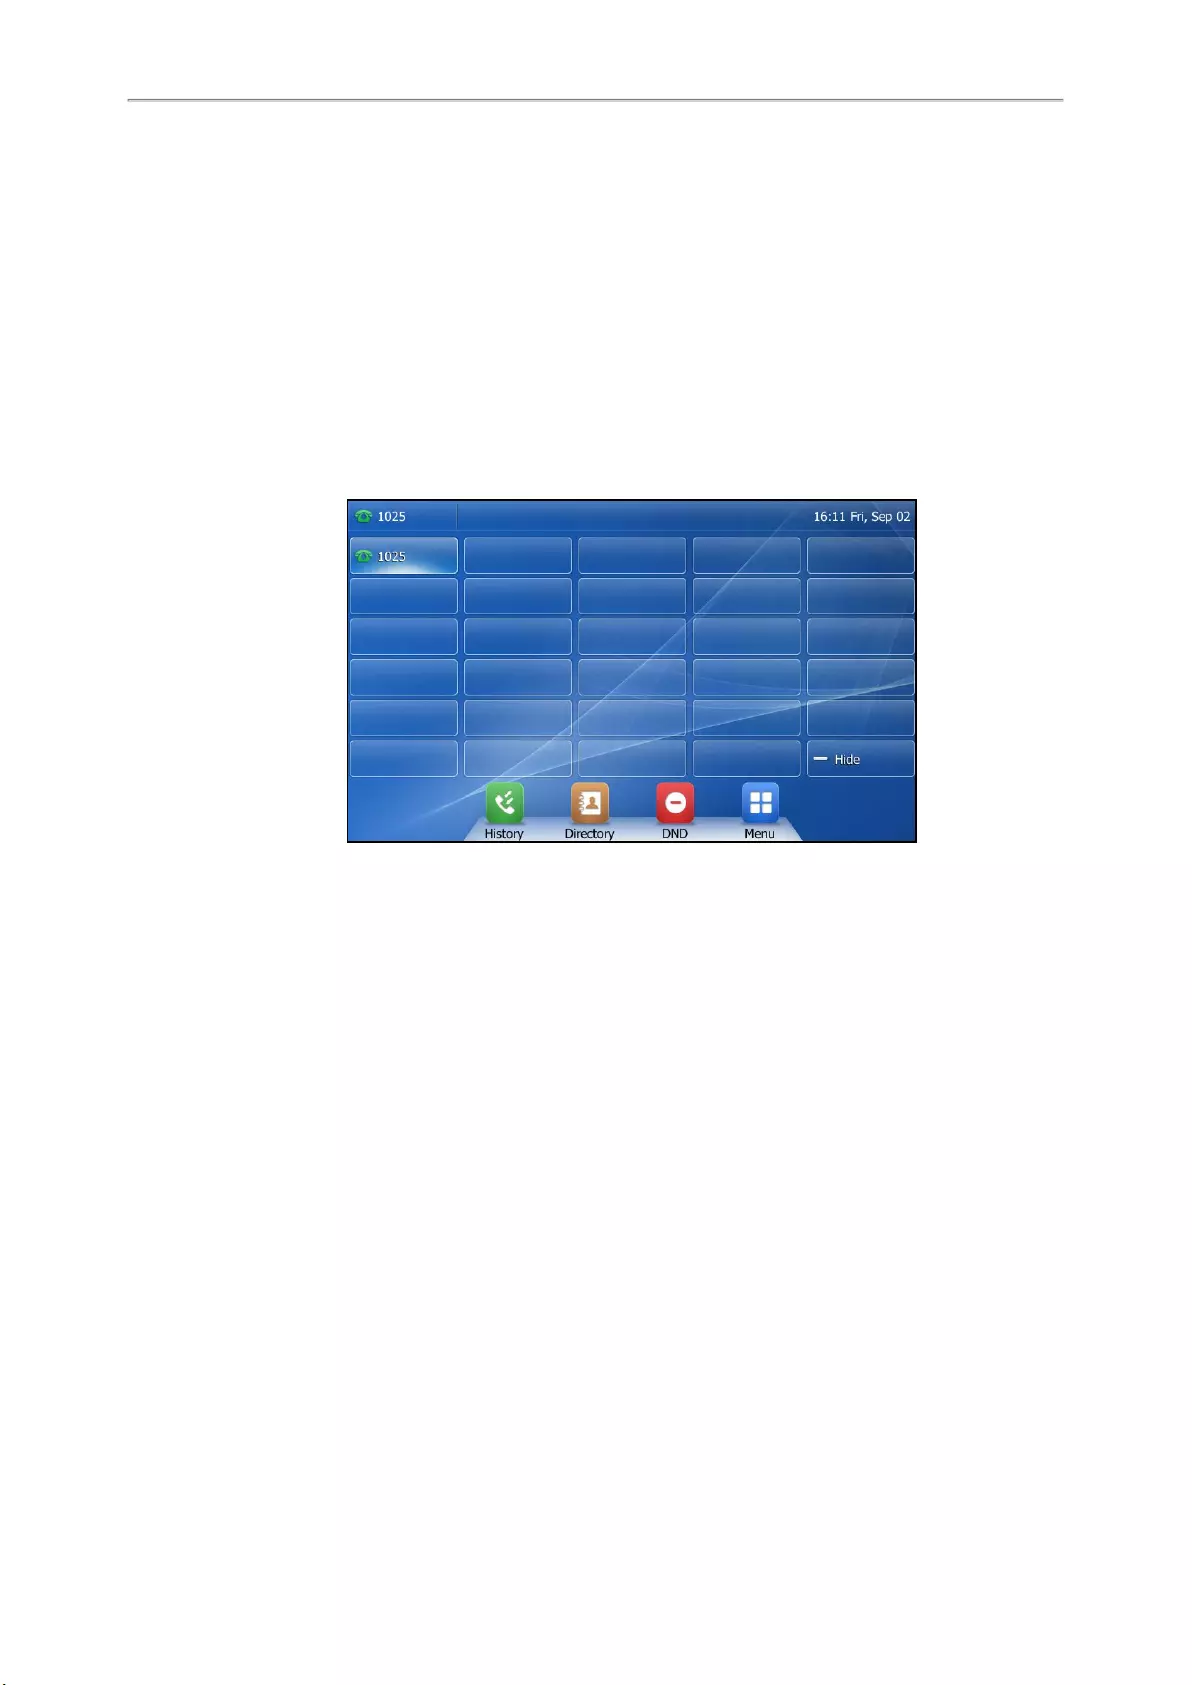
Yealink T4 Series IP Phones User Guide
93
Changing Wallpaper on Idle Screen
You can set one of your pictures as the background image on your phone‘s idle screen.
Procedure
1. Go to Menu >Basic >Display >Wallpaper.
2. Select the desired image.
3. Select Save.
Changing Wallpaper on Dsskey Screen
You can change the background picture that is displayed when unfolding the line key list on the T48S/T48G
phones.
Tap More when the phone is idle to unfold the line key list. After unfolding, the screen is shown below:
Procedure
1. Go to Menu >Basic >Display >Dsskey Wallpaper.
2. Select the desired image.
3. Select Save.
Adding a Wallpaper from a USB Flash Drive
You can use a picture that is stored on a USB flash drive as the background image of your phone.
We recommend that you add a picture less than 2.0 megapixels for T48S/T48G, 1.8 megapixels for T46S/T46G.
Either the smaller or larger picture will be scaled proportionally to fit the screen.
Before You Begin
Make sure that the picture is in the root directory of your USB flash drive, and the USB flash drive is connected to
your phone successfully.
Procedure
1. Go to Menu >USB >Browse Photo.
2. Highlight the desired picture and select Preview.
On the T48S/T48G phones, tap the desired picture to preview.
3. Select Set as >Set as wallpaper.
4. Select OK.
The phone background image will change to the selected picture.
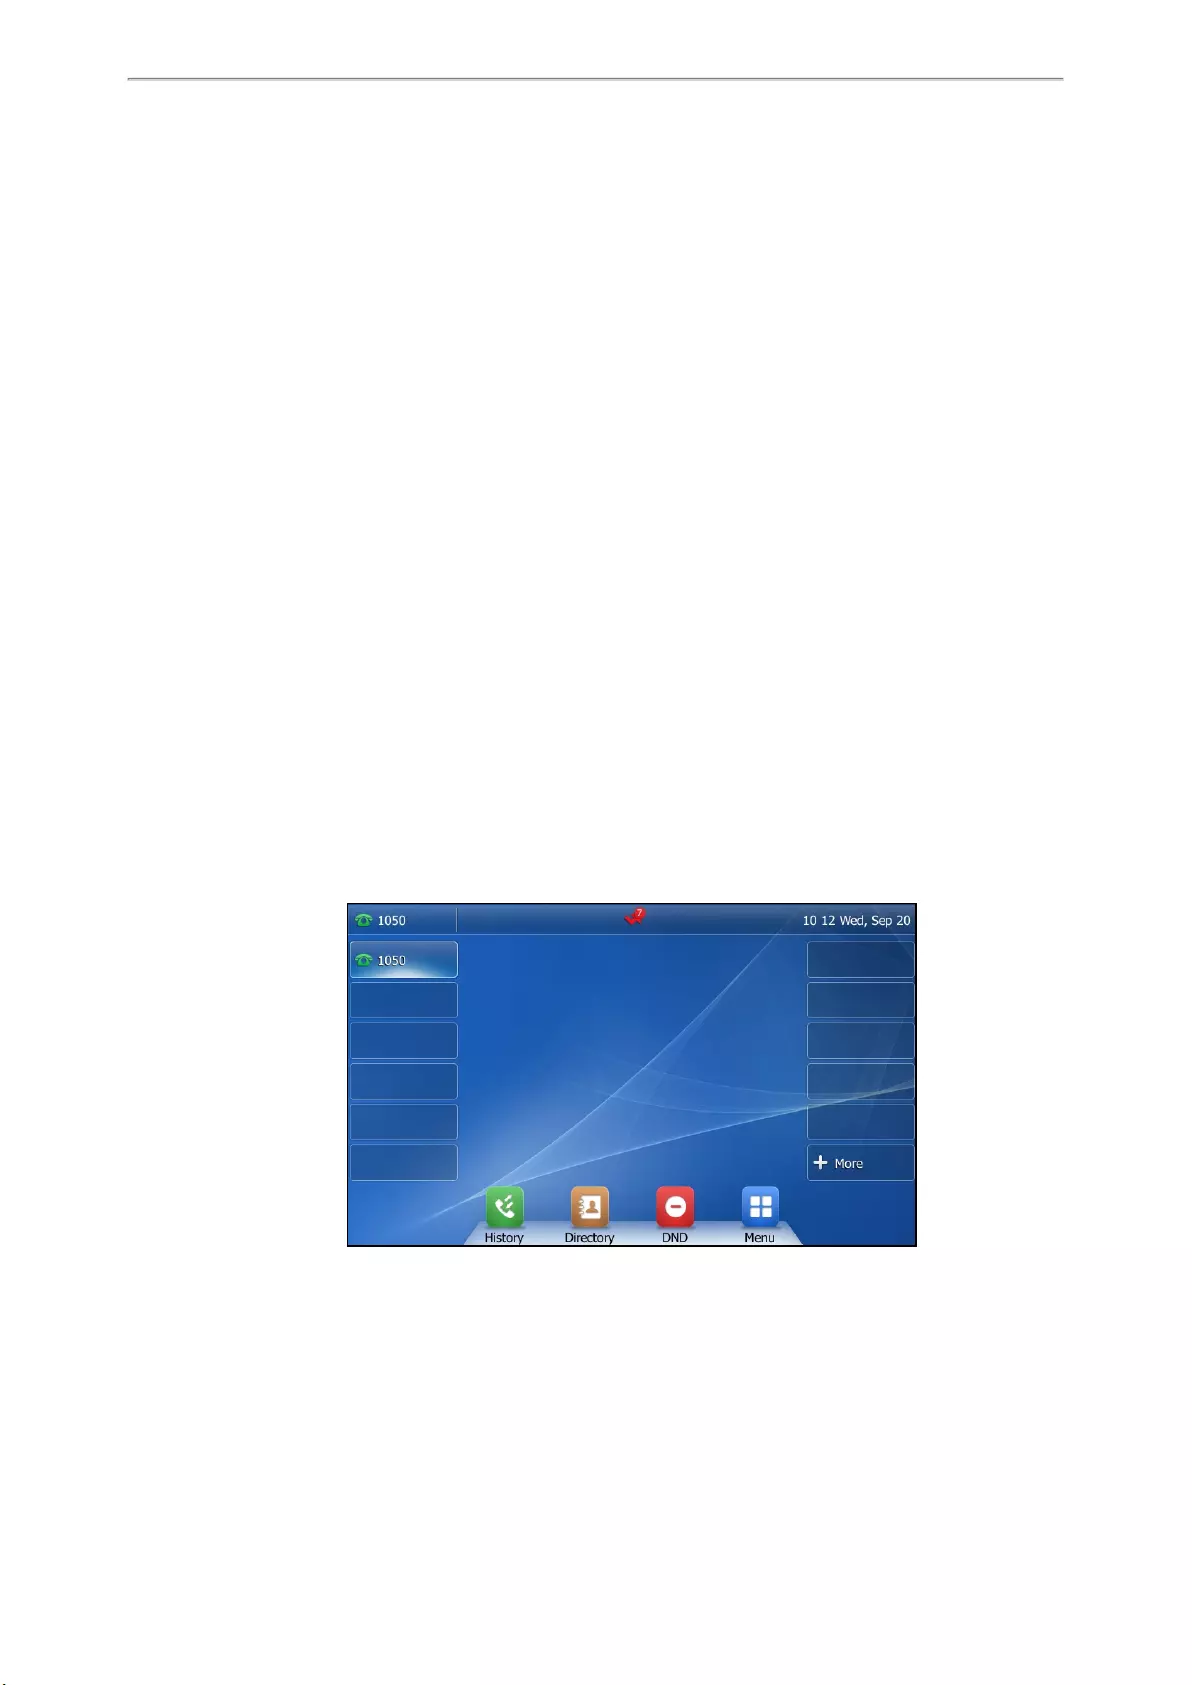
Customizing Your Phone
94
Adding a Dsskey Screen Wallpaper from a USB Flash Drive
On the T48S/T48G phones, you can set a picture that is stored in the USB flash drive as the background image for
the dsskey screen.
We recommend that you add a picture less than 2.0 megapixels. Either the smaller or larger picture will be scaled
proportionally to fit the screen.
Before You Begin
Make sure that the picture is in the root directory of your USB flash drive, and the USB flash drive is connected to
your phone successfully.
Procedure
1. Go to Menu >USB >Browse Photo.
2. Select the desired picture.
3. Select Set as >Set as dsskey wallpaper.
4. Select OK.
The background image of dsskey screen will change to the selected picture.
Adjusting Transparency
If the background picture affects the idle screen display, you can change the transparency to make the texts of the
line key and status bar easier to read.
It is only applicable to the T48S/T48G phones.
Procedure
1. Go to Menu >Basic >Display >Transparency.
2. Select the desired value from the Transparency field.
3. Select Save.
The following figure shows an example of the screen display when the transparency is set to 80%:
Screen Saver
The screen saver starts automatically when your phone has been idle for the preset waiting time. You can stop the
screen saver by pressing any key.
Topics
Changing the Waiting Time for Screen Saver

Yealink T4 Series IP Phones User Guide
95
Disabling Time & Date and Status Icons Display
Adding a Screen Saver from a USB Flash Drive
Setting the Screen Saver Type
Changing the Waiting Time for Screen Saver
You can set the waiting time after no activity before displaying the screen saver.
Procedure
1. Go to Menu >Basic >Display >Screensaver.
On the T42S/T42G/T41S/T41P/T40P/T40G phones, go to Menu >Settings >Basic Settings >Display >
Screensaver.
2. Select the desired waiting time from the Wait Time field.
3. Select Save.
Disabling Time & Date and Status Icons Display
For the T48S/T48G/T46S/T46G phones, you can disable your phone to display time, date and status icons on the
screen saver.
The Time & Date and status icons display on the screen saver, as shown below:
Note: You cannot configure Time & Date and status icons display if your system administrator has set your phone to display
custom information on the screen saver.
Procedure
1. Go to Menu >Basic >Display >Screensaver.
2. Select Disabled or Off from the Display Clock field.
3. Select Save.
Adding a Screen Saver from a USB Flash Drive
You can use a picture that is stored in your USB flash drive as the screen saver on your phone.
We recommend that you add a picture less than 2.0 megapixels for T48S/T48G, 1.8 megapixels for T46S/T46G.
Either the smaller or larger picture will be scaled proportionally to fit the screen.
Before You Begin
Make sure that the picture is in the root directory of your USB flash drive, and the USB flash drive is connected to
your phone successfully.
Procedure
1. Go to Menu >USB >Browse Photo.
2. Highlight the desired picture and select Preview.

Customizing Your Phone
96
On the T48S/T48G phones, tap the desired picture to preview.
3. Select Set as >Set as screensaver.
4. Select OK.
Setting the Screen Saver Type
The screen saver can start with different types and you can set it manually.
For T48S/T48G/T46S/T46G phones, you can choose one of the following screen saver types:
lSystem
lCustom
lServer XML (shows custom information on the screen saver)
The T42S/T42G/T41S/T41P/T40P/T40G phones can only display custom information that is preset by your system
administrator as the screen saver.
Before You Begin
If you want to set a custom picture as the screen saver, make sure that the custom picture has been uploaded by
your system administrator.
If you want to show custom information on the screen saver, make sure that the custom information has set by your
system administrator.
Procedure
1. Go to Menu >Basic >Display >Screensaver.
2. Select the desired screen saver type from the Screensaver Type field.
lIf you select System.
The phone automatically sets the built-in picture as the screen saver.
lIf you select Custom.
The phone automatically set the custom pictures as the screen saver, and display these pictures alternately.
lIf you select Server XML.
The phone automatically displays the custom information (for example, notifications or company logo) on the
screen saver.
3. Select Save.
Changing the Backlight and Time
You can change the brightness of the phone screen during phone activity and inactivity. The brightness auto-
matically changes after the phone has been idle for a specified time.
You can change the screen backlight and time in the following settings:
Active Level: The brightness level of the phone screen when the phone is active. Digits 1 to 10 represent different
brightness levels. 10 is the brightest level. It is only available for the T48S/T48G/T46S/T46G phone.
Inactive Level: The brightness of the phone screen when the phone is inactive. You can select a low brightness or
turn off the backlight. It is only available for the T48S/T48G/T46S/T46G phones.
Backlight Time: The delay time to change the brightness of the phone screen when the phone is inactive. Backlight
time includes the following settings:
lAlways On: Backlight is on permanently.
lAlways Off: Backlight is off permanently. It is not available for the T48S/T48G/T46S/T46G phone.
l15s,30s,1min,2min,5min,10min or 30min: Backlight is changed when the phone is inactive after the des-
ignated time.
Procedure

Yealink T4 Series IP Phones User Guide
97
1. Go to Menu >Basic >Display >Backlight.
On the T42S/T42G/T41S/T41P/T40P/T40G phones, go to Menu >Settings >Basic Settings >Display >Back-
light.
2. On the T48S/T48G/T46S/T46G phones, select the desired level from the Active Level field.
3. On the T48S/T48G/T46S/T46G phones, select the desired level from the Inactive Level field.
4. Select the desired time from the Backlight Time field.
5. Select Save.
Adjusting the Screen Contrast
You can adjust the screen contrast of the phone to make it easier to read.
The intensity of screen contrast ranges from 1 to 10 and the highest intensity is 10. It is only available on the
T40P/T40G phones.
Procedure
1. Go to Menu >Settings >Basic Settings >Display >Contrast.
2. Select the desired value from the Contrast field.
3. Select Save.
Changing the Language
Your phone supports several languages that you can choose to use on the phone.
Contact your system administrator to find out exactly which languages are supported on your phone.
Note: The T48G/T46G/T42G/T41P phones do not support French (Canada), Portuguese (Latin) and Spanish (Latin).
Procedure
1. Go to Menu >Basic >Language.
On the T42S/T42G/T41S/T41P/T40P/T40G phones, go to Menu >Settings >Basic Settings >Language.
2. Select the desired language.
3. Select Save.
The phone language is changed to the selected one.
Time & Date
You can set the time and date manually. The time and date formats are also variable.
Topics
Setting the Time and Date Manually
Changing the Time and Date Format
Setting the Time and Date Manually
If your phone cannot obtain the time and date automatically, you can set it manually.
Procedure
1. Go to Menu >Basic >Time & Date >General >Manual Settings.
On the T48S/T48G phones, go to Menu >Basic >Time & Date >General. And then select Manual Settings
from the Type drop-down menu.
On the T42S/T42G/T41S/T41P/T40P/T40G phones, go to Menu >Settings >Basic Settings >Time & Date >
Manual Settings.

Customizing Your Phone
98
2. Edit the date and time.
On the T46S/T46G phones, you can also press the up or down navigation key to select the desired date and
time.
3. Select Save.
The time and date set on the phone will be changed accordingly.
Note: After the phone reboots, it will be forcibly switched to obtain the time and date from the NTP server.
Changing the Time and Date Format
You can set the phone to display the time in 12-hour format or 24-hour format. You can also change the date format,
including the options to display the day (D), month (M), and year (Y).
Note: Your system administrator can customize the date format.
Procedure
1. Go to Menu >Basic >Time & Date >Time & Date Format.
On the T42S/T42G/T41S/T41P/T40P/T40G phones, go to Menu >Settings >Basic Settings >Time & Date >
Time & Date Format.
2. Select the desired time format or date format.
3. Select Save.
Setting a Key as Send
The pound key (#) is used as the send key by default. To type a phone number followed by the pound key (#), you
can set the send key to the star key (*).
You can also disable “#” and ”*» to be used as the send key.
Procedure
1. Go to Menu >Features >Others >General.
On the T48S/T48G phones, go to Menu >Features >General.
On the T42S/T42G/T41S/T41P/T40P/T40G phones, go to Menu >Features >Key As Send.
2. Select the desired value from the Key As Send field.
3. Select Save.
Customizing the Soft Keys
You can customize the function of the soft keys displayed on the bottom of the idle screen for the
T42S/T42G/T41S/T41P/T40P/T40G phones.
The soft keys are typically used to access frequently used functions, and to create menu shortcuts to access fre-
quently used phone settings. The soft keys perform the same functions as the hard keys.
Caution: We recommend that you keep a Menu soft key, otherwise you cannot access the phone settings.
Procedure
1. Go to Menu >Settings >Advanced Settings (default password: admin) > Softkey Label.
2. Select the desired soft key.
3. Select the desired key type from the Type field.
4. (Optional.) Select the desired line from the Account ID field.
5. (Optional.) Enter the string that will appear on the phone screen in the Label field.
Yealink T4 Series IP Phones User Guide
99
6. (Optional.) Enter the corresponding value in the Value field.
7. Select Save.
Phone Lock
Phone lock helps you protect your phone from unauthorized use.
Topics
Setting the Phone Lock
Locking Your Phone Manually
Unlocking Your Phone
Changing Your Phone Unlock PIN
Setting the Phone Lock
You can manually lock the phone or wait a specified time to automatically lock the phone.
What unauthorized users can do depends on the settings of the phone lock type.
The phone supports the following phone lock types:
lMenu key: it prevents unauthorized users from accessing the menu, changing the personal settings for your
phone.
lFunction key: it only allows users to use the keypad for placing a call, answering or rejecting an incoming call
and ending a call, and it prevents unauthorized users from other operations.
lAll keys: it only allows users to use the keypad for dialing an emergency number or authorized numbers that set
up by your system administrator, answering or rejecting an incoming call and ending a call, and it prevents unau-
thorized users from other operations. The T48S/T48G phones only support All Keys type of phone lock.
Note: The Volume key , HEADSET key and Speakerphone key are always available when you lock the phone.
Procedure
1. Go to Menu >Basic >Phone Lock.
On the T42S/T42G/T41S/T41P/T40P/T40G phones, go to Menu >Settings >Basic Settings >Phone Lock.
2. Enter the desired PIN (default PIN: 123) in the Unlock PIN field.
3. Select OK or Save.
4. Select Enabled from the Lock Enable field.
5. On the phones except for T48S/T48G, select the desired type from the Lock Type field.
6. Enter the desired interval (0 — 3600 seconds) in the Auto Lock field.
If the value is set to 0, the phone will not be automatically locked.
7. Select Save.
Locking Your Phone Manually
You can lock the phone manually before the phone is automatically locked.
Before You Begin
Make sure that the phone lock is set.
Procedure
1. Long press # key when the phone is idle.
The lock icon appears on the phone screen.
Related Topic
Setting the Phone Lock

Customizing Your Phone
100
Unlocking Your Phone
You can use an unlock PIN to unlock the phone.
If you forget the unlock PIN, you can enter the administrator password to unlock your phone, and then automatically
access the PIN change screen.
Procedure
1. Press any locked key, the phone prompts you to enter an unlock PIN.
On the T48S/T48G phones, press any locked key or tap the touch screen.
2. Enter the desired PIN (default: 123) in the Unlock PIN field.
3. Select OK.
The lock icon disappears from the phone screen.
Changing Your Phone Unlock PIN
The default unlock PIN is “123”. For security reasons, you should change the default unlock PIN as soon as pos-
sible.
Procedure
1. Go to Menu >Basic >Change PIN.
On the T42S/T42G/T41S/T41P/T40P/T40G phones, go to Menu >Settings >Basic Settings >Change PIN.
2. Enter your old and new unlock PIN respectively.
The unlock PIN length must be within 15 digits.
3. Select Save.
Extending the Line Key Labels
On the T46S/T42S/T41S phones, you can extend the line key labels to the half of the phone screen when the phone
is idle or during the call.
Procedure
1. Go to Menu >Features >Dsskey.
2. Select the desired line key.
3. Select Key Event from the Type field.
4. Select Extend from the Key Type field.
5. (Optional.) Enter the string that will appear on the phone screen in the Label field.
6. Select Save.
7. When the phone is idle/during the call, press the Extend key to extend the line key labels.
Note: During the call, the phone automatically exits the Extended Dsskey screen within 1 minute if there is no operation.
When the phone is idle, you need to press the Extend key again to exit the Extended Dsskey screen.
Locking the Line Key
On the T46S/T42S/T41S phones, you can make a Line key locate in the same position of different pages. Then you
can use this Line key on every page to accept incoming calls.
For T46S, this feature is only applicable to line key 1-9.
For T42S/T41S, this feature is only applicable to line key 1-5.
The following figure shows that Line key 1 is locked in the same position on each page:
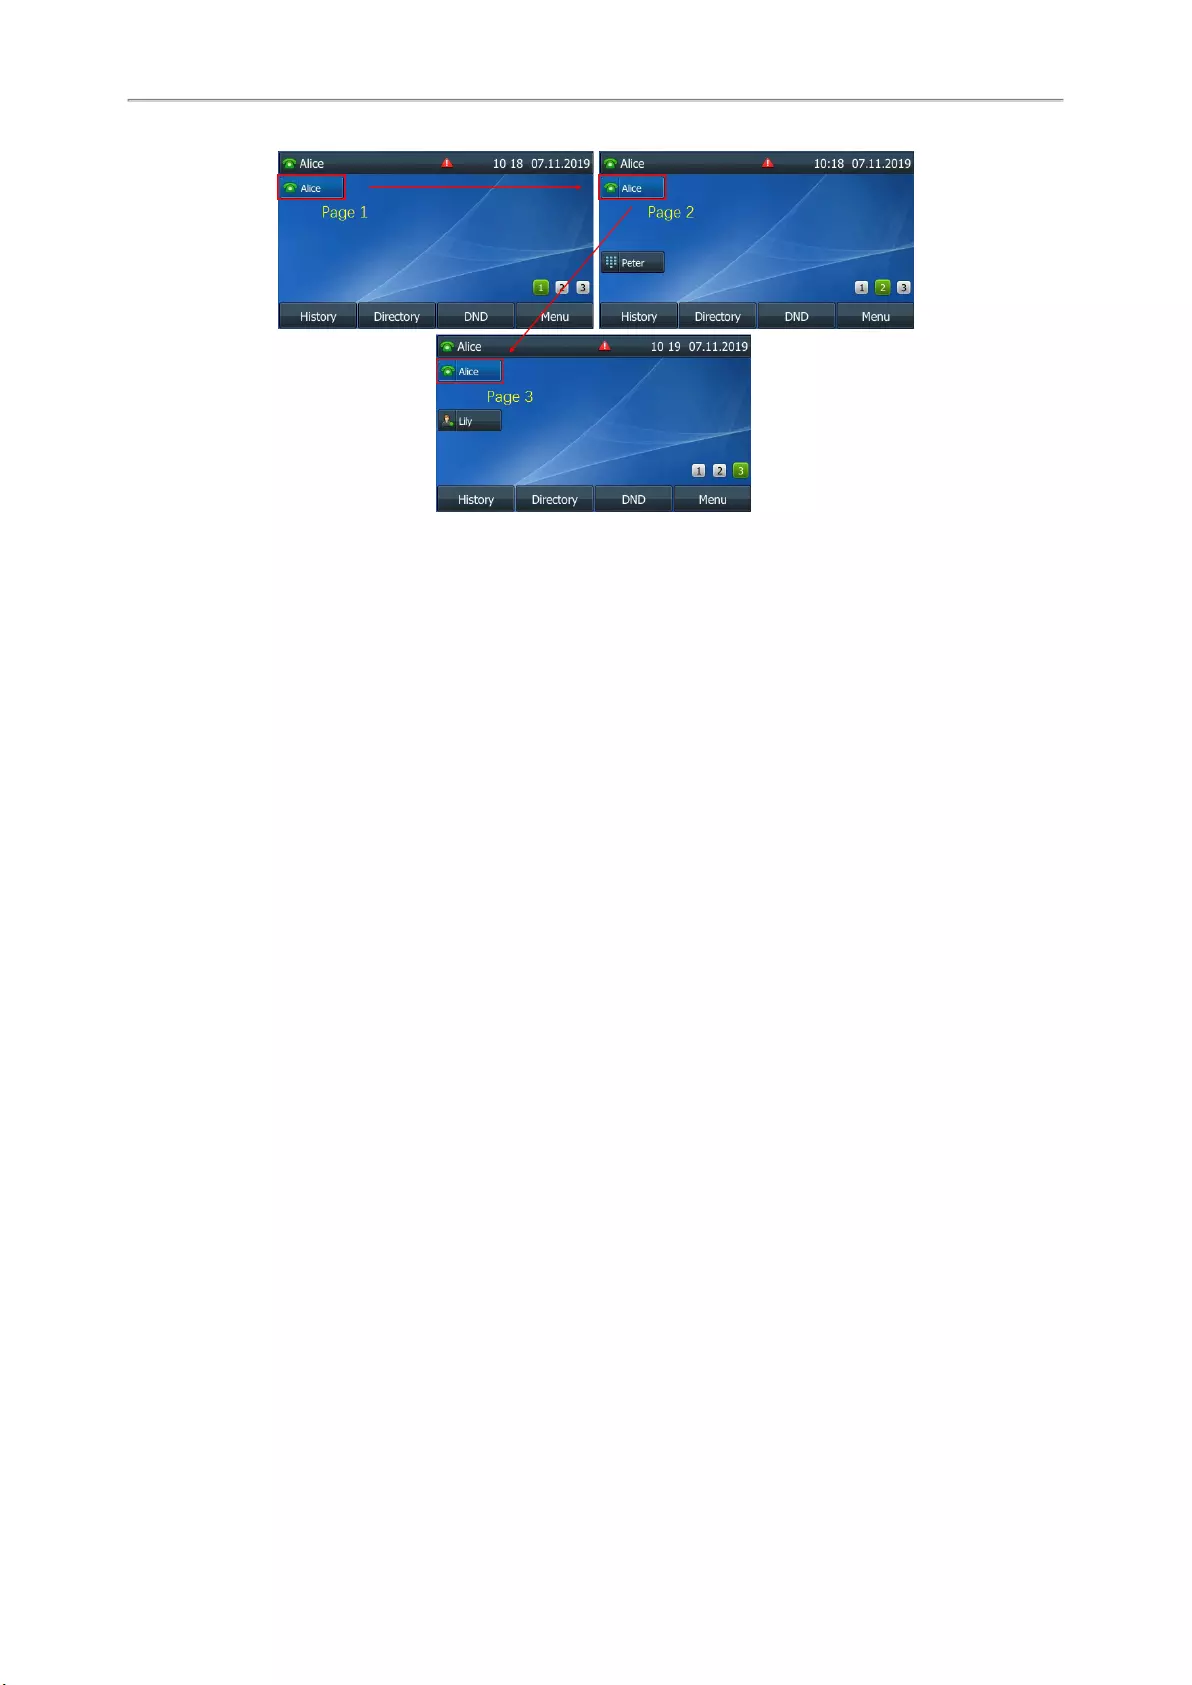
Yealink T4 Series IP Phones User Guide
101
Procedure
1. Go to Menu >Features >Dsskey.
2. Select the desired line key.
3. Select Line from the Type field.
4. Select the desired line from the Account ID field.
5. (Optional.) Enter the string that will appear on the phone screen in the Label field.
6. Select Lock from the Value field.
7. Select Save.
Related Topic
Idle Screen

Audio Settings
102
Audio Settings
You can change the basic audio settings on your phone.
Topics
Adjusting the Volume
Setting the Ring Tone
Disabling the Key Tone
Muting the Ringtone
Adjusting the Volume
You can adjust the volume of the ringer, media, and audio during a call.
Procedure
1. Press the Volume key .
Setting the Ring Tone
You can set distinctive ring tones for groups or contacts in your Local Directory so that you can identify the caller
when your phone rings.
The ring tones are used according to this priority: Contact ring tone>Group ring tone>Account ring tone >Phone ring
tone.
Topics
Setting a Ring Tone for the Phone
Setting a Ring Tone for an Account
Setting a Ring Tone for a Group
Setting a Ring Tone for a Contact
Setting a Ring Tone for the Phone
You can choose a ring tone for all incoming calls.
Procedure
1. Go to Menu >Basic >Sound >Ring Tones >Common.
On the T42S/T42G/T41S/T41P/T40P/T40G phones, go to Menu >Settings >Basic Settings >Sound >Ring
Tones >Common.
2. Select the desired ring tone.
3. Select Save.
Setting a Ring Tone for an Account
You can select a unique ring tone for an individual account.
Procedure
1. Go to Menu >Basic >Sound >Ring Tones.
On the T42S/T42G/T41S/T41P/T40P/T40G phones, go to Menu >Settings >Basic Settings >Sound >Ring
Tones.
2. Select the desired account.
3. Select the desired ring tone.
If Common is selected, this account will use the ring tone selected for the phone.
4. Select Save.

Yealink T4 Series IP Phones User Guide
103
Setting a Ring Tone for a Group
You can select a unique ring tone for various groups in your Local Directory.
Note: You can only set a ring tone for a group that is added manually.
Procedure
1. Select Directory (Dir) or go to Menu >Directory >Local Directory.
On the T48S/T48G phones, select Directory or go to Menu >Directory.
2. Highlight the desired group.
On the T48S/T48G phones, tap Settings, and then select the desired group.
3. Select Option >Detail.
On the T48S/T48G phones, tap after the group name.
4. Select the desired ring tone from the Ring field.
If Auto is selected, this group uses the ring tone according to the default priority.
If a specific ring tone is selected, this group uses the ring tone according to the priority: Contact ring tone>Group
ring tone.
5. Select Save or OK.
Setting a Ring Tone for a Contact
You can select a unique ring tone for various contacts in your Local Directory. This helps you quickly identify callers
according to the ring tones.
Procedure
1. Select Directory (Dir) or go to Menu >Directory >Local Directory.
On the T48S/T48G phones, select Directory or go to Menu >Directory.
2. Select the desired contact group or All Contacts.
3. Highlight the desired contact, and select Option >Detail.
On the T48S/T48G phones, tap after the desired contact.
4. Select the desired ring tone from the Ring field.
If Auto is selected, the contact uses the ring tone according to the default priority.
5. Select Save.
Disabling the Key Tone
If you disable the key tone, the phone will not produce a sound when pressing the keypad keys.
Procedure
1. Go to Menu >Basic >Sound >Key Tone.
On the T42S/T42G/T41S/T41P/T40P/T40G phones, go to Menu >Settings >Basic Settings >Sound >Key
Tone.
2. Turn off Key Tone.
3. Select Save.
Muting the Ringtone
You can mute the ringtone of incoming calls on the idle screen.
Procedure
1. Long press the MUTE key for 2 seconds on the idle screen.

Audio Settings
104
2. Long press the MUTE key again to unmute the ringtone.
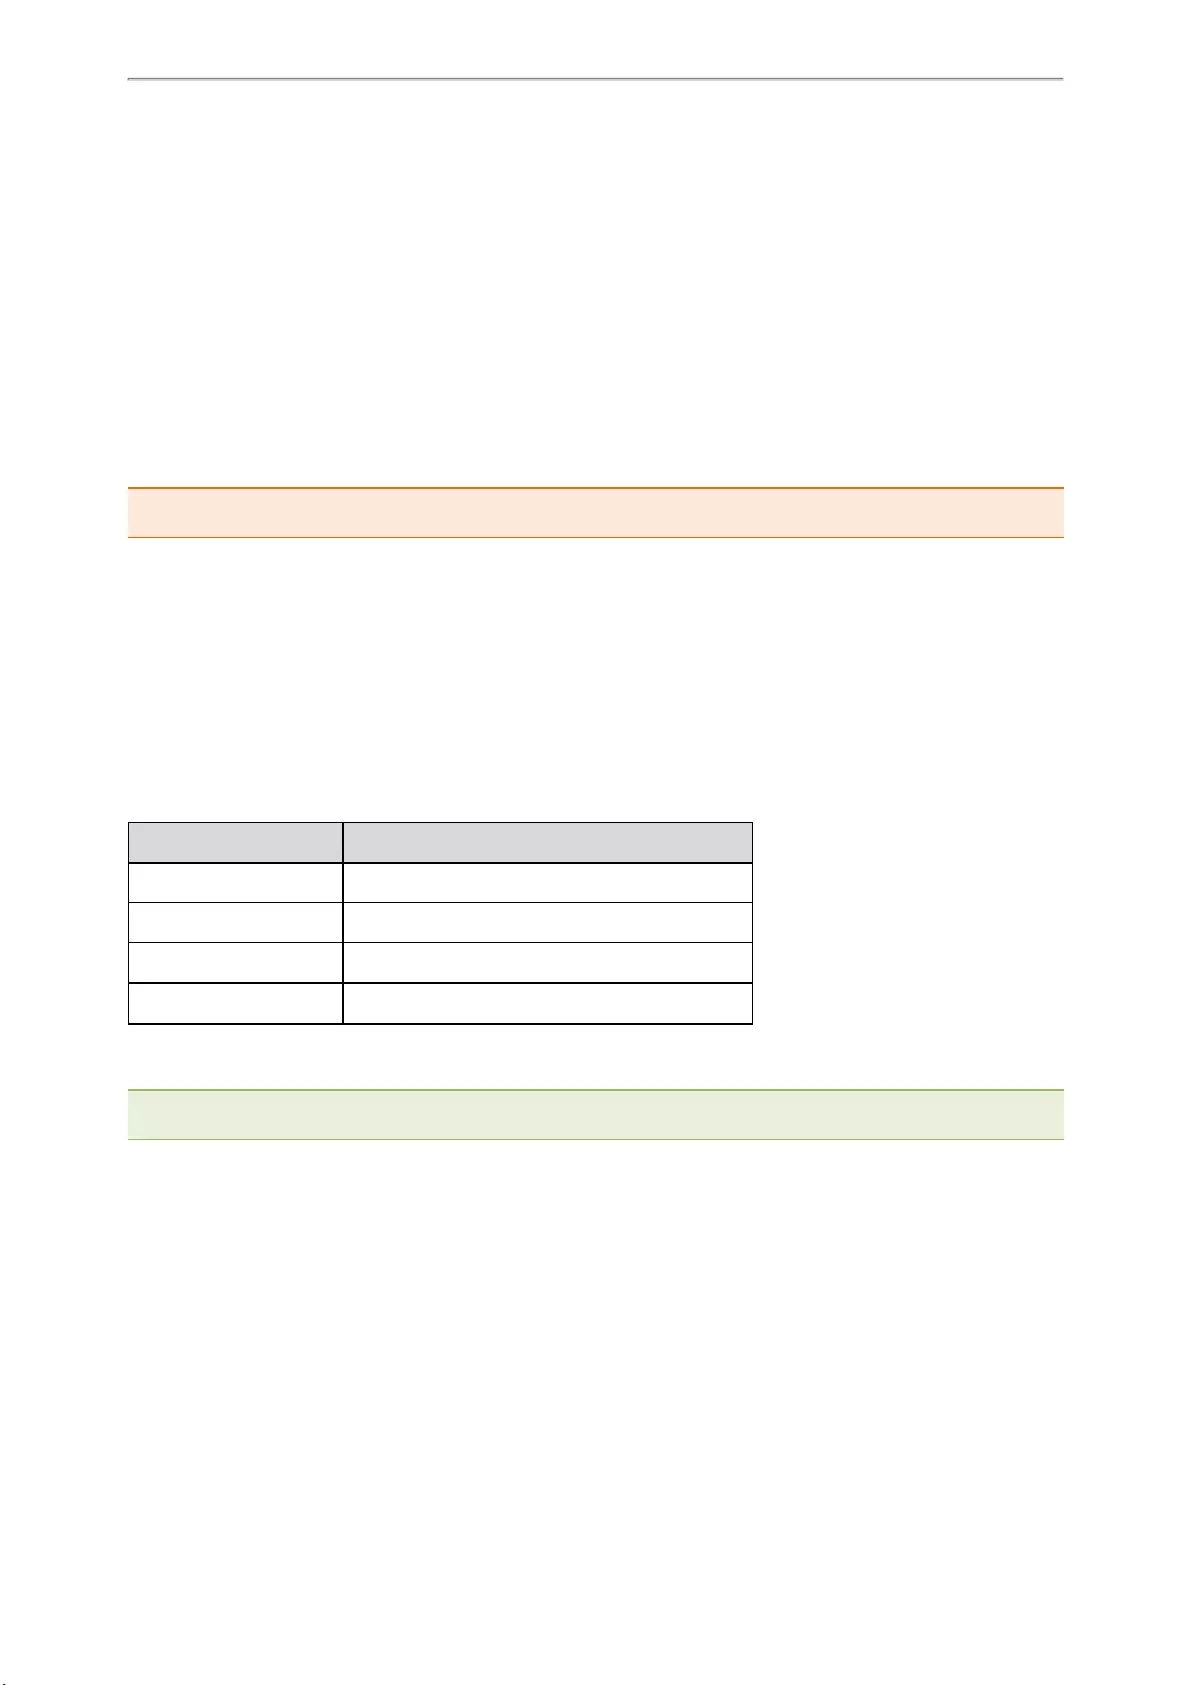
Optional Accessories with Your Phone
105
Optional Accessories with Your Phone
The phone can use optional accessories when you need to extend your phone’s capabilities.
The following optional accessories need to be purchased separately if required for your phone:
lHeadset YHS33/UH33
lWireless Headset Adapter EHS36/EHS40
lBluetooth USB Dongle BT40/BT41
lWi-Fi USB Dongle WF40/WF50
lExpansion Module EXP40
Check with your system administrator to find out which of these applications or accessories are available on your
phone.
Caution: We recommend that you use the accessories provided or approved by Yealink. The use of unapproved third—party
accessories may result in poor performance.
Topics
Headset
Bluetooth
Wireless Network
Expansion Module and Your Phone
Headset
The phone supports wired or wireless headset, USB headset and Bluetooth headset to place and answer calls.
Not all phones support all types of the headsets, different headset have different supported phone models.
Handset Supported Phone Models
Analog Headset All phones
USB Headset T48S/T48G/T46S/T46G/T42S/T41S phones
Bluetooth Headset T48S/T48G/T46S/T46G/T42S/T41S phones
Wireless Headset All phones
You can use only one headset at a time. The headset is used according to the priority: USB headset/Bluetooth head—
set>YHS33/UH33/wireless headset.
Note: Your system administrator can disable the headset feature. Check with your system administrator to find out if it is avail-
able on your phone.
Topics
Connecting the Analog Headset
Wireless Headset
Bluetooth Headset
USB Headset
Using Headsets
Connecting the Analog Headset
If you want to use an analog headset, you require an optional headset YHS33/UH33.
Procedure

Yealink T4 Series IP Phones User Guide
106
1. Simply insert the headset connector into the headset port on the back of your IP phone.
Wireless Headset
You can use most wireless headsets with your phone.
EHS36/EHS40 provides the technical interface between your phone and an EHS-compatible wireless headset,
such as Sennheiser/Jabra (GN Netcom) or Plantronics headset. After the EHS36/EHS40 and your headset are con-
nected successfully, you can handle calls by your headset.
For more information on how to connect EHS36/EHS40, see the EHS36 User Guide/EHS40 User Guide on Yealink
Technical Support page. For more information on how to use your headset, see your headset documentation from
the manufacturer.
Bluetooth Headset
You can use a Bluetooth headset to handle calls on the T48S/T48G/T46S/T46G/T42S/T41S phones.
For more information, refer to the documentation from your Bluetooth headset manufacturer.
Related Topics
Pairing and Connecting the Bluetooth Headset
Deleting the Paired Bluetooth Device
Disconnecting the Bluetooth Device
Connecting the Analog Headset
USB Headset
You can use a USB headset to handle calls on the T48S/T48G/T46S/T46G/T42S/T41S phones.
For the information on how to connect a USB headset, see the Quick Start Guide for your phone on Yealink
Support.
For a list of supported USB headsets, refer to Tested headset list compatible with Yealink IP Phone for your IP
phones on Yealink Support. USB headsets that are not listed may not function properly if you connect them to your
phone.
For more information on how to use your USB headset, refer to the related documentation from the manufacturer.
Using Headsets
After connecting a headset to your phone, you can activate the headset mode and use the headset when answer-
ing and placing calls. If you do not want to use a headset to handle calls, you can deactivate the headset mode.
Procedure
1. Press the HEADSET key on the phone.
The headset icon appears on the phone screen.
2. Press the HEADSET key again on the phone.
The headset icon disappears from the phone screen.
Note: You can initiate or end calls by pressing the HEADSET key. Check with your system administrator to find out if it is
available on your phone.
Related Topics
Switching Among the Handset, Speakerphone and Headset Modes
Placing Calls
Answering Calls
Bluetooth
When the Bluetooth mode is activated, you can pair and connect your Bluetooth device to the phone.
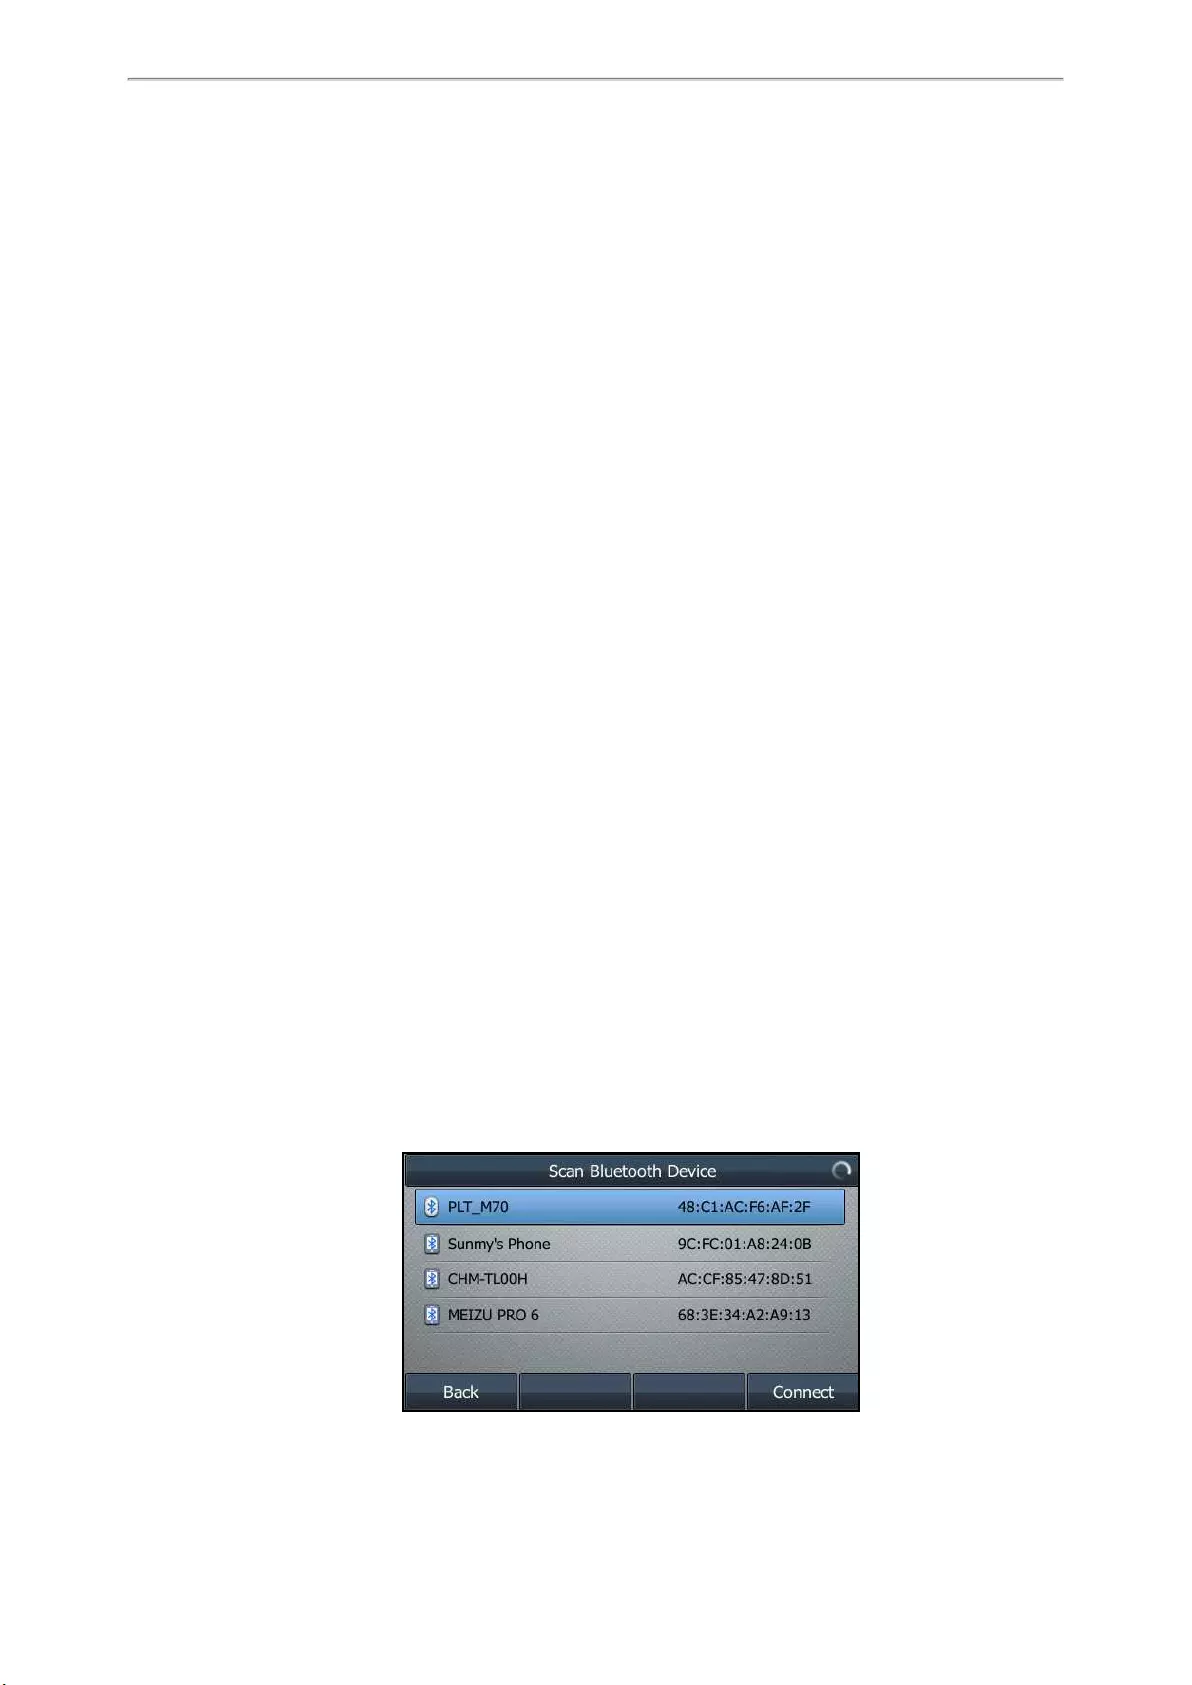
Optional Accessories with Your Phone
107
You can scan and pair up to 60 Bluetooth devices with your phone. However, only one device can be connected at
a time. If you connect your Bluetooth-enabled mobile phone to the phone, you can synchronize the mobile contacts
to the phone.
The T48S/T48G/T46S/T46G/T42S/T41S phones support Bluetooth.
Topics
Activating the Bluetooth Mode
Pairing and Connecting the Bluetooth Headset
Pairing and Connecting the Bluetooth-enabled Mobile Phone
Syncing the Mobile Contacts to the Phone
Viewing the Bluetooth Device Information
Editing Device Name of Your Phone
Deleting the Paired Bluetooth Device
Disconnecting the Bluetooth Device
Deactivating the Bluetooth Mode
Activating the Bluetooth Mode
You should activate the Bluetooth mode first when you need to connect the Bluetooth device to your phone.
Procedure
1. Insert the Bluetooth USB dongle into the USB port on the back of the phone.
The phone prompts you to scan the Bluetooth devices right now.
2. Select OK.
3. On the T46S/T46G/T42S/T41S phones, select On from the Bluetooth field.
4. On the T46S/T46G/T42S/T41S phones, select Save.
The phone scans the available Bluetooth devices automatically.
Pairing and Connecting the Bluetooth Headset
When you need the Bluetooth headset to handle calls, you should pair and connect it to your phone in advance.
Before You Begin
Make sure that the Bluetooth headset is discoverable.
Procedure
1. Go to Menu >Basic >Bluetooth.
On the T42S/T41S phones, go to Menu >Settings >Basic Settings >Bluetooth.
2. On the T46S/T46G/T42S/T41S phones, select Scan to search the Bluetooth devices.
The phone proceeds to scan the local Bluetooth devices, and the phone screen displays the available
Bluetooth devices.
3. Find your Bluetooth headset, and select Connect.

Yealink T4 Series IP Phones User Guide
108
On the T48S/T48G phones, tap your Bluetooth headset.
The Bluetooth icon appears on the phone screen except on the T42S/T41S phone.
Related Topic
Activating the Bluetooth Mode
Pairing and Connecting the Bluetooth-enabled Mobile Phone
After pairing and connecting the Bluetooth-enabled mobile phone, you can use the sync feature.
Before You Begin
Make sure that the Bluetooth-enabled mobile phone is discoverable.
Procedure
1. Go to Menu >Basic >Bluetooth.
On the T42S/T41S phones, go to Menu >Settings >Basic Settings >Bluetooth.
2. On the T46S/T46G/T42S/T41S phones, select Scan to search for the Bluetooth-enabled mobile phone.
3. Find your Bluetooth-enabled mobile phone, and then select Connect.
On the T48S/T48G phones, tap your Bluetooth-enabled mobile phone.
The phone will prompt the connection passkey on the phone screen.
4. Make sure your mobile phone is showing the same passkey, and then select OK on both mobile phone and
phone.
5. (Optional.) Select OK to enable the mobile contacts sync feature, or select Cancel to disable mobile contacts
sync feature.
Note: If you enable mobile contacts sync feature, you also need to authorize the phone to sync the contacts temporarily on the
mobile phone.
Related Topics
Activating the Bluetooth Mode
Syncing the Mobile Contacts to the Phone
Syncing the Mobile Contacts to the Phone
You can sync mobile contacts to your phone. This is a convenient way to view a contact without accessing your
mobile phone.
Topics
Enabling the Mobile Contacts Sync Feature
Viewing Your Mobile Contacts on the Phones
Disabling the Mobile Contacts Sync Feature
Enabling the Mobile Contacts Sync Feature
To sync the mobile contacts to the phone, you should enable the sync feature in advance.
Before You Begin
Make sure that the Bluetooth-enabled mobile phone is paired and connected to your phone.
Procedure
1. Go to Menu >Basic >Bluetooth >Paired Bluetooth Device.
On the T48S/T48G phones, go to Menu >Basic >Bluetooth.
On the T42S/T41S phones, go to Menu >Settings >Basic Settings >Bluetooth >Paired Bluetooth Device.
2. Select Option >Detail.

Optional Accessories with Your Phone
109
On the T48S/T48G phones, tap after the connected Bluetooth-enabled mobile phone name.
3. Select On from the Mobile Contacts Sync field.
You need to authorize the phone to synchronize the contacts temporarily on the mobile phone first, and then the
mobile contacts directory will appear in the phone directory list.
Related Topic
Pairing and Connecting the Bluetooth-enabled Mobile Phone
Viewing Your Mobile Contacts on the Phones
You can view a list of mobile contacts on the phone.
Before You Begin
Make sure that the mobile contact sync feature is enabled.
Procedure
1. Go to Menu >Directory >Mobile Contacts.
The contacts stored in your mobile phone will display in the Mobile Contacts list.
Related Topic
Enabling the Mobile Contacts Sync Feature
Disabling the Mobile Contacts Sync Feature
When you no longer view and use the mobile contacts on the phone, you can disable the sync feature.
Procedure
1. Go to Menu >Basic >Bluetooth >Paired Bluetooth Device.
On the T48S/T48G phones, go to Menu >Basic >Bluetooth.
On the T42S/T41S phones, go to Menu >Settings >Basic Settings >Bluetooth >Paired Bluetooth Device.
2. Select Option >Detail.
On the T48S/T48G phones, tap after the connected Bluetooth-enabled mobile phone name.
3. Select Off from the Mobile Contacts Sync field.
The mobile contacts directory disappears from the phone directory list.
Tip: The mobile contacts directory also disappears from the phone directory list after deactivating the Bluetooth mode.
Related Topic
Deactivating the Bluetooth Mode
Viewing the Bluetooth Device Information
You can view the Bluetooth device information when the Bluetooth mode is activated.
Before You Begin
Make sure that the Bluetooth mode is activated and the Bluetooth device has been paired on your phone.
Procedure
1. Go to Menu >Basic >Bluetooth >Paired Bluetooth Device.
On the T48S/T48G phones, go to Menu >Basic >Bluetooth.
On the T42S/T41S phones, go to Menu >Settings >Basic Settings >Bluetooth >Paired Bluetooth Device.
2. Do one of the following:

Yealink T4 Series IP Phones User Guide
110
lOn the T48S/T48G phones, view the device name, device mac address, and the connection status from the
Bluetooth Device(s) field.
Tap to view the synchronization status with mobile contacts.
lOn the T46S/T46G/T42S/T41S phones, select the desired Bluetooth device.
Select Option >Detail to view the device name, device mac address, and the synchronization status.
Related Topics
Activating the Bluetooth Mode
Pairing and Connecting the Bluetooth-enabled Mobile Phone
Editing Device Name of Your Phone
You can edit the device name of your phone for easily recognizable.
Before You Begin
Make sure that the Bluetooth mode is activated.
Procedure
1. Go to Menu >Basic >Bluetooth >Edit My Device Information.
On the T42S/T41S phones, go to Menu >Settings >Basic Settings >Bluetooth >Edit My Device Information.
The phone screen displays the device name.
2. Enter the desired name in the Device Name field.
3. Select Save.
Related Topic
Activating the Bluetooth Mode
Deleting the Paired Bluetooth Device
You can delete the Bluetooth device paired from your phone, the next time you activate the Bluetooth mode, the
phone will not automatically connect to this device.
Procedure
1. Go to Menu >Basic >Bluetooth >Paired Bluetooth Device.
On the T48S/T48G phones, go to Menu >Basic >Bluetooth.
2. Select Option >Delete.
On the T48S/T48G phones, tap > Delete.
The phone prompts you to delete the device or not.
3. Select OK.
Disconnecting the Bluetooth Device
You can disconnect your Bluetooth device from your phone. When you disconnect a Bluetooth device, it remains paired and
you can reconnect it to your phone.
Procedure
1. Go to Menu >Basic >Bluetooth >Paired Bluetooth Device.
On the T48S/T48G phones, go to Menu >Basic >Bluetooth.
2. Highlight the connected Bluetooth device and select Disconnect.
On the T48S/T48G phones, tap the connected Bluetooth device.
Tip: You can quickly disconnect your Bluetooth headset by turning your headset off.

Optional Accessories with Your Phone
111
Deactivating the Bluetooth Mode
After you deactivate the Bluetooth mode, the Bluetooth device will disconnect from your phone, but it remains
paired and you can reconnect it to your phone.
Procedure
1. Go to Menu >Basic >Bluetooth.
On the T42S/T41S phones, go to Menu >Settings >Basic Settings >Bluetooth.
2. Select Off from the Bluetooth field.
3. On the T46S/T46G/T42S/T41S phones, select Save.
Wireless Network
You can connect the T48S/T48G/T46S/T46G/T42S/T41S phones to a wireless network if Wi-Fi is available within
the area. For more information, contact your system administrator.
Topics
Activating the Wi-Fi Mode
Connecting to the Wireless Network
Viewing the Wireless Network Information
Managing the Saved Wireless Network
Disconnecting the Wireless Network Connection
Deactivating the Wi-Fi Mode
Activating the Wi-Fi Mode
You can activate the Wi-Fi mode to connect your phone to an available wireless network.
Procedure
1. Insert the Wi-Fi USB dongle into the USB port on the back of the phone.
The phone prompts you to scan the Wi-Fi devices right now.
2. Select OK.
3. On the T46S/T46G/T42S/T41S phones, select On from the Wi-Fi field.
4. On the T46S/T46G/T42S/T41S phones, select Save.
The phone scans the available wireless networks in your area.
Connecting to the Wireless Network
After you have activated the Wi-Fi mode, you can connect the phone to the wireless network.
Topics
Connecting to an Available Wireless Network Manually
Connecting to the Wireless Network Using WPS
Adding a Wireless Network Manually
Connecting to an Available Wireless Network Manually
When you enable the Wi-Fi mode, the phone is automatically connected to the saved wireless network, you can
also connect it manually.
Before You Begin
Get the password of the wireless network from your system administrator. Make sure that the Wi-Fi mode is activ-
ated.
Procedure
1. Go to Menu >Basic >Wi-Fi.

Yealink T4 Series IP Phones User Guide
112
On the T42S/T41S phones, go to Menu >Settings >Basic Settings >Wi-Fi.
2. (Optional.) To research the available network, select Scan.
3. Highlight the desired wireless network and select Connect.
On the T48S/T48G phones, tap the desired wireless network to connect or tap > Connect.
5. Enter the password in the Password field.
6. Select Enabled from the Show Password field to make the password visible.
7. Select OK.
Related Topic
Activating the Wi-Fi Mode
Connecting to the Wireless Network Using WPS
The Wi-Fi protected setup (WPS) provides simplified mechanisms to configure secure wireless networks which can
automatically configure a wireless network with a network name (SSID) and strong WPA data encryption and
authentication.
There are two supported methods in the Wi-Fi protected setup:
lPush Button Configuration (PBC): The user simply has to press the WPS key on both the phone and gate-
way/router to connect.
lPersonal Identification Number (PIN): The user enters the PIN generated randomly by the phone on the gate-
way/router to connect.
Before You Begin
Make sure that the Wi-Fi mode is activated.
Procedure
1. Go to Menu >Basic >Wi-Fi.
On the T42S/T41S phones, go to Menu >Settings >Basic Settings >Wi-Fi.
2. Do one of the following:
lSelect WPS >WPS (On the T48S/T48G phones, tap WPS) to use the PBC method, then long press the WPS
key on your gateway or router.
Once the WPS setup has completed successfully, the phone screen will prompt “Connect Success.”.
lSelect WPS >WPS-PIN (On the T48S/T48G phones, tap WPS-PIN) to use the PIN method, then log into your
gateway or router’s web interface, and configure it to search the clients. For more information, refer to the doc-
umentation from the gateway or router manufacturer.
Once WPS-PIN setup has completed successfully, the web interface of the gateway or router will prompt that
the connection is successful.
Related Topic
Activating the Wi-Fi Mode
Adding a Wireless Network Manually
If SSID broadcast on your gateway or router is disabled, the wireless network might not appear in the scanning res-
ults. In that case, you must manually add a wireless network.
The phone can store up to 5 connected wireless networks.
Before You Begin
Get the available wireless network information from your system administrator. Make sure that the Wi-Fi mode is
activated.
Procedure
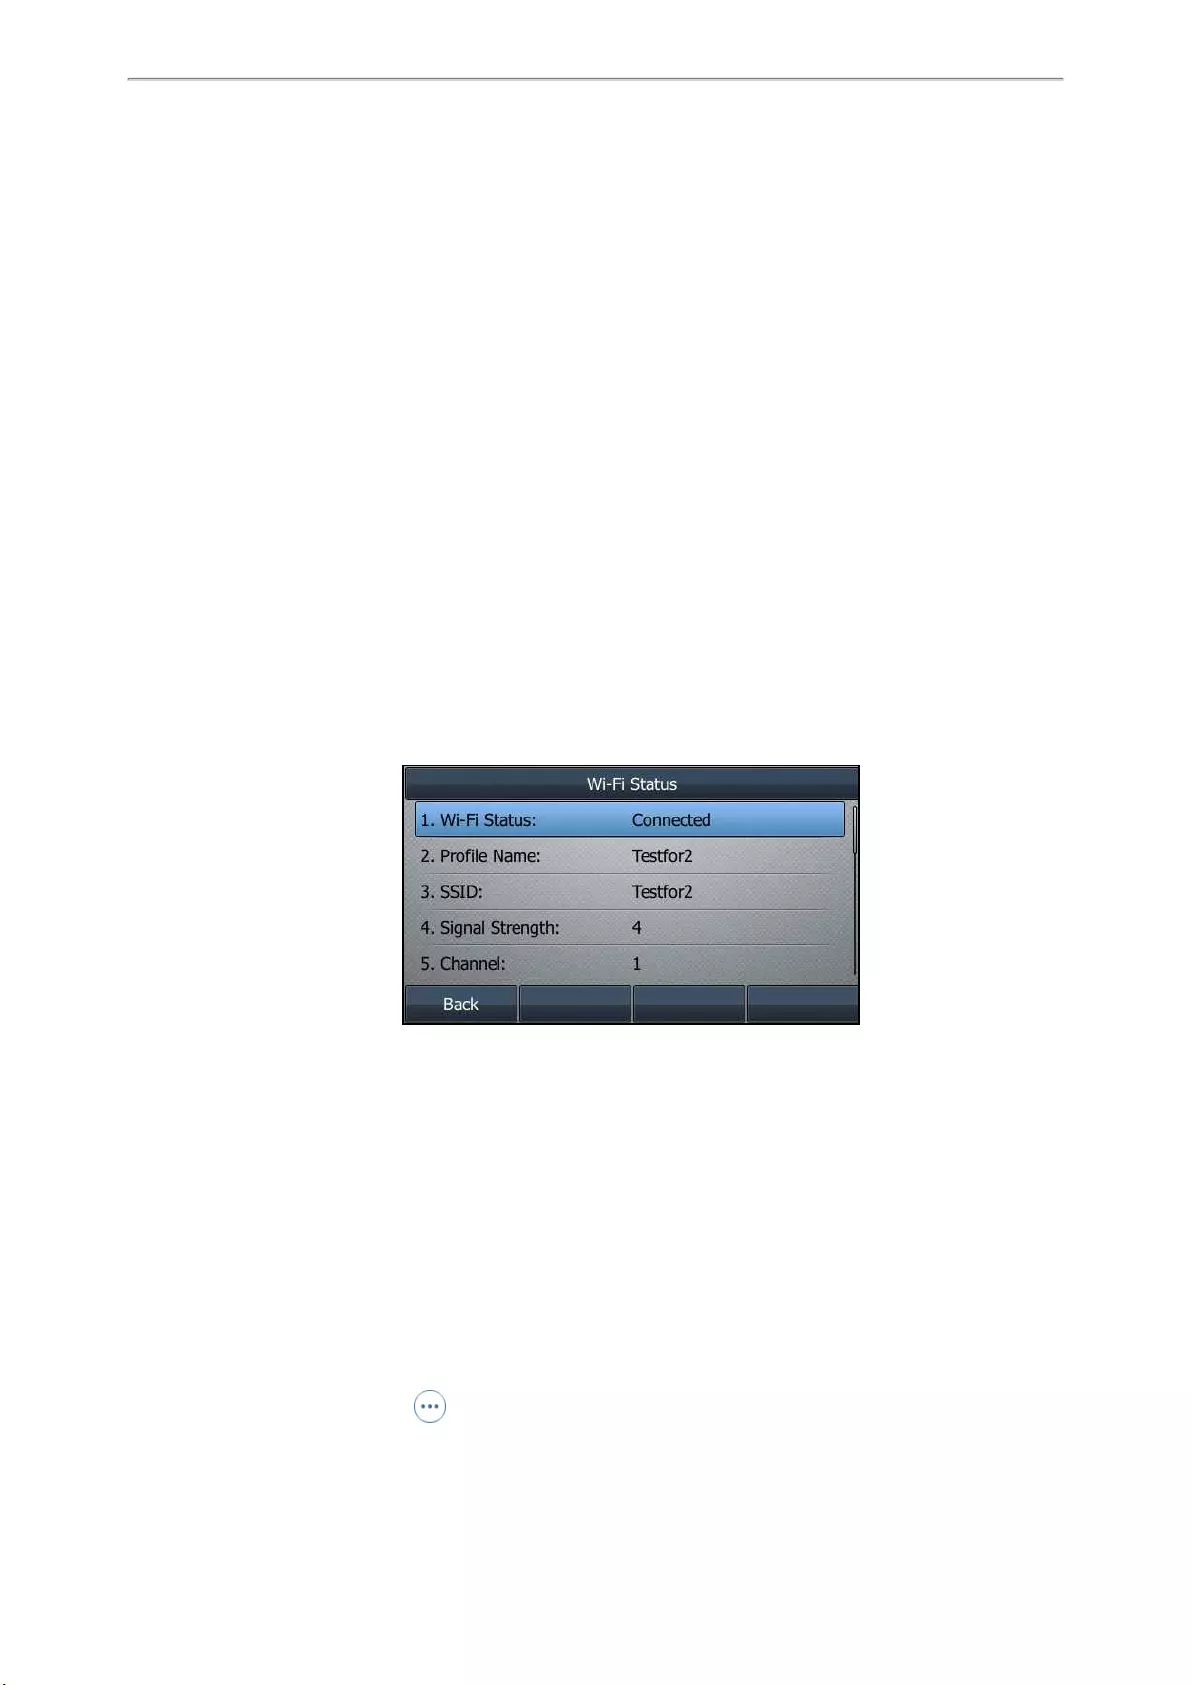
Optional Accessories with Your Phone
113
1. Go to Menu >Basic >Wi-Fi.
On the T42S/T41S phones, go to Menu >Settings >Basic Settings >Wi-Fi.
2. Highlight Known Network(s) and select Add.
On the T48S/T48G phones, tap Add.
3. Do the following:
lSelect None from the Security Mode field.
lIf you select WEP,WPA/WPA2 PSK, or WPA3-Personal from the Security Mode field, enter the desired pass-
word.
lIf you select 802.1x EAP from the Security Mode field, select the desired EAP method and enter the desired
values in the corresponding fields.
4. Select Save.
The connected wireless networks will be saved to the Known Network(s) list.
Related Topic
Activating the Wi-Fi Mode
Viewing the Wireless Network Information
You can view the wireless network information (for example, Profile Name, SSID or Signal Strength) when the Wi-Fi
mode is activated.
Procedure
1. Go to Menu >Basic >Wi-Fi >Wi-Fi Status.
On the T42S/T41S phones, go to Menu >Settings >Basic Settings >Wi-Fi >Wi-Fi Status.
Managing the Saved Wireless Network
You can edit, reorder and delete the saved wireless network.
Once the phone has been connected to a wireless network successfully, this wireless network profile will be saved
in Known Network(s) list. Next time you activate Wi-Fi mode, the phone will be automatically connected to the wire—
less network which has the highest priority (the top one).
Up to 5 wireless network profiles can be saved in Known Network(s) list. If you want to add a new one when the
phone has already saved 5 wireless network profiles, delete an older one before adding.
Procedure
1. Go to Menu >Basic >Wi-Fi >Known Network(s).
On the T42S/T41S phones, go to Menu >Settings >Basic Settings >Wi-Fi >Known Network(s).
2. Select Option.
On the T48S/T48G phones, tap .
3. Do one of the following:

Yealink T4 Series IP Phones User Guide
114
lSelect Edit to edit the wireless network profile, and select Save.
lSelect Move Up or Move Down to change the priority of the wireless network.
lSelect Delete or Delete All to delete the saved wireless network profile.
Disconnecting the Wireless Network Connection
When you no longer want to connect to the current wireless network, you can disconnect it.
Procedure
1. Go to Menu >Basic >Wi-Fi.
On the T42S/T41S phones, go to Menu >Settings >Basic Settings >Wi-Fi.
2. Select X Available Network(s) (X represents the number of available networks).
3. Highlight the connected wireless network, and select Disconnect.
On the T48S/T48G phones, tap the connected wireless network or tap > Disconnect.
Tip: You can also disconnect the wireless network when deactivating the Wi-Fi mode.
Related Topic
Deactivating the Wi-Fi Mode
Deactivating the Wi-Fi Mode
You should deactivate the Wi-Fi mode when you need to connect your phone to the wired network.
Procedure
1. Go to Menu >Basic >Wi-Fi.
On the T42S/T41S phones, go to Menu >Settings >Basic Settings >Wi-Fi.
2. Select Off from the Wi-Fi field.
3. On the T46S/T46G/T42S/T41S phones, select Save.
Expansion Module and Your Phone
The expansion module EXP40 is a console you can use to connect to a phone to add additional Ext keys and
expand the functions of your phone. Only T48S/T48G/T46S/T46G phone supports it.
For more information on expansion module EXP40, refer to the LCD Expansion Module EXP40 user guide on
Yealink Technical Support page.
Topics
Connecting the Expansion Module
Assigning the Features for Ext Keys
Adjusting the Contrast of the Expansion Module
Adjusting the Backlight of the Expansion Module
Connecting the Expansion Module
You can connect the expansion module to your phone, using the supplied materials in the expansion module’s
packaging.
Procedure
1. Connect the expansion module to the phone using the connecting sheet and screws.
2. Connect the supplied cord from the Ext jack on the host phone to the Ext in jack on the expansion module.
For more detailed information about how to connect the expansion module, refer to the LCD Expansion Module
quick start guide on the Yealink Technical Support page.

Optional Accessories with Your Phone
115
Assigning the Features for Ext Keys
You can customize features for Ext keys on the connected phone.
Procedure
1. Long press the desired Ext key on the expansion module.
The phone screen will enter the user setting interface of this key.
2. Customize the specific feature for this key on the phone.
3. Select Save.
Adjusting the Contrast of the Expansion Module
You can configure the contrast of the expansion module via the host phone to make it easier to read.
Procedure
1. Go to Menu >Basic >Display >Contrast.
2. Select the desired value between 1 and 10 (highest intensity) from the Contrast field.
3. Select Save.
Adjusting the Backlight of the Expansion Module
When you change the backlight intensity settings on your T48S/T48G/T46S/T46G phones, the backlight on expan-
sion module connected to your phone automatically changes to match the new settings.
Related Topic
Changing the Backlight and Time

Maintaining Your Phone
116
Maintaining Your Phone
When your phone is unable to operate properly, you need to investigate or troubleshoot issues along with other
tasks your system administrator may ask you to perform.
Topics
Warnings
Diagnosing the Network
Rebooting Your Phone
Resetting to Factory Settings
Updating the Phone Configuration
Clearing User’s Personalized Configuration Settings
Warnings
When some issues occur on your phone, on the T48S/T46S/T40G/T40P phones, a warning icon appears in the
status bar. On the T42S/T41S phones, a warning message appears on the idle screen.
The following lists the detailed situations:
lThe default password is being used
lFailed to register the account
lProvisioning credentials are wrong
lNetwork is unavailable
Topics
Investigating Warnings
Re-provisioning Your Phone
Clearing Warnings
Related Topic
Changing the Administrator Password
Investigating Warnings
The warning icon or message lets you know that your phone has one or more important issues. You can view
details about warnings on the Status screen.
Procedure
1. Go to Menu >Status.
2. Select Warnings.
The Warnings screen is displayed listing any issues.
Tip: You can also press the OK key when the phone is idle, and then select Warnings.
Re-provisioning Your Phone
When the provisioning credentials are wrong, you need to ask your system administrator for the valid provisioning
credentials to re-provision your phone.
Procedure
1. Go to Menu >Status >Warnings.
2. Select Auto-p credentials failed >Re Provision.
On the T48S/T48G phones, tap Auto-p credentials failed.

Yealink T4 Series IP Phones User Guide
117
3. Enter valid provisioning credentials, and select Save.
The phone prompts you to provision now or not.
4. Select OK.
Clearing Warnings
For the T42S/T41S phones, you can temporarily remove the warning message from the idle screen; for other
phones, you can temporarily remove the warning icon from the status bar. You can temporarily remove the warning
icon from the status bar.
However, the warning icon/message appears again after the phone reboots or the phone has a new warning if the
issue is not solved.
Procedure
1. Go to Menu >Status >Warnings.
2. Select Clear Icon.
Diagnosing the Network
When network problems occur on your phone, you can use the «ping» or «trace route» method to troubleshoot net—
work connectivity problems.
Procedure
1. Go to Menu >Features >Diagnostics >Network.
2. Do one of the following:
lSelect Ping, then enter the desired IP address or URL in the Ping IP or URL field.
lSelect Trace Route, then enter the desired IP address or URL in the Trace Route IP or URL field.
3. Select Start.
The screen displays the network status information.
Rebooting Your Phone
The improper operation may cause malfunction. If the malfunction occurs, your system administrator may ask you to
reboot your phone.
Procedure
1. Go to Menu >Basic >Reboot.
On the T42S/T42G/T41S/T41P/T40P/T40G phones, go to Menu >Settings >Basic Settings >Reboot.
The phone prompts you to reboot the phone or not.
2. Select OK.
Tip: You can also long press the Cancel key on the keypad when the phone is idle to reboot the phone.
Resetting to Factory Settings
When some issues occur on your phone and you have tried all troubleshooting suggestions but still do not solve
the problem, you can reset your phone to factory configurations.
This operation will delete all your personal configuration settings, and reset all settings to the factory defaults.
Check with your system administrator if the personalized settings are kept before resetting your phone to factory set—
tings.
Procedure
1. Go to Menu >Advanced (default password: admin) > Reset Config.
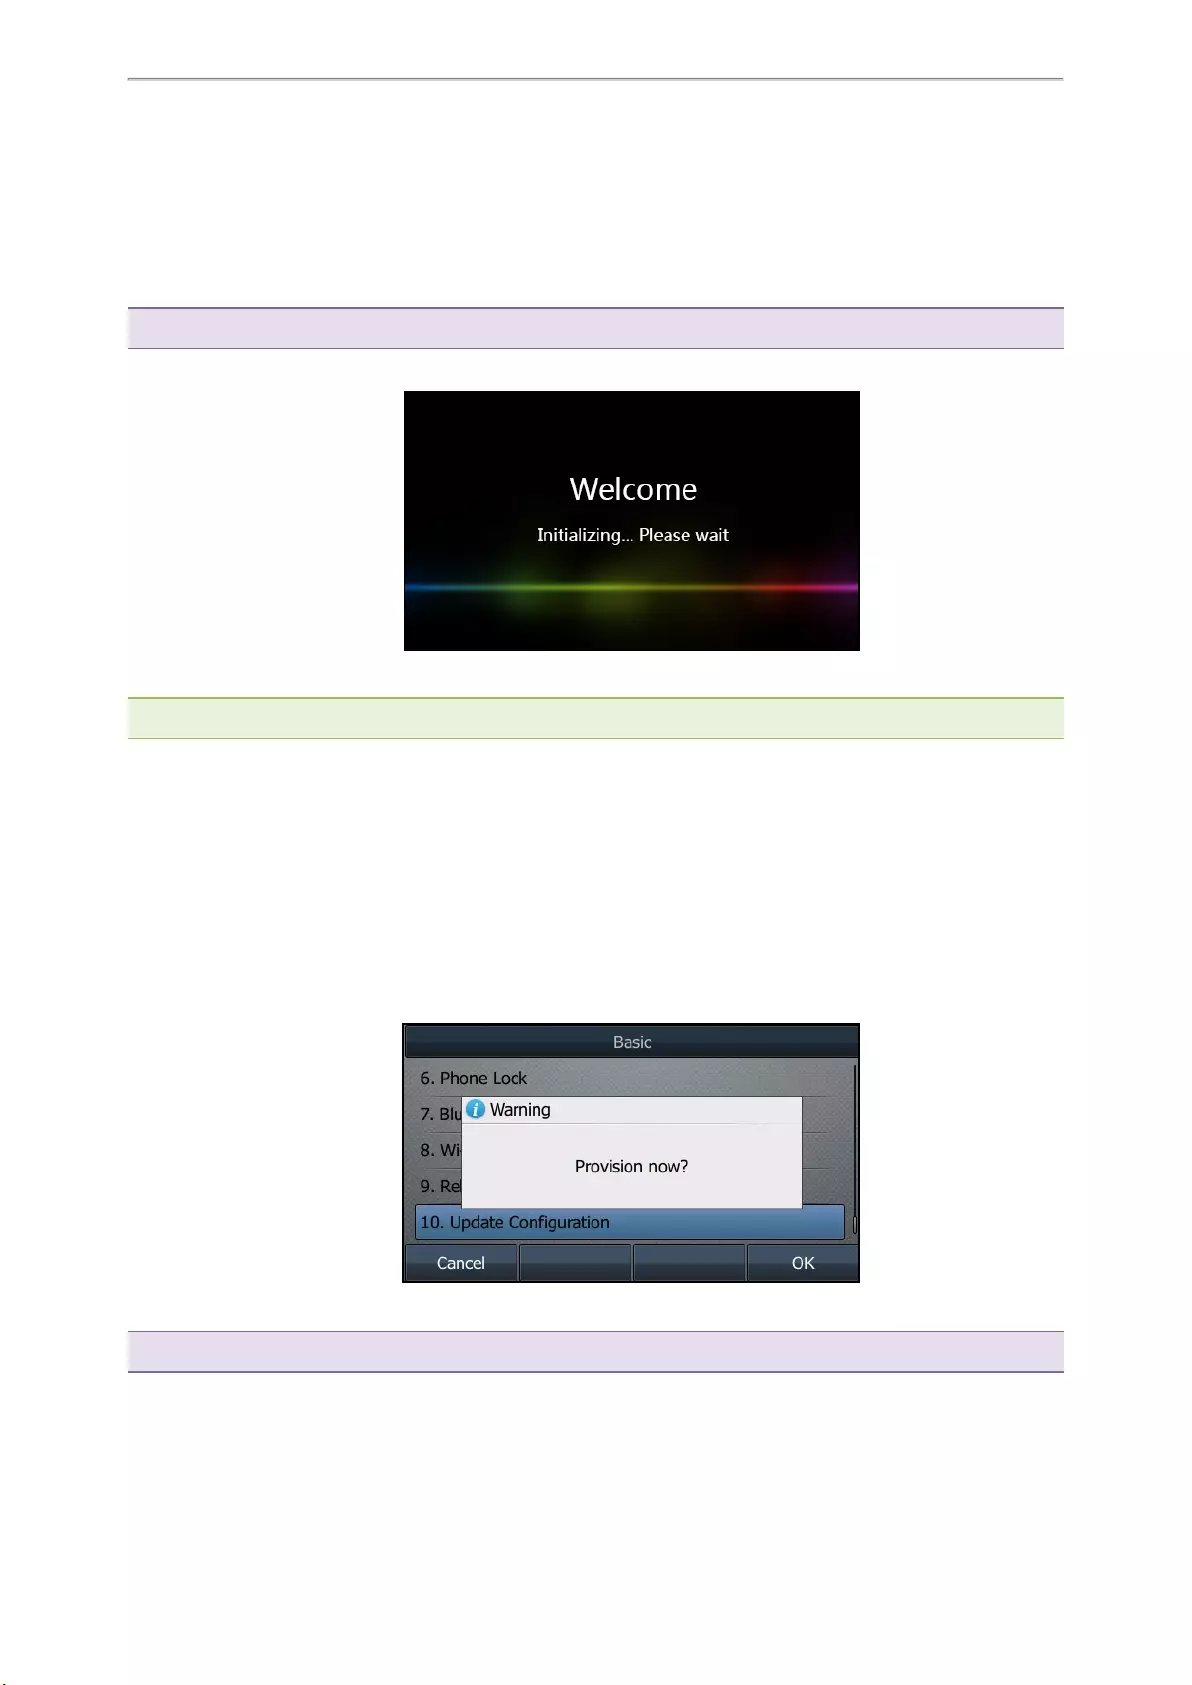
Maintaining Your Phone
118
On the T42S/T42G/T41S/T41P/T40P/T40G phones, go to Menu >Settings >Advanced Settings (default pass-
word: admin) > Reset Config.
2. Select Reset to Factory Settings >Reset.
The phone prompts you to reset the setting or not.
3. Select OK.
The phone begins resetting.
Tip: You can also long press the OK key when the phone is idle.
After reset, the screen prompts “Welcome Initializing…Please wait”.
The phone will be reset successfully after startup.
Note: Reset of your phone may take a few minutes. Do not power off until the phone has started up successfully.
Updating the Phone Configuration
Your system administrator may ask you to update the configuration for your phone to apply any changes to system
settings, which you can do without restarting it.
Procedure
1. Go to Menu >Basic >Update Configuration.
On the T42S/T42G/T41S/T41P/T40P/T40G phones, go to Menu >Settings >Basic Settings >Update Con-
figuration.
A message is displayed on the phone screen:
2. Select OK.
Tip: You can also long press the REDIAL key when the phone is idle to update the phone configuration.

Yealink T4 Series IP Phones User Guide
119
Clearing User’s Personalized Configuration Settings
You can clear the personalized configuration settings manually on the phone.
Before You Begin
Your system administrator has enabled the phone to keep the user’s personalized settings after auto provisioning.
Procedure
1. Go to Menu >Basic >Reset local settings.
On the T42S/T41S/T40P/T40G phones, go to Menu >Settings >Basic Settings >Reset local settings.
The phone prompts you to reset the local settings or not.
2. Select OK.
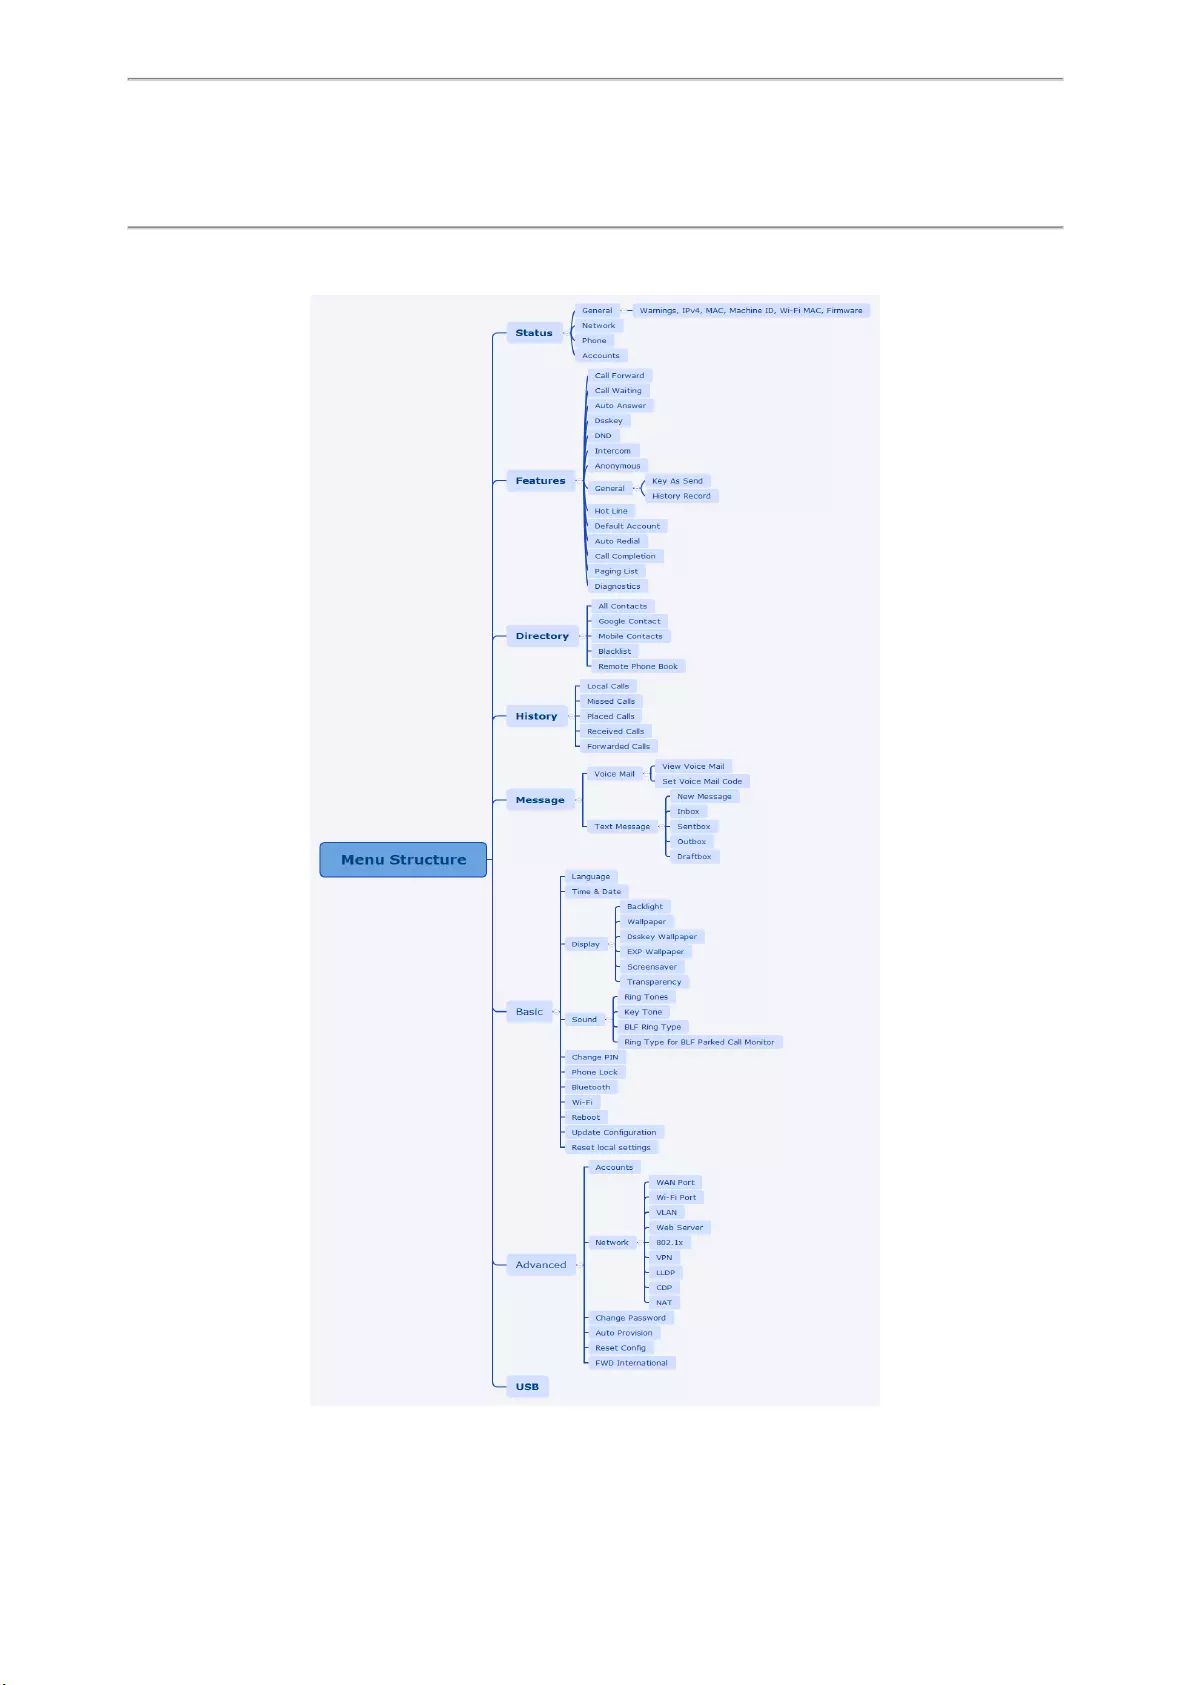
Appendix — Menu Structure
120
Appendix — Menu Structure
For the T48S/T48G Phone
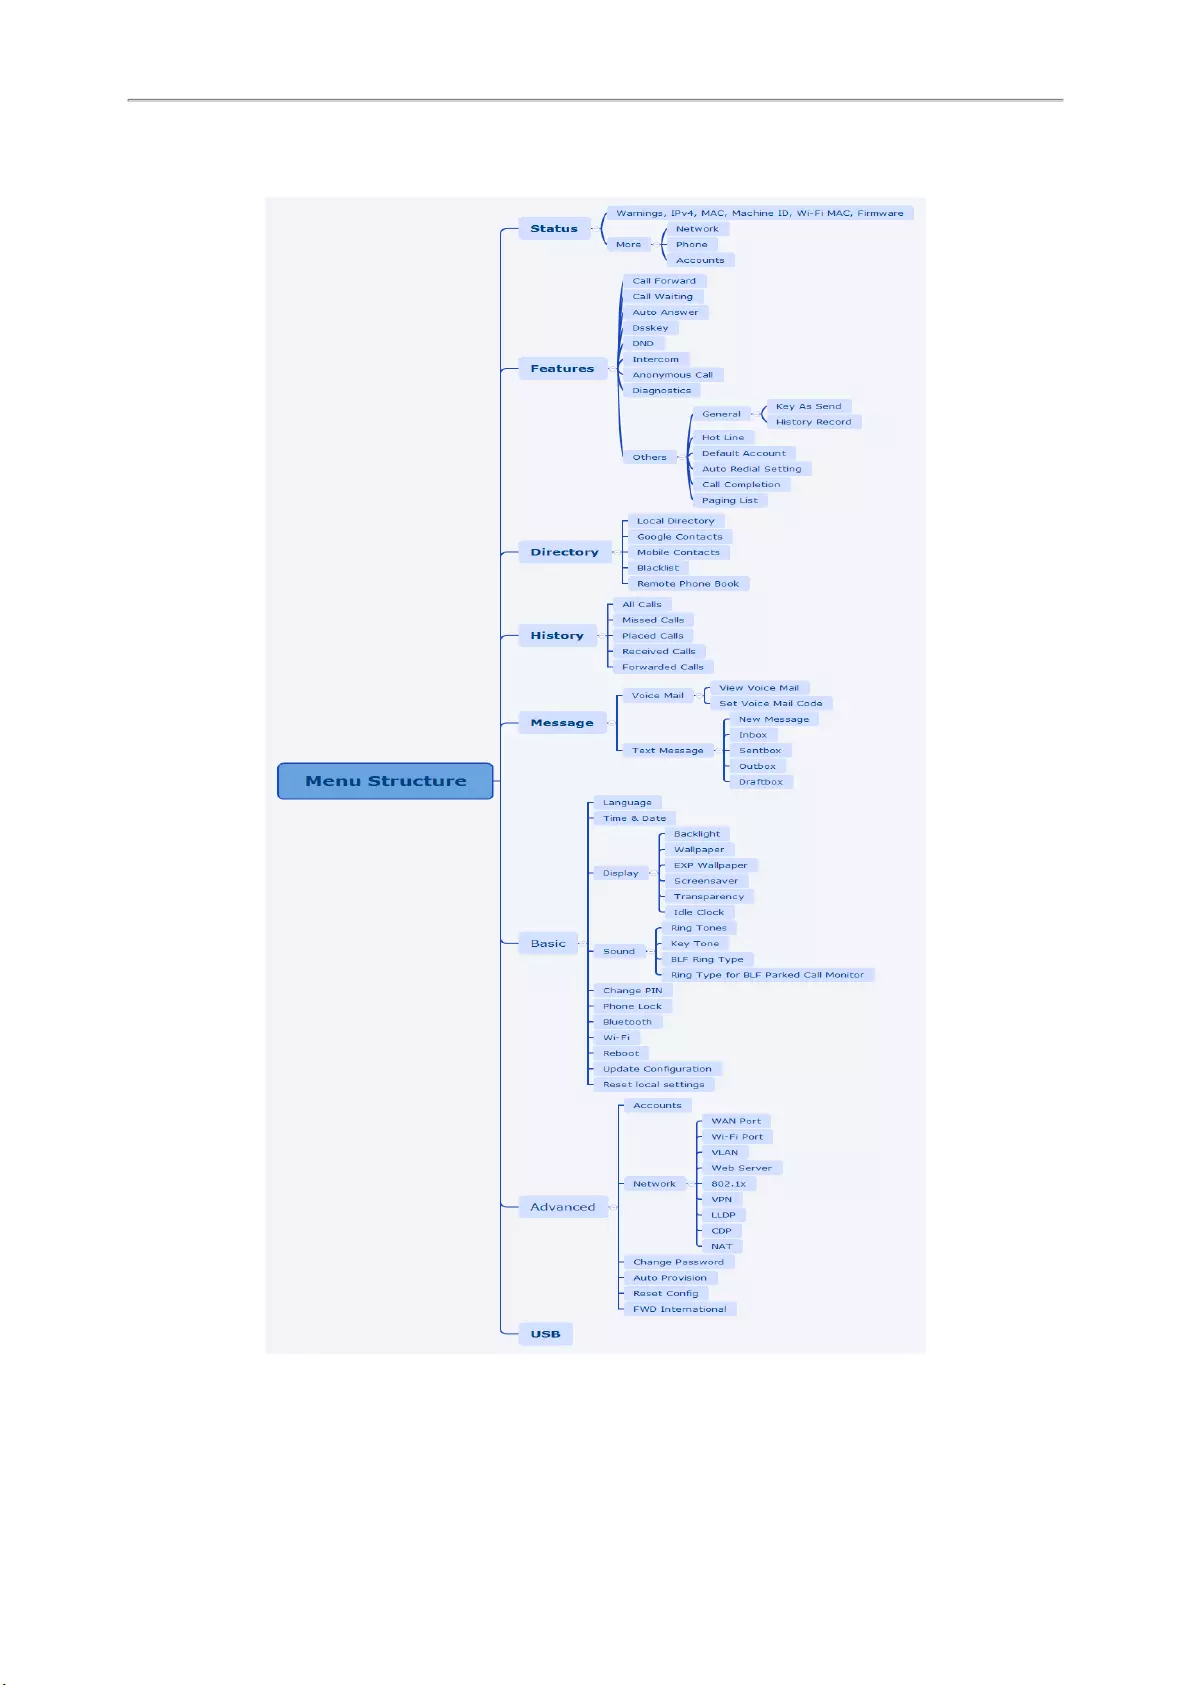
Yealink T4 Series IP Phones User Guide
121
For the T46S/T46G Phone
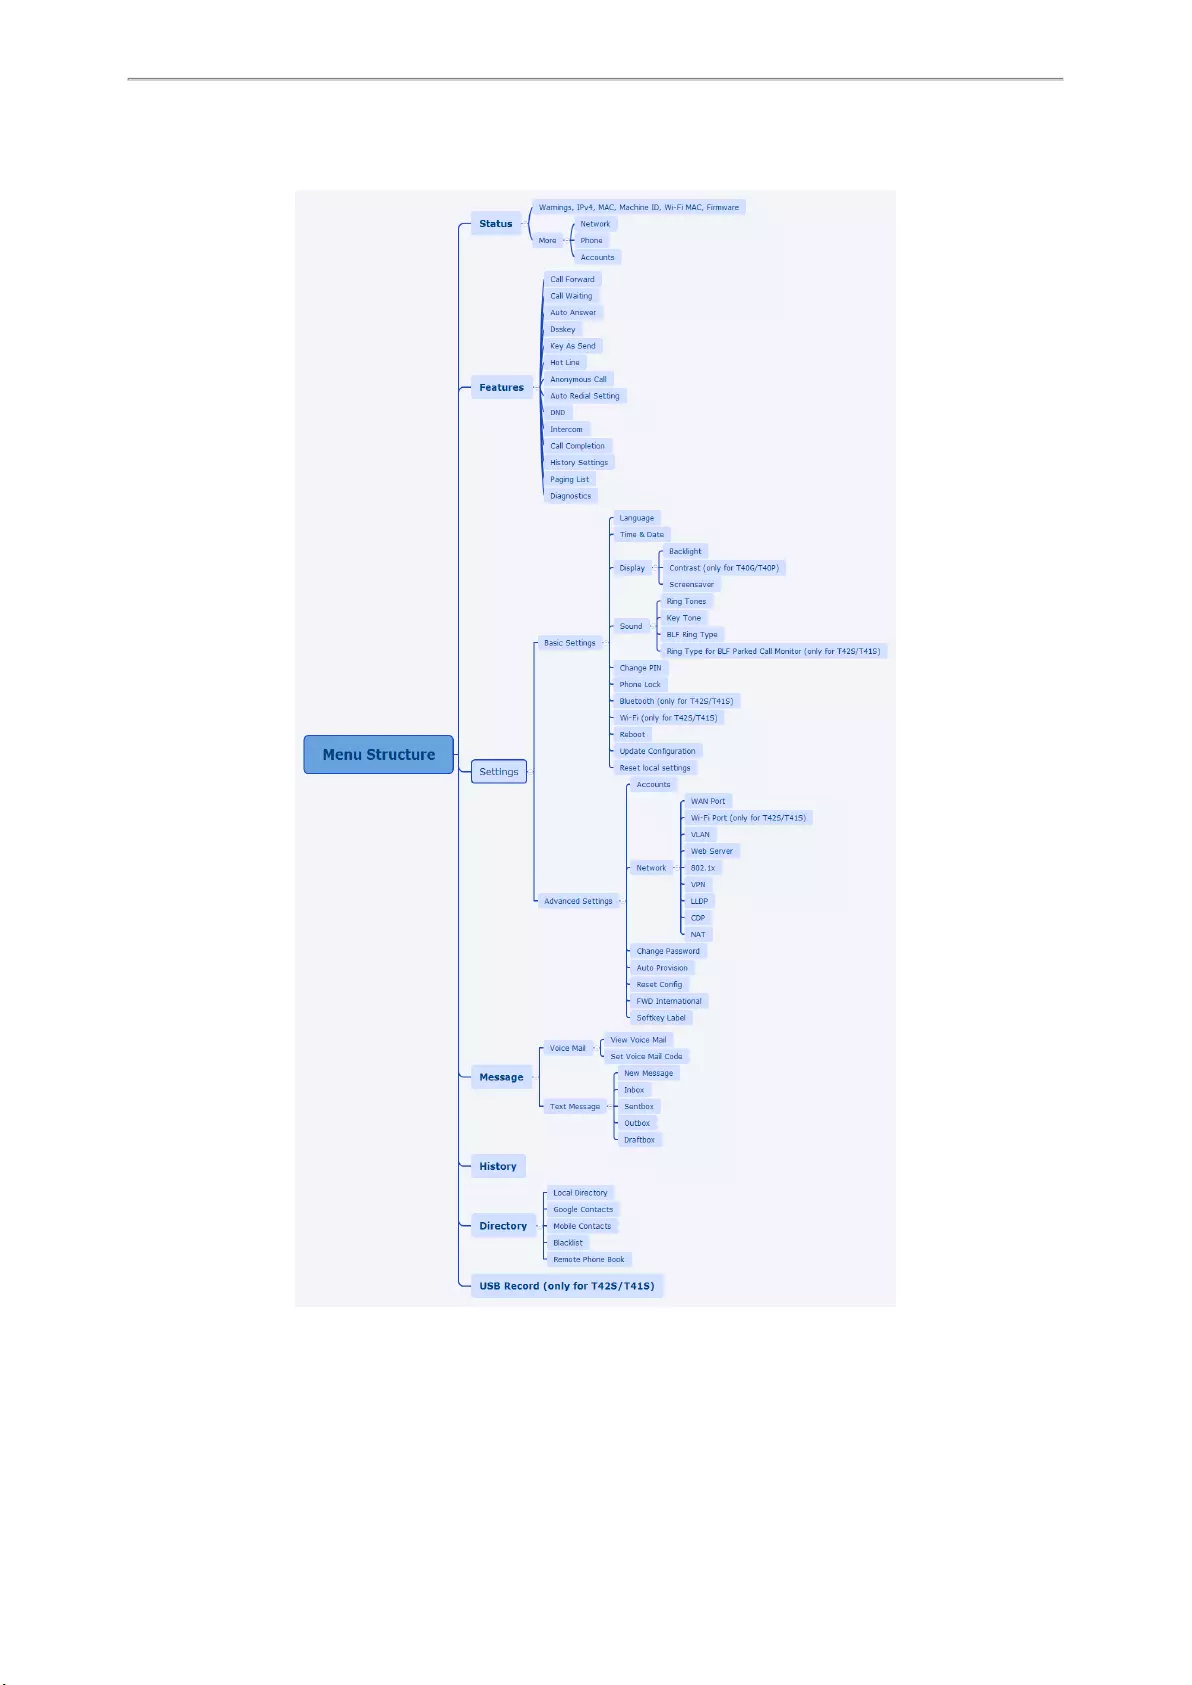
Appendix — Menu Structure
122
For the T42S/T42G/T41S/T41P/T40P/T40G Phone
View the manual for the Yealink SIP-T43U here, for free. This user manual comes under the category phones and has been rated by 2 people with an average of a 9.2. This manual is available in the following languages: English. Do you have a question about the Yealink SIP-T43U?
Ask your question here
Yealink SIP-T43U specifications
Below you will find the product specifications and the manual specifications of the Yealink SIP-T43U.
The Yealink SIP-T43U is an IP phone featuring a wired handset, designed to deliver reliable and efficient communication. This phone holds sustainability certificates, including REACH and RoHS, demonstrating its commitment to environmental compliance. With Power over Ethernet (PoE) compatibility, the phone can be powered and connected to the network through a single Ethernet cable.
The Yealink SIP-T43U supports various network protocols, such as FTP, TFTP, HTTP, HTTPS, IPv6, LLDP, CDP, and DHCP VLAN, ensuring flexibility and compatibility with different network configurations. It offers a Gigabit Ethernet LAN interface, enabling high-speed data transfer with rates of 10,100,1000 Mbit/s.
Additionally, this IP phone provides both Wi-Fi and Bluetooth capabilities, enhancing its connectivity options. With Bluetooth version 4.1, users can easily connect their devices and enjoy wireless communication. The phone also features two USB 2.0 ports for convenient data transfer and peripheral device connectivity.
Equipped with two Ethernet LAN (RJ-45) ports, the Yealink SIP-T43U offers increased versatility in network connectivity and configuration. Its sleek and contemporary design, coupled with its durable construction and premium materials, ensures long-lasting performance.
Overall, the Yealink SIP-T43U is a feature-rich IP phone that provides reliable communication solutions. With its extensive network compatibility, Wi-Fi, Bluetooth, and USB connectivity options, it offers versatile connectivity possibilities. Furthermore, its sustainability compliance and high-quality construction make it a durable and eco-friendly choice for businesses and individuals alike.
Sustainability certificates
REACH, RoHS
Power over Ethernet (PoE)
Yes
Supported network protocols
FTP/TFTP/HTTP/HTTPS, IPv6, LLDP/CDP/DHCP VLAN
General
| Brand | Yealink |
| Model | SIP-T43U | 1301202 |
| Product | phone |
| EAN | 6938818304284, 0841885102973, 5704174978954 |
| Language | English |
| Filetype | User manual (PDF), Quickstart Guide (PDF) |
Design
| Product type | IP Phone |
| Handset type | Wired handset |
| Product colour | Grey |
| Wall mountable | Yes |
| Mounting | Desk/Wall |
Certificates
| Sustainability certificates | REACH, RoHS |
| Sustainability compliance | Yes |
Power
| Power over Ethernet (PoE) | Yes |
| AC adapter input voltage | 100 — 240 V |
| AC adapter output voltage | 5 V |
| AC adapter output current | 1.2 A |
| Power consumption (typical) | 2.2 W |
Network
| Supported network protocols | FTP/TFTP/HTTP/HTTPS, IPv6, LLDP/CDP/DHCP VLAN |
| Ethernet LAN | Yes |
| Ethernet LAN interface type | Gigabit Ethernet |
| Ethernet LAN data rates | 10,100,1000 Mbit/s |
| Wi-Fi | Yes |
| Bluetooth | Yes |
| Bluetooth version | 4.1 |
| Networking standards | IEEE 802.1Q, IEEE 802.1p, IEEE 802.1x, IEEE 802.3af |
| Quality of Service (QoS) support | Yes |
| DHCP client | Yes |
| Syslog | Yes |
Ports & interfaces
| USB 2.0 ports quantity | 2 |
| Ethernet LAN (RJ-45) ports | 2 |
| DC-in jack | Yes |
| Expansion module support | Yes |
| RJ-9 ports quantity | 2 |
Phone features
| Lines quantity | 12 lines |
| Call waiting | Yes |
| Call hold | Yes |
| Call forwarding | Yes |
| Conference call | Yes |
| Redialing | Yes |
| Caller ID | Yes |
| Phonebook capacity | 1000 entries |
| Number of VoIP accounts | 12 |
| Speed dialling | Yes |
| Call return | Yes |
| Answering machine | Yes |
| SIP registrar server | Yes |
| Full duplex | Yes |
| Call transfer | Yes |
| Anonymous call | Yes |
| Anonymous call rejection | Yes |
| Call history | Yes |
Audio
| Microphone mute | Yes |
| Speakerphone | Yes |
| Voice codecs | AGC, AJB, AMR-NB, AMR-WB, G.711Mu, G.711a, G.723.1, G.726, G.729ab, OPUS, PLC, VAD, iLBC |
| Packet loss concealment (PLC) | Yes |
| Comfort noise generation (CNG) | Yes |
Packaging content
| Number of handles included | 1 pc(s) |
| Ethernet cable | Yes |
| Handset | Yes |
| Quick start guide | Yes |
| Mounting kit | Yes |
Operational conditions
| Operating relative humidity (H-H) | 10 — 95 % |
| Operating temperature (T-T) | -10 — 50 °C |
Weight & dimensions
| Width | 224.9 mm |
| Depth | 206.2 mm |
| Height | 174.9 mm |
| Package width | 246 mm |
| Package depth | 223 mm |
| Package height | 120 mm |
Display
| Touchscreen | No |
| Backlight display | Yes |
| Display diagonal | 3.7 « |
| Display resolution | 360 x 160 pixels |
| Display | LCD |
Management features
Performance
| Hearing aid compatibility | Yes |
| Dual-Tone Multi-Frequency (DTMF) modes | In-band, Out-of band, SIP info |
Logistics data
| Harmonized System (HS) code | 85171800 |
show more
Frequently asked questions
Can’t find the answer to your question in the manual? You may find the answer to your question in the FAQs about the Yealink SIP-T43U below.
What is the height of the Yealink SIP-T43U?
The Yealink SIP-T43U has a height of 174.9 mm.
What is the width of the Yealink SIP-T43U?
The Yealink SIP-T43U has a width of 224.9 mm.
What is the depth of the Yealink SIP-T43U?
The Yealink SIP-T43U has a depth of 206.2 mm.
What is the screen size of the Yealink SIP-T43U?
The screen size of the Yealink SIP-T43U is 3.7 «.
What is the screen resolution of the display of the Yealink SIP-T43U?
The screen resolution of the Yealink SIP-T43U is 360 x 160 pixels.
Is the manual of the Yealink SIP-T43U available in English?
Yes, the manual of the Yealink SIP-T43U is available in English .
Is your question not listed? Ask your question here
Для начала установки подключаем блок питание телефона в розетку 220V и Ethernet-кабель в Ваш телефон (с обратной стороны телефона разъем Internet).
Для того чтобы настроить телефон требуется узнать IP-адрес телефона, для этого необходимо нажать клавишу ОК на телефонном аппарате
Откройте браузер и наберите в строке IP-адрес, который получил SIP-телефон.
Откроется окно с запросом пользователя и пароля для входа в Web-интерфейс SIP-телефона.
Введите имя пользователя и пароль (по умолчанию пользователь: admin, пароль: admin) и нажмите кнопку Логин.

Перед Вами откроется начальная страница Web-интерфейса — Статус

Далее раскрываем раздел Аккаунт и выбираем Регистрация
В данном разделе Вам потребуется:
Активная линия — передвинуть ползунок Вкл;
Лейбл — Любой удобный для Вас;
Отображаемое имя, имя регистрации и имя пользователя — короткий номер сотрудника в АТС;
Пароль — SIP-пароль сотрудника в АТС (в случае его отсутствия, пароль сотрудника для входа в АТС);
Адрес SIP-сервера: указываем адрес Вашего домена вида xxx.gravitel.ru или xxx.aicall.ru;
Transport: UDP;
Таймаут сервера: 180.
После ввода данных нажимаем кнопку Сохранить

Статус регистрации изменится на Зарегистрирован
Далее раскрываем раздел Кодеки и выставляем приоритеты и расположения кодеков как указано на рисунке

После ввода данных нажимаем кнопку Сохранить.
Ваше устройство готово работать.
Phone Keys
The following keys display on the screen:
Keys Funcons
Menu.
Turns Headset o/on.
Turns Speakerphone o/on.
Mutes/unmutes Speaker.
Holds/Resumes a Call.
Transfers a call.
Connects to Voicemail.
Le/Right selects Accounts or Call Lists.
Up/Down selects Contacts or Entries.
Adjusts the volume.
Conrms acons. Answers incoming calls.
Cancels acons. Rejects incoming calls.
Place a Call
Only one call can be Acve at any me.
To place a call, do one of the following:
• Use the handset, headset or speakerphone, rst.
Enter the phone number and Send.
• Enter the phone number and Send. Use the handset,
headset or speakerphone.
• Select a Contact from a call list and Send.
To place a new call during an Acve call, do one of the
following:
• Press a Line key. The Acve call is placed on Hold.
Enter a phone number and Send.
• Press Hold to place the Acve call on Hold. Press
NewCall. Enter a number and Send.
Redial a Call
Redial opons include:
• Redial the last dialed number: press Redial twice.
• Redial a previously dialed number: press Redial once
to enter Placed Calls list. Use the up/down arrows to
select the number and Redial or Send.
Answer a Call
Use the handset, headset or speakerphone.
To answer a new call while on an Acve call, press
Answer. The current call is placed on Hold.
End a Call
To end an Acve call, replace the handset, press the
headset or speakerphone key or End Call.
To end a Held call, navigate to the call and press Resume
> End Call.
Hold and Resume a Call
When a call is placed on Hold, it is “parked” and caller is
unable to communicate with others on the line. Mulple
calls can be on Hold.
During an Acve call, select Hold. To resume, select the
Held call and press Resume.
Forward a Call
To manually Forward incoming calls:
• While the phone is ringing, press FWD.
• Enter a phone number and Send.
To automacally Forward all calls:
• Select Menu>Features>Call Forward. Select a Line, if
available.
• Select a Forwarding Type (Always, Busy, No Answer).
If No Answer is selected, enter the number of rings or
ring me before the call is forwarded.
• Enter a forwarding number and Save.
To disable call forwarding:
• Select Menu>Features>Call Forward and a Line, if
mulple Lines.
• Select a Forwarding Type > Enter > Disable > Save.
Forward a Call with Find Me / Follow Me:
Set up Find Me / Follow Me in Applicaon Framework or
the portal to forward calls, using the linked instrucons.
Transfer a Call
Transfer a call as follows:
• Blind (automac) — Press Transfer. Enter a number or
select a Contact and Trans.
• Aended (introducon) — Press Transfer. Enter a
number or select a Contact and Send. Press Transfer
aer the Contact answers.
This guide covers the basic features and operaon of the
Yealink
®
SIP T43U IP Desktop telephone.
For more informaon, refer to the Star2Star Knowledge
Base at knowledge.star2star.com.
Copyright © 2021, Star2Star Communicaons
Phone Screens
The Home/Idle LCD screen is the default view for the
phones.
The 2.7” display screen is surrounced by sokeys that
perform specic funcons:
Yealink
®
SIP T43U IP
Desktop Telephone
Quick Start Guide