

BELANGRIJKE VEILIGHEIDSINSTRUCTIES
LEES DEZE NAUWGEZET DOOR EN BEWAAR ZE VOOR LATER
VERWARM OF GEBRUIK GEEN ONTVLAM—
BARE MATERIALEN in of bij de oven.
De dampen kunnen brandgevaar of explosie veroorzaken.
NL
G
EBRUIK UW MAGNETRON NIET om
textiel, papier, kruiden, hout,
bloemen, fruit of andere brandbare materialen te drogen.
Brandgevaar.
A
LS MATERIAAL BINNEN OF BUITEN DE
OVEN IN BRAND VLIEGT OF ALS ER ROOK—
ONTWIKKELING IS, laat de ovendeur
dan dicht en schakel de oven uit.
Verwijder de stekker uit het stopcontact of schakel de stroom uit
via de zekering of de elektriciteitskast.
L
AAT HET VOEDSEL NIET OVERGA AR
WORDEN. Brandgevaar.
L
AAT DE OVEN NIET ONBEWAAKT ACH—
TER, vooral niet wanneer er pa-
pier, plastic of andere brandbare
materialen bij het koken worden
gebruikt. Papier kan verkolen of
branden en sommige soorten
plastic kunnen smelten wanneer
ze worden gebruikt om voedsel
op te warmen.
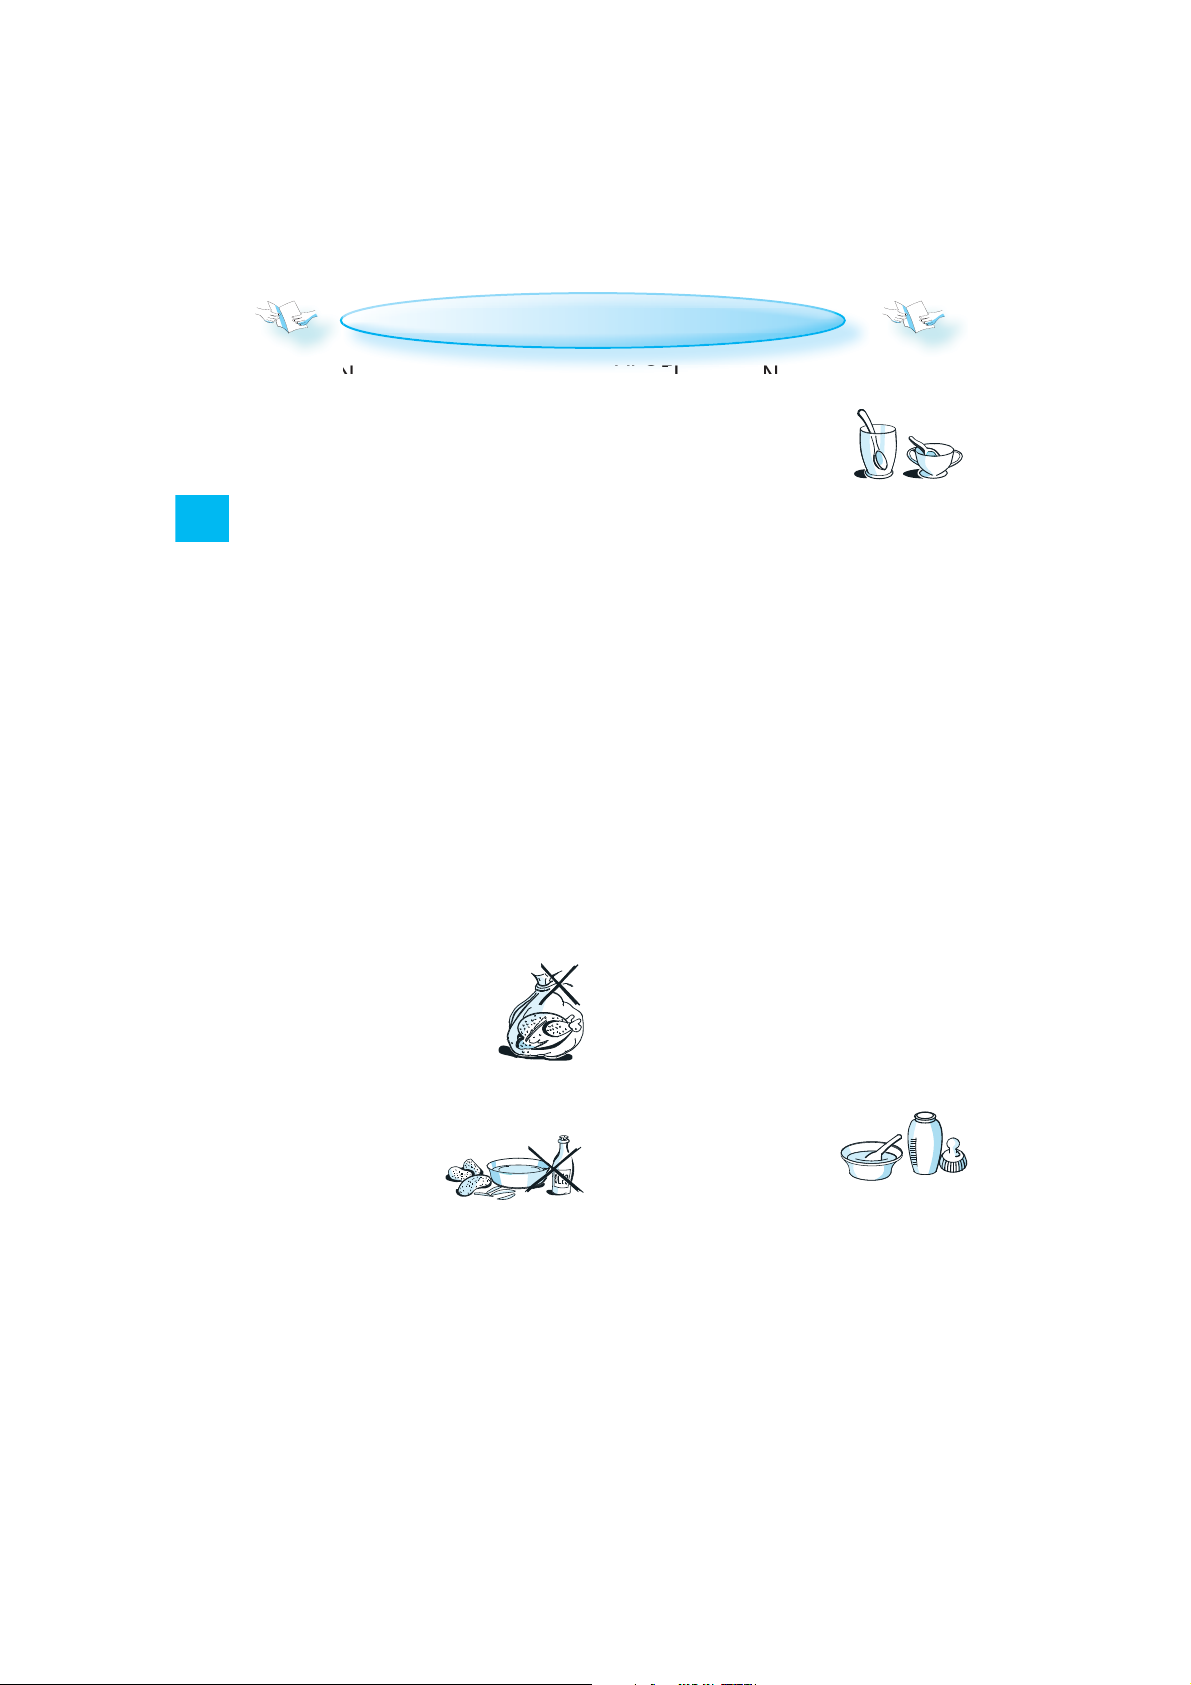
EIEREN
G
EBRUIK UW MAGNETRON niet
om hele eieren te koken of op te warmen,
met of zonder schaal,
want ze kunnen ontploffen zelfs
nadat de magnetron niet meer
verwarmt.
K
INDEREN VANA F 8 JAAR EN PERSO—
NEN MET VERMINDERDE FYSIEKE, SENSO—
RISCHE OF MENTALE VERMOGENS OF GE—
BREK AAN ERVARING EN KENNIS, MOGEN
DIT APPARAAT GEBRUIKEN indien ze
onder toezicht staan of instructies hebben ontvangen over het
gebruik van het apparaat en de
mogelijke gevaren ervan begrijpen.
L
AAT KINDEREN NIET met het appa-
raat spelen.
A
LLEEN KINDEREN VAN AF 8 JAAR EN ON—
DER TOEZICHT MOGEN HET APPARAAT GE—
BRUIKEN, reinigen of het onder-
houd ervan uitvoeren .
G
EBRUIK GEEN bijtende chemicali-
en of gassen in dit apparaat.
Dit type oven is specifiek ontworpen om voedsel op te warmen of te bereiden. De oven is
niet ontworpen voor industrieel
gebruik of gebruik in laboratoria.
74

BELANGRIJKE VEILIGHEIDSINSTRUCTIES
WAARSCHUWING!
HET APPARAAT EN DE TOEGANKELIJKE
ONDERDELEN KUNNEN HEET worden
tijdens het gebruik.
WEES VOORZICHTIG dat u de
verwarmingselementen niet
aanraakt.
HOUD KINDEREN TOT 8 JAAR ZONDER
CONSTANT TOEZICHT uit de buurt
van het apparaat.
GEBRUIK UW
MAGNETRON niet voor
het verwarmen
van materiaal in
luchtdicht verzegelde schalen.
De druk verhoogt, wat schade
kan veroorzaken bij het openen
of kan ontploffen.
ALS DE STROOMKABEL VERVANGEN
MOET WORDEN, moet dat gebeuren
met een origineel exemplaar,
dat verkrijgbaar is via
onze klantenservice.
De stroomkabel
mag uitsluitend
door een bevoegde
onderhoudsmonteur
worden vervangen.
ONDERHOUDSWERKZAAMHEDEN
MOGEN UITSLUITEND
DOOR EEN BEVOEGDE
ONDERHOUDSMONTEUR WORDEN
UITGEVOERD. Voor iemand
zonder specifieke training
is het gevaarlijk om
onderhoudswerkzaamheden
of reparaties uit te voeren
waarbij beschermkappen
verwijderd moeten worden
die bescherming bieden tegen
blootstelling aan de energie van
microgolven.
NL
VERWIJDER GEEN BESCHERMKAPPEN.
DE DEURAFDICHTINGEN EN HET GEBIED
EROMHEEN moeten regelmatig
gecontroleerd worden op
beschadigingen. In geval van
beschadiging mag het apparaat
niet worden gebruikt voordat
het is gerepareerd door een
erkende onderhoudsmonteur.
75
BELANGRIJKE VOORZORGSMAATREGELEN
ALGEMEEN
DIT APPARAAT IS UITSLUITEND BEDOELD
VOOR HUISHOUDELIJK GEBRUIK.
D
IT APPARAAT IS BEDOELD om inge-
bouwd te worden. Gebruik het
niet als vrijstaand apparaat.
NL
DIT APPARAAT IS BEDOELD om voed-
sel en dranken op te warmen. Drogen van voedsel of kleding en opwarmen van verwarmingskussens,
slippers, sponzen, vochtige doeken
en soortgelijke kan verwondingen,
ontsteking of brand veroorzaken.
HET APPARAAT MAG NIET GEBRUIKT WOR—
DEN zonder voedsel in de ovenruimte.
Hierdoor kan het apparaat beschadigd raken.
LAATS EEN GLAS WATER IN DE OVEN ALS
P
U DEZE WILT TESTEN . Het water ab-
sorbeert de microgolfenergie en
de oven raakt niet beschadigd.
EBRUIK DE OVENRUIMTE niet als op-
G
bergruimte.
ERWIJDER SLUITSTRIPS met
V
metaaldraad van papieren of plastic zakken voordat u de zakken in de oven
plaatst.
FRITUREN
EBRUIK UW MAGNETRON niet om
G
te frituren, daar u de
temperatuur van de
olie niet kunt regelen.
EBRUIK OVENLAPPEN OF OVENWANTE N
G
om brandwonden te voorkomen
wanneer u in aanraking komt met
reservoirs, onderdelen van de oven
en de pan/ovenschotel na de bereiding.
VLOEISTOFFEN
BIJVOORBEELD DRAN—
KEN OF WATER . Vloeistof-
fen kunnen oververhitten tot boven het kookpunt zonder zichtbaar te borrelen.
Daardoor kunnen hete vloeistoffen
plots overkoken. Doe het volgende
om dat te voorkomen:
1. Vermijd het gebruik van rechte potten of flessen met nauwe halzen.
2. Roer de vloeistof om alvorens
de houder in de oven te zetten en laat het lepeltje erin
staan.
3. Laat de vloeistof na het opwarmen even staan, roer opnieuw en haal de houder
voorzichtig uit de oven.
VOORZICHTIG
R
AADPLEEG ALTIJD een magnetron-
kookboek, in het bijzonder bij
het bereiden of opwarmen van
voedsel waarin alcohol zit.
W
ANNEER U BABYVOEDING
of vloeistoffen in een zuigfles of potje in de magnetron verwarmt,
moet u het voedsel altijd
doorroeren en de temperatuur controleren voordat u het serveert. Zo zorgt
u ervoor dat de warmte gelijkmatig
wordt verdeeld zodat er geen kans is
op brandwonden.
Let erop dat u het deksel en de
speen vóór het opwarmen verwijdert.
76
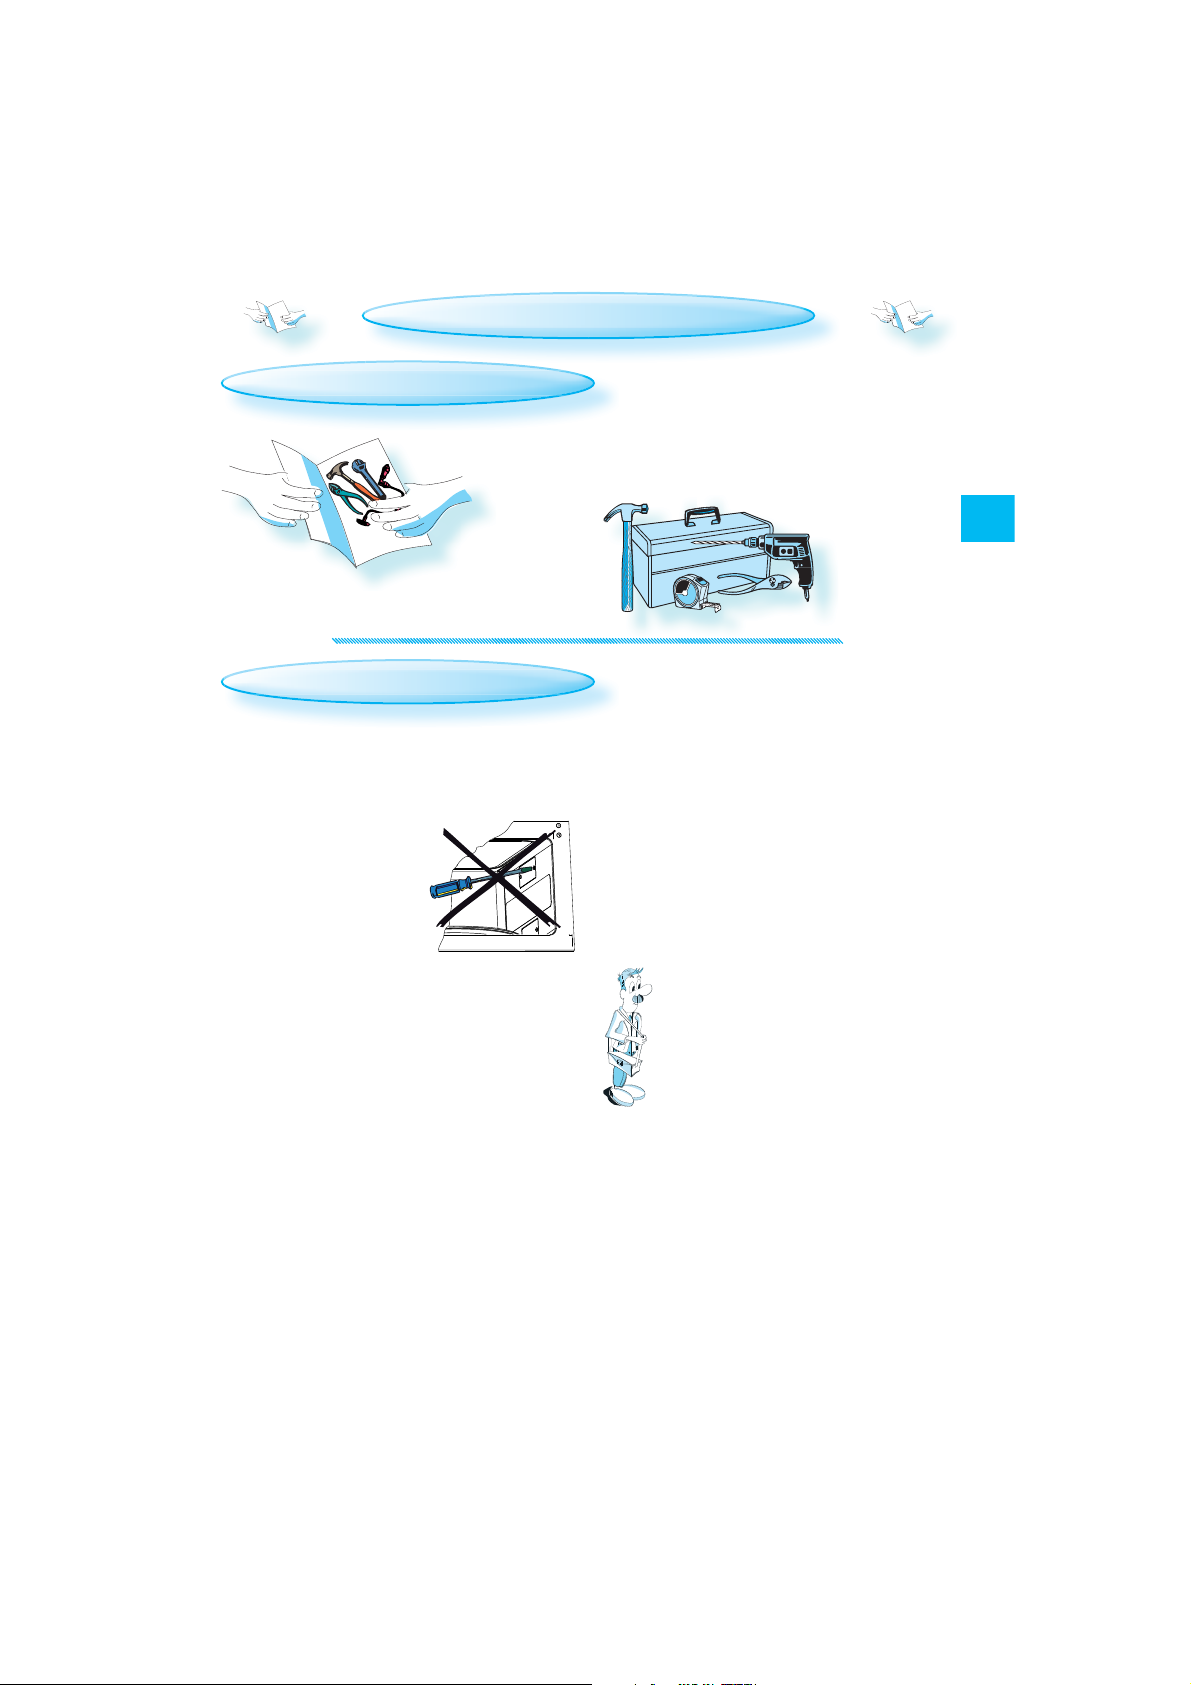
INSTALLATIE
HET APPARAAT INSTALLEREN
OLG DE MEEGELEVERDE afzonderlijke monta-
V
ge-instructies voor het installeren van het
apparaat.
VOOR HET AANSLUITEN
NL
CONTROLEER OF DE SPANNING op het
typeplaatje overeenstemt met
de spanning in uw woning.
V
ERWIJDER GEEN BE—
SCHERMINGSPLAAT—
JES VOOR AANZUIGOPE—
NINGEN die zich aan
de zijkant in het
ovengedeelte bevinden. Deze zorgen ervoor dat
er geen vet en voedseldeeltjes in
de invoerkanalen van de magnetron terecht komen.
L
ET EROP dat de ovenruimte leeg
is voordat u de oven installeert.
L
ET EROP DAT HET APPARAAT NIET IS BE—
SCHADIGD. Controleer of de oven-
deur goed sluit en of de interne
deurafdichting niet beschadigd
is. Maak de oven leeg en reinig
de binnenkant met een zachte,
vochtige doek.
EBRUIK HET APPARAAT NIET als de
G
stroomkabel of de stekker beschadigd is, als het apparaat niet
goed werkt of als het beschadigd
of gevallen is. Dompel de stroomkabel of de stekker niet onder
in water. Houd het snoer uit de
buurt van hete oppervlakken. Risico op elektrische schokken,
brand of andere ongevallen.
A
LS DE STROOMKABEL TE KORT IS,
laat dan door een gekwalificeerde elektricien of onderhoudsmonteur een stopcontact dicht bij het apparaat aanleggen.
D
E STROOMKABEL van het apparaat
moet lang genoeg zijn om het
apparaat vanuit de inbouwpositie in het meubel te kunnen aansluiten op het stopcontact van
de netvoeding.
M ERVOOR TE ZORGEN DAT DE INSTAL—
O
LATIE voldoet aan de geldende
veiligheidsvoorschriften is er een
omnipolaire schakelaar met een
afstand van minstens 3 mm.
77
NA HET AANSLUITEN
U KUNT DE OVEN ALLEEN INSCHAKELEN
als de deur goed gesloten is.
NL
De fabrikanten zijn niet aansprakelijk voor eventuele problemen
die worden veroorzaakt doordat
de gebruiker deze instructies niet
in acht heeft genomen.
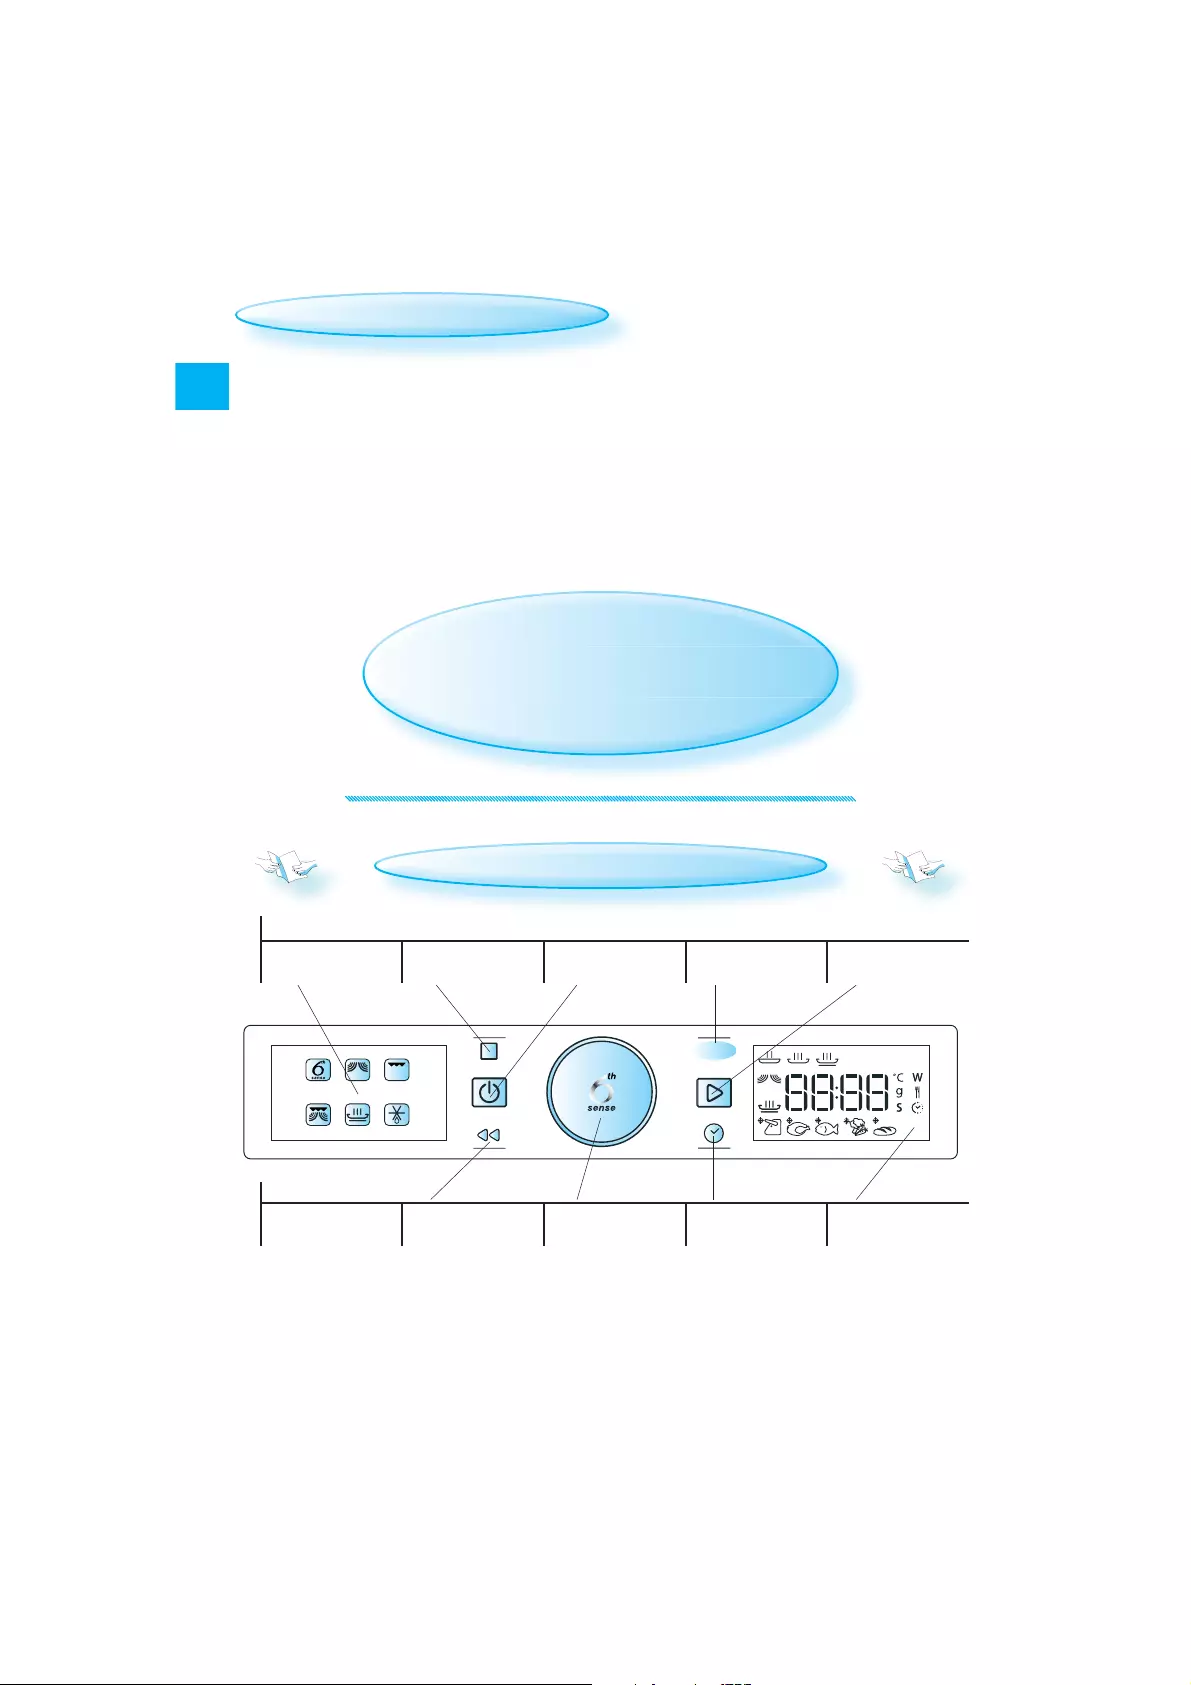
BESCHRIJVING VAN HET PANEEL
Functie
symbolen
STOP/PAUZE
toets
ON/OFF
toets
DIT APPARAAT MOET worden geaard.
De fabrikant aanvaardt geen verantwoordelijkheid voor letsel
bij personen of dieren of schade aan voorwerpen die het gevolg is van het niet naleven van
deze eis.
POWER
toets
START
toets
78
TERUG
toets
INSTEL
knop
Power
KLOK
toets
Digitaal
display
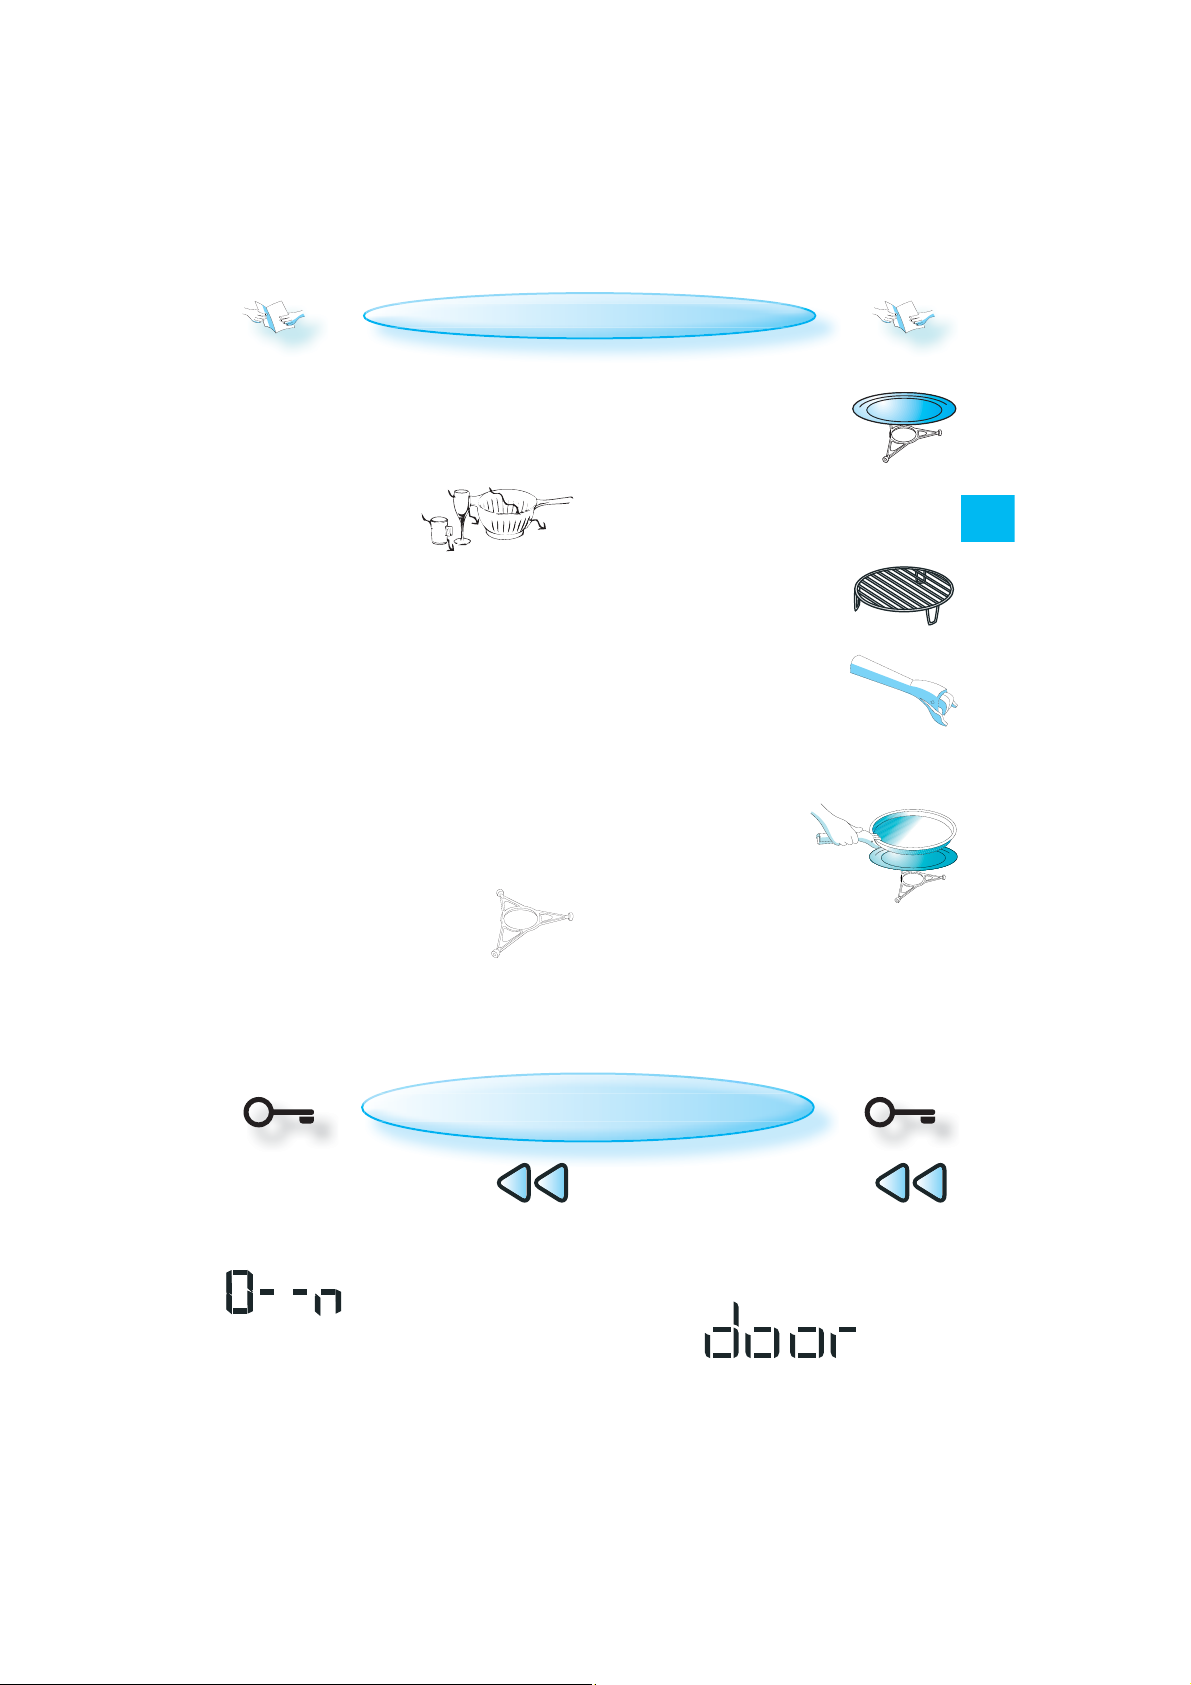
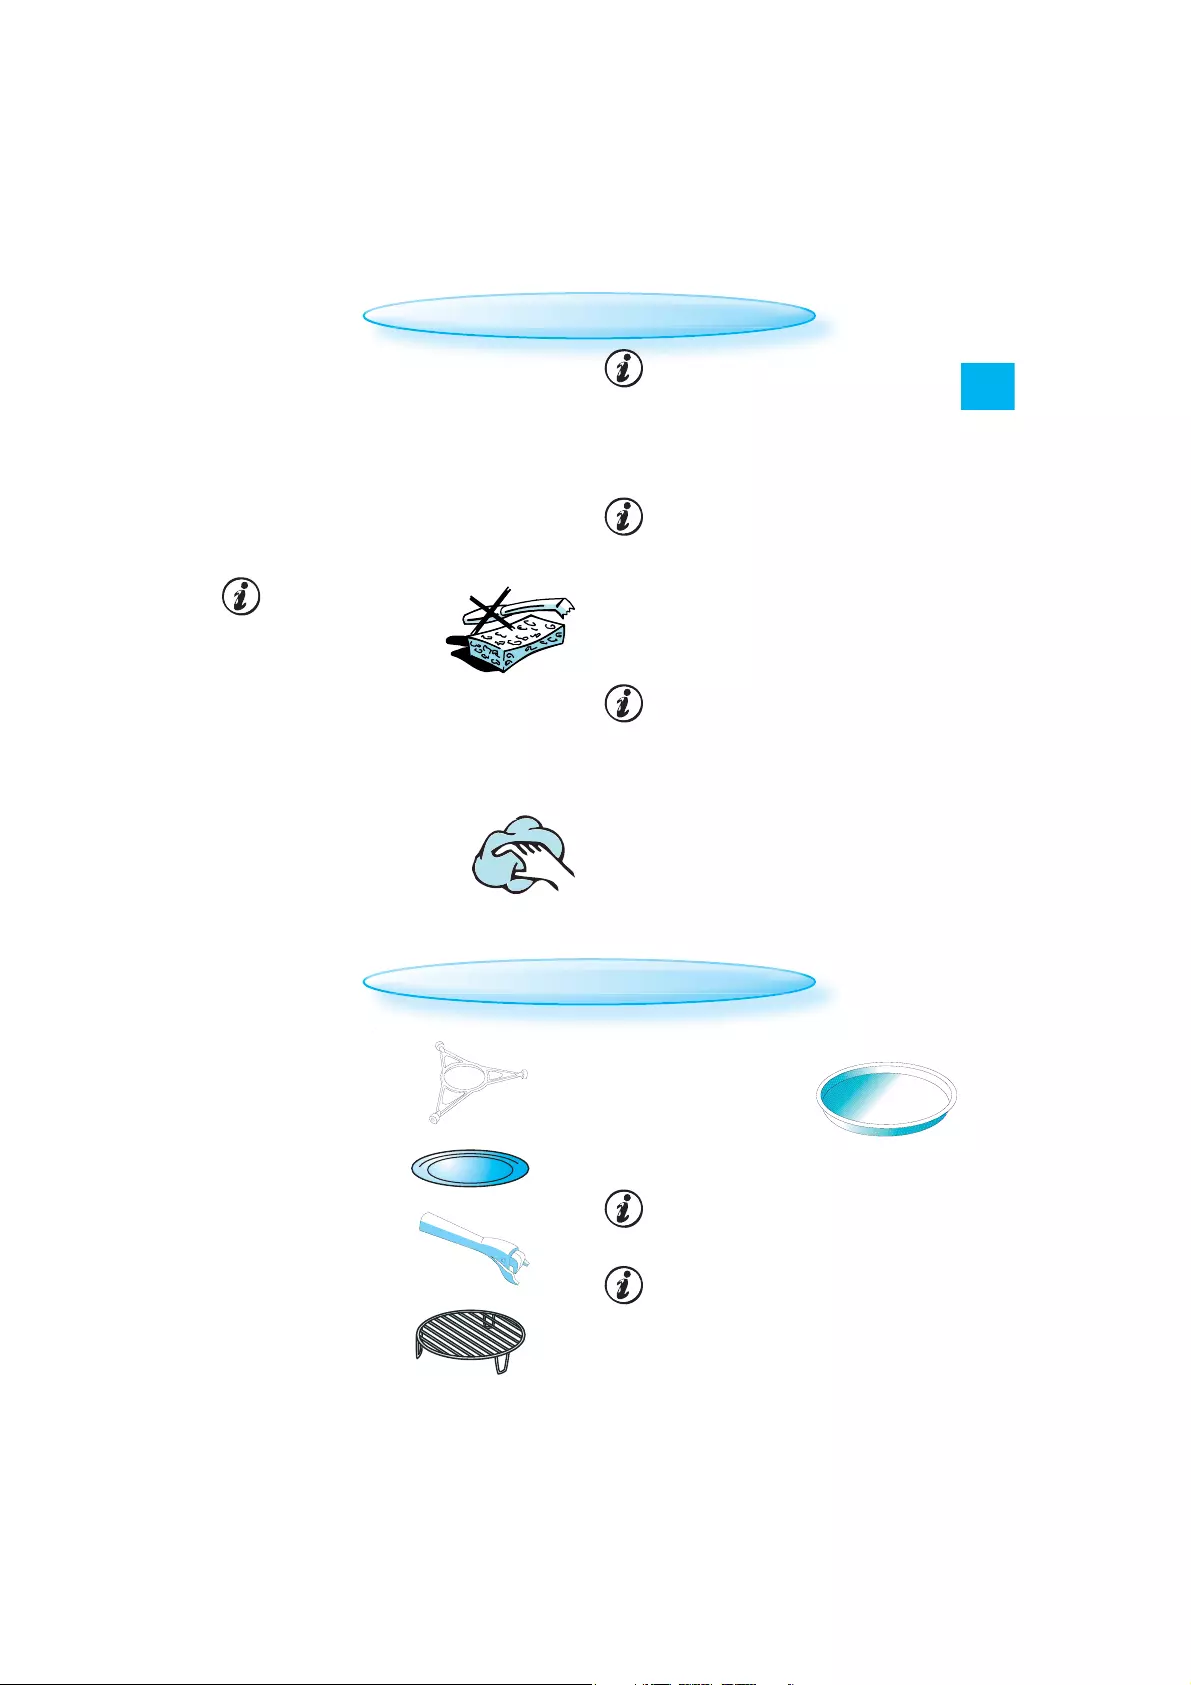
ACCESSOIRES
ALGEMEEN
ER ZIJN verschillende accessoires verkrijgbaar.
Overtuig u er vóór de aankoop van dat deze
geschikt zijn voor gebruik in de magnetron.
ONTROLEER OF HET KEUKENGEREI DAT U GEBRUIKT mi-
C
crogolfbestendig is en test
het even snel in de magnetron alvorens het te gebruiken bij het koken.
Z
ORG ERVOOR DAT VOEDSE L EN/OF ACCESSOI RES niet in
aanraking komen met de binnenkant van de
magnetronoven.
Dat is vooral belangrijk bij accessoires van
metaal of met metalen delen.
LS METAALHOUDENDE ACCESSOIRES in aanraking ko-
A
men met de binnenkant van de oven, terwijl
de oven werkt, kunnen er vonken overschieten
die de oven zouden kunnen beschadigen.
ONTROLEER ALTIJD of het draaiplateau vrij kan
C
draaien voordat u de oven start.
PLATEAUDRAGER
EBRUIK ALTIJD DE PLATEAUDRAGER als
G
steun onder het glazen draaiplateau. Plaats nooit andere voorwerpen op de plateaudrager.
Plaats de plateaudrager in de oven.
GLAZEN DRAAIPLATEAU
EBRUIK HET GLAZEN DRAAIPLATEAU
G
bij alle toepassingen. Het vangt
spatten, sappen en kruimels op
die anders de ovenruimte zouden bevuilen.
Plaats het glazen draaiplateau op de pla-
teaudrager.
ROOSTER
G
EBRUIK HET ROOSTER met Grill of
Grill Combi.
CRISPHANDGREEP
G
EBRUIK DE MEEGELEVERDE SPECIA—
LE CRISPHANDGREEP om de hete crisp-
plaat uit de oven te halen.
CRISPPLAAT
Z
ET HET VOEDSEL RECHTSTREEKS OP DE CRISPPLAAT.
Gebruik altijd het glazen
draaiplateau als steun wanneer u de crispplaat gebruikt.
ET GEEN KEUKENGEREI op de crispplaat
Z
omdat deze snel zeer heet wordt, en het voorwerp dan waarschijnlijk zou beschadigen.
DE CRISPPLAAT mag vóór gebruik worden voorverwarmd (max. 3 min.). Gebruik altijd de crispfunctie bij het voorverwarmen van de crispplaat.
NL
TOETSENVERGRENDELING /
VEILIGHEIDSVERGRENDELING
DE FUNCTIE TOETSENVERGRENDELING WORDT
INGESCHAKELD als u de TERUG-toets in-
gedrukt houdt (ongeveer 5 seconden) totdat een sleutel in plaats van de cijfers
wordt weergegeven.
De sleutel verdwijnt na 3 seconden en op het display
wordt het vorige scherm
weergegeven.
Om de toetsenvergrendeling te deblokkeren drukt u de TERUG-toets
5 seconden lang in.
E DEUR MOET WORDEN GEOPEND EN GESLOTEN om er
D
bijvoorbeeld voedsel in te zetten, voordat de
veiligheidsvergrendeling wordt uitgeschakeld.
Anders verschijnt op het display “door“.
79

VOEDSEL ROEREN OF OMDRAAIEN
DE BEREIDING VERDERTE LATEN GAANNONDERBREK
B
IJ SOMMIGE AUTOMATI SCHE 6
de oven stoppen (afhankelijk van het gekozen
programma en de voedselcategorie) en kan
de aanwijzing VOEDSEL OMDRAAIEN (TURN
FOOD) verschijnen.
Om de bereiding verder te laten gaan:
TH
SENSE FUNCTIE S kan
Open de deur.
NL
Draai het voedsel om.
Sluit de deur en start de oven weer door de
starttoets in te drukken.
(ALLEEN 6TH SENSE FUNCTIES)
OPMERK ING: IN DE MODUS SNEL ONTDOOIEN WERKT
DE OVEN NA 2 MINUTEN AUTOMATI SCH VERDER als het
voedsel niet is omgedraaid. In dit geval zal het
ontdooien wel langer duren.
AAN/UIT
Z
ET HET APPARAAT AAN OF UIT door een hal-
ve seconde lang op de On/Off toets te
drukken.
ANNEER HET APPARAAT WORDT INGESCHAKELD, func-
W
tioneren alle toetsen en knoppen normaal en
wordt de 24-uurs klok niet weergegeven.
STANDBY MODUS
WANNEER DE GEBRUIKER OP DE STOPTOETS DRUKT of
wanneer hij het product een tijd lang niet gebruikt, wordt de oven in de Standby modus
gezet.
DE BEREIDING STOPPEN / ONDERBREKEN /
VERDER TE LATEN GAAN
OM DE BEREIDING TE ONDERBREKEN:
DOOR DE DEUR TE OPENEN KAN DE BEREIDING WORDEN
ONDERBROKEN om het voedsel te controleren, om
te draaien of door te roeren. De instelling blijft
10 minuten lang gehandhaafd.
M DE BEREIDING VERDER TE LATEN GAAN:
O
SLUIT DE DEUR en druk EENMAAL op de
starttoets. De bereiding wordt hervat
vanaf het punt waarop deze is onderbroken.
DRUK TWEEMAAL op de starttoets om de tijd
met 30 seconden te verlengen.
80
W
ANNEER HET APPARAAT WORDT UITGESCHAKELD, wer-
ken de toetsen en de instelknop niet (uitgezonderd de starttoets). De 24-uurs klok wordt
weergegeven.
O
PMERKI NG: BIJ DE BESCHRIJVINGEN IN DEZE GEBRUIKS—
AANWIJZING wordt ervan uitgegaan dat de oven
ingeschakeld is.
Wanneer het apparaat is Standby staat, wordt
alleen de 24-uursklok gedempt weergegeven.
Draai aan de draaiknop of druk op een toets
om de Standby modus te verlaten.
OM DE BEREIDING VERDER TE LATEN GAAN NADAT EEN
FUNCTIE IS BEËINDIGD:
ANNEER END WO RDT WEERGEGEVEN, kunt u de be-
W
reidingstijd met 30 seconden verlengen door op
de starttoets te drukken. Telkens als op de toets
wordt gedrukt, worden 30 seconden toegevoegd aan de bereidingstijd.
R KLINKT GEDURENDE 10 MINUTEN om de
E
minuut een piepsignaal wanneer de
bereiding voltooid is. Druk op de stoptoets of
open de deur om het signaal uit te schakelen.
OPMERK ING: De oven houdt de instellingen
slechts 60 seconden vast als de deur geopend
en vervolgens gesloten wordt nadat de bereiding voltooid is.
toet
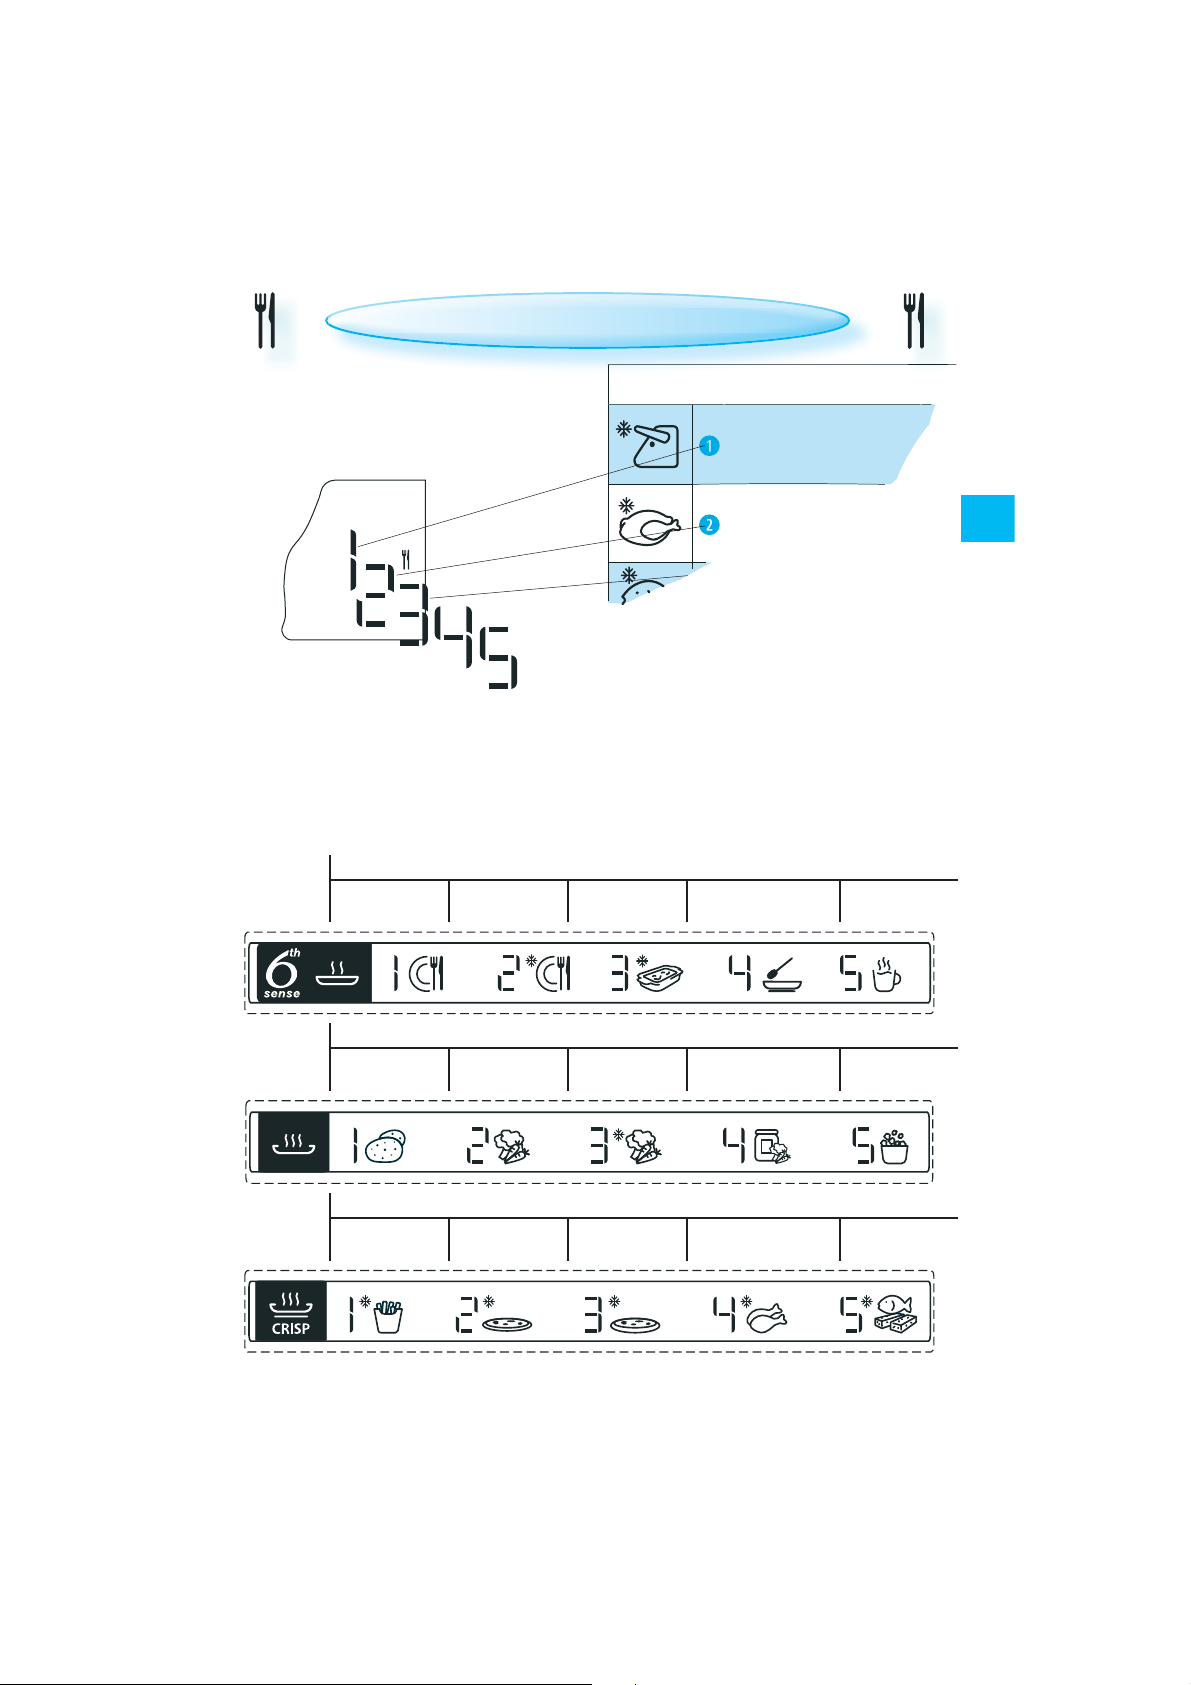
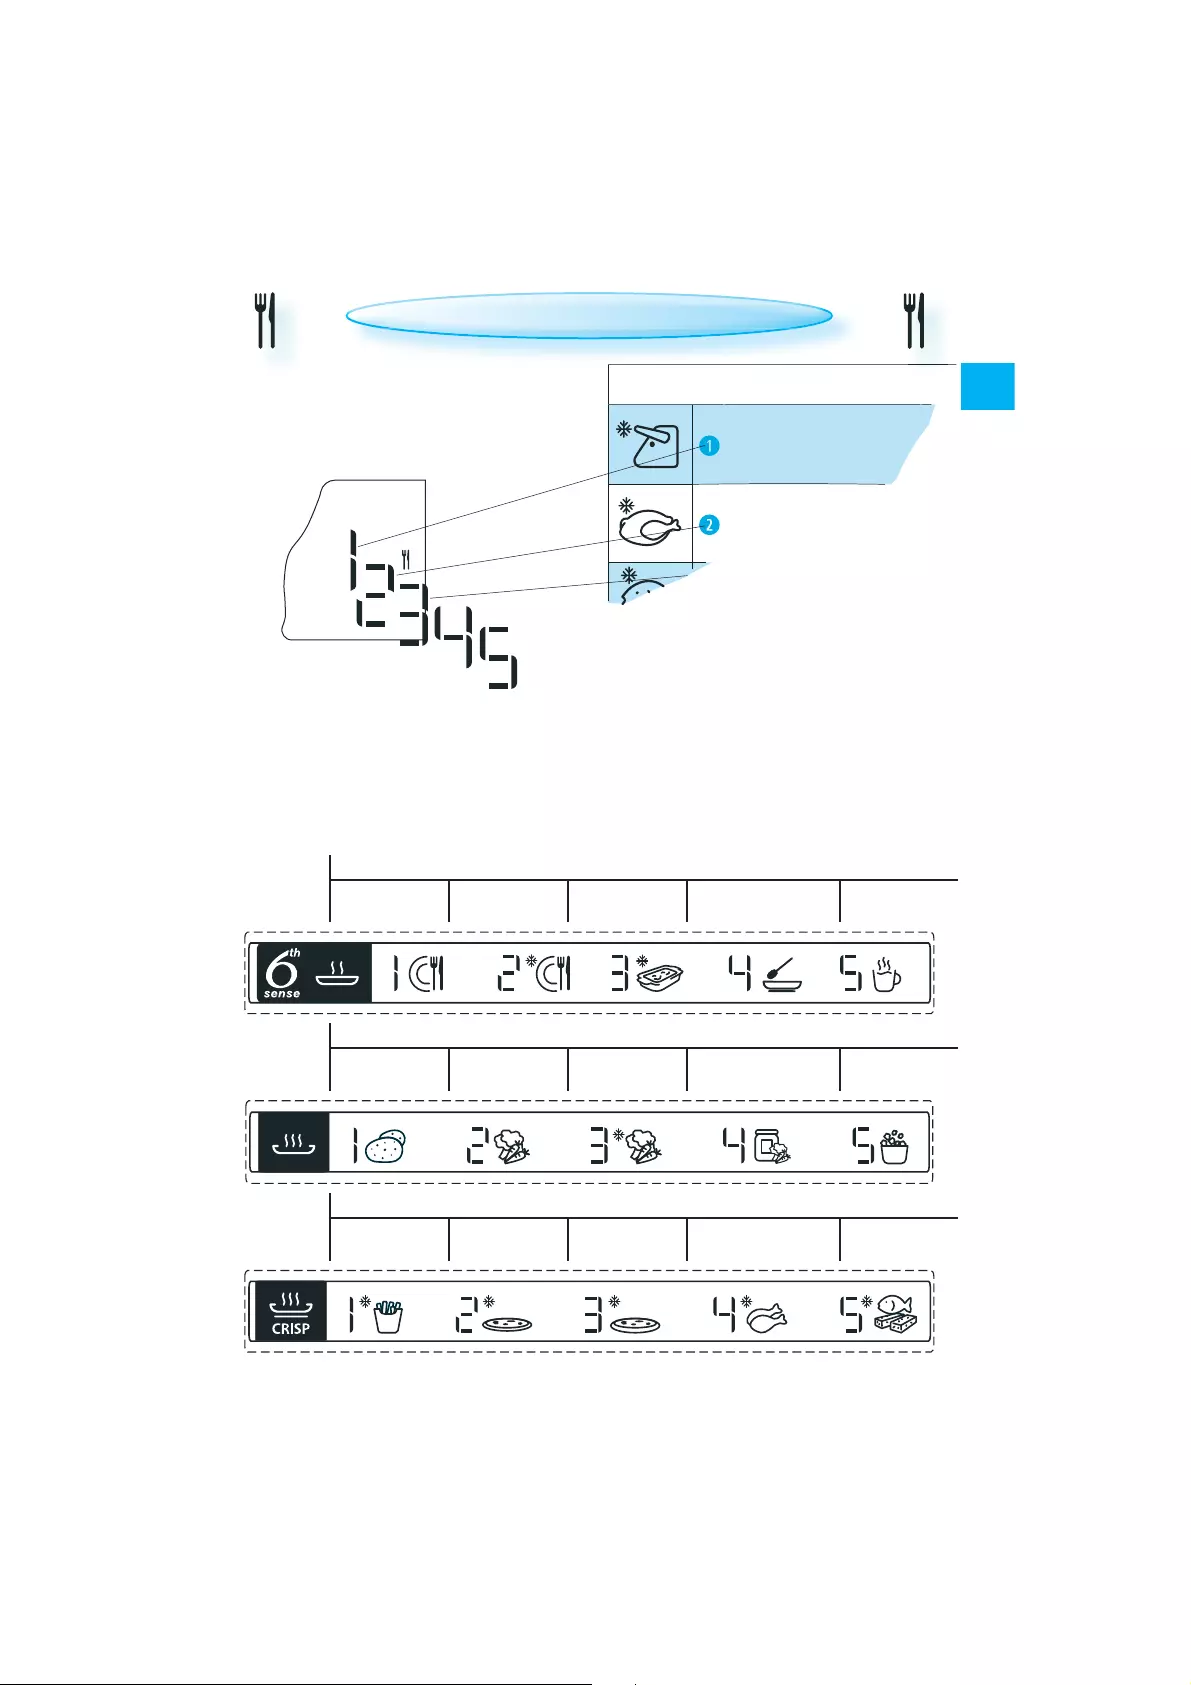
VOEDSELCATEGORIEËN (ALLEEN 6
TH
SENSE FUNCTIES)
WANNEER U DE 6TH SENSE FUNCTIES GEBRUIKT, dient de oven
te weten welke voedselcategorie hij moet gebruiken om goede resultaten te bereiken. Wanneer u
met de instelknop een voedselcategorie selecteert,
verschijnen het cijfer en het symbool van de voedselcategorie op het display.
DE VOEDSELCATEGORIEËN worden opgesomd in de
tabellen voor elke 6th Sense functie.
E LEIDRAAD VA N DE VOEDSELCATEGORIEËN van de
D
oven geeft aan welke voedselcategorie wordt
gebruikt in de functies die met voedselcategorieën werken.
6th SENSE
Kant-en-klare
maaltijd
Diepvries
maaltijd
VOEDSEL
Vlees (100 g — 2.0 kg)
Gevogelte (100 g —
V
OOR VOEDSEL DAT NIET IN DEZE TABELLEN VOORKOMT of
als het gewicht lager of hoger is dan het aanbevolen gewicht, moet u de werkwijze aanhouden voor «Bereiden en opwarmen met de
magnetron».
Opwarmen
Bevroren
lasagne
Soep Dranken
NL
Bereiden
6th SENSE
6th SENSE
Gepofte
aardappelen
Frites
Verse
groenten
Pizza,
dunne bodem
Diepvries
groenten
Crisp
Panpizza
Groenten
uit blik
Kippenvleugels /
kipnuggets
Popcorn
Vissticks
81
Loading…
View the manual for the Whirlpool AMW 730 IX here, for free. This user manual comes under the category microwaves and has been rated by 12 people with an average of a 8.4. This manual is available in the following languages: English. Do you have a question about the Whirlpool AMW 730 IX?
Ask your question here
Whirlpool AMW 730 IX specifications
Below you will find the product specifications and the manual specifications of the Whirlpool AMW 730 IX.
The Whirlpool AMW 730 IX is a microwave with an interior capacity of 31 liters. It boasts a control panel with buttons and a rotary dial for easy operation. With a microwave power of 1000 W and a grill power of 800 W, it is capable of heating and cooking food quickly and efficiently. The door hinge is downward, and there is a turntable with a size of 325 millimeters included. This microwave also features a built-in display and timer for added convenience.
The Whirlpool AMW 730 IX has a connected load of 2300 W and runs on an AC input voltage of 230 V at a frequency of 50 Hz. Its current is 10 A. It is a reliable appliance constructed with premium materials to ensure durability over time. This microwave is suitable for those who desire a high-powered cooking device with modern features. With its spacious interior and advanced control panel, it is ideal for cooking for families or hosting dinner parties. Its sleek design also adds a touch of elegance to any kitchen. The Whirlpool AMW 730 IX would be an excellent choice for someone who wants a high-quality, dependable microwave.
General
| Brand | Whirlpool |
| Model | AMW 730 IX | AMW 730 IX |
| Product | microwave |
| EAN | 8003437987106 |
| Language | English |
| Filetype | Manual (PDF) |
Features
| Interior capacity | 31 L |
| Appliance placement | Built-in |
| Product colour | Stainless steel |
| Control type | Buttons, Rotary |
| Microwave power | 1000 W |
| Grill power | 800 W |
| Door hinge | Down |
| Turntable | Yes |
| Turntable size | 325 mm |
| Built-in display | Yes |
| Timer | Yes |
| Product type | Combination microwave |
| Inverter technology | No |
| Grill type | Quartz grill |
| Number of power levels | 8 |
| Door open type | Pull-down |
| Interior light | Yes |
| Display type | LCD |
| Child lock | Yes |
| Clock function | Yes |
| Cord length | 1.35 m |
Power
| Connected load | 2300 W |
| AC input voltage | 230 V |
| AC input frequency | 50 Hz |
| Current | 10 A |
Weight & dimensions
| Width | 595 mm |
| Depth | 468 mm |
| Height | 385 mm |
| Weight | 2700 g |
| Installation compartment dimensions (WxDxH) | 556 x 550 x 380 mm |
Packaging data
| Package width | 653 mm |
| Package depth | 628 mm |
| Package height | 506 mm |
| Package weight | 29000 g |
Cooking functions & programs
| Convection cooking | No |
| Grill | Yes |
| Defrost function | Yes |
| Steam cooking | No |
| Keep warm function | — |
| Rotisserie | No |
| Reheat function | Yes |
| Auto cook function | Yes |
| Crisp maker | Yes |
Other features
show more
Frequently asked questions
Can’t find the answer to your question in the manual? You may find the answer to your question in the FAQs about the Whirlpool AMW 730 IX below.
What is the weight of the Whirlpool AMW 730 IX?
The Whirlpool AMW 730 IX has a weight of 2700 g.
What is the height of the Whirlpool AMW 730 IX?
The Whirlpool AMW 730 IX has a height of 385 mm.
What is the width of the Whirlpool AMW 730 IX?
The Whirlpool AMW 730 IX has a width of 595 mm.
What is the depth of the Whirlpool AMW 730 IX?
The Whirlpool AMW 730 IX has a depth of 468 mm.
How long does a microwave last before it loses power?
A microwave lasts an average of 2000 hours before it loses power.
Is heating food in the microwave bad for your health?
Reheating food in the microwave is not bad for your health.
Which food should not be used in the microwave?
It is not wise to put peeled food in the microwave. The heat cannot escape through the skin, causing the food to explode.
Is it bad to turn on a microwave empty?
Yes. Turning the microwave on empty can result in damage to the microwave. When the microwave is empty, the microwaves are not absorbed by the food.
Is the manual of the Whirlpool AMW 730 IX available in English?
Yes, the manual of the Whirlpool AMW 730 IX is available in English .
Is your question not listed? Ask your question here
Displayed below is the user manual for AMW 730/IX by Whirlpool which is a product in the Microwaves category.
This manual has pages.

26
EN
IMPORTANT SAFETY INSTRUCTIONS
EGGS
DO NOT USE YOUR MICROWAVE
oven for cooking or re—
heating whole eggs,
with or without the
shell, since they may explode
even after microwave heating
has ended.
THIS APPLIANCE MUST NOT BE USED by
children aged 8 and over or by
persons with reduced physical,
sensory or mental capabilities or
lack of experience and knowl—
edge unless they are supervised
or have been given instructions
on how to use the appliance
safely and understand the haz-
ards involved.
DO NOT LET CHILDREN PLAY with the
appliance.
ONLY CHILDREN AGED 8 AND OVER AND
UNDER SUPERVISION MAY USE, clean or
perform maintenance on the ap—
pliance .
DO NOT HEAT OR USE FLAMMABLE MATE—
RIALS in or near the oven. Fumes
can create a fire hazard or cause
an explosion.
DO NOT USE YOUR MICROWAVE oven
for drying textiles, paper, spic—
es, herbs, wood, flowers, fruit or
other combustible materials.
Risk of fire.
IF MATERIAL INSIDE / OUTSIDE THE OVEN
SHOULD IGNITE OR SMOKE IS OBSERVED,
keep oven door closed and turn
the oven off. Unplug the power
cord or shut off the power at the
fuse or circuit breaker panel.
DO NOT OVERCOOK FOOD. Risk of fire.
DO NOT LEAVE THE OVEN UNATTEND—
ED, especially when using paper,
plastic or other combustible ma-
terials in the cooking process.
Paper can char or burn and some
plastics can melt if used when
heating foods.
DO NOT USE corrosive chemicals or
vapours in this appliance.
This type of oven is specifically
designed to heat or cook food.
It is not designed for industrial or
laboratory use.
READ CAREFULLY AND KEEP FOR FUTURE REFERENCE
27
EN
IMPORTANT SAFETY INSTRUCTIONS
THE APPLIANCE AND ITS ACCESSIBLE
PARTS MAY BECOME HOT during use.
CARE SHOULD BE TAKEN to avoid
touching the heating elements.
KEEP CHILDREN AGED 8 AND UNDER
away from the appliance unless
under constant supervision.
DO NOT USE YOUR
MICROWAVE oven for
heating anything
in sealed airtight
containers. The
pressure increases and may
cause damage when opening or
may explode.
IF THE POWER CORD NEEDS REPLACING,
it should be replaced by an
original power cord, which is
available via our service
organization. The power
cord should only be
replaced by a trained
service technician.
MAINTENANCE WORK
SHOULD ONLY BE CARRIED
OUT BY A TRAINED SERVICE
TECHNICIAN. It is hazardous
for anyone other than
trained staff to carry out any
maintenance or repair operation
which involves the removal
of any cover which provides
protection against exposure to
microwave energy.
DO NOT REMOVE ANY COVERS.
THE DOOR SEALS AND THE AREAS
AROUND THE DOOR SEALS must be
regularly inspected for damage.
If these areas are damaged
the appliance should not be
operated until it has been
repaired by a trained service
technician.
WARNING!
28
EN
IMPORTANT SAFETY PRECAUTIONS
GENERAL
THIS APPLIANCE IS DESIGNED FOR DOMES—
TIC USE ONLY.
THIS APPLIANCE IS INTENDED to be built-
in. Do not use it freestanding.
THIS APPLIANCE IS INTENDED for heating
food and beverages. Drying food
or clothing and heating warm-
ing pads, slippers, sponges, damp
cloths and similar may lead to risk
of injury, ignition or fire.
THE APPLIANCE SHOULD NOT BE OPERATED
without food in the microwave oven.
Operation in this manner is likely to
damage the appliance.
IF YOU WISH TO PRACTICE USING the
oven, place a glass of water in-
side. The water will absorb the
microwave energy and the oven
will not be damaged.
DO NOT USE THE OVEN CAVITY for stor—
age purposes.
REMOVE WIRE TWIST—TIES from
paper or plastic bags be-
fore placing the bags in the
oven.
DEEPFRYING
DO NOT USE YOUR MICROWAVE
oven for deep-fry-
ing because the
temperature of the
oil cannot be controlled.
USE HOT PADS OR OVEN MITTS to prevent
burns when touching containers,
oven parts and pans after cooking.
LIQUIDS
E.G. BEVERAGES OR WATER.
Liquids can overheat
beyond boiling point
without visibly bub-
bling. This could cause hot liquids
to suddenly boil over.
Take the following steps to prevent
this from happening:
1. Avoid using straight-sided
containers with narrow necks.
2. Stir the liquid before plac—
ing the container in the oven
and leave the teaspoon in the
container.
3. After heating, allow to stand
for a short time, stirring again
before carefully removing the
container from the oven.
CAUTION
ALWAYS REFER to a microwave
cookbook for details, especially
if cooking or reheating food that
contains alcohol.
AFTER HEATING BABY FOOD
or liquids in a baby
bottle or in a baby
food jar, always stir
and check the temperature be-
fore serving. This will ensure that
the heat is evenly distributed and
avoid the risk of scalding or burns.
Make sure that the lid and the
teat are removed before heat—
ing.
29
EN
CHECK THAT THE VOLTAGE on the rat—
ing plate corresponds to the
voltage in your home.
DO NOT REMOVE THE
MICROWAVE INLET PRO—
TECTION PLATES lo—
cated on the side
of the oven cavi-
ty wall. They pre—
vent grease and food particles
from entering the microwave in-
let channels.
MAKE SURE that the oven cavity is
empty before installing.
MAKE SURE THAT THE APPLIANCE IS NOT
DAMAGED. Check that the oven
door closes firmly against the
door support and that the inter—
nal door seal is not damaged.
Empty the oven and clean the in—
terior with a soft, damp cloth.
DO NOT OPERATE THIS APPLIANCE if it
has a damaged power cord or
plug, if it is not working prop—
erly, or if it has been damaged
or dropped. Do not immerse
the power cord or plug in wa-
ter. Keep the cord away from hot
surfaces. Risk of electrical shock,
fire or other hazards.
IF THE POWER CORD IS TOO SHORT,
have a qualified electrician
or service technician install
an outlet near the appli—
ance.
THE POWER CORD must be long
enough to connect the appli-
ance to the mains power supply
once it is fitted inside the hous—
ing.
FOR INSTALLATION to comply with
current safety regulations, an all-
pole disconnect switch with a
minimum contact gap of 3 mm
must be used.
INSTALLATION
INSTALLING THE APPLIANCE
FOLLOW THE separate installation instruc—
tions provided when installing the appli-
ance.
PRIOR TO CONNECTING
30
EN
THE EARTHING OF THIS APPLIANCE is
compulsory. The manufacturer
accepts no responsibility for inju-
ry to persons, animals or damage
to objects arising from the failure
to observe this requirement.
THE OVEN CAN BE OPERATED ONLY if
the oven door is firmly closed.
AFTER CONNECTING
The manufacturer shall not be
liable for any problems caused
by the user’s failure to observe
these instructions.
PANEL DESCRIPTION
Function
symbols STOP/PAUSE
button ON/OFF
button POWER
button START
button
BACK
button ADJUST
knob CLOCK
button Digital
display
Power

31
EN
KEY LOCK / SAFETY LOCK
To unlock the Key Lock, press and
hold the BACK button for 5 sec-
onds.
THE DOOR MUST BE OPENED AND CLOSED, for example
to put food in it, before the safety lock is re—
leased. Otherwise the display will show “door”.
THE KEY LOCK FUNCTION IS ACTIVATED by
pressing and holding the BACK but—
ton (approx. 5 seconds) until a key
symbol appears instead of digits.
The key disappears after 3
seconds and the display re—
turns to the previous screen.
GLASS TURNTABLE
USE THE GLASS TURNTABLE with all cooking meth-
ods. It collects the dripping juic—
es and food particles that would
otherwise stain and soil the inte—
rior of the oven.
Place the glass turntable on the turntable
support.
WIRE RACK
USE THE WIRE RACK when cooking
with Grill or Grill Combi.
CRISP HANDLE
USE THE SPECIAL CRISP HANDLE SUP—
PLIED to remove the hot crisp plate
from the oven.
CRISP PLATE
PLACE THE FOOD DIRECTLY ON THE CRISP PLATE.
Always use the glass turn—
table as support when us-
ing the crisp plate.
DO NOT PLACE ANY UTENSILS on the crisp
plate since it will quickly become very
hot and is likely to damage the utensil.
THE CRISP PLATE may be preheated before use
(max. 3 minutes). Always use the Crisp function
when preheating the crisp plate.
GENERAL
THERE ARE a number of accessories available on
the market. Make sure that they are suitable for
microwave use before making any purchases.
MAKE SURE THAT THE UTENSILS YOU USE are micro—
wave-safe and test them briefly in the micro—
wave first before using them
for cooking.
WHEN PLACING FOOD AND/OR ACCESSORIES in the mi-
crowave oven, make sure that they do not
come into contact with the interior of the
oven.
This is especially important with acces-
sories made of metal or which have met-
al parts.
IF ACCESSORIES CONTAINING METAL come into con-
tact with the oven interior, sparking may oc—
cur while the oven is in operation and the oven
could be damaged.
ALWAYS MAKE SURE that the turntable is able to
turn freely before starting the oven.
TURNTABLE SUPPORT
USE THE TURNTABLE SUPPORT under the
glass turntable. Never put any other
utensils on the turntable support.
Fit the turntable support in the
oven.
ACCESSORIES

32
EN
TO CONTINUE AFTER A FUNCTION IS FINISHED:
WHEN END IS DISPLAYED, you can prolong the cook-
ing time by 30 seconds by pressing the Start but-
ton. Each time the button is pressed, another 30
seconds is added to the cooking time.
A BEEP SOUNDS once a minute for 10
minutes when cooking is finished.
Press the STOP button or open the
door to stop the beeping.
NOTE: The oven will only maintain the settings
for 60 seconds if the door is opened and then
closed after cooking is finished.
TO PAUSE COOKING:
COOKING CAN BE PAUSED to check, turn or stir the
food by opening the door. The setting will be
maintained for 10 minutes.
TO CONTINUE COOKING:
CLOSE THE DOOR and press the Start but-
ton ONCE. Cooking is resumed from
where it was paused.
PRESSING THE START BUTTON TWICE will increase
the time by 30 seconds.
STIR OR TURN FOOD (6TH SENSE FUNCTIONS ONLY)
ON / OFF
NOTE: IN JET DEFROST MODE, THE OVEN CONTINUES AU—
TOMATICALLY AFTER 2 MINUTES if the food has not
been turned. The defrost time will be longer in
this case.
WHEN THE APPLIANCE IS TURNED OFF, all the buttons
and the adjust knob are non-responsive (apart
from the Start button). The 24 hour clock is dis-
played.
NOTE: THE DESCRIPTIONS IN THESE INSTRUCTIONS FOR
USE assume that the oven is turned ON.
WHEN USING SOME OF THE 6TH SENSE FUNCTIONS the
oven may stop (depending on the chosen pro—
gram and food class) and prompt you to TURN
FOOD.
To continue cooking:
Open the door.
Turn the food.
Close the door and restart by pressing the
Start button.
TURN THE APPLIANCE ON OR OFF by press-
ing the On/Off button for ½ a second.
WHEN THE APPLIANCE IS TURNED ON, all but-
tons and knobs function normally and the
24-hour clock is not displayed.
STANDBY MODE
When the appliance is in Standby, the dimmed
24-hour clock is displayed. Turn the rota—
ry knob or press any button to exit Standby
mode.
AFTER PRESSING THE STOP BUTTON, or if the user
does not interact with the product for a certain
time, the oven enters Standby mode.
R A F
N
TI
N I
FIN
STOP / PAUSE / CONTINUE COOKING
33
EN
FOOD CLASSES (6TH SENSE FUNCTIONS ONLY)
WHEN USING THE 6TH SENSE FUNCTIONS the oven needs
to know which food class it needs to use in or-
der to achieve good results. The food class digit
and food class symbol is displayed when you are
choosing a food class with the adjust knob.
THE FOOD CLASSES are listed in the tables for each
6th Sense function.
THE FOOD CLASS GUIDE on this oven indicates
which food class is used in the functions that
apply food classes.
FOOD
MEAT (100 g — 2.0 kg)
POULTRY (100 g —
FOR FOOD NOT LISTED IN THE TABLES and if the
weight is lesser or greater than the recom-
mended weights, you should follow the proce—
dure for “Cook & Reheat with microwaves”.
6th SENSE
Reheat
Dinner plate Frozen
portion Frozen
lasagne Soup Beverage
6th SENSE
Cook
Baked
potato Fresh
vegetables Frozen
vegetables Canned
vegetables Popcorn
6th SENSE
Crisp
French fries Pizza,
thin crust Pizza,
deep pan Buffalo wings /
chicken nuggets Fish fingers

34
EN
WHEN A FUNCTION IS FINISHED, the oven may per-
form a cooling process. This is normal and the
display shows “Cool On”.
After this process, the oven switches off auto—
matically.
PRESS THE BACK BUTTON to temporarily
view the 24-hour clock when “Cool
On” is displayed.
THE COOLING PROCESS can be interrupted without
damaging the oven by opening the door.
COOLING DOWN
q PRESS THE CLOCK BUTTON (½ A SECOND). (The two digits on the left (hours) flash).
w TURN THE ADJUST KNOB to set the hours.
e PRESS THE ADJUST KNOB. (The two digits on the right (minutes) flash).
r TURN THE ADJUST KNOB to set the minutes.
t PRESS THE ADJUST KNOB again to confirm the change.
THE CLOCK IS SET AND IS IN OPERATION.
SETTING THE CLOCK
WHEN THE APPLIANCE IS FIRST PLUGGED IN
it will ask you to set the clock.
AFTER A POWER FAILURE, the clock will
flash and needs to be reset.
.
3
/
$
1
Power
35
EN
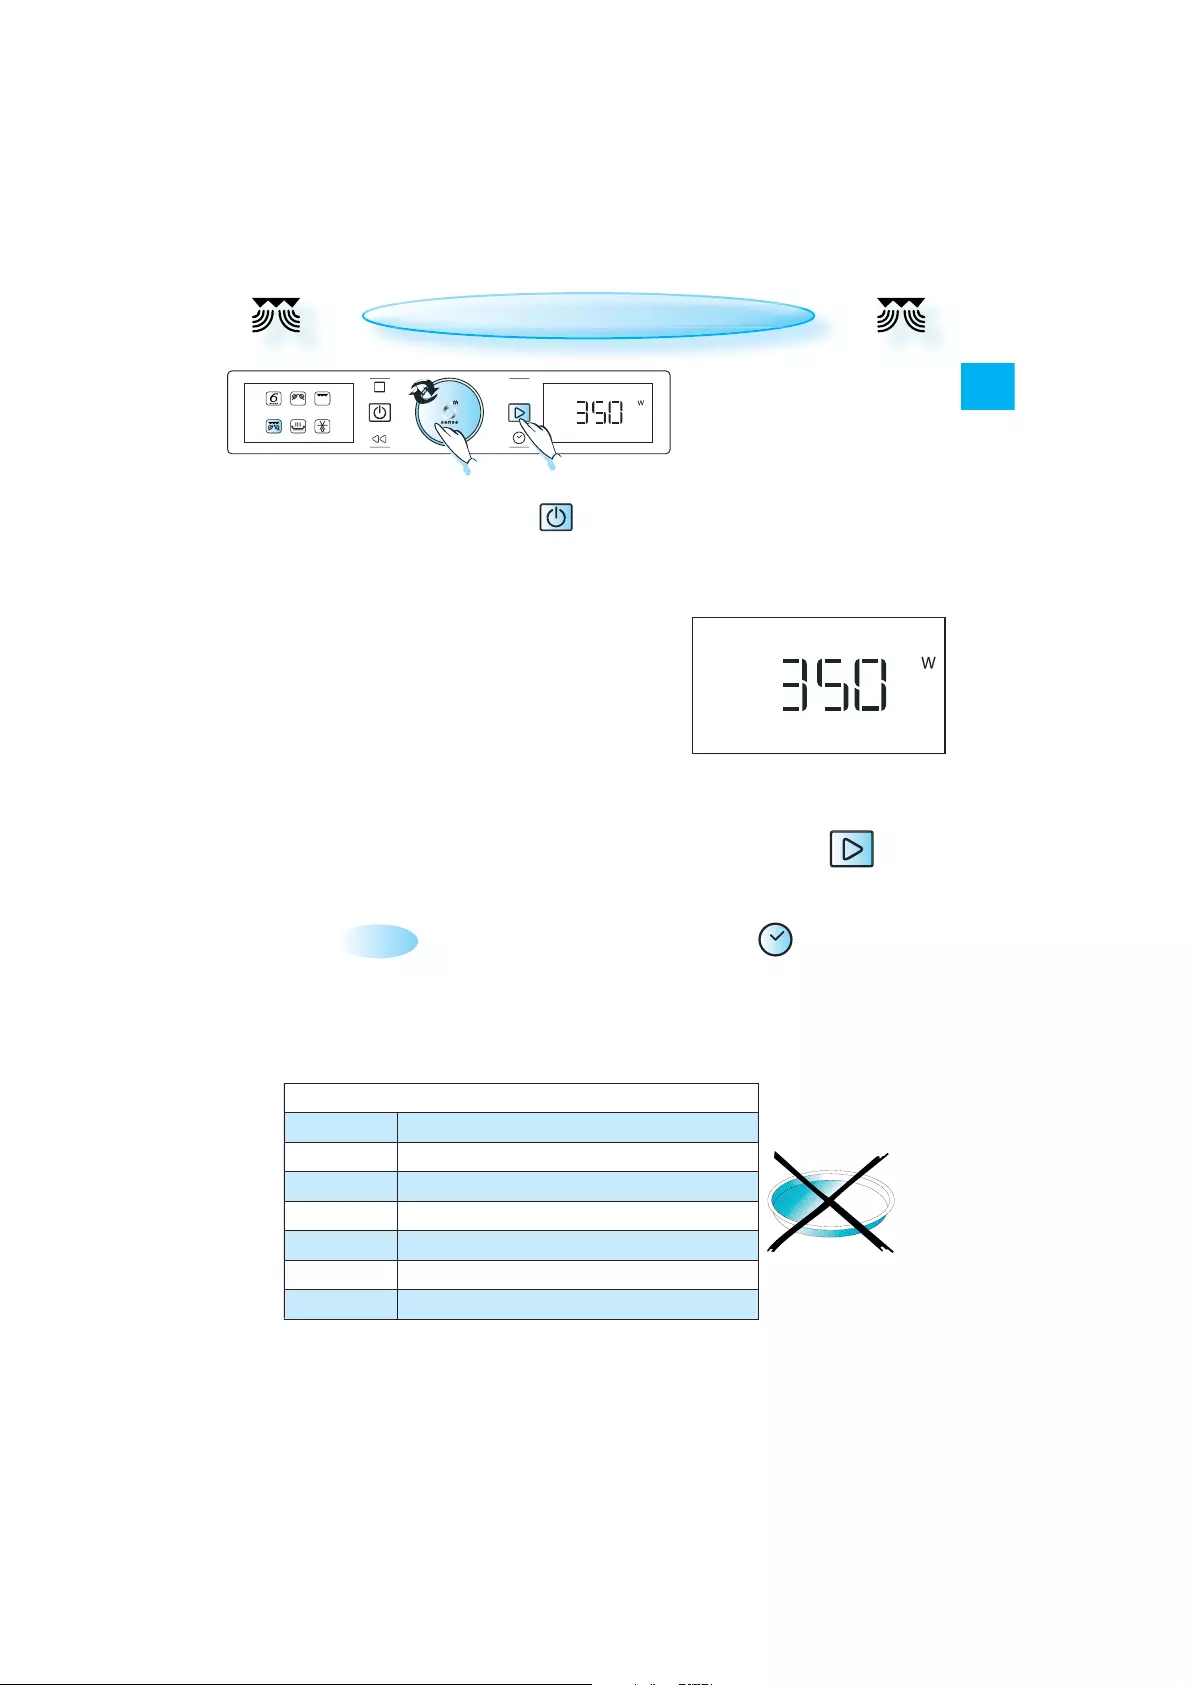
POWER LEVEL
MICROWAVES ONLY
POWER SUGGESTED USE:
1000 W REHEATING OF BEVERAGES, water, clear soup, coffee, tea or other food with a high water con—
tent. If the food contains egg or cream choose a lower power.
800 W COOKING vegetables, meat etc.
650 W COOKING fish.
500 W MORE CAREFUL COOKING e.g. high protein sauces, cheese and egg dishes and to finish cook-
ing casseroles.
350 W SIMMERING STEWS, melting butter and chocolate.
160 W DEFROSTING. Softening butter, cheeses.
90 W SOFTENING ice cream
0 W WHEN USING the Timer only.
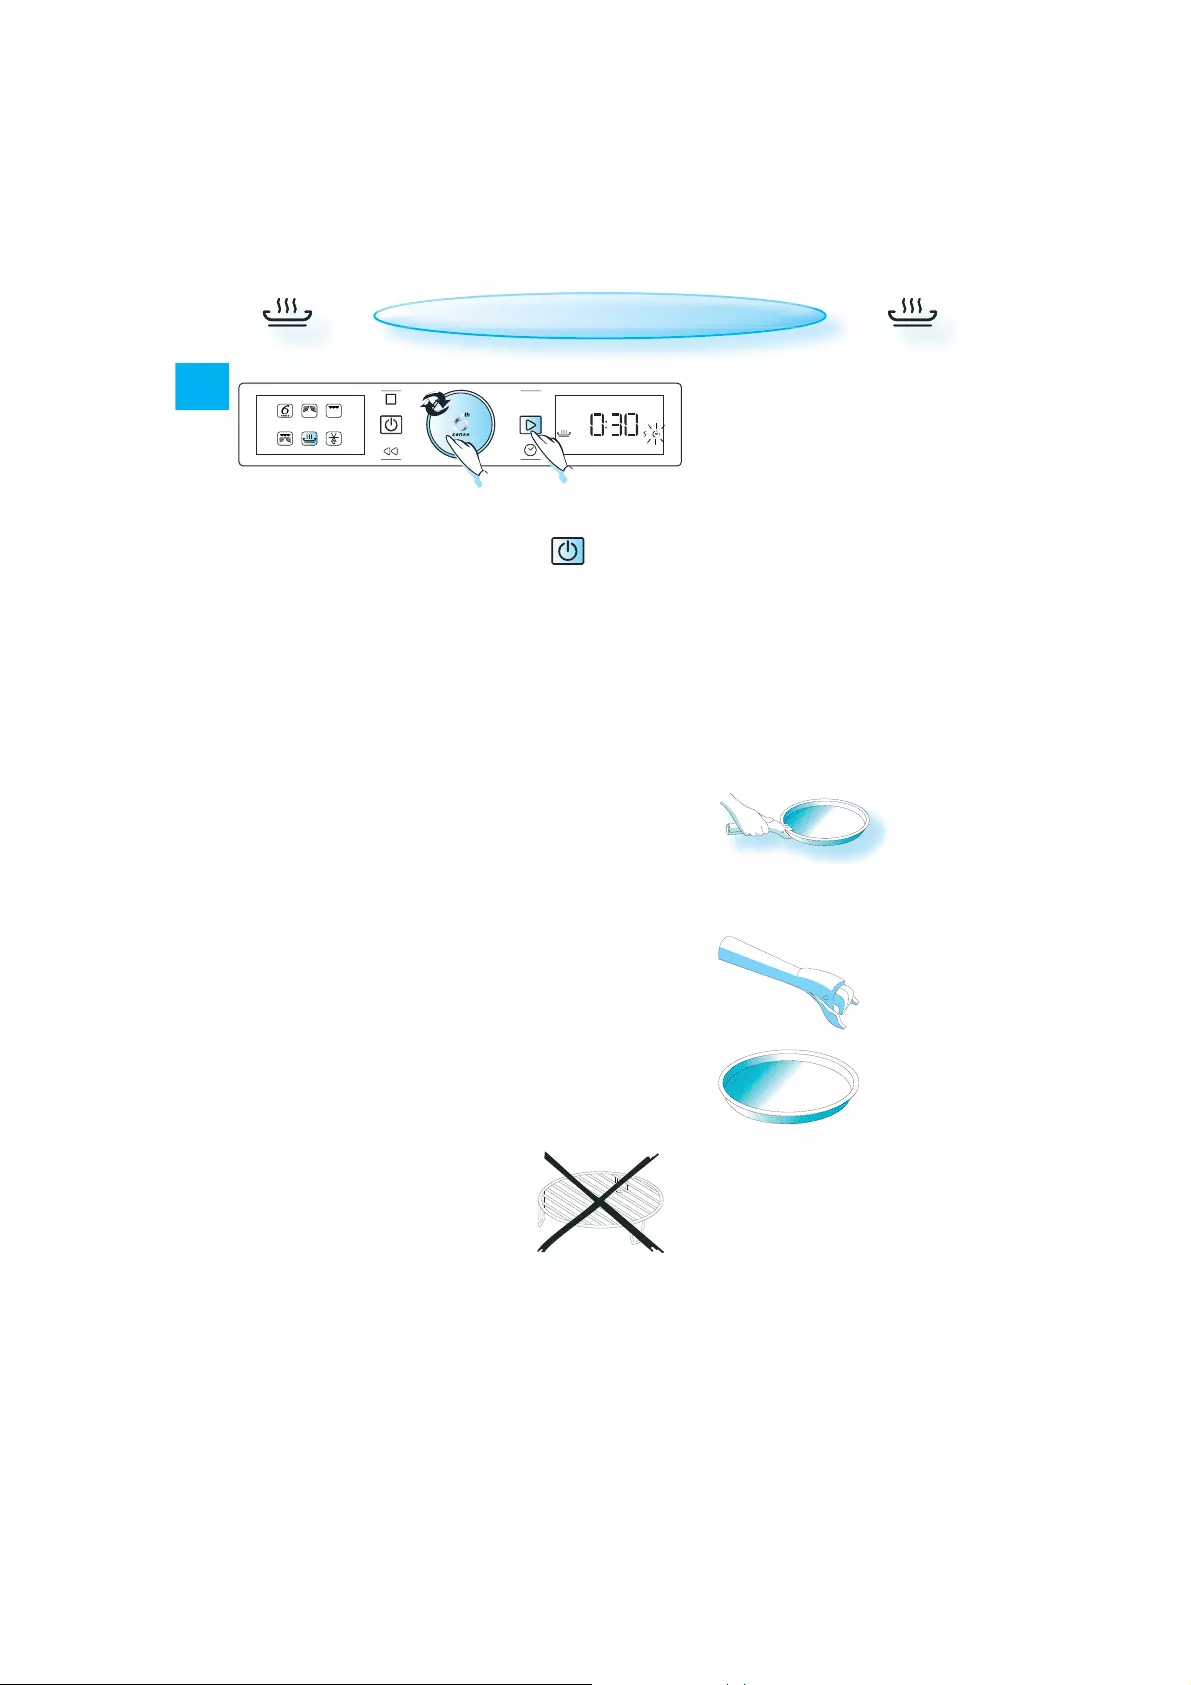
COOK & REHEAT WITH MICROWAVES
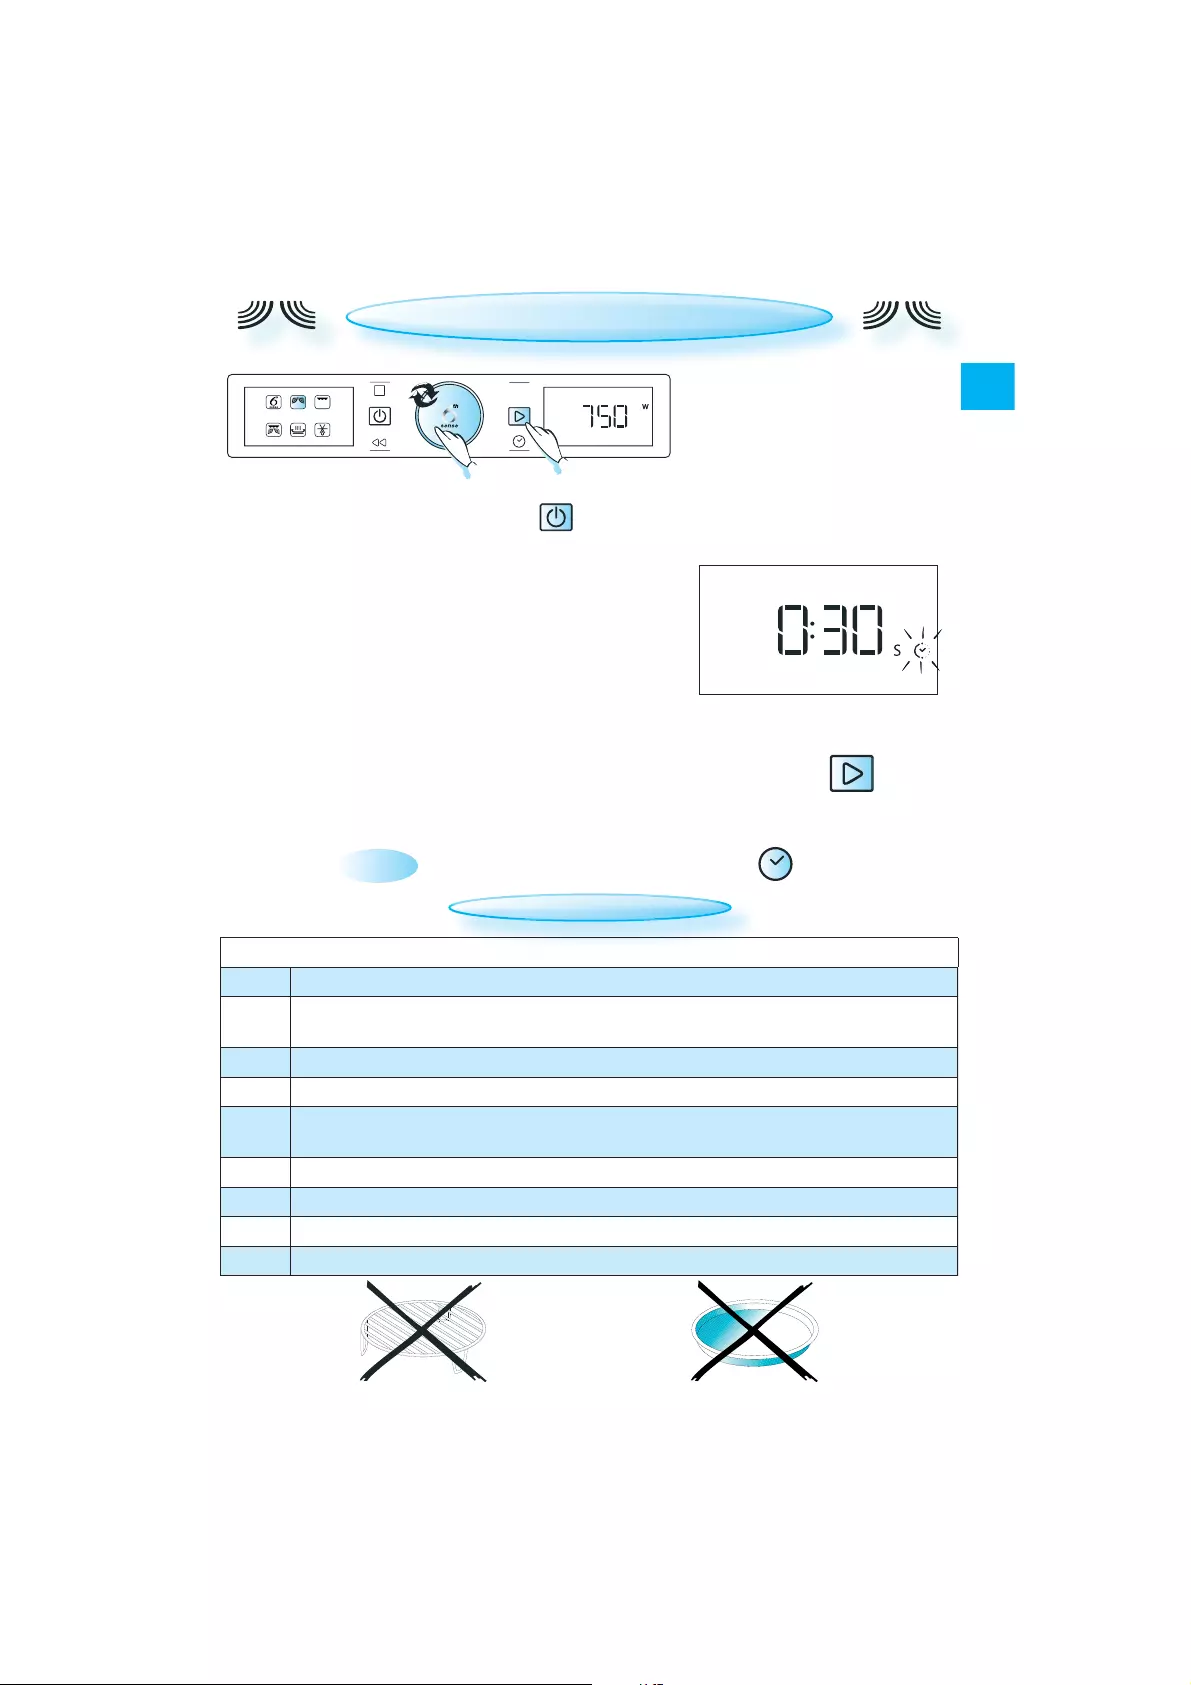
Switch on the microwave by pressing the button and proceed as follows:
q TURN THE ADJUST KNOB until you find the microwave function.
w PRESS THE ADJUST KNOB to confirm your selection.
e TURN THE ADJUST KNOB to set the microwave power level.
r PRESS THE ADJUST KNOB to confirm your selection.
t TURN THE ADJUST KNOB to set the cooking time.
y PRESS THE START BUTTON OR ADJUST KNOB.
ONCE THE COOKING PROCESS HAS BEEN STARTED:
The time can easily be increased in 30-second steps by pressing the
Start button. Each press increases the time with 30 seconds. You
may also alter the time by turning the adjust knob to increase or
decrease the time.
DURING COOKING you can change the cooking time and/or power level.
<= by pressing the desired button: =>
USE THIS FUNCTION for normal cook-
ing and reheating, such as vegeta-
bles, fish, potatoes and meat.
.
$
1
3
/4
4
Power
Power
36
EN
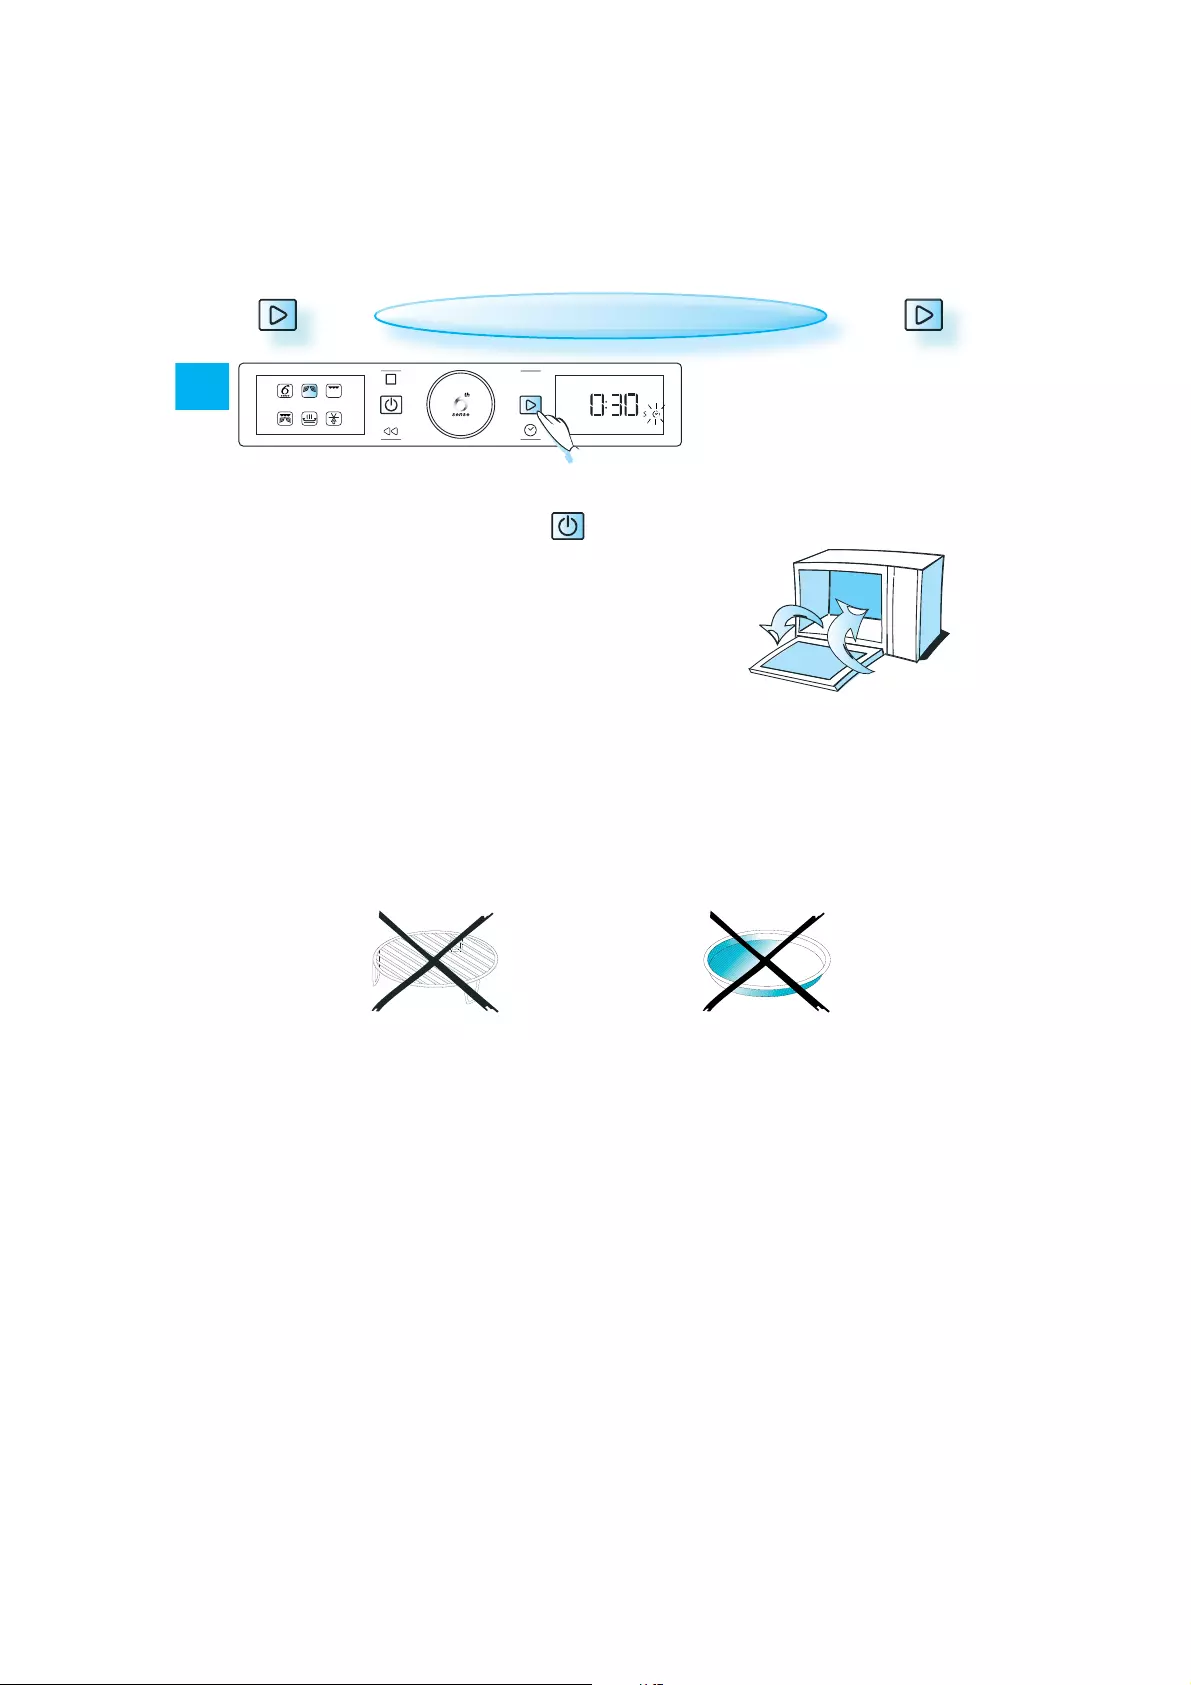
Switch on the microwave by pressing the button and proceed as follows:
q OPEN THE DOOR and place food in the oven. Close the door.
w PRESS THE START BUTTON TO AUTOMATICALLY START the oven with
full microwave power (900 W) and the cooking time set to
30 seconds. Each additional press increases the time by 30
seconds.
JET START
THIS FUNCTION IS USED to quickly re—
heat food with a high water con—
tent such as clear soup, coffee or
tea.
3
.
YOU CAN ALSO ALTER THE TIME BY TURNING THE ADJUST KNOB to increase or
decrease the time after the function has started.
NOTE:
THIS FUNCTION IS ONLY AVAILABLE when the oven is switched off or in
Standby mode while the multifunction knob is in the Microwave
position.
Power

37
EN
FOLLOW THE PROCEDURE for “Cook & Reheat with
microwaves” and choose power level 160 W
when defrosting manually.
CHECK AND INSPECT THE FOOD REGULARLY. You will
learn the times required for various amounts
from experience.
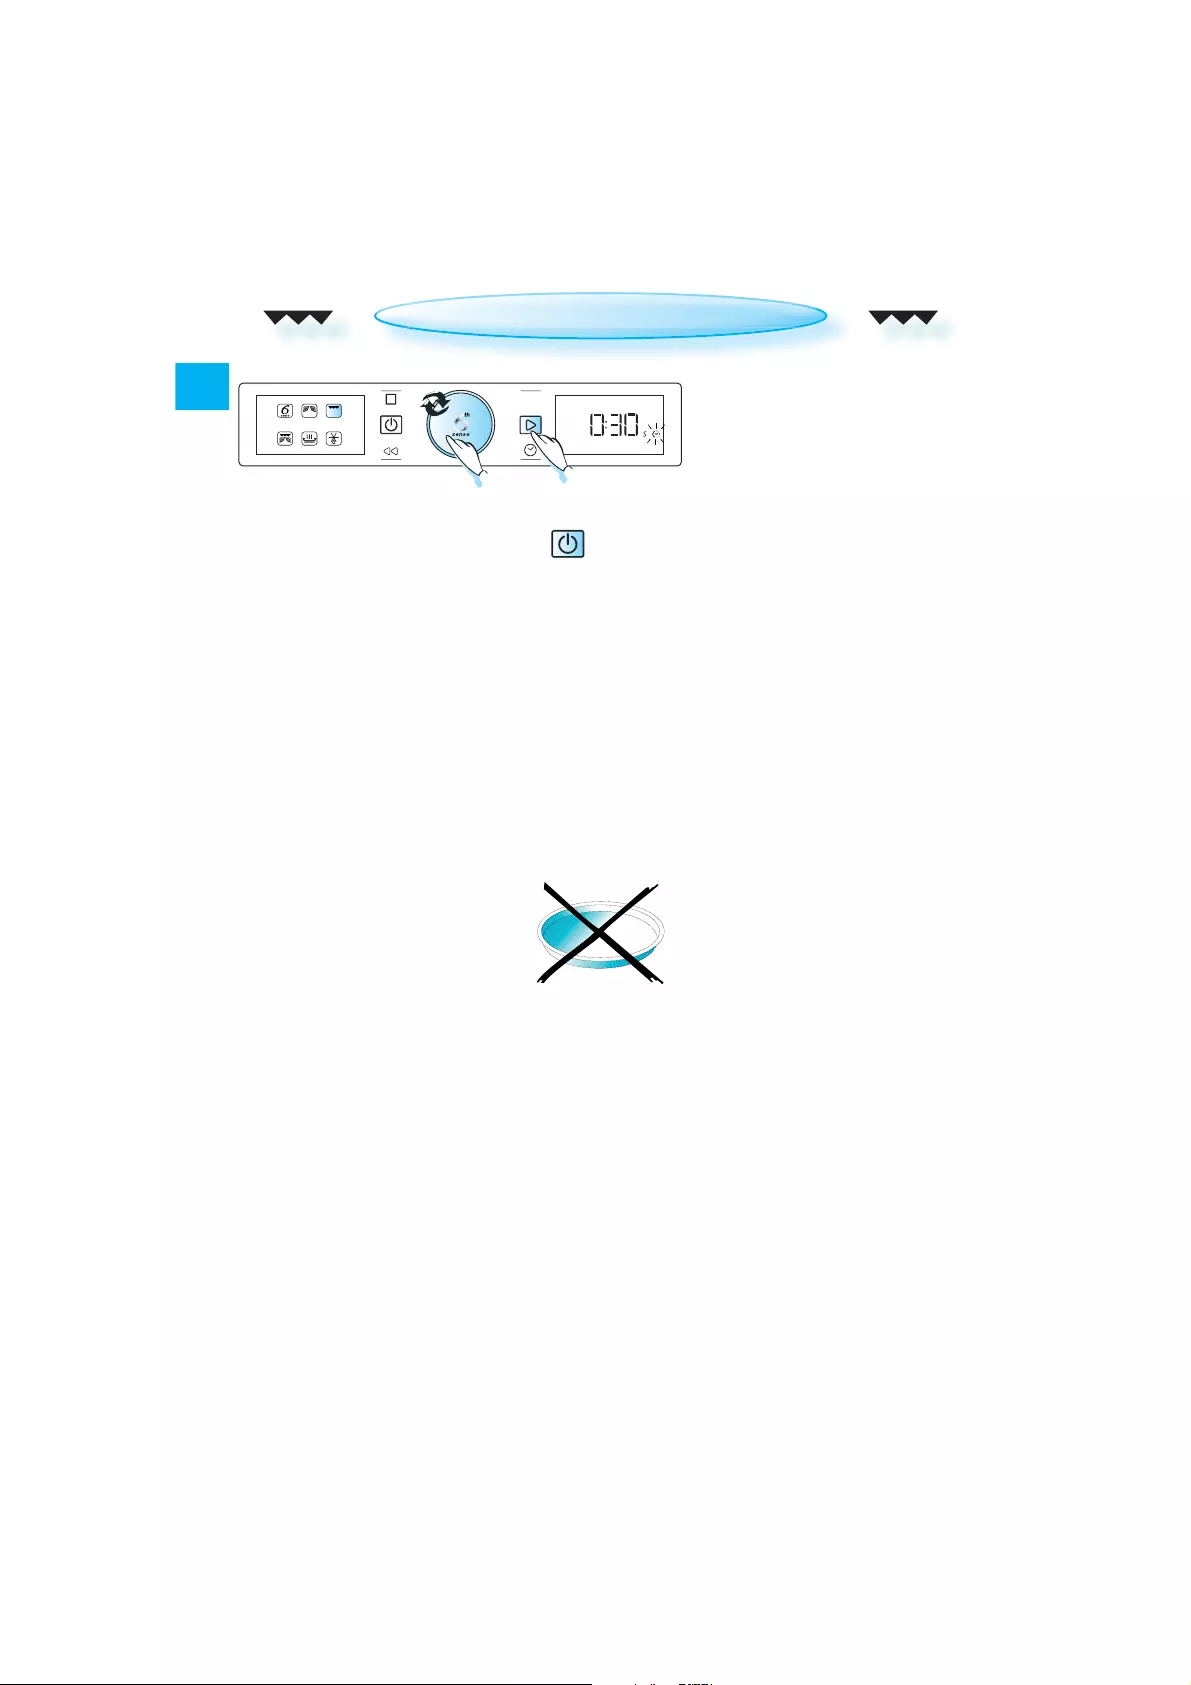
MANUAL DEFROST
TURN LARGE JOINTS halfway through the defrost-
ing process.
BOILED FOOD, STEWS AND MEAT SAUCES defrost
better if stirred during defrosting.
WHEN DEFROSTING it is better to under
thaw the food slightly and allow the
process to finish during standing time.
STANDING TIME AFTER DEFROSTING ALWAYS PRODUCES BET—
TER RESULTS since the temperature
will then be evenly distributed
throughout the food.
FROZEN FOOD IN PLASTIC BAGS, plastic film or card—
board packaging can be placed directly in the
oven provided the packaging does not
have any metal parts (e.g. metal twist
ties).
THE SHAPE OF THE PACKAGE changes the de—
frosting time. Shallow packaging de—
frosts more quickly than deep packag-
ing.
SEPARATE ITEMS as they begin to defrost.
Individual slices defrost more easily.
COVER AREAS OF FOOD with small
pieces of aluminium foil if they
start to become warm (e.g.
chicken legs and wing tips).
38
EN
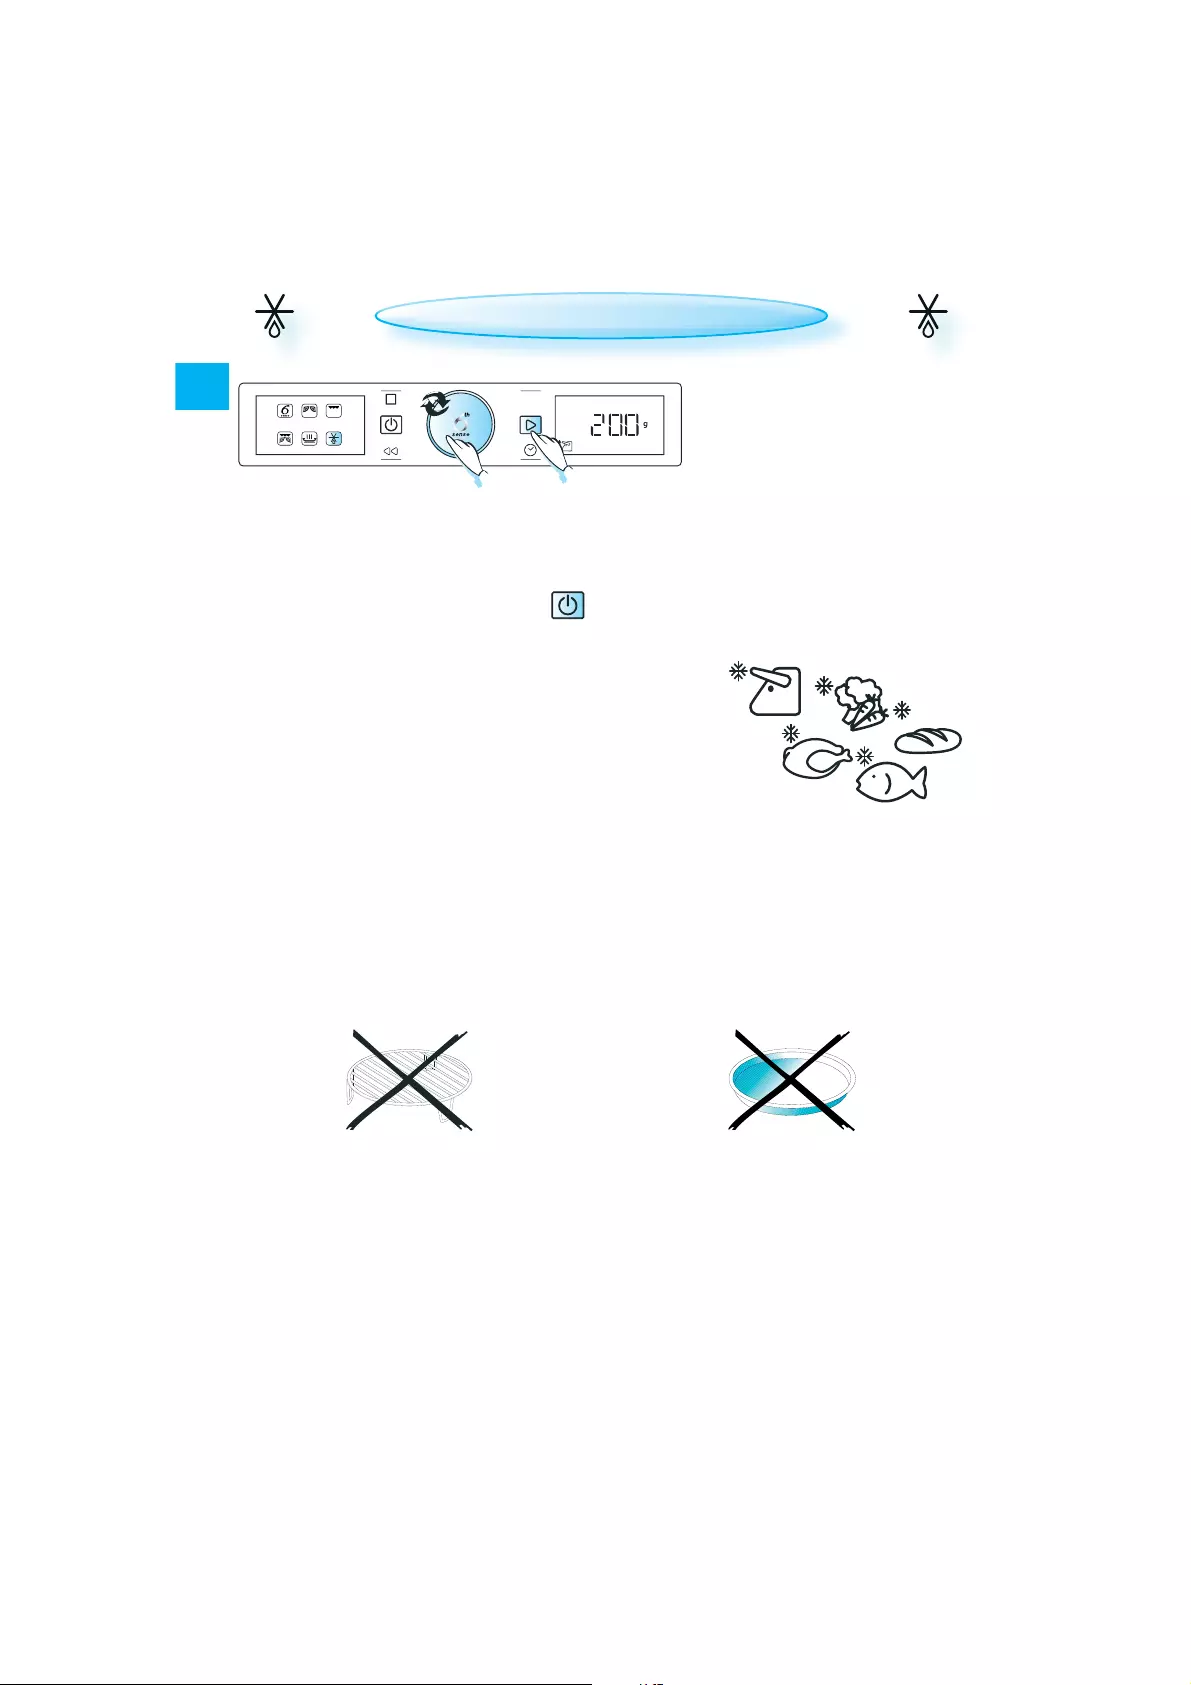
JET DEFROST
Switch on the microwave by pressing the button and proceed as follows:
q TURN THE ADJUST KNOB until you find the Jet Defrost function.
w PRESS THE ADJUST KNOB to confirm your selection.
e TURN THE ADJUST KNOB to select the food class.
r PRESS THE ADJUST KNOB to confirm your selection.
t TURN THE ADJUST KNOB to set the weight.
y PRESS THE START BUTTON.
USE THIS FUNCTION for defrosting
meat, poultry, fish, vegetables
and bread.
Jet Defrost should only be used
if the net weight is between
100 g and 2.5 kg.
ALWAYS PLACE THE FOOD on the glass
turntable.
.
3
/
$
1
4
MIDWAY THROUGH THE DEFROSTING PROCESS, the oven
stops and prompts you to “TURN” the food.
Open the door.
Turn the food.
Close the door and restart by pressing the
Start button.
NOTE: The oven continues automatically after
2 minutes if the food has not been turned.
The defrosting time will be longer in this case.
Power
39
EN
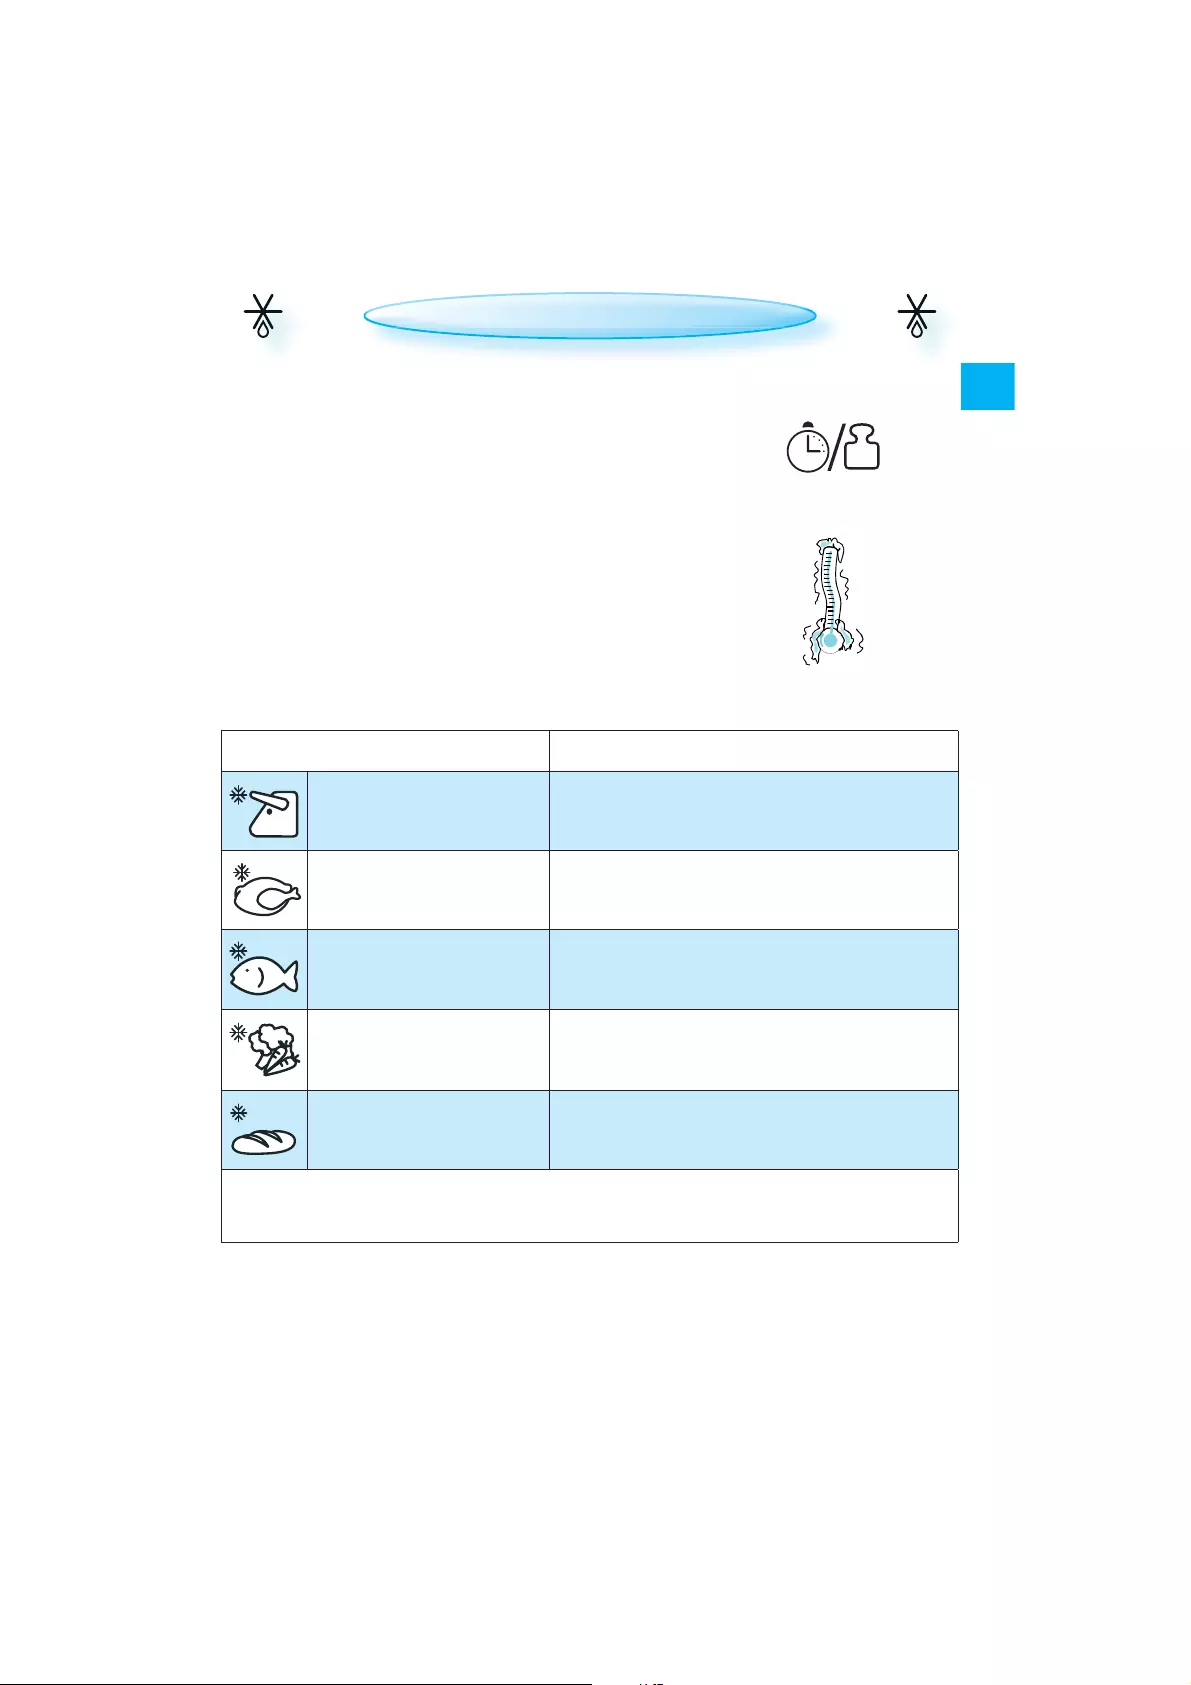
WEIGHT:
THIS FUNCTION NEEDS TO KNOW the net weight of the food. The oven
will then automatically calculate the time needed to finish the
process.
IF THE WEIGHT IS LESSER OR GREATER THAN RECOMMENDED WEIGHT: Follow
the procedure for “Cook & Reheat with microwaves” and choose
160 W when defrosting.
FROZEN FOODS:
IF THE FOOD IS WARMER than deep—freeze temperature (-18°C),
choose a lower food weight.
IF THE FOOD IS COLDER than deep—freeze temperature (-18°C),
choose a higher food weight.
FOOD TIPS
q MEAT (100 g — 2.0 kg) MINCED MEAT, cutlets, steaks or roasts.
w POULTRY (100 g — 2.5 kg) CHICKEN, WHOLE, pieces or fillets.
e FISH (100 g — 1.5 kg) WHOLE STEAKS or fillets.
r VEGETABLES (100 g — 1.5 kg) MIXED VEGETABLES, peas, broccoli etc.
t BREAD (100 g — 1.0 kg) LOAF, buns or rolls.
FOR FOOD NOT LISTED IN THIS TABLE and if the weight is lesser or greater than the recommended
weight, you should follow the procedure for “Cook & reheat with microwaves” and choose 160 W
when defrosting.
JET DEFROST
40
EN
GRILL
Switch on the microwave by pressing the button and proceed as follows:
q TURN THE ADJUST KNOB until you find the Grill function.
w PRESS THE ADJUST KNOB to confirm your selection.
e TURN THE ADJUST KNOB to set the cooking time.
r PRESS THE START BUTTON.
USE THIS FUNCTION TO quickly turn the
surface of any food placed on the
wire rack golden brown.
.
3
/
$
1
4
PLACE FOOD on the wire rack. Turn food during cooking.
MAKE SURE THAT THE UTENSILS used are heat resistant and microwave-
safe before grilling with them.
DO NOT USE PLASTIC utensils when grilling. They will melt. Items made
of wood or paper are not suitable either.
Power
41
EN
GRILL COMBI
Switch on the microwave by pressing the button and proceed as follows:
q TURN THE ADJUST KNOB until you find the Grill Combi function.
w PRESS THE ADJUST KNOB to confirm your selection.
e TURN THE ADJUST KNOB to set the Microwave power level.
r PRESS THE ADJUST KNOB to confirm your selection.
t TURN THE ADJUST KNOB to set the cooking time.
y PRESS THE START BUTTON.
ONCE THE COOKING PROCESS HAS BEEN STARTED:
The time can easily be increased in 30-second steps by pressing the
Start button. Each press increases the time by 30 seconds. You may
also alter the time by turning the adjust knob to increase or de—
crease the time.
DURING COOKING you can change the cooking time and/or power level.
<= by pressing the desired button: =>
THE MAX. POSSIBLE microwave power level when using the Grill Combi is
limited to a factory-preset level.
PLACE FOOD on the wire rack or on the glass turntable.
USE THIS FUNCTION TO cook food such
as lasagne, fish and potato gratin.
.
3
/
$
1
(
4
2
Power
GRILL COMBI
POWER: SUGGESTED USE:
650 W COOKING VEGETABLES AND GRATINS
350 — 500 W COOKING POULTRY AND LASAGNE
160 — 350 W COOKING FISH AND FROZEN GRATINS
160 W COOKING MEAT
90 W FRUIT GRATINS
0 W BROWNING ONLY DURING COOKING
Power
42
EN
CRISP
Switch on the microwave by pressing the button and proceed as follows:
q TURN THE ADJUST KNOB until you find the Crisp function.
w PRESS THE ADJUST KNOB to confirm your selection.
e TURN THE ADJUST KNOB to set the cooking time.
r PRESS THE START BUTTON.
USE THIS FUNCTION TO reheat and
cook pizzas and other dough—
based food. It is also good for fry-
ing bacon and eggs, sausages,
hamburgers etc.
er
.
3
/
$
1
(
4
2
THE OVEN AUTOMATICALLY uses Microwaves and Grill to heat the crisp
plate. This way the crisp plate will rapidly reach its working tem—
perature and begin to brown and crisp the food.
MAKE SURE that the crisp plate is correctly placed in the
middle of the glass turntable.
THE OVEN AND THE CRISP PLATE become very hot when
using this function.
DO NOT PLACE THE HOT CRISP PLATE on any surface susceptible to heat.
TAKE CARE NOT TO TOUCH the grill element.
USE OVEN MITTS or the special crisp handle supplied when remov—
ing the hot crisp plate.
ONLY USE the crisp plate supplied with this function.
Other available crisp plates on the market will not
give the correct results when using this function.
Power
43
EN
FOOD TIPS
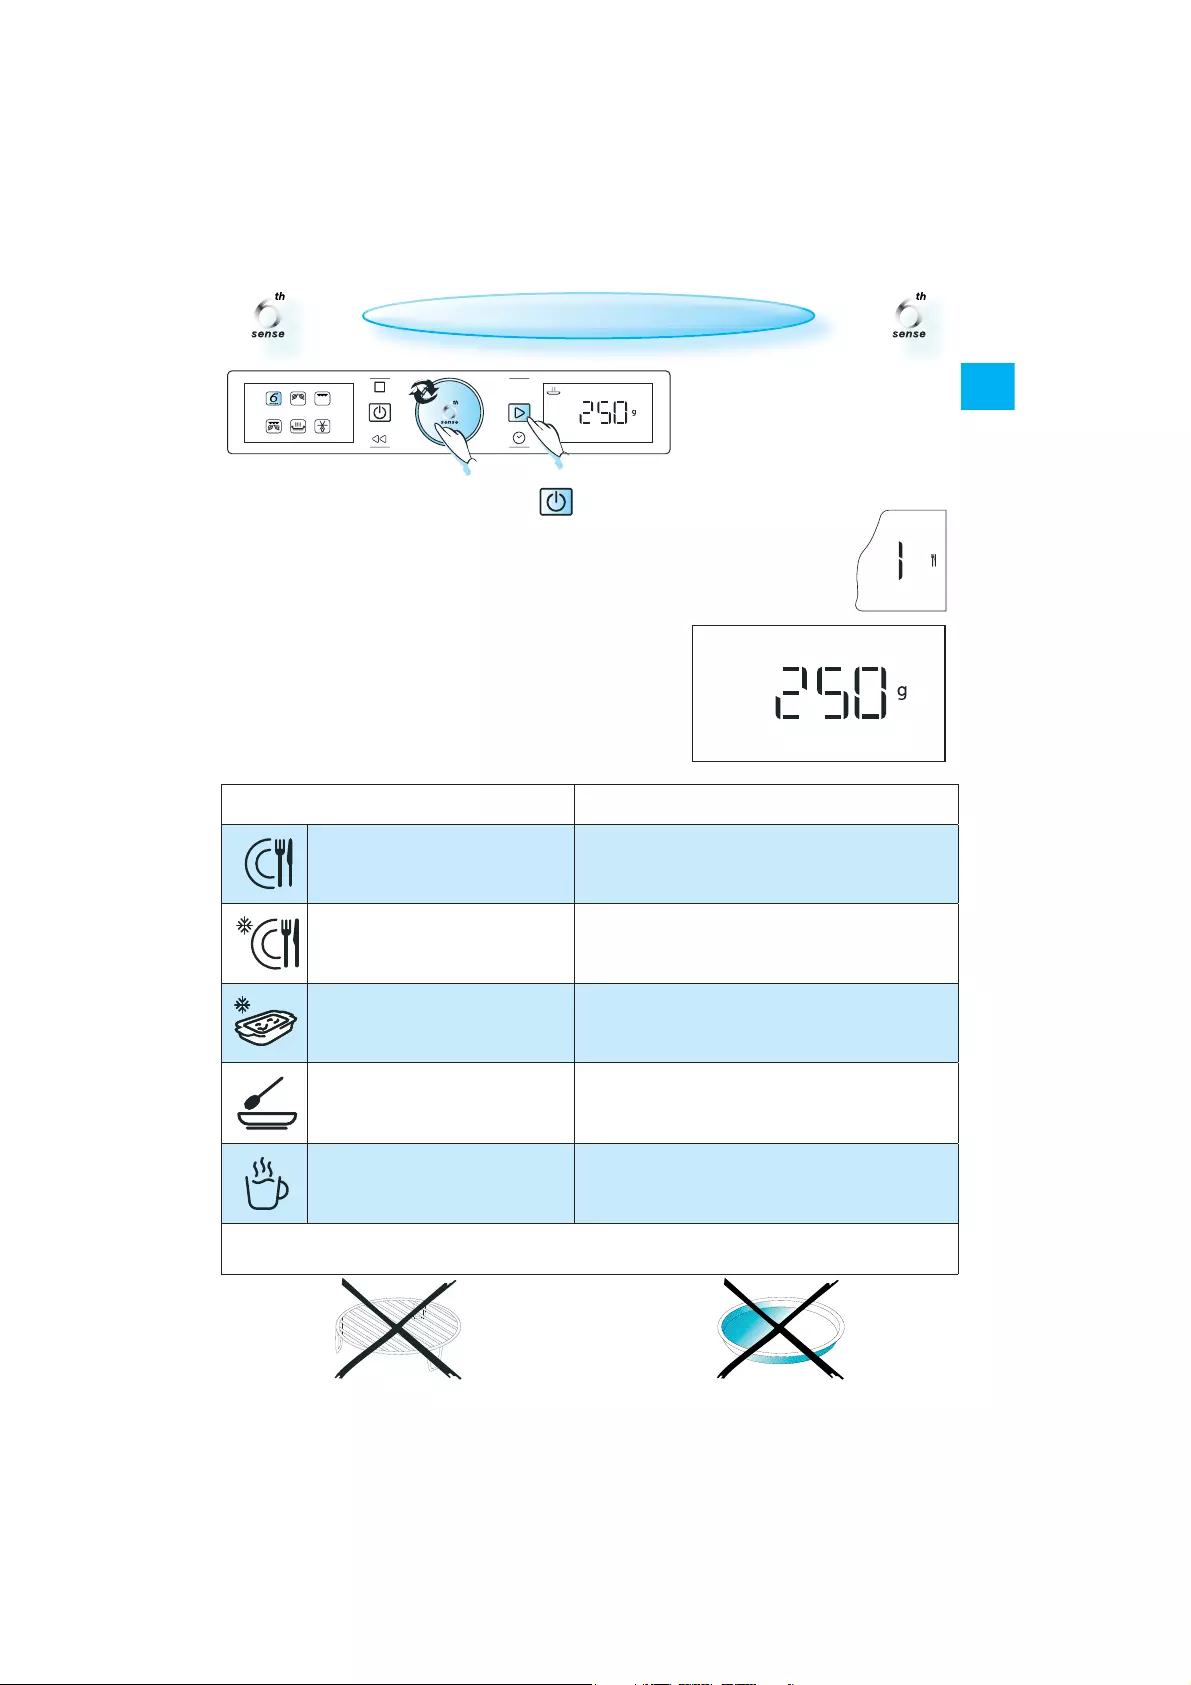
q DINNER PLATE (250 g — 500 g)
HEAT COVERED.
FOR PERFECT RESULTS, prepare food in line with the
recommendations on next page.
w FROZEN PORTION (250 g — 500 g) FOLLOW THE DIRECTIONS ON THE PACKAGING, i.e. ventila-
tion, pricking, etc..
e FROZEN LASAGNE (250 g — 500 g) REHEAT COVERED Turn if needed.
r SOUP (200 g — 800 g) REHEAT UNCOVERED in separate bowls or in a large
one.
t BEVERAGE (100 g — 500 g) HEAT UNCOVERED.
FOR FOOD NOT LISTED IN THIS TABLE and if the weight is lesser or greater than the recommended
weight, you should follow the procedure for “Cook & Reheat with microwaves”.
Switch on the microwave by pressing the button and proceed as follows:
q TURN THE ADJUST KNOB until you find the 6th Sense function.
w PRESS THE ADJUST KNOB to confirm your selection.
e TURN THE ADJUST KNOB until you find the 6th Sense Reheat function.
r PRESS THE ADJUST KNOB to confirm your selection.
t TURN THE ADJUST KNOB to select the desired food class.
y PRESS THE ADJUST KNOB to confirm your selection.
u TURN THE ADJUST KNOB to set the weight.
i PRESS THE START BUTTON.
USE THIS FUNCTION when reheat—
ing ready-made food from frozen,
chilled or room temperature.
PLACE FOOD onto a microwave-safe
heat-proof dinner plate or dish.
.
3
/
$
1
(
2
4
6TH SENSE REHEAT
Power

44
EN
ALWAYS COVER FOOD when using this function ex-
cept when reheating chilled soups, in which
case a cover is not needed.
IF THE FOOD IS PACKAGED in such way that
it is already covered, the packaging
should be cut with 2-3 scores to allow
excess pressure to escape during re—
heating.
PLASTIC FOIL should be
scored or pricked with a
fork to relieve the pressure
and to prevent bursting
as steam builds up during
cooking.
WHEN YOU ARE KEEPING a meal in the refrigerator
or “plating” a meal for reheating, arrange the
thicker, denser food
around the outside
of the plate and
the thinner or less
dense food in the
middle.
PLACE THIN SLICES of meat on top of each other or
interlace them.
THICKER SLICES such as meat loaf and sausages
should be placed close to each other.
THE RESULTS ARE ALWAYS BETTER AFTER
A STANDING TIME .of 1-2 minutes.
STIRRING DURING HEATING
DURING THE HEATING PROCESS the oven may stop
(depending on program) and prompt you to
“STIR” the food.
Open the door.
Stir the food.
Close the door and restart by pressing the
Start button.
NOTE: The oven continues automatically after
1 minute if the food has not been stirred.
The heating time will be longer in this case.
6TH SENSE REHEAT
45
EN
FOOD TIPS
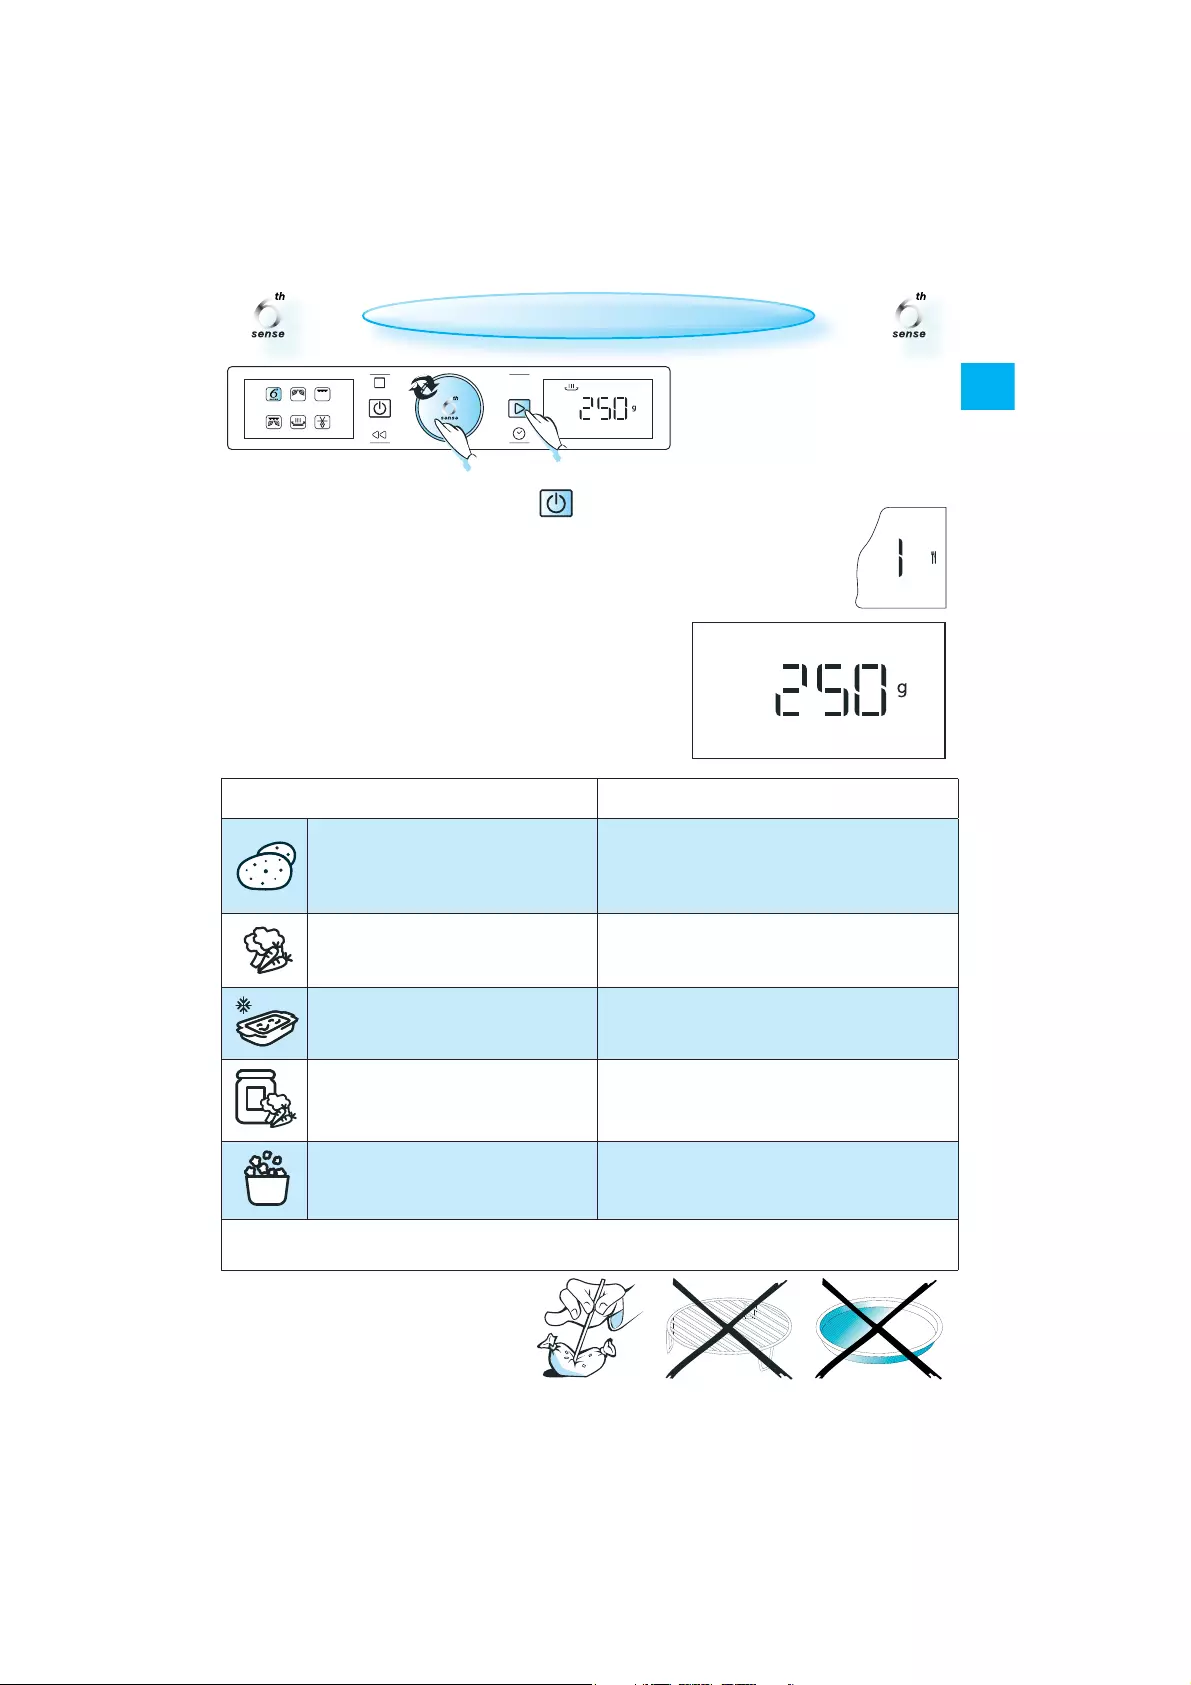
q BAKED POTATOES (200 g — 1.0 kg)
PRICK THE POTATOES and place them in a micro—
wave-safe and oven-proof dish. Turn the po—
tatoes when the oven beeps. Please be aware
that the oven, dish and food are hot.
w FRESH VEGETABLES (200 g — 800 g)
CUT VEGETABLES into even-sized pieces. Add 2-4
tablespoons of water and cover. Stir when the
oven beeps.
e FROZEN VEGETABLES (200 g — 800 g) COOK COVERED. Stir when the oven beeps.
r CANNED VEGETABLES (200 g — 600 g) POUR AWAY most of the liquid and cook – cov-
ered – in a microwave-safe dish.
t POPCORN (100 g) ONLY COOK ONE BAG AT THE TIME. If more popcorn is
needed, cook the bags one after another.
FOR FOOD NOT LISTED IN THIS TABLE and if the weight is lesser or greater than the recommended
weight, you should follow the procedure for “Cook & Reheat with microwaves”.
Switch on the microwave by pressing the button and proceed as follows:
q TURN THE ADJUST KNOB until you find the 6th Sense function.
w PRESS THE ADJUST KNOB to confirm your selection.
e TURN THE ADJUST KNOB until you find the 6th Sense Cook function.
r PRESS THE ADJUST KNOB to confirm your selection.
t TURN THE ADJUST KNOB to select the desired food class.
y PRESS THE ADJUST KNOB to confirm your selection.
u TURN THE ADJUST KNOB to set the weight.
i PRESS THE START BUTTON.
USE THIS FUNCTION FOR cooking ONLY.
6th Sense Cook can only be used
for food in the categories listed
here.
.
3
/
$
1
(
2
4
6TH SENSE COOK
PLASTIC FILM should be scored or
pricked with a fork to relieve the pres-
sure and to prevent bursting as steam
builds up during cooking.
Power
46
EN
FOOD TIPS
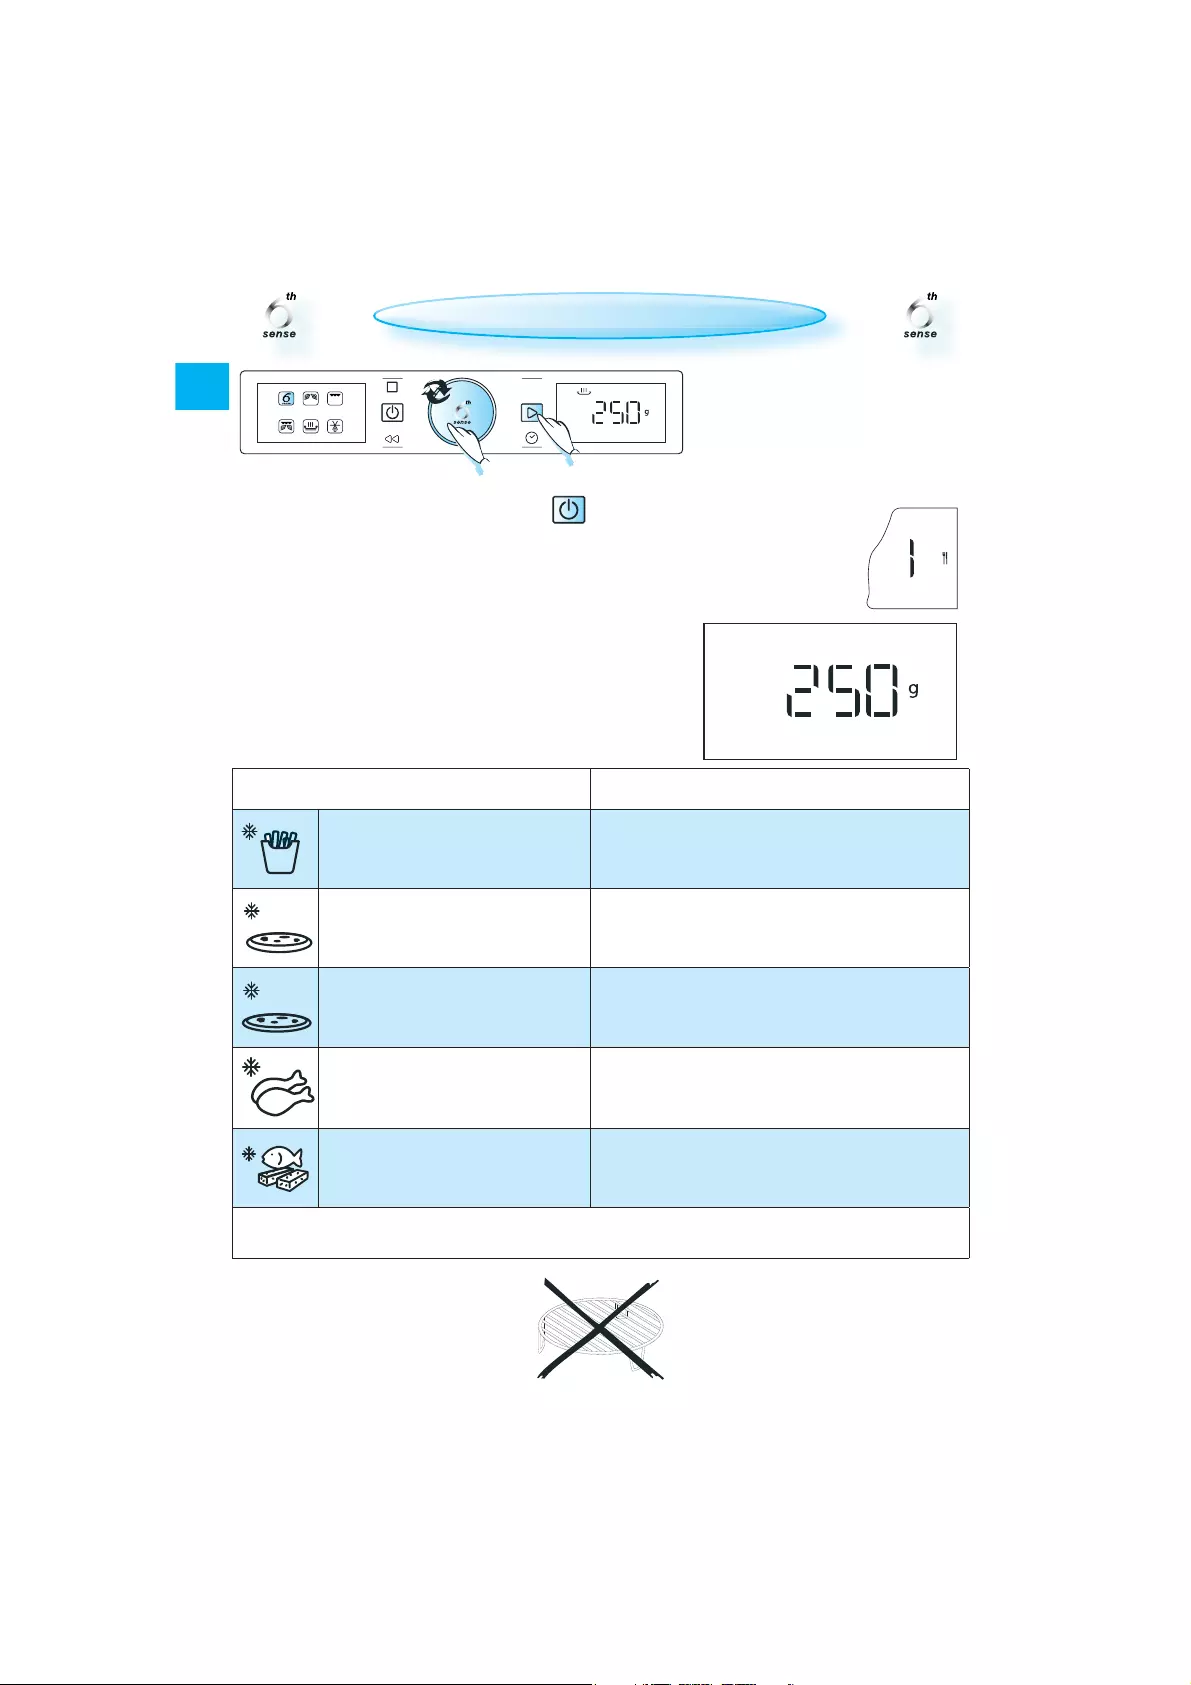
q FRENCH FRIES (200 g — 500 g) SPREAD OUT THE FRIES in an even layer on the crisp
plate. Sprinkle with salt if desired.
w PIZZA, THIN CRUST (200 g — 500 g) FOR PIZZAS WITH THIN CRUST.
e PIZZA, DEEP PAN (200 g — 800 g) FOR PIZZAS WITH THICK CRUST.
r BUFFALO WINGS /
CHICKEN NUGGETS (200 g — 500 g) FOR CHICKEN NUGGETS, oil the crisp plate.
t FISH FINGERS (200 g — 500 g)
PLACE THE FISH FINGERS IN THE APPLIANCE, leaving suffi-
cient space between them. Turn the food when
the appliance asks you to do so.
FOR FOOD NOT LISTED IN THIS TABLE and if the weight is lesser or greater than the recommended
weight, you should follow the procedure for “Cook & Reheat with microwaves”.
Switch on the microwave by pressing the button and proceed as follows:
q TURN THE ADJUST KNOB until you find the 6th Sense function.
w PRESS THE ADJUST KNOB to confirm your selection.
e TURN THE ADJUST KNOB until you find the 6th Sense Crisp function.
r PRESS THE ADJUST KNOB to confirm your selection.
t TURN THE ADJUST KNOB to select the desired food class.
y PRESS THE ADJUST KNOB to confirm your selection.
u TURN THE ADJUST KNOB to set the weight.
i PRESS THE START BUTTON.
USE THIS FUNCTION FOR crisping ONLY.
6th Sense Crisp can only be used
for food in the categories listed
here.
PLACE FOOD onto the crisp plate.
.
3
/
$
1
(
2
4
Power
6TH SENSE CRISP
47
EN
DISHWASHERSAFE:
TURNTABLE SUPPORT.
GLASS TURNTABLE.
CRISP HANDLE.
WIRE RACK.
CLEANING IS THE ONLY MAINTENANCE
normally required.
FAILURE TO MAINTAIN THE OVEN in a
clean condition could lead to de-
terioration of the surface, which
could adversely affect the life of
the appliance and possibly result
in a hazardous situation.
DO NOT USE METAL SCOURING PADS,
ABRASIVE CLEANSERS, steel-
wool pads, rough cloths,
etc. which could dam-
age the control pan-
el and interior and exterior oven surfaces.
Use a sponge with a mild detergent or pa-
per towel with spray glass cleaner. Apply
spray glass cleaner to paper towel.
DO NOT SPRAY directly on the oven.
AT REGULAR INTERVALS, and especially af-
ter any spillovers, remove the turn-
table, the turntable support and
wipe clean the base of the oven.
THIS OVEN IS DESIGNED to operate
with the turntable in place.
MAINTENANCE & CLEANING
MAINTENANCE & CLEANING
DO NOT operate the microwave oven
when the turntable has been removed
for cleaning.
USE A MILD DETERGENT, water and a soft cloth to
clean the interior surfaces, front and rear of the
door and the door opening.
DO NOT ALLOW GREASE or food particles to
build up around the door.
FOR STUBBORN STAINS, boil a cup of water in the oven
for 2 or 3 minutes. Steam will soften the marks.
ADDING SOME LEMON JUICE to a cup of water, plac—
ing this on the turntable and boiling for a few
minutes can eliminate odours inside the oven.
DO NOT USE STEAM CLEANING
APPLIANCES when cleaning
your microwave oven.
THE GRILL ELEMENT does not need cleaning since
the intense heat burns off any splashes, al-
though the ceiling above it may need regular
cleaning.
This should be done using warm water, deter-
gent and a sponge. If the grill is not used regu—
larly, it should be run for 10 minutes a month.
CAREFUL CLEANING:
THE CRISP PLATE should be cleaned in water with
a mild detergent. Heavily
soiled areas can be cleaned
with a scouring sponge and
a mild cleanser.
ALWAYS let the crisp plate cool before cleaning.
DO NOT immerse or rinse the crisp plate
while it is hot. Rapid cooling may dam-
age it.
DO NOT USE STEEL—WOOL PADS. They will
scratch the surface.
48
EN
TROUBLESHOOTING GUIDE
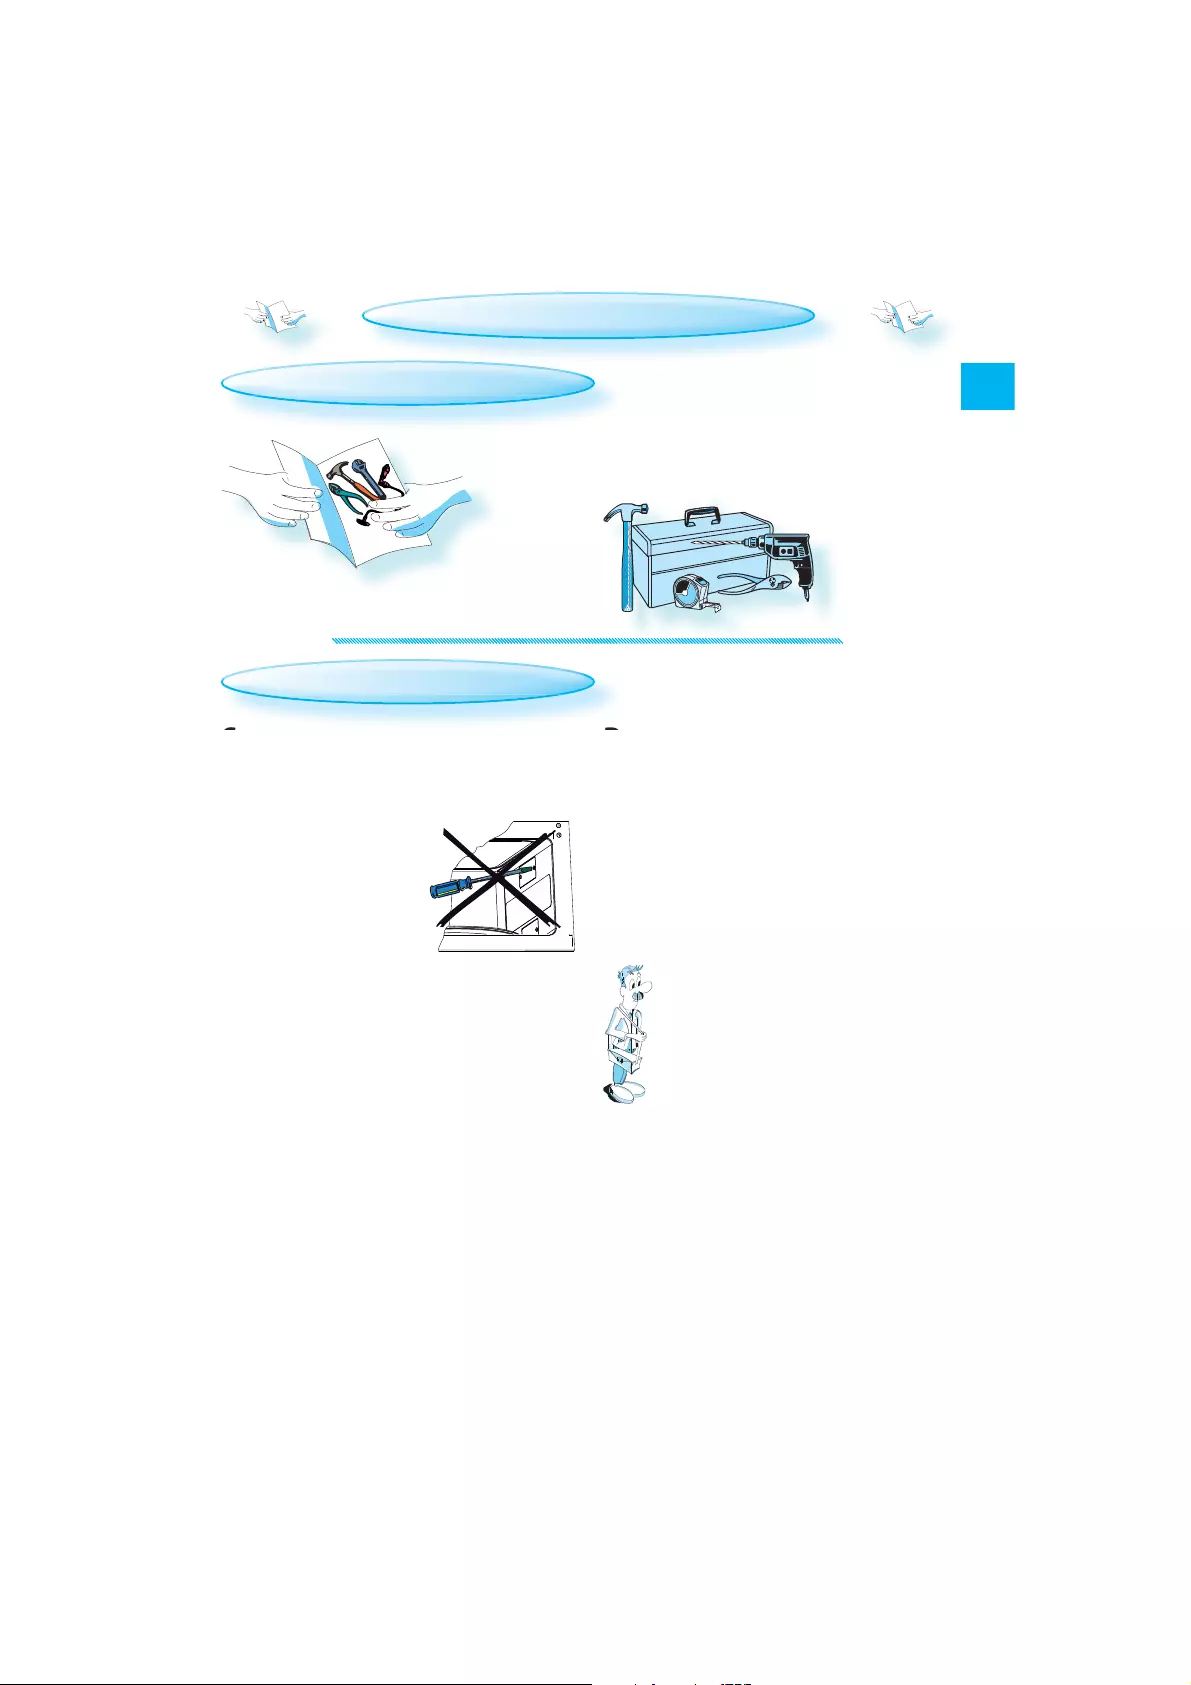
IF THE POWER CORD NEEDS REPLACING it should
be replaced by the original
power cord, which is avail—
able via our service organ—
isation. The power cord
should only be replaced by
a trained service technician.
SERVICE ONLY TO BE CARRIED OUT
BY A TRAINED SERVICE TECHNICIAN.
It is hazardous for anyone
other than trained staff to
carry out any maintenance
or repair operation which in-
volves the removal of any
cover which provides protection against
exposure to microwave energy.
DO NOT REMOVE ANY COVERS.
IF THE OVEN DOES NOT WORK, do not make a service
call until you have made the following checks:
The turntable and turntable support is in
place.
The door is properly closed.
Check the fuses and make sure that there is
power available.
Check that the oven has ample ventilation.
Wait for 10 minutes, then try to operate the
oven once more.
Open and then close the door before you
try again.
Disconnect the oven from the power sup—
ply. Wait for 10 minutes before reconnect-
ing and trying again.
THIS IS TO AVOID making unnecessary calls for
which you will be charged.
When calling Service, please give the serial
number and type number of the oven (see Ser-
vice label). Consult your warranty booklet for
further advice.
DATA FOR TESTING HEATING PERFORMANCE
IN ACCORDANCE WITH IEC 60705.
THE INTERNATIONAL ELECTROTECHNICAL COMMISSION has developed a standard for comparative testing of the
heating performance of different microwave ovens. We recommend the following for this oven:
TEST AMOUNT APPROX. TIME POWER LEVEL CONTAINER
12.3.1 1000 G12 — 13 MIN 650 W PYREX 3.227
12. 3. 2 475 G5 ½ MIN 650 W PYREX 3.827
12.3.3 900 G13 — 14 MIN 750 W PYREX 3.838
13.3 500 G 10 MIN 160 W
TECHNICAL SPECIFICATIONS
SUPPLY VOLTAGE 230 V/50 HZ
RATED POWER INPUT 2300 W
FUSE 10 A
MW OUTPUT POWER 1000 W
GRILL 800 W
OUTER DIMENSIONS (HXWXD) 385 X 595 X 468
INNER DIMENSIONS (HXWXD) 200 X 405 X 380

49
EN
THE SYMBOL on the appli-
ance, or on the documents
accompanying the appli-
ance, indicates that this ap—
pliance may not be treated as
household waste. Instead it
should be handed over to the
applicable collection point
for the recycling of electri-
cal and electronic equipment.
DISPOSAL must be carried
out in accordance with lo—
cal environmental regulations for waste dis-
posal.
FOR MORE DETAILED INFORMATION about treat-
ment, recovery and recycling of this appli—
ance, please contact your local city office, your
household waste disposal service or the shop
where you purchased the appliance.
BEFORE SCRAPPING, cut off the power cord so
that the appliance cannot be connected to the
mains.
—THE PACKING BOX can be fully recy—
cled, as confirmed by the recy-
cling symbol. Follow local
disposal regulations. Keep
potentially hazardous pack-
aging (plastic bags, polysty-
rene etc.) out of the reach of chil—
dren.
THIS APPLIANCE is marked in conformity with Eu-
ropean Directive 2012/19/EU on Waste Electri—
cal and Electronic Equipment (WEEE). By mak-
ing sure that this appliance is disposed of cor-
rectly, you can help prevent potential negative
consequences for the environment and human
health, which could otherwise be caused by in—
appropriate waste handling of this appliance.
ENVIRONMENTAL TIPS
|
Код: 125104 Извините, товара сейчас нет в наличии
Бесплатная доставка Извините, товара сейчас нет в наличии Сравнить Новости интернет-магазина «Лаукар»:23.04.2025 26.02.2025 17.02.2025 Дополнительная информация в категории Встраиваемая микроволновая печь (СВЧ):Микроволновые печи или СВЧ — разбираемся в терминах Таблица Авторизованных сервисных центров по брендам. Описание Инструкция Отзывы (0) В интернет-магазине бытовой техники «Лаукар» Вы можете скачать инструкцию к товару Встраиваемая микроволновая печь (СВЧ) Whirlpool AMW 730/IX совершенно бесплатно. Все инструкции, представленные на сайте интернет-магазина бытовой техники «Лаукар», предоставляются производителем товара. Для того чтобы скачать инструкцию, Вам необходимо нажать на ссылку «скачать инструкцию», расположенную ниже, а в случае, если ссылки нет, Скачать инструкцию Смотреть инструкцию 
Фирма-производитель оставляет за собой право на внесение изменений в конструкцию, дизайн и комплектацию товара: Встраиваемая микроволновая печь (СВЧ) Whirlpool AMW 730/IX. Пожалуйста, сверяйте информацию о товаре с информацией на |