
View the manual for the TP-Link Archer AX73 here, for free. This user manual comes under the category routers and has been rated by 3 people with an average of a 8.9. This manual is available in the following languages: English. Do you have a question about the TP-Link Archer AX73?
Ask your question here
TP-Link Archer AX73 specifications
Below you will find the product specifications and the manual specifications of the TP-Link Archer AX73.
Wi-Fi band
Dual-band (2.4 GHz / 5 GHz)
Networking standards
IEEE 802.11a, IEEE 802.11ac, IEEE 802.11ax, IEEE 802.11b, IEEE 802.11g
General
| Brand | TP-Link |
| Model | Archer AX73 | ARCHER AX73 |
| Product | router |
| EAN | 6935364010263, 0840030702327, 6935364010270 |
| Language | English |
| Filetype | User manual (PDF) |
Wireless LAN features
| Wi-Fi band | Dual-band (2.4 GHz / 5 GHz) |
| Top Wi-Fi standard | Wi-Fi 6 (802.11ax) |
| Wi-Fi standards | 802.11a, 802.11b, 802.11g, Wi-Fi 4 (802.11n), Wi-Fi 5 (802.11ac), Wi-Fi 6 (802.11ax) |
| WLAN data transfer rate (second band) | 574 Mbit/s |
| WLAN data transfer rate (first band) | 4804 Mbit/s |
| WLAN data transfer rate (max) | 5400 Mbit/s |
| Modulation | 1024-QAM, OFDM |
Management features
| MU-MIMO technology | Yes |
| WPS push button | Yes |
| Reset button | Yes |
| Quality of Service (QoS) support | Yes |
| Web-based management | Yes |
Ports & interfaces
| USB port | Yes |
| Ethernet LAN (RJ-45) ports | 4 |
| USB 3.2 Gen 1 (3.1 Gen 1) Type-A ports quantity | 1 |
| Memory card slot(s) | — |
Network
| Networking standards | IEEE 802.11a, IEEE 802.11ac, IEEE 802.11ax, IEEE 802.11b, IEEE 802.11g |
| Ethernet LAN | Yes |
| Ethernet LAN interface type | Gigabit Ethernet |
| Ethernet LAN data rates | 10,100,1000 Mbit/s |
| Cabling technology | 10/100/1000Base-T(X) |
| Dynamic DNS (DDNS) | Yes |
| Port forwarding | Yes |
| Port triggering | Yes |
| Wireless Distribution System (WDS) bridge | Yes |
| Support Samba (storage) | Yes |
| Media server | Yes |
| Built-in FTP server | Yes |
| Number of guest networks (2.4 GHz) | 1 |
| Number of guest networks (5 GHz) | 1 |
Antenna
| Antenna design | External |
| Antennas quantity | 6 |
Features
| Built-in processor | Yes |
| Processor frequency | 1500 MHz |
| Processor cores | 3 |
| Firmware upgradeable | Yes |
WAN connection
| Ethernet WAN | Yes |
| WAN connection type | RJ-45 |
| SIM card slot | No |
| 3G/4G USB modem compatibility | No |
| DSL WAN | No |
Design
| On/off switch | Yes |
| Product colour | Black |
| Product type | Portable router |
Power
| Power source type | DC |
| Output voltage | 12 V |
| Output current | 2.5 A |
Security
| Security algorithms | WPA, WPA-Enterprise, WPA2, WPA2-Enterprise, WPA3 |
| Stateful Packet Inspection (SPI) | Yes |
| Firewall | Yes |
| Access Control List (ACL) | Yes |
| IP address filtering | Yes |
| MAC address filtering | Yes |
| Filtering | Yes |
| DoS attack prevention | Yes |
| DMZ support | Yes |
| Parental control | Yes |
| Network address translation (NAT) | Yes |
Protocols
| Universal Plug and Play (UPnP) | Yes |
| DHCP client | Yes |
| Supported network protocols | IPv4, IPv6 |
Weight & dimensions
| Width | 272.5 mm |
| Depth | 147.2 mm |
| Height | 49.2 mm |
Packaging content
| Cables included | LAN (RJ-45) |
| Quick installation guide | Yes |
| AC adapter included | Yes |
Operational conditions
| Operating temperature (T-T) | 0 — 40 °C |
| Storage temperature (T-T) | -40 — 70 °C |
| Operating relative humidity (H-H) | 10 — 90 % |
| Storage relative humidity (H-H) | 5 — 90 % |
Logistics data
| Harmonized System (HS) code | 85176990 |
Sustainability
| Sustainability compliance | Yes |
| Sustainability certificates | RoHS, Federal Communications Commission (FCC), CE |
Packaging data
| Package weight | 1490 g |
| Package width | 415 mm |
| Package height | 90 mm |
| Package depth | 265 mm |
show more
Frequently asked questions
Can’t find the answer to your question in the manual? You may find the answer to your question in the FAQs about the TP-Link Archer AX73 below.
What is the height of the TP-Link Archer AX73?
The TP-Link Archer AX73 has a height of 49.2 mm.
What is the width of the TP-Link Archer AX73?
The TP-Link Archer AX73 has a width of 272.5 mm.
What is the depth of the TP-Link Archer AX73?
The TP-Link Archer AX73 has a depth of 147.2 mm.
What does the download speed on the internet depend on?
The download speed on the internet depends on the type of connection you have. If you have a 25 Mb/s connection this means that theoretically you should be able to download 25 MB per second.
What is the difference between a router and a modem?
A modem provides the internet connection via the internet provider. A router then distributes the Internet signal to the devices connected to the router.
Is WIFI radiation harmful?
WIFI is a radio frequency signal in the form of non-ionising radiation. This radiation cannot damage cells and tissues and is therefore not harmful to human health.
Is the manual of the TP-Link Archer AX73 available in English?
Yes, the manual of the TP-Link Archer AX73 is available in English .
Is your question not listed? Ask your question here
- Частным лицам
- Помощь и поддержка
- домашний билайн
- домашний интернет
- Настройка роутера
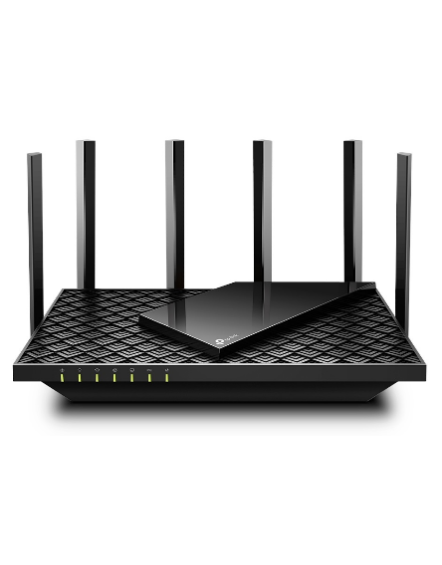
- TP-Link Archer AX73
|
Имя беспроводной сети (SSID) по умолчанию |
Диапазон 2.4 ГГц; TP-LINK_XXXXXX (где X — последовательность символов) Диапазон 5 ГГц; TP-LINK_XXXXXX_5G (где X — последовательность символов) |
|
Пароль для беспроводной сети (Wi-Fi) по умолчанию |
Указан на дне роутера |
|
|
Адрес роутера |
192.168.0.1 |
|
|
Доступ на web-интерфейс |
логин admin |
|
|
Официальный сайт |
Подключите кабель, который вам провели в квартиру наши монтажники в порт WAN, а компьютер подключите в любой из LAN портов. Вы так же можете соединить ваш ПК с роутером по беспроводной сети, но на первичном этапе настройки лучше использовать кабель.
Если при попытке открыть страницу авторизации видите настройки роутера, следуйте пошаговой инструкции и установите пароль администратора, а если система потребует — название и пароль Wi-Fi-сети. Примените настройки. Затем снова попробуйте открыть страницу авторизации по инструкции ниже.
Попробуйте открыть любую страницу в браузере или введите в адресную строку login.beeline.ru или 83.102.180.167 — откроется страница авторизации, на которой вводим «Логин» — имя пользователя по договору (089/085) — и нажимаем «Войти».

После чего появится поле для ввода пароля. Вводим постоянный пароль от логина (договора) и нажимаем «Войти».

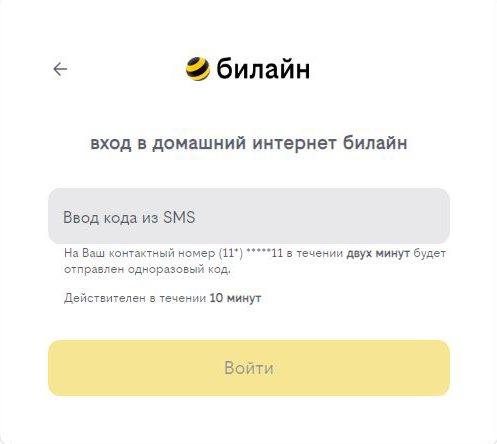
Если не помните текущий пароль, воспользуйтесь услугой «Получить одноразовый код для авторизации»: на номер для смс-уведомлений поступит код — введите его в поле «Код из SMS» и нажмите «Войти».
Появится окно с уведомлением, что вход выполнен.
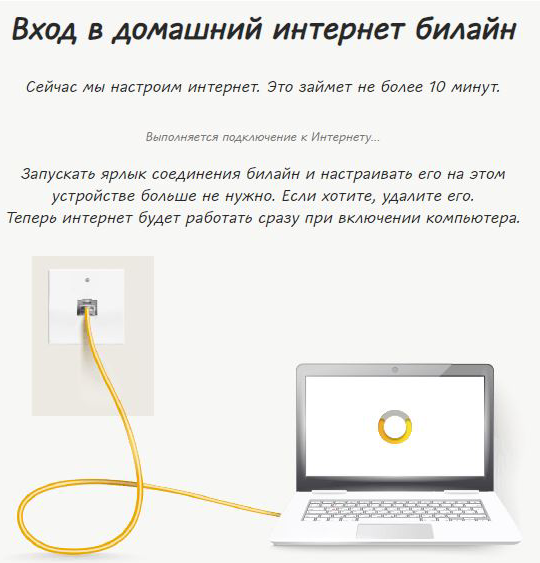
Подождите 10 минут и затем попробуйте воспользоваться интернетом. Если не сработало, перезагрузите роутер и повторите попытку.
Используйте аппаратный сброс настроек, если требуется настроить устройство заново (удалить все пользовательские настройки), нет доступа к веб-странице интерфейса настроек роутера, после настройки роутера интернет-соединение не установилось или пароль доступа к нему был утерян.
Внимание! При выполнении аппаратного сброса настроек все пользовательские установки будут сброшены на заводские параметры!
На корпусе устройства имеется углубленная кнопка СБРОС (RESET, RESTORE), позволяющая сбросить настройки на заводские установки. Кнопку СБРОС (RESET, RESTORE) вы сможете найти на той же стороне корпуса роутера, где располагаются остальные разъемы и кнопки. В редких случаях кнопка может располагаться на дне роутера.
Для того, чтобы сбросить настройки роутера на заводские установки выполните следующие действия:
Включите питание роутера и дождитесь полной загрузки устройства. Нажмите кнопку СБРОС (RESET, RESTORE), используя заостренный тонкий предмет (например, скрепку) и удерживайте 30 секунд, затем отпустите кнопку.
После этого роутер перезагрузится с установками по умолчанию (заводскими настройками) и потребуется повторная его настройка.
После настройки роутера проверьте работу Интернета, открыв любую Web-страницу
Тарифы на Домашний интернет в Москве
для дома 200 Акция ›
200
Мбит/с
Wi-Fi-роутер
не входит в тариф
В тариф не входит Wi-Fi-роутер. Вы можете взять Wi-Fi-роутер в аренду за 100,00 ₽/мес!
для дома 500 Акция ›
500
Мбит/с
Wi-Fi-роутер
не входит в тариф
В тариф не входит Wi-Fi-роутер. Вы можете взять Wi-Fi-роутер в аренду за 100,00 ₽/мес!
для игр Акция ›
600
Мбит/с
Wi-Fi-роутер
не входит в тариф
В тариф не входит Wi-Fi-роутер. Вы можете взять Wi-Fi-роутер в аренду за 100,00 ₽/мес!
Домашний интернет с ТВ и мобильной связью ещё выгоднее

© 2020 TP-Link 1910012856 REV1.0.0
User Guide
AX5400 Wi-Fi 6 Router
Archer AX73

Contents
About This Guide . . . . . . . . . . . . . . . . . . . . . . . . . . . . . . . . . . . . . . . . . . . . . . . . . . . . .1
Chapter 1. Get to Know About Your Router . . . . . . . . . . . . . . . . . . . . . . . . . . .3
1. 1. Product Overview. . . . . . . . . . . . . . . . . . . . . . . . . . . . . . . . . . . . . . . . . . . . . . . . . . . . . . . . . . . . 4
1. 2. Appearance . . . . . . . . . . . . . . . . . . . . . . . . . . . . . . . . . . . . . . . . . . . . . . . . . . . . . . . . . . . . . . . . . 4
1. 2. 1. Top Panel . . . . . . . . . . . . . . . . . . . . . . . . . . . . . . . . . . . . . . . . . . . . . . . . . . . . . . . . . . . . . 4
1. 2. 2. Back Panel . . . . . . . . . . . . . . . . . . . . . . . . . . . . . . . . . . . . . . . . . . . . . . . . . . . . . . . . . . . . 5
1. 2. 3. Side Panel. . . . . . . . . . . . . . . . . . . . . . . . . . . . . . . . . . . . . . . . . . . . . . . . . . . . . . . . . . . . . 6
Chapter 2. Connect the Hardware . . . . . . . . . . . . . . . . . . . . . . . . . . . . . . . . . . . .7
2. 1. Position Your Router . . . . . . . . . . . . . . . . . . . . . . . . . . . . . . . . . . . . . . . . . . . . . . . . . . . . . . . . . 8
2. 2. Connect Your Router. . . . . . . . . . . . . . . . . . . . . . . . . . . . . . . . . . . . . . . . . . . . . . . . . . . . . . . . . 8
Chapter 3. Log In to Your Router. . . . . . . . . . . . . . . . . . . . . . . . . . . . . . . . . . . . 11
Chapter 4. Set Up Internet Connection . . . . . . . . . . . . . . . . . . . . . . . . . . . . . 13
4. 1. Use Quick Setup Wizard . . . . . . . . . . . . . . . . . . . . . . . . . . . . . . . . . . . . . . . . . . . . . . . . . . . . 14
4. 2. Quick Setup Via TP-Link Tether App. . . . . . . . . . . . . . . . . . . . . . . . . . . . . . . . . . . . . . . . . 14
4. 3. Manually Set Up Your Internet Connection . . . . . . . . . . . . . . . . . . . . . . . . . . . . . . . . . . 15
4. 4. Set Up the Router as an Access Point . . . . . . . . . . . . . . . . . . . . . . . . . . . . . . . . . . . . . . . 18
4. 5. Set Up an IPv6 Internet Connection . . . . . . . . . . . . . . . . . . . . . . . . . . . . . . . . . . . . . . . . . 18
Chapter 5. TP-Link Cloud Service . . . . . . . . . . . . . . . . . . . . . . . . . . . . . . . . . . 22
5. 1. Register a TP-Link ID. . . . . . . . . . . . . . . . . . . . . . . . . . . . . . . . . . . . . . . . . . . . . . . . . . . . . . . . 23
5. 2. Change Your TP-Link ID Information. . . . . . . . . . . . . . . . . . . . . . . . . . . . . . . . . . . . . . . . . 23
5. 3. Manage the User TP-Link IDs . . . . . . . . . . . . . . . . . . . . . . . . . . . . . . . . . . . . . . . . . . . . . . . 24
5. 3. 1. Add TP-Link ID to Manage the Router . . . . . . . . . . . . . . . . . . . . . . . . . . . . . . . . . 25
5. 3. 2. Remove TP-Link ID(s) from Managing the Router . . . . . . . . . . . . . . . . . . . . . . 25
5. 4. Manage the Router via the TP-Link Tether App . . . . . . . . . . . . . . . . . . . . . . . . . . . . . . 26
Chapter 6. Wireless Settings . . . . . . . . . . . . . . . . . . . . . . . . . . . . . . . . . . . . . . . 27
6. 1. Specify Wireless Settings . . . . . . . . . . . . . . . . . . . . . . . . . . . . . . . . . . . . . . . . . . . . . . . . . . 28
6. 2. Schedule Your Wireless Function . . . . . . . . . . . . . . . . . . . . . . . . . . . . . . . . . . . . . . . . . . . 30
6. 3. Use WPS for Wireless Connection . . . . . . . . . . . . . . . . . . . . . . . . . . . . . . . . . . . . . . . . . . 30
6. 3. 1. Connect via the Client’s PIN . . . . . . . . . . . . . . . . . . . . . . . . . . . . . . . . . . . . . . . . . . 31

6. 3. 2. Connect via the Router’s PIN . . . . . . . . . . . . . . . . . . . . . . . . . . . . . . . . . . . . . . . . . 31
6. 3. 3. Push the WPS Button. . . . . . . . . . . . . . . . . . . . . . . . . . . . . . . . . . . . . . . . . . . . . . . . . 31
6. 4. Advanced Wireless Settings . . . . . . . . . . . . . . . . . . . . . . . . . . . . . . . . . . . . . . . . . . . . . . . . 32
Chapter 7. Guest Network. . . . . . . . . . . . . . . . . . . . . . . . . . . . . . . . . . . . . . . . . . 34
7. 1. Create a Network for Guests . . . . . . . . . . . . . . . . . . . . . . . . . . . . . . . . . . . . . . . . . . . . . . . 35
7. 2. Customize Guest Network Options. . . . . . . . . . . . . . . . . . . . . . . . . . . . . . . . . . . . . . . . . . 36
Chapter 8. USB Settings. . . . . . . . . . . . . . . . . . . . . . . . . . . . . . . . . . . . . . . . . . . . 37
8. 1. Access the USB Storage Device . . . . . . . . . . . . . . . . . . . . . . . . . . . . . . . . . . . . . . . . . . . . 38
8. 1. 1. Access the USB Device Locally. . . . . . . . . . . . . . . . . . . . . . . . . . . . . . . . . . . . . . . 38
8. 1. 2. Access the USB Device Remotely . . . . . . . . . . . . . . . . . . . . . . . . . . . . . . . . . . . . 39
8. 1. 3. Customize the Access Settings. . . . . . . . . . . . . . . . . . . . . . . . . . . . . . . . . . . . . . . 41
8. 2. Media Sharing . . . . . . . . . . . . . . . . . . . . . . . . . . . . . . . . . . . . . . . . . . . . . . . . . . . . . . . . . . . . . . 43
8. 3. Time Machine . . . . . . . . . . . . . . . . . . . . . . . . . . . . . . . . . . . . . . . . . . . . . . . . . . . . . . . . . . . . . . 44
Chapter 9. HomeShield . . . . . . . . . . . . . . . . . . . . . . . . . . . . . . . . . . . . . . . . . . . . 46
9. 1. Network Security . . . . . . . . . . . . . . . . . . . . . . . . . . . . . . . . . . . . . . . . . . . . . . . . . . . . . . . . . . . 47
9. 2. Parental Controls . . . . . . . . . . . . . . . . . . . . . . . . . . . . . . . . . . . . . . . . . . . . . . . . . . . . . . . . . . . 47
9. 3. Network Analysis & Optimization. . . . . . . . . . . . . . . . . . . . . . . . . . . . . . . . . . . . . . . . . . . . 48
Chapter 10. OneMesh with Seamless Roaming . . . . . . . . . . . . . . . . . . . . . . 50
10. 1. Set Up a OneMesh Network. . . . . . . . . . . . . . . . . . . . . . . . . . . . . . . . . . . . . . . . . . . . . . . . . 51
10. 2. Manage Devices in the OneMesh Network . . . . . . . . . . . . . . . . . . . . . . . . . . . . . . . . . . 53
Chapter 11. Network Security . . . . . . . . . . . . . . . . . . . . . . . . . . . . . . . . . . . . . . . 55
11. 1. Protect the Network from Cyber Attacks . . . . . . . . . . . . . . . . . . . . . . . . . . . . . . . . . . . . 56
11. 2. Access Control . . . . . . . . . . . . . . . . . . . . . . . . . . . . . . . . . . . . . . . . . . . . . . . . . . . . . . . . . . . . . 56
11. 3. IP & MAC Binding . . . . . . . . . . . . . . . . . . . . . . . . . . . . . . . . . . . . . . . . . . . . . . . . . . . . . . . . . . . 58
Chapter 12. NAT Forwarding. . . . . . . . . . . . . . . . . . . . . . . . . . . . . . . . . . . . . . . . . 61
12. 1. Share Local Resources on the Internet by Port Forwarding . . . . . . . . . . . . . . . . . . 62
12. 2. Open Ports Dynamically by Port Triggering . . . . . . . . . . . . . . . . . . . . . . . . . . . . . . . . . . 64
12. 3. Make Applications Free from Port Restriction by DMZ . . . . . . . . . . . . . . . . . . . . . . . 65
12. 4. Make Xbox Online Games Run Smoothly by UPnP . . . . . . . . . . . . . . . . . . . . . . . . . . . 66
Chapter 13. VPN Server . . . . . . . . . . . . . . . . . . . . . . . . . . . . . . . . . . . . . . . . . . . . . 68
13. 1. Use OpenVPN to Access Your Home Network . . . . . . . . . . . . . . . . . . . . . . . . . . . . . . . 69
13. 2. Use PPTP VPN to Access Your Home Network . . . . . . . . . . . . . . . . . . . . . . . . . . . . . . 70

Chapter 14. Customize Your Network Settings. . . . . . . . . . . . . . . . . . . . . . . 76
14. 1. Change the LAN Settings . . . . . . . . . . . . . . . . . . . . . . . . . . . . . . . . . . . . . . . . . . . . . . . . . . . 77
14. 2. Configure to Support IPTV Service. . . . . . . . . . . . . . . . . . . . . . . . . . . . . . . . . . . . . . . . . . 77
14. 3. Specify DHCP Server Settings . . . . . . . . . . . . . . . . . . . . . . . . . . . . . . . . . . . . . . . . . . . . . . 79
14. 4. Set Up a Dynamic DNS Service Account . . . . . . . . . . . . . . . . . . . . . . . . . . . . . . . . . . . . 80
14. 5. Create Static Routes. . . . . . . . . . . . . . . . . . . . . . . . . . . . . . . . . . . . . . . . . . . . . . . . . . . . . . . . 81
Chapter 15. Manage the Router . . . . . . . . . . . . . . . . . . . . . . . . . . . . . . . . . . . . . 84
15. 1. Upgrade the Firmware . . . . . . . . . . . . . . . . . . . . . . . . . . . . . . . . . . . . . . . . . . . . . . . . . . . . . . 85
15. 1. 1. Auto Update . . . . . . . . . . . . . . . . . . . . . . . . . . . . . . . . . . . . . . . . . . . . . . . . . . . . . . . . 85
15. 1. 2. Online Upgrade . . . . . . . . . . . . . . . . . . . . . . . . . . . . . . . . . . . . . . . . . . . . . . . . . . . . . 85
15. 1. 3. Local Upgrade . . . . . . . . . . . . . . . . . . . . . . . . . . . . . . . . . . . . . . . . . . . . . . . . . . . . . . 86
15. 2. Backup and Restore Configuration Settings . . . . . . . . . . . . . . . . . . . . . . . . . . . . . . . . . 87
15. 3. Change the Login Password . . . . . . . . . . . . . . . . . . . . . . . . . . . . . . . . . . . . . . . . . . . . . . . . 88
15. 4. Password Recovery. . . . . . . . . . . . . . . . . . . . . . . . . . . . . . . . . . . . . . . . . . . . . . . . . . . . . . . . . 89
15. 5. Local Management . . . . . . . . . . . . . . . . . . . . . . . . . . . . . . . . . . . . . . . . . . . . . . . . . . . . . . . . . 90
15. 6. Remote Management . . . . . . . . . . . . . . . . . . . . . . . . . . . . . . . . . . . . . . . . . . . . . . . . . . . . . . . 91
15. 7. System Log. . . . . . . . . . . . . . . . . . . . . . . . . . . . . . . . . . . . . . . . . . . . . . . . . . . . . . . . . . . . . . . . . 93
15. 8. Test the Network Connectivity . . . . . . . . . . . . . . . . . . . . . . . . . . . . . . . . . . . . . . . . . . . . . . 95
15. 9. Set Up System Time . . . . . . . . . . . . . . . . . . . . . . . . . . . . . . . . . . . . . . . . . . . . . . . . . . . . . . . . 97
15. 10. Set the Router to Reboot Regularly. . . . . . . . . . . . . . . . . . . . . . . . . . . . . . . . . . . . . . . . . . 99
15. 11. Control the LED. . . . . . . . . . . . . . . . . . . . . . . . . . . . . . . . . . . . . . . . . . . . . . . . . . . . . . . . . . . .100
FAQ . . . . . . . . . . . . . . . . . . . . . . . . . . . . . . . . . . . . . . . . . . . . . . . . . . . . . . . . . . . . . . . . 101
1
About This Guide
This guide is a complement of Quick Installation Guide. The Quick Installation Guide
instructs you on quick internet setup, and this guide provides details of each function
and shows you the way to configure these functions appropriate to your needs.
Note: Features available in the router may vary by model and software version. Router
availability may also vary by region or ISP. All images, steps, and descriptions in this
guide are only examples and may not reflect your actual Router experience.
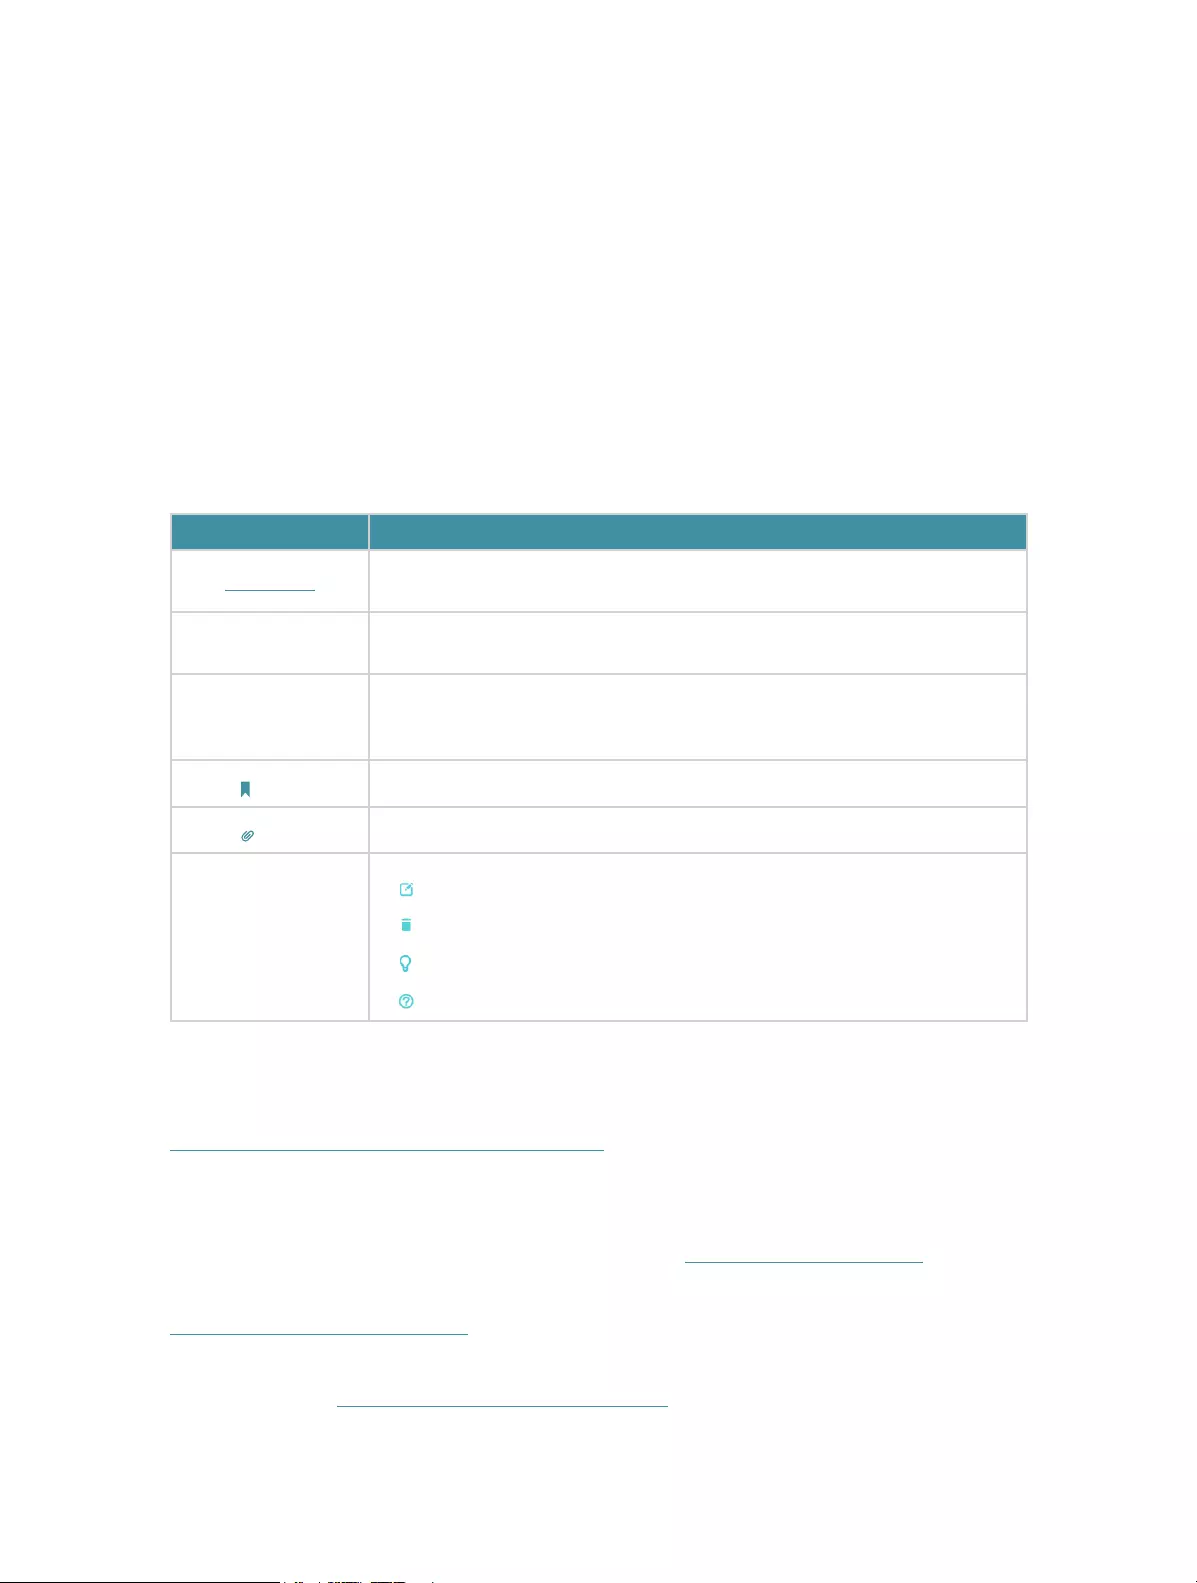
Conventions
In this guide the following conventions are used:
Convention Description
Underlined Underlined words or phrases are hyperlinks. You can click to redirect to a
website or a specific section.
Teal Contents to be emphasized and texts on the web page are in teal, including the
menus, items, buttons, etc.
>
The menu structures to show the path to load the corresponding page. For
example, Advanced > Wireless > WDS means the WDS function page is under
the Wireless menu that is located in the Advanced tab.
Note: Ignoring this type of note might result in a malfunction or damage to the device.
Tips: Indicates important information that helps you make better use of your device.
symbols on the web
page
• Click to edit the corresponding entry.
• Click to delete the corresponding entry.
• click to enable or disable the corresponding entry.
• Click to view more information about items on the page.
More Info
The latest software, management app and utility can be found at Download Center at
https://www.tp-link.com/support/download/.
The Quick Installation Guide can be found where you find this guide or inside the
package of the router.
Specifications can be found on the product page at https://www.tp-link.com.
TP-Link Community is provided for you to discuss our products and share knowledge at
https://community.tp-link.com.
Our Technical Support contact information can be found at the Contact Technical
Support page at https://www.tp-link.com/support/.

2
*Maximum wireless signal rates are the physical rates derived from IEEE Standard
802.11 specifications. Actual wireless data throughput and wireless coverage are
not guaranteed and will vary as a result of 1) environmental factors, including building
materials, physical objects, and obstacles, 2) network conditions, including local
interference, volume and density of traffic, product location, network complexity, and
network overhead, and 3) client limitations, including rated performance, location,
connection, quality, and client condition.
*Use of Wi-Fi 6 (802.11ax), and features including OFDMA, MU-MIMO, 1024-QAM, and
HT160 require clients to also support the corresponding features.
*Saving clients’ battery power requires clients to also support the 802.11ax Wi-Fi
standard. Actual power reduction may vary as a result of network conditions, client
limitations, and environmental factors.
*Use of WPA3 requires clients to also support the corresponding feature.
*This router may not support all the mandatory features as ratified in Draft 3.0 of IEEE
802.11ax specification.
*Further software upgrades for feature availability may be required.

Chapter 1
Get to Know About Your
Router
This chapter introduces what the router can do and shows its appearance.
It chapter contains the following sections:
• Product Overview
• Appearance

4
Chapter 1 Get to Know About Your Router
1. 1. Product Overview
TP-Link AX router, with next-generation 802.11ax Wi-Fi Technology, achieves Wi-
Fi performance at its ultimate level. The revolutionary combination of OFDMA and
1024QAM improve throughput by 4 times and dramatically increase the whole network
capacity and efficiency. It’s also backwards compatible with 802.11a/b/g/n/ac.
Moreover, it is simple and convenient to set up and use the TP-Link router due to its
intuitive web interface and the powerful Tether app.
1. 2. Appearance
1. 2. 1. Top Panel
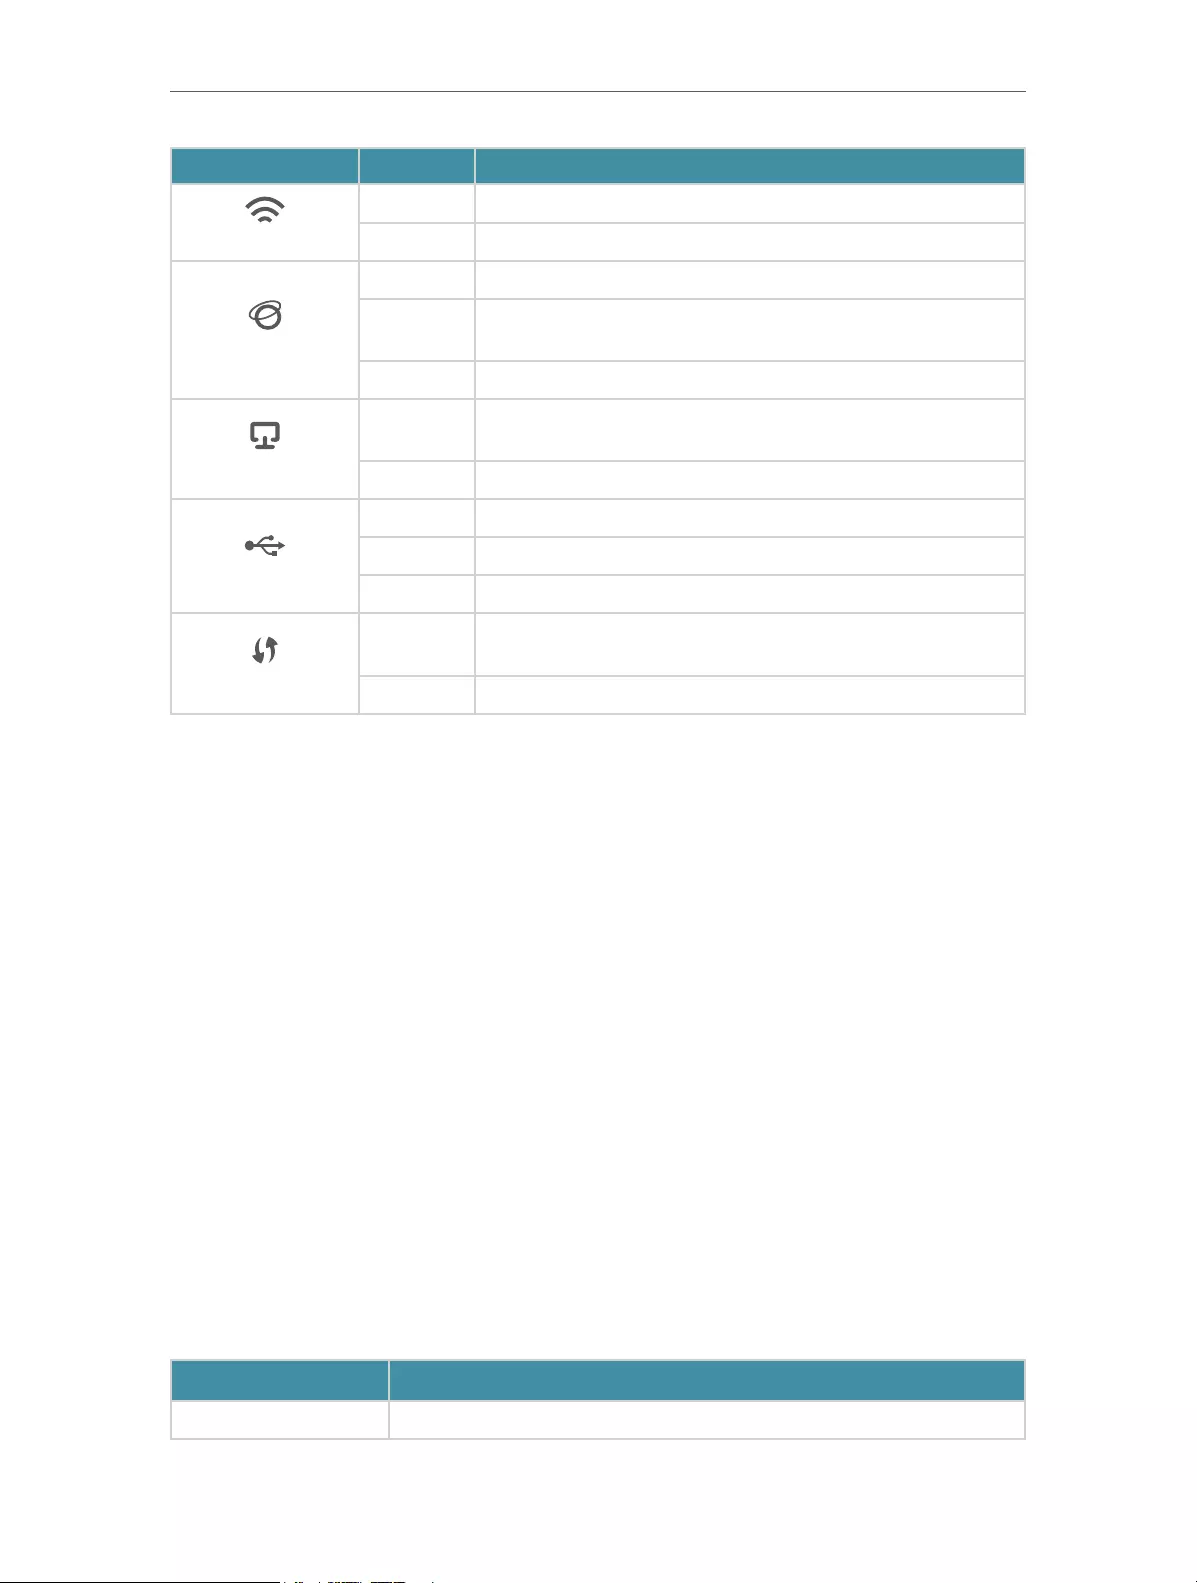
The router’s LEDs (view from left to right) are located on the front. You can check the
router’s working status by following the LED Explanation table.
LED Explanation
Name Status Indication
(Power)
On The system has started up successfully.
Flashing The system is starting up or the firmware is being upgraded. Do
not disconnect or power off your router.
Off Power is off.
(2.4 GHz Wireless)
On The 2.4 GHz wireless band is enabled.
Off The 2.4 GHz wireless band is disabled.
5
Chapter 1 Get to Know About Your Router
Name Status Indication
(5 GHz Wireless)
On The 5 GHz wireless band is enabled.
Off The 5 GHz wireless band is disabled.
(Internet)
Green On Internet service is available.
Orange On The router’s Internet port is connected, but the internet service
is not available.
Off The router’s Internet port is unplugged.
(Ethernet)
On At least one powered—on device is connected to the router’s
Ethernet port.
Off No powered-on device is connected to the router’s Ethernet port.
(USB)
On The inserted USB device is ready to use.
Blinking A USB device is being identified.
Off No device is plugged into the USB port.
(WPS)
On/Off This light remains on for 5 minutes when a WPS connection is
established, then turns off.
Blinking WPS connection is in progress. This may take up to 2 minutes.
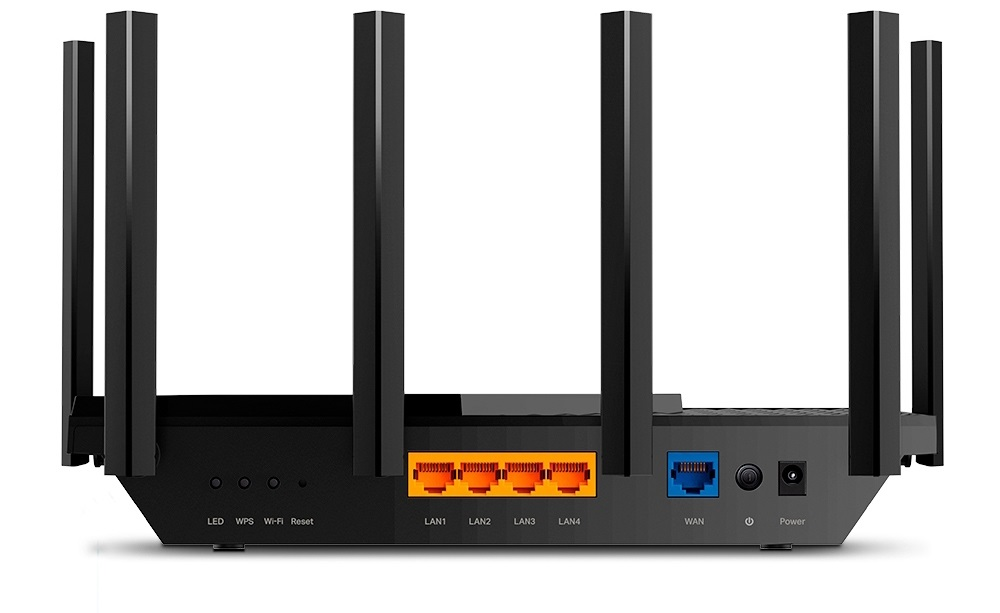
1. 2. 2. Back Panel
The following parts (view from left to right) are located on the back panel.
Button and Port Explanation
Item Description
LED Button Press the LED button for 1 second to turn on or off the LEDs of your router.

6
Chapter 1 Get to Know About Your Router
Item Description
WPS Button
Press this WPS button, and immediately press the WPS button on your client
device to start the WPS process. The LED of the router should change
from blinking to solid on, indicating successful WPS connection.
Wi-Fi Button Press and hold the Wi-Fi button for more than 2 seconds to turn on or off the
wireless function of your router.
Reset Button Press and hold the button until the Power LED blinks to reset the router to its
factory default settings.
LAN Port (1-4) For connecting your PC or other wired devices to the router.
WAN Port* For connecting to a modem or an Ethernet outlet.
Power On/Off Button Press this button to power on or off the router.
Power Port For connecting the router to a power socket via the provided power adapter.
1. 2. 3. Side Panel
The following part is located on the side panel.
Button and Port Explanation
Item Description
USB 3.0 Port For connecting a USB storage device to the router.

Chapter 2
Connect the Hardware
This chapter contains the following sections:
• Position Your Router
• Connect Your Router
8
Chapter 2 Connect the Hardware
2. 1. Position Your Router
• The product should not be located in a place where it will be exposed to moisture or
excessive heat.
• Place the router in a location where it can be connected to multiple devices as well as
to a power source.
• Make sure the cables and power cord are safely placed out of the way so they do not
create a tripping hazard.
• The router can be placed on a shelf or desktop.
• Keep the router away from devices with strong electromagnetic interference, such as
Bluetooth devices, cordless phones and microwaves.
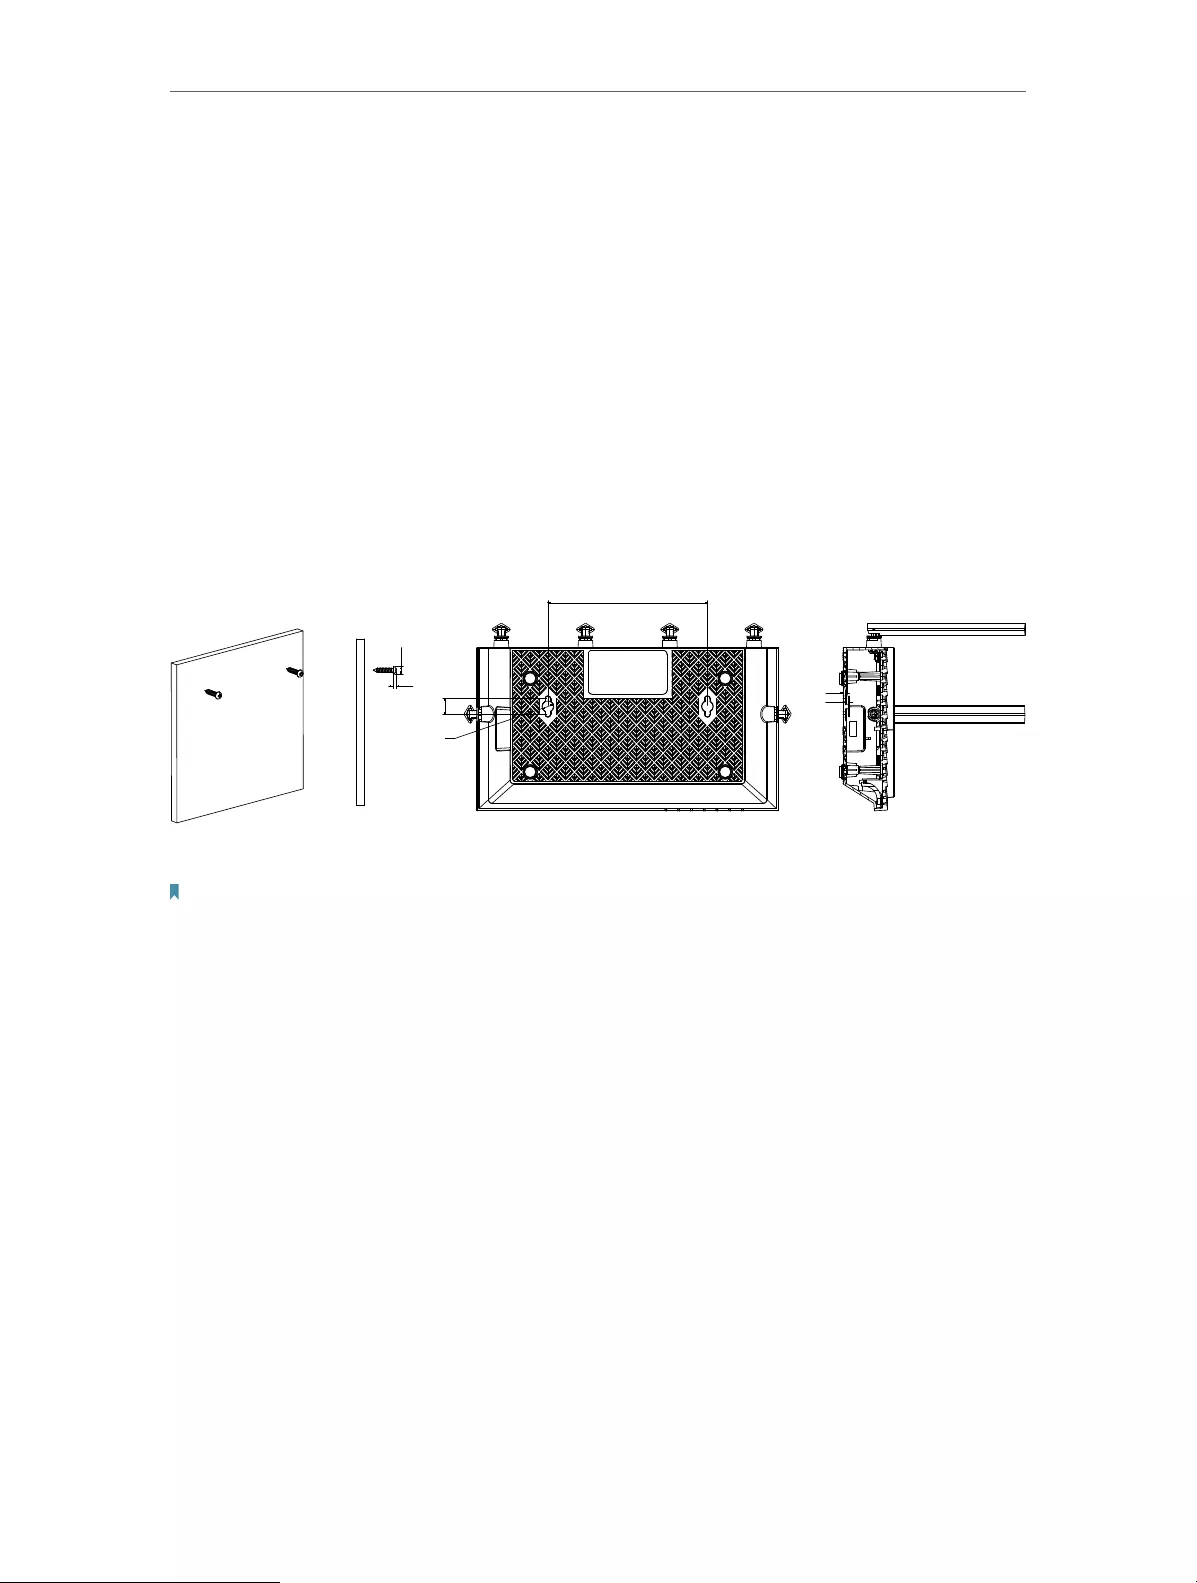
• Generally, the router is placed on a horizontal surface, such as on a shelf or desktop.
The device also can be mounted on the wall as shown in the following figure.
143.9
14
∅10
3
2
ΦD
H
NOTE:
5.207<D<8.179mm
H<3mm
Note:
The diameter of the screw head, 5.207mm<D<8.179mm, and the distance of two screws is 143.9mm. The screw that
project from the wall need around 5mm based, and the length of the screw need to be at least 20mm to withstand the
weight of the product.
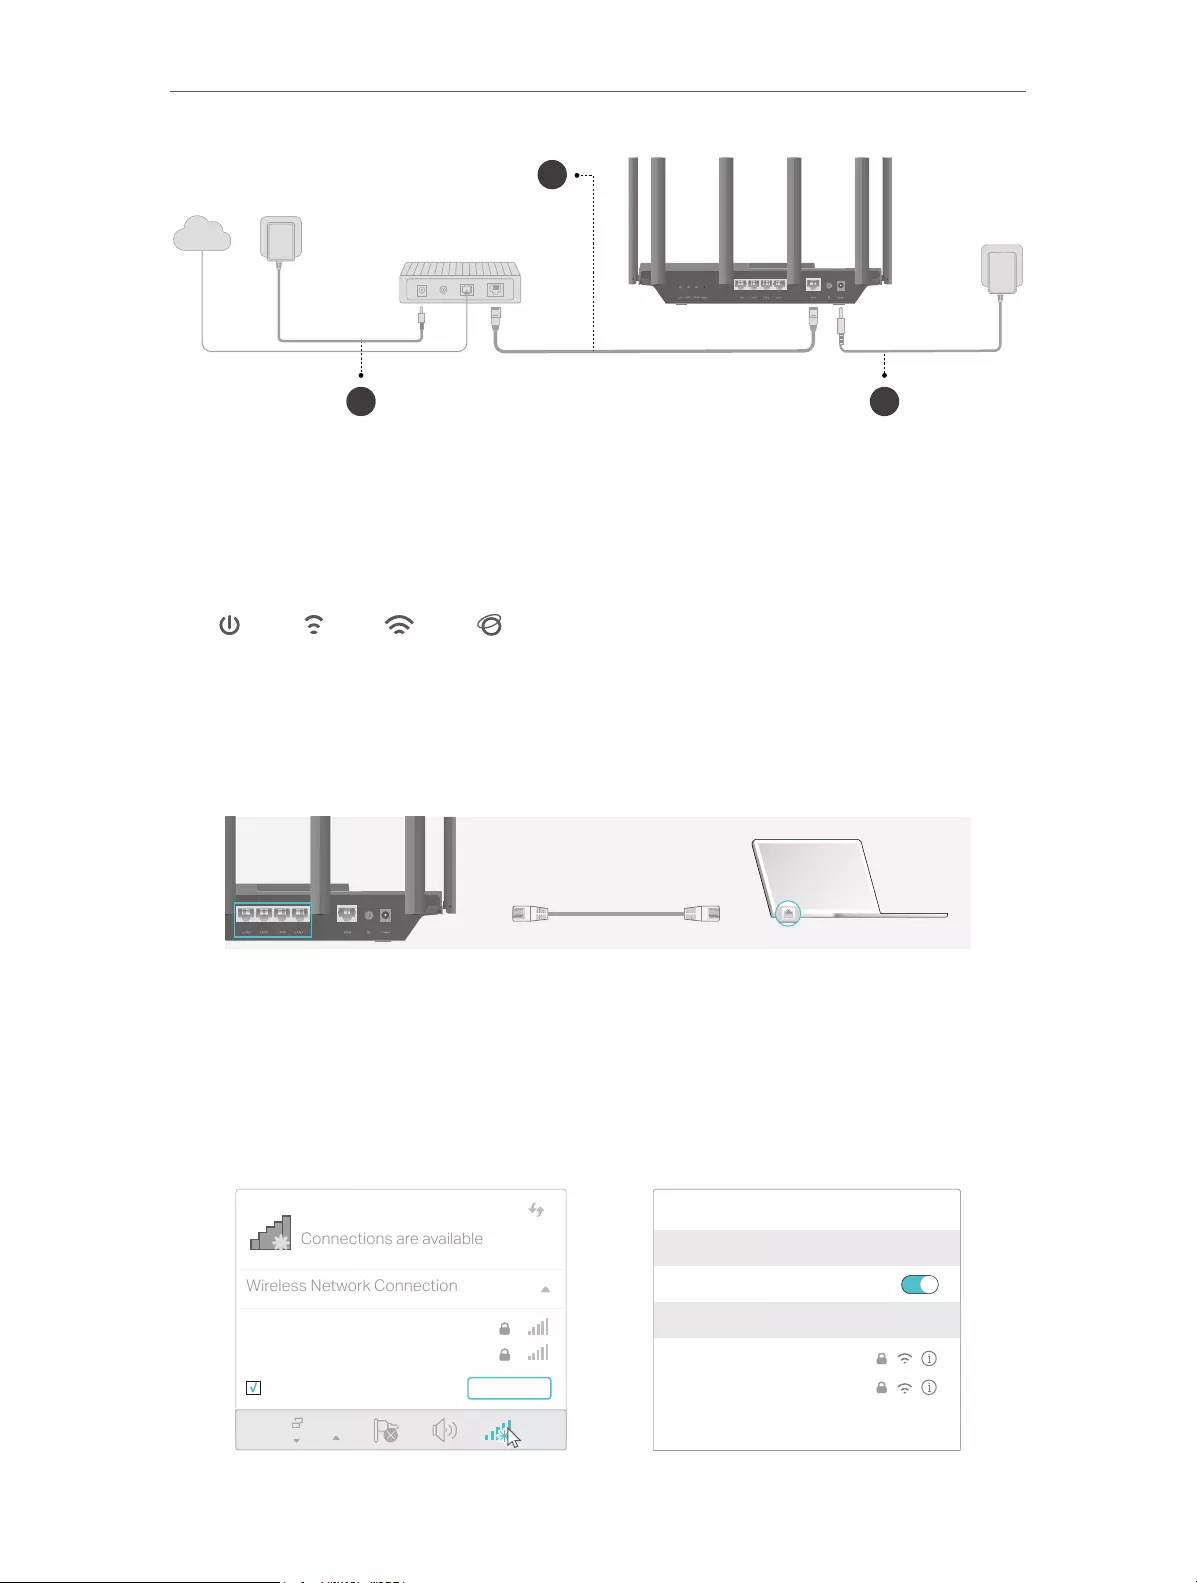
2. 2. Connect Your Router
Before you start:
1 ) Turn off your modem, if any, and remove the backup battery if it has one.
2 ) Place the router horizontally and orient the antennas vertically.
If your internet comes from an Ethernet outlet instead of a DSL / Cable / Satellite
modem, connect the router’s WAN port to it, then follow steps 3 and 4 to complete the
hardware connection.
9
Chapter 2 Connect the Hardware
2 3
Internet
1
1. Connect the powered-off modem to the router’s WAN port with an Ethernet cable.
2. Turn on the modem, and then wait about 2 minutes for it to restart.
3. Connect the power adapter to the router and turn on the router.
4. Verify that the hardware connection is correct by checking the following LEDs.
Power
Internet
2.4 GHz
5 GHz
5. Connect your computer to the router.
• Method 1: Wired
Turn off the Wi-Fi on your computer and connect the devices as shown below.
Ethernet cable
• Method 2: Wirelessly
1 ) Find the SSID (Network Name) and Wireless Password printed on the label at
the bottom of the router.
2 ) Click the network icon of your computer or go to Wi-Fi Settings of your smart
device, and then select the SSID to join the network.
Connections are available
Wireless Network Connection
TP-Link_XXXX
TP-Link_XXXX_5G
Connect automatically Connect
Wi-Fi
Wi-Fi
TP-Link_XXXX
TP-Link_XXXX_5G
CHOOSE A NETWORK…
Other…
< Settings
OR
Smart DeviceComputer
10
Chapter 2 Connect the Hardware
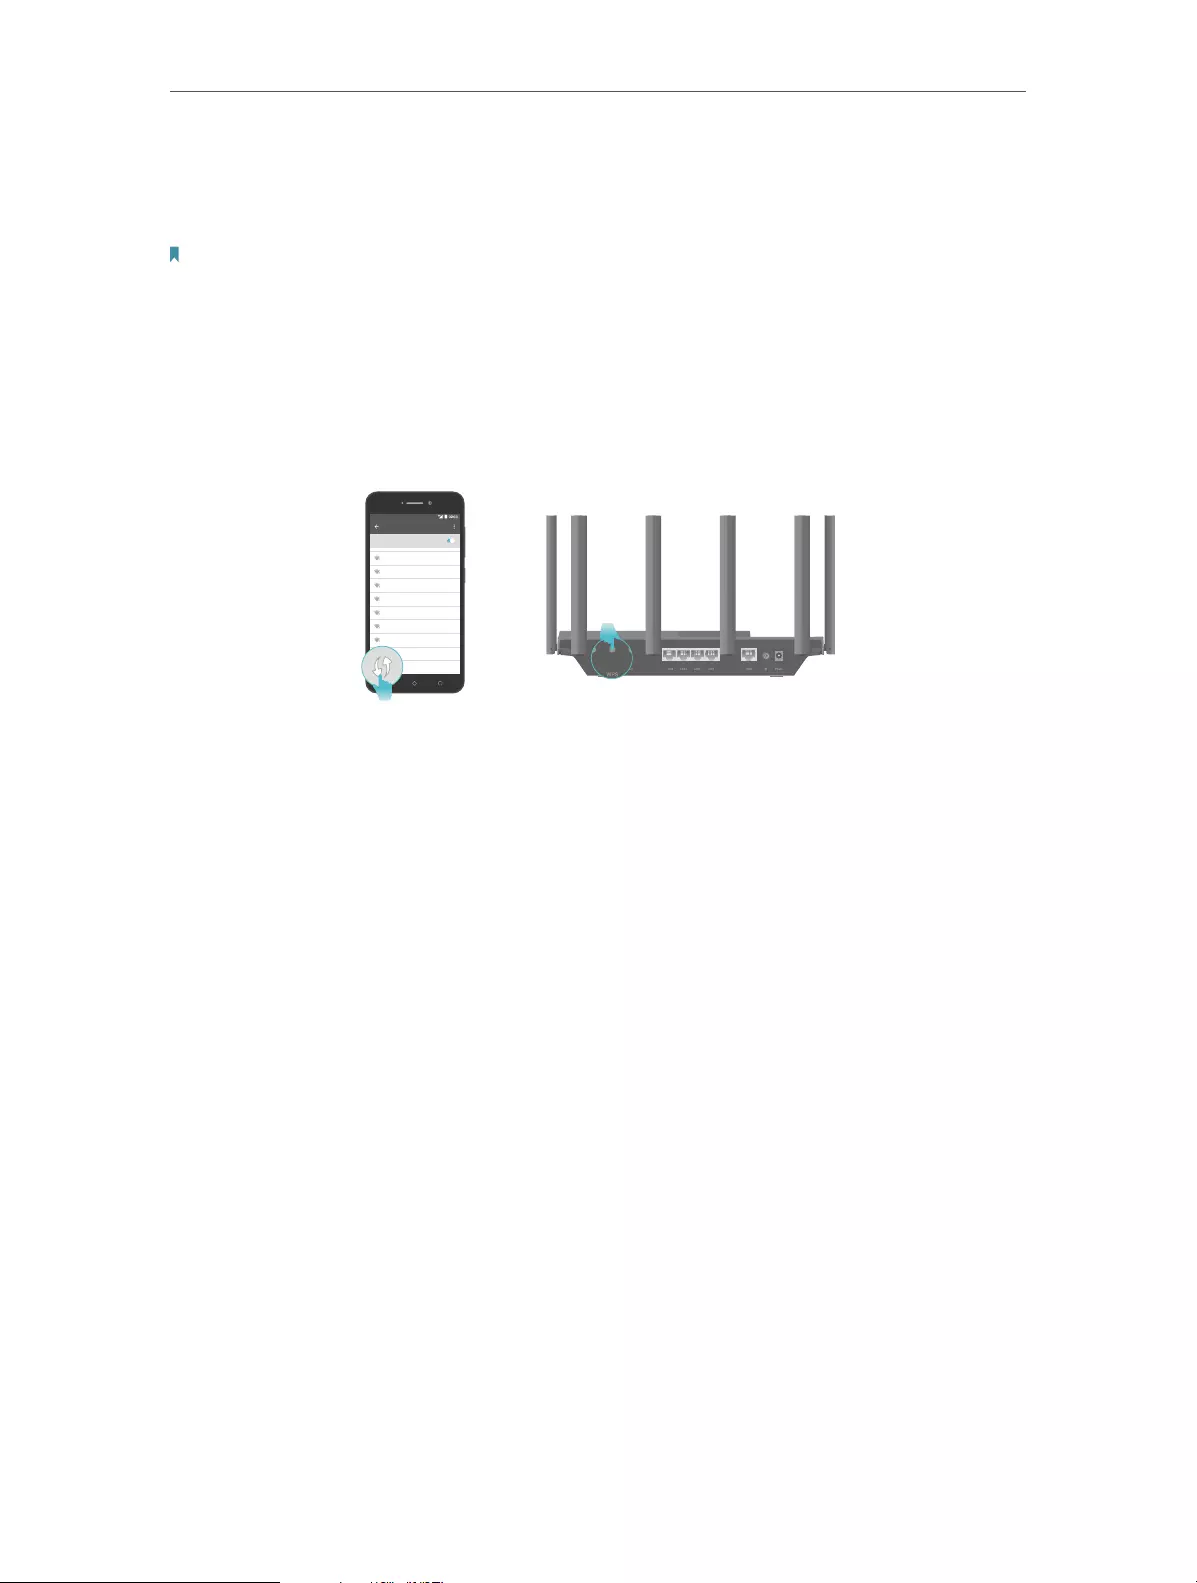
• Method 3: Use the WPS button
Wireless devices that support WPS, including Android phones, tablets, and most USB
network cards, can be connected to your router through this method.
Note:
• WPS is not supported by iOS devices.
• The WPS function cannot be configured if the wireless function of the router is disabled. Also, the WPS function will be
disabled if your wireless encryption is WEP. Please make sure the wireless function is enabled and is configured with
the appropriate encryption before configuring the WPS.
1 ) Tap the WPS icon on the device’s screen. Here we take an Android phone for
instance.
2 ) Within two minutes, press the WPS button on your router.
WLAN
On
TP-Link
MyHome
David
HomeNetwork
TP-Link_Home
TP-Link_Router
Test

Chapter 3
Log In to Your Router

12
Chapter 3 Log In to Your Router
With a web-based utility, it is easy to configure and manage the router. The web-based
utility can be used on any Windows, Mac OS or UNIX OS with a Web browser, such as
Microsoft Internet Explorer, Mozilla Firefox or Apple Safari.
Follow the steps below to log in to your router.
1. Set up the TCP/IP Protocol in Obtain an IP address automatically mode on your
computer.
2. Visit http://tplinkwifi.net, and create a login password for secure management
purposes. Then click Let’s Get Started to log in.
Note:
• If the login window does not appear, please refer to the FAQ Section.
• If you have registered a TP-Link ID and bound your cloud router to it, the login password you created here will be
invalid. Please log in to the cloud router using your TP-Link ID.

Chapter 4
Set Up Internet Connection
This chapter introduces how to connect your router to the internet. The router is
equipped with a web-based Quick Setup wizard. It has necessary ISP information built
in, automates many of the steps and verifies that those steps have been successfully
completed. Furthermore, you can also set up an IPv6 connection if your ISP provides
IPv6 service.
It contains the following sections:
• Use Quick Setup Wizard
• Quick Setup Via TP-Link Tether App
• Manually Set Up Your Internet Connection
• Set Up the Router as an Access Point
• Set Up an IPv6 Internet Connection
14
Chapter 4 Set Up Internet Connection
4. 1. Use Quick Setup Wizard
The Quick Setup Wizard will guide you to set up your router.
Tips:
If you need the IPv6 internet connection, please refer to the section of Set Up an IPv6 Internet Connection.
Follow the steps below to set up your router.
1. Visit http://tplinkwifi.net, and log in with the password you set for the router.
2. Follow the step-by-step instructions to complete Quick Setup configuration or go
to Advanced > Quick Setup for configuration to connect your router to the internet.
Then follow the step-by-step instructions to connect your router to the internet.
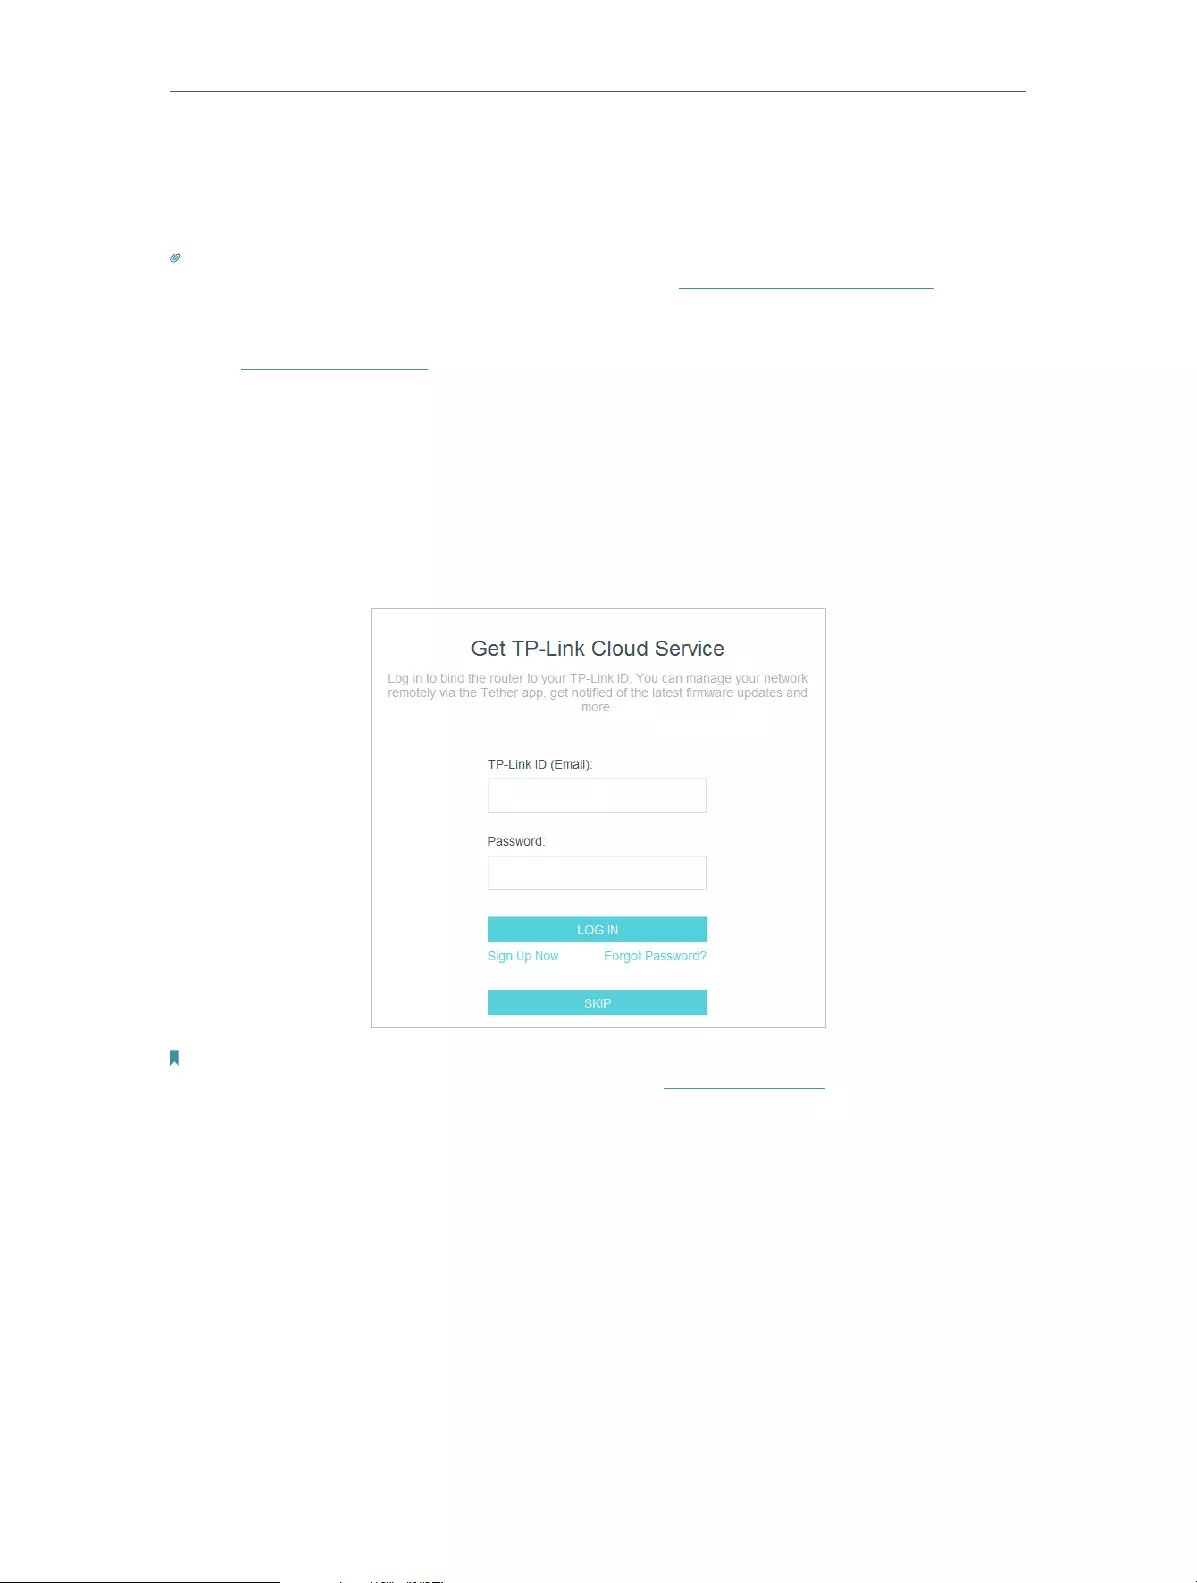
3. To enjoy a more complete service from TP-Link (remote management, TP-Link DDNS,
and more.), log in with your TP-Link ID or click Sign Up Now to get one. Then follow the
instructions to bind the cloud router to your TP-Link ID.
Note:
• To learn more about the TP-Link Cloud service, please refer to the TP-Link Cloud Service section.
• If you do not want to register a TP-Link ID now, you may click Skip to proceed.
• If you have changed the preset wireless network name (SSID) and wireless password during the Quick Setup process,
all your wireless devices must use the new SSID and password to connect to the router.
4. 2. Quick Setup Via TP-Link Tether App
The Tether app runs on iOS and Android devices, such as smartphones and tablets.
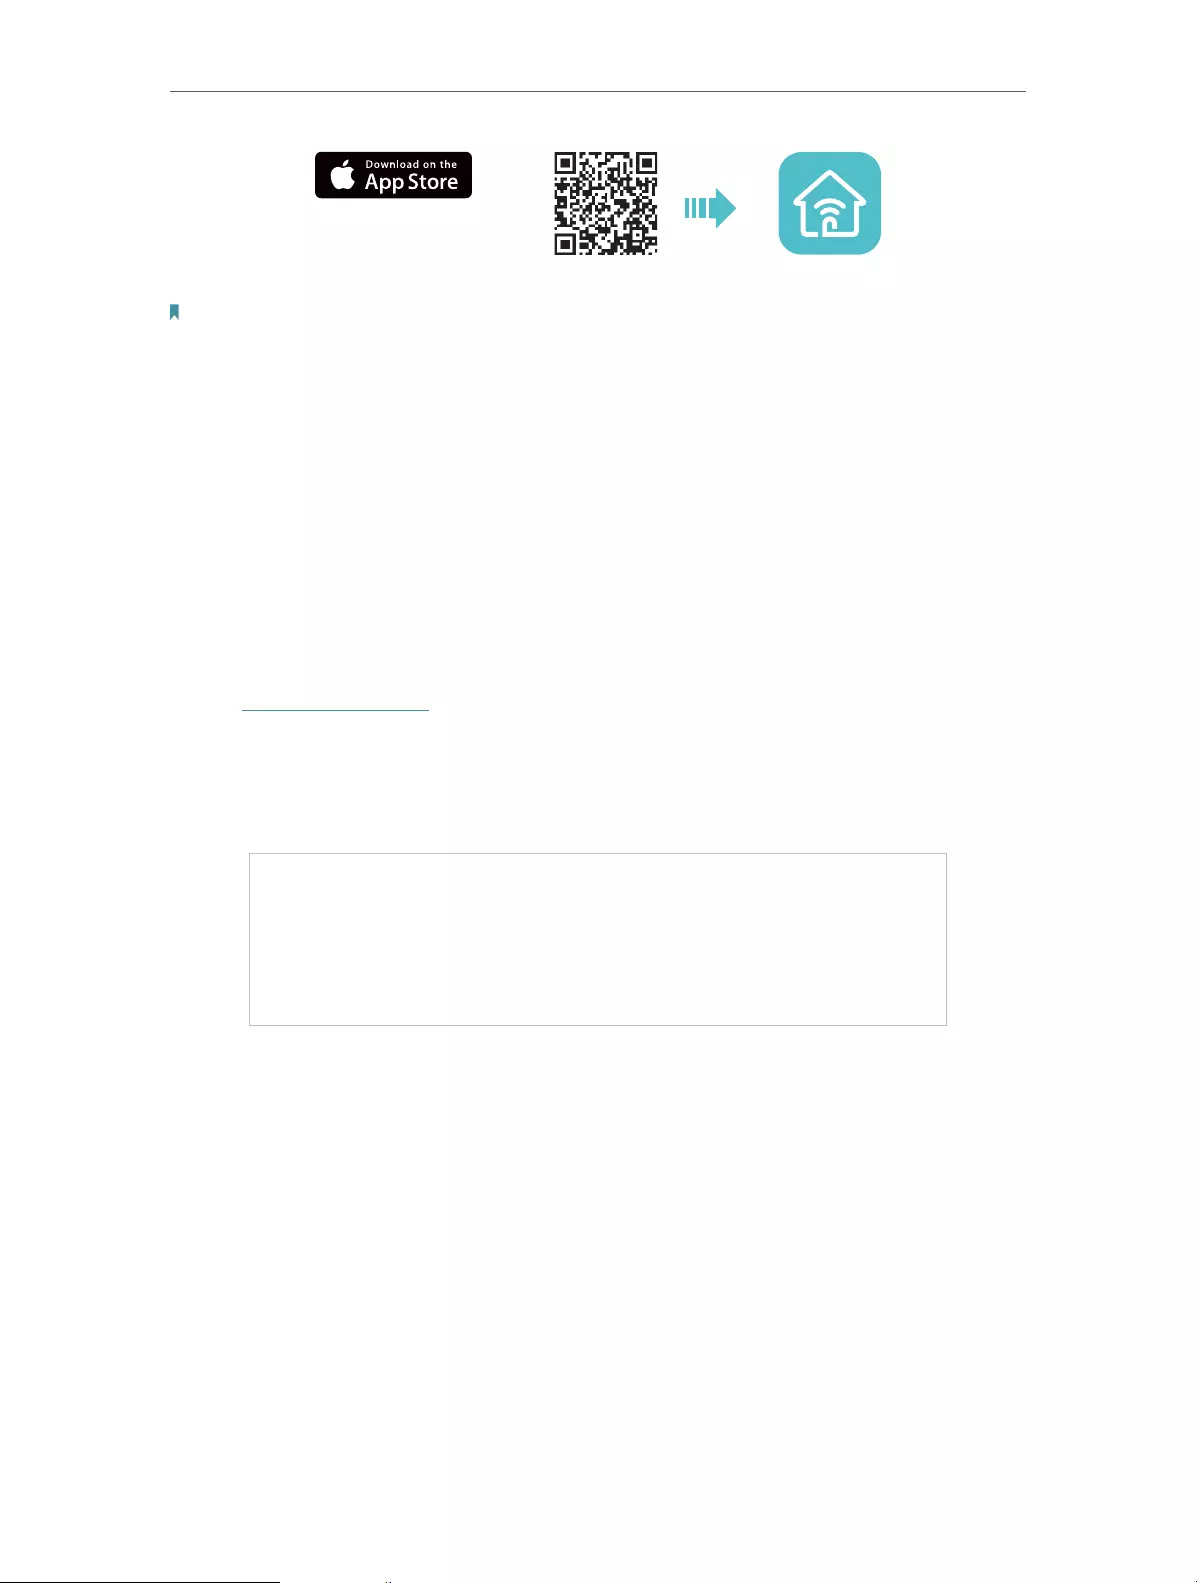
1. Launch the Apple App Store or Google Play store and search “TP-Link Tether” or
simply scan the QR code to download and install the app.
15
Chapter 4 Set Up Internet Connection
OR
2. Launch the Tether app and log in with your TP-Link ID.
Note: If you don’t have a TP-Link ID, create one first.
3. Tap the + button and select Router > Wireless Router. Follow the steps to complete
the setup and connect to the internet.
4. Connect your devices to the newly configured wireless networks of the router and
enjoy the internet!
4. 3. Manually Set Up Your Internet Connection
In this part, you can check your current internet connection settings. You can also
modify the settings according to the service information provided by your ISP.
Follow the steps below to check or modify your internet connection settings.
1. Visit http://tplinkwifi.net, and log in with your TP-Link ID or the password you set for
the router.
2. Go to Internet.
3. Select your internet connection type from the drop-down list.
4. Follow the instructions on the page to continue the configuration. Parameters on the
figures are just used for demonstration.
1 ) If you choose Dynamic IP, you need to select whether to clone the MAC address.
Dynamic IP users are usually equipped with a cable TV or fiber cable.

16
Chapter 4 Set Up Internet Connection
2 ) If you choose Static IP, enter the information provided by your ISP in the
corresponding fields.
3 ) If you choose PPPoE, enter the username and password provided by your ISP.
PPPoE users usually have DSL cable modems.

17
Chapter 4 Set Up Internet Connection
4 ) If you choose L2TP, enter the username and password and choose the
Secondary Connection provided by your ISP. Different parameters are needed
according to the Secondary Connection you have chosen.
5 ) If you choose PPTP, enter the username and password, and choose the
Secondary Connection provided by your ISP. Different parameters are needed
according to the Secondary Connection you have chosen.
5. Click Save.
Tips:
• If you use Dynamic IP and PPPoE and you are provided with any other parameters that are not required on the page,
please go to Advanced > Network > Internet to complete the configuration.
• If you still cannot access the internet, refer to the FAQ section for further instructions.

18
Chapter 4 Set Up Internet Connection
4. 4. Set Up the Router as an Access Point
The router can work as an access point, transforming your existing wired network to a
wireless one.
1. Visit http://tplinkwifi.net, and log in with your TP-Link ID or the password you set for
the router.
2. Go to Advanced > System > Operation Mode, select Access Point and click Save. The
router will reboot and switch to Access Point mode.
3. After rebooting, connect the router to your existing wired router via an Ethernet cable.
4. Log in again to the web management page http://tplinkwifi.net, and go to Advanced
> Quick Setup.
5. Configure your wireless settings and click Next.
6. Confirm the information and click Save. Now, you can enjoy Wi-Fi.
Tips:
• Functions, such as Parental Controls, QoS and NAT Forwarding, are not supported in the Access Point mode.
• Functions, such as Guest Network, are the same as those in the Router mode.
4. 5. Set Up an IPv6 Internet Connection
Your ISP provides information about one of the following IPv6 internet connection types:
PPPoE, Dynamic IP(SLAAC/DHCPv6), Static IP, 6to4 tunnel, Pass-Through (Bridge).
1. Visit http://tplinkwifi.net, and log in with your TP-Link ID or the password you set for
the router.

19
Chapter 4 Set Up Internet Connection
2. Go to Advanced > IPv6.
3. Enable IPv6 and select the internet connection type provided by your ISP.
Tips:
If you do not know what your internet connection type is, contact your ISP or judge according to the already known
information provided by your ISP.
4. Fill in information as required by different connection types.
1 ) Static IP: Fill in blanks and click Save.
2 ) Dynamic IP(SLAAC/DHCPv6): Click Advanced to input further information if
your ISP requires. Click Save and then click Renew.
3 ) PPPoE: By default, the router uses the IPv4 account to connect to the IPv6
server. Click Advanced to input further information if your ISP requires. Click
Save and then click Connect.

20
Chapter 4 Set Up Internet Connection
Note:
If your ISP provides two separate accounts for the IPv4 and IPv6 connections, manually enter the username and
password for the IPv6 connection.
4 ) 6to4 Tunnel: An IPv4 internet connection type is a prerequisite for this
connection type (Manually Set Up Your Internet Connection). Click Advanced to
input further information if your ISP requires. Click Save and then click Connect.
5 ) Pass-Through (Bridge): Click Save and skip to Step 6.

21
Chapter 4 Set Up Internet Connection
5. Configure LAN ports. Windows users are recommended to choose from the first two
types. Fill in Address Prefix provided by your ISP, and click Save.
6. Click Status to check whether you have successfully set up an IPv6 connection.
Tips:
Visit the FAQ section if there is no internet connection.

Chapter 5
TP-Link Cloud Service
TP-Link Cloud service provides a better way to manage your cloud devices. Log in to
your router with a TP-Link ID, and you can easily monitor and manage your home network
when you are out and about via the Tether app. To ensure that your router stays new and
gets better over time, the TP-Link Cloud will notify you when an important firmware
upgrade is available. Surely you can also manage multiple TP-Link Cloud devices with a
single TP-Link ID.
This chapter introduces how to register a new TP-Link ID, bind or unbind TP-Link IDs
to manage your router, and the Tether app with which you can manage your home
network no matter where you may find yourself.
It contains the following sections:
• Register a TP-Link ID
• Change Your TP-Link ID Information
• Manage the User TP-Link IDs
• Manage the Router via the TP-Link Tether App
23
Chapter 5 TP-Link Cloud Service
5. 1. Register a TP-Link ID
If you have skipped the registration during the Quick Setup process, you can:
1. Visit http://tplinkwifi.net, and log in with the password you set for the router.
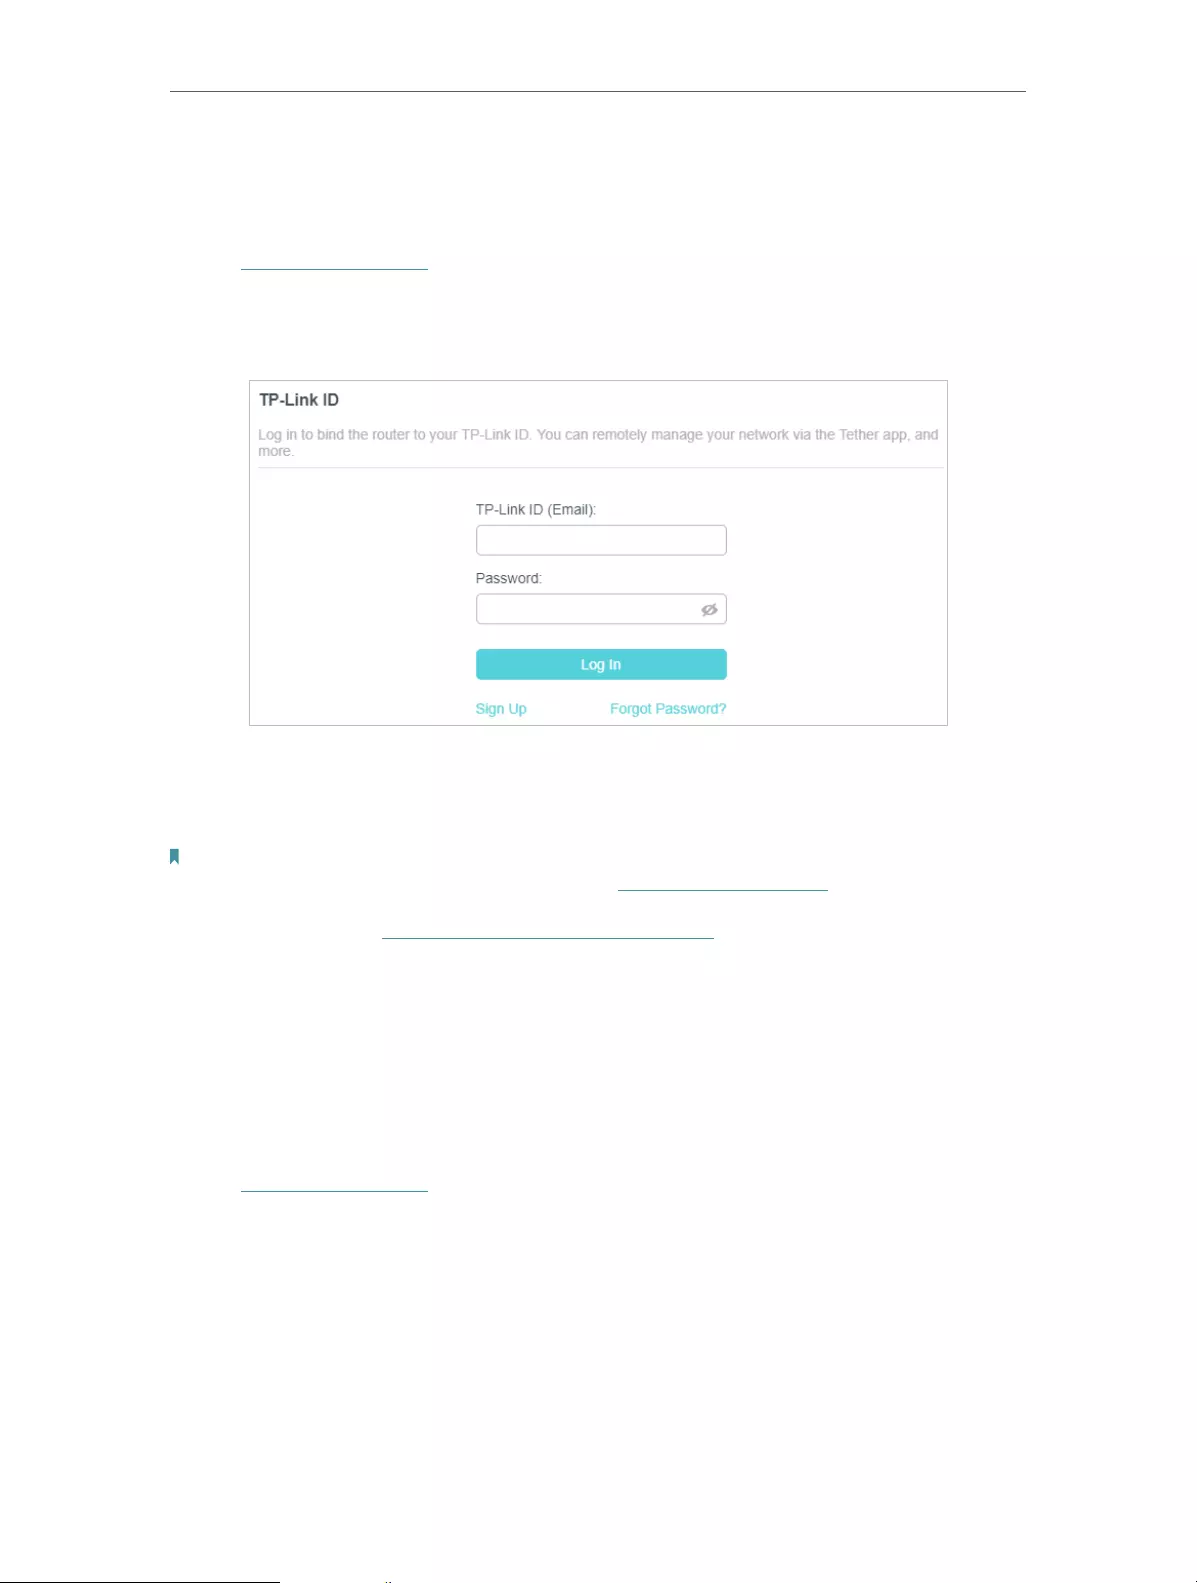
2. Go to Advanced > TP-Link ID or click TP-Link ID on the very top of the page.
3. Click Sign Up and follow the instructions to register a TP-Link ID.
4. After activating your TP-Link ID, come back to the TP-Link ID page to log in. The
TP-Link ID used to log in to the router for the first time will be automatically bound as
an Admin.
Note:
• To learn more about the Admin and User TP-Link ID, refer to Manage the User TP-Link IDs.
• Once you have registered a TP-Link ID on the web management page, you can only register another TP-Link ID via the
Tether APP. Please refer to Manage the Router via the TP-Link Tether App to install the app.
• If you want to unbind the admin TP-Link ID from your router, please go to Advanced > TP-Link ID, an click Unbind in the
Device Information section.
5. 2. Change Your TP-Link ID Information
Follow the steps below to change your email address and password of your TP-Link ID
as needed.
1. Visit http://tplinkwifi.net, and log in with your TP-Link ID.
2. Go to Advanced > TP-Link ID, and focus on the Account Information section.
• To change your email address:
1. Click behind the Email.
2. Enter the password of your TP-Link ID, then a new email address. And click Save.

24
Chapter 5 TP-Link Cloud Service
• To change your password:
1. Click behind the Password.
2. Enter the current password, then a new password twice. And click Save.
5. 3. Manage the User TP-Link IDs
The TP-Link ID used to log in to the router for the first time will be automatically bound
as the Admin account. An admin account can add or remove other TP-Link IDs to or

25
Chapter 5 TP-Link Cloud Service
from the same router as Users. All accounts can monitor and manage the router locally
or remotely, but user accounts cannot:
• Reset the router to its factory default settings either on the web management page
or in the Tether app.
• Add/remove other TP-Link IDs to/from the router.
5. 3. 1. Add TP-Link ID to Manage the Router
1. Visit http://tplinkwifi.net, and log in with your TP-Link ID.
2. Go to Advanced > TP-Link ID, and focus on the Bound Accounts section.
3. Click , enter another TP-Link ID as needed and click Save.
Note: If you need another TP-Link ID, please register a new one via the Tether app. Refer to Manage the Router via the
TP-Link Tether App to install the app and register a new TP-Link ID.
4. The new TP-Link ID will be displayed in the Bound Accounts table as a User.
5. 3. 2. Remove TP-Link ID(s) from Managing the Router
1. Visit http://tplinkwifi.net, and log in with your TP-Link ID.
2. Go to Advanced > TP-Link ID, and focus on the Bound Accounts section.
3. Tick the checkbox(es) of the TP-Link ID(s) you want to remove and click Unbind.

26
Chapter 5 TP-Link Cloud Service
5. 4. Manage the Router via the TP-Link Tether App
The Tether app runs on iOS and Android devices, such as smartphones and tablets.
1. Launch the Apple App Store or Google Play store and search “TP-Link Tether” or
simply scan the QR code to download and install the app.
OR
2. Launch the Tether app and log in with your TP-Link ID.
Note: If you don’t have a TP-Link ID, create one first.
3. Connect your device to the router’s wireless network.
4. Go back to the Tether app, select the model of your router and log in with the password
you set for the router.
5. Manage your router as needed.
Note: If you need to remotely access your router from your smart devices, you need to:
• Log in with your TP-Link ID. If you don’t have one, refer to Register a TP-Link ID.
• Make sure your smartphone or tablet can access the internet with cellular data or a Wi-Fi network.

Chapter 6
Wireless Settings
This chapter guides you on how to configure the wireless settings.
It contains the following sections:
• Specify Wireless Settings
• Schedule Your Wireless Function
• Use WPS for Wireless Connection
• Advanced Wireless Settings
28
Chapter 6 Wireless Settings
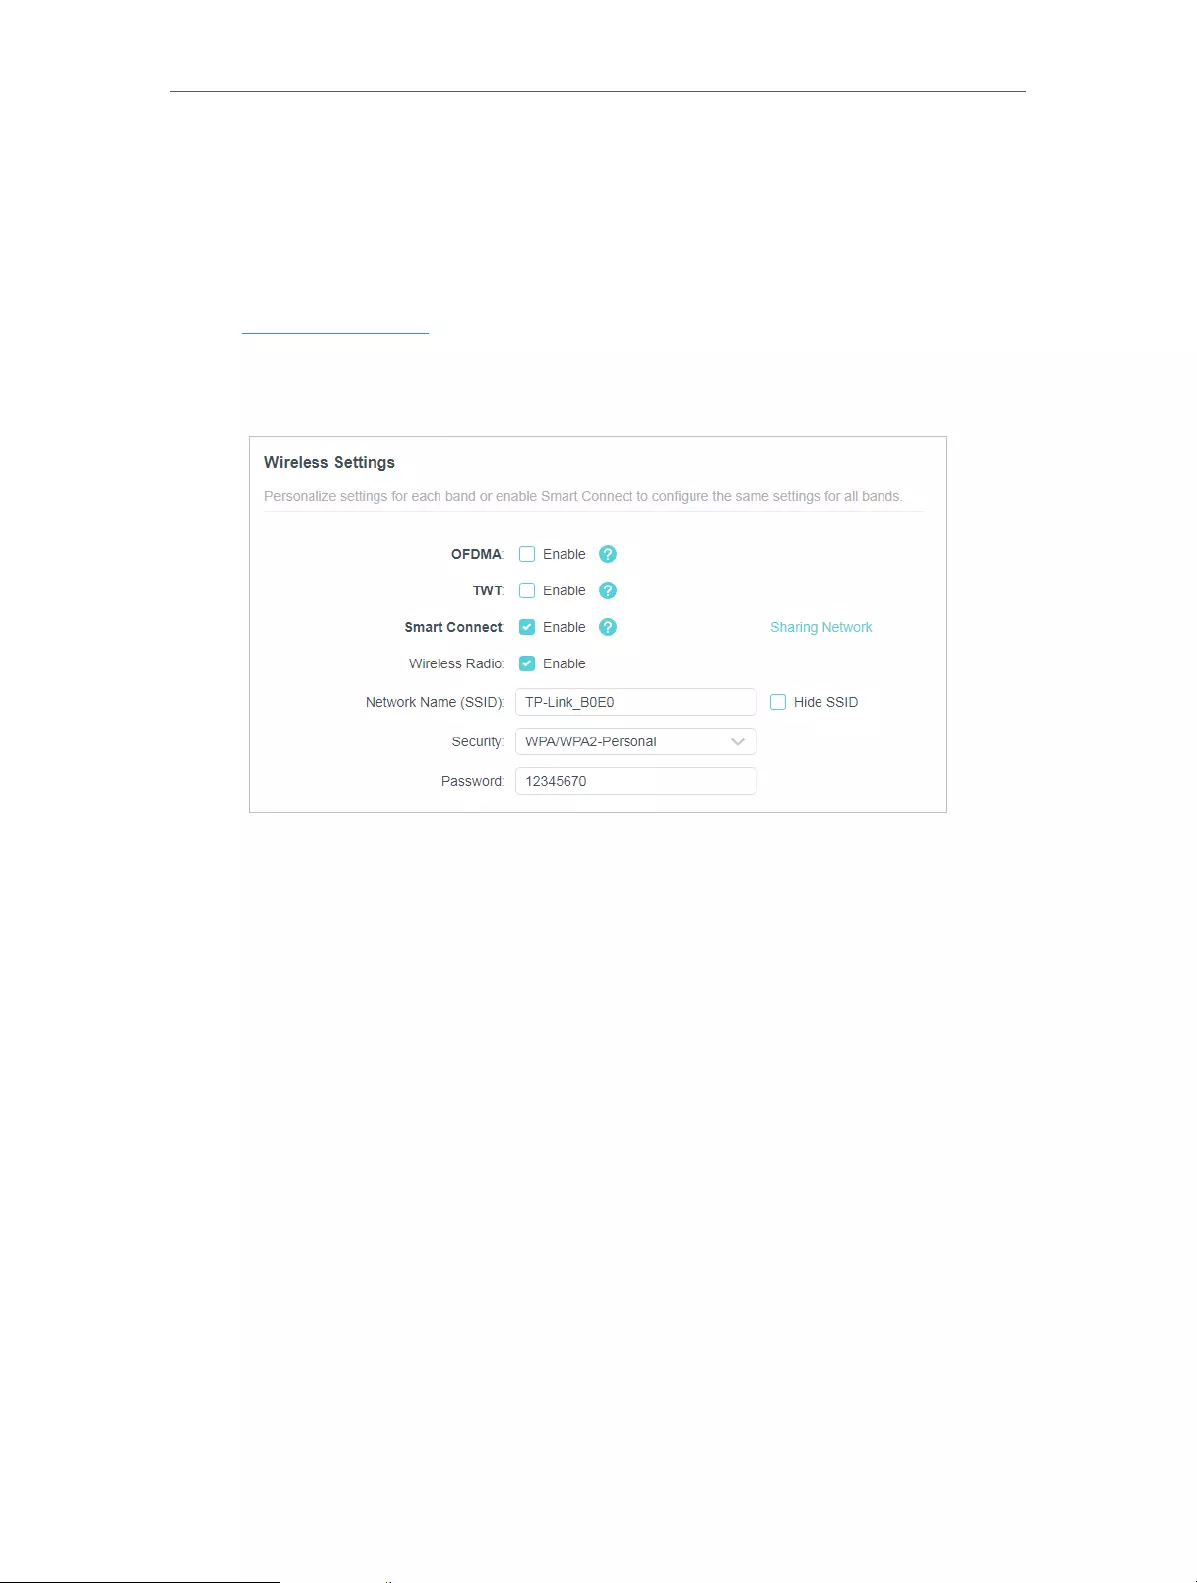
6. 1. Specify Wireless Settings
The router’s wireless network name (SSID) and password, and security option are preset
in the factory. The preset SSID and password can be found on the label of the router.
You can customize the wireless settings according to your needs.
1. Visit http://tplinkwifi.net, and log in with your TP-Link ID or the password you set for
the router.
2. Go to Wireless or Advanced > Wireless > Wireless Settings.
• To enable or disable OFDMA:
OFDMA enables multiple users to transmit data simultaneously, and thus greatly
improves speed and efficiency. Noted that only when your clients also support OFDMA,
can you fully enjoy the benefits. It is disabled by default.
1. Go to Advanced > Wireless > Wireless Settings.
2. Enable OFDMA.
• To enable or disable TWT:
TWT (Target Wake Time) allows 802.11ax routers and clients to negotiate their periods
to transmit and receive data packets. Clients only wake up at TWT sessions and remain
in sleep mode for the rest of the time, which significantly extend their battery life. It is
disabled by default.
1. Go to Advanced > Wireless > Wireless Settings.
2. Enable TWT.
• To use the Smart Connect function:
The Smart Connect function lets you enjoy a more high-speed network by assigning
your devices to best wireless bands based on actual conditions to balance network
demands.

29
Chapter 6 Wireless Settings
1. Go to Advanced > Wireless > Wireless Settings.
2. Enable Smart Connect.
3. Keep the default values or set a new SSID and password, and click SAV E . This SSID
and password will be applied for the 2.4GHz and 5GHz wireless networks. If you want
to configure the wireless settings separately for each band, untick the checkbox to
disable this feature.
• To enable or disable the wireless function:
1. Go to Wireless or Advanced > Wireless > Wireless Settings.
2. The wireless function is enabled by default. If you want to disable the wireless function
of the router, just untick the Enable checkbox of each wireless network. In this case,
all the wireless settings will be invalid.
• To change the wireless network name (SSID) and wireless password:
1. Go to Wireless or Advanced > Wireless > Wireless Settings.
2. Create a new SSID in Network Name (SSID) and customize the password for the
network in Password. The value is case-sensitive.
Note: If you change the wireless settings with a wireless device, you will be disconnected when the settings are
effective. Please write down the new SSID and password for future use.
• To hide SSID:
1. Go to Wireless or Advanced > Wireless > Wireless Settings.
2. Select Hide SSID, and your SSID won’t display when you scan for local wireless
networks on your wireless device and you need to manually join the network.
• To change the security option:
1. Go to Advanced > Wireless > Wireless Settings.
2. Select an option from the Security drop-down list: None, WPA/WPA2-Personal,
WPA2/WPA3-Personal, WPA/WPA2-Enterprise. We recommend you don’t change
the default settings unless necessary.
In addition
• Transmit Power — Select either High, Middle or Low to specify the data transmit power.
The default and recommended setting is High.
• Channel Width — Select a channel width (bandwidth) for the wireless network.
• Channel — Select an operating channel for the wireless network. It is recommended
to leave the channel to Auto, if you are not experiencing the intermittent wireless
connection issue.

30
Chapter 6 Wireless Settings
• Mode — Select a transmission mode according to your wireless client devices. It is
recommended to just leave it as default.
6. 2. Schedule Your Wireless Function
The wireless network can be automatically off at a specific time when you do not need
the wireless connection.
1. Visit http://tplinkwifi.net, and log in with your TP-Link ID or the password you set for
the router.
2. Go to Advanced > Wireless > Wireless Schedule.
3. Enable the Wireless Schedule feature.
4. Click Add to specify a wireless off period during which you need the wireless off
automatically, and click SAVE.
Note:
• The Effective Time Schedule is based on the time of the router. You can go to Advanced > System > Time & Language
to modify the time.
• The wireless network will be automatically turned on after the time period you set.
6. 3. Use WPS for Wireless Connection
Wi-Fi Protected Setup (WPS) provides an easier approach to set up a security-protected
Wi-Fi connection.
1. Visit http://tplinkwifi.net, and log in with your TP-Link ID or the password you set for
the router.
2. Make sure the Wi-Fi of your router is on and go to Advanced > Wireless > WPS.

31
Chapter 6 Wireless Settings
6. 3. 1. Connect via the Client’s PIN
Enter the PIN of your device and click Connect. Then your device will get connected to
the router.
6. 3. 2. Connect via the Router’s PIN
Select Router’s PIN in Method 1 to enable Router’s PIN. You can use the default PIN or
generate a new one.
Note:
PIN (Personal Identification Number) is an eight—character identification number preset to each router. WPS supported
devices can connect to your router with the PIN. The default PIN is printed on the label of the router.
6. 3. 3. Push the WPS Button
Click Start on the screen or directly press the router’s WPS button. Within two minutes,
enable WPS on your personal device. Success will appear on the screen and the WPS
LED of the router should change from flashing to solid on, indicating successful WPS
connection.

32
Chapter 6 Wireless Settings
6. 4. Advanced Wireless Settings
Check advanced wireless settings for your device.
1. Visit http://tplinkwifi.net, and log in with your TP-Link ID or the password you set for
the router.
2. Go to Advanced > Wireless > Additional Settings.
3. Configure advanced wireless settings.
• WMM — WMM function can guarantee the packets with high-priority messages being
transmitted preferentially.

33
Chapter 6 Wireless Settings
• AP Isolation — This function isolates all connected wireless stations so that wireless
stations cannot access each other through WLAN.
• Airtime Fairness — This function can improve the overall network performance by
sacrificing a little bit of network time on your slow devices.
• Zero Wait DFS — Zero Wait DFS (Dynamic Frequency Selection) allows the router to
immediately reselect a new channel once the radar signal is detected on a channel
allocated to radar devices to ensure lag-free network experience.
• Beacon Interval — Enter a value between 40 and 1000 in milliseconds to determine the
duration between beacon packets that are broadcasted by the router to synchronize
the wireless network. The default value is 100 milliseconds.
• RTS Threshold— Enter a value between 1 and 2346 to determine the packet size of
data transmission through the router. By default, the RTS (Request to Send) Threshold
size is 2346. If the packet size is greater than the preset threshold, the router will send
RTS frames to a particular receiving station and negotiate the sending of a data frame.
• DTIM Interval — The value determines the interval of DTIM (Delivery Traffic Indication
Message). Enter a value between 1 and 15 intervals. The default value is 1, which
indicates the DTIM Interval is the same as Beacon Interval.
• Group Key Update Period — Enter a number of seconds (minimum 30) to control the
time interval for the encryption key automatic renewal. The default value is 0, meaning
no key renewal.

Chapter 7
Guest Network
This function allows you to provide Wi-Fi access for guests without disclosing your
main network. When you have guests in your house, apartment, or workplace, you can
create a guest network for them. In addition, you can customize guest network options
to ensure network security and privacy.
It contains the following sections:
• Create a Network for Guests
• Customize Guest Network Options

35
Chapter 7 Guest Network
7. 1. Create a Network for Guests
1. Visit http://tplinkwifi.net, and log in with your TP-Link ID or the password you set for
the router.
2. Go to Advanced > Wireless > Guest Network or click Wireless on the top page. Locate
the Guest Network section.
3. Create a guest network as needed.
1 ) Tick the Enable checkbox for the 2.4GHz or 5GHz wireless network.
2 ) Customize the SSID. Don‘t select Hide SSID unless you want your guests to
manually input the SSID for guest network access.
3 ) Select the Security type and customize your own password. If No security is
selected, no password is needed to access your guest network.
4. Click Save. Now your guests can access your guest network using the SSID and
password you set!
5. You can also click Sharing Network to share the SSID and password to your guests.
Tips:
To view guest network information, go to Network Map and locate the Guest Network section. You can turn on or off the
guest network function conveniently.

36
Chapter 7 Guest Network
7. 2. Customize Guest Network Options
1. Visit http://tplinkwifi.net, and log in with your TP-Link ID or the password you set for
the router.
2. Go to Advanced > Wireless >Guest Network. Locate the Guest Permissions section.
3. Customize guest network options according to your needs.
• Allow guests to see each other
Tick this checkbox if you want to allow the wireless clients on your guest network
to communicate with each other via methods such as network neighbors and Ping.
• Allow guests to access your local network
Tick this checkbox if you want to allow the wireless clients on your guest network
to communicate with the devices connected to your router’s LAN ports or main
network via methods such as network neighbors and Ping.
4. Click Save. Now you can ensure network security and privacy!

Chapter 8
USB Settings
This chapter describes how to use the USB ports to share files and media from the USB
storage devices over your home network locally, or remotely through the internet.
The router supports USB external flash drives and hard drives.
It contains the following sections:
• Access the USB Storage Device
• Media Sharing
• Time Machine

38
Chapter 8 USB Settings
8. 1. Access the USB Storage Device
Insert your USB storage device into the router’s USB port and then access files stored
there locally or remotely.
Tips:
• If you use USB hubs, make sure no more than 4 devices are connected to the router.
• If the USB storage device requires using bundled external power, make sure the external power has been connected.
• If you use a USB hard drive, make sure its file system is FAT32, exFat, NTFS or HFS+.
• Before you physically disconnect a USB device from the router, safely remove it to avoid data damage: Go to Advanced
> USB > USB Storage Device and click Remove.
8. 1. 1. Access the USB Device Locally
Insert your USB storage device into the router’s USB port and then refer to the following
table to access files stored on your USB storage device.
Windows
computer
• Method 1:
Go to Computer > Network, then click the Network Server Name (TP-
SHARE by default) in the Computer section.
Note:
Operations in different systems are similar. Here we take Windows 7 as an example.

39
Chapter 8 USB Settings
Windows
computer
• Method 2:
Open the Windows Explorer (or go to Computer) and type the server
address \\tplinkwifi.net or ftp://tplinkwifi.net in the address bar, then
press Enter.
Mac
1 ) Select Go > Connect to Server.
2 ) Type the server address smb://tplinkwifi.net.
3 ) Click Connect.
4 ) When prompted, select the Guest radio box. (If you have set up a
username and a password to deny anonymous access to the USB
disks, you should select the Registered User radio box. To learn how
to set up an account for the access, refer to To Set Up Authentication
for Data Security.)
Tablet Use a third-party app for network files management.
Tips:
You can also access your USB storage device by using your Network/Media Server Name as the server address. Refer
to To Customize the Address of the USB Storage Device to learn more.
8. 1. 2. Access the USB Device Remotely
You can access your USB disk outside the local area network. For example, you can:

40
Chapter 8 USB Settings
• Share photos and other large files with your friends without logging in to (and paying
for) a photo-sharing site or email system.
• Get a safe backup for the materials for a presentation.
• Remove the files on your camera’s memory card from time to time during the journey.
Note:
If your ISP assigns a private WAN IP address (such as 192.168.x.x or 10.x.x.x), you cannot use this feature because
private addresses are not routed on the internet.
Follow the steps below to configure remote access settings.
1. Visit http://tplinkwifi.net, and log in with your TP-Link ID or the password you set for
the router.
2. Go to Advanced > USB > USB Storage Device.
3. Tick the Internet FTP checkbox, and then click Save.
4. Refer to the following table to access your USB disk remotely.

41
Chapter 8 USB Settings
Computer
1 ) Open the Windows Explorer (or go to Computer, only for Windows
users) or open a web browser.
2 ) Type the server address in the address bar:
Type in ftp://<WAN IP address of the router>:<port number> (such
as ftp://59.40.2.243:21). If you have specified the domain name
of the router, you can also type in ftp://<domain name>:<port
number> (such as ftp://MyDomainName:21)
3 ) Press Enter on the keyboard.
4 ) Access with the username and password you set in To Set Up
Authentication for Data Security.
Tips:
You can also access the USB disk via a third-party app for network files management, which can
resume broken file transfers.
Tablet Use a third-party app for network files management.
Tips:
Click Set Up a Dynamic DNS Service Account to learn how to set up a domain name for you router.
8. 1. 3. Customize the Access Settings
By default, all the network clients can access all folders on your USB disk. You can
customize your sharing settings by setting a sharing account, sharing specific contents
and setting a new sharing address on the router’s web management page.
1. Visit http://tplinkwifi.net, and log in with your TP-Link ID or the password you set for
the router.
2. Go to Advanced > USB > USB Storage Device.
• To Customize the Address of the USB Storage Device
You can customize the server name and use the name to access your USB storage
device.
1. In the Access Method session, make sure Samba for Windows is ticked, and enter a
Network/Media Server Name as you like, such as MyShare, then click Save.

42
Chapter 8 USB Settings
2. Now you can access the USB storage device by visiting \\MyShare (for Windows) or
smb://MyShare (for Mac).
• To Only Share Specific Content
Focus on the File Sharing section. Specify sharing folders that you want to share and
click Save.
• To Set Up Authentication for Data Security
You can set up authentication for your USB storage device so that network clients will
be required to enter username and password when accessing the USB storage device.
1. In the File Sharing section, enable Secure Sharing.

43
Chapter 8 USB Settings
2. Click to modify the access account. The username and password are both
admin for default administrator account, and both visit for default visitor account.
Accessing as an administrator can read and modify the shared folders while visitors
can only read the shared folders.
Note:
1. For Windows users, do not set the sharing username the same as the Windows username. Otherwise, Windows
credential mechanism may cause the following problems:
• If the sharing password is also the same as the Windows password, authentication will not work since the Windows
will automatically use its account information for USB access.
• If the sharing password is different from the Windows password, the Windows will be unable to remember your
credentials and you will always be required to enter the sharing password for USB access.
2. Due to Windows credential mechanism, you might be unable to access the USB disk after changing Authentication
settings. Please log out from the Windows and try to access again. Or you can change the address of the USB disk
by referring to To Customize the Address of the USB Storage Device.
8. 2. Media Sharing
The feature of Media Sharing allows you to view photos, play music and watch movies
stored on the USB storage device directly from DLNA-supported devices, such as your
computer, tablet and PS2/3/4.
1. Visit http://tplinkwifi.net, and log in with your TP-Link ID or the password you set for
the router.
2. Go to Advanced > USB > USB Storage Device.
3. Enable Media Sharing.
4. When your USB storage device is inserted into the router, your DLNA-supported
devices (such as your computer and pad) connected to the router can detect and
play the media files on the USB storage devices.
5. Refer to the following table for detailed instructions.

44
Chapter 8 USB Settings
Windows
Computer
• Go to Computer > Network, then click the Media Server Name (Model
number-share by default) in the Media Devices section.
Note:
Here we take Windows 7 as an example.
Tablet • Use a third-party DLNA-supported player.
8. 3. Time Machine
Time Machine backs up all files on your Mac computer to a USB storage device
connected to your router.
1. Visit http://tplinkwifi.net, and log in with your TP-Link ID or the password you set for
the router.
2. Go to Advanced > USB > Time Machine.

45
Chapter 8 USB Settings
3. Tick the checkbox to enable Time Machine.
4. Click Select to select a location for Time Machine backups.
5. Set the Size Limit for Backups.
Note: 0 means no limit for the space.
6. Click Save.

Chapter 9
HomeShield
Customize your home network with enhanced security using a kit of features built in
TP-Link HomeShield. Whether protecting your sensitive data or limiting the access of
kids and guests, TP-Link HomeShield provides you the tools you need to fully manage
your network.
It contains the following sections:
• Network Security
• Parental Controls
• Network Analysis & Optimization
47
Chapter 9 HomeShield
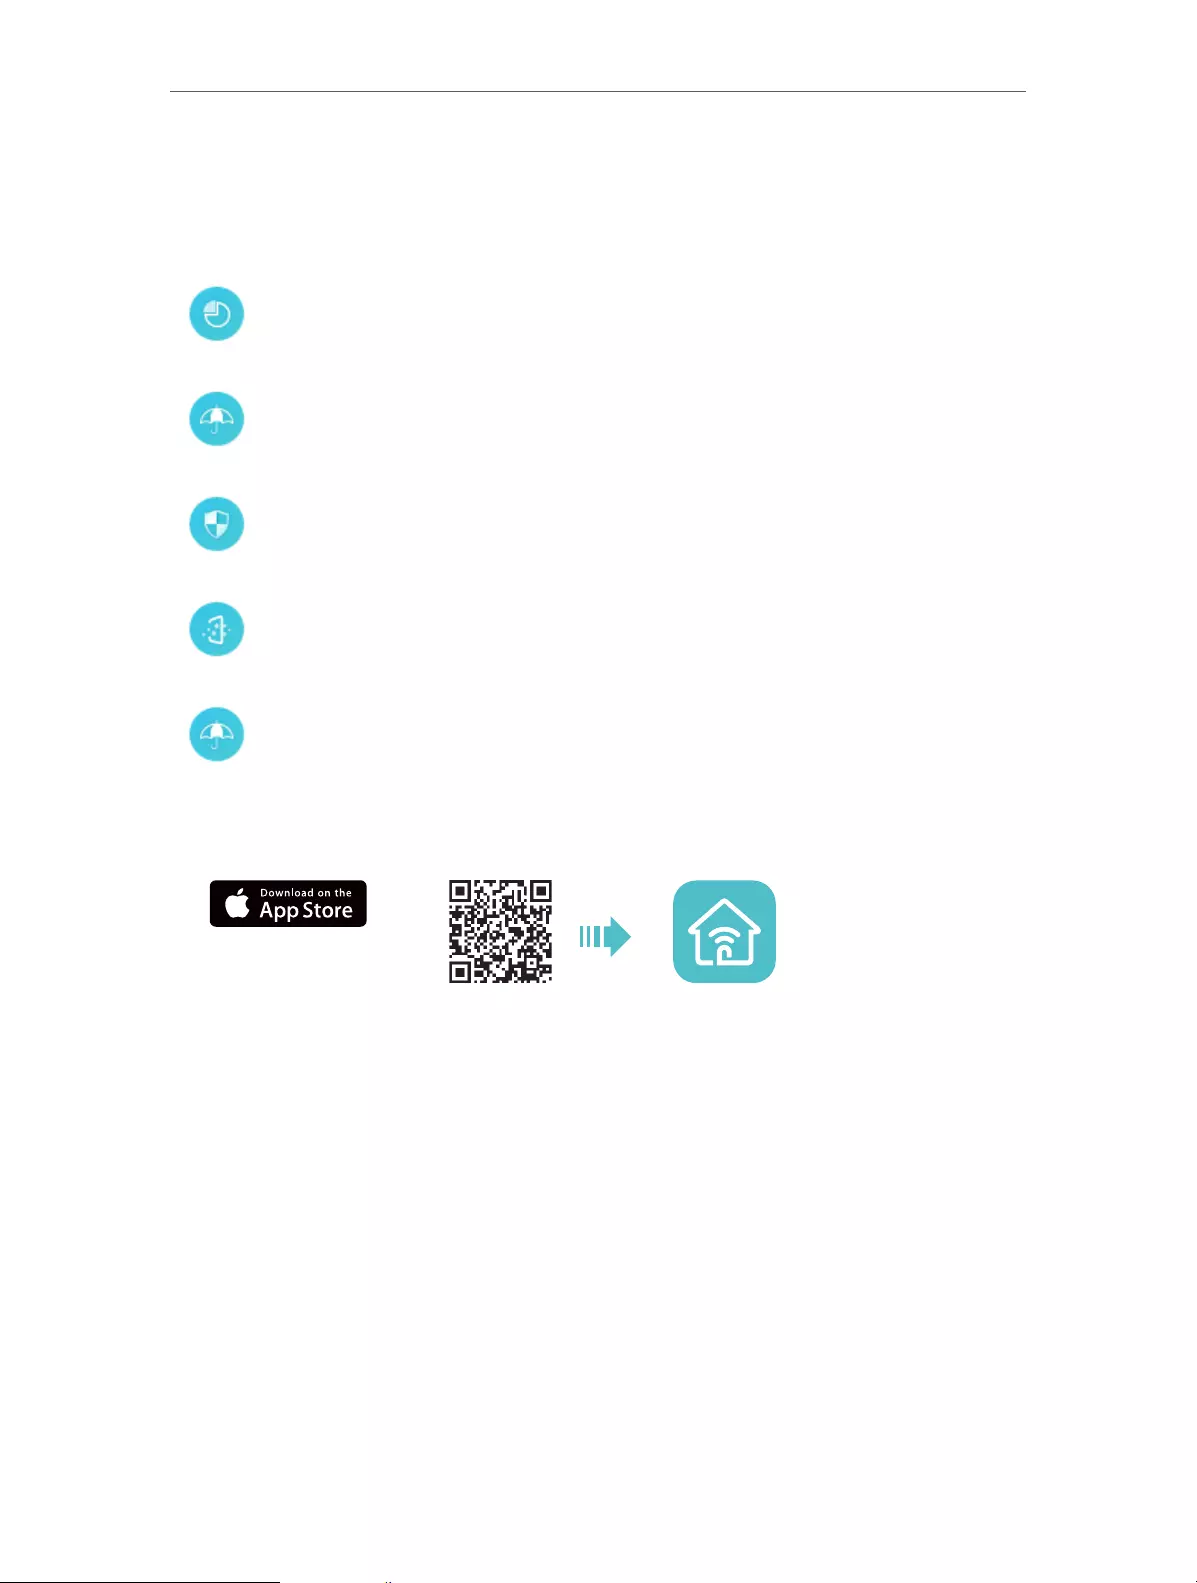
9. 1. Network Security
TP-Link HomeShield provides many tools to protect your network from malicious
attacks.
• To use this feature, download Tether to enjoy the HomeShield service
1. Scan the QR code or get the Tether app from the Apple App Store or Google Play.
OR
2. Launch the Tether app and log in with your TP-Link ID. If you don’t have an account,
create one first.
3. Log in to your router and tap the HomeShield tab to use this feature.
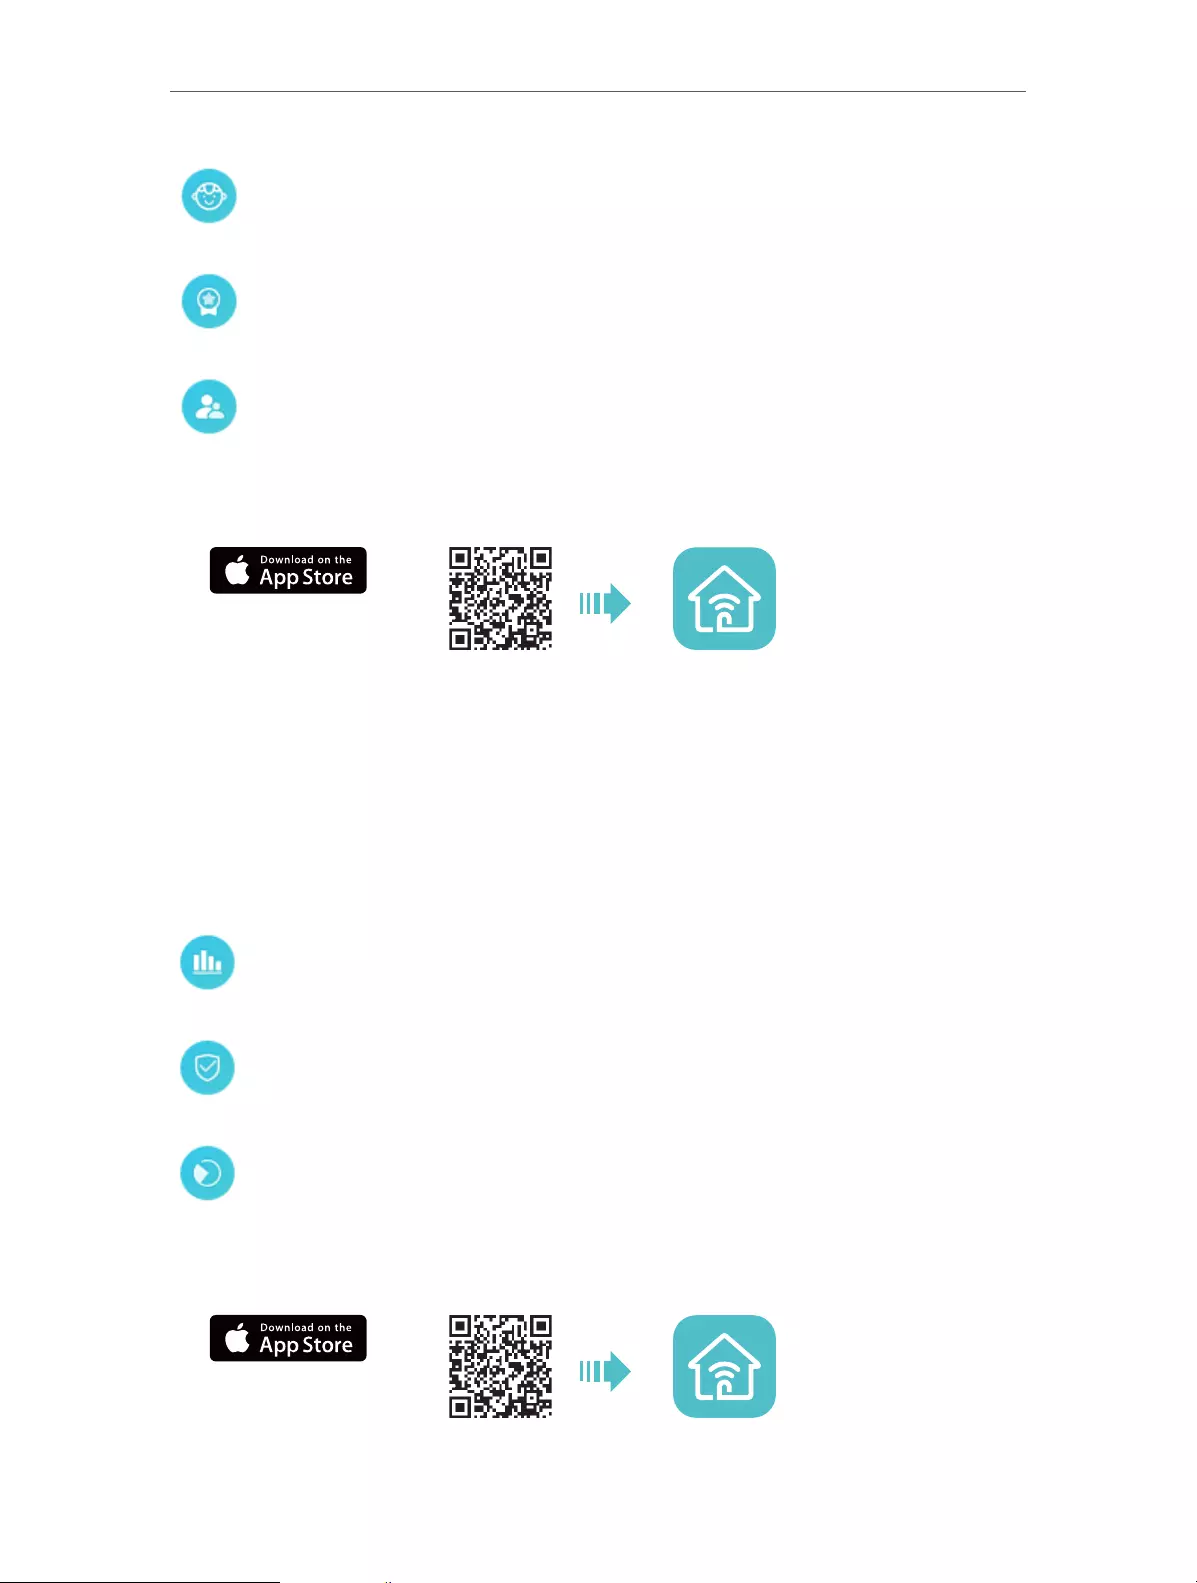
9. 2. Parental Controls
Parental Controls allows you to set up unique restrictions on internet access for each
member of your family. You can block inappropriate content, set daily limits for the total
time spent online and restrict internet access to certain times of the day.
Network Analysis
Analyze and optimize your network
IoT Protection
Get real-time security for your Internet of Things
Intrusion Prevention System
Identifies and block network intruders
Malicious Content Filter
Block malicious content
DDoS Protection
Protects your home network from DDoS attacks
48
Chapter 9 HomeShield
• To use this feature, download Tether to enjoy the HomeShield service
1. Scan the QR code or get the Tether app from the Apple App Store or Google Play.
OR
2. Launch the Tether app and log in with your TP-Link ID. If you don’t have an account,
create one first.
3. Log in to your router and tap the HomeShield tab to use this feature.
9. 3. Network Analysis & Optimization
TP-Link HomeShield provides many tools for you to analyze and optimize your network.
• To use this feature, download Tether to enjoy the HomeShield service
1. Scan the QR code or get the Tether app from the Apple App Store or Google Play.
OR
Child Protection
Keep your child away from inappropriate content
Family Incentive Program
Manage screen time and create rewards
Family Time
Pause the internet to enjoy family time
Weekly and Monthly Reports
Get weekly and monthly reports of your network usage
Quality of Service (QoS)
Prioritizes devices to give faster performance
Scan
Run a scan for a better network performance and security anytime

49
Chapter 9 HomeShield
2. Launch the Tether app and log in with your TP-Link ID. If you don’t have an account,
create one first.
3. Log in to your router and tap the HomeShield tab to use this feature.

Chapter 10
OneMesh with Seamless
Roaming
This chapter introduces the TP-Link OneMeshTM feature.
It contains the following sections:
• Set Up a OneMesh Network
• Manage Devices in the OneMesh Network
51
Chapter 10 OneMesh with Seamless Roaming
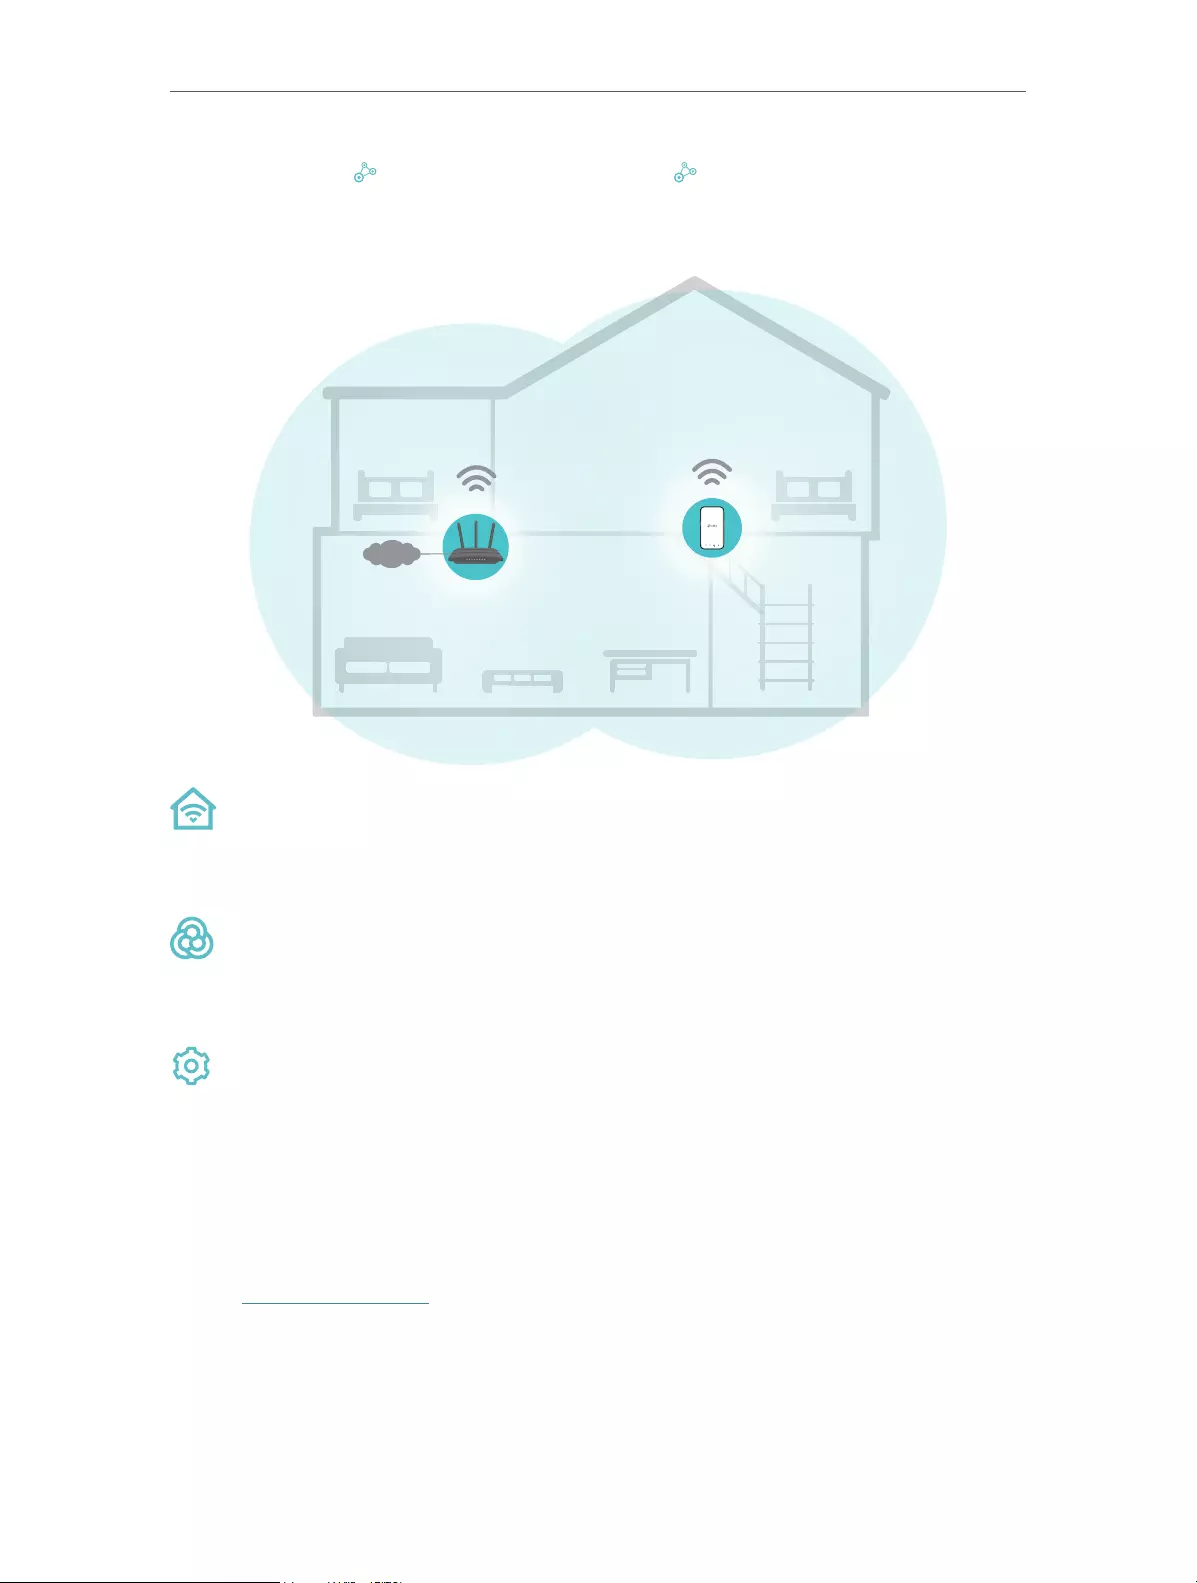
TP-Link OneMesh router and TP-Link OneMesh extenders work together to form
one unified Wi-Fi network. Walk through your home and stay connected with the fastest
possible speeds thanks to OneMesh’s seamless coverage.
INT E R NE T
SAME
Network Name & Password
for seamless roaming
Unified Wi-Fi Network
Router and extenders share the same wireless settings, including network name,
password, access control settings and more.
Seamless Roaming
Devices automatically switch between your router and extenders as you move
through your home for the fastest possible speeds.
Easy Setup and Management
Set up a OneMesh network with a push of WPS buttons. Manage all network devices
on the Tether app or at your router’s web management page.
10. 1. Set Up a OneMesh Network
1. Visit http://tplinkwifi.net, and log in with your TP-Link ID or the password you set for
the router.
2. Go to Advanced > OneMesh.

52
Chapter 10 OneMesh with Seamless Roaming
3. Connect a OneMesh extender to this router by following the setup instructions in the
extender’s manual. The extender will be listed on the router’s OneMesh page.
Note: To check full list of TP-Link OneMesh devices, visit https://www.tp-link.com/onemesh/compatibility.
4. If you have set up the extender to join the OneMesh network, it will be listed on the
router’s OneMesh page.
Otherwise, you need to find it in the Available OneMesh Devices list and click Add to
add it to the OneMesh network.
Done! Now your router and extender successfully form a OneMesh network!

53
Chapter 10 OneMesh with Seamless Roaming
10. 2. Manage Devices in the OneMesh Network
In a OneMesh network, you can manage all mesh devices and connected clients on
your router’s web page.
• To view mesh devices and connected clients in the network:
1. Visit http://tplinkwifi.net, and log in with your TP-Link ID or the password you set for
the router.
2. Go to Network Map.
3. Click to view all mesh devices, and click to view all connected clients.
• To manage a OneMesh device in the network:
1. Visit http://tplinkwifi.net, and log in with your TP-Link ID or the password you set for
the router.
2. Go to Advanced > OneMesh.
3. Click the OneMesh device to view detailed information.

54
Chapter 10 OneMesh with Seamless Roaming
4. Manage the OneMesh device as needed. You can:
• Change device information.
• Click Manage Device to redirect to the web management page of this device.
• Click Leave OneMesh to delete this device from the OneMesh network.

Chapter 11
Network Security
This chapter guides you on how to protect your home network from cyber attacks and
unauthorized users by implementing these three network security functions. You can
protect your home network from cyber attacks, block or allow specific client devices to
access your network using Access Control, or you can prevent ARP spoofing and ARP
attacks using IP & MAC Binding.
It contains the following sections:
• Protect the Network from Cyber Attacks
• Access Control
• IP & MAC Binding

56
Chapter 11 Network Security
11. 1. Protect the Network from Cyber Attacks
The SPI (Stateful Packet Inspection) Firewall protects the router from cyber attacks
and validate the traffic that is passing through the router based on the protocol. This
function is enabled by default.
1. Visit http://tplinkwifi.net, and log in with your TP-Link ID or the password you set for
the router.
2. Go to Advanced > Security > Firewall. It’s recommended to keep the default settings.
11. 2. Access Control
Access Control is used to block or allow specific client devices to access your network
(via wired or wireless) based on a list of blocked devices (Blacklist) or a list of allowed
devices (Whitelist).
I want to:
Block or allow specific client devices to access my network (via wired or wireless).
How can I do that?
1. Visit http://tplinkwifi.net, and log in with your TP-Link ID or the password you set for
the router.
2. Go to Advanced > Security > Access Control.
3. Toggle on to enable Access Control.
4. Select the access mode to either block (recommended) or allow the device(s) in the
list.
To block specific device(s):
1 ) Select Blacklist.
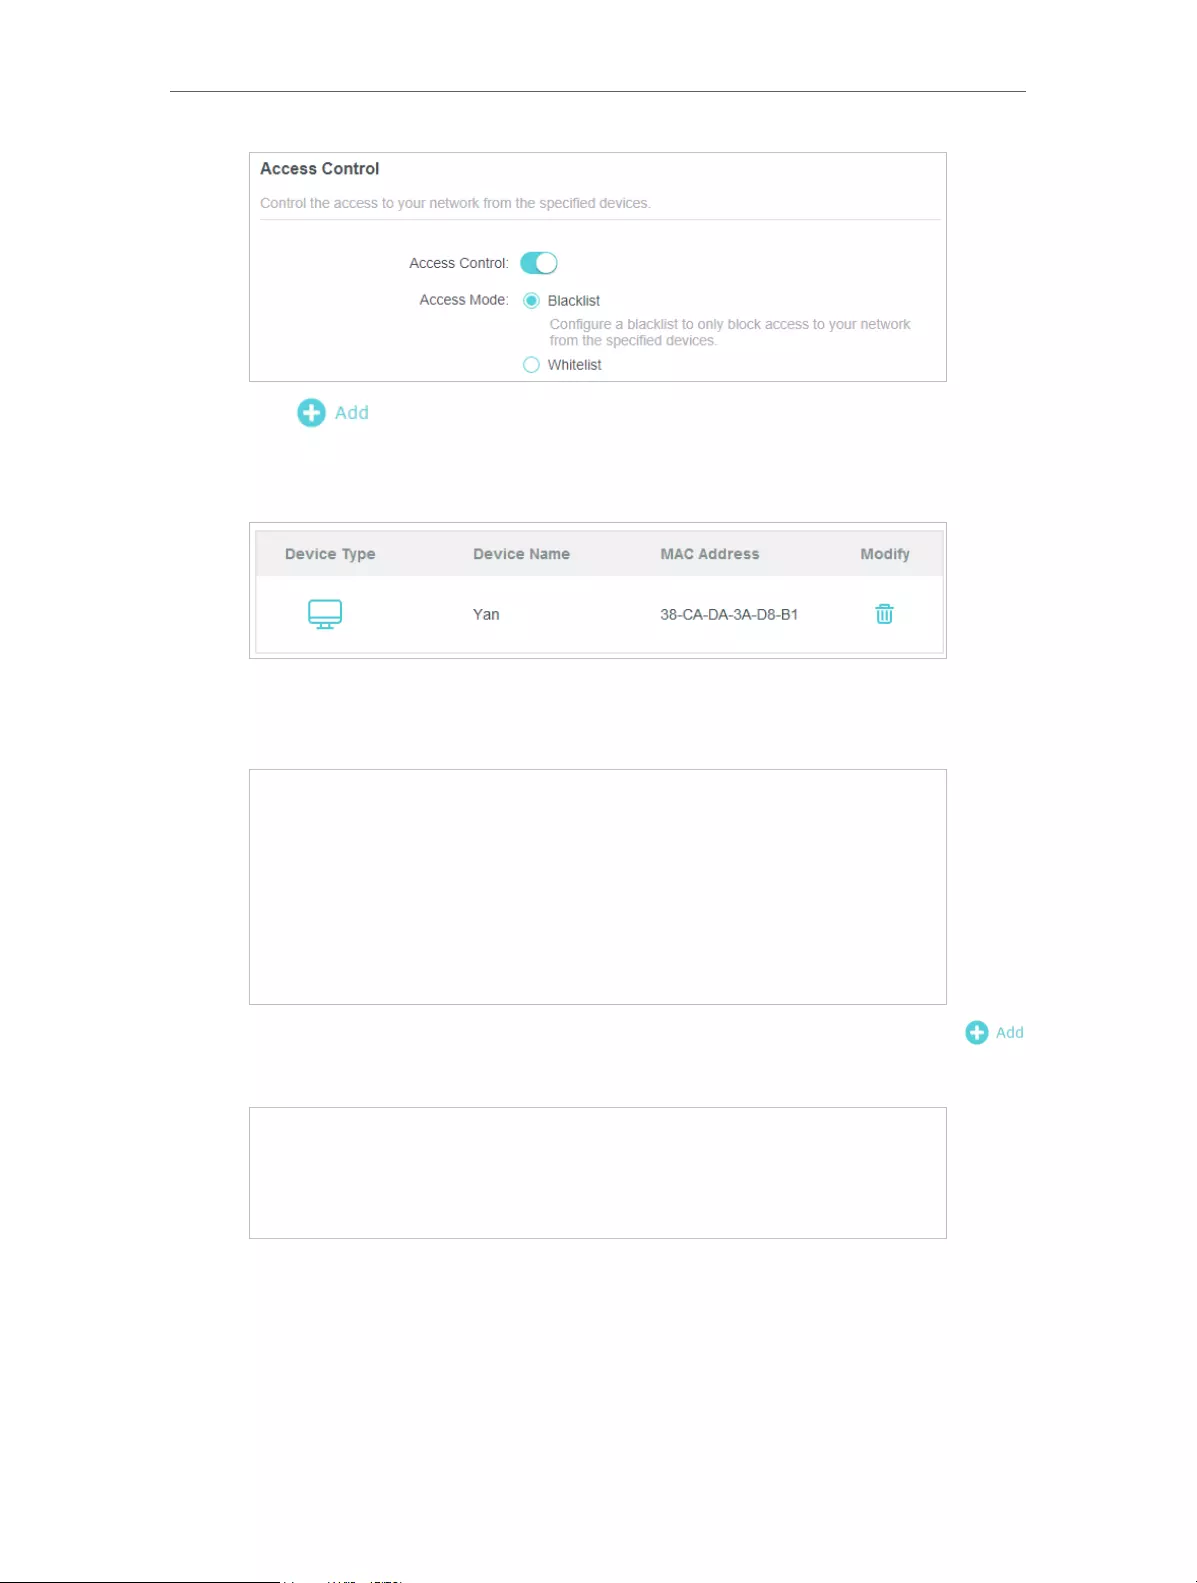
57
Chapter 11 Network Security
2 ) Click and select devices you want to be blocked and Click ADD.
3 ) The Operation Succeeded message will appear on the screen, which means the
selected devices have been successfully added to the blacklist.
To allow specific device(s):
1 ) Select Whitelist and click SAVE .
2 ) Your own device is in the whitelist by default and cannot be deleted. Click
to add other devices to the whitelist.
• Add connected devices
1 ) Click Select From Device List.
2 ) Select the devices you want to be allowed and click ADD.

58
Chapter 11 Network Security
3 ) The Operation Succeeded message will appear on the screen, which means the
selected devices have been successfully added to the whitelist.
• Add unconnected devices
1 ) Click Add Manually.
2 ) Enter the Device Name and MAC Address of the device you want to be allowed
and click ADD.
3 ) The Operation Succeeded message will appear on the screen, which means the
device has been successfully added to the whitelist.
Done!
Now you can block or allow specific client devices to access your network (via wired or
wireless) using the Blacklist or Whitelist.
11. 3. IP & MAC Binding
IP & MAC Binding, namely, ARP (Address Resolution Protocol) Binding, is used to bind
network device’s IP address to its MAC address. This will prevent ARP Spoofing and
other ARP attacks by denying network access to an device with matching IP address in
the Binding list, but unrecognized MAC address.

59
Chapter 11 Network Security
I want to:
Prevent ARP spoofing and ARP attacks.
How can I do that?
1. Visit http://tplinkwifi.net, and log in with your TP-Link ID or the password you set for
the router.
2. Go to Advanced > Security > IP & MAC Binding.
3. Enable IP & MAC Binding.
4. Bind your device(s) according to your need.
To bind the connected device(s):
1 ) Click in the Binding List section.
2 ) Click VIEW CONNECTED DEVICES and select the device you want to bind. The
MAC Address and IP Address fields will be automatically filled in.
3 ) Click SAVE.

60
Chapter 11 Network Security
To bind the unconnected device:
1 ) Click in the Binding List section.
2 ) Enter the MAC Address and IP Address that you want to bind.
3 ) Click SAVE.
Done!
Now you don’t need to worry about ARP spoofing and ARP attacks!

Chapter 12
NAT Forwarding
The router’s NAT (Network Address Translation) feature makes devices on the LAN use
the same public IP address to communicate with devices on the internet, which protects
the local network by hiding IP addresses of the devices. However, it also brings about
the problem that an external host cannot initiatively communicate with a specified
device on the local network.
With the forwarding feature the router can penetrate the isolation of NAT and allows
devices on the internet to initiatively communicate with devices on the local network,
thus realizing some special functions.
The TP-Link router supports four forwarding rules. If two or more rules are set, the
priority of implementation from high to low is Port Forwarding, Port Triggering, UPNP
and DMZ.
It contains the following sections:
• Share Local Resources on the Internet by Port Forwarding
• Open Ports Dynamically by Port Triggering
• Make Applications Free from Port Restriction by DMZ
• Make Xbox Online Games Run Smoothly by UPnP
62
Chapter 12 NAT Forwarding
12. 1. Share Local Resources on the Internet by Port
Forwarding
When you build up a server on the local network and want to share it on the internet,
Port Forwarding can realize the service and provide it to internet users. At the same
time Port Forwarding can keep the local network safe as other services are still invisible
from the internet.
Port Forwarding can be used for setting up public services on your local network,
such as HTTP, FTP, DNS, POP3/SMTP and Telnet. Different services use different
service ports. Port 80 is used in HTTP service, port 21 in FTP service, port 25 in SMTP
service and port 110 in POP3 service. Please verify the service port number before the
configuration.
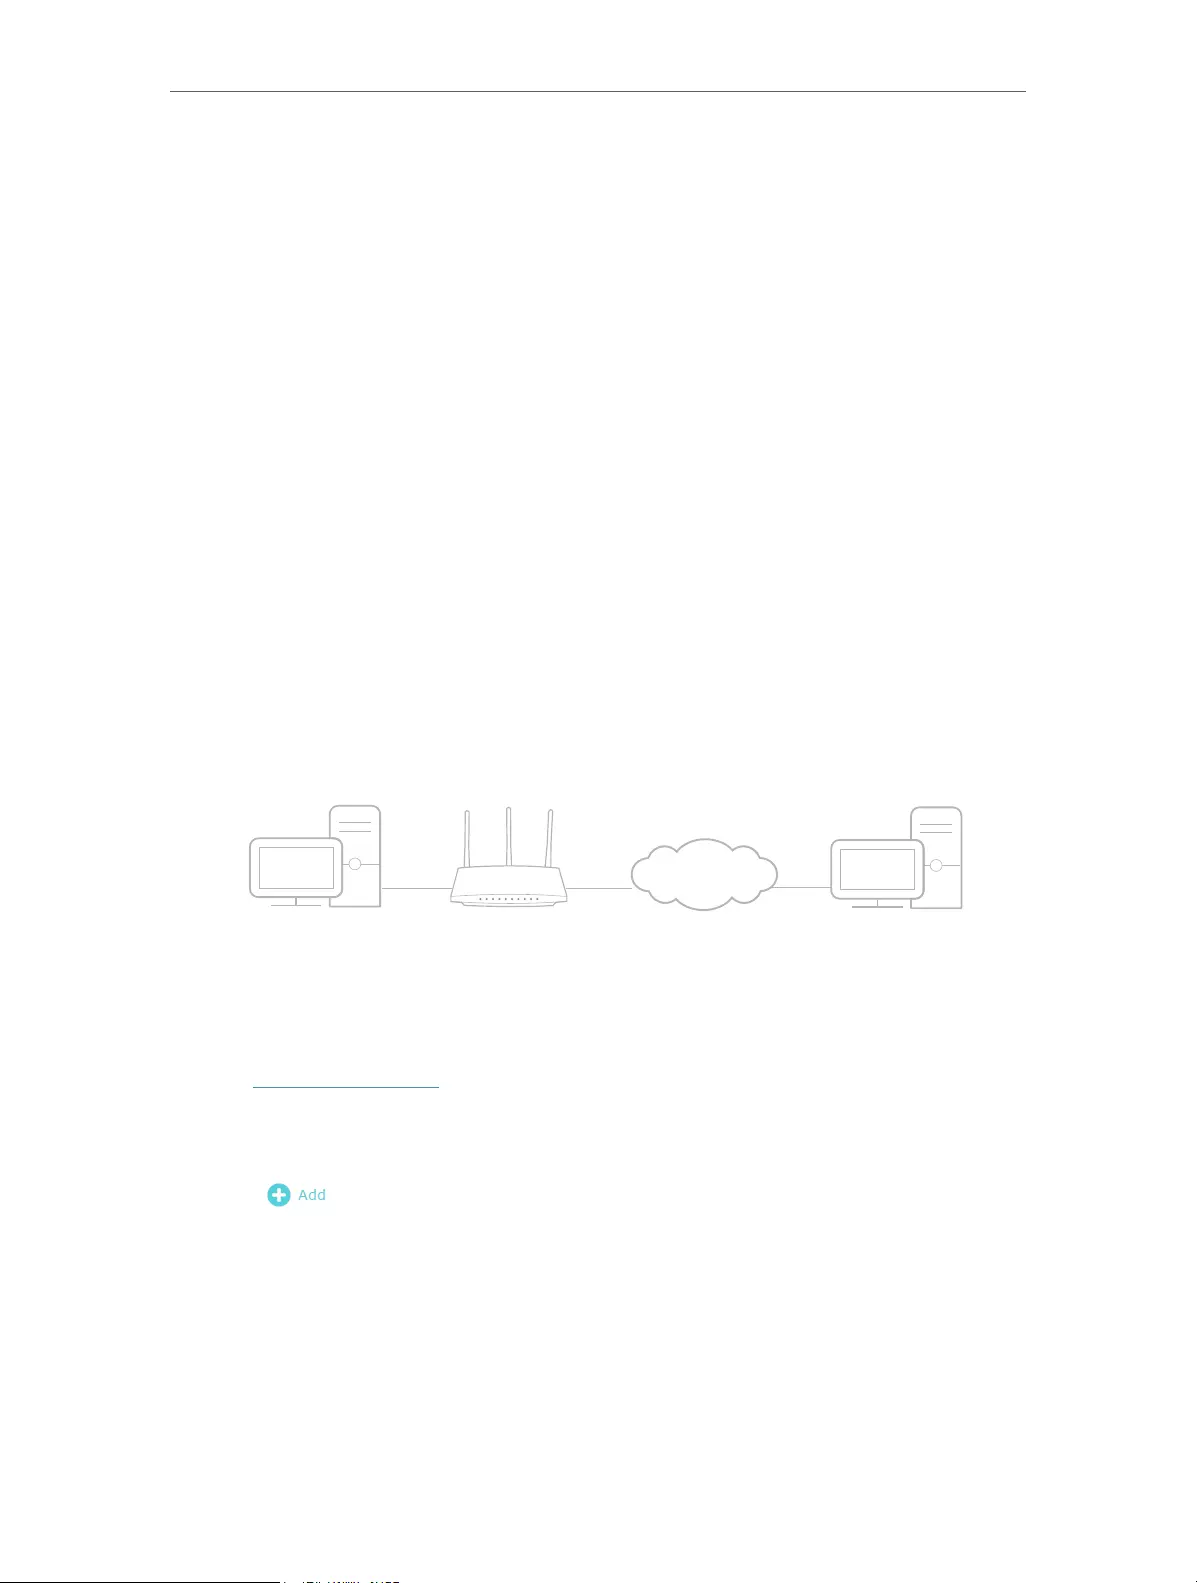
I want to:
Share my personal website I’ve built in local network with my friends through the internet.
For example, the personal website has been built on my home PC (192.168.0.100). I hope
that my friends on the internet can visit my website in some way. The PC is connected
to the router with the WAN IP address 218.18.232.154.
INTERNET
WAN: 218.18.232.154LANHome
How can I do that?
1. Assign a static IP address to your PC, for example 192.168.0.100.
2. Visit http://tplinkwifi.net, and log in with your TP-Link ID or the password you set for
the router.
3. Go to Advanced > NAT Forwarding > Port Forwarding.
4. Click .

63
Chapter 12 NAT Forwarding
5. Click VIEW COMMON SERVICES and select HTTP. The External Port, Internal Port
and Protocol will be automatically filled in.
6. Click VIEW CONNECTED DEVICES and select your home PC. The Device IP
Address will be automatically filled in. Or enter the PC’s IP address 192.168.0.100
manually in the Device IP Address field.
7. Click SAVE.
Tips:
• It is recommended to keep the default settings of Internal Port and Protocol if you are not clear about which port and
protocol to use.
• If the service you want to use is not in the common services list, you can enter the corresponding parameters
manually. You should verify the port number that the service needs.
• You can add multiple port forwarding rules if you want to provide several services in a router. Please note that the
External Port should not be overlapped.
Done!
Users on the internet can enter http:// WAN IP (in this example: http:// 218.18.232.154)
to visit your personal website.

64
Chapter 12 NAT Forwarding
Tips:
• The WAN IP should be a public IP address. For the WAN IP is assigned dynamically by the ISP, it is recommended
to apply and register a domain name for the WAN referring to Set Up a Dynamic DNS Service Account. Then users
on the internet can use http:// domain name to visit the website.
• If you have changed the default External Port, you should use http:// WAN IP: External Port or http:// domain name:
External Port to visit the website.
12. 2. Open Ports Dynamically by Port Triggering
Port Triggering can specify a triggering port and its corresponding external ports.
When a host on the local network initiates a connection to the triggering port, all the
external ports will be opened for subsequent connections. The router can record the
IP address of the host. When the data from the internet return to the external ports, the
router can forward them to the corresponding host. Port Triggering is mainly applied to
online games, VoIPs, video players and common applications including MSN Gaming
Zone, Dialpad and Quick Time 4 players, etc.
Follow the steps below to configure the Port Triggering rules:
1. Visit http://tplinkwifi.net, and log in with your TP-Link ID or the password you set for
the router.
2. Go to Advanced > NAT Forwarding > Port Triggering and click .
3. Click VIEW COMMON SERVICES, and select the desired application. The Triggering
Port, Triggering Protocol and External Port will be automatically filled in. The following
picture takes application MSN Gaming Zone as an example.

65
Chapter 12 NAT Forwarding
4. Click SAVE.
Tips:
• You can add multiple port triggering rules according to your network need.
• The triggering ports can not be overlapped.
• If the application you need is not listed in the Existing Applications list, please enter the parameters manually. You
should verify the external ports the application uses first and enter them into External Port field according to the
format the page displays.
12. 3. Make Applications Free from Port Restriction
by DMZ
When a PC is set to be a DMZ (Demilitarized Zone) host on the local network, it is totally
exposed to the internet, which can realize the unlimited bidirectional communication
between internal hosts and external hosts. The DMZ host becomes a virtual server with
all ports opened. When you are not clear about which ports to open in some special
applications, such as IP camera and database software, you can set the PC to be a DMZ
host.
Note:
When DMZ is enabled, the DMZ host is totally exposed to the internet, which may bring some potential safety hazards. If
DMZ is not in use, please disable it in time.
I want to:
Make the home PC join the internet online game without port restriction.
For example, due to some port restriction, when playing the online games, you can log
in normally but cannot join a team with other players. To solve this problem, set your PC
as a DMZ host with all ports open.

66
Chapter 12 NAT Forwarding
How can I do that?
1. Assign a static IP address to your PC, for example 192.168.0.100.
2. Visit http://tplinkwifi.net, and log in with your TP-Link ID or the password you set for
the router.
3. Go to Advanced > NAT Forwarding > DMZ and tick to enable DMZ.
4. Click VIEW CONNECTED DEVICES and select your PC. The Device IP
Address will be automatically filled in. Or enter the PC’s IP address 192.168.0.100
manually in the DMZ Host IP Address field.
5. Click SAVE.
Done!
The configuration is completed. You’ve set your PC to a DMZ host and now you can
make a team to game with other players.
12. 4. Make Xbox Online Games Run Smoothly by
UPnP
The UPnP (Universal Plug and Play) protocol allows applications or host devices
to automatically find the front—end NAT device and send request to it to open the
corresponding ports. With UPnP enabled, the applications or host devices on the
local network and the internet can freely communicate with each other thus realizing
the seamless connection of the network. You may need to enable the UPnP if you
want to use applications for multiplayer gaming, peer-to-peer connections, real-time
communication (such as VoIP or telephone conference) or remote assistance, etc.
Tips:
• UPnP is enabled by default in this router.
• Only the application supporting UPnP protocol can use this feature.
• UPnP feature needs the support of operating system (e.g. Windows Vista/ Windows 7/ Windows 8, etc. Some of
operating system need to install the UPnP components).
For example, when you connect your Xbox to the router which has connected to
the internet to play online games, UPnP will send request to the router to open the

67
Chapter 12 NAT Forwarding
corresponding ports allowing the following data penetrating the NAT to transmit.
Therefore, you can play Xbox online games without a hitch.
INTERNET
If necessary, you can follow the steps to change the status of UPnP.
1. Visit http://tplinkwifi.net, and log in with your TP-Link ID or the password you set for
the router.
2. Go to Advanced > NAT Forwarding > UPnP and toggle on or off according to your
needs.

Chapter 13
VPN Server
The VPN (Virtual Private Networking) Server allows you to access your home network in
a secured way through internet when you are out of home. The router offers two ways
to setup VPN connection: OpenVPN and PPTP (Point to Point Tunneling Protocol) VPN.
OpenVPN is somewhat complex but with greater security and more stable. It is suitable
for restricted environment, such as campus network and company intranet.
PPTP VPN is more easily used and its speed is faster, it’s compatible with most
operating systems and also supports mobile devices. Its security is poor and your
packets may be cracked easily, and PPTP VPN connection may be prevented by some
ISP.
It contains the following sections, please choose the appropriate VPN server
connection type as needed.
• Use OpenVPN to Access Your Home Network
• Use PPTP VPN to Access Your Home Network

69
Chapter 13 VPN Server
13. 1. Use OpenVPN to Access Your Home Network
In the OpenVPN connection, the home network can act as a server, and the remote
device can access the server through the router which acts as an OpenVPN Server
gateway. To use the VPN feature, you should enable OpenVPN Server on your router,
and install and run VPN client software on the remote device. Please follow the steps
below to set up an OpenVPN connection.
Home Network Router Remote Devices
Step1. Set up OpenVPN Server on Your Router
1. Visit http://tplinkwifi.net, and log in with your TP-Link ID or the password you set for
the router.
2. Go to Advanced > VPN Server > OpenVPN, and tick the Enable box of OpenVPN.
Note:
• Before you enable VPN Server, we recommend you configure Dynamic DNS Service (recommended) or assign a
static IP address for router’s WAN port and synchronize your System Time with internet.
• The first time you configure the OpenVPN Server, you may need to Generate a certificate before you enable the VPN
Server.
3. Select the Service Type (communication protocol) for OpenVPN Server: UDP, TCP.
4. Enter a VPN Service Port to which a VPN device connects, and the port number
should be between 1024 and 65535.
5. In the VPN Subnet/Netmask fields, enter the range of IP addresses that can be leased
to the device by the OpenVPN server.

70
Chapter 13 VPN Server
6. Select your Client Access type. Select Home Network Only if you only want the
remote device to access your home network; select Internet and Home Network if
you also want the remote device to access internet through the VPN Server.
7. Click SAVE.
8. Click GENERATE to get a new certificate.
Note: If you have already generated one, please skip this step, or click GENERATE to update the certificate.
9. Click EXPORT to save the OpenVPN configuration file which will be used by the
remote device to access your router.
Step 2. Configure OpenVPN Connection on Your Remote Device
1. Visit http://openvpn.net/index.php/download/community-downloads.html to
download the OpenVPN software, and install it on your device where you want to
run the OpenVPN client utility.
Note: You need to install the OpenVPN client utility on each device that you plan to apply the VPN function to access
your router. Mobile devices should download a third-party app from Google Play or Apple App Store.
2. After the installation, copy the file exported from your router to the OpenVPN client
utility’s “config” folder (for example, C:\Program Files\OpenVPN\config on Windows).
The path depends on where the OpenVPN client utility is installed.
3. Run the OpenVPN client utility and connect it to OpenVPN Server.
13. 2. Use PPTP VPN to Access Your Home Network
PPTP VPN Server is used to create a VPN connection for remote device. To use the VPN
feature, you should enable PPTP VPN Server on your router, and configure the PPTP
connection on the remote device. Please follow the steps below to set up a PPTP VPN
connection.
Step 1. Set up PPTP VPN Server on Your Router
1. Visit http://tplinkwifi.net, and log in with your TP-Link ID or the password you set for
the router.

71
Chapter 13 VPN Server
2. Go to Advanced > VPN Server > PPTP, and tick the Enable box of PPTP.
Note: Before you enable VPN Server, we recommend you configure Dynamic DNS Service (recommended) or assign a
static IP address for router’s WAN port and synchronize your System Time with internet.
3. In the Client IP Address field, enter the range of IP addresses (up to 10) that can be
leased to the devices by the PPTP VPN server.
4. Set the PPTP connection permission according to your needs.
• Select Allow Samba (Network Place) access to allow your VPN device to access
your local Samba server.
• Select Allow NetBIOS passthrough to allow your VPN device to access your
Samba server using NetBIOS name.
• Select Allow Unencrypted connections to allow unencrypted connections to
your VPN server.
5. Click SAVE.
6. Configure the PPTP VPN connection account for the remote device. You can create
up to 16 accounts.
1 ) Click .
2 ) Enter the Username and Password to authenticate devices to the PPTP VPN
Server.

72
Chapter 13 VPN Server
3 ) Click ADD.
Step 2. Configure PPTP VPN Connection on Your Remote Device
The remote device can use the Windows built-in PPTP software or a third-party PPTP
software to connect to PPTP Server. Here we use the Windows built-in PPTP software
as an example.
1. Go to Start > Control Panel > Network and Internet > Network and Sharing Center.
2. Select Set up a new connection or network.
3. Select Connect to a workplace and click Next.

73
Chapter 13 VPN Server
4. Select Use my Internet connection (VPN).
5. Enter the internet IP address of the router (for example: 218.18.1.73) in the Internet
address field. Click Next.

74
Chapter 13 VPN Server
6. Enter the User name and Password you have set for the PPTP VPN server on your
router, and click Connect.
7. The PPTP VPN connection is created and ready to use.

75
Chapter 13 VPN Server

Chapter 14
Customize Your Network
Settings
This chapter guides you on how to configure advanced network features.
It contains the following sections:
• Change the LAN Settings
• Configure to Support IPTV Service
• Specify DHCP Server Settings
• Set Up a Dynamic DNS Service Account
• Create Static Routes

77
Chapter 14 Customize Your Network Settings
14. 1. Change the LAN Settings
The router is preset with a default LAN IP 192.168.0.1, which you can use to log in to
its web management page. The LAN IP address together with the Subnet Mask also
defines the subnet that the connected devices are on. If the IP address conflicts with
another device on your local network or your network requires a specific IP subnet, you
can change it.
1. Visit http://tplinkwifi.net, and log in with your TP-Link ID or the password you set for
the router.
2. Go to Advanced > Network > LAN.
3. Type in a new IP Address appropriate to your needs. And leave the Subnet Mask as
the default settings.
4. Click SAVE.
Note: If you have set the Port Forwarding, DMZ or DHCP address reservation, and the new LAN IP address is not in the
same subnet with the old one, then you should reconfigure these features.
14. 2. Configure to Support IPTV Service
I want to:
Configure IPTV setup to enable Internet/IPTV/Phone service provided by my internet
service provider (ISP).
How can I do that?
1. Visit http://tplinkwifi.net, and log in with your TP-Link ID or the password you set for
the router.
2. Go to Advanced > Network > IPTV/VLAN.
3. If your ISP provides the networking service based on IGMP technology, e.g., British
Telecom(BT) and Talk Talk in UK:
1 ) Tick the IGMP Proxy and IGMP Snooping checkbox, then select the IGMP Version,
either V2 or V3, as required by your ISP.

78
Chapter 14 Customize Your Network Settings
2 ) Click SAVE.
3 ) After configuring IGMP proxy, IPTV can work behind your router now. You can
connect your set-top box to any of the router’s Ethernet port.
If IGMP is not the technology your ISP applies to provide IPTV service:
1 ) Tick Enable IPTV/VLAN.
2 ) Select the appropriate Mode according to your ISP.
• Select Bridge if your ISP is not listed and no other parameters are required.
• Select Custom if your ISP is not listed but provides necessary parameters.
3 ) After you have selected a mode, the necessary parameters, including the LAN
port for IPTV connection, are predetermined. If not, select the LAN type to
determine which port is used to support IPTV service.
4 ) Click SAVE.
5 ) Connect the set-top box to the corresponding LAN port which is predetermined
or you have specified in Step 3.
Done!
Your IPTV setup is done now! You may need to configure your set-top box before
enjoying your TV.

79
Chapter 14 Customize Your Network Settings
14. 3. Specify DHCP Server Settings
By default, the DHCP (Dynamic Host Configuration Protocol) Server is enabled and
the router acts as a DHCP server; it dynamically assigns TCP/IP parameters to client
devices from the IP Address Pool. You can change the settings of the DHCP Server if
necessary, and you can reserve LAN IP addresses for specified client devices.
1. Visit http://tplinkwifi.net, and log in with your TP-Link ID or the password you set for
the router.
2. Go to Advanced > Network > DHCP Server.
• To specify the IP address that the router assigns:
1. Tick the Enable checkbox.
2. Enter the starting and ending IP addresses in the IP Address Pool.
3. Enter other parameters if the ISP offers. The Default Gateway is automatically filled in
and is the same as the LAN IP address of the router.
4. Click SAVE.
• To reserve an IP address for a specified client device:
1. Click Add in the Address Reservation section.

80
Chapter 14 Customize Your Network Settings
2. Click VIEW CONNECTED DEVICES and select the you device you want to reserve an
IP for. Then the MAC Address will be automatically filled in. Or enter the MAC address
of the client device manually.
3. Enter the IP address to reserve for the client device.
4. Click SAVE.
14. 4. Set Up a Dynamic DNS Service Account
Most ISPs assign a dynamic IP address to the router and you can use this IP address
to access your router remotely. However, the IP address can change from time to time
and you don’t know when it changes. In this case, you might apply the DDNS (Dynamic
Domain Name Server) feature on the router to allow you and your friends to access your
router and local servers (FTP, HTTP, etc.) using a domain name without checking and
remembering the IP address.
Note: DDNS does not work if the ISP assigns a private WAN IP address (such as 192.168.1.x) to the router.
1. Visit http://tplinkwifi.net, and log in with your TP-Link ID or the password you set for
the router.
2. Go to Advanced > Network > Dynamic DNS.
3. Select the DDNS Service Provider: TP-Link, NO-IP or DynDNS. It is recommended
to select TP-Link so that you can enjoy TP-Link’s superior DDNS service. Otherwise,
please select NO-IP or DynDNS. If you don’t have a DDNS account, you have to
register first by clicking Register Now.
Note: To enjoy TP-Link’s DDNS service, you have to log in with a TP-Link ID. If you have not logged in with one, click
log in.
4. Click Register in the Domain Name List if you have selected TP-Link, and enter the
Domain Name as needed.
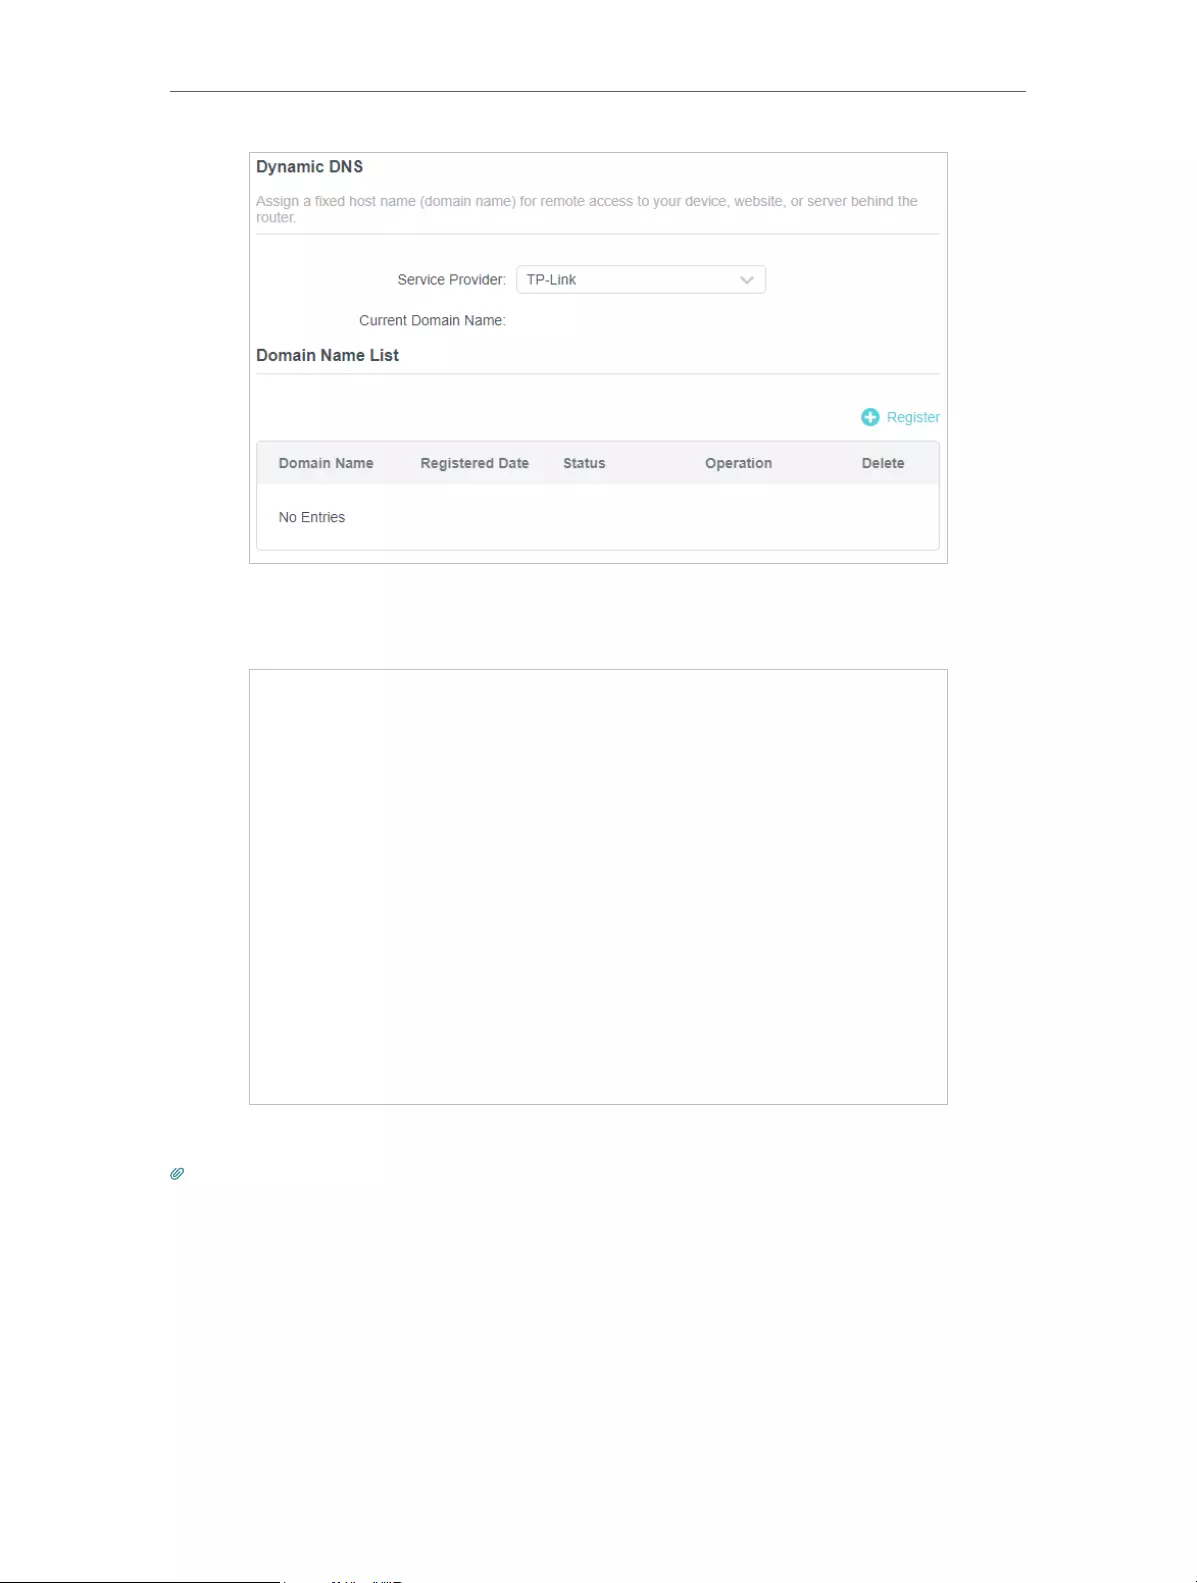
81
Chapter 14 Customize Your Network Settings
If you have selected NO-IP or DynDNS, enter the username, password and domain
name of your account.
5. Click LOGIN AND SAVE.
Tips: If you want to use a new DDNS account, please click Logout first, and then log in with a new account.
14. 5. Create Static Routes
Static routing is a form of routing that is configured manually by a network administrator
or a user by adding entries into a routing table. The manually-configured routing
information guides the router in forwarding data packets to the specific destination.

82
Chapter 14 Customize Your Network Settings
I want to:
Visit multiple networks and servers at the same time.
For example, in a small office, my PC can surf the internet through Router A, but I also
want to visit my company’s network. Now I have a switch and Router B. I connect the
devices as shown in the following figure so that the physical connection between my
PC and my company’s server is established. To surf the internet and visit my company’s
network at the same time, I need to configure the static routing.
Company’s server
PC
Router B
Router A
Switch
LAN: 192.168.0.1
192.168.0.100
LAN: 192.168.0.2
WAN: 172.30.30.100
172.30.30.1
How can I do that?
1. Change the routers’ LAN IP addresses to two different IP addresses on the same
subnet. Disable Router B’s DHCP function.
2. Visit http://tplinkwifi.net, and log in with your TP-Link ID or the password you set for
Router A.
3. Go to Advanced > Network > Routing.
4. Click Add and finish the settings according to the following explanations:

83
Chapter 14 Customize Your Network Settings
Network Destination: The destination IP address that you want to assign to a static
route. This IP address cannot be on the same subnet with the WAN IP or LAN IP of
Router A. In the example, the IP address of the company network is the destination
IP address, so here enter 172.30.30.1.
Subnet Mask: Determines the destination network with the destination IP address.
If the destination is a single IP address, enter 255.255.255.255; otherwise, enter
the subnet mask of the corresponding network IP. In the example, the destination
network is a single IP, so here enter 255.255.255.255.
Default Gateway: The IP address of the gateway device to which the data packets
will be sent. This IP address must be on the same subnet with the router’s IP which
sends out data. In the example, the data packets will be sent to the LAN port of
Router B and then to the Server, so the default gateway should be 192.168.0.2.
Interface: Determined by the port (WAN/LAN) that sends out data packets. In the
example, the data are sent to the gateway through the LAN port of Router A, so LAN/
WLAN should be selected.
Description: Enter a description for this static routing entry.
5. Click SAVE.
6. Check the Routing Table below. If you can find the entry you’ve set, the static routing
is set successfully.
Done!
Open a web browser on your PC. Enter the company server’s IP address to visit the
company network.

Chapter 15
Manage the Router
This chapter will show you the configuration for managing and maintaining your router.
It contains the following sections:
• Upgrade the Firmware
• Backup and Restore Configuration Settings
• Change the Login Password
• Password Recovery
• Local Management
• Remote Management
• System Log
• Test the Network Connectivity
• Set Up System Time
• Set the Router to Reboot Regularly
• Control the LED

85
Chapter 15 Manage the Router
15. 1. Upgrade the Firmware
TP-Link aims at providing better network experience for users.
We will inform you through the web management page if there’s any update firmware
available for your router. Also, the latest firmware will be released at the TP-Link official
website www.tp-link.com, and you can download it from the Support page for free.
Note:
• Backup your router configuration before firmware upgrade.
• Do NOT turn off the router during the firmware upgrade.
15. 1. 1. Auto Update
1. Visit http://tplinkwifi.net, and log in with your TP-Link ID or the password you set for
the router.
2. Enable Auto Update.
3. Specify the Update Time and save the settings.
The router will update firmware automatically at the specified time when new version is
available.
15. 1. 2. Online Upgrade
1. Visit http://tplinkwifi.net, and log in with your TP-Link ID or the password you set for
the router.
2. When the latest firmware is available for your router, the upgrade icon will
display in the top-right corner of the page. Click the icon to go to the Firmware
Upgrade page.
Alternatively, you can go to Advanced > System > Firmware Upgrade, and click
CHECK FOR UPGRADES to see whether the latest firmware is released.

86
Chapter 15 Manage the Router
3. Focus on the Online Upgrade section, and click UPGRADE if there is new firmware.
4. Wait a few minutes for the upgrade and reboot to complete.
Tips: If there’s a new and important firmware update for your router, you will see the prompt notification on your
computer as long as a web browser is opened. Click UPGRADE, and log in to the web management page with the
username and password you set for the router. You will see the Firmware Upgrade page.
15. 1. 3. Local Upgrade
1. Download the latest firmware file for the router from www.tp-link.com.
2. Visit http://tplinkwifi.net, and log in with your TP-Link ID or the password you set for
the router.
3. Go to Advanced > System > Firmware Upgrade.
4. Focus on the Local Upgrade section. Click BROWSE to locate the downloaded new
firmware file, and click UPGRADE.

87
Chapter 15 Manage the Router
5. Wait a few minutes for the upgrade and reboot to complete.
Note: If you fail to upgrade the firmware for the router, please contact our Technical Support.
15. 2. Backup and Restore Configuration Settings
The configuration settings are stored as a configuration file in the router. You can
backup the configuration file to your computer for future use and restore the router to
a previous settings from the backup file when needed. Moreover, if necessary you can
erase the current settings and reset the router to the default factory settings.
1. Visit http://tplinkwifi.net, and log in with your TP-Link ID or the password you set for
the router.
2. Go to Advanced > System Tools > Backup & Restore.
• To backup configuration settings:
Click BACK UP to save a copy of the current settings to your local computer. A ‘.bin’ file
of the current settings will be stored to your computer.
• To restore configuration settings:
1. Click BROWSE to locate the backup configuration file stored on your computer, and
click RESTORE.
2. Wait a few minutes for the restoring and rebooting.
Note: During the restoring process, do not turn off or reset the router.
• To reset the router except your login password and TP-Link ID:
1. In the Factory Default Restore section, click RESTORE.

88
Chapter 15 Manage the Router
2. Wait a few minutes for the resetting and rebooting.
Note:
• During the resetting process, do not turn off the router.
• After reset, you can still use the current login password or the TP-Link ID to log in to the web management page.
• To reset the router to factory default settings:
1. Click FACTORY RESTORE to reset the router.
2. Wait a few minutes for the resetting and rebooting.
Note:
• During the resetting process, do not turn off or reset the router.
• We strongly recommend you backup the current configuration settings before resetting the router.
15. 3. Change the Login Password
The account management feature allows you to change your login password of the web
management page.
Note: If you are using a TP-Link ID to log in to the web management page, the account management feature will be
disabled. To manage the TP-Link ID, go to Advanced > TP-Link ID.
1. Visit http://tplinkwifi.net, and log in with the password you set for the router.
2. Go to Advanced > System > Administration and focus on the Change Password
section.
3. Enter the old password, then a new password twice (both case-sensitive). Click SAVE.

89
Chapter 15 Manage the Router
4. Use the new password for future logins.
15. 4. Password Recovery
This feature allows you to recover the login password you set for you router in case you
forget it.
Note: If you are using a TP-Link ID to log in to the web management page, the Password Recovery feature will be
disabled. To manage the TP-Link ID, go to Advanced > TP-Link ID.
1. Visit http://tplinkwifi.net, and log in with the password you set for the router.
2. Go to Advanced > System > Administration and focus on the Password Recovery
section.
3. Tick the Enable box of Password Recovery.
4. Specify a mailbox (From) for sending the recovery letter and enter its SMTP Server
address. Specify a mailbox (To) for receiving the recovery letter. If the mailbox (From)
to send the recovery letter requires encryption, Tick the Enable box of Authentication
and enter its username and password.
Tips:
• SMTP server is available for users in most webmail systems. For example, the SMTP server address of Gmail
is smtp.gmail.com.
• Generally, Authentication should be enabled if the login of the mailbox requires username and password.
5. Click SAVE.
To recover the login password, please visit http://tplinkwifi.net, click Forgot Password?
on the login page and follow the instructions to set a new password.

90
Chapter 15 Manage the Router
15. 5. Local Management
This feature allows you to limit the number of client devices on your LAN from accessing
the router by using the MAC address-based authentication.
1. Visit http://tplinkwifi.net, and log in with your TP-Link ID or the password you set for
the router.
2. Go to Advanced > System > Administration and complete the settings In Local
Management section as needed.
• Access the router via HTTPS and HTTP:
Tick the Enable box of Local Management via HTTPS to access the router via HTTPS
and HTTP, or keep it disabled to access the router only via HTTP.
• Allow all LAN connected devices to manage the router:
Select All Devices for Local Managers.
• Allow specific devices to manage the router:
1. Select All Devices for Local Managers and click SAVE.

91
Chapter 15 Manage the Router
2. Click Add Device.
3. Click VIEW CONNECTED DEVICES and select the device to manage the router from
the Connected Devices list, or enter the MAC address of the device manually.
4. Specify a Description for this entry.
5. Click SAVE.
15. 6. Remote Management
This feature allows you to control remote devices’ authority to manage the router.
1. Visit http://tplinkwifi.net, and log in with your TP-Link ID or the password you set for
the router.
2. Go to Advanced > System > Administration and complete the settings in Remote
Management section as needed.
• Forbid all devices to manage the router remotely:
Do not tick the Enable checkbox of Remote Management.

92
Chapter 15 Manage the Router
• Allow all devices to manage the router remotely:
1. Tick the Enable checkbox of Remote Management.
2. Keep the HTTPS and HTTP port as default settings (recommended) or enter a value
between 1024 and 65535.
3. Select All Devices for Remote Managers.
4. Click SAVE.
Devices on the internet can log in to http://Router’s WAN IP address:port number (such
as http://113.116.60.229:1024) to manage the router.
Tips:
• You can find the WAN IP address of the router on Network Map > Internet.
• The router’s WAN IP is usually a dynamic IP. Please refer to Set Up a Dynamic DNS Service Account if you want to log
in to the router through a domain name.
• Allow a specific device to manage the router remotely:

93
Chapter 15 Manage the Router
1. Tick the Enable checkbox of Remote Management.
2. Keep the HTTPS and HTTP port as default settings (recommended) or enter a value
between 1024 and 65535.
3. Select Specified Device for Remote Managers.
4. In the Only this IP Address field, enter the IP address of the remote device to manage
the router.
5. Click SAVE.
Devices using this WAN IP can manage the router by logging in to http://Router’s WAN
IP:port number (such as http://113.116.60.229:1024).
Tips: The router’s WAN IP is usually a dynamic IP. Please refer to Set Up a Dynamic DNS Service Account if you want
to log in to the router through a domain name.
15. 7. System Log
When the router does not work normally, you can save the system log and send it to the
technical support for troubleshooting.
• To save the system log locally:
1. Visit http://tplinkwifi.net, and log in your TP-Link ID or the password you set for the
router.
2. Go to Advanced > System > System Log.
3. Choose the type and level of the system logs as needed.

94
Chapter 15 Manage the Router
4. In the Save Log section, click SAVE TO LOCAL to save the system logs to a local disk.
• To send the system log to a mailbox at a fixed time:
For example, I want to check my router’s working status at a fixed time every day,
however, it’s too troublesome to log in to the web management page every time I want
to go checking. It would be great if the system logs could be sent to my mailbox at 8
a.m. every day.
1. Visit http://tplinkwifi.net, and log in with your TP-Link ID or the password you set for
the router.
2. Go to Advanced > System Tools > System Log.
3. In the Save Log section, click MAIL LOG.
4. Enter the information required:

95
Chapter 15 Manage the Router
1 ) Email From: Enter the email address used for sending the system log.
2 ) Select Require Password.
Tips: Generally, Require Password should be selected if the login of the mailbox requires username and password.
3 ) Username: Enter the email address used for sending the system log.
4 ) Email Password: Enter the password to login the sender’s email address.
5 ) SMTP Server: Enter the SMTP server address.
Tips: SMTP server is available for users in most webmail systems. For example, the SMTP server address of
Hotmail is smtp-mail.outlook.com.
6 ) Email To: Enter the recipient’s email address, which can be the same as or
different from the sender’s email address.
7 ) Select Mail Log Automatically.
Tips: The router will send the system log to the designated email address if this option is enabled.
8 ) Frequency: This determines how often the recipient will receive the system log .
5. Click SAVE.
15. 8. Test the Network Connectivity
Diagnostics is used to test the connectivity between the router and the host or other
network devices.

96
Chapter 15 Manage the Router
1. Visit http://tplinkwifi.net, and log in with your TP-Link ID or the password you set for
the router.
2. Go to Advanced > System > Diagnostics.
3. Enter the information:
1 ) Choose Ping or Traceroute as the diagnostic tool to test the connectivity;
• Ping is used to test the connectivity between the router and the tested host,
and measure the round-trip time.
• Traceroute is used to display the route (path) your router has passed to reach
the tested host, and measure transit delays of packets across an Internet
Protocol network.
2 ) Enter the IP Address or Domain Name of the tested host.
3 ) Modify the Ping Count number and the Ping Packet Size. It’s recommended to
keep the default value.
4 ) If you have chosen Traceroute, you can modify the Traceroute Max TTL. It’s
recommended to keep the default value.
4. Click START to begin the diagnostics.
The figure below indicates the proper connection between the router and the Yahoo
server (www.Yahoo.com) tested through Ping.

97
Chapter 15 Manage the Router
The figure below indicates the proper connection between the router and the Yahoo
server (www.Yahoo.com) tested through Traceroute.
15. 9. Set Up System Time
System time is the time displayed while the router is running. The system time you
configure here will be used for other time-based functions like Parental Controls. You
can choose the way to obtain the system time as needed.
1. Visit http://tplinkwifi.net, and log in with your TP-Link ID or the password you set for
the router.
2. Go to Advanced > System > Time & Language.
• To get time from the internet:
1. Enable 24-Hour Time if you want the time to display in a 24-hour way.
2. In the Set Time field, select Get from Internet.
3. Select your local Time Zone from the drop-down list.
4. In the NTP Server I field, enter the IP address or domain name of your desired NTP
Server.

98
Chapter 15 Manage the Router
5. (Optional) In the NTP Server II field, enter the IP address or domain name of the
second NTP Server.
6. Click SAVE.
• To get time from your computer:
1. In the Set Time field, select Get from Managing Device.
2. The time of your computer will then be displayed and click SAVE.
• To manually set the date and time:
1. In the Set Time field, select Manually.
2. Set the current Date (In MM/DD/YYYY format).
3. Set the current Time (In HH/MM/SS format).
4. Click SAVE.
• To set up Daylight Saving Time:
1. Tick the Enable box of Daylight Saving Time.

99
Chapter 15 Manage the Router
2. Select the correct Start date and time when daylight saving time starts at your local
time zone.
3. Select the correct End date and time when daylight saving time ends at your local
time zone.
4. Click SAVE.
15. 10. Set the Router to Reboot Regularly
The Scheduled Reboot feature cleans the cache to enhance the running performance
of the router.
1. Visit http://tplinkwifi.net, and log in with your TP-Link ID or the password you set for
the router.
2. Go to Advanced > System > Reboot.
3. Tick the Enable box of Reboot Schedule.
4. Specify the Reboot Time when the router reboots and Repeat to decide how often it
reboots.
5. Click SAVE.

100
Chapter 15 Manage the Router
15. 11. Control the LED
The LED of the router indicates its activities and status. You can enable the Night Mode
feature to specify a time period during which the LED is off.
1. Visit http://tplinkwifi.net, and log in with your TP-Link ID or the password you set for
the router.
2. Go to Advanced > System > LED Control.
3. Enable Night Mode.
4. Specify the LED off time, and the LED will be off during this period every day.
5. Click SAVE.

101
FAQ
Q1. What should I do if I forget my wireless password?
The default wireless password is printed on the label of the router. If the password has
been altered:
1. Connect your computer to the router using an Ethernet cable.
2. Visit http://tplinkwifi.net, and log in with your TP-Link ID or the password you set for
the router.
3. Go to Wireless to retrieve or reset your wireless password.
Q2. What should I do if I forget my web management password?
• If you are using a TP-Link ID to log in, or you have enabled the Password Recovery
feature of the router, click Forgot password on the login page and then follow the
instructions to reset it.
• Alternatively, press and hold the Reset button of the router until the Power LED blinks
to restore factory default settings, and then visit http://tplinkwifi.net to create a new
login password.
Note:
• Please refer to Password Recovery to learn how to configure Password Recovery.
• You’ll need to reconfigure the router to surf the internet once the router is reset, and please mark down your new
password for future use.
Q3. What should I do if I can’t log in to the router’s web management
page?
This can happen for a variety of reasons. Please try the methods below to log in again.
• Make sure your computer is connected to the router correctly and the corresponding
LED indicator(s) light up.
• Make sure the IP address of your computer is configured as Obtain an IP address
automatically and Obtain DNS server address automatically.
• Make sure http://tplinkwifi.net or http://192.168.0.1 is correctly entered.
• Check your computer’s settings:
1 ) Go to Start > Control Panel > Network and Internet, and click View network
status and tasks.
2 ) Click Internet Options on the bottom left.
3 ) Click Connections and select Never dial a connection.

102
4 ) Click LAN settings and deselect the following three options and click OK.
5 ) Go to Advanced > Restore advanced settings, click OK to save the settings.

103
• Use another web browser or computer to log in again.
• Reset the router to factory default settings and try again. If login still fails, please
contact the technical support.
Note: You’ll need to reconfigure the router to surf the internet once the router is reset.
Q4. What should I do if I can’t access the internet even though the
configuration is finished?
1. Visit http://tplinkwifi.net, and log in with your TP-Link ID or the password you set for
the router.
2. Go to Advanced> Network > Status to check internet status:
If IP Address is a valid one, please try the methods below and try again:
• Your computer might not recognize any DNS server addresses. Please manually
configure the DNS server.
1 ) Go to Advanced > Network > DHCP Server.
2 ) Enter 8.8.8.8 as Primary DNS, click SAVE .
Tips: 8.8.8.8 is a safe and public DNS server operated by Google.

104
• Restart the modem and the router.
1 ) Power off your modem and router, and leave them off for 1 minute.
2 ) Power on your modem first, and wait about 2 minutes until it gets a solid cable
or Internet light.
3 ) Power on the router.
4 ) Wait another 1 or 2 minutes and check the internet access.
• Reset the router to factory default settings and reconfigure the router.
• Upgrade the firmware of the router.
• Check the TCP/IP settings on the particular device if all other devices can get internet
from the router.
As the picture below shows, if the IP Address is 0.0.0.0, please try the methods below
and try again:
• Make sure the physical connection between the router and the modem is proper.
• Clone the MAC address of your computer.

105
1 ) Visit http://tplinkwifi.net, and log in with your TP-Link ID or the password you set
for the router.
2 ) Go to Internet or Advanced > Network > Internet and focus on the MAC Clone
section.
3 ) Choose an option as needed (enter the MAC address if Use Custom MAC
Address is selected), and click SAVE .
Tips:
• Some ISP will register the MAC address of your computer when you access the internet for the first time
through their Cable modem, if you add a router into your network to share your internet connection, the ISP will
not accept it as the MAC address is changed, so we need to clone your computer’s MAC address to the router.
• The MAC addresses of a computer in wired connection and wireless connection are different.
• Modify the LAN IP address of the router.
Note:
Most TP-Link routers use 192.168.0.1/192.168.1.1 as their default LAN IP address, which may conflict with the IP
range of your existing ADSL modem/router. If so, the router is not able to communicate with your modem and you
can’t access the internet. To resolve this problem, we need to change the LAN IP address of the router to avoid
such conflict, for example, 192.168.2.1.
1 ) Visit http://tplinkwifi.net, and log in with your TP-Link ID or the password you set
for the router.
2 ) Go to Advanced > Network > LAN.
3 ) Modify the LAN IP address as the follow picture shows. Here we take 192.168.2.1
as an example.
4 ) Click Save.
• Restart the modem and the router.

106
1 ) Power off your modem and router, and leave them off for 1 minute.
2 ) Power on your modem first, and wait about 2 minutes until it get a solid cable
or Internet light.
3 ) Power on the router.
4 ) Wait another 1 or 2 minutes and check the internet access.
• Double check the internet connection type.
1 ) Confirm your internet connection type, which can be learned from the ISP.
2 ) Visit http://tplinkwifi.net, and log in with your TP-Link ID or the password you set
for the router.
3 ) Go to Advanced > Network > Internet.
4 ) Select your Internet Connection Type and fill in other parameters.
5 ) Click Save.
6 ) Restart the modem and the router again.
• Please upgrade the firmware of the router.
If you’ve tried every method above but still cannot access the internet, please contact
the technical support.
Q5. What should I do if I can’t find my wireless network or I cannot
connect the wireless network?
If you fail to find any wireless network, please follow the steps below:
• Make sure the wireless function of your device is enabled if you’re using a laptop with
built-in wireless adapter. You can refer to the relevant document or contact the laptop
manufacturer.

107
• Make sure the wireless adapter driver is installed successfully and the wireless
adapter is enabled.
• On Windows 7
1 ) If you see the message No connections are available, it is usually because the
wireless function is disabled or blocked somehow.
2 ) Click Troubleshoot and windows might be able to fix the problem by itself.
• On Windows XP
1 ) If you see the message Windows cannot configure this wireless connection,
this is usually because windows configuration utility is disabled or you are
running another wireless configuration tool to connect the wireless.
2 ) Exit the wireless configuration tool (the TP-Link Utility, for example).
3 ) Select and right click on My Computer on desktop, select Manage to open
Computer Management window.
4 ) Expand Services and Applications > Services, find and locate Wireless Zero
Configuration in the Services list on the right side.
5 ) Right click Wireless Zero Configuration, and then select Properties.
6 ) Change Startup type to Automatic, click on Start button and make sure the
Service status is Started. And then click OK.
If you can find other wireless network except your own, please follow the steps below:
• Check the WLAN LED indicator on your wireless router/modem.
• Make sure your computer/device is still in the range of your router/modem. Move it
closer if it is currently too far away.
• Go to Wireless or Advanced > Wireless > Wireless Settings, and check the wireless
settings. Double check your wireless Network Name and SSID is not hided.
If you can find your wireless network but fail to connect, please follow the steps below:
• Authenticating problem/password mismatch:
1 ) Sometimes you will be asked to type in a PIN number when you connect to
the wireless network for the first time. This PIN number is different from the
Wireless Password/Network Security Key, usually you can only find it on the
label of your router.

108
2 ) If you cannot find the PIN or PIN failed, you may choose Connecting using a
security key instead, and then type in the Wireless Password/Network Security
Key.
3 ) If it continues to show note of Network Security Key Mismatch, it is suggested
to confirm the wireless password of your wireless router.
Note: Wireless Password/Network Security Key is case sensitive.
• Windows unable to connect to XXXX / Can not join this network / Taking longer than
usual to connect to this network:
• Check the wireless signal strength of your network. If it is weak (1~3 bars),
please move the router closer and try again.
• Change the wireless Channel of the router to 1, 6 or 11 to reduce interference
from other networks.
• Re-install or update the driver for your wireless adapter of the computer.

109
FCC compliance information statement
Product Name: AX5400 Wi-Fi 6 Router
Model Number: Archer AX73
Component Name Model
I.T.E. Power Supply NBS30D120250VU
Responsible party:
TP-Link USA Corporation, d/b/a TP-Link North America, Inc.
Address: 145 South State College Blvd. Suite 400, Brea, CA 92821
Website: http://www.tp-link.com/us/
Tel: +1 626 333 0234
Fax: +1 909 527 6803
E-mail: sales.usa@tp-link.com
This equipment has been tested and found to comply with the limits for a Class
B digital device, pursuant to part 15 of the FCC Rules. These limits are designed
to provide reasonable protection against harmful interference in a residential
installation. This equipment generates, uses and can radiate radio frequency
energy and, if not installed and used in accordance with the instructions, may
cause harmful interference to radio communications. However, there is no
guarantee that interference will not occur in a particular installation. If this
equipment does cause harmful interference to radio or television reception,
which can be determined by turning the equipment off and on, the user is
encouraged to try to correct the interference by one or more of the following
measures:
• Reorient or relocate the receiving antenna.
• Increase the separation between the equipment and receiver.
• Connect the equipment into an outlet on a circuit different from that to which
the receiver is connected.
• Consult the dealer or an experienced radio/ TV technician for help.
This device complies with part 15 of the FCC Rules. Operation is subject to the
following two conditions:
1. This device may not cause harmful interference.
2. This device must accept any interference received, including interference
that may cause undesired operation.
Any changes or modifications not expressly approved by the party responsible
for compliance could void the user’s authority to operate the equipment.

110
Note: The manufacturer is not responsible for any radio or TV interference
caused by unauthorized modifications to this equipment. Such modifications
could void the user’s authority to operate the equipment.
FCC RF Radiation Exposure Statement
This equipment complies with FCC RF radiation exposure limits set forth for an
uncontrolled environment. This device and its antenna must not be co-located
or operating in conjunction with any other antenna or transmitter.
“To comply with FCC RF exposure compliance requirements, this grant is
applicable to only Mobile Configurations. The antennas used for this transmitter
must be installed to provide a separation distance of at least 20 cm from all
persons and must not be co-located or operating in conjunction with any other
antenna or transmitter.”
We, TP-Link USA Corporation, has determined that the equipment shown as
above has been shown to comply with the applicable technical standards, FCC
part 15. There is no unauthorized change is made in the equipment and the
equipment is properly maintained and operated.
FCC compliance information statement
Product Name: I.T.E. Power Supply
Model Number: NBS30D120250VU
Responsible party:
TP-Link USA Corporation, d/b/a TP-Link North America, Inc.
Address: 145 South State College Blvd. Suite 400, Brea, CA 92821
Website: http://www.tp-link.com/us/
Tel: +1 626 333 0234
Fax: +1 909 527 6803
E-mail: sales.usa@tp-link.com
This equipment has been tested and found to comply with the limits for a Class
B digital device, pursuant to part 15 of the FCC Rules. These limits are designed
to provide reasonable protection against harmful interference in a residential
installation. This equipment generates, uses and can radiate radio frequency
energy and, if not installed and used in accordance with the instructions, may
cause harmful interference to radio communications. However, there is no
guarantee that interference will not occur in a particular installation. If this
equipment does cause harmful interference to radio or television reception,
which can be determined by turning the equipment off and on, the user is
encouraged to try to correct the interference by one or more of the following
measures:

111
• Reorient or relocate the receiving antenna.
• Increase the separation between the equipment and receiver.
• Connect the equipment into an outlet on a circuit different from that to which
the receiver is connected.
• Consult the dealer or an experienced radio/ TV technician for help.
This device complies with part 15 of the FCC Rules. Operation is subject to the
following two conditions:
1. This device may not cause harmful interference.
2. This device must accept any interference received, including interference
that may cause undesired operation.
Any changes or modifications not expressly approved by the party responsible
for compliance could void the user’s authority to operate the equipment.
We, TP-Link USA Corporation, has determined that the equipment shown as
above has been shown to comply with the applicable technical standards, FCC
part 15. There is no unauthorized change is made in the equipment and the
equipment is properly maintained and operated.
Issue Date: 2020-10-12

112
CE Mark Warning
This is a class B product. In a domestic environment, this product may cause
radio interference, in which case the user may be required to take adequate
measures.
OPERATING FREQUENCY(the maximum transmitted power)
2400 MHz -2483.5 MHz (20dBm)
5150 MHz -5250 MHz (23dBm)
EU declaration of conformity
TP-Link hereby declares that the device is in compliance with the essential
requirements and other relevant provisions of directives 2014/53/EU, 2009/125/
EC, 2011/65/EU and (EU)2015/863.
The original EU declaration of conformity may be found at https://www.tp-link.com/en/ce
RF Exposure Information
This device meets the EU requirements (2014/53/EU Article 3.1a) on the
limitation of exposure of the general public to electromagnetic fields by way of
health protection.
The device complies with RF specifications when the device used at 20 cm from
your body.
National Restrictions
Attention: This device may only be used indoors in all EU member states and
EFTA countries.
Canadian Compliance Statement
This device contains licence-exempt transmitter(s)/receiver(s) that comply with
Innovation, Science and Economic Development Canada’s licence-exempt
RSS(s). Operation is subject to the following two conditions:

113
Canadian Compliance Statement
This device contains licence-exempt transmitter(s)/receiver(s) that comply with
Innovation, Science and Economic Development Canada’s licence-exempt
RSS(s). Operation is subject to the following two conditions:
(1) This device may not cause interference.
(2) This device must accept any interference, including interference that may
cause undesired operation of the device.
L’émetteur/récepteur exempt de licence contenu dans le présent appareil est
conforme aux CNR d’Innovation, Sciences et Développement économique
Canada applicables aux appareils radio exempts de licence. L’exploitation est
autorisée aux deux conditions suivantes :
1) L’appareil ne doit pas produire de brouillage;
2) L’appareil doit accepter tout brouillage radioélectrique subi, même si le
brouillage est susceptible d’en compromettre le fonctionnement.
Caution:
1. The device for operation in the band 5150–5250 MHz is only for indoor use
to reduce the potential for harmful interference to co-channel mobile satellite
systems;
Avertissement:
1. Le dispositif fonctionnant dans la bande 5150-5250 MHz est réservé
uniquement pour une utilisation à l’intérieur afin de réduire les risques de
brouillage préjudiciable aux systèmes de satellites mobiles utilisant les mêmes
canaux;
Radiation Exposure Statement:
This equipment complies with IC radiation exposure limits set forth for an
uncontrolled environment. This equipment should be installed and operated
with minimum distance 20cm between the radiator & your body.
Déclaration d’exposition aux radiations:
Cet équipement est conforme aux limites d’exposition aux rayonnements IC
établies pour un environnement non contrôlé. Cet équipement doit être installé
et utilisé avec un minimum de 20 cm de distance entre la source de rayonnement
et votre corps.
Industry Canada Statement
CAN ICES-3 (B)/NMB-3(B)

114
Korea Warning Statements:
당해 무선설비는 운용중 전파혼신 가능성이 있음.
NCC Notice & BSMI Notice:
注意!
依據 低功率電波輻射性電機管理辦法
第十二條 經型式認證合格之低功率射頻電機,非經許可,公司、商號或使用者均
不得擅自變更頻率、加大功率或變更原設計之特性或功能。
第十四條 低功率射頻電機之使用不得影響飛航安全及干擾合法通信;經發現有干
擾現象時,應立即停用,並改善至無干擾時方得繼續使用。前項合法通信,指依
電信規定作業之無線電信。低功率射頻電機需忍受合法通信或工業、科學以及醫
療用電波輻射性電機設備之干擾。
4.7.9.1應避免影響附近雷達系統之操作。
4.7.9.2高增益指向性天線只得應用於固定式點對點系統。
安全諮詢及注意事項
• 請使用原裝電源供應器或只能按照本產品注明的電源類型使用本產品。
• 清潔本產品之前請先拔掉電源線。請勿使用液體、噴霧清潔劑或濕布進行
清潔。
• 注意防潮,請勿將水或其他液體潑灑到本產品上。
• 插槽與開口供通風使用,以確保本產品的操作可靠並防止過熱,請勿堵塞
或覆蓋開口。
• 請勿將本產品置放於靠近熱源的地方。除非有正常的通風,否則不可放在
密閉位置中。
• 請不要私自打開機殼,不要嘗試自行維修本產品,請由授權的專業人士進
行此項工作。
限用物質含有情況標示聲明書
設備名稱:AX5400 Wi-Fi 6 Router
Equipment name
型號(型式):Archer AX73
Type designation (Type)
單元
Unit
限用物質及其化學符號
Restricted substances and its chemical symbols
鉛
Lead
(Pb)
汞
Mercury
(Hg)
鎘
Cadmium
(Cd)
六價鉻
Hexavalent
chromium
(Cr+6)
多溴聯苯
Polybrominated
biphenyls
(PBB)
多溴二苯醚
Polybrominated
diphenyl ethers
(PBDE)
PCB ○ ○ ○ ○ ○ ○
外殼 ○ ○ ○ ○ ○ ○
電源供應器 − ○ ○ ○ ○ ○
115
天線 ○ ○ ○ ○ ○ ○
備考1.〝超出0.1 wt %〞及〝超出0.01 wt %〞係指限用物質之百分比含量超出百分比含量基準值
Note 1:“Exceeding 0.1 wt %” and “exceeding 0.01 wt %” indicate that the percentage content of
the restricted substance exceeds the reference percentage value of presence condition.
備考2.〝○〞係指該項限用物質之百分比含量未超出百分比含量基準值。
Note 2:“○” indicates that the percentage content of the restricted substance does not exceed the
percentage of reference value of presence.
備考3.〝−〞係指該項限用物質為排除項目。
Note 3:The “−” indicates that the restricted substance corresponds to the exemption.
Продукт сертифіковано згідно с правилами системи УкрСЕПРО на
відповідність вимогам нормативних документів та вимогам, що передбачені
чинними законодавчими актами України.
Safety Information
• Keep the device away from water, fire, humidity or hot environments.
• Do not attempt to disassemble, repair, or modify the device. If you need service,
please contact us.
• Do not use damaged charger or USB cable to charge the device.
• Do not use any other chargers than those recommended
• Do not use the device where wireless devices are not allowed.
• Adapter shall be installed near the equipment and shall be easily accessible.
• Use only power supplies which are provided by manufacturer and in the original
packing of this product. If you have any questions, please don’t hesitate to
contact us.
Please read and follow the above safety information when operating the device.
We cannot guarantee that no accidents or damage will occur due to improper
use of the device. Please use this product with care and operate at your own risk.
Explanations of the symbols on the product label
Symbol Explanation
DC voltage
AC voltage
Class II equipment

116
Symbol Explanation
Polarity of output terminals
Energy efficiency Marking
Indoor use only
RECYCLING
This product bears the selective sorting symbol for Waste electrical and electronic
equipment (WEEE). This means that this product must be handled pursuant to European
directive 2012/19/EU in order to be recycled or dismantled to minimize its impact on
the environment.
User has the choice to give his product to a competent recycling organization or to the
retailer when he buys a new electrical or electronic equipment.
21 декабря 2020 г. компания TP-Link начала продажи в России своего новенького домашнего роутера Archer AX73 (AX5400). За мои долгие годы использования роутеров TP-Link в домашних условиях успел насмотреться многого: были и положительные моменты, и отрицательные. Спойлер – а здесь и цена приятная, и функционал. Так ли все хорошо на самом деле и мое мнение после недели тестового использования аппарата вы можете узнать ниже в этой статье.
Друзья, если у вас остались какие-то вопросы или пожелания к этой статье, можете оставить комментарий. Поможете себе, поможете другим, поможете нам.
Содержание
- Краткое мнение
- Характеристики
- Комплектация
- Внешний вид
- Установка и Подключение
- Быстрая настройка – Tether
- Быстрая настройка – На ноутбуке через Web-интерфейс
- Сброс на заводские настройки
- Полная настройка
- Схема сети
- Изменить тип подключения к интернету
- Простые настройки Wi-Fi
- Дополнительные настройки
- Быстрая настройка
- Сеть – LAN
- Сеть – IPTV
- Сеть – DHCP-сервер
- Сеть – DDNS
- TP-Link ID
- Беспроводной режим – Настройки беспроводного режима
- Беспроводной режим – WPS
- USB
- NAT-переадресация – Перенаправление порта (ПРОБРОС порта)
- VPN-сервер
- Система – Обновление встроенного ПО
- Система – LED индикатор
- Система – Рабочий режим
- HomeShield
- Карта покрытия
- А что со скоростями?
- Инструкция
- Эмулятор
- Видео
- Итого
- Задать вопрос автору статьи
Краткое мнение
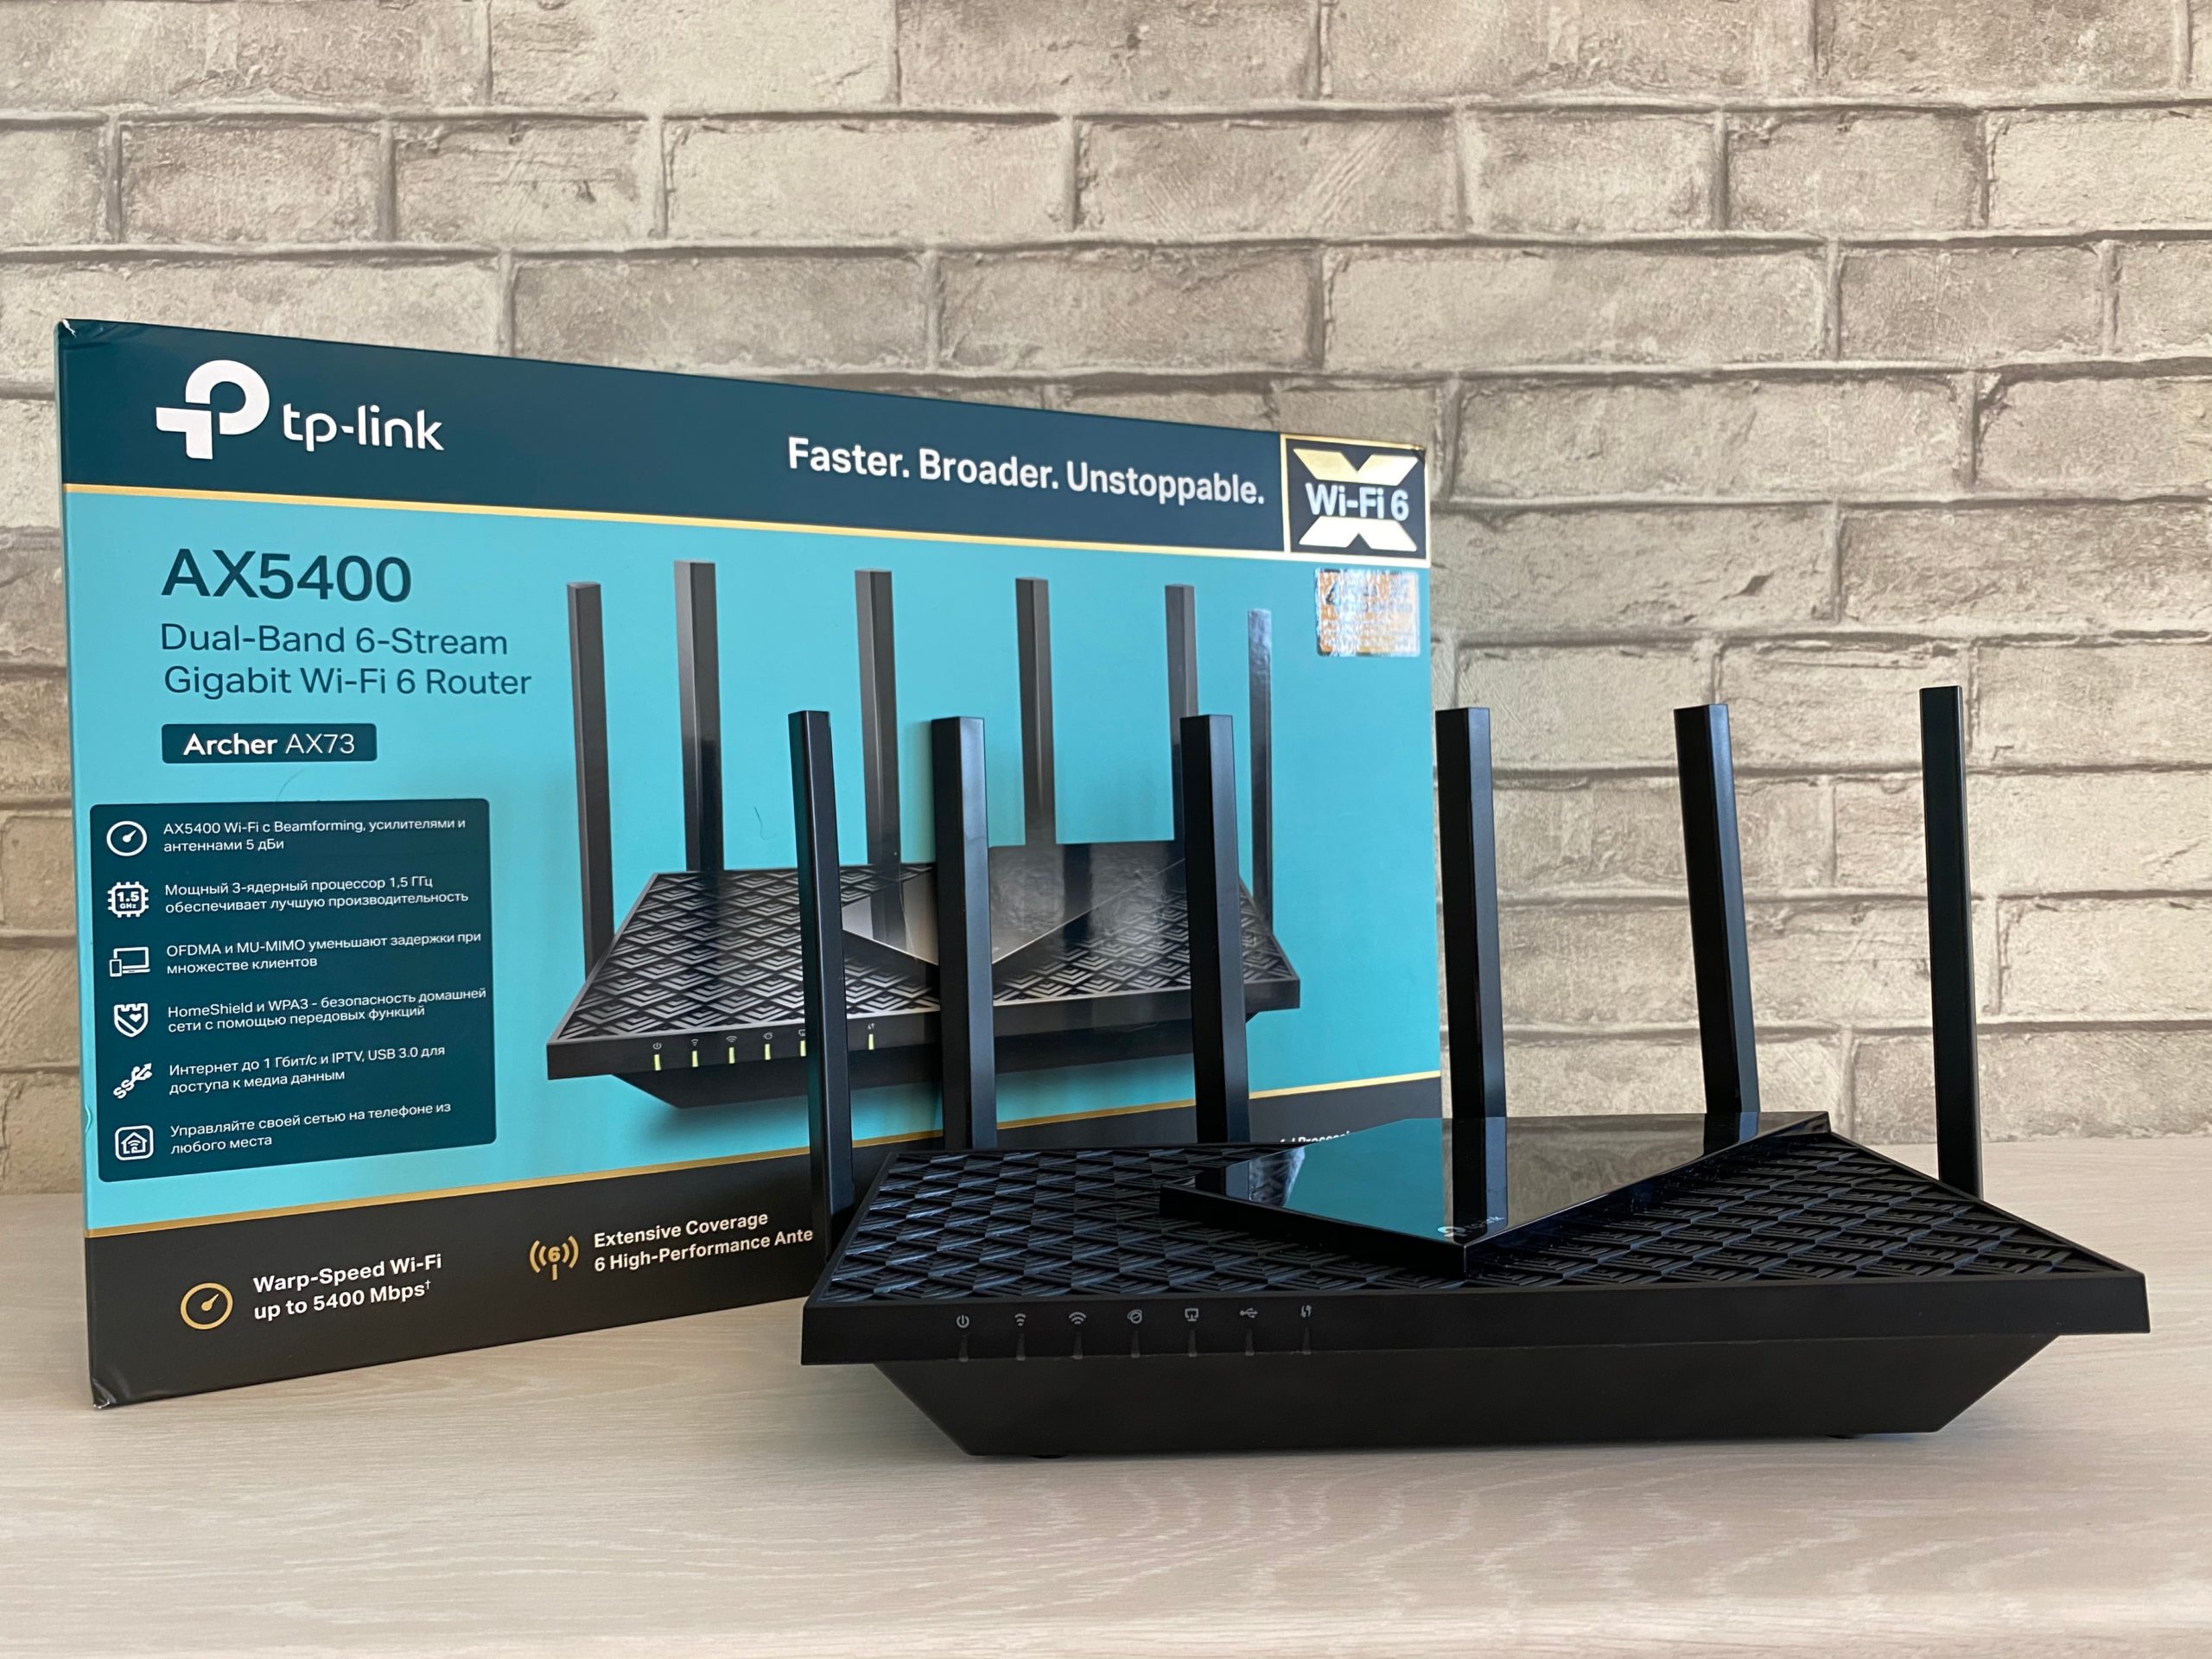
Для тех, кто не любит читать длинные обзоры, но хочет кратко собрать чужой опыт в своих сомнениях «покупать или нет», рекомендую ознакомиться с этим разделом. Здесь, на мой взгляд, я собрал самое важное, что может быть полезно домашнему пользователю.
- Wi-Fi 6. Причем неурезанный и с поддержкой 160 МГц. Перечислять здесь все фичи Wi-Fi 6 не хотелось бы, поэтому рекомендую вам познакомиться вот с этой моей статьей. Там все красиво и по полочкам. Да и на будущее будет знать полезно, т.к. Wi-Fi 6 – это не история одного конкретного роутера, а вообще всех Wi-Fi устройств ближайшего будущего. Так что если стоит выбор между Wi-Fi 5 (802.11ac) и Wi-Fi 6 (802.11ax) – при наличии бюджета однозначно стоит смотреть на новую версию.
- Гигабитный Wi-Fi. Это особенно актуально для тех, кто уже подключился к гигабитному интернету, а Wi-Fi прошлого поколения ему урезал скорость. Здесь максимальная скорость на весь роутер – ~5400 Мбит/с (4804 Мбит/с на 5 ГГц и 574 Мбит/с на 2.4 ГГц). Это и есть тот самый AX5400. Итого – подключаем гигабитный интернет, а далее и по проводу, и по воздуху можем творить парочку 8К стримов без особых проблем.
- Подключение ~200 устройств (128 на 5 ГГц и 96 на 2.4 ГГц). Нас часто спрашивают о максимальном числе устройств, подключаемых к Wi-Fi роутера. Особенно это актуально с появлением умного дом, где много разных мелких датчиков, а люди привыкли к своему USB-модему с максимальным ограничением в 16 устройств. Здесь эта проблема решена полностью. Более того, если в будущем соберетесь вдруг переводить все свои устройства на Wi-Fi 6, это все заработает в новых красках – здесь подключатся те же OFDMA и MU-MIMO 4×4, характерные для Wi-Fi 6. Со старым оборудованием все будет работать по-старому.
- HomeShield. Новая интересная защита роутера на базе Avira. Раньше такого не встречал. Но есть НО – ряд функций платный, поэтому предлагаю выделить на его рассмотрение отдельный раздел здесь. Хотя при такой цене роутера и наличию бесплатных возможностей – вполне себе интересное решение.
- USB порт. Этого порта мне очень не хватает на моем текущем роутере. А если честно, очень хотелось бы увидеть 2 порта, т.к. один у меня в былые времена всегда был занят принтером, а второй было бы интересно организовать под хранилище для фильмов для просмотра на ТВ.
- OneMesh. Функция доступна из коробки. На своем AX10 я так и не дождался ее появления, а тут все доступно и сразу. Для тех, кто не в курсе, эта особенность позволяет организовать дома действительно бесшовную Wi-Fi сеть. Кто использовал репитеры (даже с одинаковым названием сети), понимает, что при переходе от одной точки к другой, телефон все равно на время отключается от сети, а это очень критично при тех же звонках по Wi-Fi.
- Нет режима репитера и подключения WDS. Лично для меня эти функции на этом роутере не нужны – мост строить не буду, а для репитера здесь есть OneMesh.
- У USB порта в текущей версии не весь функционал. Нет принт-сервера и поддержки модемов.
- HomeShield. Да, его я выносил выше в преимущества, но есть один нюанс. Для доступа к базовому родительскому контролю придется устанавливать мобильное приложение. Кому-то это будет наоборот быстрее, но мне иногда проще входить в конфигуратор через браузер. Хотя все самое необходимое здесь есть и так, если не используете плотно – не пострадаете. Да и вполне возможно когда-нибудь это перенесется в обычный конфигуратор – все-таки нет привязки к железу.
Что получаем по итогу: вполне годный мощный роутер со всеми актуальными функциями, в функционале для того же TP-Link есть что-то новое, что интересно разобрать. Бонусом – оригинальный дизайн.
- Отлично подойдет тем, кто искал хороший роутер на Wi-Fi 6. Я уже пожалел, что сделал это раньше.
- Мощный домашний роутер.
- За отличную цену (рекомендуемая – до 7000 рублей, на практике продается прямо сейчас в магазинах намного дешевле), за свои деньги ТОП.
Характеристики
Самое главное по характеристикам этого роутера:
- Wi-Fi 6
- Два диапазона 2.4 ГГц и 5 ГГц
- Скорости: 4804 Мбит/с на 5 ГГц и 574 Мбит/с на 2.4 ГГц
- USB 3.0
- 6 антенн (несъемные, но свободно вращаются). 1я и 3я (вид спереди) – 2.4 ГГц, остальные отвечают за 5 ГГц
- Трехъядерный процессор 1.5 ГГц (Broadcom BCM6750)
- Гигабитные порты (WAN и LAN)
Все остальные характеристики выношу под спойлер, авось кто-то и там увидит что-то интересное:
Подробные характеристики
| Стандарты Wi-Fi | Wi-Fi 6:
802.11 ax/ac/n/a 5 ГГц 802.11 ax/n/b/g 2.4 ГГц |
| Скорости Wi-FI | AX5400:
5 ГГц: 4804 Мбит/с 2.4 ГГц: 574 Мбит/с |
| Антенны | 6 антенны, несъемные
Поддержка Beamforming и High-Power FEM |
| Особенности Wi-Fi | Двухдиапазонный
4×4 MU-MIMO OFDMA Airtime Fairness DFS 6 потоков |
| Режимы работы | Роутер
Точка доступа |
| Процессор | 3-х ядерный, 1.5 ГГц, Broadcom 6750
Для 5 ГГц выделен отдельный BCM43684 В настройках конфигуратора сейчас отображается 4 ядра |
| Ethernet порты | WAN: 1 шт., гигабитный
LAN: 4 шт., гигабитные Доступна LAG на 2 порта |
| USB | USB 3.0
Поддержка носителей NTFS, FAT32, exFAT, HFS+ Функции: Apple Time Machine, FTP, Медиа-сервер |
| Кнопки | Wi-Fi вкл/выкл
Питание вкл/выкл Индикаторы вкл/выкл WPS вкл/выкл Сброс настроек |
| Питание | 12 В, 2.5 А, 30 Вт |
| Защита Wi-Fi | WPA, WPA2, WPA3, WPA/WPA2-Enterprise |
| Безопасность сети | SPI Firewall
Контроль доступа IP & MAC Binding Шлюз на уровне приложений HomeShield |
| Гостевые сети | 1 x 5 ГГц и 1 x 2.4 ГГц |
| VPN | OpenVPN и PPTP |
| Mesh | OneMesh |
| Родительский контроль | На базе HomeShield:
Профили членов семьи Фильтрация URL Лимит времени Расписание доступа (с функцией времени сна) Логирование и подробные отчеты |
| Типы подключений | Динамический IP (DHCP)
Статический IP PPPoE PPTP L2TP |
| Приоритезация | QoS |
| Облачные сервисы | Автоматическое обновление
TP-Link ID DDNS |
| NAT | Port Forwarding Port Triggering DMZ UPnP Virtual Server |
| IPTV | IGMP Proxy IGMP Snooping Bridge Tag VLAN |
| DHCP | Address Reservation
DHCP Client List Server |
| DDNS сервисы | TP-Link
NO-IP DynDNS |
| Настройка | Tether App
WEB-конфигуратор |
| Размеры | 272.5 – 147.2 – 49.2 мм (без учета антенн) |
| Комплектация | Роутер
Адаптер питания RJ45 Ethernet кабель Руководство по быстрой установке |
| Сертификация | FCC, CE, RoHS |
| Условия использования и хранения | Рабочая температура: 0℃~40℃
Температура хранения: -40℃~70℃ Рабочая влажность: 10%~90% Влажность хранения: 5%~90% |
| Мощность передачи Wi-Fi | CE: <20dBm{2.4GHz} <23dBm{5.15GHz~5.35GHz} <30dBm{5.47GHz~5.725GHz} FCC: <24dBm{5.25GHz~5.35GHz&5.47GHz~5.725GHz } <30dBm{2.4GHz &5.15GHz~5.25GHz&5.725GHz~5.825GHz } |
| Чувствительность Wi-Fi | 2.4GHz: 11ac VHT20 MCS0:-94.5dBm 11ac VHT20 MCS8:-72.5dBm 11ac VHT40 MCS0:-92.5dBm 11ac VHT40 MCS9:-69.5dBm 11ax HE20 MCS0:-95dBm 11ax HE20 MCS11:-64.5dBm 11ax HE40 MCS0:-92.5dBm 11ax HE40 MCS11:-62dBm 5GHz: 11ac VHT20 MCS0:-97dBm 11ac VHT20 MCS8:-74dBm 11ac VHT40 MCS0:-95dBm 11ac VHT40 MCS9:-70dBm 11ac VHT80 MCS0:-91.5dBm 11ac VHT80 MCS9:-66dBm 11ac VHT160 MCS0:-86dBm 11ac VHT160 MCS9:-61dBm 11ax HE20 MCS0:-95dBm 11ax HE20 MCS11:-64dBm 11ax HE40 MCS0:-91.5dBm 11ax HE40 MCS11:-62dBm 11ax HE80 MCS0:-88dBm 11ax HE80 MCS11:-58dBm 11ax HE160 MCS0:-85.5dBm 11ax HE160 MCS11:-55dBm |
| Гарантия | 4 года |
Комплектация
Как уже неоднократно писал, последние коробки TP-Link лично мне очень заходят. Большие, красочные, информативные, а с этим роутером она еще и тяжелая. Так и чувствуется мощь продукта. Внутри основной коробки «оболочки», нас ждет еще одна упаковка (вижу такое впервые):
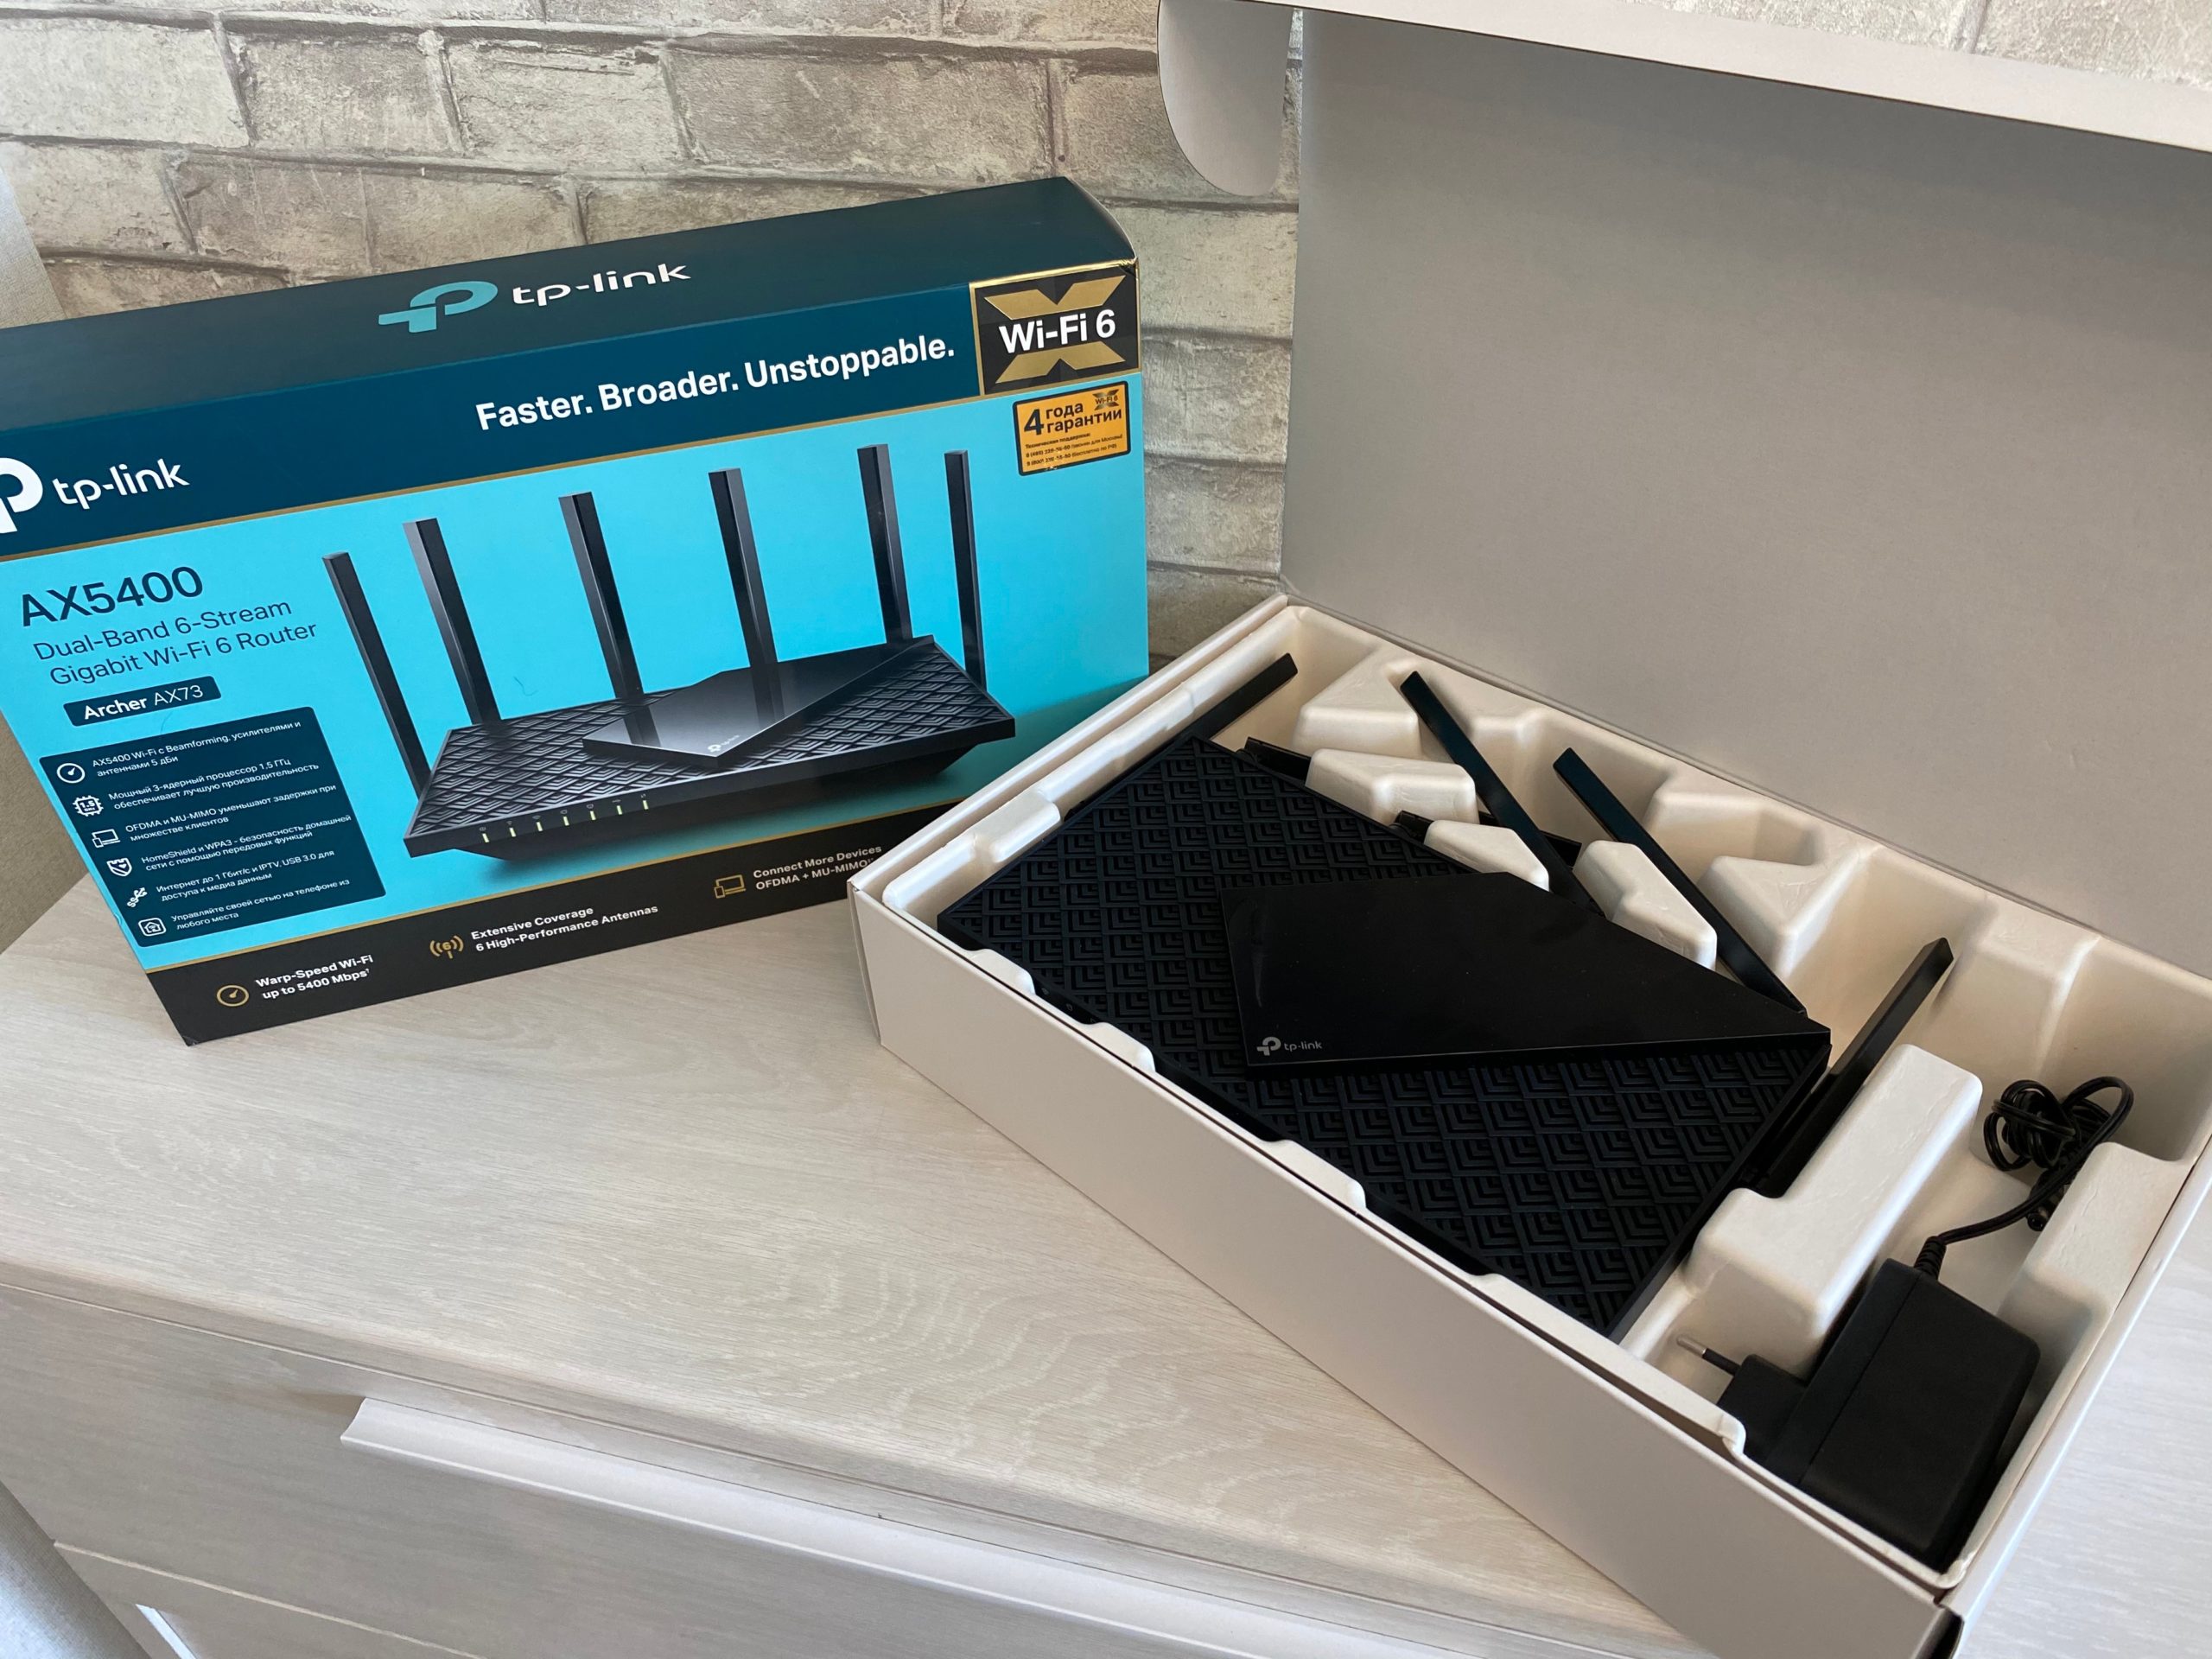
А дальше все по своим местам в пакетиках и плёночках – прямо мечта распаковщика (оцените это при распаковке каждой из шести антенн). Весь комплект почти стандартный:
- Роутер
- Адаптер питания
- Кабель Ethernet RJ45 короткий
- Блок питания 12 В, 2.5 А, 30 Вт – мощный блочок
- Набор бумаг: быстрая установка, адаптация под разные языки (русский есть), гарантия и….карточка с дефолтными именами Wi-Fi и паролями от нее. Сюда же можно записать свои данные после установки.
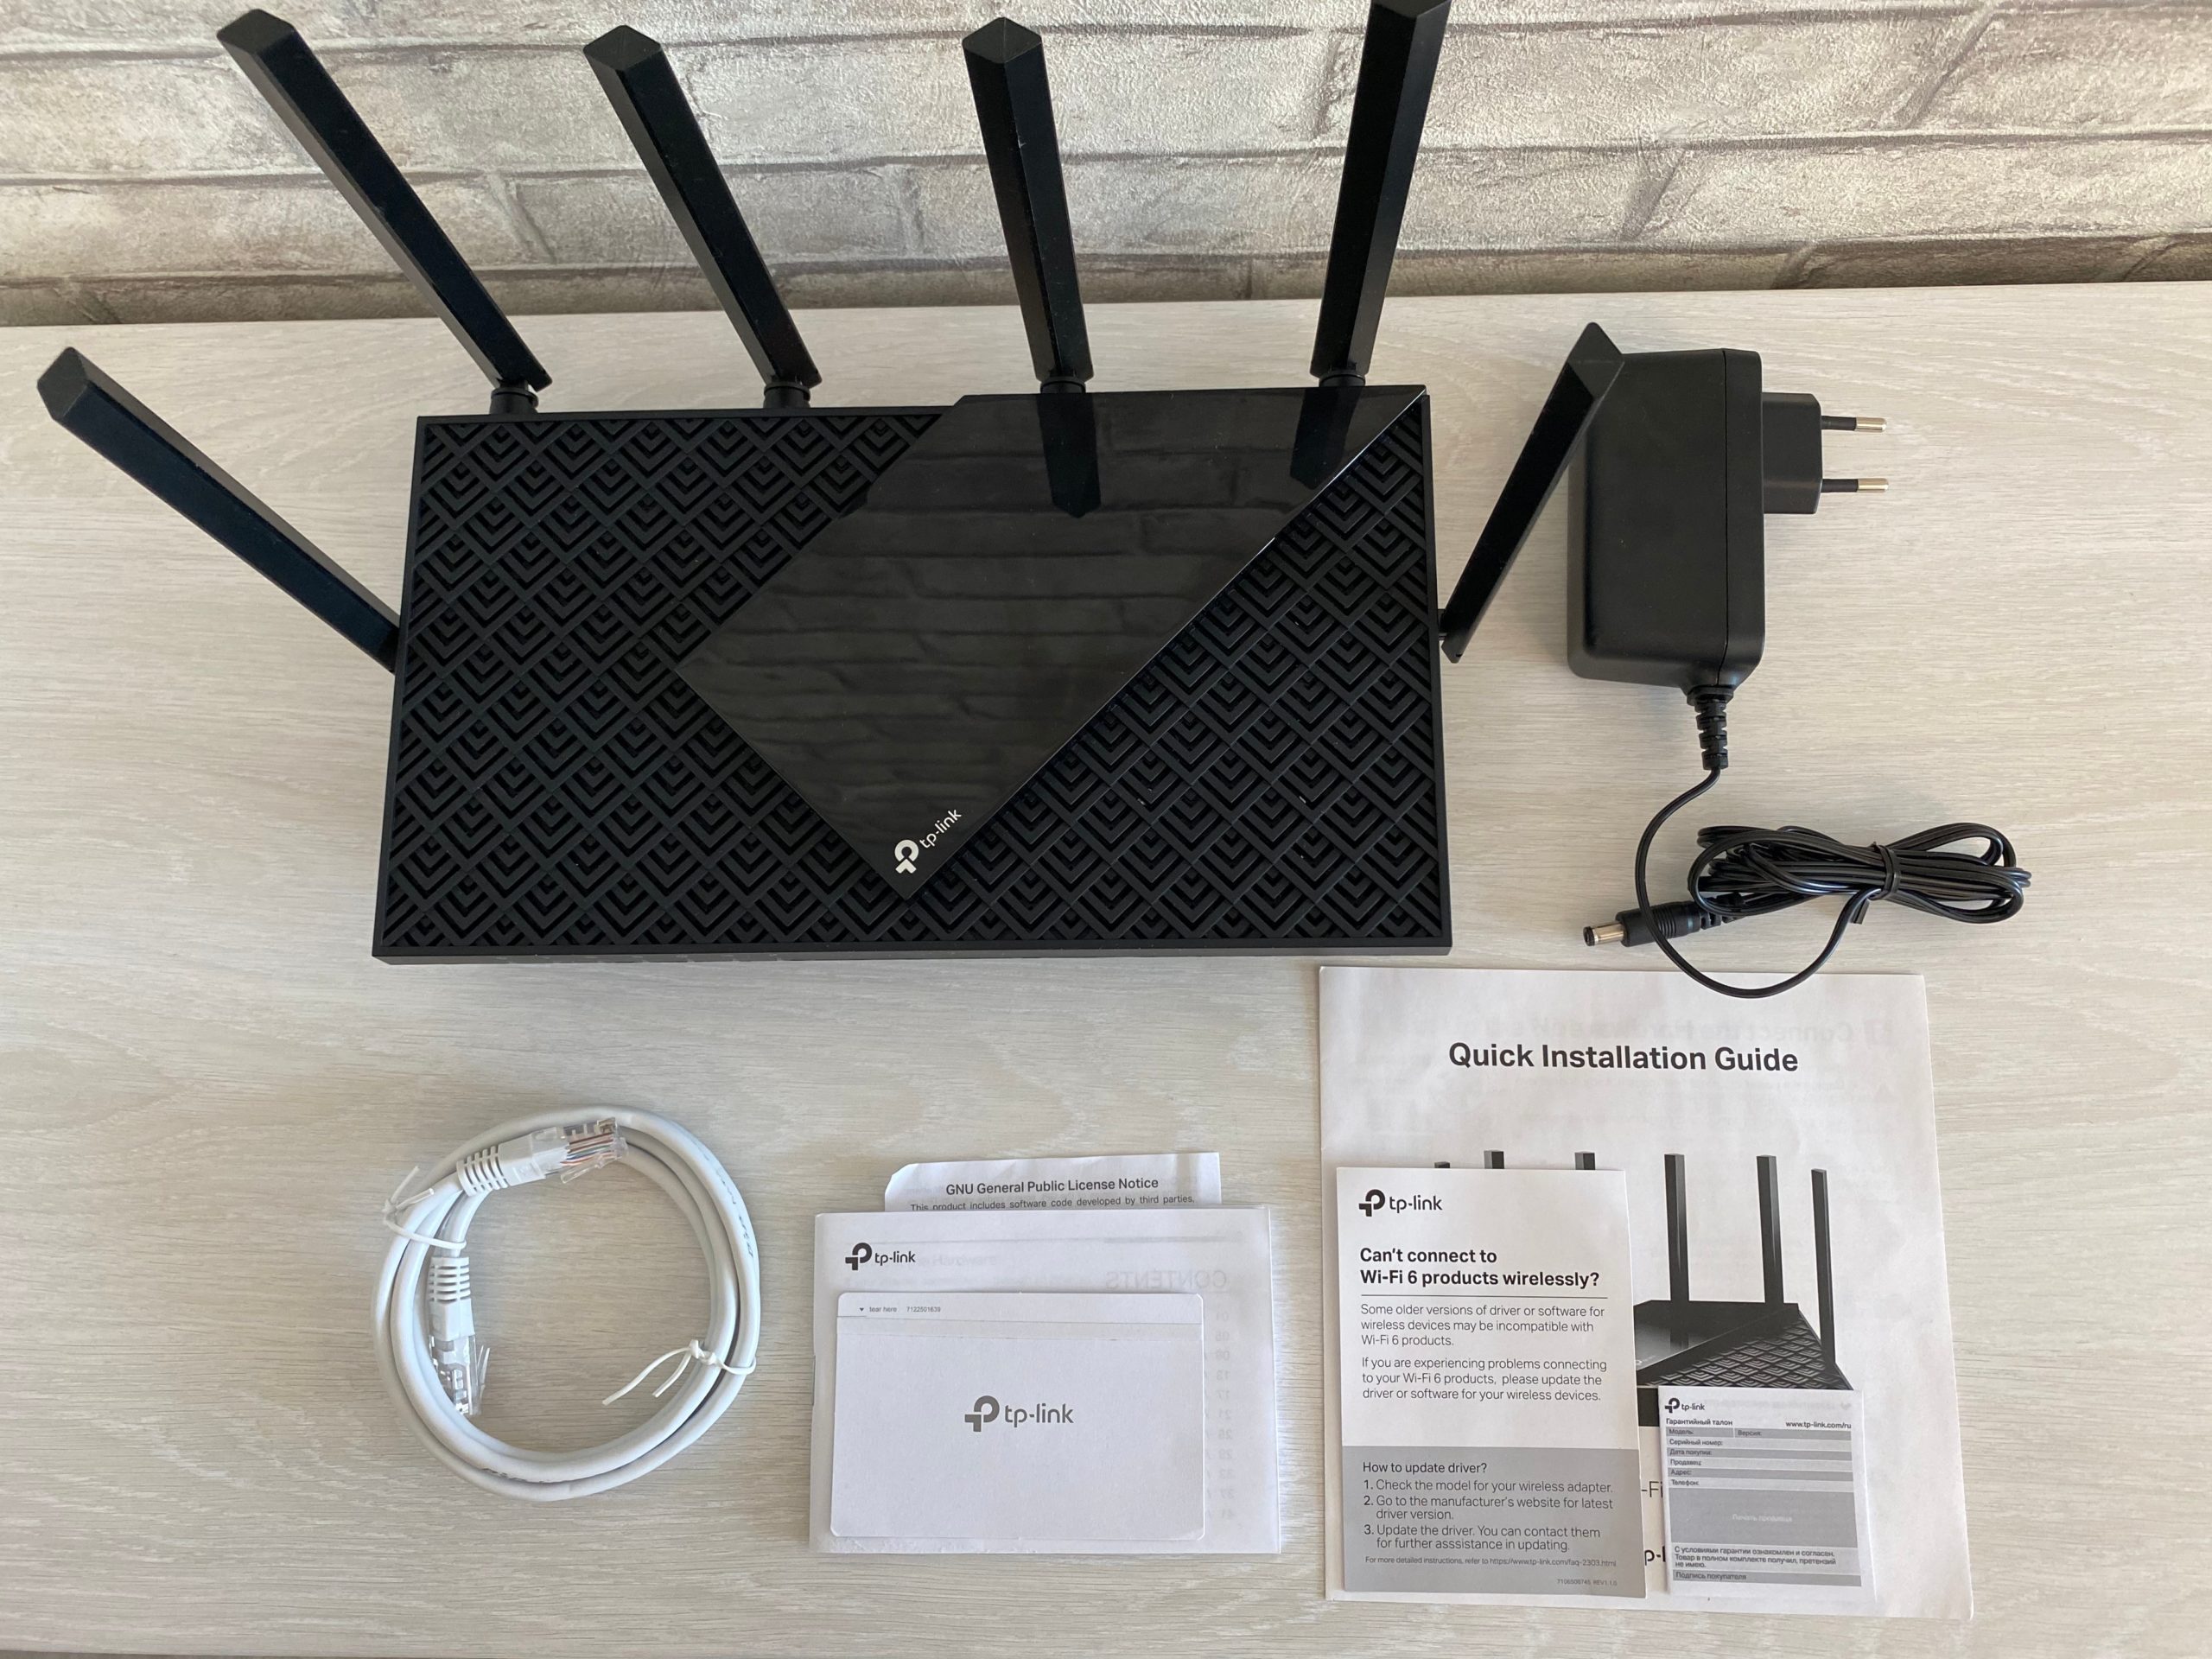
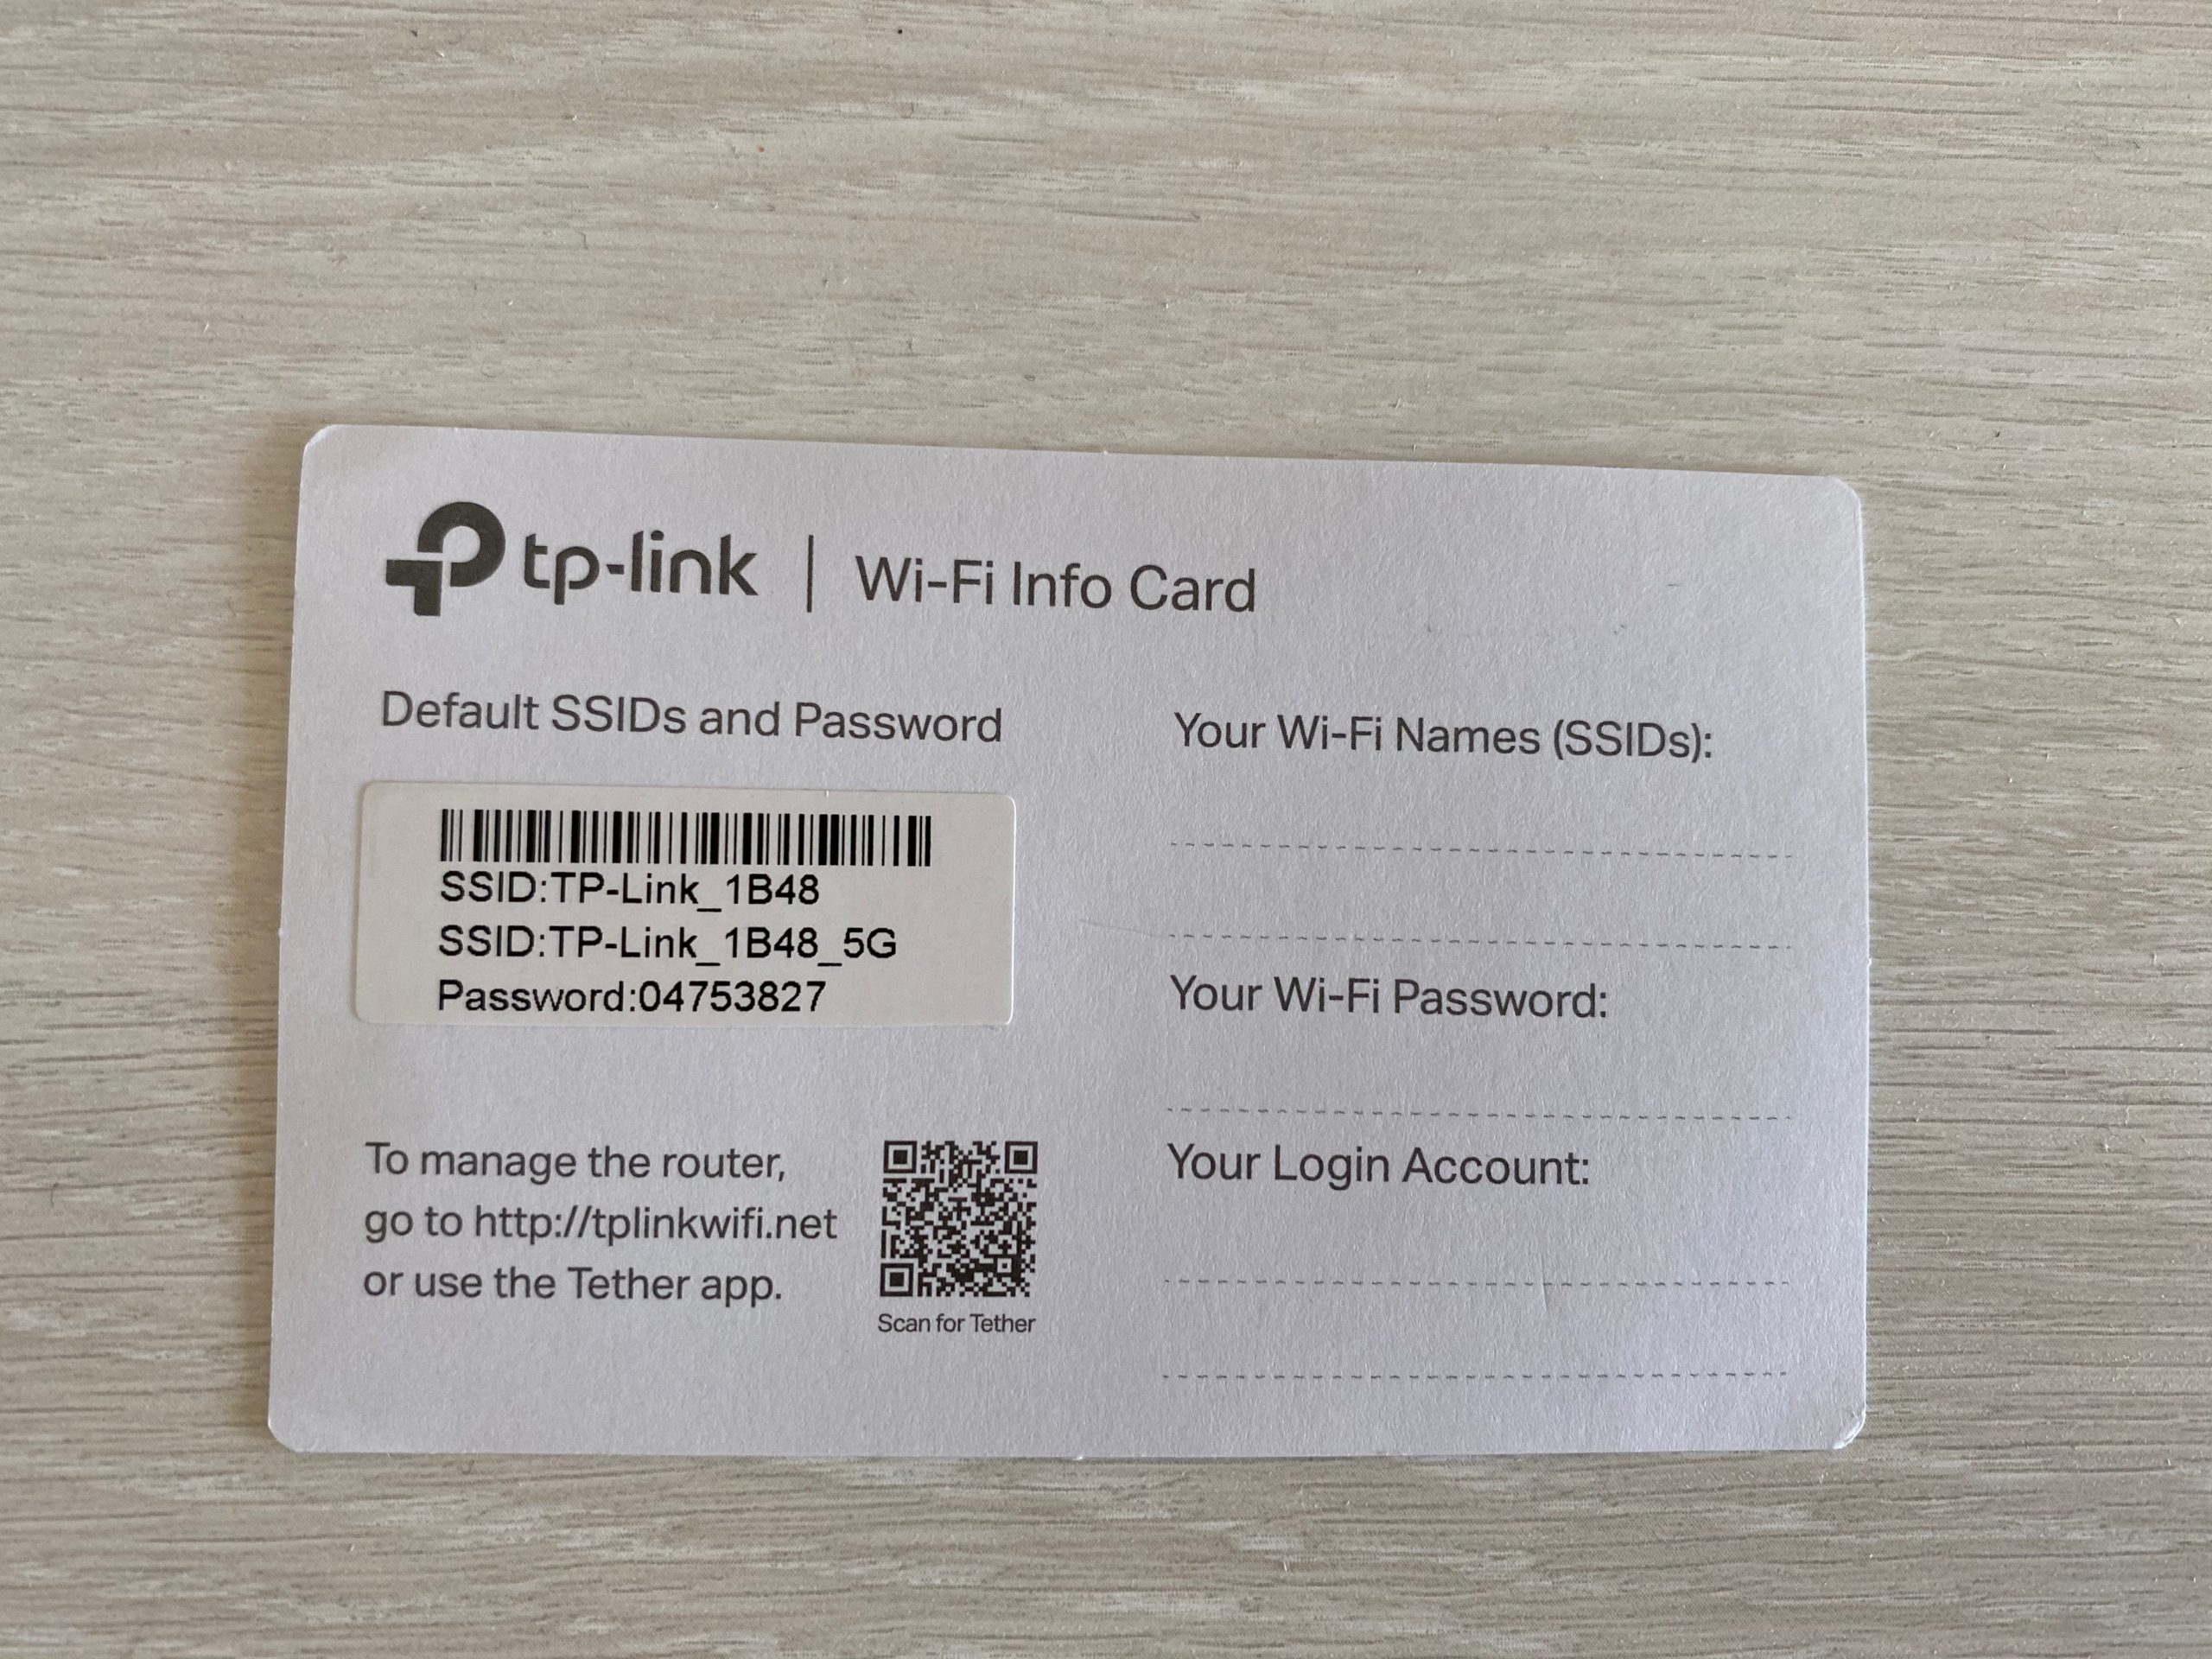
Внешний вид
А теперь переходим непосредственно к внешнему виду роутера:
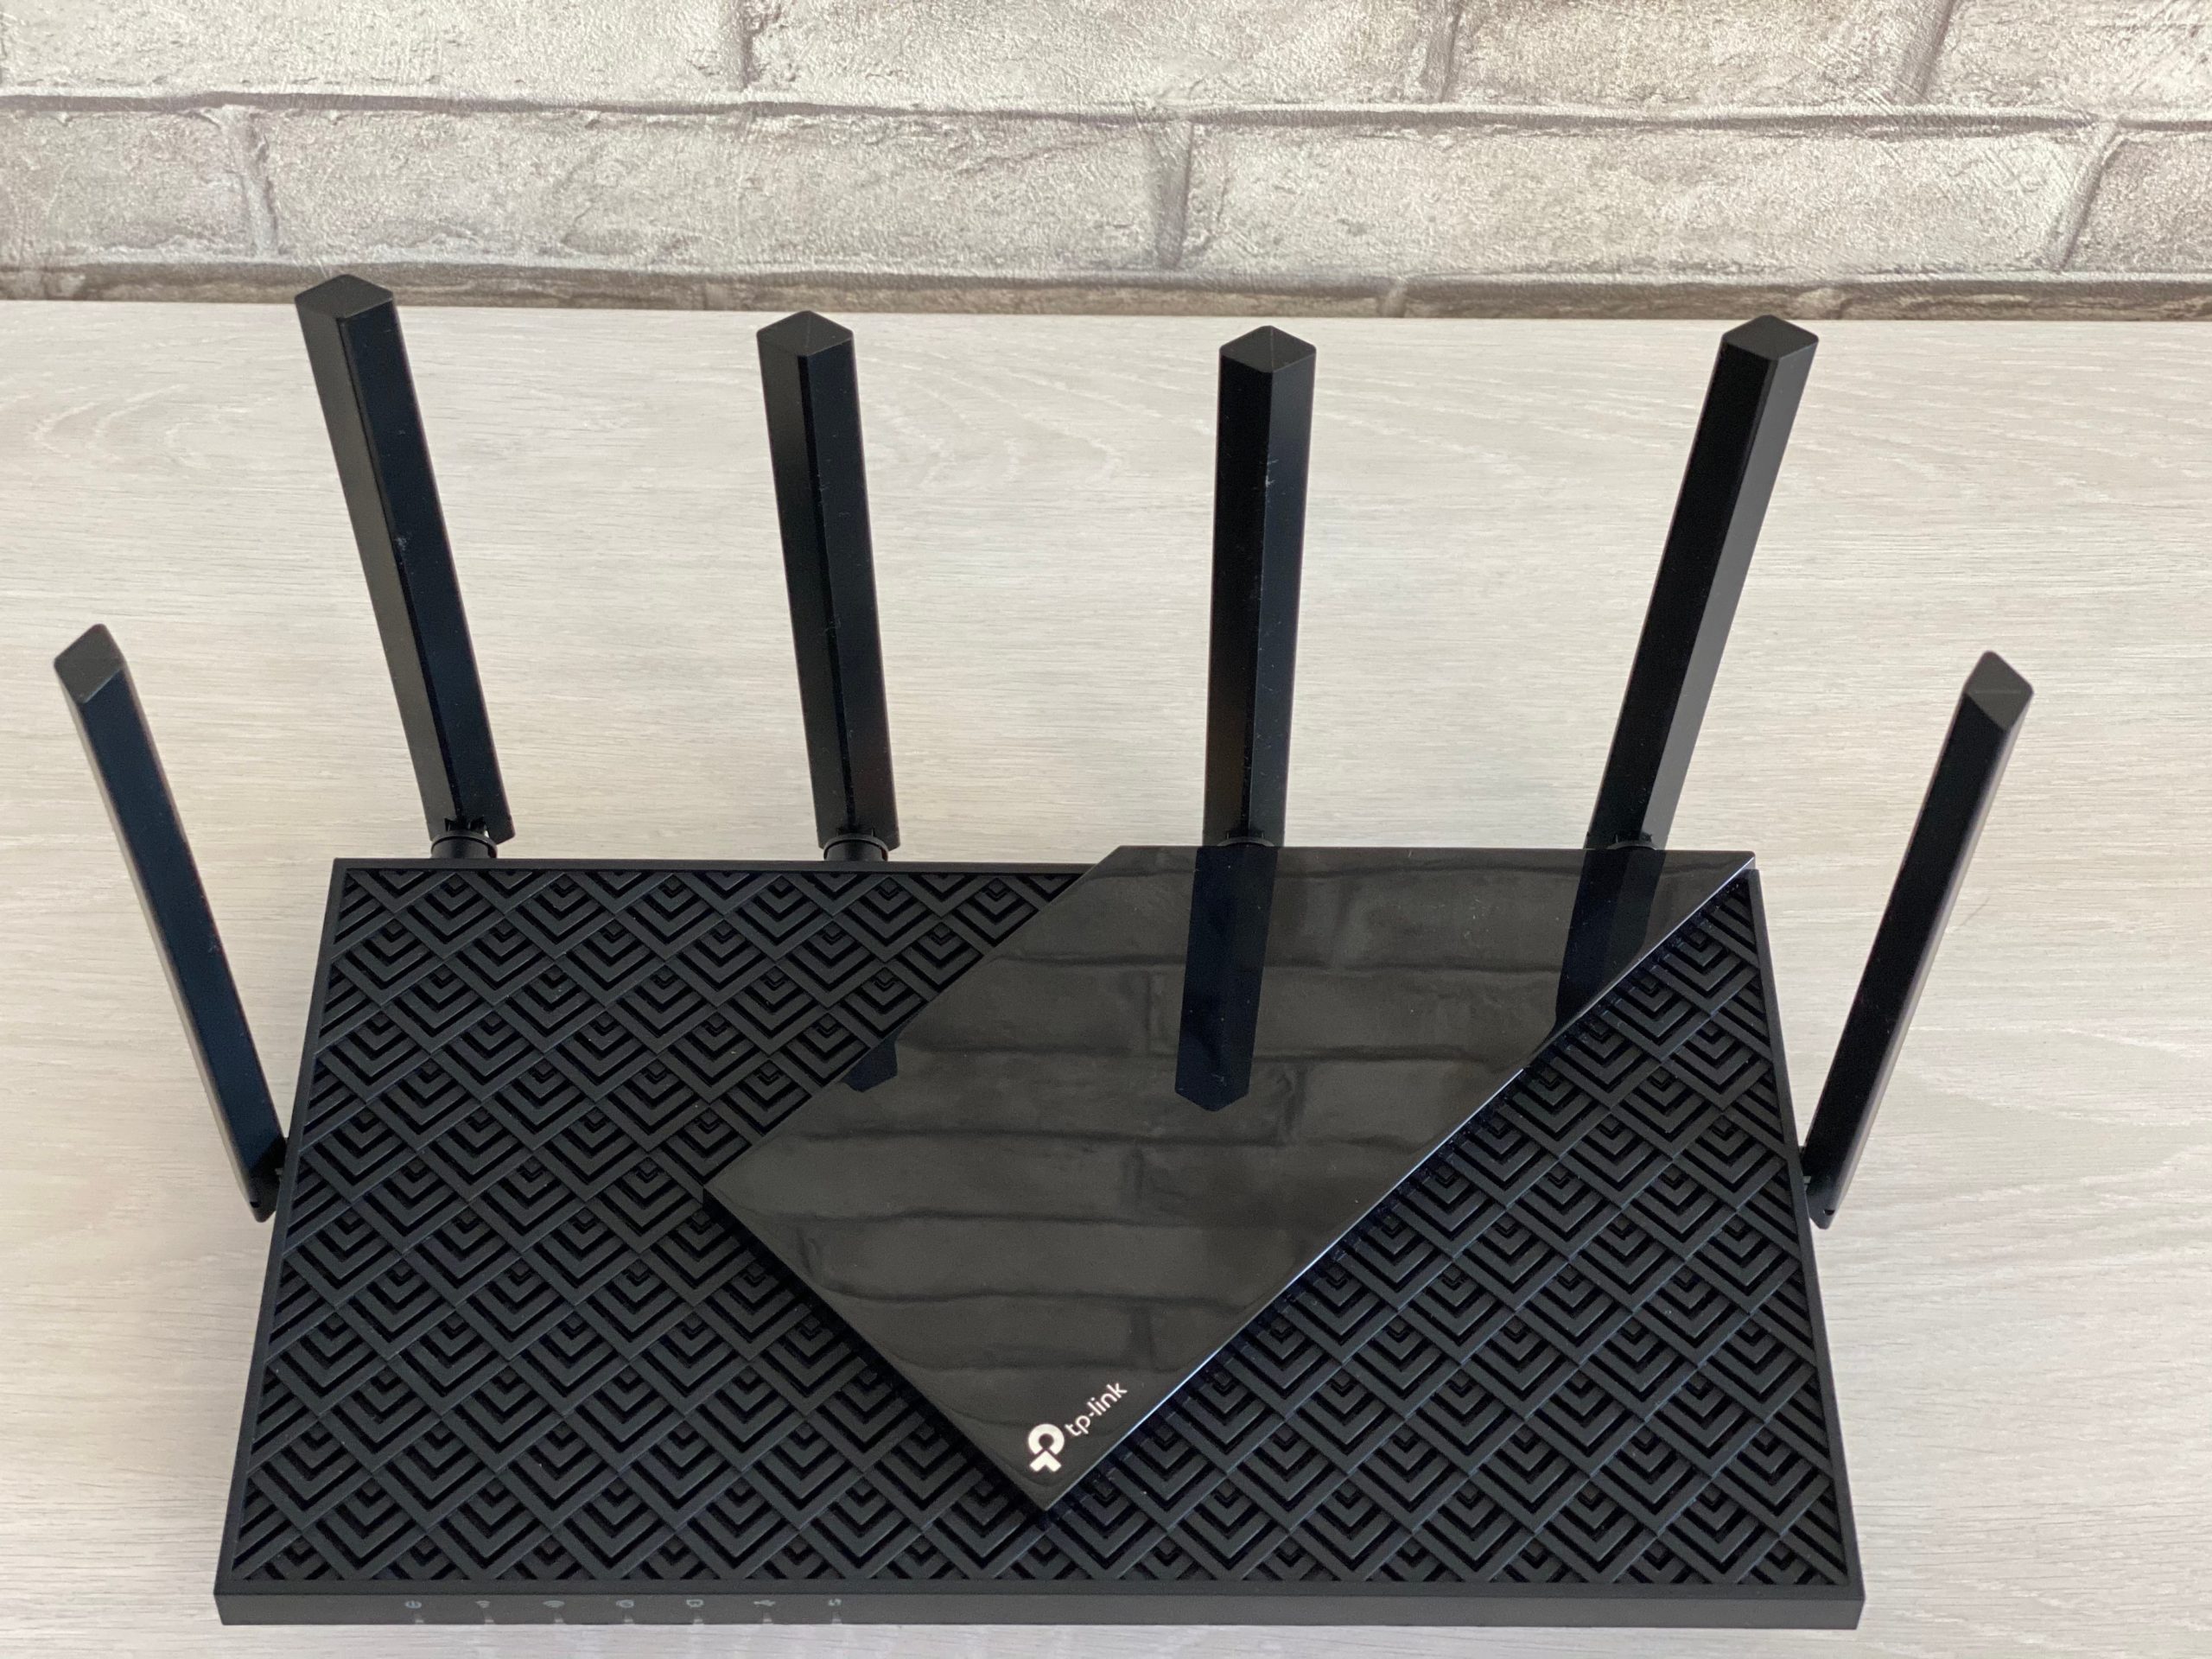
Интересно же? Я такого раньше не видел. Про 6 антенн вы уже знаете, перейдем к самой «решетке». Вот этот вот красивый узор в верхней части роутера, выполненный в каком-то приятном на ощупь материале, на самом деле является вентиляционной решеткой. Да, вентиляция здесь есть и снизу, и все это в комплексе должно обеспечивать достаточно охлаждение, т.к. даже в режиме простая роутер пытается греться.
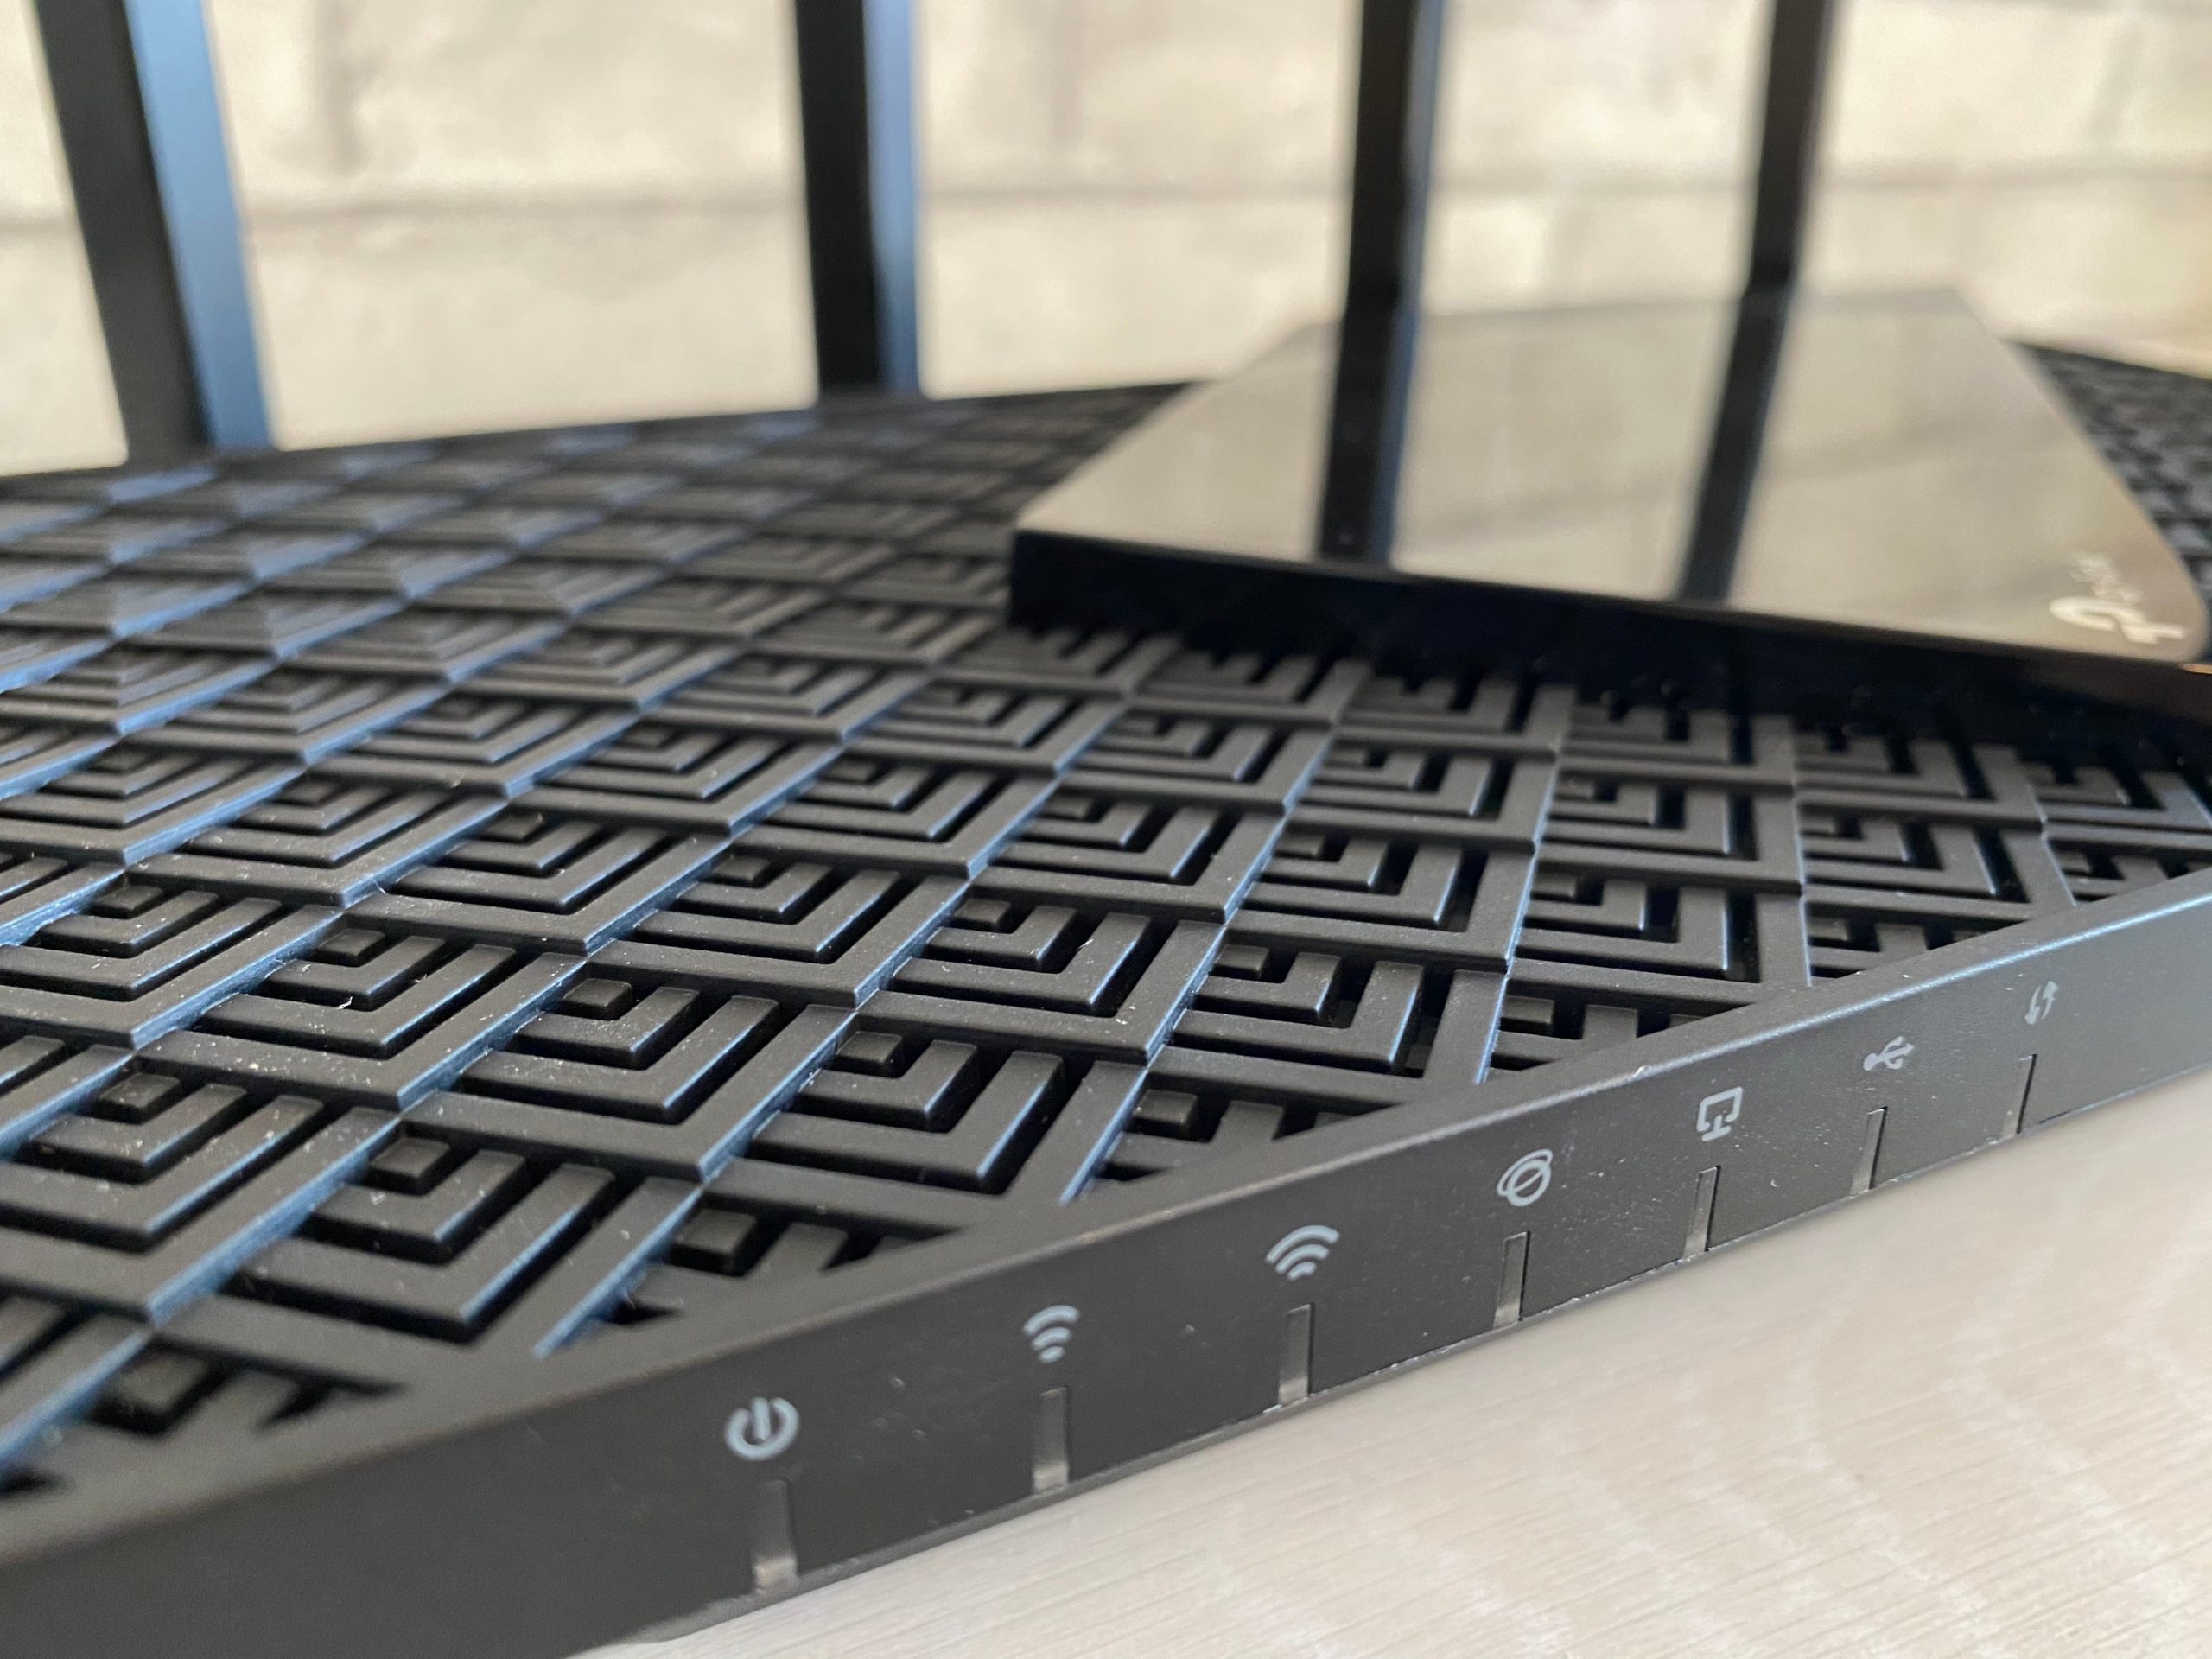
Если смотреть как-то сбоку, то можно и не понять, что это решетка, но при взгляде сверху даже можно заметить плату через перфорацию. Еще интересный здесь элемент дизайна та самая пластина. Некоторые ее даже путают со смартфоном, лежащим на роутере.
А я вдруг подумал: было бы забавно, в такую пластину включить беспроводную зарядку. А то обычно убираешь роутер куда-подальше от глаз на долгие годы, а тут был бы и на виду, да еще и использовался бы каждый день в хозяйстве. Разумеется, применять только на старших моделях, ибо у владельцев младших обычно беспроводной зарядки ПОКА нет. И пока я такого не видел.
На передней панели слева нас встречают индикаторы:
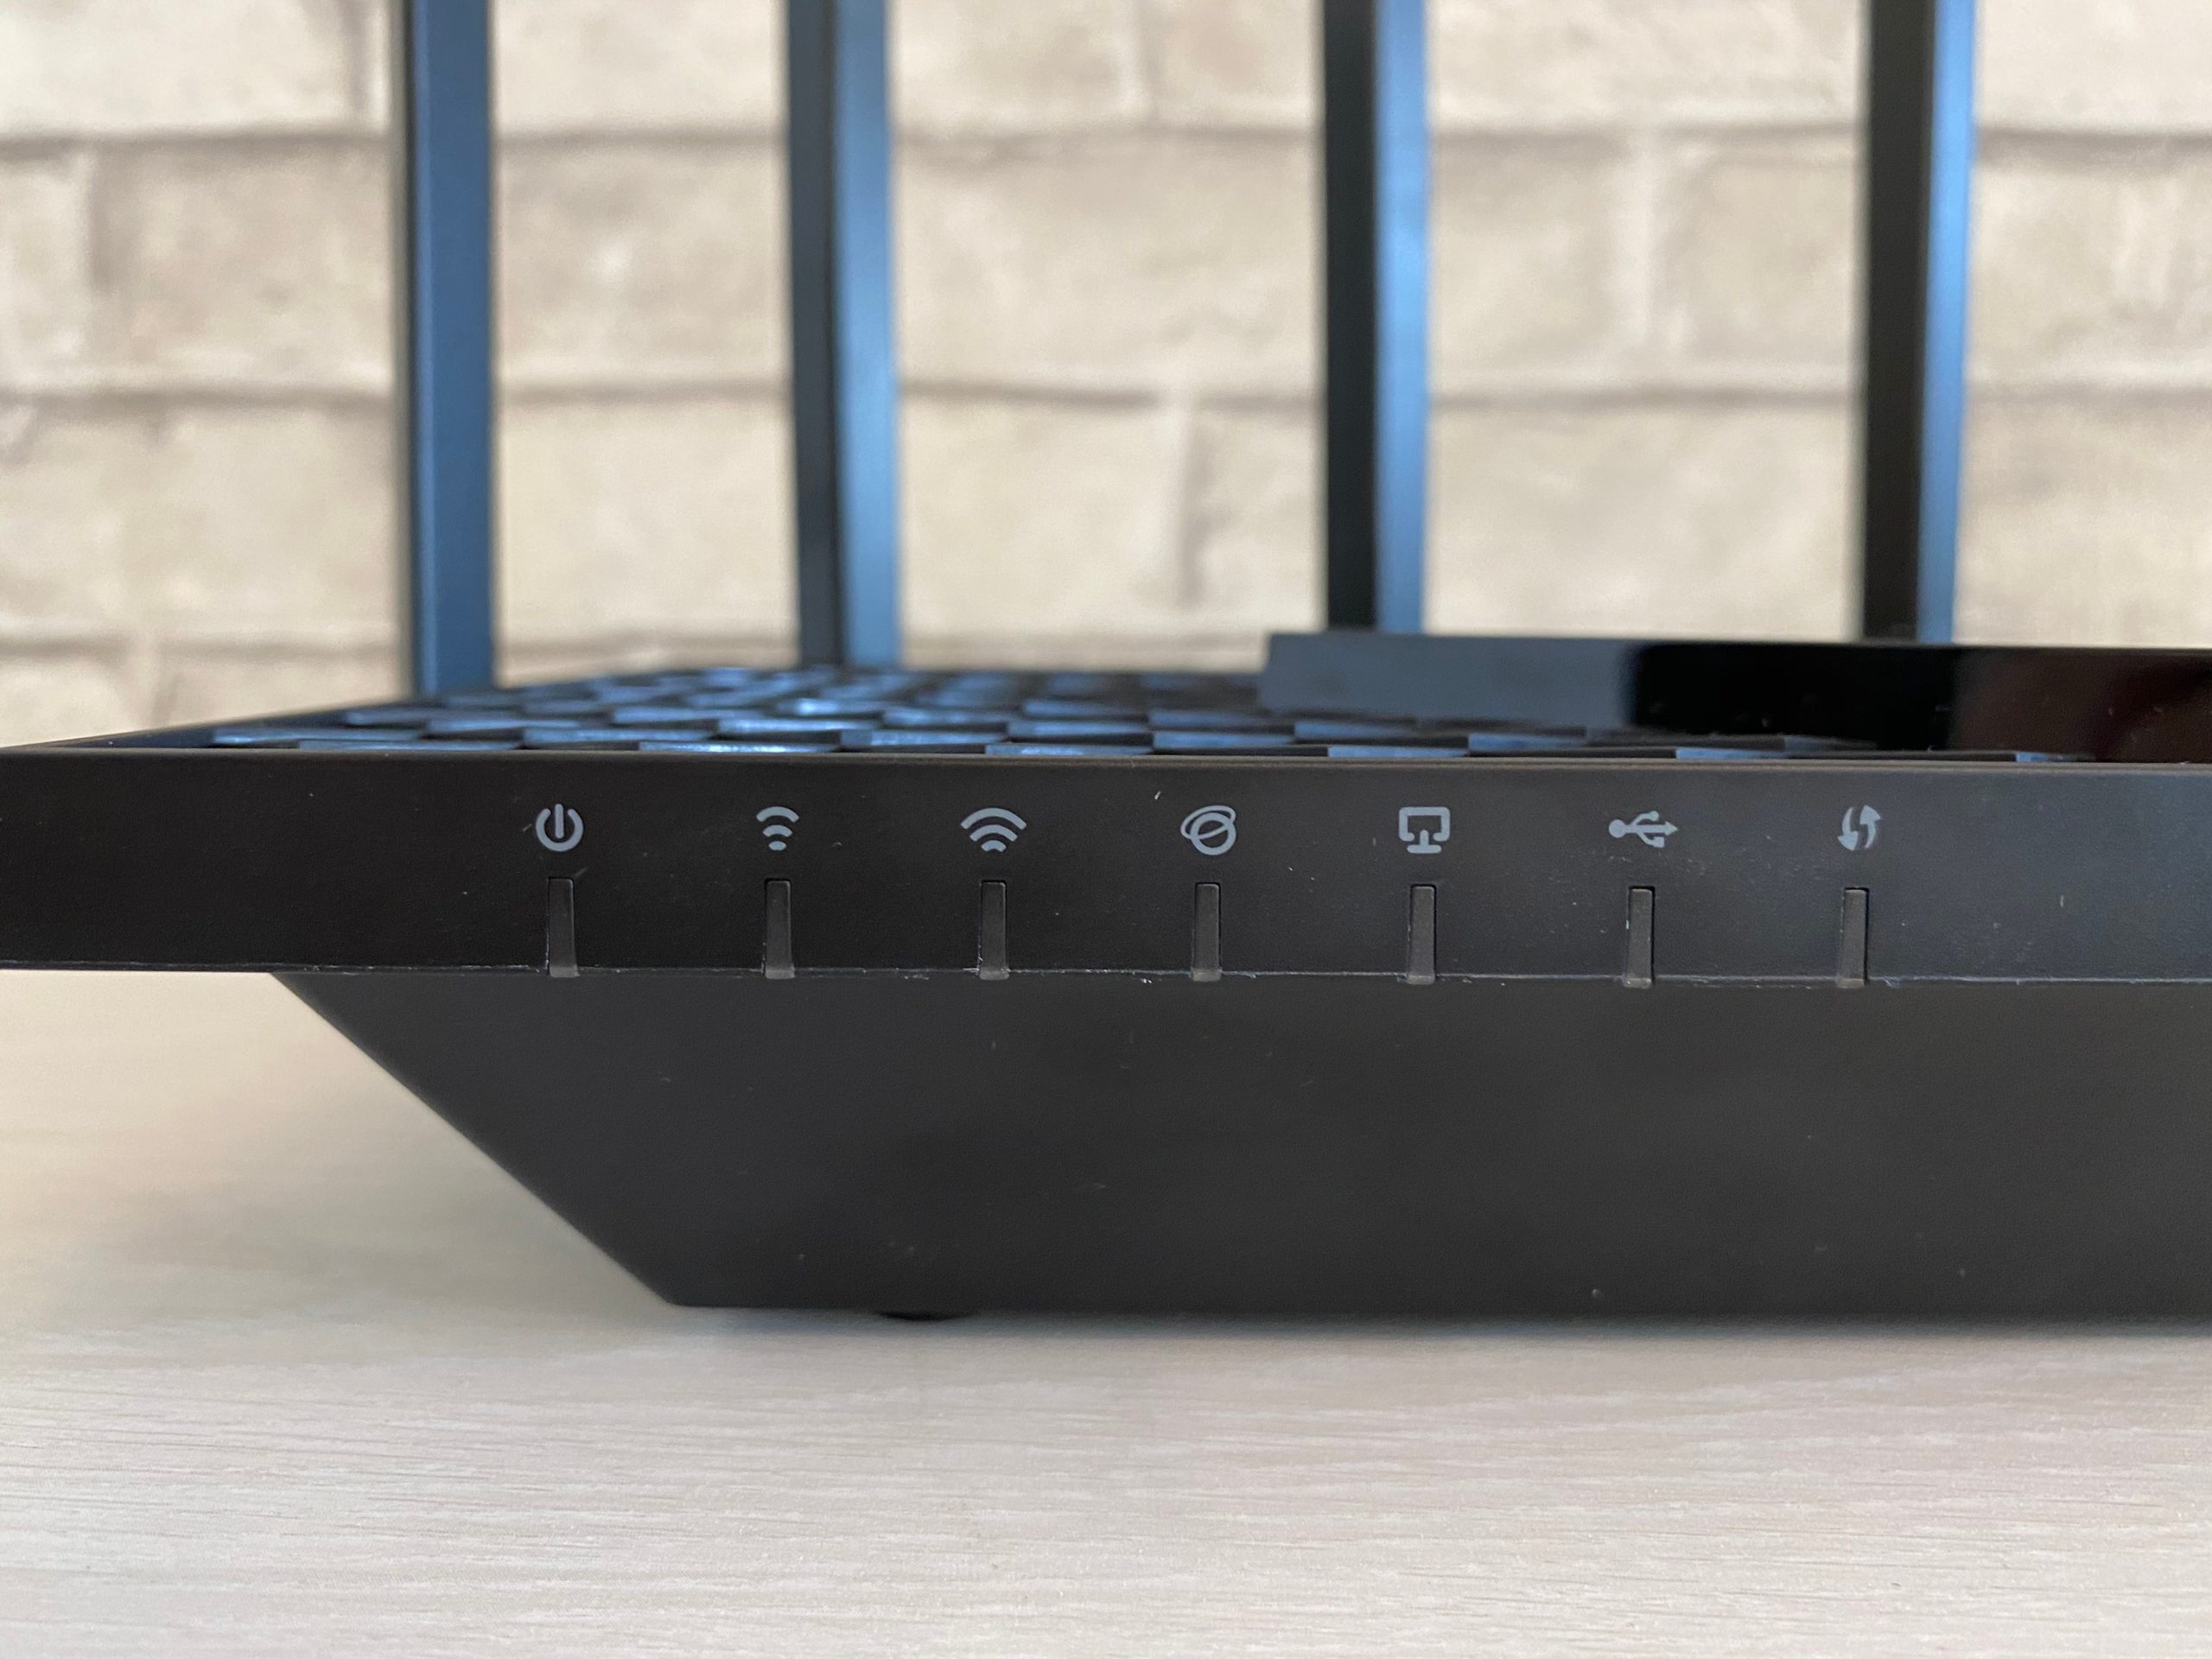
Слева-направо:
- Питание
- Wi-Fi 2.4 ГГц (маленькая иконка)
- Wi-Fi 5 ГГц (большая иконка)
- Интернет (горит зеленым, если все ОК, а оранжевым при отсутствии интернета)
- LAN
- USB
- WPS
Справа расположен USB-порт (USB 3.0). Очень удобно, что его вынесли отдельно, т.к. некоторые жесткие диски (а особенно модемы, если бы это здесь поддерживалось) не очень комфортно размещать у стены:
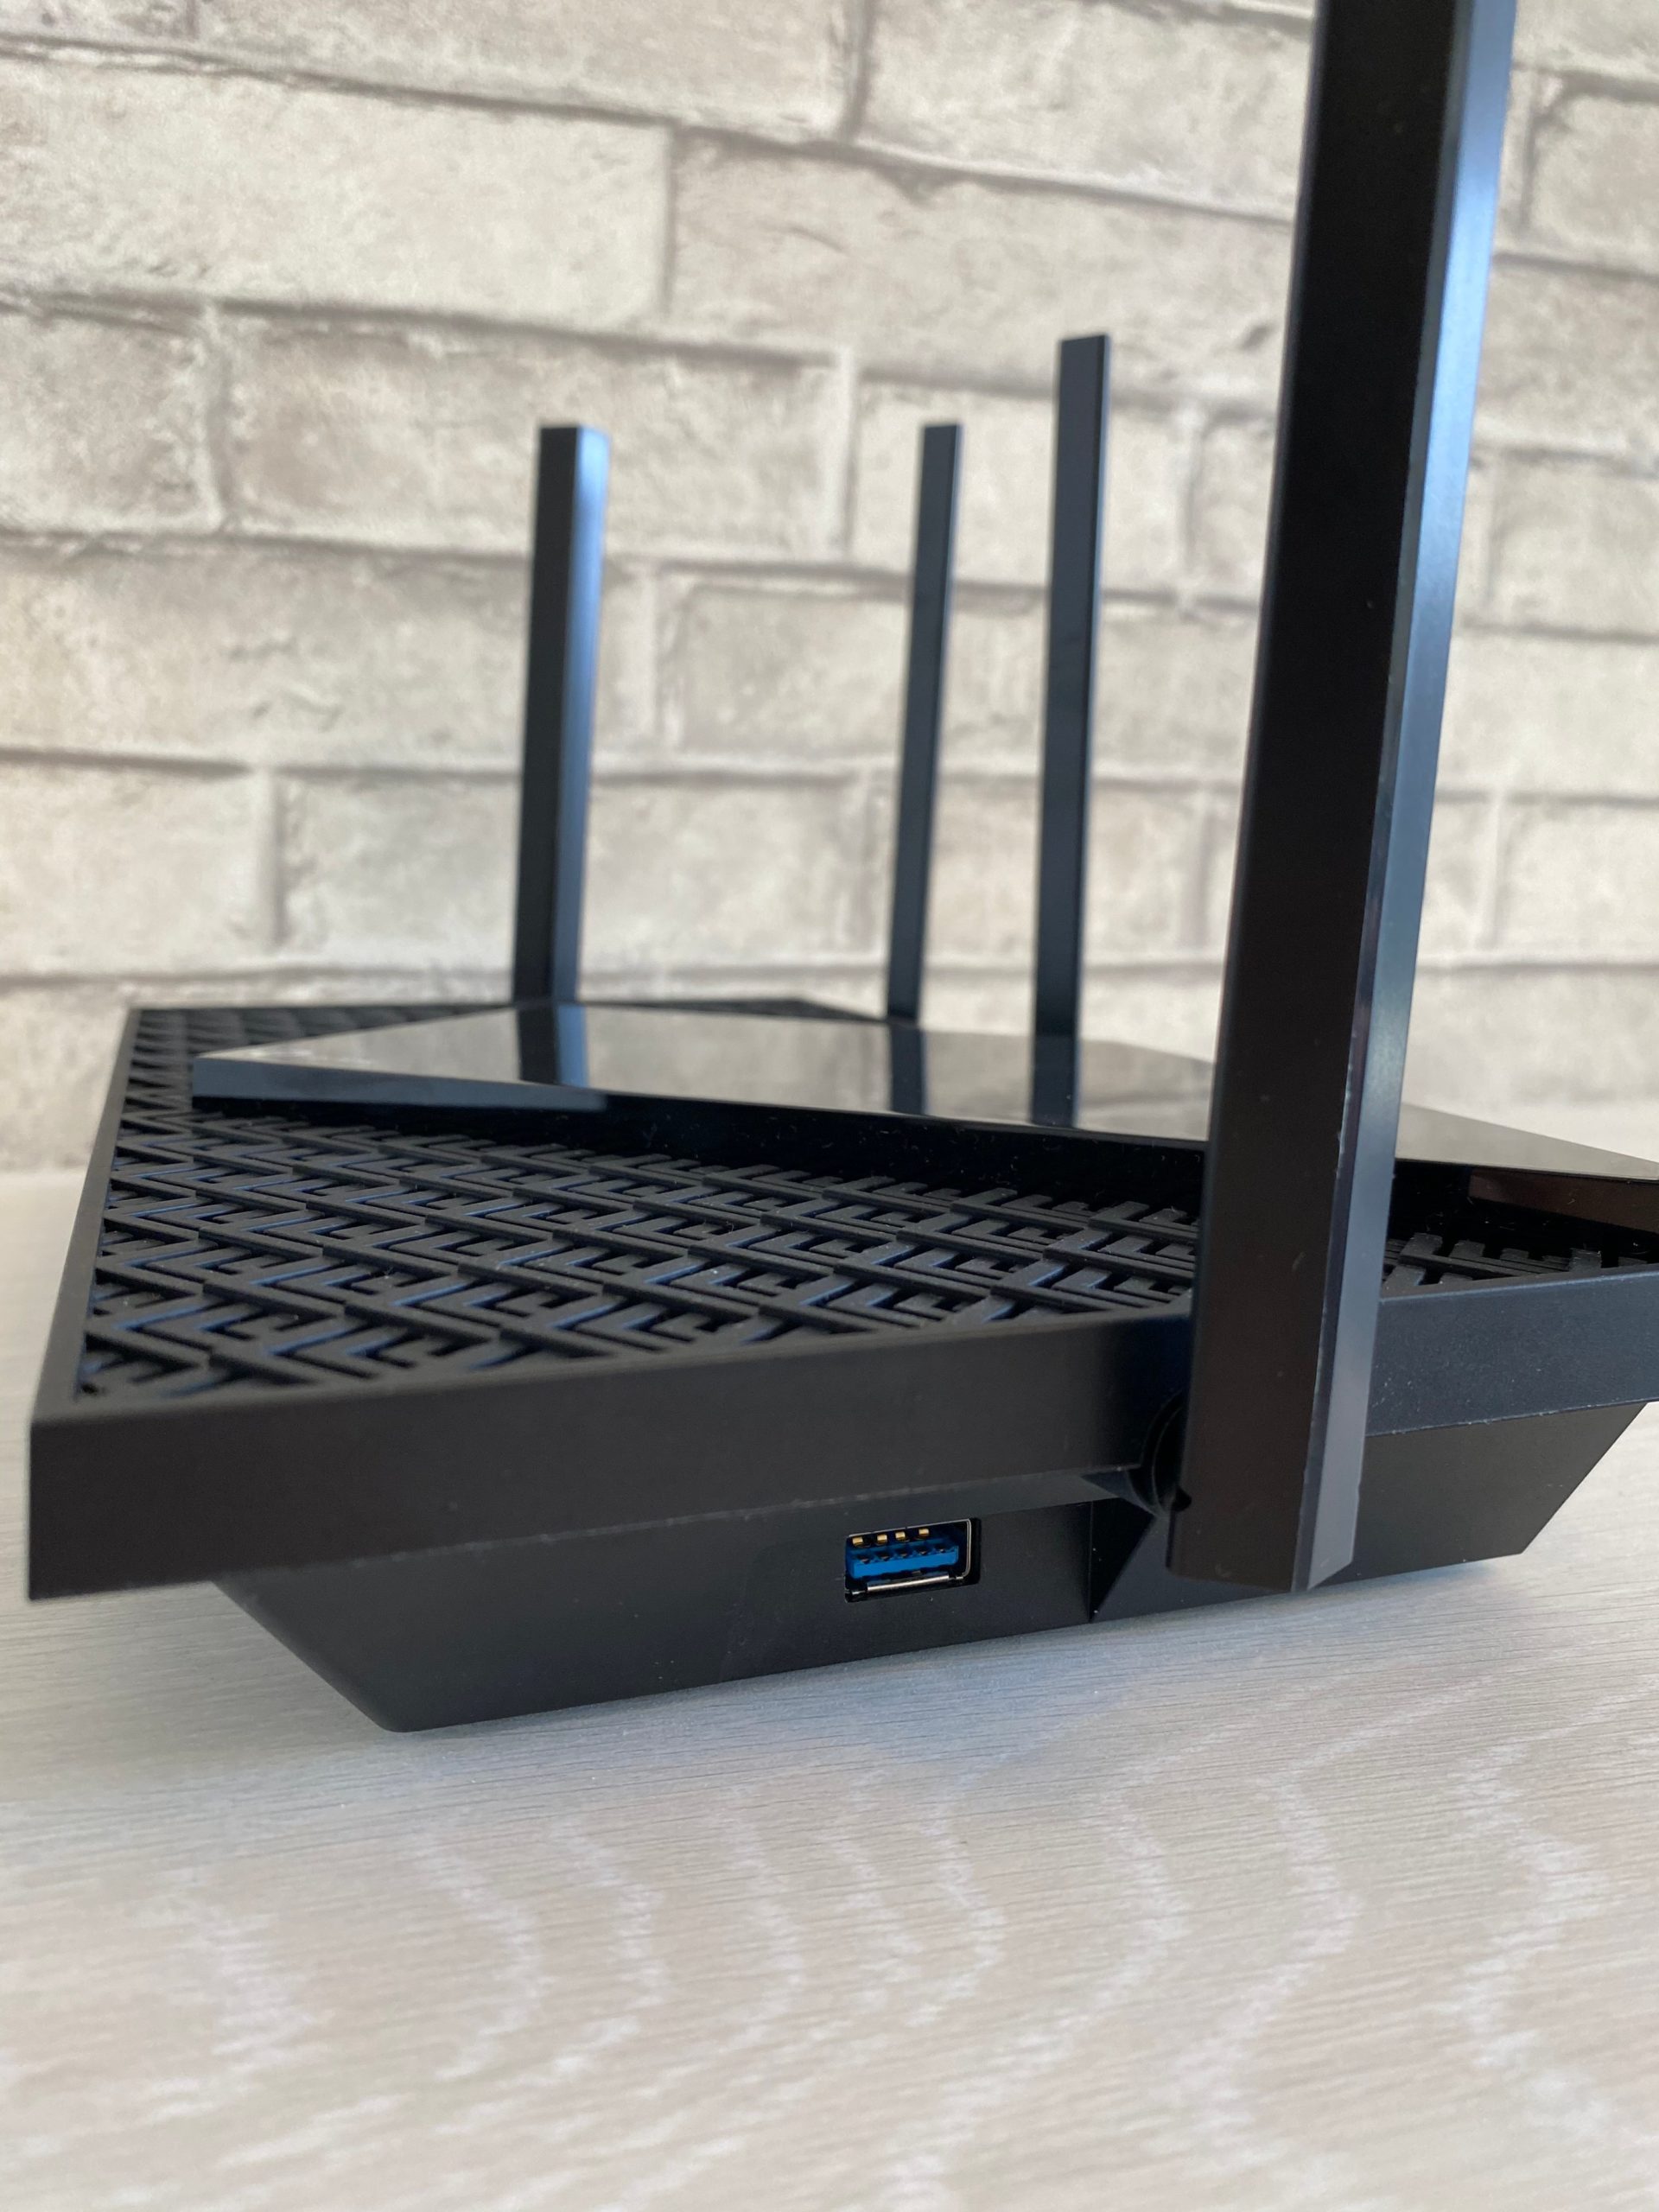
А еще уже здесь можно заметить, что роутер довольно высокий. Все мои модели в сравнении с ним выглядят «малышами».
Все остальное самое интересное здесь расположено на тыльной стороне:
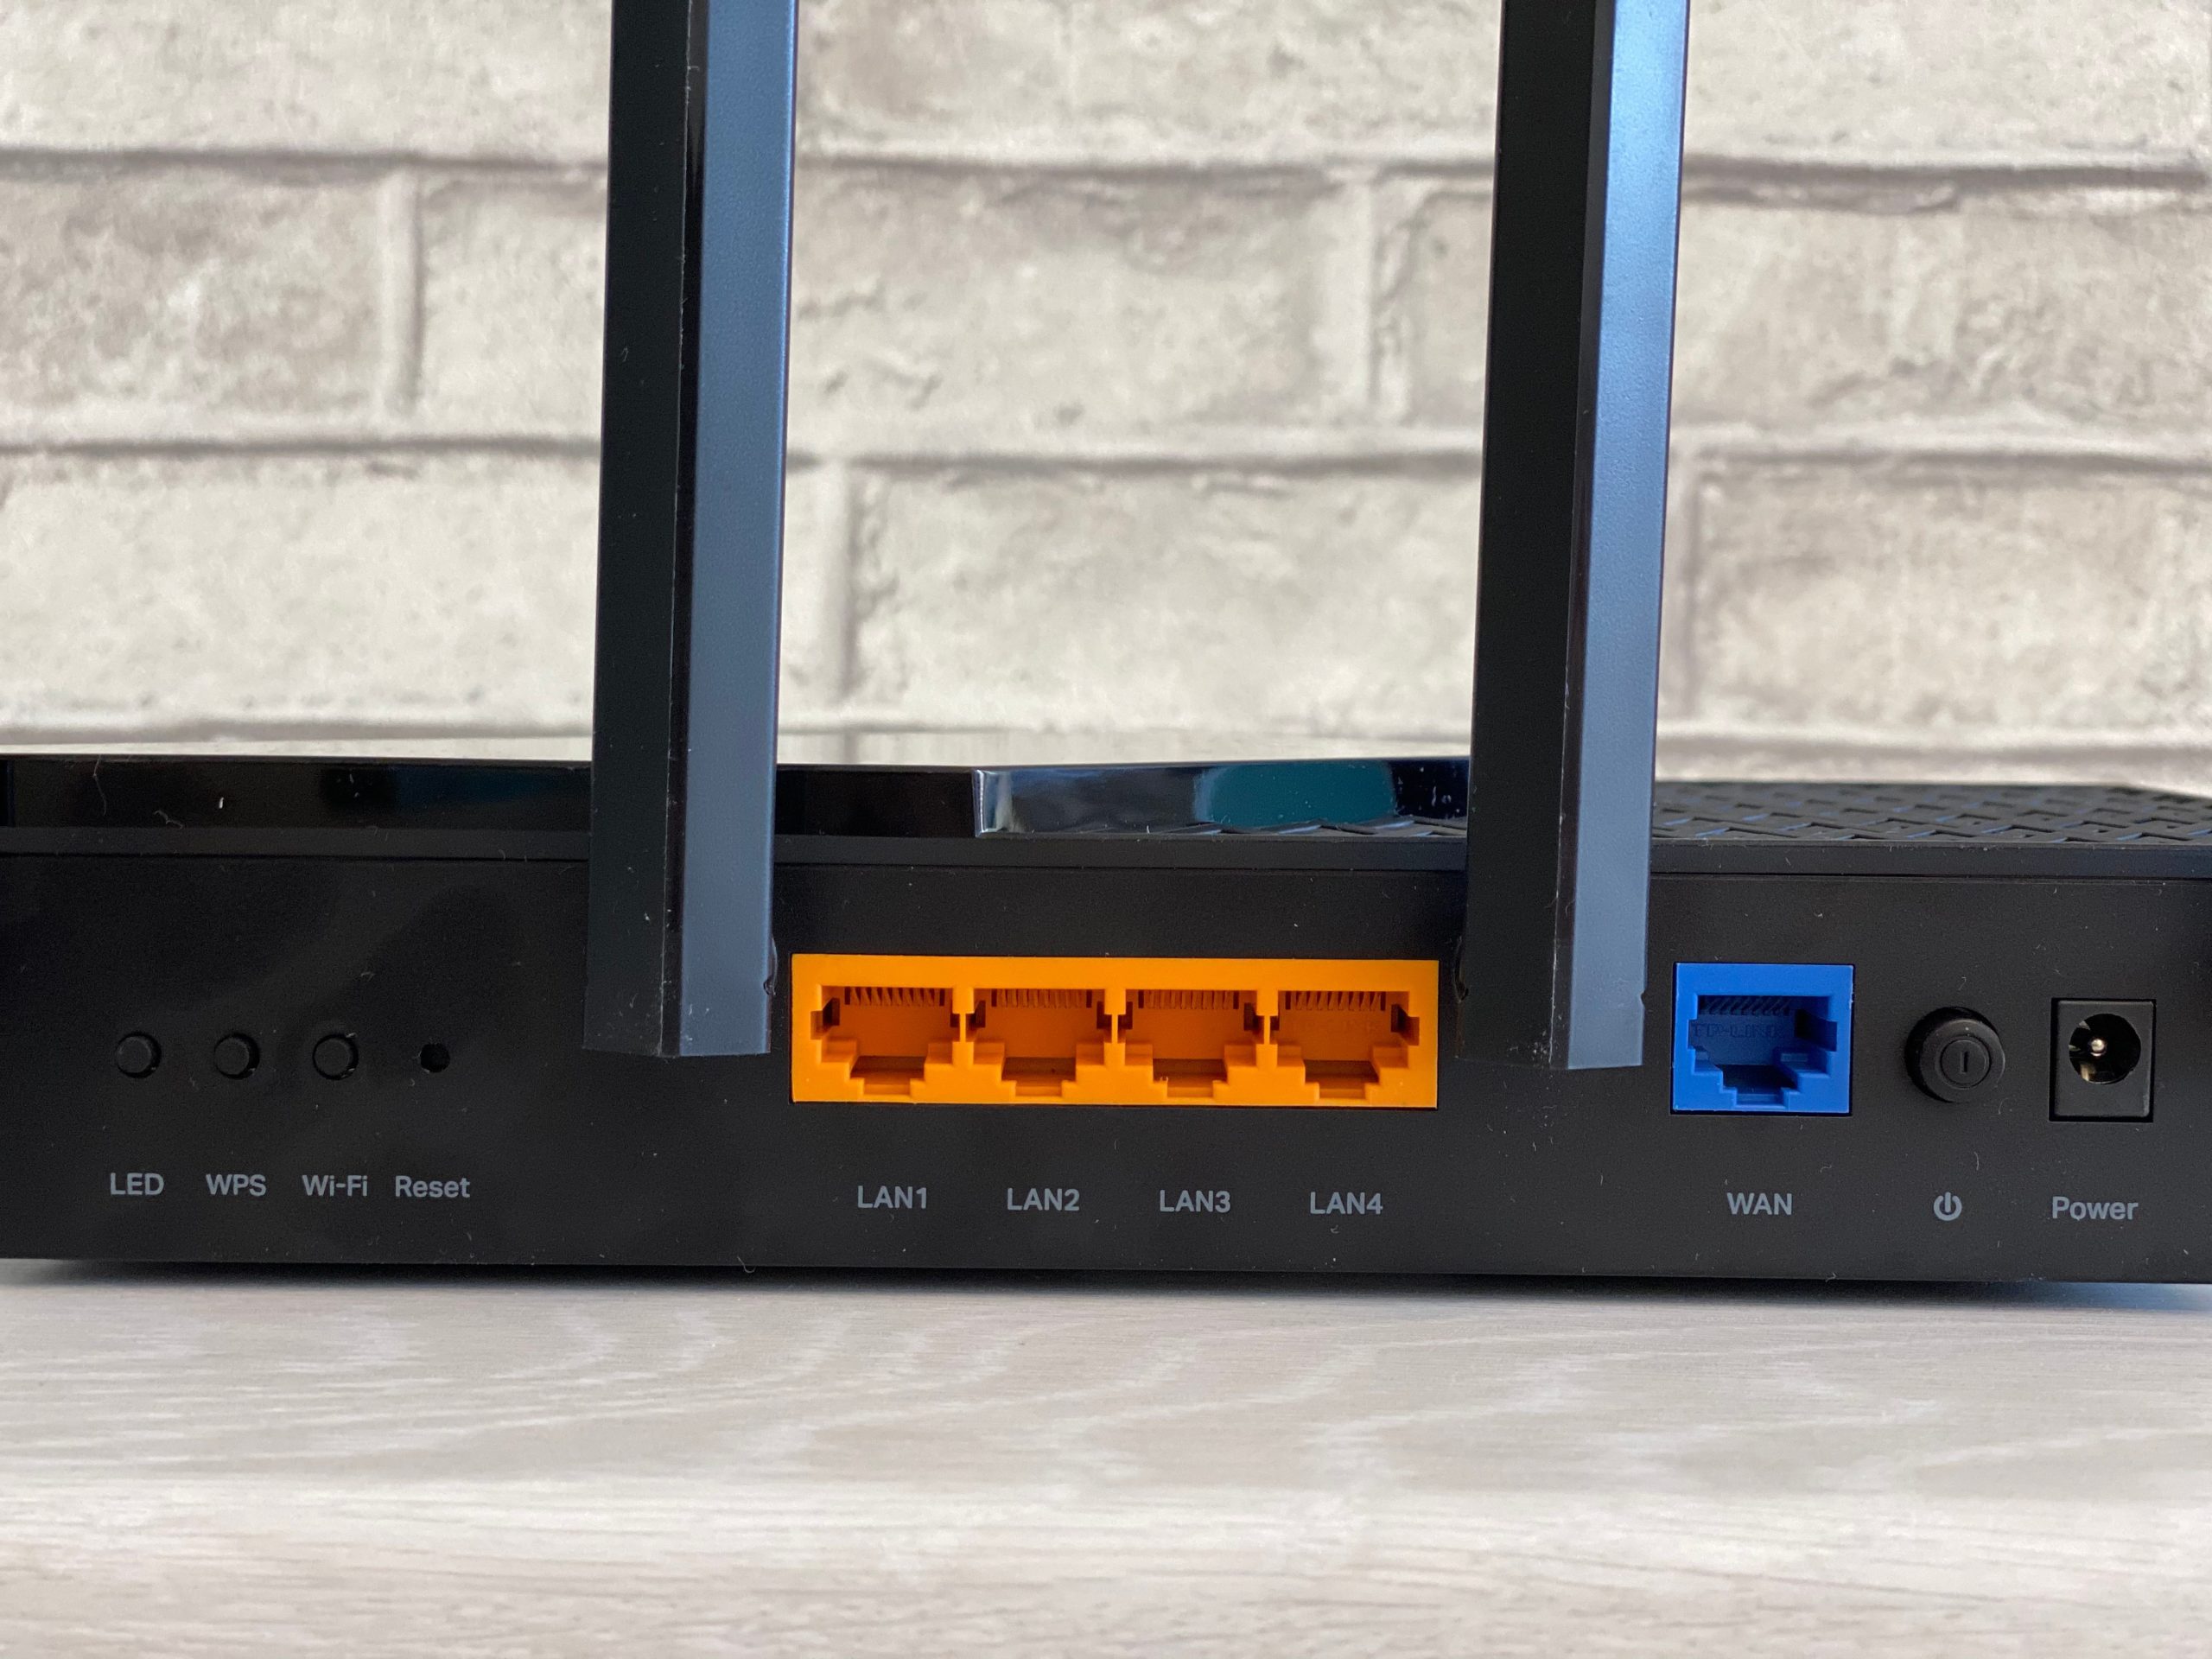
Слева направо:
- Кнопка выключения LED (индикаторов). Впервые вижу, чтобы на выключение индикации выделяли отдельную кнопку. Прикольно. Ничего против не имею.
- Выключение/включение WPS.
- Выключение/включение Wi-Fi. Прошу обратить внимание, что на все функции выделили отдельные кнопки, а не стали их совмещать в одну (ранее часто встречались комбинации WPS/Wi-Fi или WPS/Reset) на одной кнопке.
- Reset (утопленная). Стандартная кнопка сброса на заводские настройки. Прямо классика. Взяли что-то тонкое (скрепку, ручку, иголку), нажали эту кнопку при включенном роутере, подержали ее около 10 секунд до моргания лампочек, радуемся чистому роутеру.
- LAN – 4 желтых локальных порта.
- WAN – 1 штука, синий.
- Кнопка включения/выключения питания. Отличная механическая кнопка, очень удобно будет перезагружать роутер без всяких извращений.
- Разъем под адаптер питания.
На дне у нас тоже все стандартно: перфорация по всей площади, прорезиненные ножки, ушки для подвеса на стену, наклейка с данными для подключения (адрес входа в настройщик, названия точек доступа и пароль/пин от них):
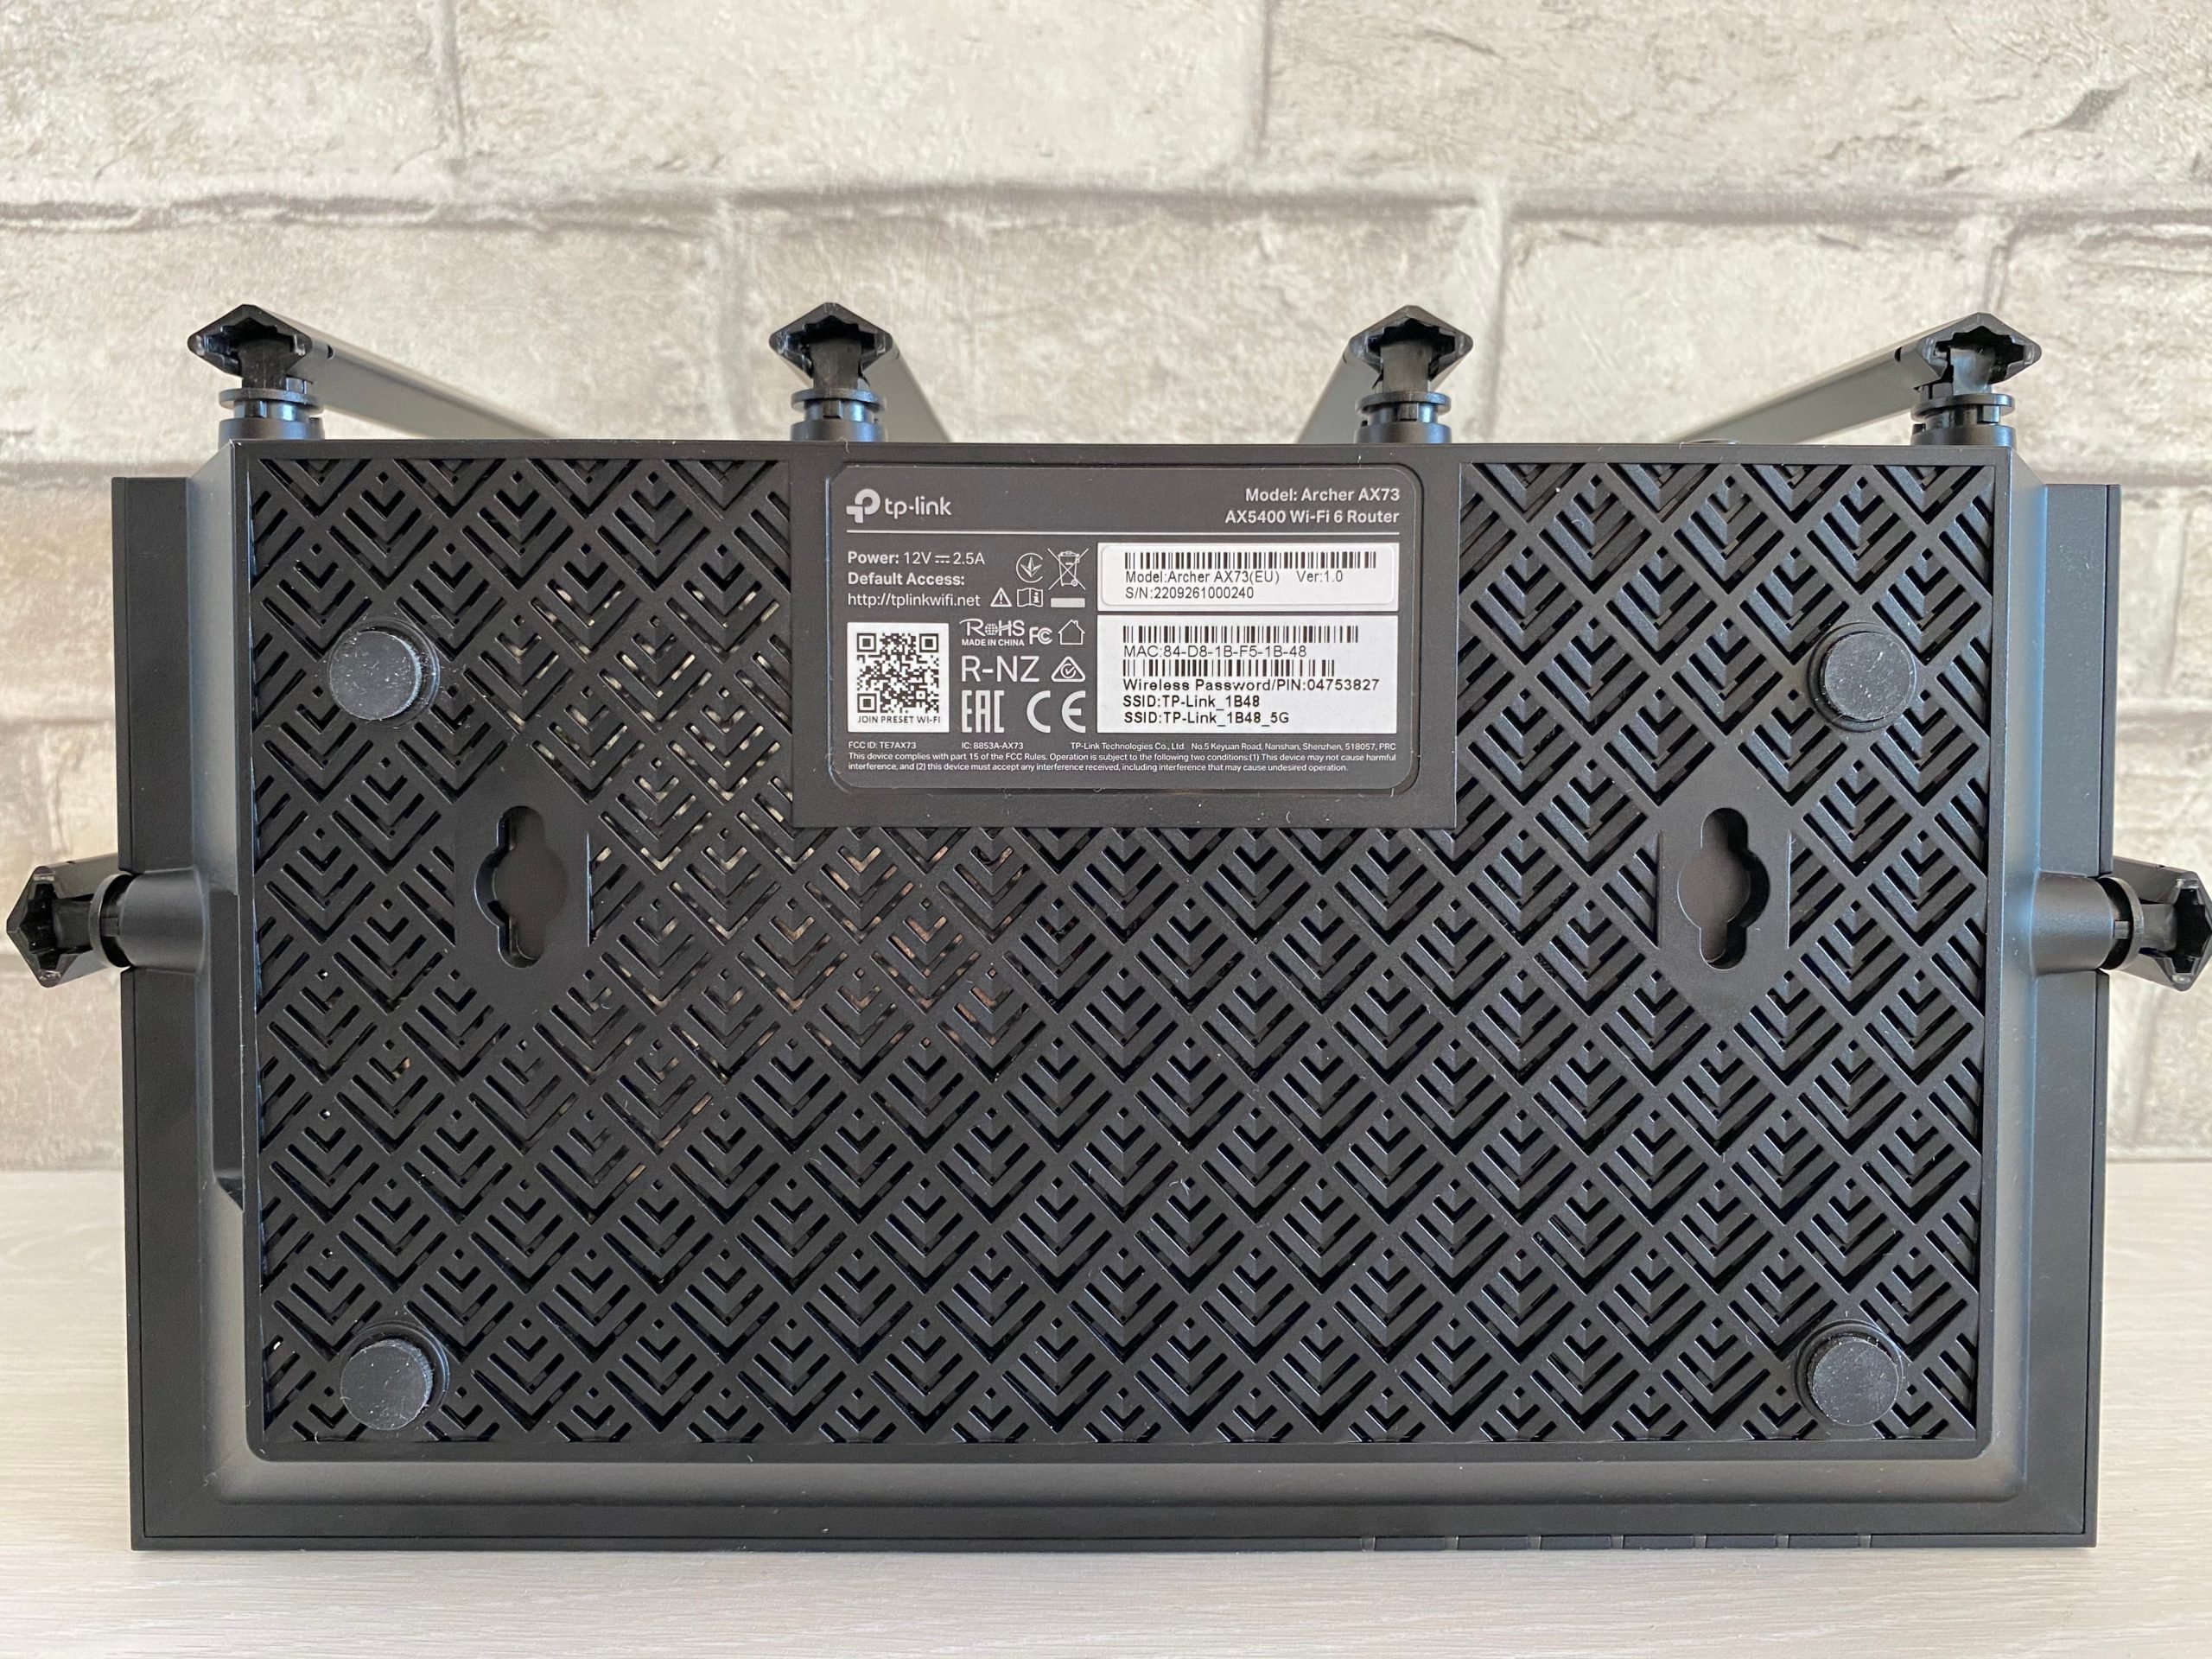
Итого: стильно, свежо, интересно. Подходит для любого интерьера, но наверняка будет находиться в самом неприметном месте)
Установка и Подключение
Предлагаю кратко познакомиться с процессом установки и подключения этого роутера к проводам. Никаких особенностей здесь нет:
- Кабель провайдера (от интернета) подключаем в порт WAN (синий).
- Если будете подключать к роутеру компьютер по проводу – используем любой желтый порт.
- Не забываем подключить к питанию и нажать на кнопку включения. Индикаторы должны заработать.
Все. Здесь традиционный совет от меня: Wi-Fi магии не существует, даже на этом роутере, поэтому стараемся размещать ближе к центру квартиры, и все с интернетом у вас будет хорошо.
Быстрая настройка – Tether
Разбор функционала роутера с комментариями я обычно выношу в раздел с настройками. И как правило я начинаю с базового подключения через браузер компьютера. Но тут что-то захотелось представить себя простым домашним пользователям, у которого нет ноутбука или компьютера (а таких людей все больше), и посмотреть как можно настроить роутер через приложение. Попробуем?
- Устанавливаем на телефон приложение TP-Link Tether (есть в Play Market и App Store). ССЫЛКА ДЛЯ ЛЕНИВЫХ.
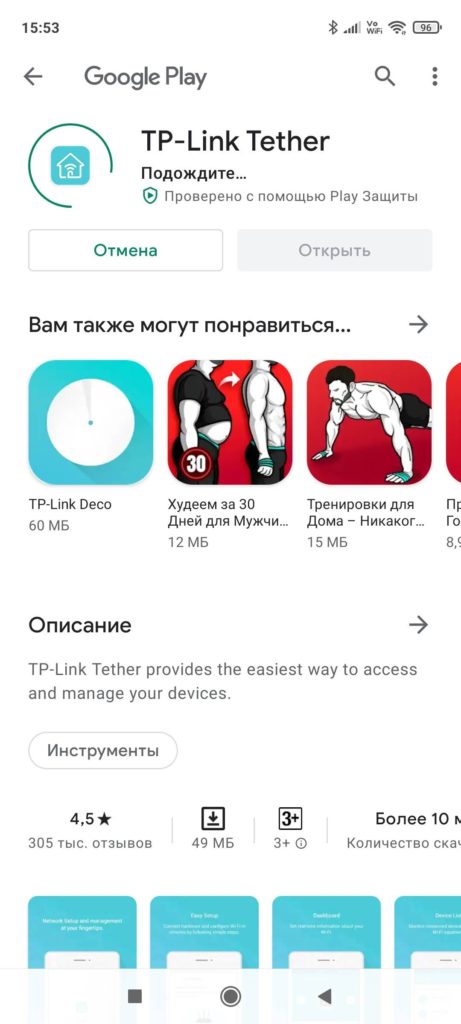
- Входим в свой TP-Link ID. Если еще не создавали у них учетную запись – нужно зарегистрироваться.
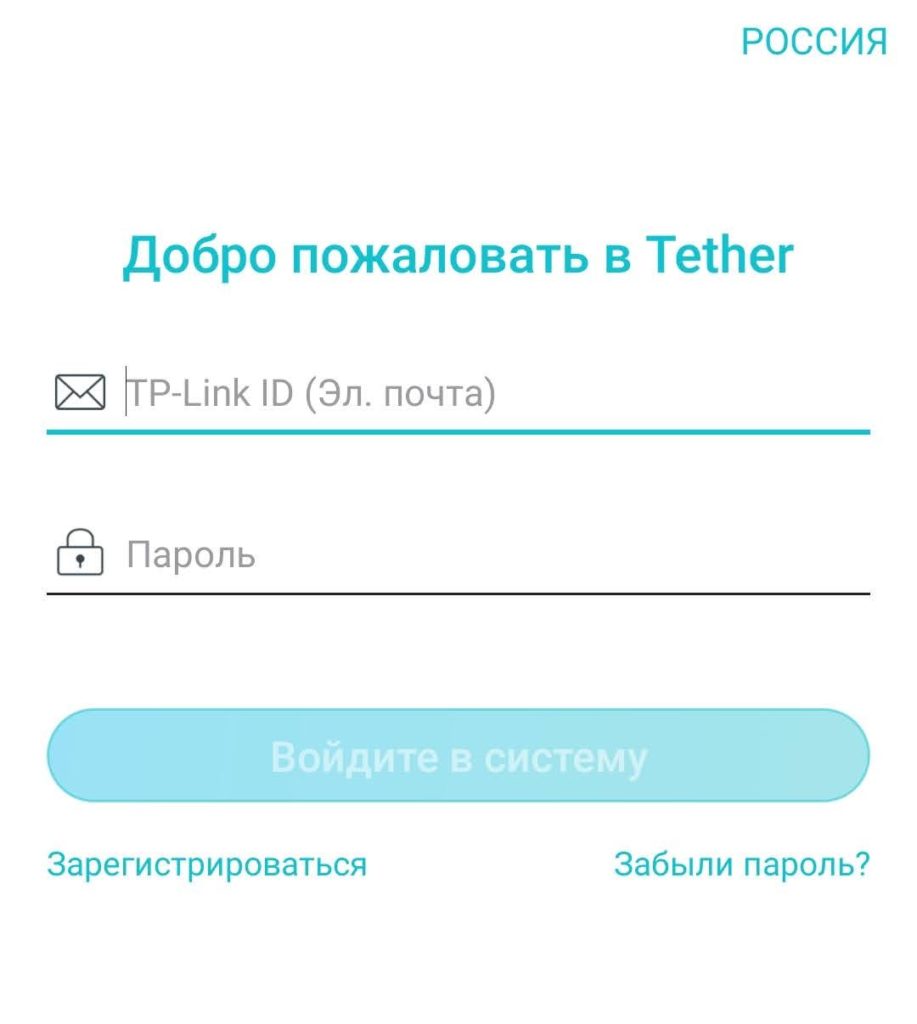
- У меня здесь уже есть мое устройство, так что добавляем новое, кликнув вот по этому плюсику:
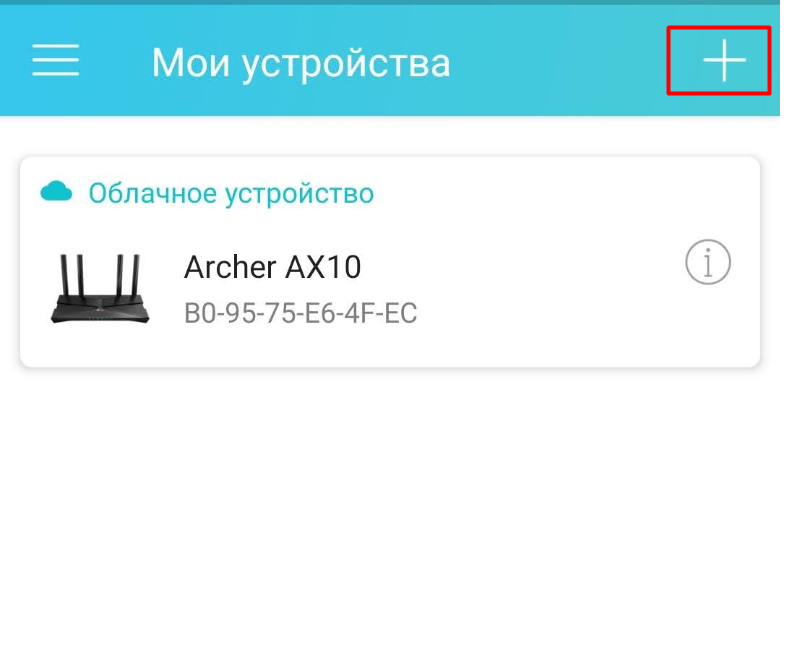
- «Маршрутизатор»:
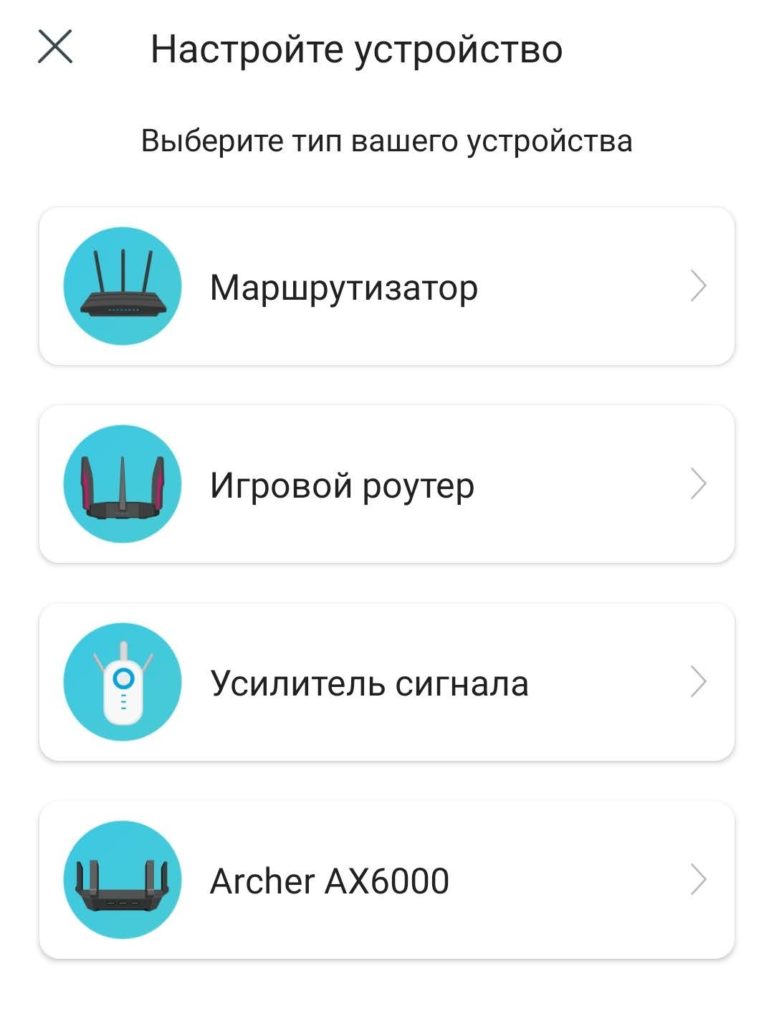
- «Wi-Fi маршрутизатор»:
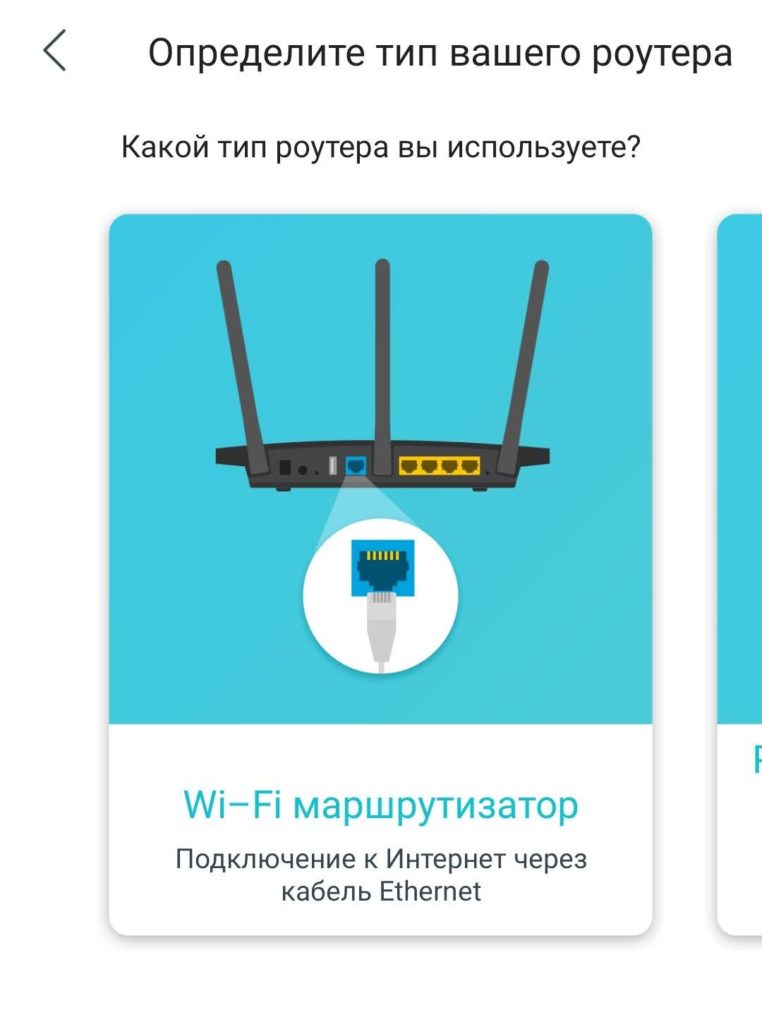
- Далее по сути и будет дельная инструкция по подключению роутера. Так что щелкаем везде «Далее», а на трудных местах я буду останавливаться отдельно. Сначала мы должны дойти до этапа, где нас попросят подключиться к Wi-Fi сети роутера:
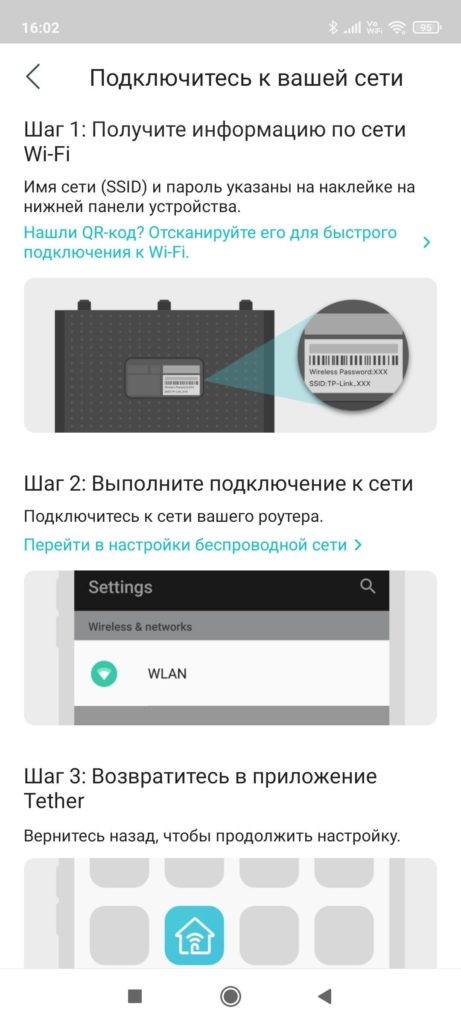
- Подключаемся к Wi-Fi сети роутера вручную. Названия Wi-Fi сетей и пароль указаны на наклейке на дне роутера или на отдельной бумажке. Переворачиваем, смотрим, подключаемся. Лично я подключился с помощью QR-кода из инструкции на скриншоте выше – сам QR-код находится на той самой наклейке на дне.
- После подключения к сети и нажатия кнопки «Я подключен», начнется поиск сети, в результате которого вы увидите свой роутер:
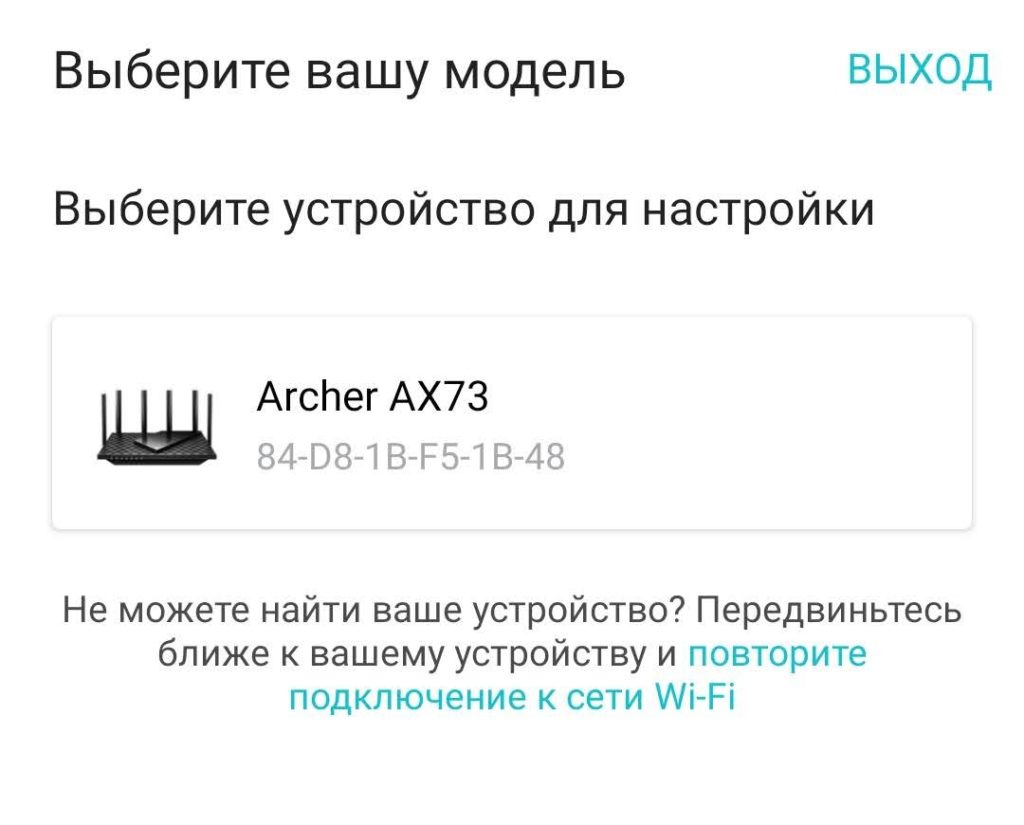
- Создаем новый пароль для доступа в будущем к конфигуратору роутера.
- Выбираем тип подключения. Тип подключения полностью зависит от вашего провайдера. Обычно он указывается в договоре. Если не знаете его – смело звоним своему провайдеру и узнаем. Более того, если ваш тип подключения будет отличаться от Динамического IP (например, как у меня PPPoE), то далее нужно будет еще ввести дополнительные данные (например, логин и пароль для доступа к интернету по PPPoE или необходимость смены MAC-адреса при Динамическом IP – тут больше интересуемся у своего провайдера или смотрим данные из договора, сложного ничего нет):
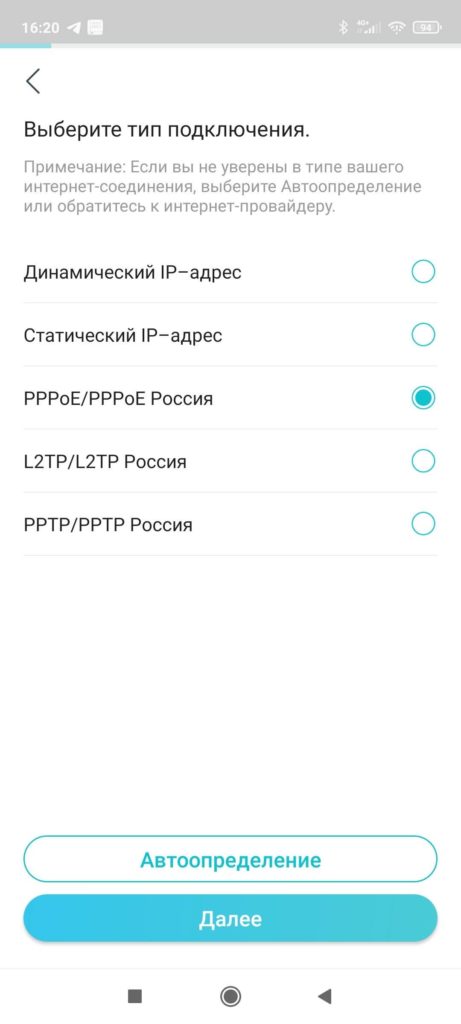
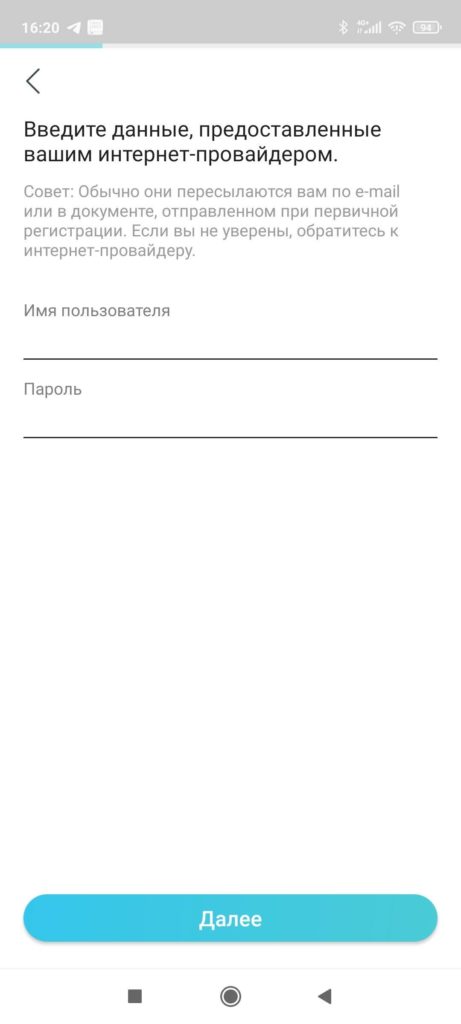
- Задаем настройки для Wi-Fi сети. Smart Connect можно оставить включенным – это создаст сети на 2.4 ГГц и 5 ГГц под ОДНИМ именем, а роутер сам будет определять подключаемые устройства и вешать им правильную частоту. В остальном задаем имя Wi-Fi сети и пароль от нее:
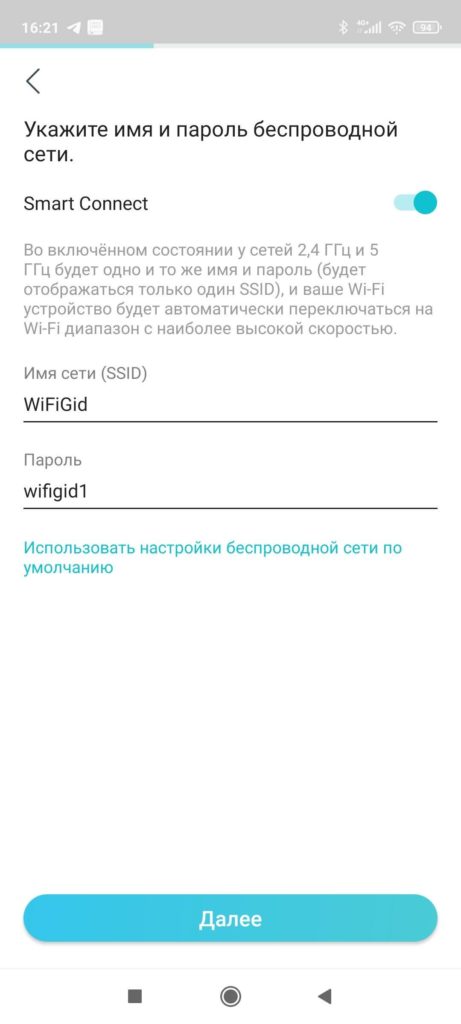
- Включаем автообновление роутера и задаем его время (я ничего не трогал).
- Применяем настройки и радуемся. Оранжевый индикатор на роутере после подключения его к интернету должен загореться зеленым.
Далее нас почему-то сразу радуют функциями HomeShield, но я пока предлагаю остановиться – главной цели мы достигнули: интернет есть, Wi-Fi работает.
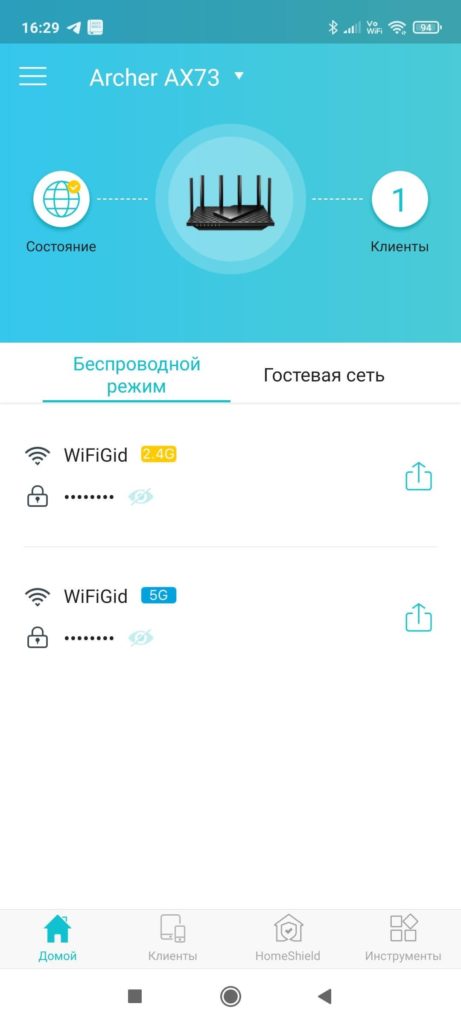
Быстрая настройка – На ноутбуке через Web-интерфейс
Теперь пройдемся по классическому способу настройки роутера – с помощью компьютера или ноутбука. В моем случае это будет ноутбук с подключением по Wi-Fi (хотя я настоятельно рекомендую использовать провод).
- Подключаемся к Wi-Fi сети роутера (где брать названия сетей и пароль от нее уже писал):
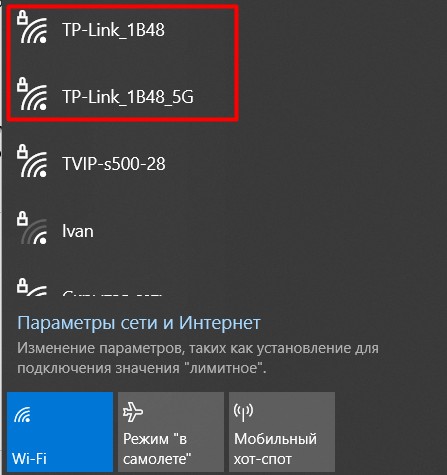
- Вводим в браузере любой из следующих адресов (можно просто перейти по ссылкам):
http://tplinkwifi.net
192.168.0.1
- Снова идем по знакомой нам дороге. Просят создать пароль для доступа в конфигуратор в будущем, чтобы злые хакеры не потревожили наш Ютубчик:
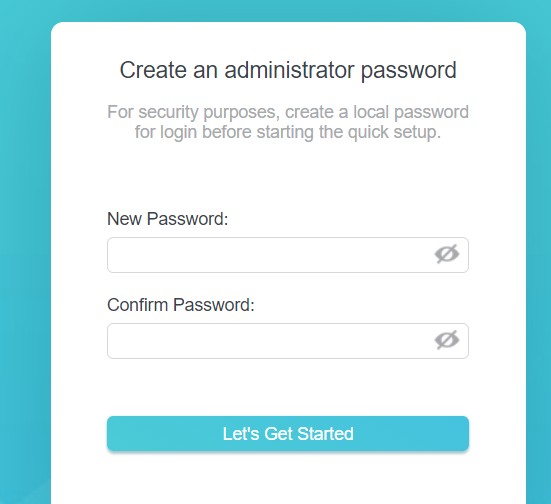
- Выбираем часовой пояс:
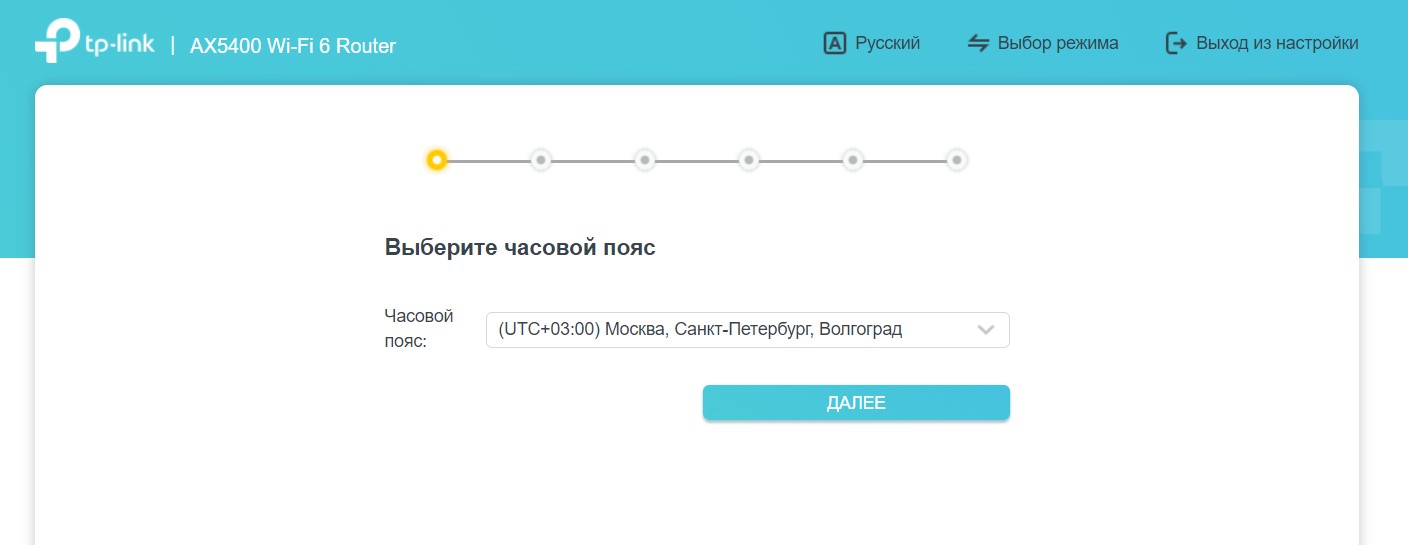
- Задаем тип подключения и все необходимые для него параметры (уже писал выше про это, есть возможность задать Динамический IP, Статический IP, PPPoE, L2TP, PPTP). Если что – уточняем у провайдера:
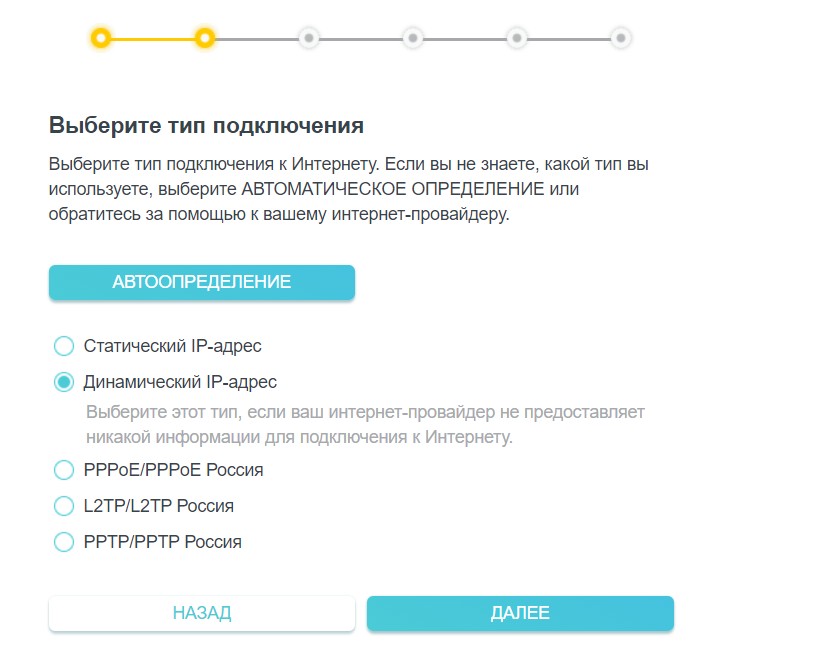
- Задаем настройки Wi-Fi сети:
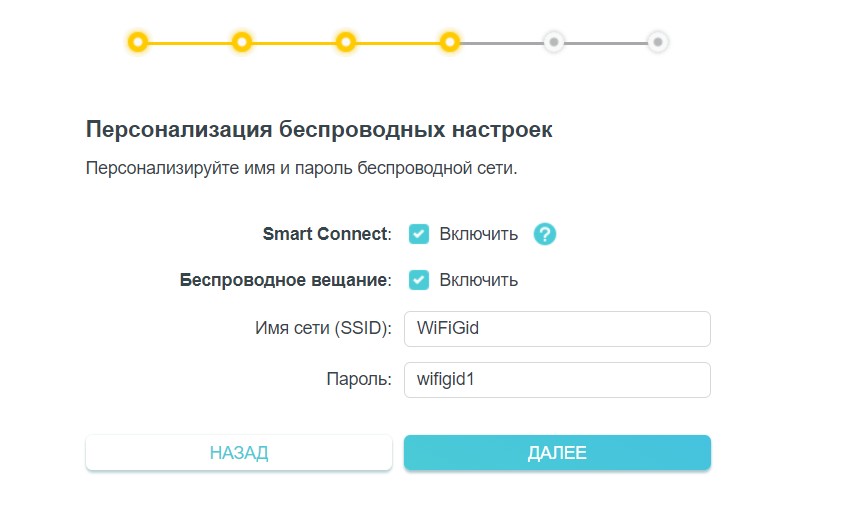
- Ждем окончания проверки соединения и радуемся. Если у вас что-то до сих пор не работает – значит просто ошиблись в типе соединения или данных от него. Попробуйте еще раз и все получится.
После окончания настройки, если вы меняли название Wi-Fi сети, не забудьте переподключиться к новой созданной сети!
Сброс на заводские настройки
Если вы получили это устройство себе не в новом виде, при входе в конфигуратор требуется какой-то неизвестный пароль или же просто что-то пошло не так и хочется начать сначала, рекомендую сделать сброс на заводские настройки. Проще всего это сделать через физическую кнопку сзади:
- Включаем роутер. Убеждаемся, что индикатор включения перестал мигать.
- Нажимаем кнопку сброса чем-то тонким и держим около 10 секунд.
- Индикаторы должны моргнуть, а роутер начнет перезагружаться.
- Все!
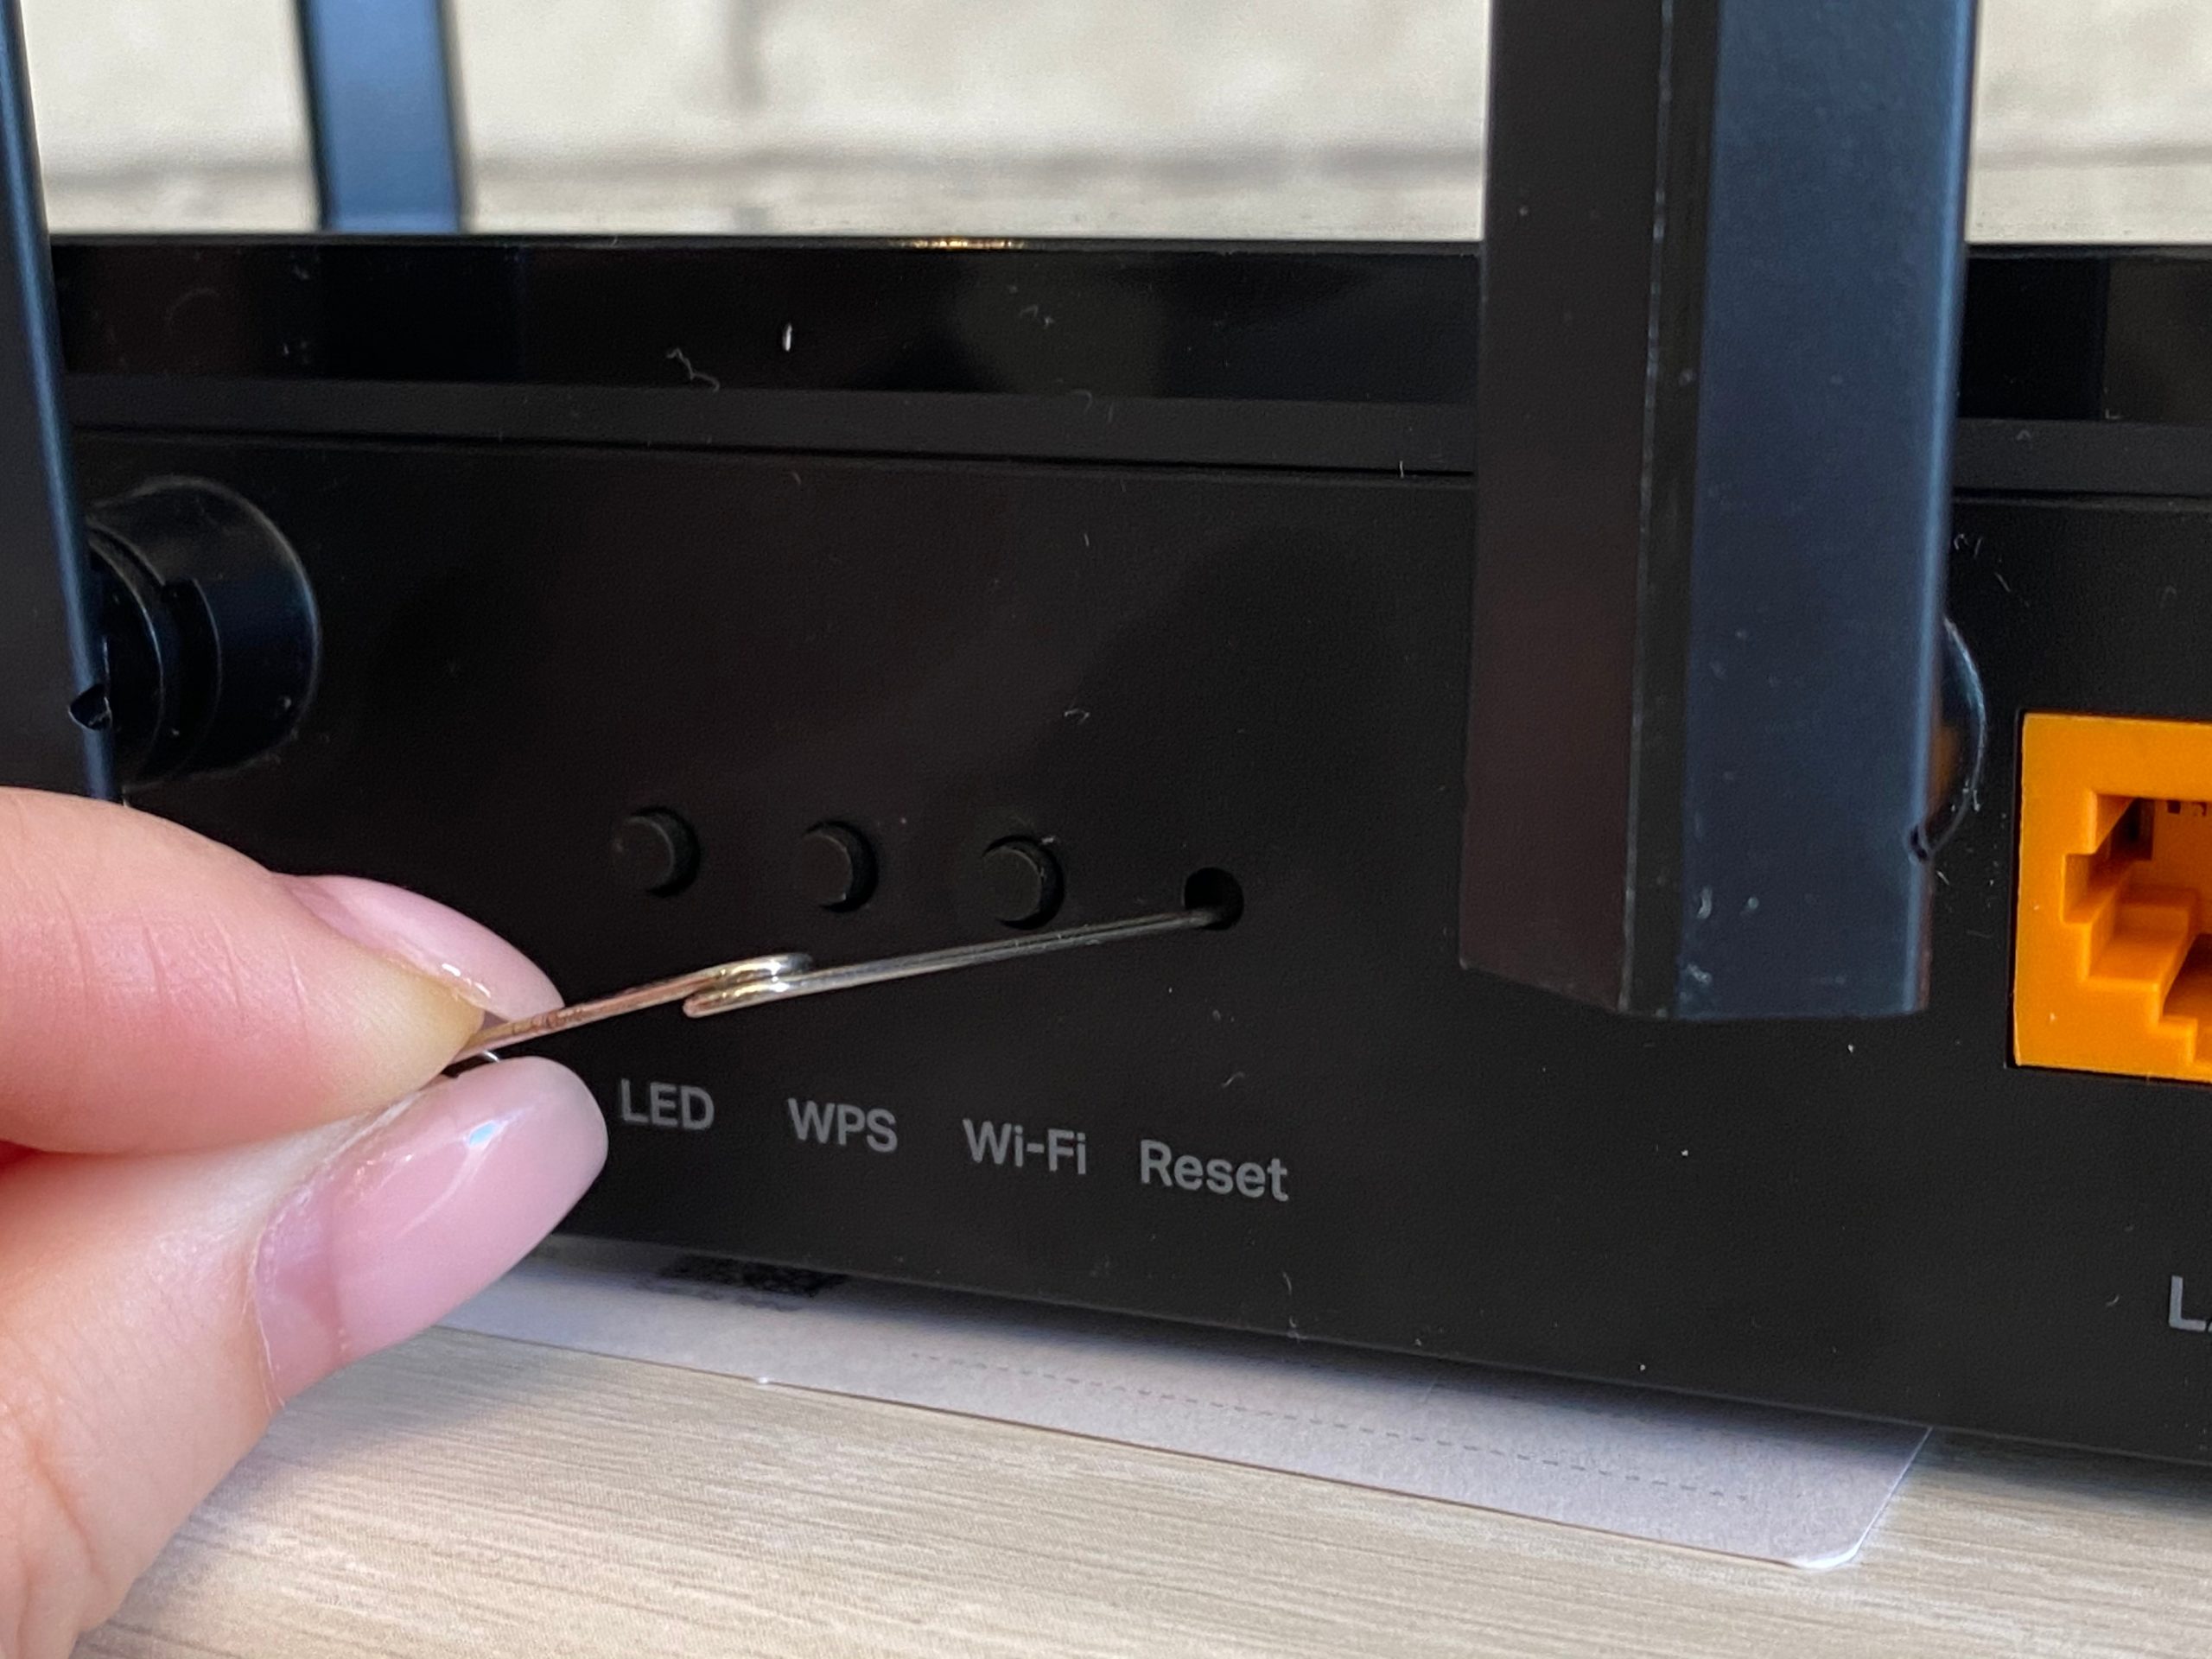
Полная настройка
На самом деле полной настройки здесь не будет. Здесь мне хотелось бы показать возможности интерфейса роутера и осветить некоторые функции самого роутера – и именно через интерфейс это проще всего сделать. Остановимся на версии веб-конфигуратора, т.к. здесь скриншоты получатся нагляднее. Вы же можете искать эти же настройки в приложении – все прекрасно настраивается и через него.
Схема сети
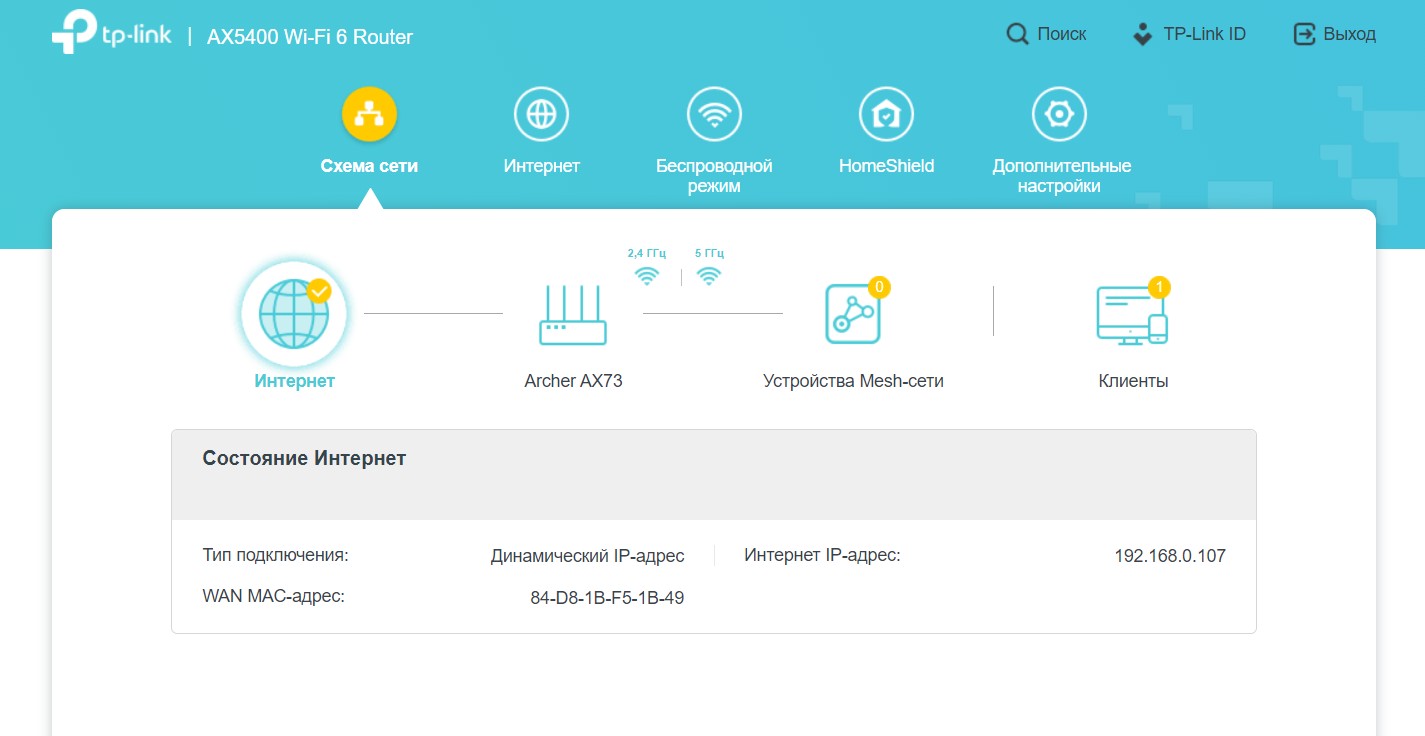
«Схема сети» — это главная страница роутера. Для меня ее содержание было не сразу очевидно. Но если присмотреться, верхние иконки Интернет, Archer AX73, Устройства Mesh-сети и Клиенты являются кнопками (т.к. вкладками этой страницы). Можно пощелкать и найти что-то полезное для себя:
- Интернет – здесь можно увидеть главное, есть интернет или нет его. Хотя роутер подскажет вам отсутствие интернета и без этого – загорится оранжевый индикатор. Верный сигнал звонить своему провайдеру с вопросами.
- Archer AX73 – здесь можно включить/выключить Wi-Fi сети по их частотам, завести быстро гостевую сеть, посмотреть нагрузку по процессору и памяти, узнать в какие порты подключены устройства и на какой скорости.
- Устройства Mesh-сети. Здесь отображаются те устройства, которые подключены к роутеру по технологии OneMesh.
- Клиенты. Прочие устройства, как-то подключенные к роутеру. Можно посмотреть скорости их подключения к роутеру и заблокировать их (если кто-то жутко вам мешает насладиться дома тишиной).
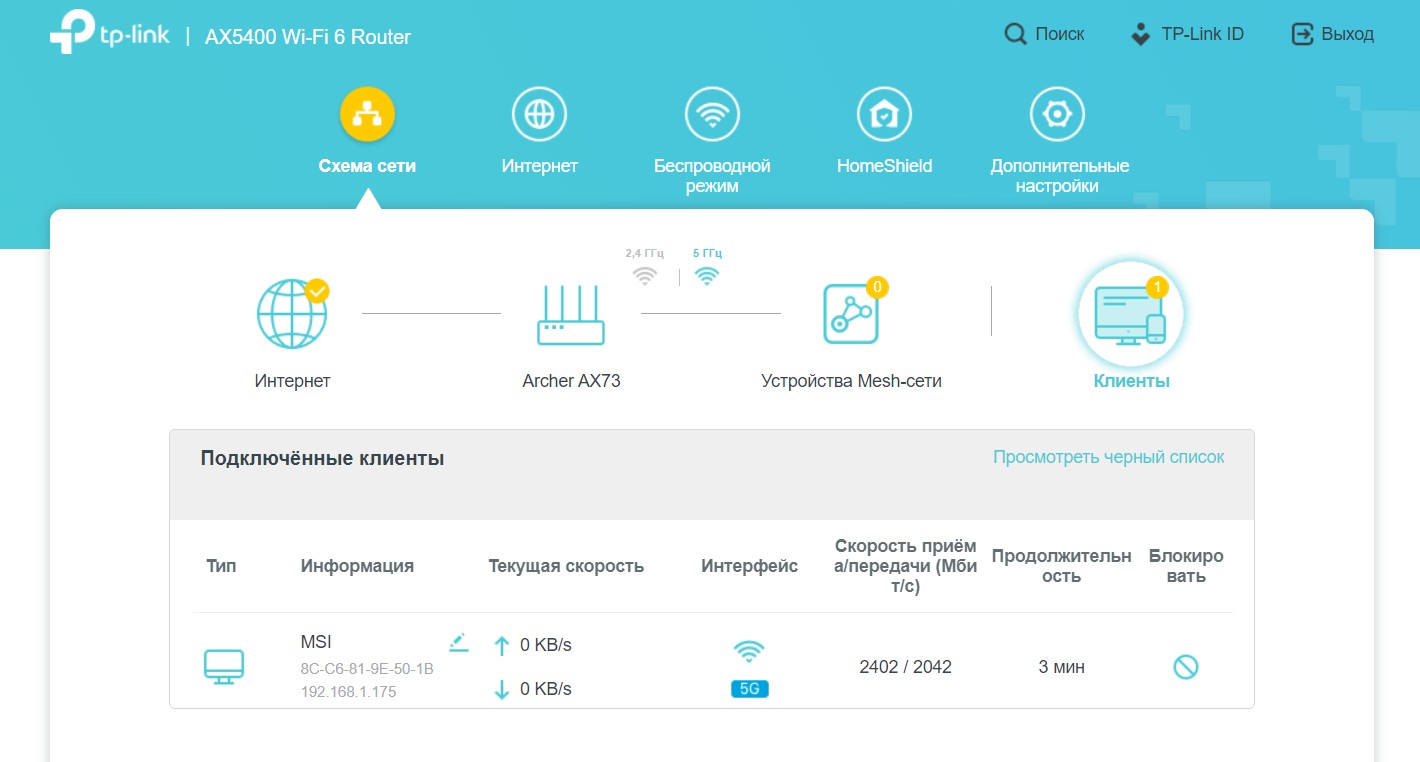
Изменить тип подключения к интернету
Представим, что ваш роутер настроен идеально под вас, и не хотелось бы делать ему сброс на заводские настройки. Но вот незадача – пришлось сменить интернет-провайдера (ну или переехали). Достаточно просто сменить тип подключения, а все остальное останется как есть. Для этого здесь есть вкладка «Интернет»:
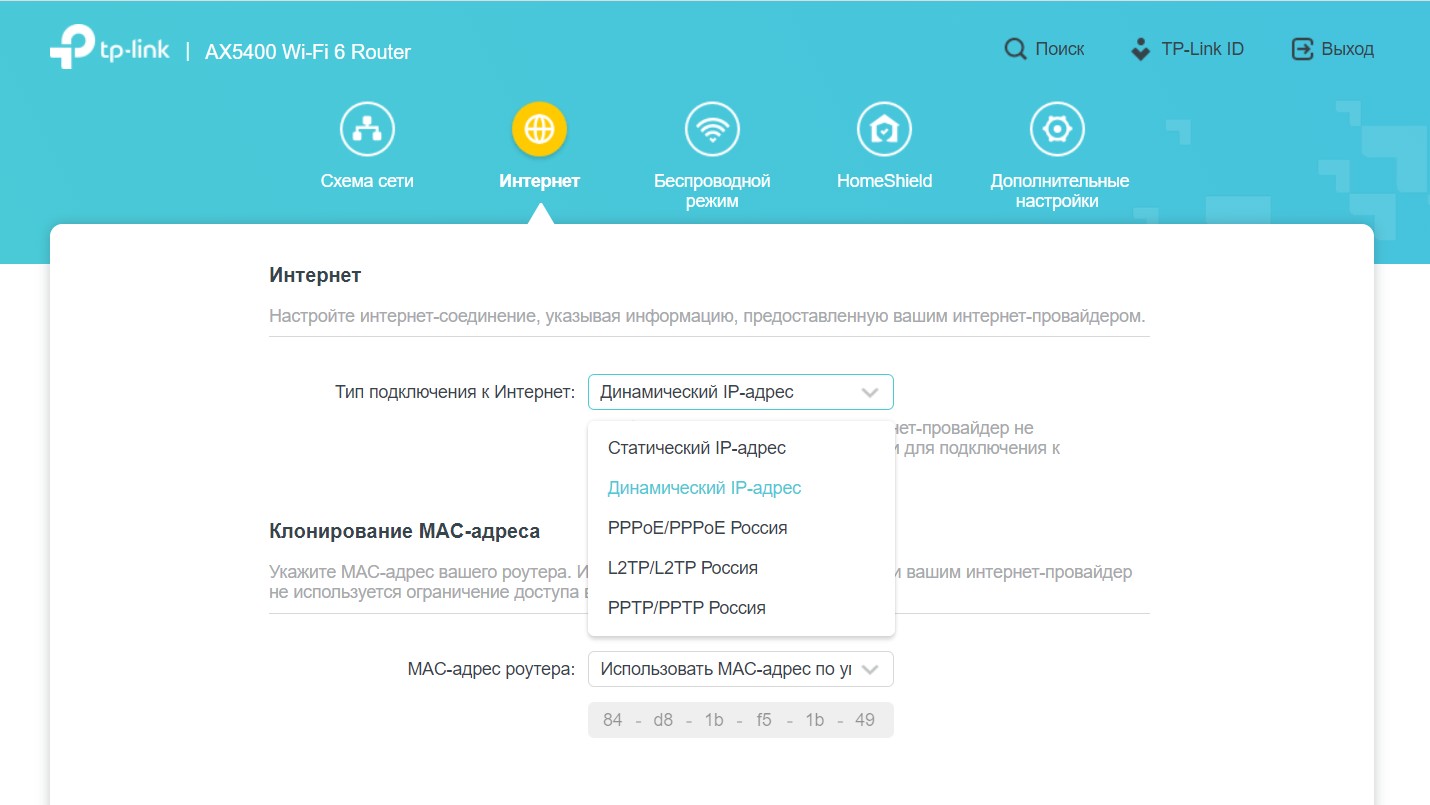
Как видите, здесь представлены снова те самые знакомые типы подключения. Так что если при первой настройке что-то пошло не так, можно просто пытаться донастроить это здесь.
Простые настройки Wi-Fi
Следующая простая задача – захотелось быстро настроить гостевую сеть Wi-Fi или же поменять пароль от существующей сети. Конечно, есть и альтернативные варианты, но как один из них, здесь есть созданная вкладка «Беспроводной режим»:
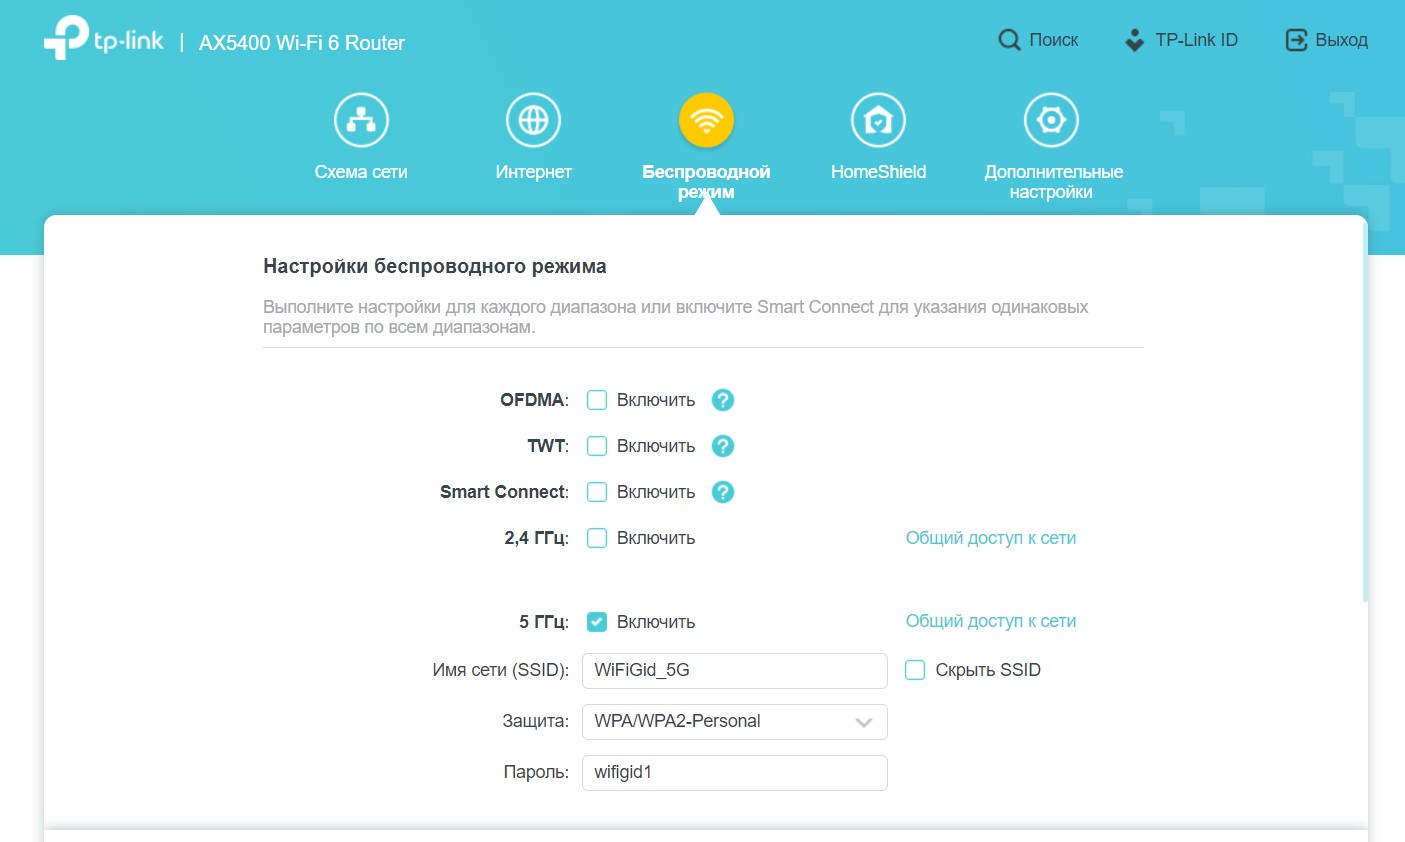
На самом деле там деталей больше, чем показано на скриншоте, да и я уже успел произвести свою настройку (не нужно ничего повторять, в крайнем случае оставьте все как было у вас изначально). Отдельные пункты и из этого раздела мы рассмотрим чуть позже.
Пункт HomeShield сейчас пропускается умышленно. К его рассмотрению мы вернемся в отдельном абзаце, так как это особая функция этого роутера.
Дополнительные настройки
Здесь собраны все остальные возможности роутера для его тонкой настройки. Желательно хотя бы раз ознакомиться с ними самостоятельно, я лишь остановлюсь на самом важном на мой взгляд.
Быстрая настройка
Помните, при первой настройке запускался мастер настройки? Его можно вызвать именно отсюда:
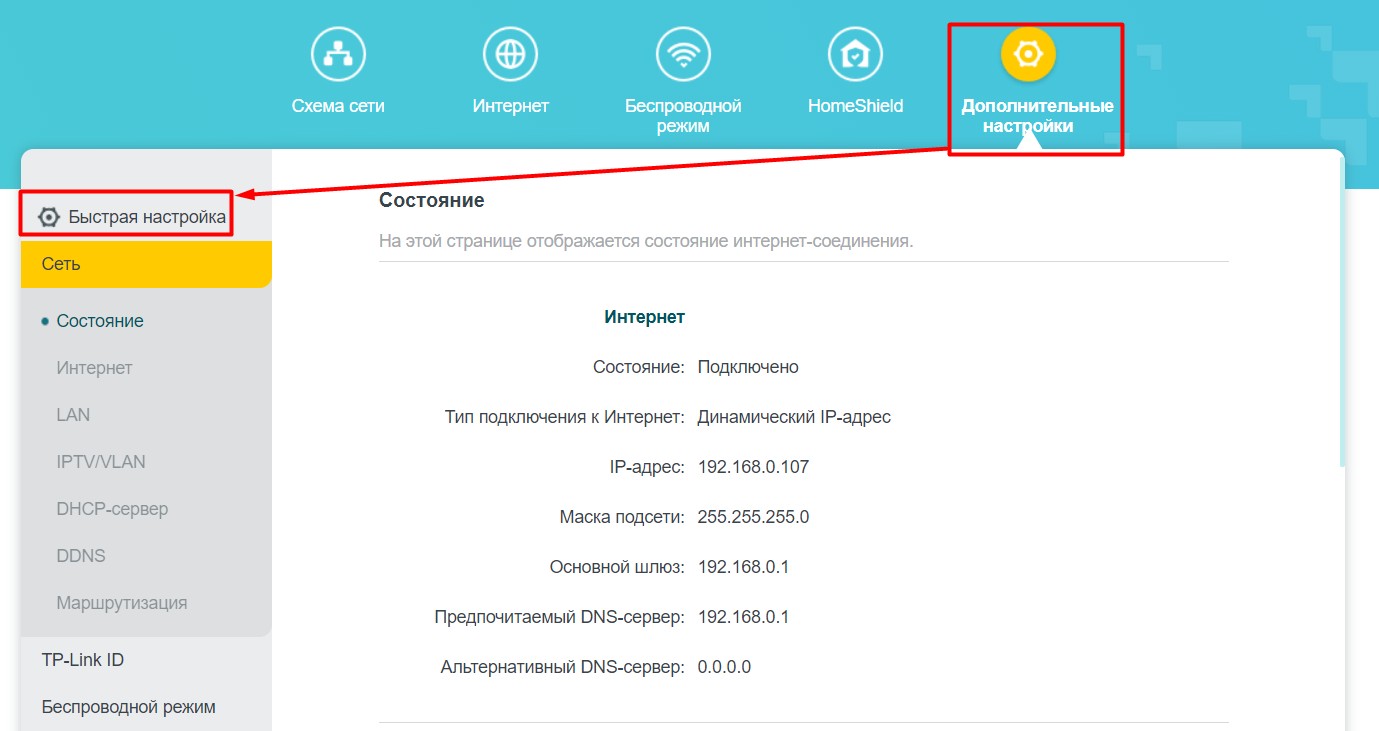
Сеть – LAN
Здесь можно изменить IP адрес самого роутера (например, для изменения подсети при разрешении конфликтов или подключению к другому роутеру) и задать агрегацию каналов (до 2 портов LAN, например, для подключения к домашнему NAS-серверу и получению теоретических 2 Гбит/с по проводу):

Сеть – IPTV
Актуально для тех, кто еще подключается оригинальные IPTV-приставки к телевизору (лично я ушел в приложения на телевизоре, но кому-то без SmartTV может быть очень даже актуально). По умолчанию IPTV выключен – достаточно включить галочку, выбрать нужные порты роутера для IPTV и подключить к ним приставки:

Сеть – DHCP-сервер
По умолчанию DHCP-сервер выдает адреса начиная с X.X.X.100. Если вам нужно изменить диапазон выдаваемых адресов, это делается именно в этом разделе. Тут же можно и вовсе отключить DHCP, но тогда нужно не забывать настраивать все устройства вручную.
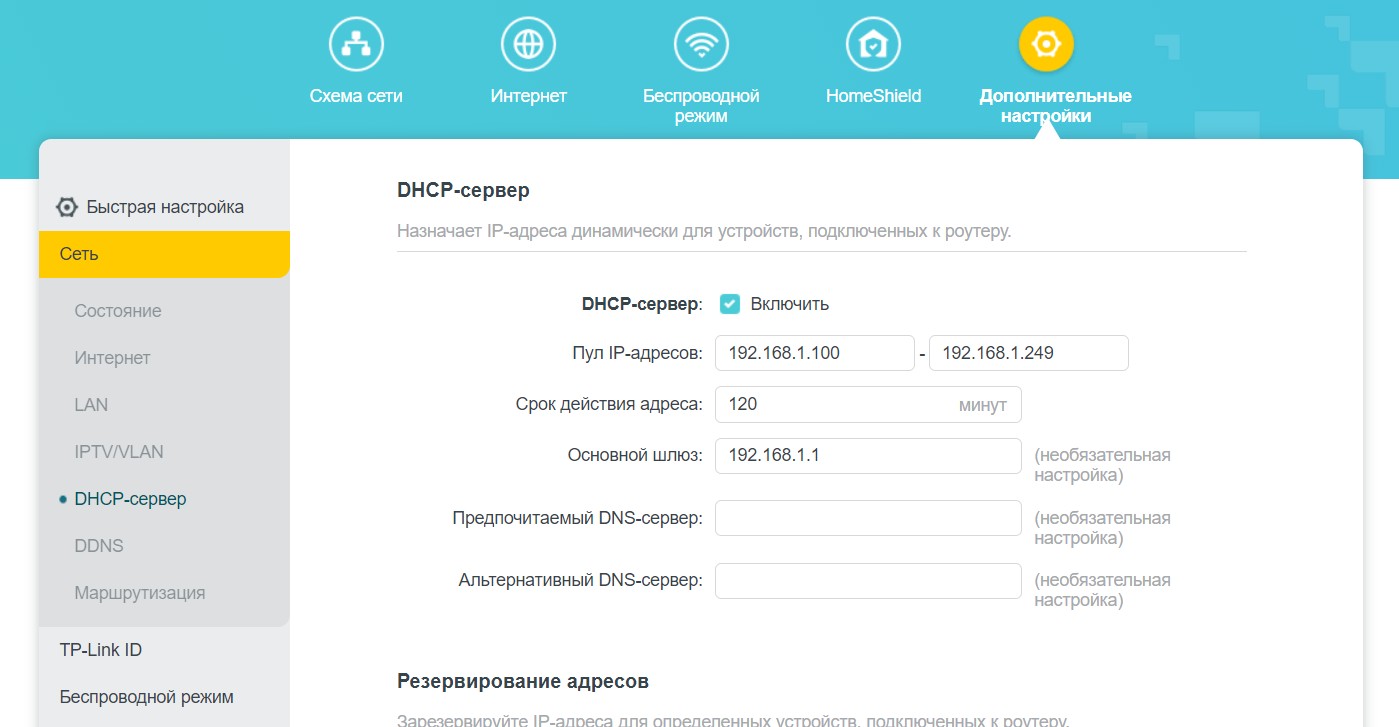
Сеть – DDNS
Классический пример – создали вы у себя в локальной сети сервер Minecraft (пример, особенно близко детям и у кого есть дети). А друг хочет удаленно подключиться к вам. Вы грамотно пробросили порты, дали доступы и все классно играется. Но завтра ваш провайдер захотел поменять ваш внешний IP (если у вас не постоянный внешний белый IP, про серые адреса вообще пока промолчу). Что делать? Давать другу новый IP адрес. И так каждый раз.
Чтобы этого не делать постоянно, достаточно завести внешнее «доменное имя», и пусть оно само постоянно привязывается к вашему IP-адресу. Конечно же, такой привязкой будет заниматься сам роутер. В настоящий момент поддерживается три провайдера динамического DNS – сам TP-Link, NO-IP и DynDNS:
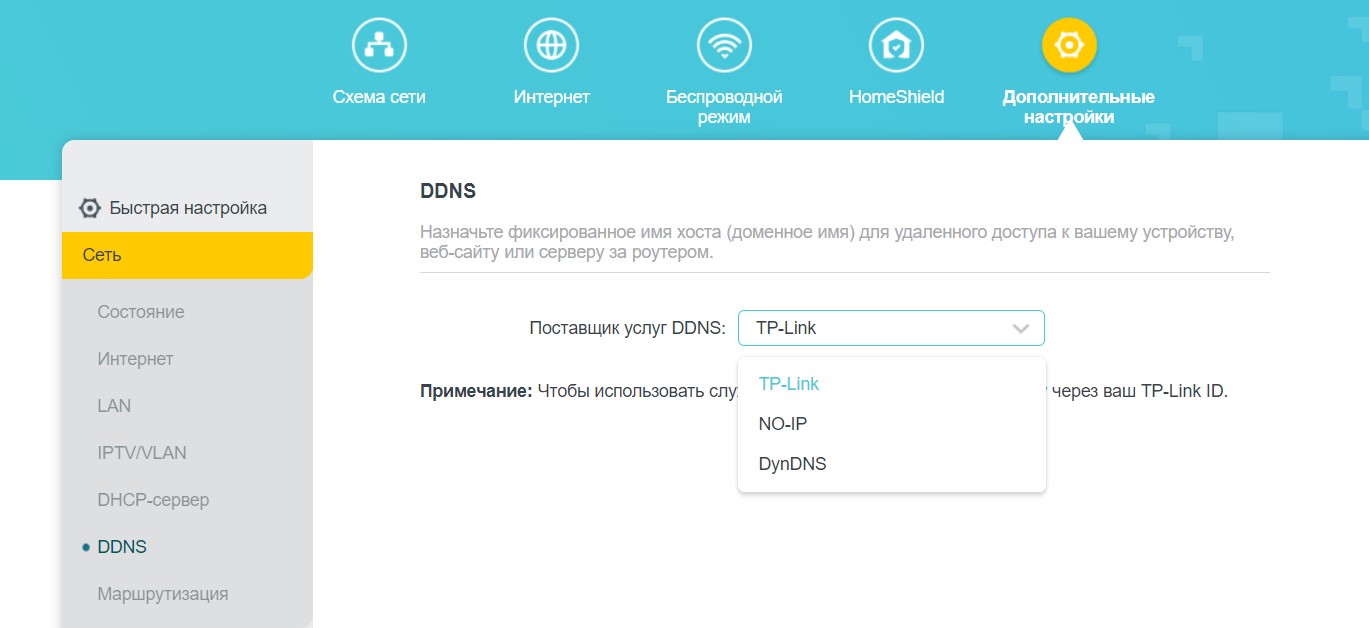
TP-Link ID
Свой роутер можно привязать к аккаунту TP-Link ID. Тогда и дополнительные сервисы будут доступны (вроде DDNS, HomeShield или подключению к роутеру через приложение извне). Сделать привязку можно здесь:
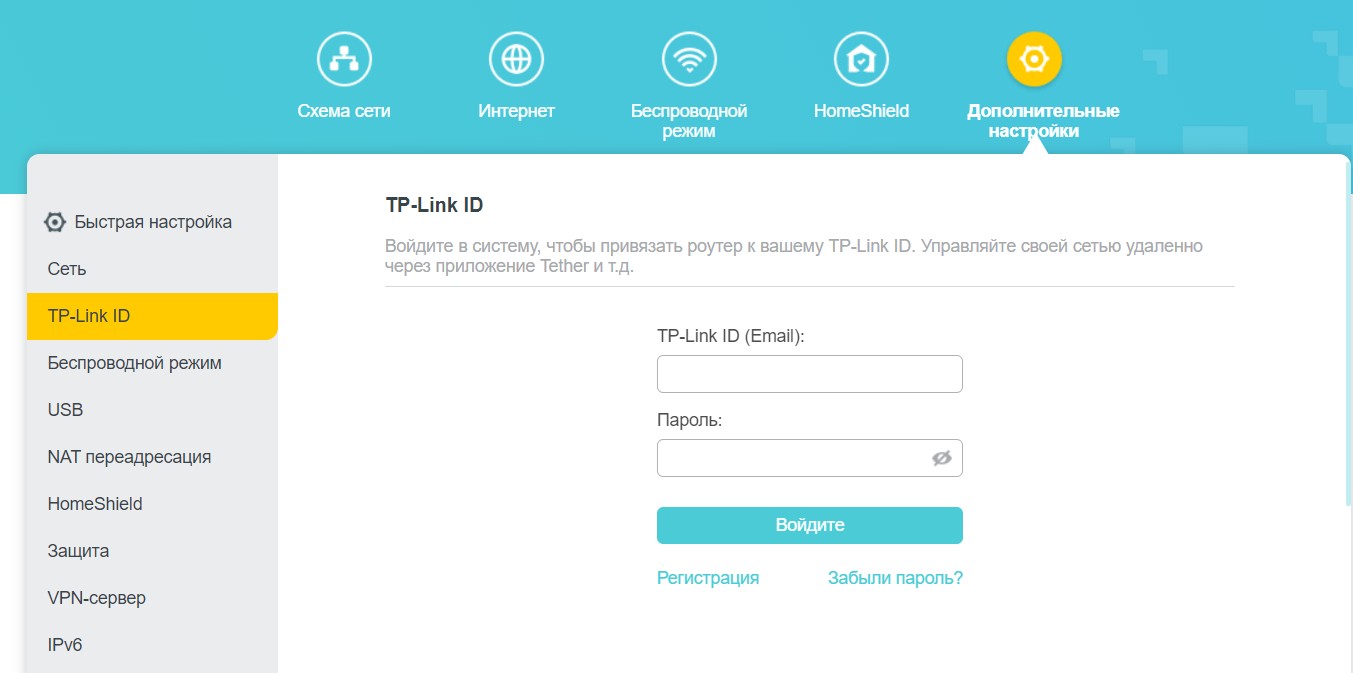
Беспроводной режим – Настройки беспроводного режима
Все самые интересные настройки Wi-Fi нужно делать именно здесь. В остальных разделах большей части отсюда не представлено. Поэтому ранее я и старался опускать всё это. Наверстываю упущенное:
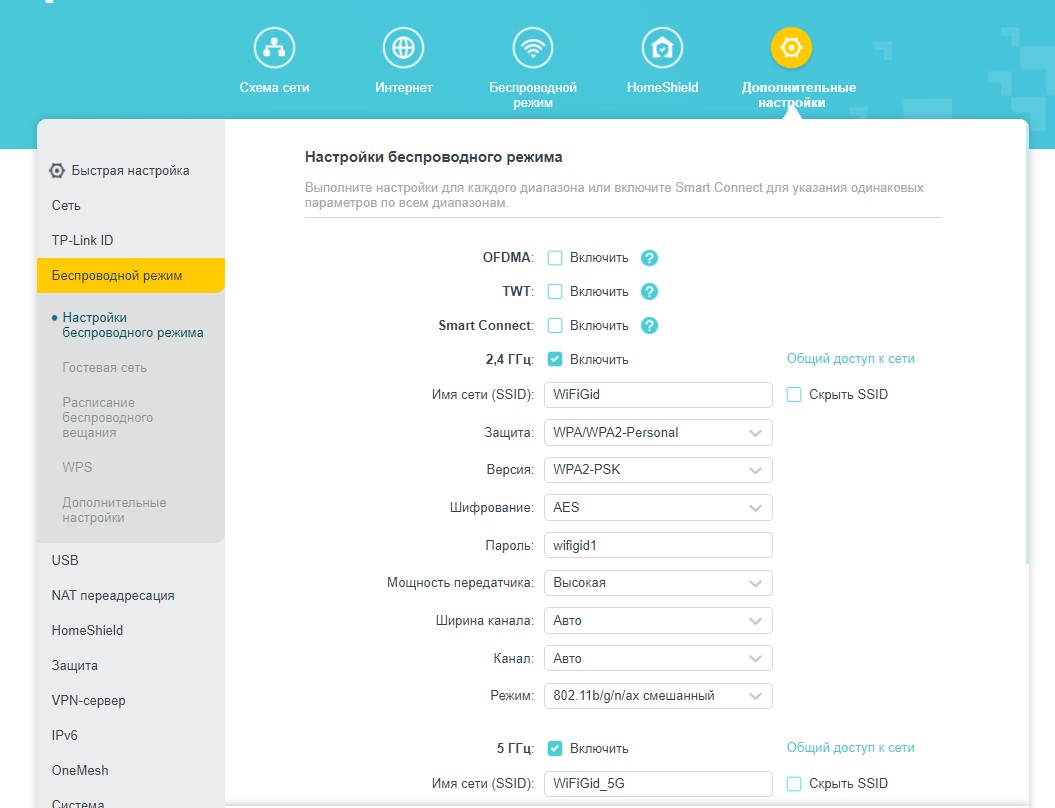
Пробежимся по пунктам:
- OFDMA – прекрасная функция Wi-Fi Ранее я уже давал отсылки на них, рекомендую все-таки познакомиться вам с этой технологией. Здесь же очень кратко и грубо – если раньше Wi-Fi отвечал всем по очереди, то теперь он может отвечать нескольким устройствам одновременно. Разумеется, актуально только для клиентов Wi-Fi 6. Поэтому если их у вас уже много – must have.
- TWT – «таймер пробуждения» для умных устройств. Сейчас это не особо актуально, т.к. большая часть умных устройств до сих пор сидит на Wi-Fi Но в будущем эта функция сможет держать эти устройства не постоянно подключенными к сети, а лишь при необходимости или по расписанию. Что должно очень сильно экономить энергию, особенно если они работают не от электросети.
- Smart Connect – роутер объединяет две частоты 2.4 и 5 ГГц в «одну» сеть, а подключаемым устройствам сам отдает нужную частоту. Функция интересная и классная, НО при ее активации становится невозможным детально настроить каждую Wi-Fi сеть. Если вам ничего дополнительно не нужно настраивать – можно смело активировать, удобно.
- А далее начинаются уже настройки каждой отдельной частоты (если выключен Smart Connect): можно включить/выключить частоту, перезадать имя и пароль, выбрать тип защиты (есть поддержка WPA3), задать ширину канала (например, сейчас для теста я включил 160 МГц, чтобы получить максимальную скорость), задать канал (хотя Wi-Fi 6 и не свойственны помехи чужих сетей, но дома полно и старых устройств).
Беспроводной режим – WPS
Здесь можно отключить функцию WPS (и вроде уже и не надо на этом роутере, но безопасники наверняка отключат) или подключить другое устройство с помощью функции WPS (например, подключаем повторитель, и не хочется бежать за роутером, чтобы нажать кнопку WPS):
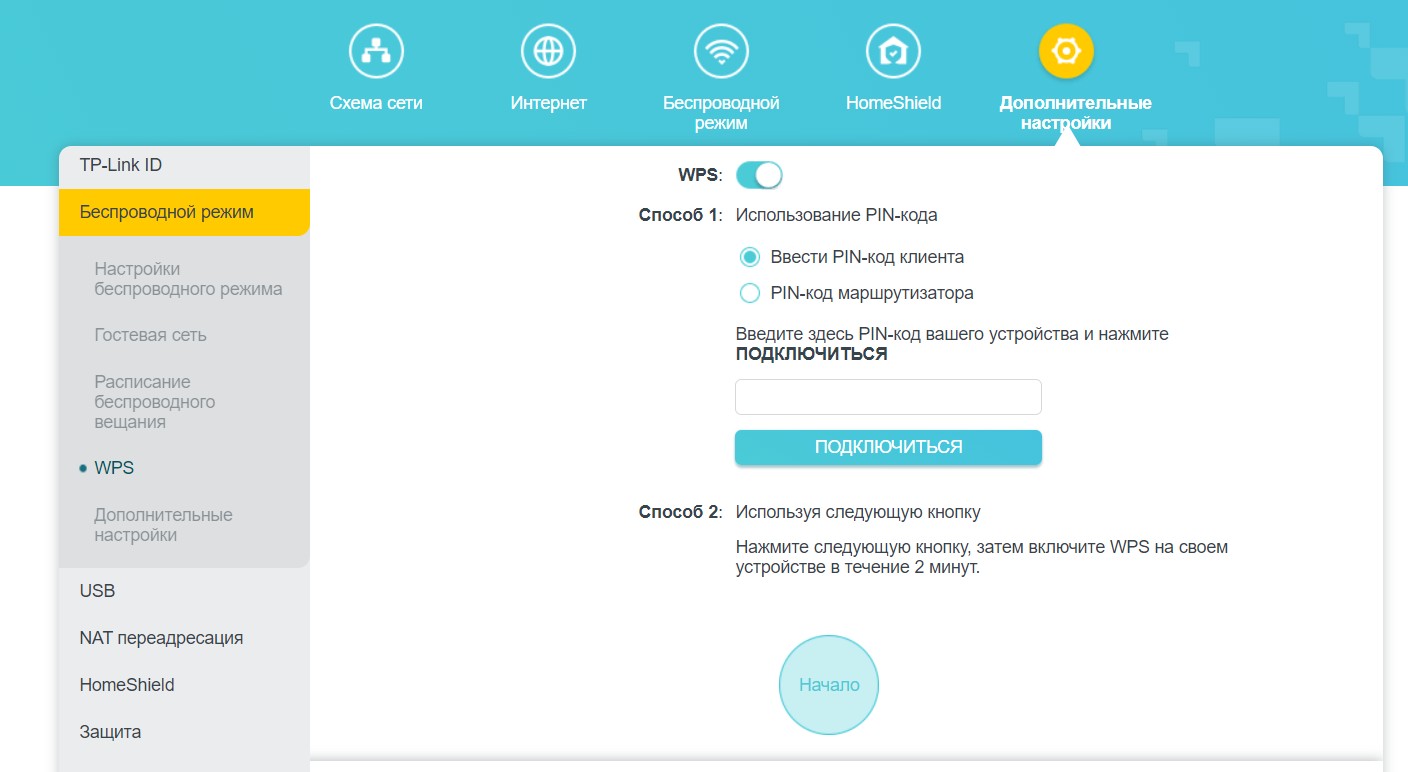
USB
К сожалению, в функциях USB порта на момент написания обзора нет принт-сервера и поддержки модемов.
USB порт здесь используется как хранилище данных – например, для любимого телевизора или резервного общего хранилища в локальной сети. Тоже ничего сложного – подключаем USB и пользуемся. Здесь же можно задать варианты доступов к нему (по умолчанию внешний доступ отключен). Для владельцев Mac есть возможность использования Time Machine.
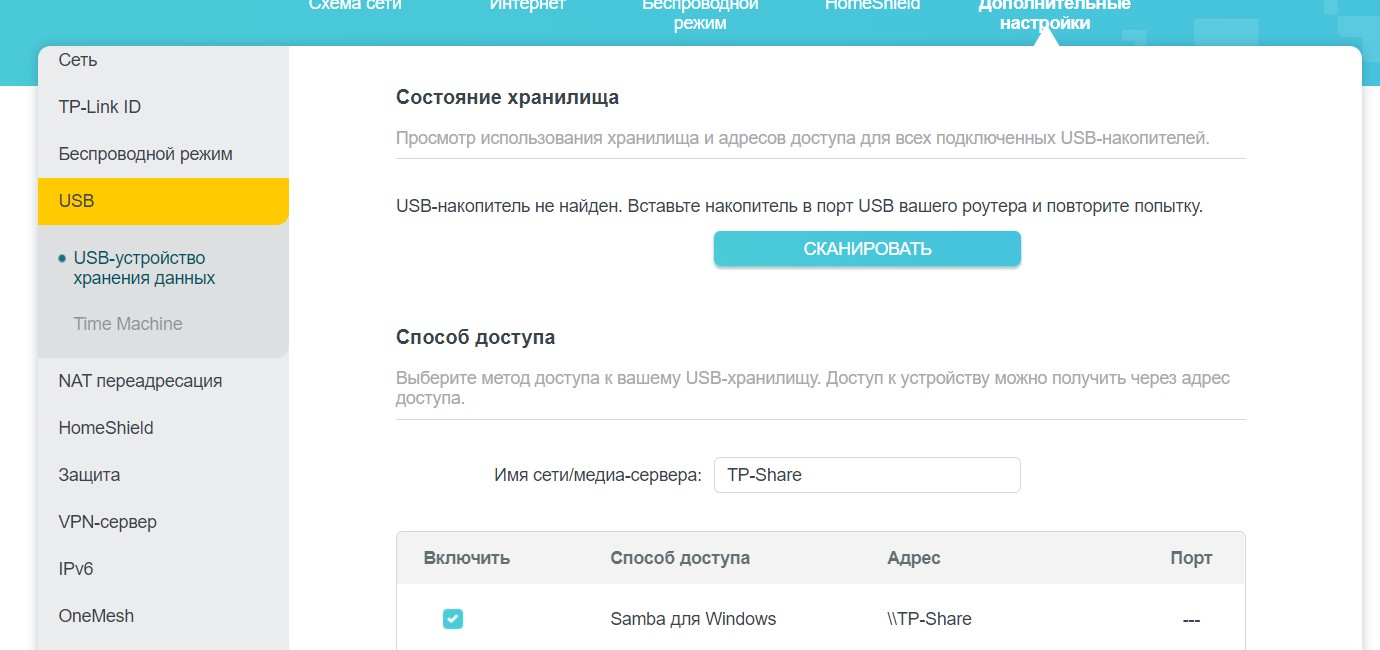
NAT-переадресация – Перенаправление порта (ПРОБРОС порта)
Еще один частый вариант обращений к нам – проброс порта. Делается он именно в этом разделе. Добавляем новое правило, привязываем порт к IP адресу своего локального компьютера, радуемся. Из удобного – есть предустановки для готовых сервисов (хотя в быту обычно прописываешь что-то стороннее):

VPN-сервер
Речь идет о СОЗДАНИИ VPN сервера самим роутером. Есть поддержка OpenVPN и PPTP. Т.е. вы создаете конфигурацию (OpenVPN) или учетные записи (PPTP), а пользователи благодаря ним извне подключаются к вашей локальной сети.
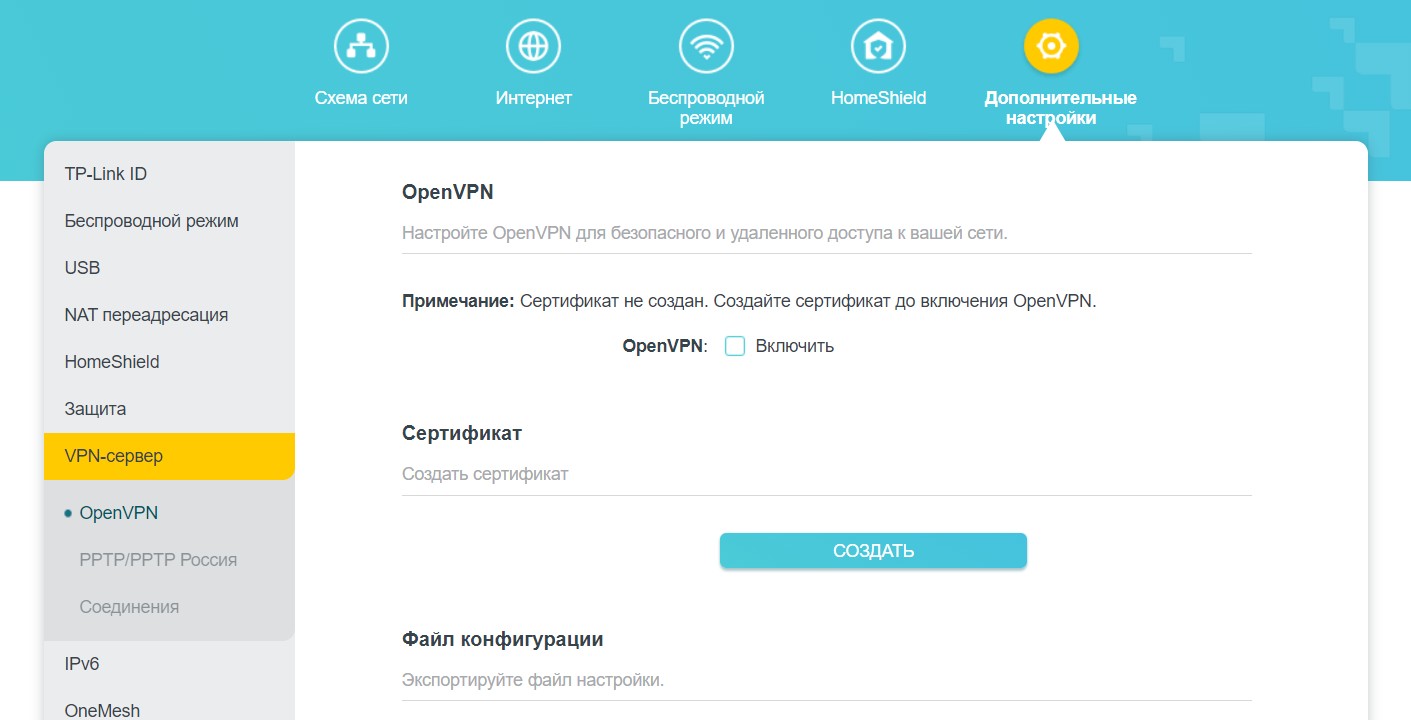
К сожалению, подключаться к тем же OpenVPN конфигам этот роутер не умеет. Так что ищущим придется ждать альтернативных прошивок (да это характерно вообще для всех роутеров).
Обновление: в новом обновлении роутер получил функцию VPN клиента. Теперь все работает.
Система – Обновление встроенного ПО
Речь идет про обновление прошивки. По умолчанию можно активировать автообновление (актуально в домашних условиях, чтобы не забывать проверять обновления), здесь же есть возможность ручной загрузки файла на случай появления альтернативных прошивок в будущем:
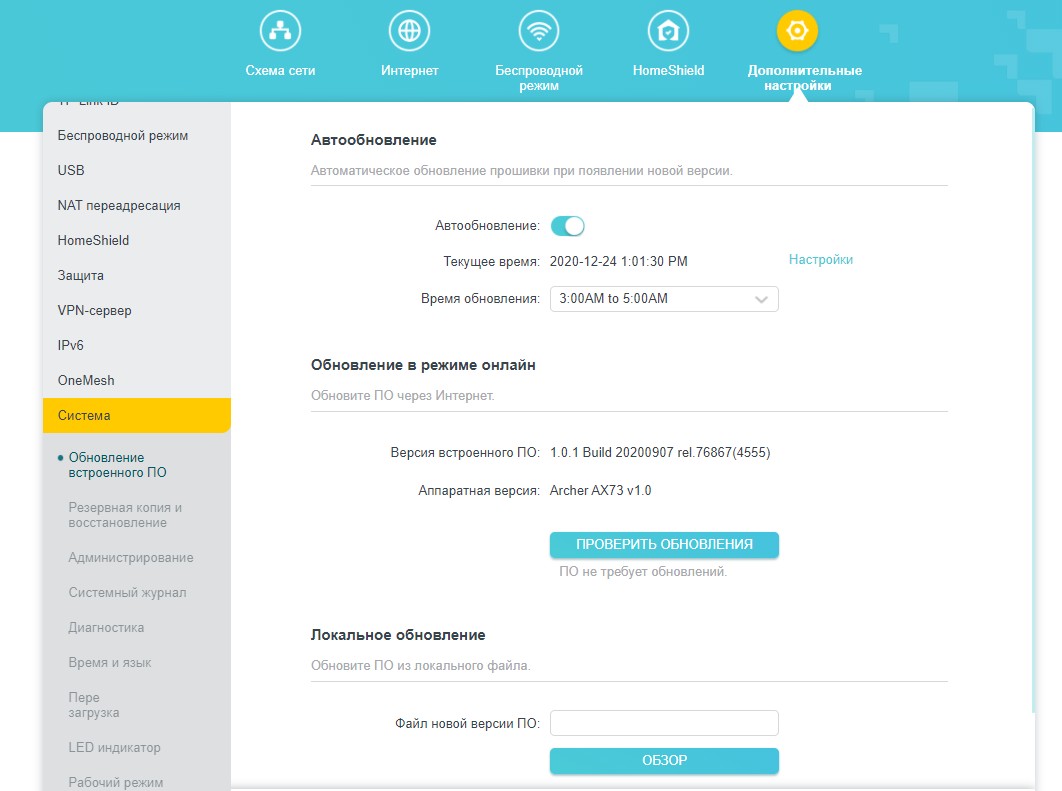
Система – LED индикатор
Еще раз напомню, что на самом роутере есть отдельная кнопка LED для выключения индикаторов (они светят не так ярко даже ночью, но вдруг кому-то мешаются эстетически). В настройках здесь их также можно отключить, но что самое интересное – здесь есть ночной режим. Т.е. отключает «лампочки» только на ночь по расписанию, а днем пусть будут включены, чтобы не профукать очередной обвал линии у провайдера:
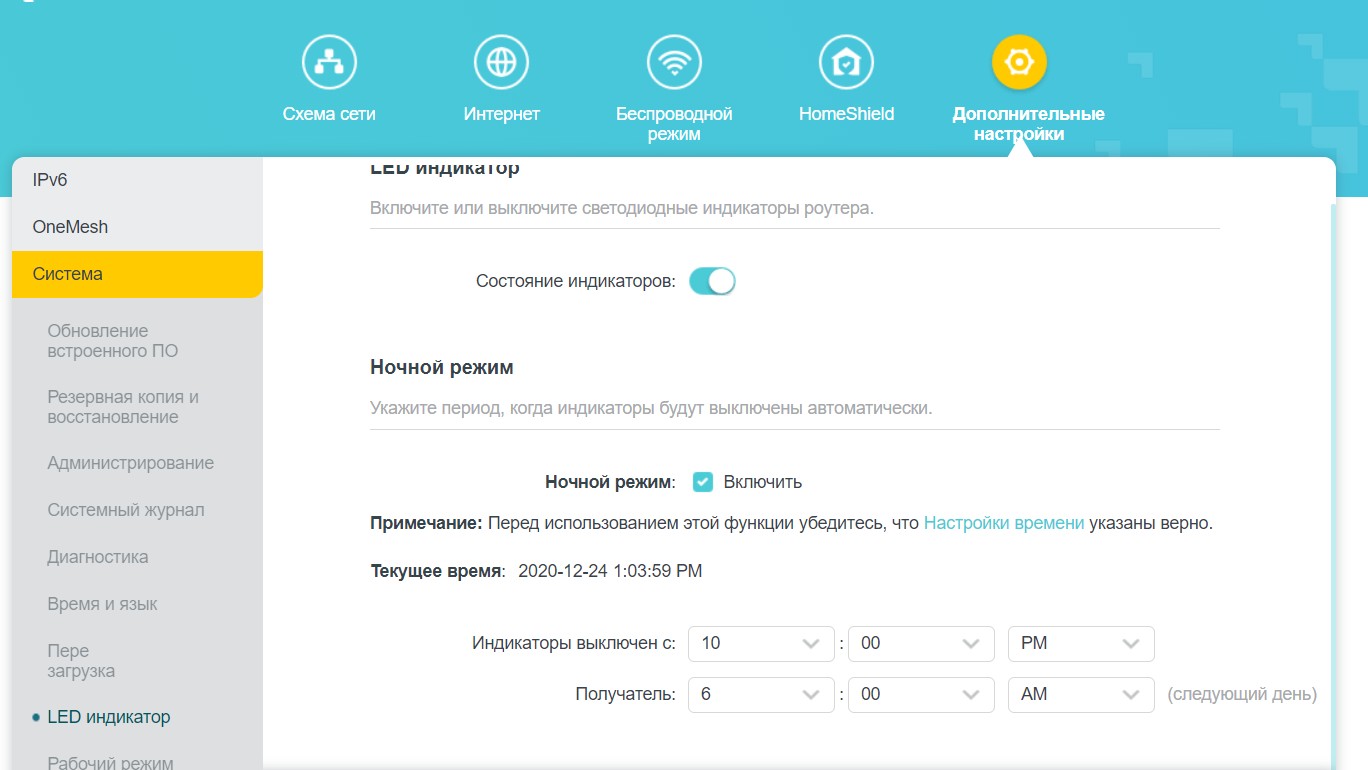
Система – Рабочий режим
Чтобы избежать некоторых сложностей, здесь сразу же предоставлены два режима работы:
- Режим Wi-Fi роутера – роутер сам подключается к интернету через кабель провайдера и раздает дальше интернет.
- Режим точки доступа – роутер берет готовый интернет от другого устройства (модема, роутера или оптического терминала) и без создания дополнительных подключений просто раздает его дальше.
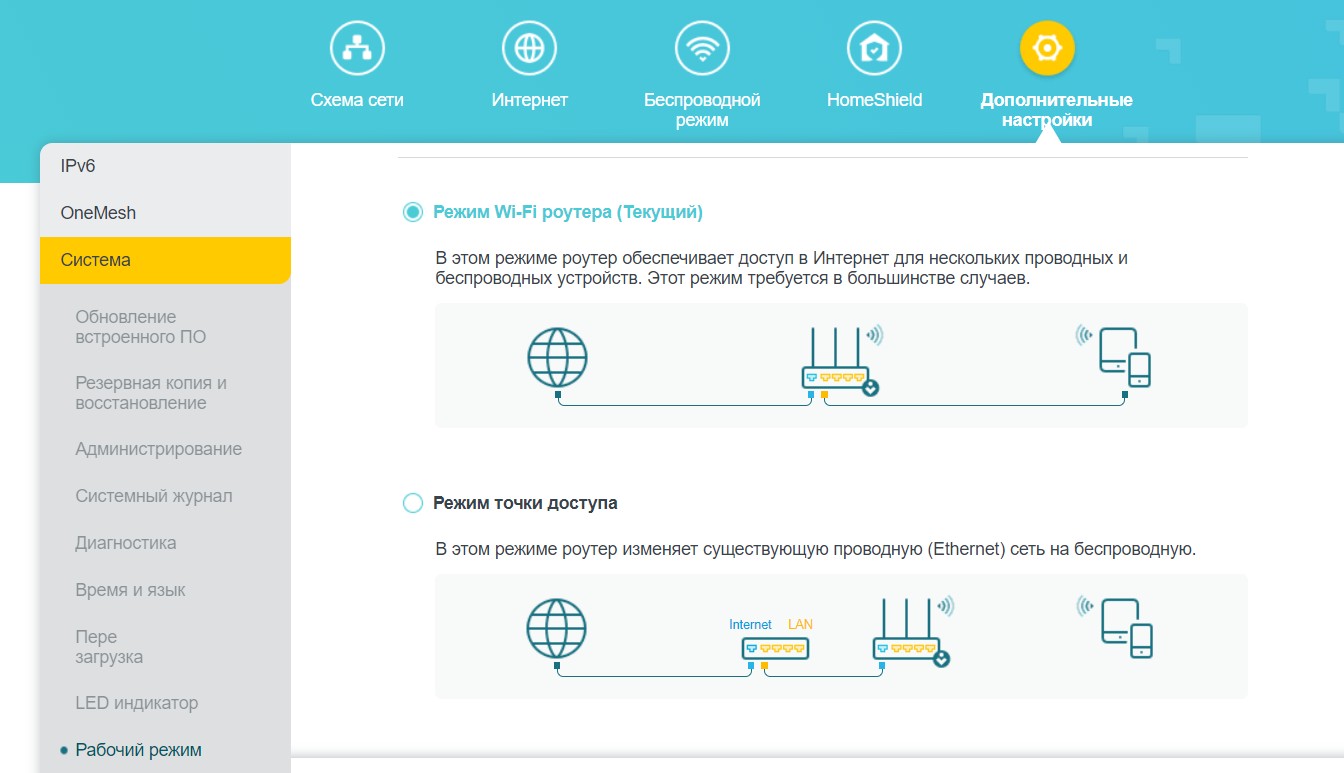
Режим репитера здесь не предусмотрен! Не нужно из этого роутера делать простой повторитель)
HomeShield
А где же привычные для других роутеров функции родительского контроля и прочих QoS? А вот тут это все вынесли в отдельную настройку HomeShield – новую систему защиты роутера в сотрудничестве с Avira. Поэтому предлагаю вынести ее обсуждение здесь в отдельном разделе.
Что включено в этот комплекс:
- Безопасность (защита вещей умного дома, защита от DDOS, вторжения злоумышленников, вредоносного контента).
- Родительский контроль (фильтры для членов семьи, поощрения для выделения дополнительного времени в интернете за сделанные уроки, время сна для полного отключения интернета на ночь).
- Анализ и оптимизация сети (отчеты, QoS и какое-то умное сканирование для оптимизации работы сети).
Но в веб-конфигураторе почему-то ничего из этого раздела нельзя посмотреть, требует зайти в мобильное приложение:
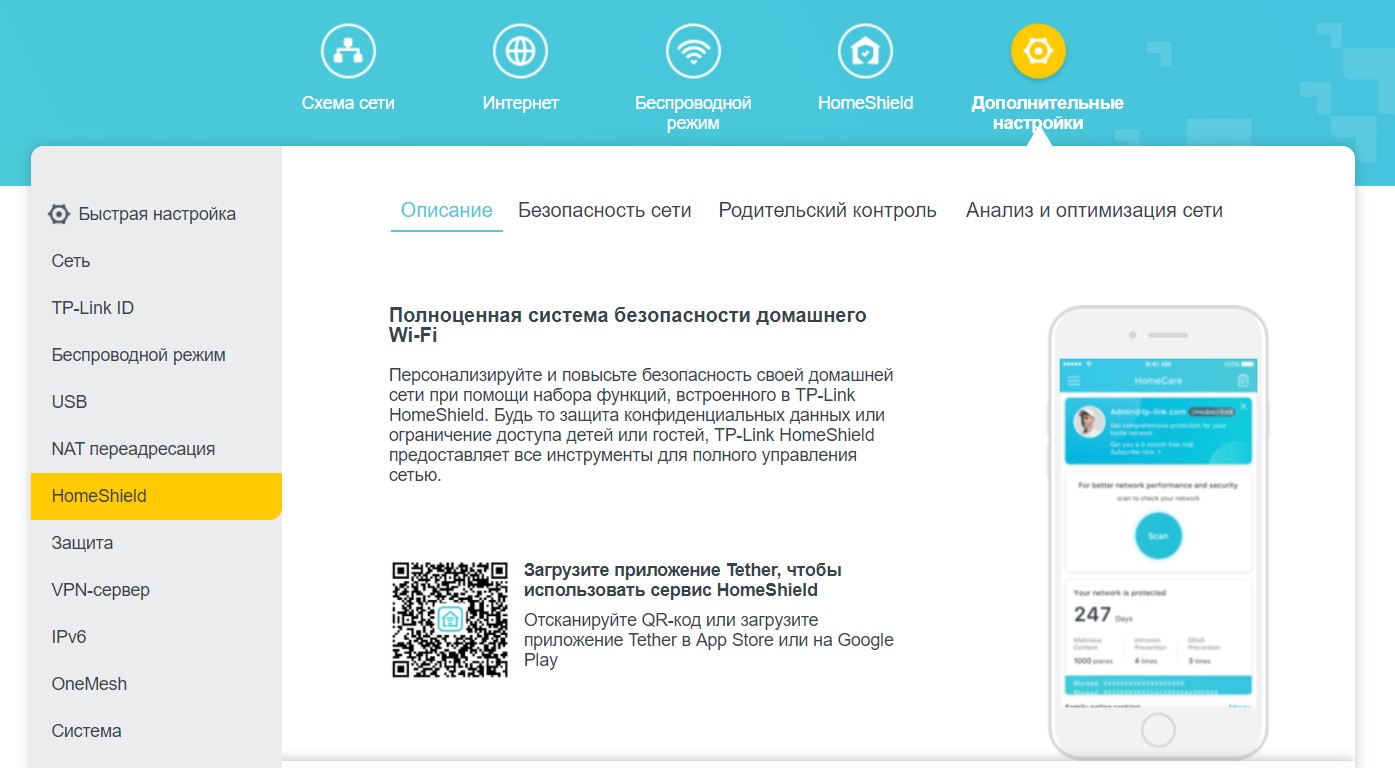
А вот в мобильном приложении этот раздел уже доступен:
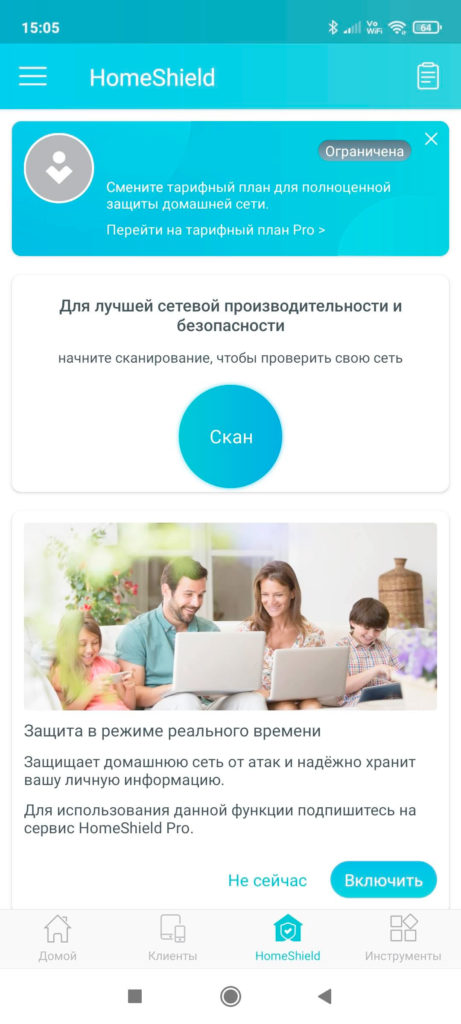
При желании можно приобрести подписку:
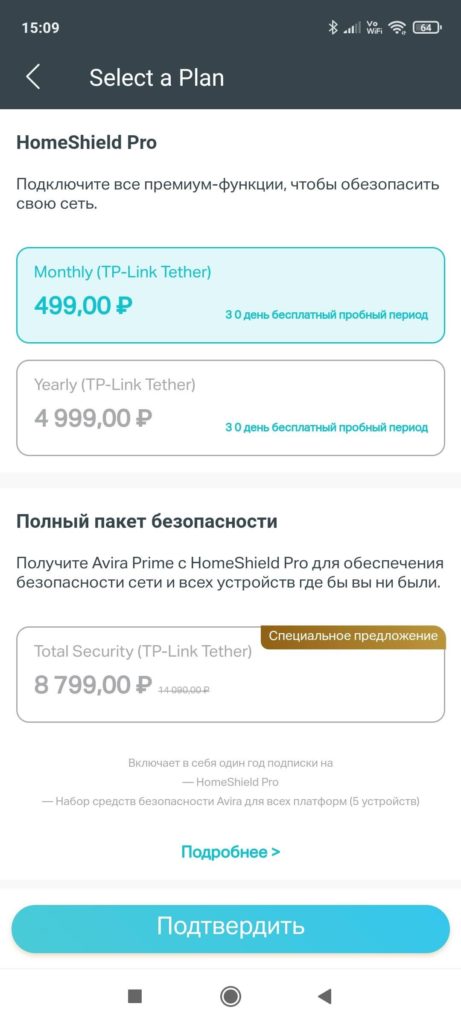
Но по факту основной функционал для родительского контроля и QoS доступен бесплатно. Привожу сравнительную таблицу возможностей ПРО версий и обычной:
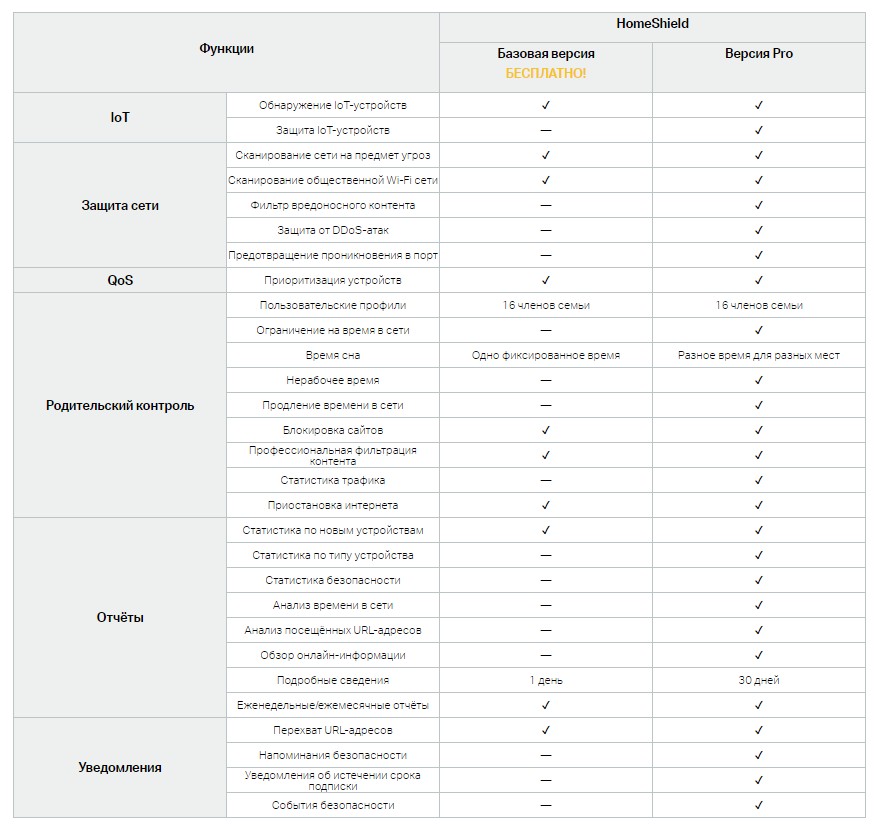
Итого, чтобы добавить приоритет какому-то устройству (по классике – телевизору для просмотров 4К фильмов) или задать базовые функции родительского контроля (заблокировать сайты по URL или фильтрам, задать время сна) – нужно ставить мобильное приложение и спокойно задавать это там. Ищущим отдельного раздела в веб-конфигураторе – не получится. Но и делать это приходится далеко не часто)
Хотя в остальном все выглядит интересно (стоит отметить правильный подход введения профилей членов семей, у которых может быть несколько устройств):
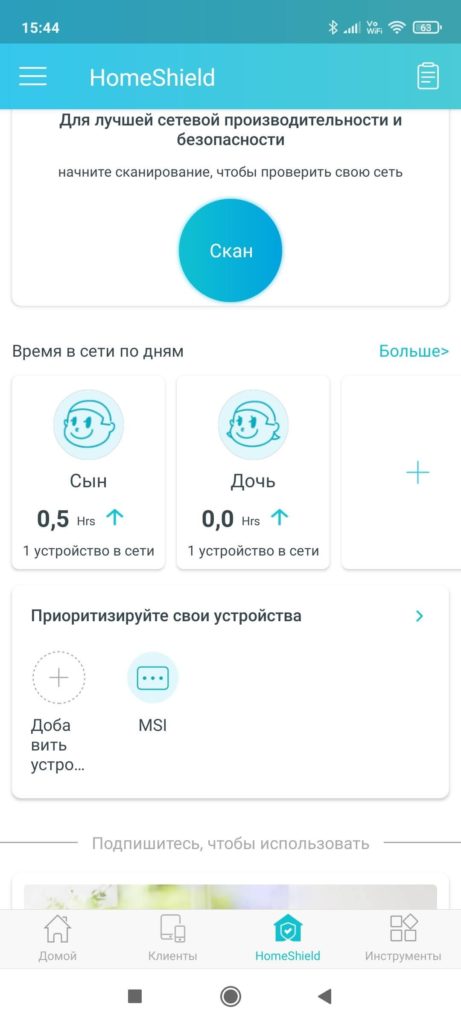
Но снова и исключительно по моему мнению – привычнее было бы увидеть в обычном конфигураторе отдельные функции родительского контроля и приоритезации, а уже защиту сделать опциональной в отдельном разделе. Но это мое личное мнение, на сам функционал это никак не влияет. А есть дополнительные функции – и хорошо. Тем более за такую цену.
Карта покрытия
Традиционно все роутеры, прошедшие нас, проходят тест покрытия обычной советской «двушкой», чтобы лишний раз удостовериться в том, что все они работают одинаково несмотря на заявления производителей в эксклюзивности работы конкретного устройства. Проверяем:
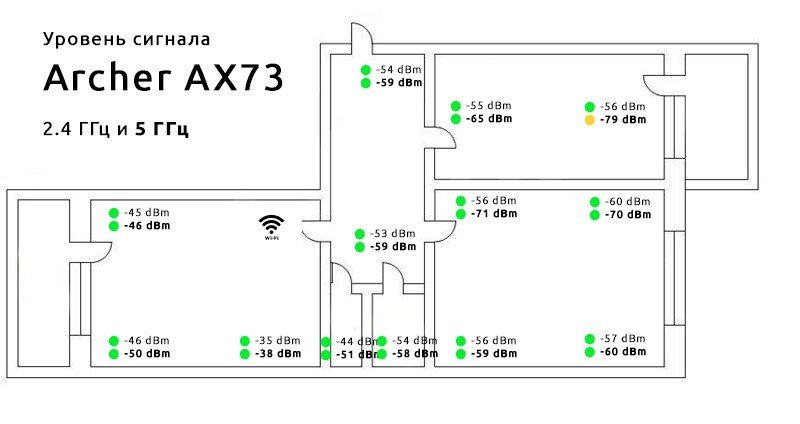
Как видим, тест двушкой пройден. Даже из отдаленной комнаты сигнал позволяет покрывать всю площадь помещения без каких-то страшных аномалий и необходимости установки повторителей.
А что со скоростями?
Здесь было бы самое место произвести серию замеров скоростей по всем интерфейсам, НО:
- Этот роутер рассчитан для простых домашних пользователей, которые просто хотят наслаждаться интернетом. Поэтому более важен личный опыт. Я пользовался этим роутером около недели чистого времени. Десяток устройств, параллельные торренты/YouTube/телевизор с фильмами 4К по интернету и DLNA. Внезапных перезагрузок, сбоев и каких-то личных ограничений я не заметил. Что ОЧЕНЬ понравилось – OneMesh. Этот роутер одной этой функцией уделывает мой AX10.
- Я до сих пор не нашел достойный Wi-Fi адаптер для замеров на скоростях свыше 2.4 Гбит/с (мой текущий – AX200). А вот этот уровень он легко уделывает(
- Порты этого роутера – 1 Гбит/с, что вполне укладывает самый быстрый интернет в России на текущий день. Однозначно хватит еще на долгие годы, а там может лет через 5 увидим зачатки чего-то революционно нового.
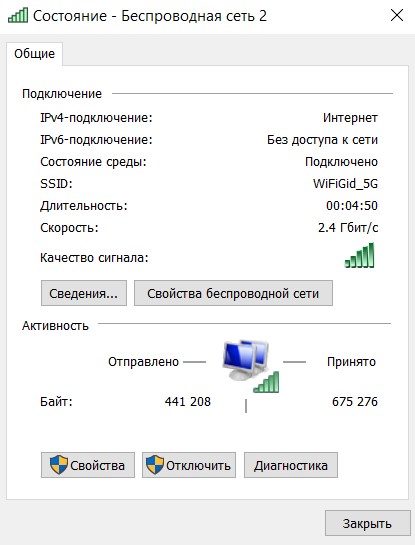
Поэтому – если нужно что-то действительно замерить и посмотреть, всегда можно попросить об этом в комментариях, мы действительно стараемся держать свои статьи в актуальном виде по мере необходимости.
Инструкция
Предлагаю официальную инструкцию, вдруг мои разъяснения для кого-то оказались бесполезны:
Скачать
Эмулятор
Ссылочка на эмуляторы Archer AX73, чтобы ознакомиться с текущим Web-интерфейсом вживую:
ЭМУЛЯТОР
Видео
Традиционная подборка сторонних видео с YouTube для полноты раскрытия картины:
Итого
Когда берешь новенький роутер в руки, профессиональная деградация заставляет сразу же его оценить в рублях. А тут особо придраться не к чему для использования дома: все работает более чем достаточно, есть большой запас наперед, Wi-Fi 6, AX5400, OneMesh. Предварительно я ему предсказал 12000 рублей…
Какого же было мое удивление, когда TP-Link поставила рекомендуемую цену до 7000 рублей, а прямо сейчас в старт продаж в том же DNS он продается за 6000 рублей (а то и дешевле). И не придраться, просто разрыв шаблона. В сравнении с моим AX10, это просто ТОП за свои деньги. Может быть что-то плохое и всплывет в далеком будущем в процессе наглой эксплуатации, но я сомневаюсь. А текущие выделенные недостатки меня не останавливают, конечно, хотелось бы получить идеальный образец, но это скорее за разумную цену невозможно. Рекомендовал бы? Лично я уже успел порекомендовать его к покупке паре своих знакомых, и сам нахожусь в процессе преодоления себя, ибо OneMesh очень сильно подкупает.
И вот в таком приятном последумии в момент расставания с этой моделью, я и прощаюсь с вами! Не забываем про комментарии, всегда на связи, ваш WiFiGid.
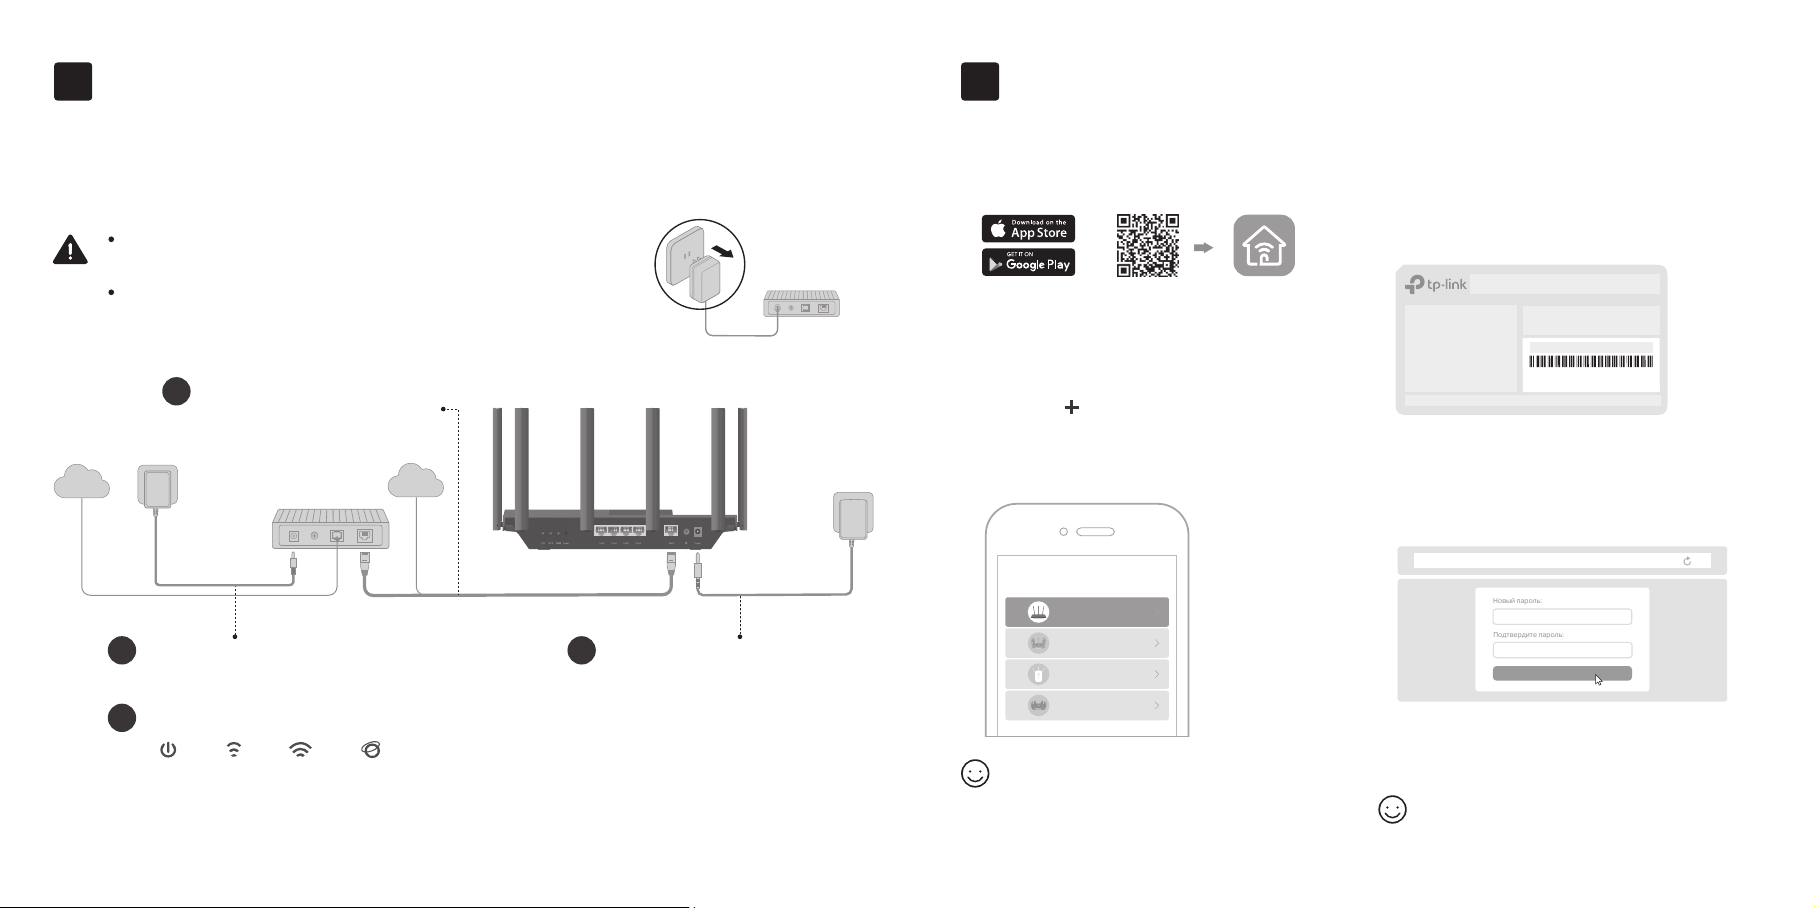
1
Физическое подключение
2
Настройка сети
Если у вас прямое подключение к интернету (без модема), подключите
кабель Ethernet к порту WAN роутера и выполните шаги 3 и 4 для
завершения физического подключения.
Разместите роутер на горизонтальной поверхности
и направьте антенны вертикально.
Отключите питание модема (если он есть) и извлеките
аккумулятор (если он есть).
* Реальный продукт может отличаться от изображённого.
Подключите выключенный
1
модем к порту WAN
роутера с помощью
кабеля Ethernet.
Интернет
Включите модем и подождите около
2
Интернет
двух минут, пока он перезагрузится.
Убедитесь, что горят нижеуказанные индикаторы.
4
Питание 2,4 ГГц 5 ГГц Интернет
Примечание: если индикаторы 2,4 ГГц и 5 ГГц не горят, нажмите и удерживайте кнопку Wi-Fi на задней панели
устройства дольше двух секунд, после чего оба индикатора должны загореться.
← Если у вас прямое подключение (без модема)
3
Подключите адаптер питания
к роутеру и включите роутер.
Отключите питание
Модем
Способ 1: через приложение
1. Скачайте приложение Tether.
или
Отсканируйте
2. Откройте приложение Tether
и войдите с помощью TP-Link ID.
Если у вас нет TP-Link ID, его надо создать.
3. Нажмите в приложении Tether
и выберите
Роутер
>
Wi-Fi роутер
Выполните указания для завершения
настройки и подключения к интернету.
Выбор устройства
Роутер
Игровой роутер
Усилитель
Archer AX6000
Интернет готов к работе!
Для полноценной работы привяжите
TP-Link ID к роутеру.
Tether
Способ 2: через браузер
1.
Пoдключите устройство к роутеру
по Wi-Fi или с помощью кабеля Ethernet.
Имена сетей Wi-Fi (SSID) и пароль по умолчанию
напечатаны на этикетке на нижней панели роутера.
Model: Archer AX3000
AX3000 Gigabit Wi-Fi Router
XXXXXXXX
Wi-Fi пароль/PIN:
SSID:TP-Link_XXXX
SSID:TP-Link_XXXX_5G
.
Введите в адресной строке браузера
2.
http://tplinkwifi.net
или
http://192.168.0.1
и создайте пароль для входа.
Если окно входа не появляется, перейдите к пункту В1
в разделе Нужна помощь? этого руководства.
http://tplinkwi.net
Приступим к работе
Следуйте пошаговым указаниям для
3.
настройки интернет-подключения
и регистрации в Облаке TP-Link.
Интернет готов к работе!
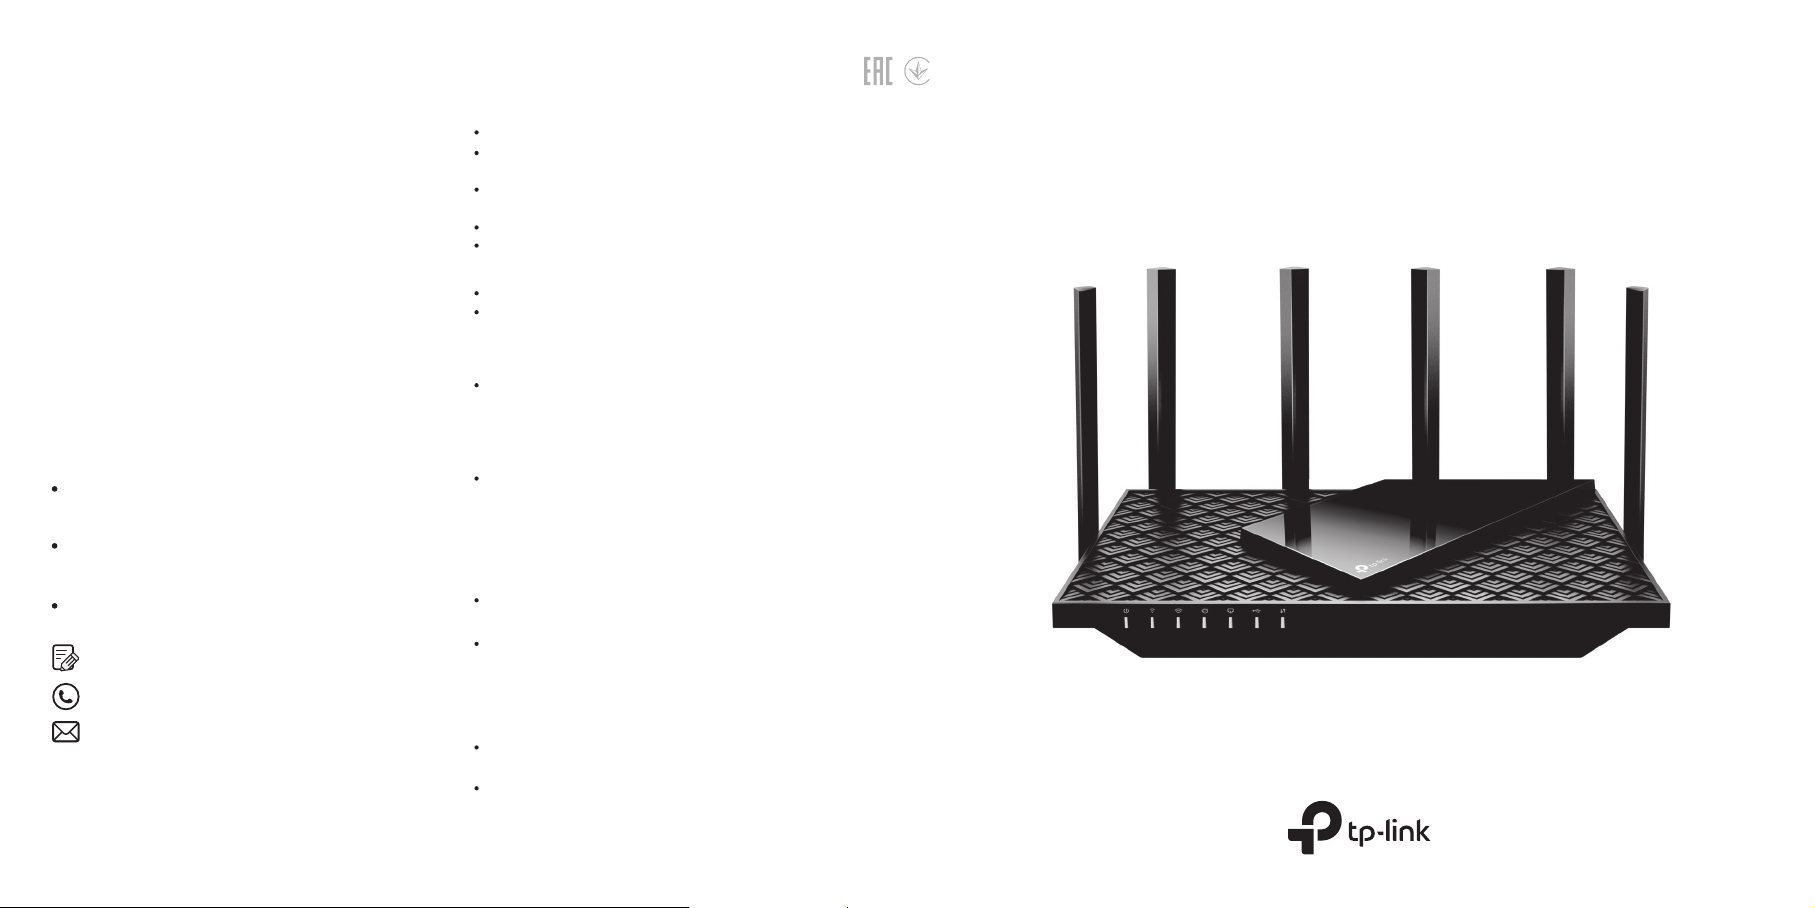
Описание кнопок
Кнопка LED
Нажмите и удерживайте кнопку 1 секунду, чтобы включить
или выключить индикаторы роутера.
Кнопка WPS
Нажмите и удерживайте кнопку 1 секунду и сразу нажмите
кнопку WPS на клиенте, чтобы начать подключение WPS.
Кнопка Wi-Fi
Нажмите и удерживайте кнопку дольше двух секунд, чтобы
включить или отключить Wi-Fi на роутере.
Кнопка Reset
Нажмите и удерживайте кнопку около шести секунд, пока
не начнёт мигать индикатор питания (Power), чтобы
восстановить заводские настройки роутера.
USB-порт
USB-порт позволяет без труда обмениваться файлами
с несколькими устройствами. Подробная информация:
https://www.tp-link.com/app/usb
Локальное хранилище
Делитесь файлами на USB-накопителе с устройствами
в сети
Медиасервер
Воспроизводите медиафайлы с USB-накопителя
на компьютере и других устройствах
Удалённый доступ
Получайте доступ к USB-накопителю, находясь не дома
Сообщество TP-Link (на английском языке)
https://community.tp-link.com
Техподдержка, руководства пользователя и другое
https://www.tp-link.com/ru/support
Предложения и пожелания можно отправлять на
project.ru@tp-link.com
• Избегайте контакта устройства с водой и огнём, а также использования
устройства в условиях высокой влажности и высоких температур.
• Не пытайтесь самостоятельно разбирать, ремонтировать или
модифицировать устройство.
• Используйте только рекомендуемые зарядные устройства.
• Не используйте повреждённый USB-кабель или зарядное устройство для
зарядки устройства.
• Не используйте устройство в местах, где запрещено использование
беспроводных устройств.
• Адаптер должен быть установлен в легкодоступном месте недалеко
от оборудования.
Нужна помощь?
Что делать, если не получается войти в веб-интерфейс?
В1.
Перезагрузите роутер и повторите попытку.
Если на компьютере статический IP-адрес, включите автополучение
IP-адреса.
Проверьте, правильно ли введено в браузере
или введите
Попробуйте использовать другой браузер.
Переподключите сетевой адаптер.
http://192.168.0.1
либо
http://192.168.1.1
В2. Что делать, если нет доступа в интернет?
Перезагрузите модем и роутер и повторите попытку.
Проверьте, есть ли доступ к интернету, подключив компьютер
непосредственно к сети интернет-провайдера с помощью кабеля
Ethernet. Если доступа к интернету нет, свяжитесь со своим
интернет-провайдером.
Войдите в веб-интерфейс роутера и перейдите в раздел
сети
, чтобы проверить, действителен ли IP-адрес. Если адрес
действителен, перейдите в раздел
настройка
физическое подключение.
Если используется кабельный модем, войдите в веб-интерфейс
роутера, перейдите в раздел
Интернет
МАС-адрес текущего компьютера
Перезагрузите модем и роутер.
и повторите настройку; в противном случае проверьте
>
Клонирование MAC-адреса
Дополнительно
Дополнительные настройки
и нажмите
В3. Что делать, если я забыл пароль от Wi-Fi?
Пароль Wi-Fi по умолчанию можно найти на этикетке на нижней
панели устройства (если он не менялся пользователем).
Подключите компьютер непосредственно к роутеру с помощью
кабеля Ethernet. Войдите в веб-интерфейс управления роутера
на
http://tplinkwifi.net
чтобы сбросить пароль Wi-Fi.
В4.
Что делать, если я забыл пароль от веб-интерфейса?
Если для входа используется TP-Link ID, нажмите
на странице входа и следуйте указаниям для сброса пароля.
Либо нажмите и удерживайте кнопку сброса (Reset) на задней
панели около шести секунд, пока не замигает индикатор питания
(Power). Затем перейдите на
логин и пароль.
и перейдите в раздел
http://tplinkwifi.net
© 2020 TP-Link 7106508967 REV1.0.0
http://tplinkwifi.net
>
Быстрая
, выберите
Клонировать
Сохранить
Беспроводной режим
Забыл пароль
и создайте новый
Карта
.
>
Сеть
Руководство по
быстрой настройке
>
,
AX5400 Роутер с поддержкой Wi-Fi 6