
Весы для композиции тела Xiaomi Mi Body Composition Scale — это привлекательные весы, которые отлично вписываются в любую ванную комнату.
Преимущества:
- Привлекательный дизайн;
- Легко настроить;
- Много метрик тела.
Основные характеристики:
- Цена достаточно приемлемая;
- Можно измерить 10 показателей тела;
- Сопутствующее приложение для Android и iOS;
- Bluetooth 4.0;
- Диапазон веса 5-150 кг;
- Точность до 50 г.
Шкала состава тела Xiaomi Mi
Mi Body Composition Scale — это многофункциональные, но недорогие весы для ванной комнаты, которые могут считывать все с вашего процента жира в организме, массы костей и, конечно же, вашего веса.
Весы для тела Xiaomi Mi — Дизайн
Верх — закаленное стекло с противоскользящим покрытием, которое под ногами выглядит мягким и приятным на ощупь. Нескользящая отделка имеет дополнительный эффект: она не так сильно загрязняется и пылится, как обычное стекло.
В остальном полностью белый дизайн прерывается только тонким Mi в центре и четырьмя круглыми серебряными подушками, которые используются шкалой для отправки электрического сигнала, используемого для показаний биопротивления, и для анализа жира в организме.
Вверху скрыт светодиодный дисплей, который включается, только когда вы наступаете на весы. Дисплей настроен только на отображение вашего веса, поэтому вы не получите никакой другой полезной информации. Вам нужно открыть приложение, чтобы увидеть данные о составе тела.
Переверните весы, и вы найдете батарейный отсек, куда вам нужно будет вставить 4 батарейки ААА для питания.
Весы для тела Xiaomi Mi — Показания и приложение
Стоит обратить внимание на отказ от ответственности при первом использовании весов. В нем говорится, что первые несколько показаний могут быть неточными. Первые три раза использования весов, может немного искажать вес. Чтобы откалибровать весы, может потребоваться несколько применений, после чего они начнут давать показания в соответствии с существующими данными.
Шкала использует анализ для оценки других показателей организма (всего 10). По сути, это посылает небольшой электрический сигнал через ваши ноги, и время для завершения цепи используется для оценки состава вашего тела жира, мышц и костей. Это не совсем идеальная мера с точки зрения точного измерения, особенно в отношении анализа жира в организме. Тем не менее, при условии, что вы можете получить последовательные измерения, это все еще хороший способ отслеживать ваши успехи.
Все эти данные синхронизируются по Bluetooth с сопутствующим приложением Mi Fit, где вы вводите свои данные, такие как пол, возраст и рост. Показания затем используются вместе с ними для расчета других показателей, включая ИМТ, мышечную массу, висцеральный жир, воду в организме и скорость основного обмена.
Подключение весов к приложению
Для нормальной работы устройства необходимо загрузить и установить специальное приложение «Mi Fit». Перейдите в магазин и загрузите «Mi Fit». Для быстрого поиска используйте QR-код. Загрузите приложение «Mi Fit» и запустите его. Руководствуясь регистрационным номером измерительного устройства, подключите его к смартфону. После несложного процесса сопряжения можно сохранять результат, просматривать показатели и историю взвешивания.
Меры предосторожности
- Не располагайте весы на влажной и скользкой поверхности. Не становитесь на весы влажными ногами, чтобы не поскользнуться;
- Становитесь обеими ногами на весы, чтобы избежать опрокидывания устройства;
- Не устанавливайте весы в воду;
- Используйте мягкую ткань и нейтральные моющие средства для очистки поверхности устройства;
- Вовремя меняйте элементы питания, чтобы избежать утечки электролита и повреждения устройства;
- Не рекомендуется использовать устройство людям с кардиостимулятором или другими электрическими имплантатами (инсулиновой помпой, искусственным водителем ритма и др);
- Функция измерения уровня жира не предназначена для использования беременными женщинами и профессиональными атлетами.
Использование весов
Установите весы на твёрдой ровной поверхности. Встаньте босиком на поверхность так, как показано на рисунке (рисунок на верху), чтобы обеспечить хороший контакт кожи с электродами. Как только индикатор веса перестанет мигать, устройство начнёт измерение состава тела. Когда индикатор прогресса мигает, это означает, что измерение завершено. Вы можете войти в приложение Mi Fit, чтобы просмотреть информацию о составе тела. Результаты измерений, которые отображают весы, используются только в качестве справочной информации, и не являются медицинским заключением.
Умные весы способны определять вес пользователя в нескольких единицах: цзини, фунты и килограммы. Для установки подходящего показателя измерения используйте приложение Mi Fit.
Символы
В случае, если в процессе взвешивания появилась буква L, элементы питания следует заменить, так как получить точные данные не получится.
На дисплее устройства может появиться мигающий символ «OL» — весы сигнализируют о превышении максимально возможной массы. Допустимая цифра — до 150 кг

DIGITAL MEDIA RECEIVER
RECEPTEUR NUMERIQUE MULTIMEDIA
RICEVITORE MULTIMEDIALE DIGITALE
RECEPTOR DIGITAL DE MEDIOS
DIGITALER MEDIA RECEIVER
DIGITALE MEDIA-RECEIVER
ЦИФРОВОЙ МЕДИАРЕСИВЕР
MVH-X380BT
MVH-180UI
MVH-180UBG
MVH-180UB
MVH-181UB
English Français Italiano Español Deutsch Nederlands Русский
Owner’s Manual
Mode d’emploi
Manuale d’istruzioni
Manual de instrucciones
Bedienungsanleitung
Handleiding
Руководство пользователя

Table of Contents
Before You Start ………………………………………………………………. 3
Getting Started ……………………………………………………………….. 4
Radio ……………………………………………………………………………….. 7
USB/iPod/AUX …………………………………………………………………. 8
Bluetooth……………………………………………………………………….. 10
App Mode………………………………………………………………………. 14
Using Pioneer ARC APP………………………………………………….. 15
Settings………………………………………………………………………….. 16
FUNCTION settings ……………………………………………………… 16
AUDIO settings…………………………………………………………….. 17
SYSTEM settings ………………………………………………………….. 18
ILLUMINATION settings……………………………………………….. 19
MIXTRAX settings………………………………………………………… 19
Connections/Installation……………………………………………….. 20
Additional Information………………………………………………….. 23
• In the following instructions, a USB memory or USB audio player are referred
to as “USB device”.
• In this manual, iPod and iPhone are referred to as “iPod”.
Declaration of Conformity with regard to the R&TTE Directive 1999/5/EC
English:
Hereby, Pioneer, declares that this MVH-X380BT is
compliance with the essential requirements
in
and other relevant provisions of Directive 1999/5/
EC.
Suomi:
Pioneer vakuuttaa täten että MVH-X380BT
t
yyppinen laite on direktiivin 1999/5/EY
oleellisten vaatimusten ja sitä koskevien
direktiivin muiden ehtojen mukainen.
Nederlands:
Hierbij verklaart Pioneer dat het toestel MVHX
380BT in over eenstemming is met de essen tiële
eisen en de andere relevante bepalingen van
richtlijn 1999/5/EG
França is:
Par la présente Pioneer déclare que l’appareil
M
VH-X380BT est conforme aux exigences
essentielles et aux autres dispositions pertinentes
de la directive 1999/5/CE
Svenska:
Härmed intygar Pioneer att denna MVH-X380BT
s
tår I överens-stämmelse med de väsentliga
egenska pskrav och övri ga relevanta
bestämmelser som framgår av direktiv 1999/5/EG.
Dansk:
Undertegnede Pioneer erklærer herved, at
f
ølgende udstyr MVH-X380BT overholder de
væsentli ge krav og øvrige re levante krav i direk tiv
1999/5/EF
Deutsch:
Hiermit erklärt Pioneer, dass sich dieses Gerät
M
VH-X380BT in Übereinstimmung mit den
grundlegenden Anforde-rungen und den
anderen re levanten Vorschr iften der Rich tlinie
1999/5/EG befindet». (BMWi)
Ελληνικά:
ΜΕ ΤΗΝ ΠΑΡΟΥΣΑ Pioneer ΔΗΛΩΝΕΙ ΟΤΙ MVH-
380BT ΣΥΜ-ΜΟΡΦΩΝΕΤΑΙ ΠΡΟΣ ΤΙΣ ΟΥΣΙΩΔΕΙΣ
X
ΑΠΑΙΤΗΣΕΙΣ ΚΑΙ ΤΙΣ ΛΟΙΠΕΣ ΣΧΕΤΙΚΕΣ ΔΙΑΤΑΞΕΙΣ
ΤΗΣ ΟΔΗΓΙΑΣ 1999/5 /ΕΚ
Italiano:
Con la presente Pioneer dichiara che questo MVHX
380BT è conforme ai requisiti essenziali ed alle
altre disposizioni pertinenti stabilite dalla direttiva
1999/5/CE.
Español:
Por medio de la presente Pioneer declara que el
M
VH-X380BT cum ple con los requi sitos esenciales
y cualesquiera otras disposiciones aplicables o
exigibles de la Directiva 1999/5/CE
Português:
Pioneer declara que este MVH-X380BT está
c
onforme com os requisitos essenciais e outras
disposições da Directiva 1999/5/CE.
Čeština:
Pioneer tímto prohlašuje, že tento MVH-X380BT je
v
e shodě se základními požadavky a dalšími
příslušnými ustanove-ními směrnice 1999/5/ES
Eesti:
Käesolevaga kinnitab Pioneer seadme MVHX
380BT vastavust direk tiivi 1999/5/EÜ
põhinõuetele ja nimetatud direktiivist
tulenev atele teistele asjakohaste le sätetele.
Magyar:
Alulírott, Pioneer nyilatkozom, hogy a MVHX
380BT megfelel a vo-natkozó alapvetõ
követelményeknek és a z 1999/5/EC irányelv
egyéb elõ írásainak.
Latviešu valoda:
Ar šo Pionee r deklarē, k a MVH-X380BT a tbilst
D
irektīvas 1999/5/EK būtiskajām prasībām un
citiem ar to saistītajiem noteikumiem.
2En

Lietuvių kalba:
Šiuo Pioneer deklaruoja, kad šis MVH-X380BT
atitinka esmi nius reikalavimus ir kitas 1999/5/EB
Direktyvos nuostatas.
Malti:
Hawnhekk, Pioneer jiddikjara li dan MVH-X380BT
j
ikkonfor ma mal-ħtiġ ijiet essenz jali u ma
provvedimenti oħrajn relevanti li hemm fidDirrettiva 1999/5/EC
Slovenčina:
Pioneer týmto vyhlasuje, že MVH-X380BT spĺňa
z
ákladné požiadavky a všetky príslušné
ustanovenia Smernice 1999/5/ES.
Slovenščina:
Pioneer izjavlja, da je ta MVH-X380BT v skladu z
b
istvenimi zahtevami in ostalimi relevantnimi
določili direktive 1999/5/ES.
Română:
Prin prezenta, Pioneer declara ca acest MVHX3
80BT este in conformitate cu cerintele esentiale
si alte prevederi ale Directivei 1999/5/EU.
български:
С настоящето, Pioneer декларира, че този MVHX
380BT отго-варя на основните изисквания и
други съответни постановления на Директива
1999/5/EC.
Polski :
Niniejszym Pioneer oświadcza, że MVH-X380BT
j
est zgodny z zasadniczymi wymogami oraz
pozostałymi stosownymi postanowieniami
Dyrektywy 199 9/5/EC
Norsk:
Pioneer er klærer her ved at utstyret MVH-X380BT
e
r i samsvar med de grunnleggende krav og
øvrige relevante kr av i direktiv 1999/5/EF.
Íslenska:
Hér með lýsir Pioneer yfir því að MVH-X380BT er í
sa
mræmi við grunnkröfur og aðrar kröfur, sem
gerðar eru í tilskipun 1999/5/EC
Hrvatski:
Ovime tvrtka Pioneer izjavlju je da je ovaj MVHX
380BT u skladu osnovnim zahtjevima i ostalim
odredbama Direkt ive 1999/5/EC.
Türkç e:
Bu vesile ile, PIONEER, bu M VH-X380BT için 1999/
5
/EC Direktifinin esas şartları ve diğer ilgili
hükümlerine uygunluğu beyan eder.
Before You Start
Thank you for purchasing this PIONEER product
To ensure proper use, please read through this manual before using this product. It is
especially important that you read and observe WARN INGs a nd CAUTIONs in this manual.
Please keep the manual in a safe and accessible place for future reference.
If you want to dispose this product, do not mix it with general household waste. There is a
separate collection system for used electronic products in accordance with legislation
that requires proper treatment, recovery and recycling.
Private households in the member states of the EU, in Switzerland and Norway may return
their used electronic products free of charge to designated collection facilities or to a
retailer (if you purchase a similar new one).
For countries not mentioned above, please contact your local authorities for the correct
method of disposal.
By doing so yo u will ensure that your d isposed product und ergoes the necessar y treatment,
recovery and recycling and thus prevent potential negative effects on the environment and
human health.
• Do not attempt to install or service this product by yourself. Installation or servicing
of this product by p ersons without training and experie nce in electronic equipment
and automotive accessor ies may be dangerous and could expose you to th e risk of
electric shock, injury or other hazards.
• Do not attempt to operate the un it while driving. Make sure to pull off the road and pa rk
your vehicle in a safe location before attempting to use the controls on the device.
• Do not allow this unit to come into contact with moisture and/or liquids. Electrical shock
could result. Also, damage to this unit, smoke, and overheating could result from contact
with liquids.
• Always keep the volume low enough to hear outside sounds.
• The CarStereo-Pass is for use only in Germany.
3En
• This product is evaluated in moderate and tropical climate condition under the Audio,
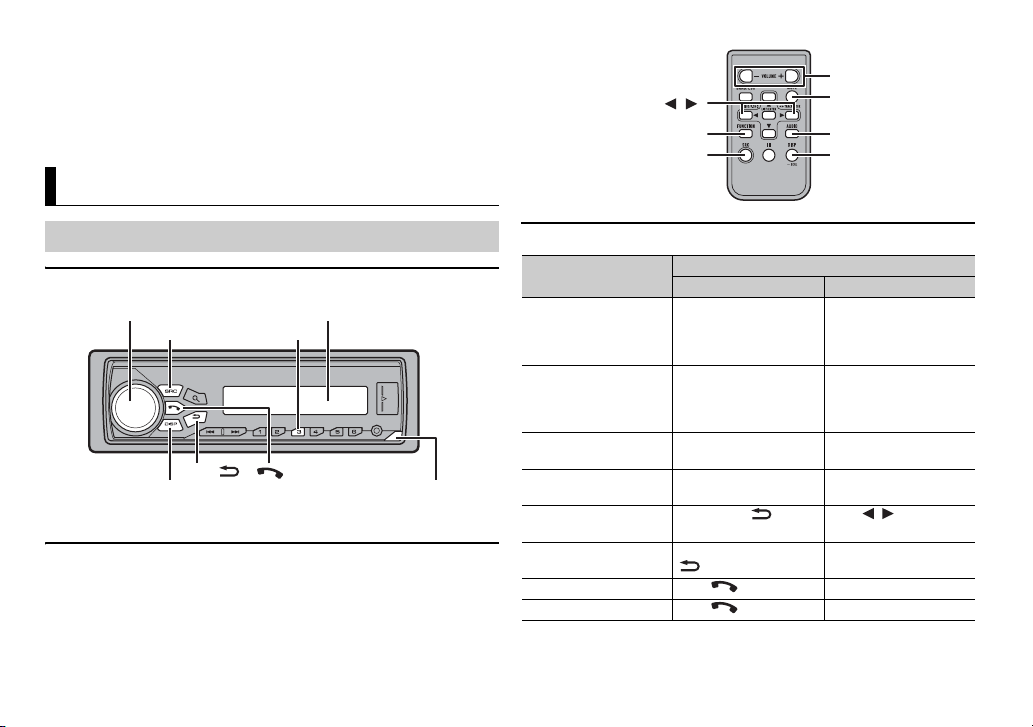
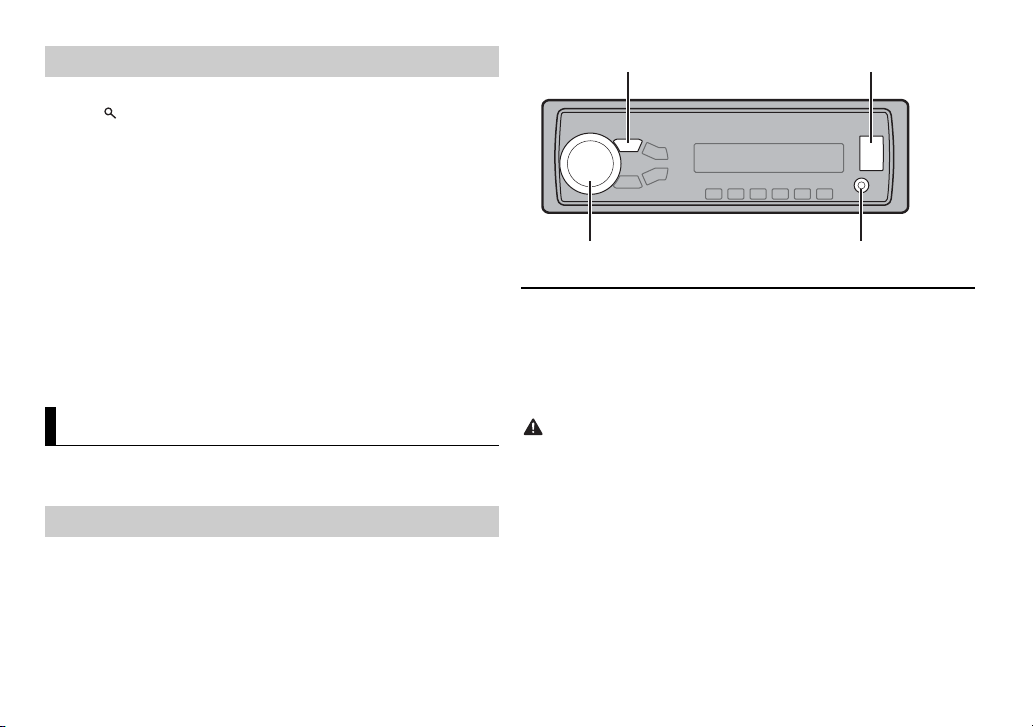
SRC (source)/OFF
Detach button
Display windowM.C. (multi-control) dial
BAND/
*
DISP (display)
/
SRC (source)
VOLUME +/–
MUTE
DISP (display)
FUNCTION
AUDIO
video and similar electronic apparatus — Safety requirements, IEC 60065.
If you experience problems
Should thi s unit fail to work p roperly, please contac t your dealer or ne arest authorized
PIONEER Se rvice Station .
Getting Started
Basic operation
MVH-X380BT/180UI/180UBG/180UB/181UB
* The button indicatio ns vary depending on the unit.
Remote Control
Remote control is supplied only for MVH-181UB.
4En
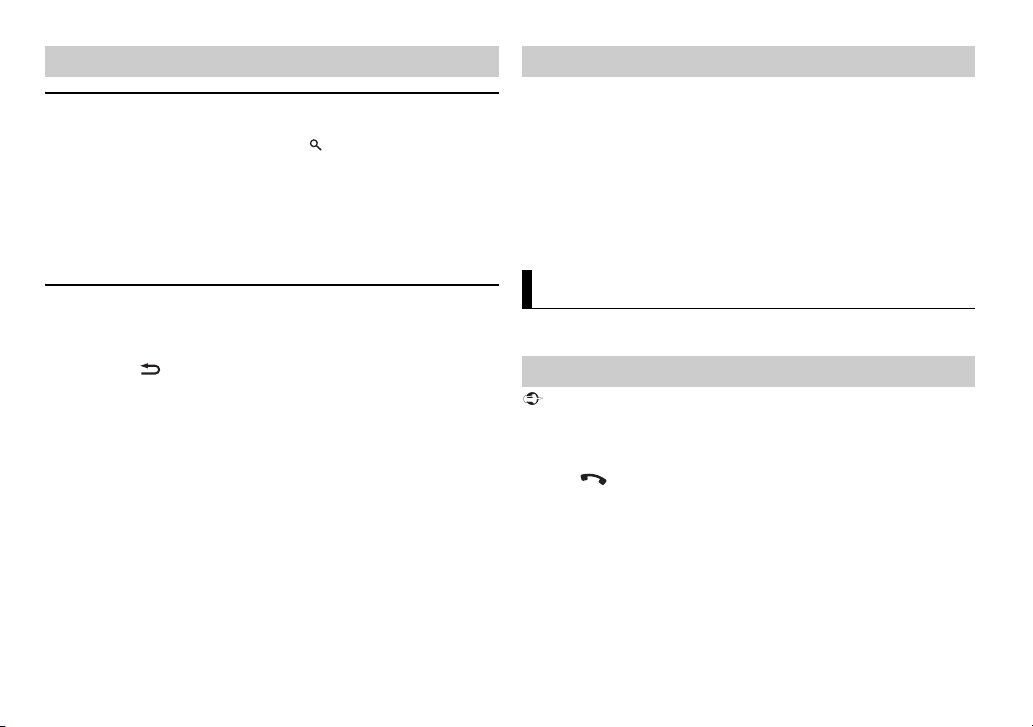
Frequently used operations
Purpose
Turn on the power* Press SR
Adjust the volume Turn t he M.
Select a source Press SR
Change the display
info
rmation
Return to the previous
d
isplay/list
Return to the normal
di
splay from the menu
Answering a call Press . –
Ending a call Press . –
Head Unit Remote Control
C/OFF to turn
on the power.
Press and hold SR
to turn off th e power.
C/OFF
repeatedly.
Press DISP repeatedly. Press DISP repeatedly.
Press BAND/ . Press / to select the
Press and hold BAND/
.
Operation
C to turn on the
Press SR
power.
C/OFF
Press and hold SRC to
turn off the power.
C. dial. Press VOLUM E + or –.
Press MU
unit. Press again to
unmute.
Press SRC repeatedly.
next/previous folder.
TE to mute the
–
* When this unit’s blue/white lead is connected to the vehicle’s auto-antenna relay control
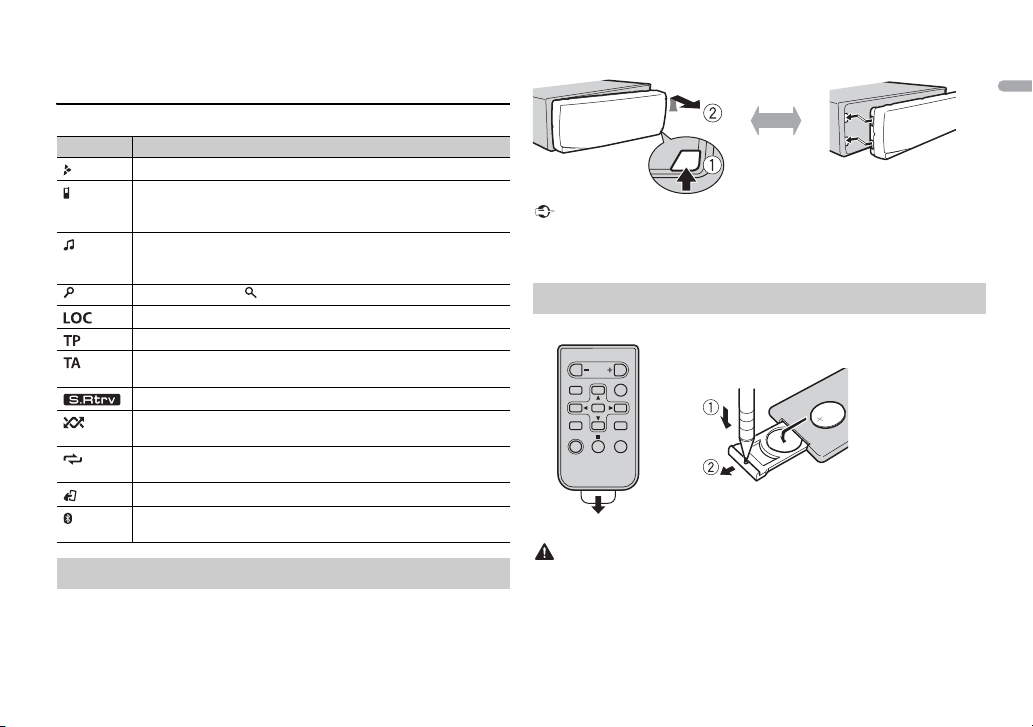
How to replace the battery
Insert the CR2025 (3 V ) battery with the plus (+) and
minus (–) poles orientated properly.
terminal, the vehicle’s antenna extends when this unit’s source is turned on. To retract the
antenna, turn the source off.
Display indication
Indication Description
Appears when a lower tier of the menu or folder exists.
Appears when a Bluetooth telephone is connected to this unit by
P (Hands Free Profile) (page 10) and flashes while the
HF
telephone is on hold. (Only for Bluetooth-compatible models.)
Appears when a Bluetooth audio player is connected to this unit
y A2DP (Advanced Audio Distribution Profile) (page 10).
b
(Only for Bluetooth-compatible models.)
Appears when the button is pressed.
Appears when the local seek tuning function is set (page 16).
Appears when a traffic program is received.
Appears when the TA (traffic announcements) function is set
(page 16).
Appears when the sound retriever function is set (page 17).
Appears when random/shuffle play is set (except when BT AUDIO
i
s selected as the source).
Appears when repeat play is set (except when BT AUDIO is
sel
ected as the source).
Appears when the iPod control function is set (page 10).
Appears when a Bluetooth connection is made (page 10).
(Only for Bluetooth-compatible models.)
Detaching the front panel
Detach the front panel to prevent theft. Remove any cables and devices
attached to the front panel and turn off the unit before detaching it.
• Avoid subjectin g the front panel to exces sive shock.
• Keep the front panel out of direct sunlight and high temperatures.
• Always store the deta ched front panel in a protective case or bag.
Preparing the remote control
Remove the insulation sheet before use.
• Do not ingest the battery, Chemical Burn Hazard.
• This product, including the supplied remote control, contains a coin/button cell battery. If
the coin/button cell battery is swallowed, it can cause severe internal burns in just two
hours and can lead to death.
• Keep new or used batteries out of the reach of children. If the battery is swallowed or
placed inside any part of the body, consult a doctor immediately.
5En
• If the battery compartment does not close securely, stop using the product and keep it
away from children.
• Do not expose the battery or remote control to excessive heat such as direct sunlight or
fire.
• There is a potential danger of explosion if the battery is incorrectly replaced. When
replacing the battery, replace it with the same type.
• Do not handle or store the battery with metallic tools or objects.
• If the battery leaks, remove the battery and wipe the remote control completely clean.
Then install a new battery.
• When disposing of used batteries, please comply with governmental regulations or
environmental public institutions’ rules that apply in your country/area.
• Do not store the remo te control in high temperatures or di rect sunlight.
• Do not let the remote control fall onto the floor, where it may become jam med under the
brake or accelerator pedal.
Setup menu
When you turn the ignition switch to ON after installation, [SET UP :YES]
appears in the display.
1 Press the M.C. dial.
The setup menu disappears after 30 seconds of no operation. If you prefer
n
ot to set at this time, turn the M.C. dial to select [NO], then press to
confirm.
2 Turn the M.C. dial to select the options, then press to confirm.
To proceed to the next menu option, you need to confirm your selection.
Menu Item Description
LANGUAGE Select the language to display the text information from
[ENG](English),
](Russian),
[РУС
[TUR](Turkish)
CLOCK SET Set the clock.
compressed audio file.
a
Menu Item Description
FM STEP Select the FM tuning step from 100 kHz or 50 kHz.
[100], [50]
3 [QUIT :YES] appears when all the settings have been made.
To return to the first item of the setup menu, turn the M.
[QUIT :NO], then press to confirm.
C. dial to select
4 Press the M.C. dial to confirm the settings.
• You can cancel the menu setting by pressing SRC/OFF.
• These settings can be made at any time from the SYSTEM settings (page 18) and INITIAL
settings (page 6).
Canceling the demonstration display (DEMO
OFF)
1 Press the M.C. dial to display the main menu.
2 Tur n th e M.C. dial to select [SYSTEM], then press to confirm.
3 Tur n th e M.C. dial to select [DEMO OFF], then press to confirm.
4 Tur n th e M.C. dial to select [YES], then press to confirm.
INITIAL settings
1 Press and hold SRC/OFF until the unit turns off.
2 Press and hold SRC/OFF to display the main menu.
3 Tur n th e M.C. dial to select [INITIAL], then press to confirm.
4 Tur n th e M.C. dial to select an option, then press to confirm.
6En
The options v ary depending on t he unit.
Menu Item Description
FM STEP Select the FM tuning step from 100 kHz or 50 kHz.
[100], [50]
SP-P/O MODE Select when there is a full-range speaker connected to
[REAR/SUB.W]
[SUB.W/SUB.W] Select when there is a passive subwoofer connected
[REAR/REAR] Select when there are full-range speakers connected to
S/W UPDATE Select to update the unit to the latest Bluetooth
SYSTEM RESET Select [YES] to initialize the unit settings. The unit will be
[YES], [CANCEL]
he rear speaker output leads and there is a subwoofer
t
connected to the RCA output.
irectly to the rear speaker output leads and there is a
d
subwoofer connected to the RCA output.
e rear speaker output leads and RCA output. If the re is
th
a full-range speaker connected to the rear speaker
output leads, and the RCA output is not used, you may
select either [REAR/SUB.W] or [REAR/REAR].
oftware. For details on Bluetooth software and
s
updating, visit our website.
restarted automatically.
(Some of the settings will be retained even after
esetting the unit, such as Bluetooth pairing information,
r
etc.)
Radio
The tuner frequencies on this unit are allocated for use in Western Europe,
Asia, the Middle East, Africa and Oceania. Use in other areas may result in poor
reception. The RDS (radio data system) function only works in areas that
broadcast RDS signals for FM stations.
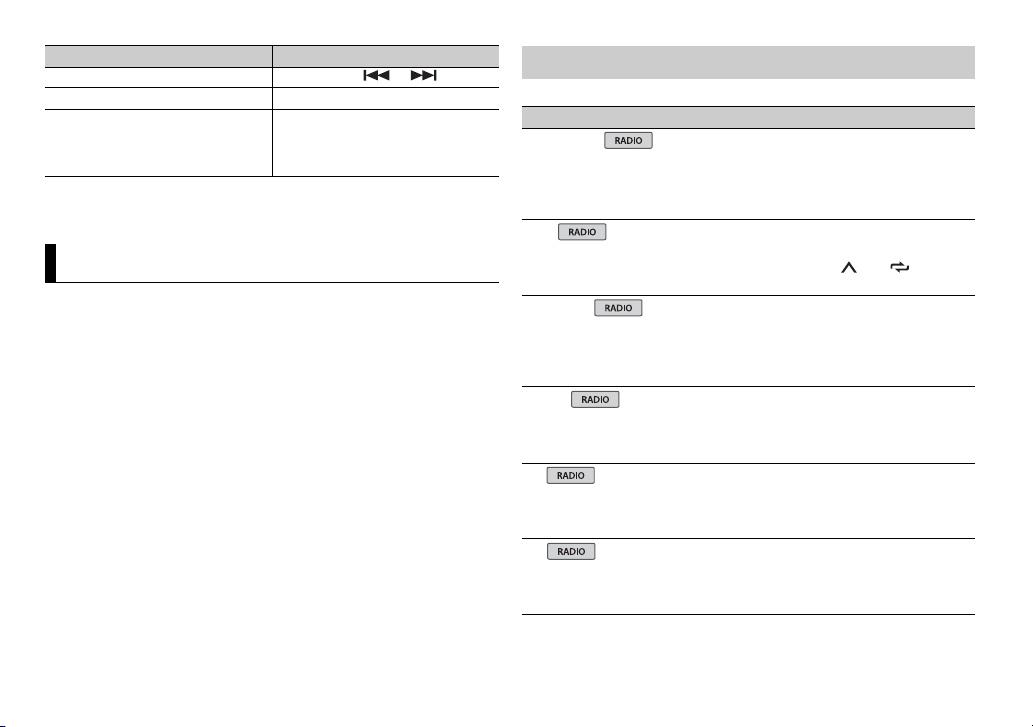
Receiving preset stations
1 Press SRC/OFF to select [RADIO].
2 Press BAND / to select the band from [FM1], [FM2], [FM3], [MW] or
[LW].
3 Press a number button (1/ to 6/ ).
The / buttons can be also used to select a preset station when [SEEK] is set to
[PCH] in the FUNCTION settings (page 17).
Best stations memory (BSM)
The six strongest stations are stored on the number buttons (1/ to 6/ ).
1 After selecting the band, press the M.C. dial to display the main menu.
2 Tur n th e M.C. dial to select [FUNCTION], then press to confirm.
3 Tur n th e M.C. dial to select [BSM], then press to confirm.
To seek a station manually
1 After selecting the band, press / to select a station.
Press and hold / then release to seek an available station.
Scanning stops when the unit receives a station. To cancel seek tuning,
press / .
[SEEK] needs to be set to [MAN] in the FUNCTION settings (page 17).
To store stations manually
1 While receiving the station you want to store, press and hold one of the
number buttons (1/ to 6/ ) until it stops flashing.
7En
Using PTY functions
AUX input jack (3.5 mm stereo jack)
USB port
SRC (source)/OFF
M.C. (multi-control) dial
The unit searches for a station by PTY (program type) information.
1 Press during FM reception.
2 Turn the M.C. dial to select a program type from [NEWS/INFO],
[POPULAR], [CLASSICS] or [OTHERS].
3 Press the M.C. dial.
The unit begins to search for a station. When it is found, its program service
na
me is displayed.
• To cancel the search, press the M.C. dial.
• The program of some stations may differ from that indicated by the transmitted PTY.
• If no station is broadcasting the type of program you searched for, [NOT FOUND] is
displayed for about two seconds and then the tuner returns to the original station.
PTY list
For more details about PTY list, visit the following site:
http://www.pioneer.eu/eur/products/25/121/tech/CarAudio/PTY.html
USB/iPod/AUX
iPod function is not available for MVH-180UBG/180UB/181UB.
Playing back
Disconnect headphones from the device before connecting it to the unit.
USB devices (including Android™)/iPod
1 Open the USB port cover.
2 Plug in the USB device/iPod using an appropriate cable.
To automatically switch to [USB] source when a USB device/iPod is connected to the unit,
set [USB AUTO] to [ON] in the SYSTEM settings (page 18).
Use an optional Pioneer USB cable (CD-U50E) to connect the USB device as any device
connected di rectly to the unit will protru de out from the unit, which could be dangerous.
Before removing the device, stop playback.
AOA connections
For details on AOA connection, see page 15.
MTP connection
A device installed with Android OS 4.0 or later can be connected to the unit via MTP, using
the cable supplied with the device. However, depending on the connected device and the
numbers of the files in the device, audio files/songs may not be able to be played back via
MTP. Note t hat MTP connection is not compatible w ith WAV and F LAC* file formats, an d
cannot be used with the MIXTRAX function.
* The FLAC files are only compatible with MVH-180UI/180UBG/180UB/181UB.
8En

If you use an MTP connection, [ANDROID WIRED] needs to be set to [MEMORY] in the
SYSTEM settings
(page 19).
AUX
1 Insert the stereo mini plug into the AUX input jack.
2 Press SRC/OFF to select [AUX] as the source.
If [AUX] is set to [OFF] in the SYSTEM settings, [AUX] cannot be selected as a source
(page 18).
Operations
You can make various adjustments in the FUNCTION settings (page 16).
Note that the following operations do not work for an AUX device. To operate
an
AUX device, use the device itself.
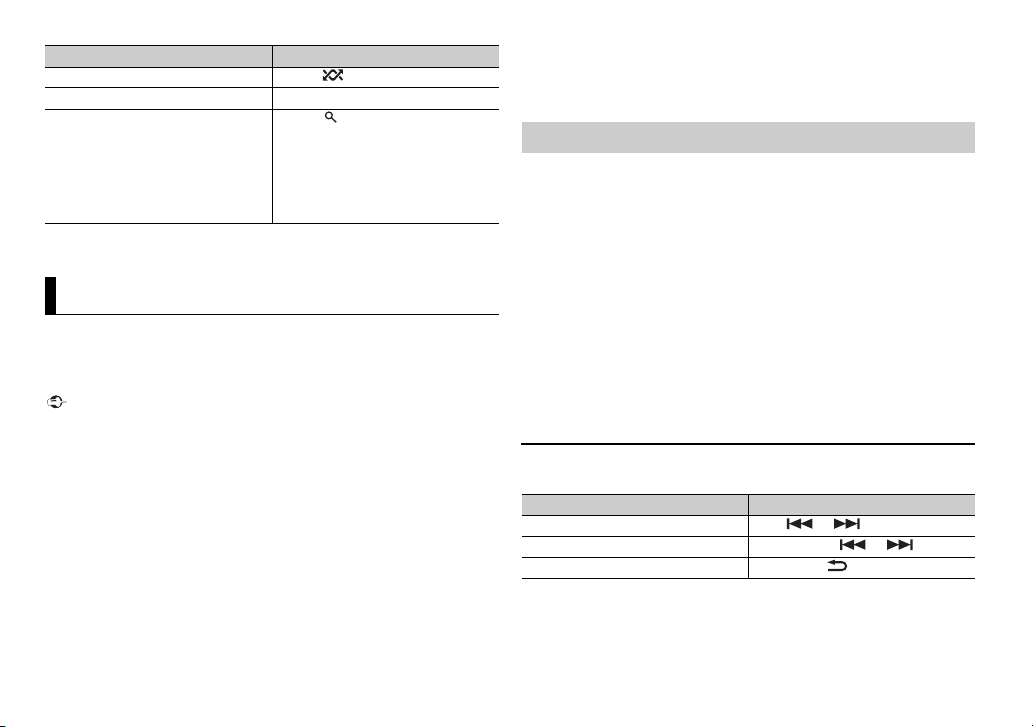
Purpose Operation
Select a folder/album*1 Press 1/ or 2/ .
Select a track/song (chapter) Press or .
Fast forwa rd or re verse *3 Press and hold or .
Search for a file from a list 1 Press to display the l ist.
View a list of the files in the selected
lder /categor y*1
fo
Play a song in the selected folder/
egory*1
cat
rn th e M.C. dial to select the
2 Tu
desired file (folder) name or
category, then press to confirm.
rn th e M.C. dial to select the
3 Tu
desired file, then press to confirm.
Playback starts.
Press the M.C. dial when a folder/
category is selected.
Press and hold the M.C. dial when a
folder/category is selected.
Purpose Operation
Alphabetical search (iPod only) 1 Press to display the list.
Repeat play Press 6/ .
Random/shuffle play Press 5/ .
Shuffle all play (iPod only) Press and hol d 5/ .
Pause/resume playback Press 4/PA
Sound retriever*2 Press 3/S.
Return to root folder (USB only)*1 Press and hol d .
Change drives in USB device
(Devices that support the USB mass
torage device class protocol only)
s
*1 Compressed audio files only
*2 When there is no 3/S.Rtrv. button on the unit, the sound retriever function can be set by
the FUNCTION settings.
*3 Wh en you use the fast forward or reverse function while playing a VBR file, the playback
time may be not correct.
rn t he M.C. dial to select the
2 Tu
desired category list, then press
to enter the alphabetical search
.
mode
(Turning the M.
enters the alphabetical search
mode.)
rn t he M.C. dial to select a letter,
3 Tu
then press to display the
alphabetical list.
To cancel alphabetical search, press
D/ .
BAN
[1]: Effective for low compression rates
[2]: Effective for high compression
tes
ra
Press BAND/
C. dial twice also
US E.
Rtrv.
.
9En
Useful functions for iPod
Link play mode
You can access songs based on the artist, album, or genre currently playing.
1 While listening to a song, press and hold to enter the link play mode.
2 Turn the M.C. dial to select the mode ([ARTIST], [ALBUM], [GENRE]), then
press to confirm.
The selected song/album will be played after the currently playing song.
The selected song/album may be canceled if you use funct ions other than those from the
link play mode (e.g. fast forward and reverse).
About MIXTRAX (USB/iPod only)
(Only for MVH-X380BT)
The MIXTRAX function creates a non-stop mix of your music library. For details
on MIXTRAX settings, see page 19.
• This function is not compatible with an Android device connected via MTP.
• When USB is selected as a source and the MIXTRAX function is in use, the sound retriever
function is disabled.
• Depending on the file/song, sound effects may not be available.
1 Press 3/MIX to turn MIXTRAX on/off.
iPod control
You can control the unit via a connected iPod.
The following iPod models are not compatible with this function.
–iPod nano 1st generation, iPod with video
1 Press BAND/ during playback, then select the control mode.
[CO
NTRO L iPod]: The unit’s iPod function can be operated from the
connec ted iPod.
[CO
NTRO L AUDIO]: The unit’s iPod function can only be operated by the
buttons on the unit or suppl ied remote control. In this mode, the connected
iPod cannot be turned on or off.
• Pressing iPod can also switch the control mode (only for MVH-180UI).
• Switching the cont rol mode to [CONTROL iPod] pau ses song playback. Us e the connected
iPod to resume playback.
• The following operations are still accessible from the unit, even if the control mode is set
to [CONTROL iPod].
– Pause, fast forward/reverse, song/chapter selection
• The volume can only be adjusted from the unit.
10En
Bluetooth
(Only for MVH-X380BT)
Bluetooth connection
If three or more Bluetooth devices (e.g. a phone and separate audio player) are connected,
they may not work properly.
1 Turn on the Bluetooth function of the device.
2 Press to display the phone menu.
3 Tur n th e M.C. dial to select [BT SETTING], then press to confirm.
4 Tur n th e M.C. dial to select [ADD DEVICE], then press to confirm.
The unit starts to search for available devices, then displays them in the
de
vice list.
• T
o cancel searching, press the M.C. dial.
• I
f the desired device is not in the list, select [RE-SEARCH].
• If the
re is no device available, [NOT FOUND] appears in the display.

5 Turn the M.C. dial to select a device from the device list, then press to
confirm.
Press and hold the M.C
between the Bluetooth device address and device name.
. dial to switch the displayed device information
6 Select [Pioneer BT Unit] shown in the device display.
7 Make sure the same 6-digit number appears on t his unit and the device,
then select “Yes” on the device.
• [DEVICE FULL] appears if the unit has already been paired with three other devices. In this
case, delete one of the paired devices. See [DEL DEVICE] or [GUEST MODE] in the
Bluetooth s ettings (page 11).
• Depending on the device, the PIN code is required in step 7. In this case, input [0000].
The Bluetooth con nection can be also made by detect ing the unit from the Bluetooth
device. To do so, [VISIBLE] in the Bluetooth settings needs to be set to [ON]. For detail s on a
Bluetooth device operations, refer to the operating instructions supplied with the
Bluetooth device.
Bluetooth settings
Menu Item Description
DEVICELIST Display the list of paired Bluetooth devices. “*” appears
DEL DEVICE Delete the device information.
[DELETE YES],
DELETE NO]
[
ADD DEVICE Register a new device.
A.CONN Select [ON] to connect to a Bluetooth device
[ON], [OFF]
n the device name when the Bluetooth connection is
o
established.
a
utomatically.
Menu Item Description
VISIBLE Select [ON] so that a Bluetooth device can detect the
[ON], [OFF]
PIN CODE Change the PIN code.
DEV. INFO Switch the device information on the display between
GUEST MODE Select [ON] to move to the [DEL DEVICE] screen
[ON], [OFF]
A.PAIRING Select [ON] to pair the unit and iPhone automatically
[ON], [OFF]
unit when the unit is connected via Bluetooth to another
device.
ress the M.C. dial to display the setting mode.
1 P
rn th e M.C. dial to select a number.
2 Tu
ress the M.C. dial to move the cursor to the next
3 P
position.
ter inputting the PIN code, press and hold the M.C.
4 Af
dial.
After inputting the PIN code, pressing the M.
returns you to the PIN code input display, and you can
change the PIN code.
e device name and Bluetooth device address.
th
automatically when the unit has already been paired
with three devices.
en an iPhone is connected to the unit via USB. ( This
wh
function may not be available depending on the version
of iOS you are using.)
C. dial
Bluetooth telephone
First, make a Bluetooth connection with the Bluetooth telephone (page 10).
Up to two Bluetooth telephones can be connected simultaneously.
• Leaving the u nit on standby to con nect to your phone via Bluetooth whil e the engine is
not running can drain the vehicle’s battery.
• Be sure to park your vehicle in a safe place and apply the parking brake before operation.
11En
To make a phone ca ll
1 Press to display the phone menu.
When two phones are connected, a phone
menu will display. To switch to another phone, press again.
name appears first then a phone
2 Turn the M.C. dial to select [RECENTS] or [PHONE BOOK], then press to
confir m.
If you select [PHONE BOOK], proceed to step 4.
3 Turn the M.C. dial to select [MISSED], [DIALLED] or [RECEIVED], then
press to confirm.
4 Turn the M.C. dial to select a name or phone number, then press to
confir m.
The phone call starts.
To answer an incoming call
1 Press when a call is received.
When two phones are connected to the unit via Bluetooth and there is an incoming call
while one phone is being used for a call, a message will appear in the display. To answer that
incoming call, you need to end the existing call.
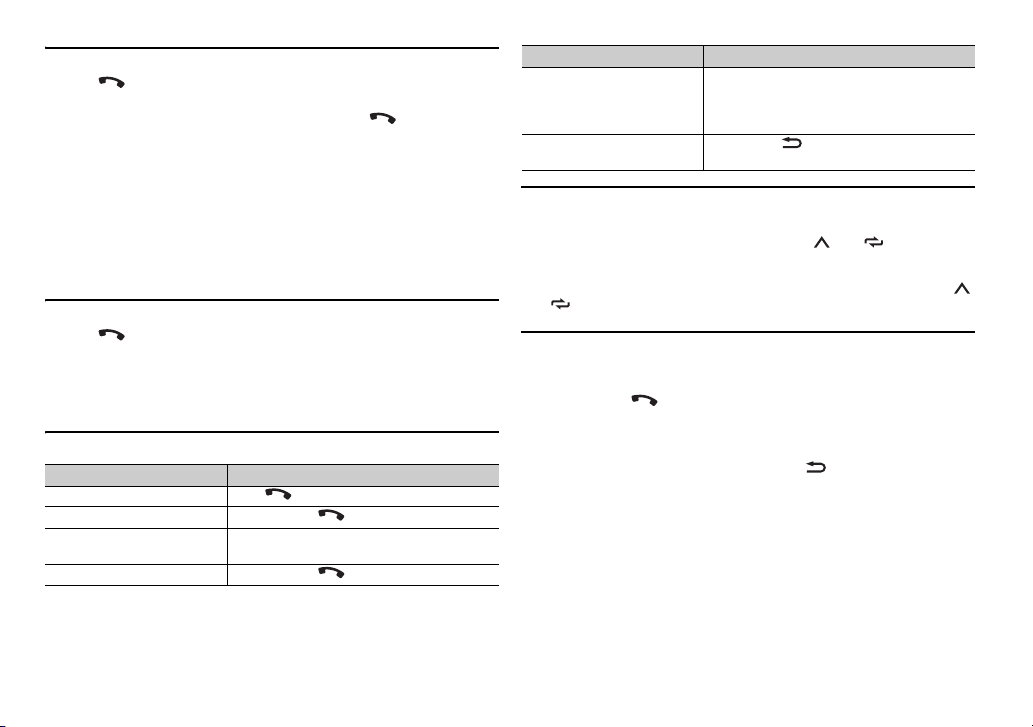
Basic operations
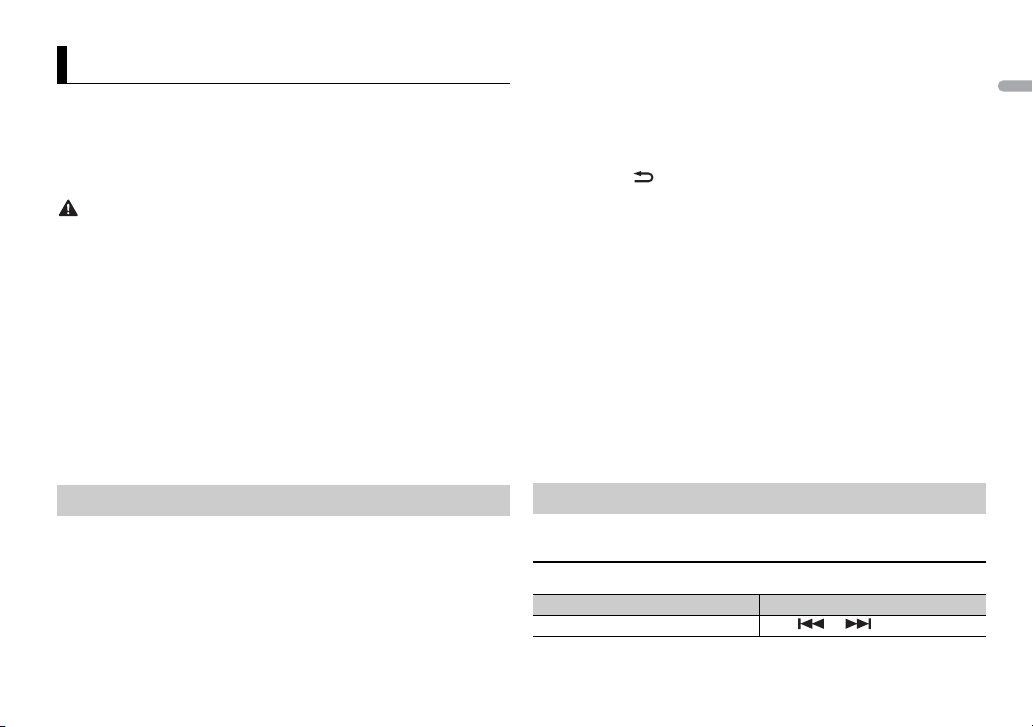
Purpose Operation
End a call Pres s .
Reject an incoming call Press and hold when a call is received.
Switch between the current
r and a caller on hold
calle
Cancel a caller on hold Press and hold .
Press the M.C. dial.
Purpose Operation
Adjust the volume of the
caller’s voice (When private
mode is on, this function is not
available.)
Turn the pri vacy mode on or
f
of
Tur n the M.
Press BAND/ during the call.
C. dial during the call.
To preset phone numbers
1 Select a phone number from a phone book or call history.
2 Press and hold one of the number buttons (1/ to 6/ ).
The contact is stored in the selected preset number.
To make a call using a preset number, press one of the number buttons (1/
to 6/ ), then press the M.
C. dial.
Voice recognition (Only for iPhone)
This function is only available when an iPhone equipped with voice
recognition is connected to the unit via Bluetooth.
1 Press and hold to activate the voice recognition mode.
2 Press the M.C. dial and then talk into the microphone to input voice
commands.
To exit the voice recognition mode, press BA
For details on the voice recognition features, refer to the manual supplied with your iPhone.
ND/ .
12En
Phone menu
Menu Item Description
RECENTS Display the missed call history.
[MISSED]
[DIALLED] Display the dialed call history.
[RECEIVED] Display the received call history.
PHONE BOOK*1 Display the contacts which have been transferred from
PRESET 1-6 Recall the preset phone numbers. You can also recall the
A.ANSR*2 Select [ON] to answer an incoming call automatically.
[ON], [OFF]
R.TONE Select [ON] if the ring tone does not come out from the
[ON], [OFF]
PB INVT Invert the order of names in the phone book (name
PB A.SYNC Select whether or not to transfer the contacts from your
[ON], [OFF]
y
our phone. Set [VISIBLE] in the Bluetooth settings to
[ON] to browse the contacts via this unit.
eset phone numbers by pressing one of the number
pr
buttons (1/ to 6/ ).
akers. Depending on the connected phone, this
car spe
function may not work.
view).
ne automatically when your phone is connected to
pho
the unit.
hen connected for the first time, the contacts from
• W
your phone are transferred automatically, regardless of
the [PB A.SYNC] setting.
f you switch from [ON] to [OFF], th e auto
• I
synchronization will not be performed on the next
connection.
f you switch from [OFF] to [ON], the auto
• I
synchronization will be performed when your phone is
connected to the unit.
uring the auto synchronization, you cannot cancel
• D
the synchronization, even if you select [OFF].
Menu Item Description
BT SET TING You can adjust various settings for Bluetooth
*1 The contacts on your phone will normally be transferred automatically when the phone
is connect ed. If they are not, use your phone to transfer the contacts.
*2 I f two phones are connected, this function does not work on incoming calls that are
received while one of the phones is being used for a call.
connections. For details on Bluetooth settings, see
page 11.
Bluetooth audio
• Depending on the Bluetooth audio player connected to this unit, the available operations
will be limited to the following two levels:
– A2DP (Advanced Audio Distribution Profile) can only play back songs on your audio
player.
– AVRCP (Audio/Video Remote Control Profile) can perform functions such as playback,
pause, select song, etc.
• The sound of the Bluetooth audio player will be muted when the phone is i n use.
• When the Bluetoot h audio player is in use, you cannot connect to a Bluetooth teleph one
automatically.
• Depending on the type of Bluetooth audio player you have connected to this unit,
operation and information displayed may vary based on availability and functionality.
1 Make a Bluetooth connection with the Bluetooth audio player.
2 Press SRC/OFF to select [BT AUDIO] as the source.
3 Press BAND / to star t playback.
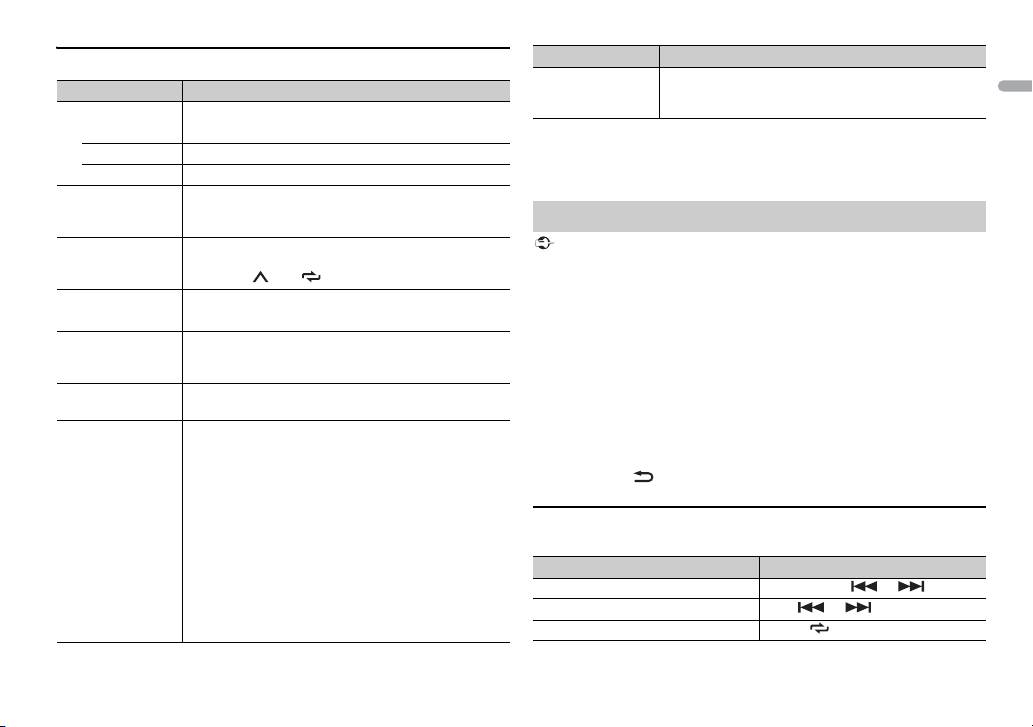
Basic operations
You can make various adjustments in the FUNCTION settings (page 16).
Purpose Operation
Fast forward or reverse Press and hold or .
Select a track Press or .
Repeat play* Press 6/ .
13En
Purpose Operation
Random play* Press 5/ .
Pause/resume playback Press 4/PA
Search for a file from a list 1 P
* Depending on the connected device, these operations may not be available.
USE .
ress to display a list.
rn the M.C. dial to select the
2 Tu
desired folder n ame, then press to
confir m.
rn the M.C. dial to select the
3 Tu
desired file, then press to confirm.
Playback starts.
App Mode
(APP mode is not available for MVH-180UBG/180UB/181UB.)
You can enjoy listening to an application
unit. In some cases, you can control an application by using the unit.
For details on compatible devices, visit our website.
Use of third party apps may involve or require the provision of personally identifiable
information, whether through the creation of a user account or otherwise, and for certain
applications, the provision of geo location data.
ALL THIRD PARTY APPS ARE THE SOLE RESPONSIBILITY OF THE PROVIDERS, INCLUDING
WITHOUT LIMITATION COLLECTION AND SECURITY OF USER DATA AND PRIVACY
PRACTICES . BY ACCESSING THIR D PARTY APPS, YOU AGREE TO REV IEW THE TERMS OF
SERVICE AND PRIVACY POLICIES OF THE PROVIDERS. IF YOU DO NOT AGREE WITH THE
TERMS OR POLICIES OF ANY PROVIDER OR DO NOT CONSENT TO THE USE OF
GEOLOCATION DATA WHERE APPLICABL E, DO NOT USE THAT THIRD PARTY APP.
For iPhone users
This function is compatible with iPhones and iPod touches ins talled with iOS 5.0 or la ter.
For Android device users
This function is compatible with devices that have Android OS 2.3 or later installed and also
support Bluetooth SPP (Serial Port Profile) and A2DP (Advance Audio Distribution Profile).
on an iPhone/Android device via the
PIONEER IS NOT LIABLE FOR ANY THIRD PARTY APPS OR CONTENT, INCLUDING WITHOUT
LIMITATION THEIR ACCURACY OR COMPLETENESS. THE CONTENT AND FUNCTIONALITY OF
SUCH APPS ARE THE SOLE RESPONSIBILITY OF THE APP PROVIDER.
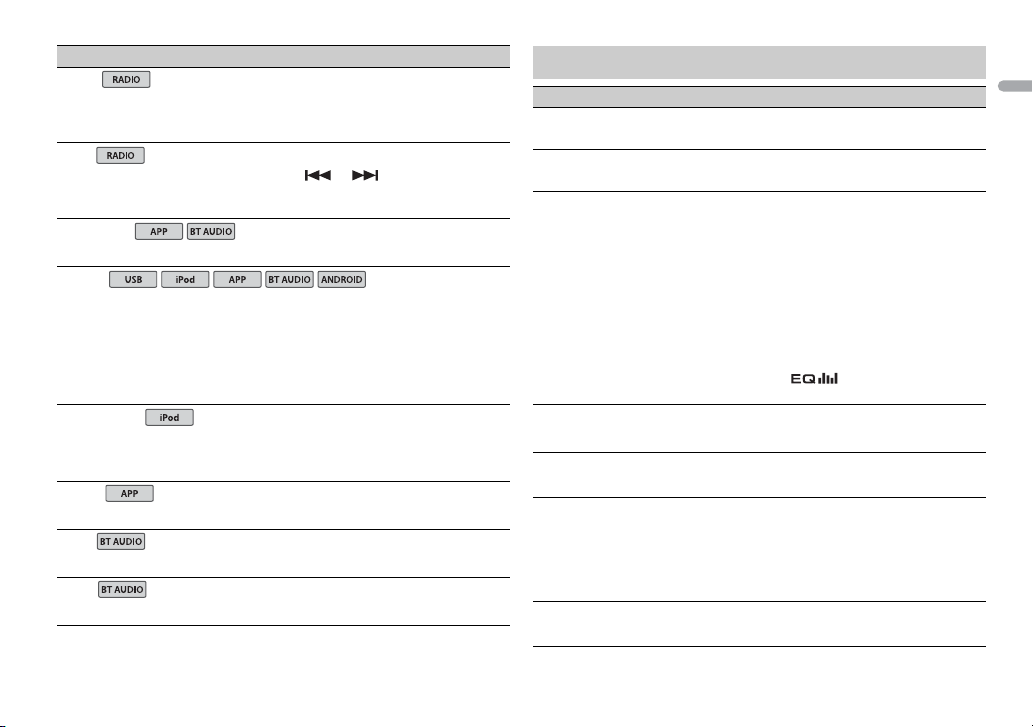
Playback of an application via the unit
The Bluetooth connection is available for MVH-X380BT.
1 Connect this unit with the mobile device.
• iP
hone via USB (page 
• A
ndroid device via Bluetooth (page 10)
2 Press the M.C. dial to display the main menu.
3 Tur n th e M.C. dial to select [SYSTEM], then press to confirm.
4 Tur n th e M.C. dial to select [APP CONN.SET], then press to confirm.
5 Tur n th e M.C. dial to select one of the below.
• Se
lect [WIRED] for iPhone.
• S
elect [BLUETOOTH] for an Android de vice.
6 Press SRC/OFF to select [APP].
7 Operate the mobile device to start up the application.
Basic operations
You can make various adjustments in the FUNCTION settings (page 16) .
Purpose Operation
Select a track Press or .
Fast forwa rd or reverse Press and hold or .
Pause/resume playback Press BAND/ .
14En
Using Pioneer ARC APP
(Pioneer ARC APP for iPhone is not available for MVH-180UBG/180UB/181UB.)
You can operate the unit from Pioneer ARC APP installed on an iPhone/
Android device. In some cases, you can control aspects of the application, such
as source selection, pause, etc., by using the unit.
For details on what operations are available on the application, see the
ap
plication’s help section.
Do not attempt to op erate the application while dri ving. Make sure to pull off the road and
park your vehic le in a safe location before atte mpting to use the controls o n the application.
For iPhone use rs
This function is compatible with iPhones (iPhone 5 or later) and iPod touches
in
stalled with iOS 8.0 or later.
You can download Pioneer ARC APP on iTunes App Store.
For Android device users
This function is compatible with devices that have Android OS 4.1 or later
i
nstalled and also support Bluetooth SPP (Serial Port Profile) and AOA (Android
Open Accessory) 2.0.
You can download Pioneer ARC APP on Google Play™.
4 Tur n th e M.C. dial to select [APP CONN.SET], then press to confirm.
5 Tur n th e M.C. dial to select one of the below.
• S
elect [WIRED] for a device connected via USB.
• Se
lect [BLUETOOTH] for an Android device connected via Bluetooth.
Proceed to step 9 if you select the USB connection for iPhone or the
luetooth connection.
B
6 Press BAND / to display the previous menu list.
7 Tur n th e M.C. dial to select [ANDROID WIRED], then press to confirm.
8 Tur n th e M.C. dial to select [APP CONTROL] for an Android device
connec ted via USB.
If [ON] is selected in [P.APP AUTO ON] (page 19), Pioneer ARC APP on the
Android device starts automatically, and all the steps are finished.
If Pioneer ARC APP has not been installed on your Android device yet, a message that
prompts you to install the application will appear on your Android device. Select [OFF]
in [P.APP AUTO ON] to clear the message (page 19).
9 Press SRC/OFF to select any source.
10 Launch Pioneer ARC APP on the mobile device.
Some Android devices connected via AOA 2.0 may not work properly or emit sounds due to
their own software design, regardless of the OS version.
Making a connection with Pioneer ARC APP
The Bluetooth connection is available for MVH-X380BT.
1 Connect this unit with the mobile device.
• i
Phone/Android device via USB (page
• A
ndroid device via Bluetooth (page 10)
2 Press the M.C. dial to display the main menu.
3 Turn the M.C. dial to select [SYSTEM], then press to confirm.
You can also launch the application by pressing and holding the M.C. dial if you select
the USB connection for iPhone or the Bluetooth connection.
Listening to music on Android
1 Press SRC/OFF to select [ANDR OID].
Basic operations
Purpose Operation
Select a track Press or .
15En
Purpose Operation
Fast forward or reverse Press and hold or .
Pause/resume playback Press 4/PA
Sound retriever* Pres s 3/S.
* When there is no 3/S.Rtrv button on the unit, the sound retriever function can be set by
the FUNCTION settings.
USE .
Rtrv.
[1]: Effective for low compression rates
[2]: Effective for high compression
tes
ra
Settings
You can adjust various settings in the main menu.
1 Press the M.C. dial to display the main menu.
2 Turn the M.C. dial to select one of the categories below, then press to
confirm.
• FUNC TION settings (page 16)
• AUDIO settings (page 17)
• SYSTEM settings (page 18)
• ILLUMINATION settings (page 19)
• MIX TRAX settings (page 19)
3 Turn the M.C. dial to select the options, then press to confirm.
• The Bluetooth-related menu items in the following tables are not available for MVH-
180UI/180UBG/180UB/181UB.
• iPod-related menu items in the following tables are not available for MVH-180UBG/
180UB/181UB.
• APP mode-related menu items in the following tables are not available for MVH-180UBG/
180UB/181UB.
FUNCTION settings
The menu items vary according to the source.
Menu Item Description
FM SETTING
[TALK], [STANDARD], [MUSIC] Match the sound quality level with the
BSM
REGIONAL
[ON], [OFF] Limit the reception to the specific regional
LOC AL
FF], [LV1], [LV2], [LV3],
FM: [O
[LV4]
MW/LW: [O
TA
[ON], [OFF] Receive current traffic information if
AF
[ON], [OFF] Allow the unit to retune to a different
FF], [LV1], [LV2]
adcast signal conditions of the FM band
bro
signal. (Available only when FM band is
selected.)
Store the six strongest stations on the
ber buttons (1/ to 6/ )
num
automatically.
grams when AF (alternative frequencies
pro
search) is selected. (Available only when
FM band is se lected.)
Restrict the tuning station accordin g to the
al strength.
sign
ailable. (Available only when FM band is
av
selected.)
uency providing the same station.
freq
(Available only when FM band is selected.)
16En
Menu Item Description
NEWS
[ON], [OFF] Interrupt the currently selected source with
SEEK
[MAN], [PCH] Assign or buttons to seek the
SEL DEVICE
S.RTRV
[1] (effective for low
mpression rates),
co
[2] (effective for high
mpression rates),
co
[OFF]
AUDIO BOOK
[FASTER], [NORMAL],
LOWER]
[S
PAUS E
PLAY
STOP
news programs. (Available only when FM
band is selected.)
stations one by one (manual tuning) or
ect a station from the preset channels.
sel
Connect a Bluetooth device in the list.
Enhance compressed audio and restore
ch sound.
ri
Not available when:
SB is selected as a source and the
• U
MIXTRAX function is set to on.
AC file is played back. (Available for
• The FL
MVH-180UI/180UBG/180UB/181UB)
Change the playback speed. (Not available
when [CONTROL iPod] is selected in the
control mode.)
Pause or resume playback.
Start playback.
Stop playback.
AUDIO settings
Menu Item Description
FAD ER *1
Adjust the front and rear speaker balance.
BALANCE
Adjust the left and right speaker balance.
EQ SETTING
[SUPER BASS], [POWERFUL],
[NATURAL], [VOCAL],
[CUSTOM1], [CUSTOM2],
[FLAT]
Select an equalizer band and
evel for further customizing.
l
Equalizer band: [80HZ],
[250HZ], [800HZ], [2.5KHZ],
[8KHZ]
Equalizer l evel: [+
LOUDN ESS
[OFF], [LOW], [MID], [HI] Compensate for clear sound at low volume.
SUB.W*2
[NOR], [REV], [OFF] Select the subwoofer phase.
SUB.W CTRL*2
Cut-off frequency: [50H
[63HZ], [80HZ], [100HZ],
[125HZ], [160HZ], [200HZ]
Output level: [–24] t
Slope level: [–
BASS BOOST
[0] to [+6] Select the bass boost level.
6] to [–6]
*3
12], [–24]
Select or customize the equalizer curve.
[CUSTOM1] can be set separately for each
source. However, each of the below
combinations are set to the same setting
automatically.
SB, iPod, ANDROID, and APP (iPhone)
• U
T AUDIO, ANDROID, and APP (Android)
• B
[CUSTOM2] is a shared setting used for all
urces.
so
You can also switch the equalizer by
essing repeatedly (Only for
pr
MVH-180UBG/180UB/181UB).
Z],
Only frequencies lower than those in the
selected range are output from the
subwoofer.
o [+6]
17En

Menu Item Description
HPF SET TING
FF],
Cut-off frequency: [O
[50HZ], [63HZ], [80HZ],
[100HZ], [125HZ], [160HZ],
[200HZ]
Slope level: [–12],
SLA
[+4] to [–4] Adjust the volume level for each source
*1 Not available when [SUB.W/SUB.W] is selected in [SP-P/O MODE] in the INITIAL settings
(page 7).
*2 Not available when [REAR/REAR] is selected in [SP-P/O MODE] in the INITIAL settings
(page 7).
*3 Not available when [OFF] is selected in [SUB.W].
[–24]
Only frequencies higher than the high-pass
filter (HPF) cutoff are output from the
speakers.
except FM.
Each of the below combinations are set to
he same setting automatically.
t
SB, iPod, ANDROID, and APP (iPhone)
• U
T AUDIO, ANDROID, and APP (Android)
• B
SYSTEM settings
You can also access to these menus when the unit is turned off.
Menu Item Description
LANGUAGE
[ENG](English), [РУС]
(Russian), [TUR](Turkish)
CLOCK SET
12H/24H
[12H], [24H] Select the time notation.
Select the language to display the text
information from a compressed audio file.
Set the clock (page 6).
Menu Item Description
AUTO P I
[ON], [OFF] Search for a different station with the same
AUX
[ON], [OFF] Set to [ON] when using an auxiliary device
USB AUTO
[ON], [OFF] Select [ON] to automatically switch to
BT AUDIO
[ON], [OFF] Set the Bluetooth signal on/off.
MUTE MODE (Only for MVH-180UI)
[MUTE], [20dB ATT], [10dB
T]
AT
PW SAVE*
[ON], [OFF] Reduce the battery power consumption.
BT MEM CL EAR
[YES], [CANCEL] Clear the Bluetooth device data (device list,
gramming, even if using a preset
pro
station.
nnected to the unit.
co
SB] source when a USB device/iPod is
[U
connected to the unit.
Select [OFF] when a USB device/iPod is
connected to the unit just for
being
charging.
Mute or attenuate sound automatically
when a signal from equipment with a mute
function is received.
Turning on the source is the only operation
owed when this function is on.
all
N code, call history, phone book, preset
PI
phone numbers) stored in the unit.
[CLEARED] appears when data is
successfully deleted.
18En

Menu Item Description
BT VERSIO N
Displays the system version of the unit and
e Bluetooth module.
th
APP CONN.SET
[WIRED], [BLUETOOTH] Select the appropriate connection method
ANDROID WIRED
[MEMORY], [APP CONTROL] Select the appropriate connection method
P. AP P A U TO O N
[ON], [OFF]
* [PW SAVE] is canceled if the vehicle battery is disconnected and will need to be turned
back on once the battery is reconnected. When [PW SAVE] is off, depending on
connection methods, the unit may continue to draw power from the battery if your
vehicle’s ignition does not have an ACC (accessory) position.
rding to your device.
acco
or an Android device.
f
etting is not available when
• This s
[BLUETOOTH] is selected in [APP
CONN.SET].
Select [ON] to automatically launch the car
remote application when a n Android device
is connected to the unit via AOA. (Not
available when [MEMORY] is selected in
[ANDROID WIRED].)
ILLUMINATION settings
Menu Item Description
DIM SETTING
[SYNC CLOCK], [MANUAL] Change the display brightness.
BRIGHTNESS
[1] to [10] Change the display brightness.
The available setting ranges differ
epending on [D IM SETTING].
d
MIXTRAX settings
(Only for MVH-X380BT)
Menu Item Description
SHORT PLAYBCK
[1.0 MIN], [1.5 MIN], [2.0 MIN],
[2.5 MIN], [3.0 MIN], [OFF]
MIX PATTERN
[SOUND LEVEL] Change the MIXTRAX special effects
[LOW PASS] The mix pattern changes according to
[RANDOM] The mix pattern changes randomly
DISPLAY FX
[ON], [OFF] Set the MIXTRAX special effects on/off.
CUT IN FX
[ON], [OFF] Turn the MIXTRAX sound effects on/off
Select the length of the playback time.
rding to the audio level.
acco
The mix pattern changes according to
he sound level.
t
e bass level.
th
acco
rding to the sound level mode and
low pass mode.
ile manually changing the tracks.
wh
19En

Connections/Installation
ACC posi tion No ACC p osition
MVH-X380BT/180UI/180UBG/180UB/
181UB
Connections
• When installing this unit in a vehicle
without an ACC (accessory) position
on the ignition switch, failure to
connect the red cable to the terminal
that detects operation of the ignition
key may result in batter y drain.
• Use of this unit in conditions other
than the following could resul t in fire
or malfunction.
– Vehicles with a 12-volt battery and
tive grounding.
nega
– When speaker output is used by 4
ls, use speakers over 50 W
channe
(maximum input power) and
between 4 Ω to 8 Ω (impedance
value). Do not use 1 Ω to 3 Ω
speakers for this unit.
– When rear speaker output is used
y 2 Ω of subwoofer, use speakers
b
over 70 W (maximum input power).
* Please refer to connections for a
onnecti on method.
c
o prevent a short-circuit,
• T
overheating or malfunction, be sure
to follow the directions below.
– Disconnect the neg ative terminal
the battery before insta llation.
of
– Secure the wiring with cable
amps or adhesive tape. Wrap
cl
adhesive tape around wiring that
comes into contact with metal
parts to protect the wiring.
– Place all cables away from moving
arts, such as the shift lever and
p
seat rails.
– Place all cables away from hot
such as near the heater
places,
outlet.
– Do not connect the yellow cable to
he battery by passing it through
t
the hole to the engine
compartment.
– Cover any disconnected cable
onnectors with insulating tape.
c
– Do not shorten any cables.
– Never cut the insulation of the
wer cable of this unit in order to
po
share the power with other devices.
The current capacity of the cable is
limited.
– Use a fuse of the rating prescribed.
– Never wire the negative speaker
irectly to ground.
cable d
– Never band together negative
les of multiple speakers.
cab
hen this unit is on, control signals
• W
are sent through the blue/white
cable. Connect this cable to the
system remote control of an extern al
power amp or the vehicle’s autoantenna relay control terminal (max.
300mA 12 V DC). If the vehicle is
equipped with a glass antenna,
connect it to the antenna booster
power supply terminal.
• Never connect the blue/white cable
to the power terminal of an external
power amp. Also, never connect it to
the power terminal of the auto
antenna. Doing so may result in
battery drain or a malfunction.
ack cable is ground. Ground
• The bl
cables for this unit and other
equipment (especially, high-current
products such as power amps) must
be wired separately. If they are not,
an accidental detachment may res ult
in a fire or malfunction.
raphical symbol placed
• The g
on the product means direct current.
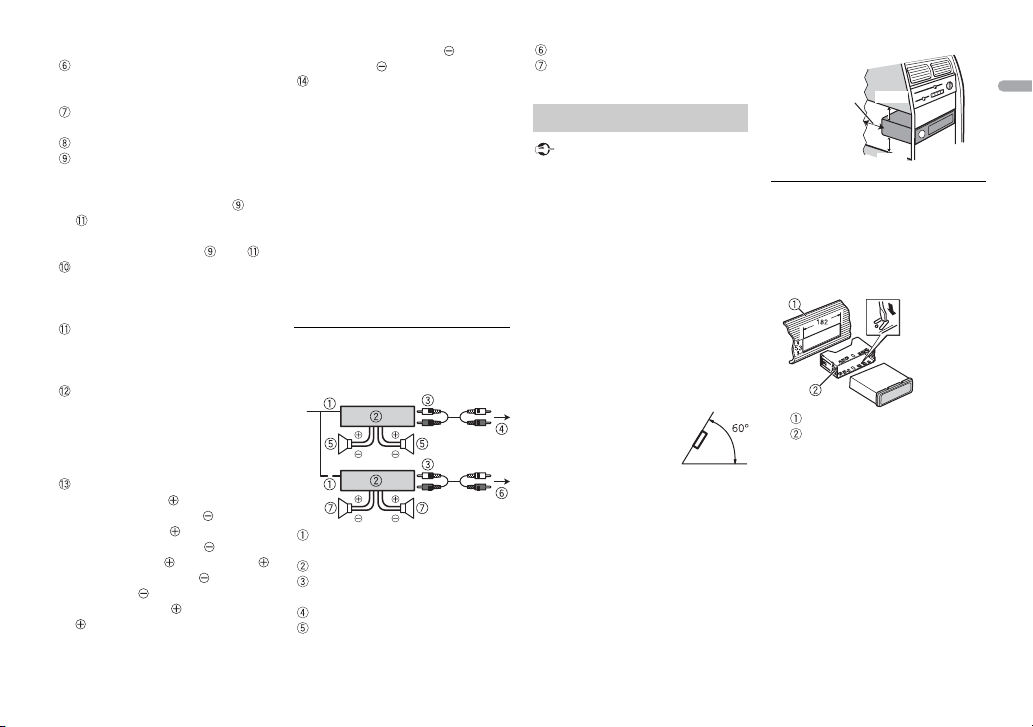
This unit
Microphone 4 m (Only for MVHX380BT)
Rear output or subwoofer output
Front output (Only for MVHX380BT/180UI)
Antenna input
Power cord input
Fuse (10 A)
Wired remote input (Only for MV HX380BT/180UI)
Hard-wired remote control ada pter
an be connected (sold separately).
c
Microphone input (Only for MVHX380BT)
Power cord
To power cord input
Depending on the kind of vehicle,
the function of and may be
different. In this case, be sure to
nnect to and to .
co
Yel l ow
Back-up (or accessory)
Yel l ow
Connect to the constant 12 V
pply terminal.
su
Red
20En
Leave ample
space
5 cm
5 cm
Accessory (or back-up)
Red
Connect to terminal controlled by
he ignition switch (12 V DC).
t
Connect leads of the same color to
each other.
Black (chassis ground)
Blue/white
The pin position of the ISO
nnector will differ depending on
co
the type of vehicle. Connect and
when Pin 5 is an antenna
control type. In another type of
hicle, never connec t and .
ve
Blue/white
Connect to the system control
erminal of the power amp (max.
t
300 mA 12 V DC).
Blue/white
Connect to the auto-antenna relay
ontrol terminal (max. 300 mA 12 V
c
DC).
Yellow/black (Only for MVH-180UI)
If you use equipment with a Mute
unction, wire this lead to the
f
Audio Mute lead on that
equipment. If not, keep the Audio
Mute lead free of any connections.
Speaker leads
White: Front left
White/black: Front left
Gray: Front right
Gray/black: Front right
Green: Rear left or subwoofer
Green/black: Rear left or
subwoofer
Violet: Rear right or subwoofer
Violet/bla ck: Rear right or
subwoofer
ISO connector
In some vehicles, the ISO connector
y be divided into two. In this
ma
case, be sure to connect to both
connectors.
• Change the initial menu of this unit.
Refer to [SP-P/O MODE]
subwoofer output of this unit is
naural.
mo
hen using a subwoofer of 2 Ω, be
• W
sure to connect the subwoofer to the
violet and violet/black leads of this
unit. Do not connect anything to the
green and green/black leads.
(page 7). The
Power amp (sold separately)
Perform these connections when
using the optional amplifier.
System remote control
Connect to blue/white cable.
Power amp (sold separately)
Connect with RCA cables (sold
separately)
To front output*
Front sp eaker*
To rear output or subwoofer output
Rear speaker or subwoofer
* Only for MVH-X380BT/180UI
Installation
• Check all connections and systems
before final installation.
• Do not use unauthorized parts as
this may cause malfunctions.
onsult your dealer if installation
• C
requires drilling of holes or other
modifications to the vehicle.
not install this unit where:
• Do
– it may interfere with operation of
he vehicle.
t
– it may cause injury to a passenger
a result of a sudden stop.
as
he semiconductor laser will be
• T
damaged if it overheats. Install this
unit away from hot places such as
near the heater outlet.
ptimum
• O
performance is
obtained when the
unit is installed at an
angle of less than 60°.
hen installing, to ensure proper
• W
heat dispersal when us ing this unit,
make sure you leave ample space
behind the rear panel and wrap any
loose cables so they are not blocking
the vents.
DIN mount installation
1 Insert the supplied mounting
sleeve into the dashboard.
2 Secure the mounting sleeve by
using a screwdriver to bend the
metal tabs (90°) into place.
Dashboard
Mounting sleeve
ake sure that the unit is
• M
installed securely in place. An
unstable installation may cause
skipping or other malfunctions.
When not using the supplied
mounting sleeve
1 Line up the holes on the
mounting bracket with the holes
on the sides of the unit to attach
the bracket.
21En
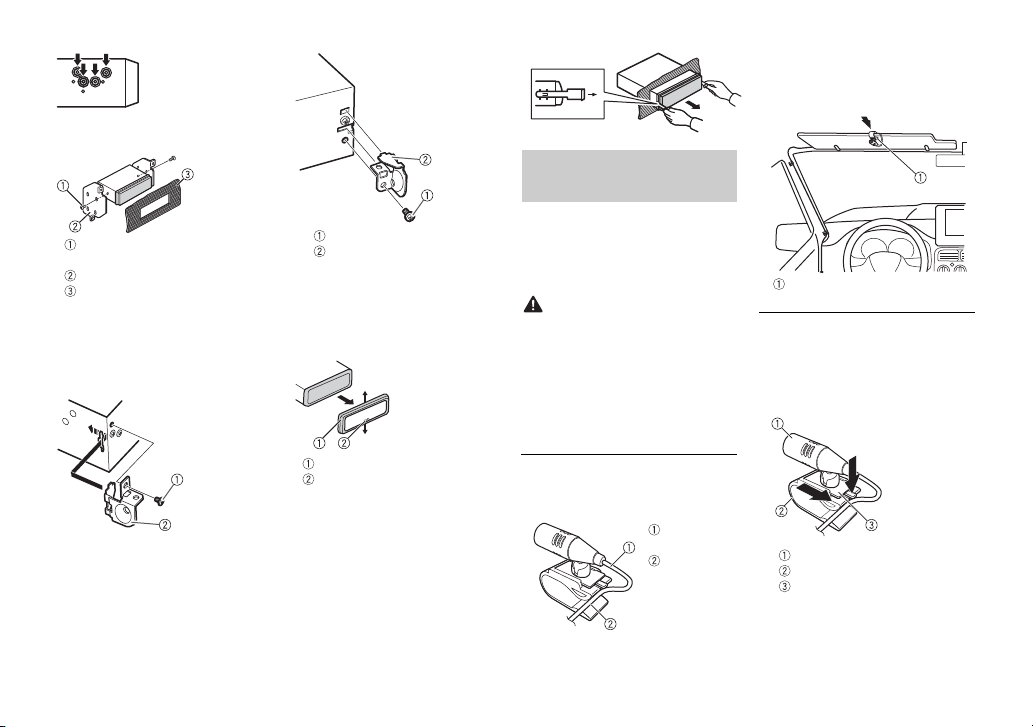
2 Screw in one screw on each side to
hold the unit in place.
Tapping screw (5 mm × 9 mm,
not supplied with product)
Mounting bracket
Dashboard or console
Using the included bracket
Check to make sure that the included
bracket matches your partic ular
model of vehicle and then attach it to
the unit as shown below.
22En
Removing the unit (installed
with the supplied mounting
sleeve)
1 Remove the trim ring.
Trim rin g
Notched tab
eleasing the front panel allows
• R
easier access to the trim ring.
hen reattaching the trim ring,
• W
point the side with the notched
tab down.
2 Inser t the supplied extraction
keys into bot h sides of the unit
until they click into place.
3 Pull the unit out of the dashboard.
Installing the
microphone
(Only for MVH-X380BT)
The microphone should be placed
directly in front of the driver at a
suitable distance to pick up their voice
clearly.
It is extremely dangerous to allow the
microphone lead to become wound
around the steering column or shift
lever. Be sure to install the
microphone in such a way that it will
not obstruct driving. It is
recommended to use the clamps (sold
separately) to arrange the lead.
To install on the sun visor
1 Fit the microphone lead into the
groove.
2 Ins tall the microphone clip on the
sun visor.
Lowering the sun visor reduces the
oice recognition rate.
v
To install on the steering
column
1 Slide the microphone base to
detach it from the microphone
clip.
Microphone
Microphone clip
Microphone base
2 Ins tall the microphone on the rear
side of the steering column.

Additional Information
Troubleshooting
The display automatically returns to
the normal display.
→ No operations have been made for
about 30 seconds.
– Perform an operation.
The repeat play range changes
unexpectedly.
→ Depending on the repeat play
range, the selected range may
change when another folder or
track is being selected or during
fast forwarding/reversing.
– Select the repeat play range
ain.
ag
A subfolder is not played back.
→ Subfolders cannot be played when
[FLD] (folder repeat) is selected.
– Select another repeat play range.
The sound is intermittent.
→ You are using a device, such as a
cellular phone, that may cause
audible interference.
– Move electrical devices that may
The sound from the Bluetooth audio
source is not played back.
→ There is a call in progress on a
Bluetooth-connected cellular
phone.
g the interference away
be causin
from the unit.
– The sound will be played back
the call is terminated.
when
Bluetooth-connected cellular
→ A
phone is currently being operated.
– Stop using the cellular phone.
nnection between the unit
→ The co
and the cellular phone is not
established correctly after a call
made by a Bluetooth-connected
cellular phone.
– Make a Bluetooth connection
ween the unit and the cellular
bet
phone again.
Error messages
Common
AMP ERROR
→ This unit fails to operate or the
speaker connection is incorrect.
protective circuit is activated.
→ The
– Check the speaker connection.
– Turn the ignition switch OFF and
to ON again. If the message
back
remains, contact your dealer or an
authorized Pioneer Service
Station for assistance.
NO XXXX (NO TITLE, for example)
→ There is no embedded text
information.
– Switch the display or play another
ck/file.
tra
23En

USB device/iPod
FORMAT READ
→ Sometimes there is a delay
between the start of playback and
when you start to hear any sound.
– Wait until the message
isappears and you hear sound.
d
NO AUDIO
→ There are no songs.
– Transfer the audio files to the USB
vice and connect.
de
he connected USB device has
→ T
security enabled.
– Follow the USB device
tructions to disable the
ins
security.
SKIPPED
→ The connected USB device contains
DRM protected files.
– The protected files are skipped.
PROTECT
→ All the files on the connected USB
device are embedded with DRM.
– Replace the USB device.
N/A USB
→ The connected USB device is not
supported by this unit.
– Disconnect your device and
eplace it with a compatible USB
r
device.
HUB ERROR
→ The USB device connected via a
USB hub is not supported by this
unit.
– Connect the USB device directly
o this unit using a USB cable.
t
CHECK USB
→ The USB connector or USB cable
has short-circuited.
– Check that the USB connector or
SB cable is not caught in
U
something or damaged.
he connected USB device
→ T
consumes more than maximum
allowable current.
– Disconnect the USB device and
o not use it. Turn the ignition
d
switch OFF and back to ACC or
ON. Connect only compliant USB
devices.
he iPod operates correctly but
→ T
does not charge.
– Make sure the connection cable
or the iPod has not shor ted out
f
(e.g., not c aught in metal obj ects).
After checking, turn the ignition
switch OFF and back to ON, or
disconnect the iPod and
reconnect.
ERROR-19
→ Communication failed.
– Perform one of the following
erations, then return to the
op
USB source.
urn the ignition switch OFF a nd
• T
back to ON.
nnect the USB device.
• Disco
hange to a different source.
• C
od failure.
→ iP
– Disconnect the cable from the
od. Once the iPod’s main menu
iP
is displayed, reconnect the iPod
and reset it.
ERROR-23
→ USB device was not formatted
properly.
– Format the USB device with
12 , FAT16 or FAT 32 .
FAT
ERROR-16
→ The iPod firmware version is old.
–Update the iPod version.
od failure.
→ iP
– Disconnect the cable from the
Pod. Once the iPod’s main menu
i
is displayed, reconnect the iPod
and reset it.
STOP
→ There are no songs in the current
list.
– Select a list that contains songs.
NOT FOUND
→ No related songs.
– Transfer songs to the iPod.
Bluetooth device
ERROR-10
→ The power failed for the Bluetooth
module of the unit.
– Turn the ignition switch OFF and
k to ACC or ON.
bac
Apps
NO BT DEVICE GO TO BT MENU TO
REGISTER
→ No Bluetooth device found.
– Connect the unit and the device
a Bluetooth (page 10).
vi
CONN. FAILED PRESS BAND KEY TO
RETRY
→ Bluetooth connection failed.
– Press BAN
DISCONNECTED PRESS BAND KEY TO
RETRY
→ Bluetooth connection failed.
– Press BAN
CHECK APP
→ Connection to the application
failed.
– Follow the instructions that
START UP APP
→ The application has not started
running yet.
– Operate the mobile device to
D/ to make a
connection again.
D/ to make a
connection again.
on the screen.
appear
art up the application.
st
Handling guidelines
USB storage device
• Connections via USB hubs are not
supported.
irmly secure the U SB storage device
• F
before driving. Do not let the USB
storage device fall onto the floor,
where it may become jammed under
the brake or accelerator pedal.
24En

• Depending on the USB storage
device, the following problems may
occur.
–Operations may vary.
–The storage device may not be
gnized.
reco
– Files may not be played back
operly.
pr
– The device may cause audible
erference when you are listening
int
to the radio.
iPod
• Do not leave the iPod in places with
high temperatures.
irmly secure the iPod when driving.
• F
Do not le t the iPod fall onto t he floor,
where it may become jammed under
the brake or accelerator pedal.
ttings of the iPod such as the
• The se
equalizer and repeat play are
changed automatically when the
iPod is connected to the unit. Once
the iPod is disconnected, those
settings will return to the original
settings.
ncompatible text saved on the iPod
• I
will not be displayed by the unit.
Compressed audio
compatibility
• On
ly the first 32 characters can be
displayed as a file name (including
the file extension) or a folder name.
he unit may not work properly
• T
depending on the application used
to encode WMA files.
here may be a slight delay at the
• T
start of the playback of audio files
embedded with image data, or audio
files stored on a USB device with
numerous folder hierarchies.
ssian text to be displayed on this
• Ru
unit should be encoded in one of the
following character sets:
– Unicode (UTF-8, UTF-16)
– A character set other than Unicode
hat is used in a Windows
t
environment and is set to Russian
in the multi-language setting
• Pioneer cannot guarantee
compatibility with all USB mass
storage devices, and assumes no
responsibility for any loss of data on
media players, smartphones, or
other devices while using this
product.
• Do not leave discs or a USB storage
device in any place that is subject to
high temperatures.
WMA files
File ex tension .wma
Bit rate 48 kbps to 320 kbps
Sampling
frequency
(CBR), 48 kbps to
384 kbps (VBR)
32 kHz, 44.1 kH z, 48
kHz
Window s Media™
Audio Professiona l,
Lossless, Voice/
DRM Stream/
Stream with video
Not compatible
MP3 files
File e xtensio n .mp3
Bit rate 8 kbps to 320 kbps
Sampling
frequency
Compatible ID3 tag
version
M3u playlist Not compatible
MP3i (MP3
interactive), mp3
PRO
(CBR) , VBR
8 kHz to 48 kHz (32
kHz, 44.1 kHz, 48
kHz for emph asis)
1.0, 1.1, 2.2, 2.3, 2.4
(ID3 tag Version 2.x
is given priority
over Version 1.x. )
Not compatible
WAV files
• WAV file formats cannot be
connected via MTP.
File e xtensio n .wav
Quantization bits 8 and 16 (LPCM), 4
Sampling
frequency
(MSADPCM)
16 kHz to 48 kHz
(LPCM), 22.05 kHz
and 44.1 kHz (MS
ADPCM)
AAC files (MVH-X380BT
only)
Compatible format AAC encoded by
File e xtensio n .m4a
Sampling
frequency
Transmission rate 16 kbps to 320
Apple Lossless Not compatible
AAC file bought
from the iTunes
Store (.m4p file
extension)
iTunes
11.025 kHz to 48
kHz
kbps, VBR
Not compatible
FLAC files (MVH-180UI/
180UBG/180UB/181UB only)
• FLAC file formats cannot be
connected via MTP.
AC files may not be playable,
• FL
depending on the encoder.
File e xtensio n .flac
Sampling
frequency
Quantization bit
rate
Channel mode 1/2 ch
8/11.025/12/16/
22.05/24/32/44.1/
48 kHz
16 bit
USB device
• There may be a slight delay when
starting playback of audio files on a
USB storage device with numerous
folder hierarchies.
25En
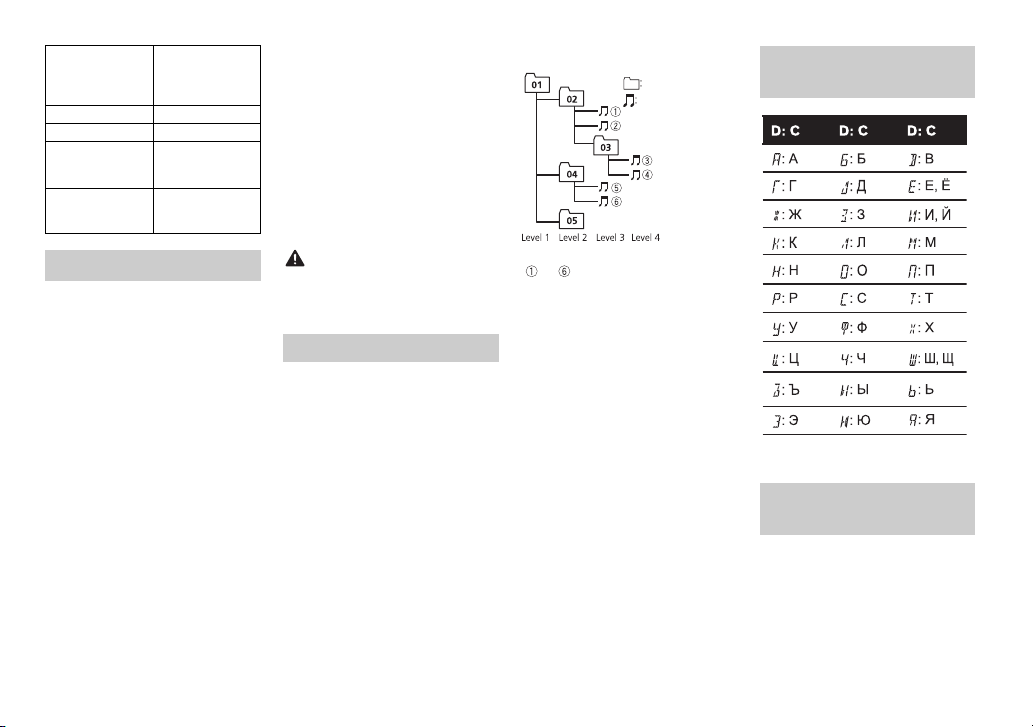
Playable folder
Folder
Compressed
audio file
to : Playback sequence
01 to 05: Folde r number
hierarchy
Playable folders Up to 500
Playable files Up to 15 000
Playback of
copyrightprotected files
Partitioned USB
device
Up to eight tiers (A
practical hierarchy
is less than two
tiers.)
Not compatible
Only the first
partition can be
played.
iPod compatibility
This unit supports only the following iPod
models. Supported iPo d software versions
are shown below. Older versio ns may not
be supported.
Made for
–iPod touch (1st through 5th
generation)
–iPod classic
– iPod with video
–iPod nano (1st through 7th
neration)
ge
–iPhone 6
– iPhone 6 Plus
–iPhone 5s
–iPhone 5c
–iPhone 5
–iPhone 4s
–iPhone 4
–iPhone 3GS
–iPhone 3G
–iPhone
rations may vary depending on
• Ope
the generation and/or software
version of the iPod.
sers of iPod with the Lightning
• U
Connector should use the Lightning
to USB Cable (supplied with iPod).
sers of iPod with the Dock
• U
Connector should use the CD-IU51.
For details, consult your dealer.
fer to the iPod manuals for
• Re
information about the file/format
compatibility.
udiobook, Podcast: Compatible
• A
Pioneer accepts no responsibility for
data lost on the iPod, even if that data
is lost while this unit is used.
Sequence of audio files
The user cannot assign folder
numbers and specify playback
sequences with this unit. Sequence of
audio file depends on the connected
device.
Note that the hidden files in a USB
device cann
ot be played back.
Example of a hierarchy
Russian character
chart
Copyright and
trademark
Bluetooth
The Bluetooth® word mark and logos are
registered trademarks owned by Bluetooth
SIG, Inc. and any use of such marks by
PIONEER CORPORATION is under license.
Other trademarks and trade names are
those of their respective owners.
26En

iTunes
Apple and iTunes are trademarks of
Apple Inc., registered in the U.S. and
other countries.
WMA
Windows Media is either a registered
rademark or trademark of Microsoft
t
Corporation in the United States and/
or other countries.
This product includes technology
wned by Microsoft Corporation and
o
cannot be used or distributed without
a license from Microsoft Licensing, Inc.
FLAC
Copyright © 2000-2009 Josh Coalson
Copyright © 2011-2013 Xiph.Org
undat ion
Fo
Redistribution and use in source and
y forms, with or without
binar
modification, are permitted provided
that the following conditions are met:
– Redistributions of source code must
etain the above copyright notice,
r
this list of conditions and the
following disclaimer.
– Redistributions in binary form must
duce the above copyright
repro
notice, this list of conditions and the
following disclaimer in the
documentation and/or other
materials provided with the
distribution.
– Neither the name of the Xiph.org
oundation n or the names of its
F
contributors may be used to end orse
or promote products derived from
this software without specific prior
written permission.
THIS SOFTWARE IS PROVIDED BY THE
YRIGHT HOLDERS AND
COP
CONTRIBUTORS “AS IS” AND ANY
EXPRESS OR IMPLIED WARRANTIES,
INCLUDING, BUT NOT LIMITED TO, TH E
IMPLIED WARRANTIES OF
MERCHANTABILITY AND FITNESS FOR
A PARTICULAR PURPOSE ARE
DISCLAIMED. IN NO EVENT SHALL THE
FOUNDATION OR CONTRIBUTORS BE
LIABLE FOR ANY DIRECT, INDIRECT,
INCIDENTAL, SPECIA L, EXEMPLARY, OR
CONSEQUENTIAL DAMAGES
(INCLUDING, BUT NOT LIMITED TO,
PROCUREMENT OF SUBSTITUTE
GOODS OR SERVICES; LOSS OF USE,
DATA, OR PROFITS; OR BUSINESS
INTERRUPTION) HOWEVER CAUSED
AND ON ANY THEORY OF LIABILITY,
WHETHER IN CONTRACT, STRICT
LIABILITY, OR TORT (INCLUDING
NEGLIGENCE OR OTHERW ISE) ARISING
IN ANY WAY OUT OF THE USE OF THIS
SOFTWARE, EVEN IF ADVISED OF THE
POSSIBILITY OF SUCH DAMAGE.
iPod & iPhone
iPhone, iPod, iPod classic, iPod nano,
iPod touch are trademarks of
and
ple Inc., registered in the U.S. and
Ap
other countries.
Lightning is a trademark of Apple Inc.
“Made for iPod” and “Made for iPhone”
ean that an electronic accessory has
m
been designed to connect specifically
to iPod or iPhone, respectively, and
has been certified by the developer to
meet Apple performance standards.
Apple is not responsible for the
operation of this device or its
compliance with safety and regulator y
standards. Please note that the use of
this accessory with iPod or iPhone
may affect wireless performance.
Android & Google Play
Android, Google Play, and the Google
logo are trademarks of Google
Play
Inc.
MIXTRAX
MIXTRAX is a trademark of the
NEER CORPORATION.
PIO
Specifications
General
Power source: 14.4 V DC (10.8 V to 15.1
V allowable)
Grounding system: Negative type
Maximum current consumption: 10.0
A
Dimensions ( W × H × D):
DIN
Chassis: 178 mm × 50 mm × 97
mm
Nose: 188 mm × 58 mm × 17 mm
D
Chassis: 178 mm × 50 mm × 97
mm
Nose: 170 mm × 46 mm × 17 mm
Weight: 0.5 kg
Audio
Maximum power output:
• 50 W × 4 ch/4 Ω (for no
ubwoofer)
s
• 50 W × 2 ch/4 Ω + 70 W × 1 ch/2
Ω (for subwoofer)
Continuous power output:
22 W × 4 (50 Hz to 15 000 Hz, 5 %
D, 4 Ω load, both channels
TH
iven)
dr
Load impedance: 4 Ω (4 Ω to 8 Ω
wable)
allo
Preout maximum output level: 2.0 V
Loudness contour: +10 dB (100 Hz),
6.5 dB (10 kHz) (volume: –30 dB)
+
Equalizer (5-Band Graphic Equalizer):
Frequency: 80 Hz/250 Hz/800 Hz/
.5 kHz/8 kHz
2
Equalization range: ±12 dB (2 dB
ep)
st
Subwoofer (mono):
Frequency: 50 Hz/63 Hz/80 Hz/
00 Hz/125 Hz/160 Hz/200 Hz
1
Slope: –12 dB/oct, –24 dB/oct
Gain: +6 dB to –24 dB
Phase: Normal/Reverse
USB
USB standard specification: USB 2.0
full speed
Maximum current supply: 1 A
USB Protocol:
MSC (Mass Storage Class)
MTP (Media Transfer Protocol)
AOA (Android Open Accessory)
0
2.
Fi le s yst em: FAT 12, FAT 16, FAT3 2
MP3 decoding format: MPEG-1 & 2
dio La yer 3
Au
WMA decoding format: Ver. 7, 7.1, 8, 9,
0, 11, 12 (2 ch audio) (Windows
1
Media Player)
27En

AAC decoding format: MPEG-4 AAC
(iTunes encoded only) (Ver. 10.6
and earlier) (MVH-X380BT)
FLAC decoding format: v1.3.0 (Free
ossless Audio Codec) (MVH-
L
180UI/180UBG/180UB/181UB)
WAV signal format: Linear PCM & MS
DPCM (Non-compressed)
A
FM tuner
Frequency range: 87.5 MHz to 108.0
MHz
Usable sensitivity: 11 dBf (1.0 μV/75 Ω,
o, S/N: 30 dB)
mon
Signal-to-noise ratio: 72 dB (IEC-A
work)
net
MW tuner
Frequency range: 531 kHz to 1 602 kHz
Usable sensitivity: 25 μV (S/N: 20 dB)
Signal-to-noise ratio: 62 dB (IEC-A
work)
net
LW tu ner
Frequency range: 153 kHz to 281 kHz
Usable sensitivity: 28 μV (S/N: 20 dB)
Signal-to-noise ratio: 62 dB (IEC-A
work)
net
Bluetooth
(MVH-X380BT)
Version: Bluetooth 3.0 certified
Output power: +4 dBm Maximum
ower class 2)
(P
Frequency band(s): 2 400 MHz to 2
.5 MHz
483
Bluetooth profiles:
GAP (Generic Access Profile)
SDAP (Service Discovery
plication Profile)
Ap
OPP (Object Push Profile)
HFP (Hands Free Profile) 1.6
PBAP (Phone Book Access Profile)
A2DP (Advanced Audio
istribution Profile)
D
AVRCP (Audio/Video Remote
ntrol Profile) 1.5
Co
SPP (Serial Port Profile) 1.1
Specifications and the design are
subject to modifications without
notice.
28En

29En
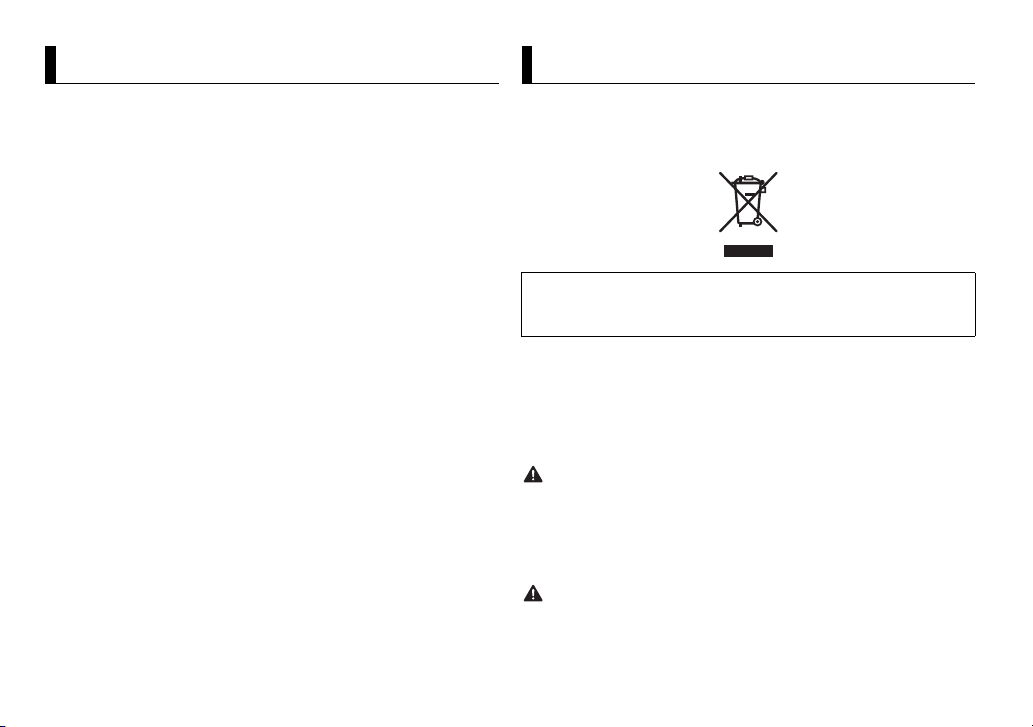
À propos de ce mode d’emploi :
Table des matières
Avant de commencer………………………………………………………. 2
Mise en route…………………………………………………………………… 3
Radio ……………………………………………………………………………….. 6
USB/iPod/AUX …………………………………………………………………. 7
Bluetooth……………………………………………………………………….. 10
Mode d’application ……………………………………………………….. 14
Utilisation de Pioneer ARC APP……………………………………… 15
Réglages………………………………………………………………………… 16
Réglages FUNCTION ……………………………………………………. 17
Réglages AUDIO…………………………………………………………… 18
Réglages SYSTEM ………………………………………………………… 19
Réglages ILLUMINATION ……………………………………………… 20
Réglages MIXTRAX………………………………………………………. 20
Raccordements/Installation ………………………………………….. 21
Informations complémentaires …………………………………….. 24
• Parmi les instructions suivantes, les clés USB ou les lecteurs audio USB sont
collectivement désignés sous le nom de « périphérique USB ».
• Dans ce mode d’emploi, les iPod et les iPhone sont collectivement désignés
sous le nom d’« iPod ».
Avant de commencer
Nous vous remercions d’avoir acheté cet appareil PIONEER
Pour garantir une utilisation correcte, lisez bien ce mode d’emploi avant d’utiliser cet
appareil. Il est particulièrement important que vous lisiez et respec tiez les indications
ATTENTION et PRÉCAUTION de ce mode d’emploi. Conservez-le dans un endroit sûr et
facilement acces sible pour toute consultation ul térieure.
Si vous souhaitez vous débarrasser de cet appareil, ne le mettez pas à la poubelle avec
vos ordures ménagères. Il existe un système de collecte séparé pour les appareils
électroniques usagés, qui doivent être récupérés, traités et recyclés conformément à la
législation.
Dans les états membres de l’UE, en Suisse et en Norvège, les foyers domestiques peuvent
rapporter le urs produits électroniques u sagés gratuitement à des points de col lecte
spécifiés ou à un revendeur (sous réserve d’achat d’un produit similaire).
Dans les pays qui ne sont pas mentionnés ci-dessus, veuillez contacter les autorités locales
pour vous informer de la méthode correcte de mise au rebut.
En agissant ainsi vous assurerez que le produit que vous mettez au rebut est soumis au
processus de traitement, de récupération et de recyclage nécessaire et éviterez ainsi les
effets négatifs potentiels sur l’environnement et la santé publique.
• N’essayez pas d’installer cet ap pareil ou d’en faire l’entretien vous-mê me.
L’installa tion ou l’entretien de cet a ppareil par des p ersonnes sans for mation et sans
expérience en équipem ent électronique et en accessoires auto mobiles peut être
dangereux et vous exposer à des risques d’électrocution ou à d’autres dangers.
• N’essayez pas de démonter ou de modifier cet appareil. Veillez à quitter la route et garer
votre véhicule en lieu sûr avant d’essayer d’utiliser les commandes de l’appareil.
• Ne laissez pas cet appareil entrer en contact avec de l’humidité et/ou des liquides. Cela
pourrait provoquer une décharge électrique. Tout contact avec des liquides pour rait
également provoquer des dommages, de la fumée et une surchauffe de l’ap pareil.
2Fr
Loading…
Настройки: Pioneer MVH-180UB
17Ru
Русский
* Если на устройстве отсутствует кнопка 3/S.Rtrv, функцию преобразования звука
можно настроить в настройках FUNCTION.
В главном меню можно настроить различные параметры.
1 Нажмите M.C. для отображения главного меню.
2 Поверните M.C. для выбора одной из следующих категорий, затем
нажмите для подтверждения.
• Настройки FUNCTION (стр. 17)
• Настройки AUDIO (стр. 18)
• Настройки SYSTEM (стр. 19)
• Настройки ILLUMINATION (стр. 20)
• Настройки MIXTRAX (стр. 20)
3 Поверните M.C. для выбора параметров, затем нажмите для
подтверждения.
ПРИМЕЧАНИЯ
Элемент меню Описание
FM SETTING
[TALK], [STANDARD], [MUSIC] Настройка уровня качества сигнала в
соответствии с условиями сигнала
Настройки
вещания полосы FM. (Доступно только
при выборе полосы FM.)
BSM
Автоматическое сохранение шести
радиостанций с наилучшим качеством
приема под числовыми кнопками (с 1/
по 6/).
REGIONAL
[ON], [OFF] Ограничение приема определенными
региональными программами, если
выбрано AF (поиск альтернативных
частот). (Доступно только при выборе
полосы FM.)
LOCAL
• Пункты меню, имеющие отношение к Bluetooth, в следующих таблицах недоступны
FM: [OFF], [LV1], [LV2], [LV3],
Ограничение настройки станции в
для MVH-180UI/180UBG/180UB/181UB.
[LV4]
соответствии с мощностью сигнала.
• Пункты меню, имеющие отношение к iPod, в следующих таблицах недоступны для
MW/LW: [OFF], [LV1], [LV2]
MVH-180UBG/180UB/181UB.
TA
• Пункты меню, относящиеся к APP, в следующих таблицах недоступны для MVH-
180UBG/180UB/181UB.
[ON], [OFF] Получение информации о текущем
трафике, если доступно. (Доступно
только при выборе полосы FM.)
Настройки FUNCTION
AF
Элементы меню отличаются в зависимости от источника.
[ON], [OFF] Перенастройка на другую частоту, на
которой вещается эта же станция.
(Доступно только при выборе полосы
FM.)
Элемент меню Описание
NEWS
[ON], [OFF] Прерывание выбранного источника
программами новостей. (Доступно
только при выборе полосы FM.)
SEEK
[MAN], [PCH] Назначение кнопок или для
поочередного поиска станций
(настройка вручную) или выбор станций
из списка предустановленных каналов.
SEL DEVICE
Подключение устройства Bluetooth в
списке.
S.RTRV
[1]: (Предназначено для
Улучшение качества сжатого аудио и
низких скоростей сжатия),
восстановление насыщенности звука.
[2]: (Предназначено для
Недоступно в следующих случаях:
высоких скоростей сжатия),
• если в качестве источника выбрано
[OFF]
USB и включена функция MIXTRAX.
• Воспроизводится файл FLAC. (Доступно
для MVH-180UI/180UBG/180UB/181UB)
AUDIO BOOK
[FASTER], [NORMAL],
Изменение скорости воспроизведения.
[SLOWER]
(Недоступно, если выбран параметр
[CTRL iPod] в режиме управления.)
PAUSE
Пауза или возобновление
воспроизведения.
PLAY
Начало воспроизведения.
18Ru
USB
iPod
iPod
Элемент меню Описание
STOP
Остановка воспроизведения.
Настройки AUDIO
Элемент меню Описание
FADER*1
Настройка баланса переднего и заднего
динамика.
BALANCE
Настройка баланса левого и правого
динамика.
EQ SETTING
[SUPER BASS], [POWERFUL],
Выберите или настройте кривую
[NATURAL], [VOCAL],
эквалайзера.
[CUSTOM1], [CUSTOM2],
[CUSTOM1] можно выбрать отдельно для
[FLAT]
каждого источника. Однако для любых
комбинаций, указанных ниже,
Выбор полосы и уровня
автоматически устанавливаются
эквалайзера для
одинаковые настройки.
дальнейшей настройки.
• USB, iPod, ANDROID и APP (iPhone)
Полоса эквалайзера:
• BT AUDIO, ANDROID и APP (Android)
[80HZ], [250HZ], [800HZ],
[CUSTOM2] является общей настройкой,
[2.5KHZ], [8KHZ]
используемой для всех источников.
Уровень эквалайзера: от
Вы можете также включить эквалайзер,
[+6] до [–6]
несколько раз нажимая на кнопку
(только для MVH-180UBG/
180UB/181UB).
LOUDNESS
[OFF], [LOW], [MID], [HI] Компенсация для четкого звучания при
низком уровне громкости.

19Ru
Русский
*2 Недоступно, если выбран параметр [REAR/REAR] в [SP-P/O MODE] в настройках
Элемент меню Описание
INITIAL (стр. 7).
SUB.W*2
*3 Недоступно, если выбран параметр [OFF] в [SUB.W].
[NOR], [REV], [OFF] Выбор фазы сабвуфера.
SUB.W CTRL*2*3
Настройки SYSTEM
Частота среза: [50HZ],
На выходе сабвуфера будут
Вы можете получить доступ к этим меню даже если устройство
[63HZ], [80HZ], [100HZ],
воспроизводиться только те частоты,
выключено.
[125HZ],
которые ниже указанного диапазона
[160HZ], [200HZ]
частот.
Элемент меню Описание
Уровень выходного
LANGUAGE
сигнала: от [–24] до [+6]
Крутизна
[ENG](Английский), [РУС]
Выбор языка для отображения
характеристики:
(Русский), [TUR](Турецкий)
текстовой информации с сжатого
[–12], [–24]
аудиофайла.
BASS BOOST
CLOCK SET
от [0] до [+6] Выбор усиления нижних звуковых
Настройка часов (стр. 6).
частот.
12H/24H
HPF SETTING
[12H], [24H] Выбор формата времени.
Частота среза: [OFF], [50HZ]
На динамики будут выводиться только
AUTO PI
, [63HZ], [80HZ], [100HZ],
частоты выше, чем установленные
[ON], [OFF] Поиск другой станции с такой же
[125HZ], [160HZ], [200HZ]
фильтром высоких частот (HPF).
программой даже во время вызова
Крутизна
предварительной настройки.
характеристики:
[–12], [–24]
AUX
SLA
[ON], [OFF] Выберите [ON] при подключении к
данному устройству вспомогательного
от [+4] до [–4] Настройка уровня громкости для
устройства.
каждого источника кроме FM.
Для любых комбинаций, указанных
USB AUTO
ниже, автоматически устанавливаются
[ON], [OFF] Выберите [ON] для автоматического
одинаковые настройки.
переключения на источник [USB], когда
• USB, iPod, ANDROID и APP (iPhone)
устройство USB/iPod подключено к
• BT AUDIO, ANDROID и APP (Android)
устройству.
Выберите [OFF], когда устройство USB/
*1 Недоступно, если выбран параметр [SUB.W/SUB.W] в [SP-P/O MODE] в настройках
INITIAL (стр. 7).
iPod подключается к устройству для
зарядки.

Элемент меню Описание
Элемент меню Описание
BT AUDIO
P. A PP AU TO ON
[ON], [OFF] Включение/отключение сигнала
[ON], [OFF]
Выберите [ON], чтобы автоматически
Bluetooth.
запустить приложение для автомобиля
при подключении устройства Android к
MUTE MODE (Доступно только для MVH-180UI)
устройству с помощью AOA. (Недоступно,
[MUTE], [20dB ATT], [10dB
Автоматическое отключение или
если выбран параметр [MEMORY] в
AT T]
приглушение звука при получении
[ANDROID WIRED].)
сигнала с оборудования с функцией
отключения звука.
* Режим [PW SAVE] отключается при отсоединении аккумуляторной батареи
автомобиля; при подсоединении батареи его потребуется включить снова. При
PW SAVE*
выключенном режиме [PW SAVE] возможно, что, в зависимости от метода
[ON], [OFF] Режим энергосбережения.
подключения, устройство будет потреблять энергию аккумулятора, если зажигание
При включении функции будет доступно
автомобиля не имеет положения ACC (аксессуар).
только включение источника.
BT MEM CLEAR
Настройки ILLUMINATION
[YES], [CANCEL] Удаление данных с устройства Bluetooth
(списка устройства, PIN-кода, журнала
Элемент меню Описание
вызовов, телефонного справочника,
DIM SETTING
предустановленных телефонных
номеров).
[SYNC CLOCK], [MANUAL] Изменение яркости дисплея.
[CLEARED] отображается при успешном
BRIGHTNESS
удалении данных.
от [1] до [10] Изменение яркости дисплея.
BT VERSION
Набор настроек зависит от того,
Отображение версии системы
включена ли функция [DIM SETTING].
устройства и модуля Bluetooth.
APP CONN.SET
Настройки MIXTRAX
[WIRED], [BLUETOOTH] Выбор необходимого способа
подключения в соответствии с
(Только для MVH-X380BT)
устройством.
Элемент меню Описание
ANDROID WIRED
SHORT MODE
[MEMORY], [APP CONTROL] Выбор необходимого способа
[1.0 MIN], [1.5 MIN], [2.0 MIN],
Выбор продолжительности
подключения для устройства Android.
[2.5 MIN], [3.0 MIN], [OFF]
воспроизведения.
20Ru
Оглавление
Топ 10 инструкций
Другие инструкции
Просмотр
Доступно к просмотру 204 страницы. Рекомендуем вам скачать файл инструкции, поскольку онлайн просмотр документа может сильно отличаться от оригинала.
-
DIGITAL MEDIA RECEIVER                                                                         English
RECEPTEUR NUMERIQUE MULTIMEDIA
RICEVITORE MULTIMEDIALE DIGITALE
RECEPTOR DIGITAL DE MEDIOS                                                                     Francais
DIGITALER MEDIA RECEIVER
DIGITALE MEDIA-RECEIVER
ЦИФРОВОЙ МЕДИАРЕСИВЕР                                                                          Italiano
MVH-X380BT                                                                                     Espanol
MVH-180UI                                                              Owner’s Manual
Mode d’emploi
Manuale d’istruzioni        Deutsch
MVH-180UBG                                                    Manual de instrucciones
Bedienungsanleitung
MVH-180UB                                                                  Handleiding         Nederlands
Руководство пользователя
MVH-181UB                                                                                      Русский
-
Declaration of Conformity with regard to the R&TTE Directive 1999/5/EC
Table of Contents
Before You Start ......................................................................... 3
Getting Started .......................................................................... 4
Radio ............................................................................................ 7  English:  ?? ??? ??????? Pioneer ??????? ??? MVH-
Hereby, Pioneer, declares that this MVH-X380BT is   X380BT ???-?????????? ???? ??? ?????????
USB/iPod/AUX ............................................................................ 8  in compliance with the essential requirements   ?????????? ??? ??? ?????? ???????? ?????????
and other relevant provisions of Directive 1999/5/  ??? ??????? 1999/5/??
EC.
Bluetooth................................................................................... 10  Suomi:  Italiano:
Con la presente Pioneer dichiara che questo MVH-
Pioneer vakuuttaa taten etta MVH-X380BT   X380BT e conforme ai requisiti essenziali ed alle
App Mode.................................................................................. 14  tyyppinen laite on direktiivin 1999/5/EY   altre disposizioni pertinenti stabilite dalla direttiva
oleellisten vaatimusten ja sita koskevien   1999/5/CE.
Using Pioneer ARC APP........................................................... 15  direktiivin muiden ehtojen mukainen.  Espanol:
Nederlands:              Por medio de la presente Pioneer declara que el
Settings...................................................................................... 16  Hierbij verklaart Pioneer dat het toestel MVH-  MVH-X380BT cumple con los requisitos esenciales
X380BT in overeenstemming is met de essentiele
y cualesquiera otras disposiciones aplicables o
exigibles de la Directiva 1999/5/CE
FUNCTION settings ...............................................................  16  eisen en de andere relevante bepalingen van   Portugues:
richtlijn 1999/5/EG
AUDIO settings.......................................................................  17  Francais:  Pioneer declara que este MVH-X380BT esta
Par la presente Pioneer declare que l’appareil   conforme com os requisitos essenciais e outras
SYSTEM settings ....................................................................  18  MVH-X380BT est conforme aux exigences   disposicoes da Directiva 1999/5/CE.
essentielles et aux autres dispositions pertinentes   Cestina:
ILLUMINATION settings........................................................  19  de la directive 1999/5/CE  Pioneer timto prohlasuje, ze tento MVH-X380BT je
Svenska:                 ve shode se zakladnimi pozadavky a dalsimi
MIXTRAX settings..................................................................  19  Harmed intygar Pioneer att denna MVH-X380BT   prislusnymi ustanove-nimi smernice 1999/5/ES
star I overens-stammelse med de vasentliga   Eesti:
Connections/Installation........................................................ 20  egenskapskrav och ovriga relevanta   Kaesolevaga kinnitab Pioneer seadme MVH-
bestammelser som framgar av direktiv 1999/5/EG.  X380BT vastavust direktiivi 1999/5/EU
Dansk:                   pohinouetele ja nimetatud direktiivist
Additional Information........................................................... 23  Undertegnede Pioneer erkl?rer herved, at   tulenevatele teistele asjakohastele satetele.
folgende udstyr MVH-X380BT overholder de   Magyar:
v?sentlige krav og ovrige relevante krav i direktiv   Alulirott, Pioneer nyilatkozom, hogy a MVH-
1999/5/EF               X380BT megfelel a vo-natkozo alapveto
Deutsch:                 kovetelmenyeknek es az 1999/5/EC iranyelv
Hiermit erklart Pioneer, dass sich dieses Gerat   egyeb eloirasainak.
MVH-X380BT in Ubereinstimmung mit den   Latviesu valoda:
About this manual:                              grundlegenden Anforde-rungen und den   Ar so Pioneer deklare, ka MVH-X380BT atbilst
anderen relevanten Vorschriften der Richtlinie   Direktivas 1999/5/EK butiskajam prasibam un
• In the following instructions, a USB memory or USB audio player are referred   1999/5/EG befindet". (BMWi)  citiem ar to saistitajiem noteikumiem.
to as “USB device”.                           ????????:
• In this manual, iPod and iPhone are referred to as “iPod”.
2 En
-
Lietuviu kalba:
Siuo Pioneer deklaruoja, kad sis MVH-X380BT      Before You Start
atitinka esminius reikalavimus ir kitas 1999/5/EB
Direktyvos nuostatas.
Malti:                                         Thank you for purchasing this PIONEER product
Hawnhekk, Pioneer jiddikjara li dan MVH-X380BT      To ensure proper use, please read through this manual before using this product. It is   English
jikkonforma mal-htigijiet essenzjali u ma     especially important that you read and observe WARNINGs and CAUTIONs in this manual.
provvedimenti ohrajn relevanti li hemm fid-
Dirrettiva 1999/5/EC                          Please keep the manual in a safe and accessible place for future reference.
Slovencina:
Pioneer tymto vyhlasuje, ze MVH-X380BT splna
zakladne poziadavky a vsetky prislusne
ustanovenia Smernice 1999/5/ES.
Slovenscina:
Pioneer izjavlja, da je ta MVH-X380BT v skladu z
bistvenimi zahtevami in ostalimi relevantnimi
dolocili direktive 1999/5/ES.
Romana:
Prin prezenta, Pioneer declara ca acest MVH-   If you want to dispose this product, do not mix it with general household waste. There is a
X380BT este in conformitate cu cerintele esentiale   separate collection system for used electronic products in accordance with legislation
si alte prevederi ale Directivei 1999/5/EU.
български:                                      that requires proper treatment, recovery and recycling.
С настоящето, Pioneer декларира, че този MVH-
X380BT отго-варя на основните изисквания и    Private households in the member states of the EU, in Switzerland and Norway may return
други съответни постановления на Директива    their used electronic products free of charge to designated collection facilities or to a
1999/5/EC.                                    retailer (if you purchase a similar new one).
Polski:                                        For countries not mentioned above, please contact your local authorities for the correct
Niniejszym Pioneer oswiadcza, ze MVH-X380BT   method of disposal.
jest zgodny z zasadniczymi wymogami oraz      By doing so you will ensure that your disposed product undergoes the necessary treatment,
pozostalymi stosownymi postanowieniami
Dyrektywy 1999/5/EC                           recovery and recycling and thus prevent potential negative effects on the environment and
Norsk:                                         human health.
Pioneer erkl?rer herved at utstyret MVH-X380BT
er i samsvar med de grunnleggende krav og         WARNING
ovrige relevante krav i direktiv 1999/5/EF.
Islenska:                                      •Do not attempt to install or service this product by yourself. Installation or servicing
Her me? lysir Pioneer yfir ?vi a? MVH-X380BT er i   of this product by persons without training and experience in electronic equipment
samr?mi vi? grunnkrofur og a?rar krofur, sem   and automotive accessories may be dangerous and could expose you to the risk of
ger?ar eru i tilskipun 1999/5/EC               electric shock, injury or other hazards.
Hrvatski:                                      •Do not attempt to operate the unit while driving. Make sure to pull off the road and park
Ovime tvrtka Pioneer izjavljuje da je ovaj MVH-
X380BT u skladu osnovnim zahtjevima i ostalim   your vehicle in a safe location before attempting to use the controls on the device.
odredbama Direktive 1999/5/EC.
Turkce:                                            CAUTION
Bu vesile ile, PIONEER, bu MVH-X380BT icin 1999/
5/EC Direktifinin esas sartlar? ve diger ilgili   •Do not allow this unit to come into contact with moisture and/or liquids. Electrical shock
hukumlerine uygunlugu beyan eder.              could result. Also, damage to this unit, smoke, and overheating could result from contact
with liquids.
•Always keep the volume low enough to hear outside sounds.
•The CarStereo-Pass is for use only in Germany.
En  3
- 1
- 2
- 3
- 4
- 204
-
Page 1: Pioneer MVH-180UB
[…]
-
Page 2: Pioneer MVH-180UB
[…]
-
Page 3: Pioneer MVH-180UB
[…]
-
Page 4: Pioneer MVH-180UB
[…]
-
Page 5: Pioneer MVH-180UB
[…]
-
Page 6: Pioneer MVH-180UB
[…]
-
Page 7: Pioneer MVH-180UB
[…]
-
Page 8: Pioneer MVH-180UB
[…]
-
Page 9: Pioneer MVH-180UB
[…]
-
Page 10: Pioneer MVH-180UB
[…]
-
Page 11: Pioneer MVH-180UB
[…]
-
Page 12: Pioneer MVH-180UB
[…]
-
Page 13: Pioneer MVH-180UB
[…]
-
Page 14: Pioneer MVH-180UB
[…]
-
Page 15: Pioneer MVH-180UB
[…]
-
Page 16: Pioneer MVH-180UB
[…]
-
Page 17: Pioneer MVH-180UB
[…]
-
Page 18: Pioneer MVH-180UB
[…]
-
Page 19: Pioneer MVH-180UB
[…]
-
Page 20: Pioneer MVH-180UB
[…]
-
Page 21: Pioneer MVH-180UB
[…]
-
Page 22: Pioneer MVH-180UB
[…]
-
Page 23: Pioneer MVH-180UB
[…]
-
Page 24: Pioneer MVH-180UB
[…]
-
Page 25: Pioneer MVH-180UB
[…]
-
Page 26: Pioneer MVH-180UB
[…]
-
Page 27: Pioneer MVH-180UB
[…]
-
Page 28: Pioneer MVH-180UB
[…]
-
Page 29: Pioneer MVH-180UB
[…]
-
Page 30: Pioneer MVH-180UB
[…]
-
Page 31: Pioneer MVH-180UB
[…]
-
Page 32: Pioneer MVH-180UB
[…]
-
Page 33: Pioneer MVH-180UB
[…]
-
Page 34: Pioneer MVH-180UB
[…]
-
Page 35: Pioneer MVH-180UB
[…]
-
Page 36: Pioneer MVH-180UB
[…]
-
Page 37: Pioneer MVH-180UB
[…]
-
Page 38: Pioneer MVH-180UB
[…]
-
Page 39: Pioneer MVH-180UB
[…]
-
Page 40: Pioneer MVH-180UB
[…]
-
Page 41: Pioneer MVH-180UB
[…]
-
Page 42: Pioneer MVH-180UB
[…]
-
Page 43: Pioneer MVH-180UB
[…]
-
Page 44: Pioneer MVH-180UB
[…]
-
Page 45: Pioneer MVH-180UB
[…]
-
Page 46: Pioneer MVH-180UB
[…]
-
Page 47: Pioneer MVH-180UB
[…]
-
Page 48: Pioneer MVH-180UB
[…]
-
Page 49: Pioneer MVH-180UB
[…]
-
Page 50: Pioneer MVH-180UB
[…]
-
Page 51: Pioneer MVH-180UB
[…]
-
Page 52: Pioneer MVH-180UB
[…]
-
Page 53: Pioneer MVH-180UB
[…]
-
Page 54: Pioneer MVH-180UB
[…]
-
Page 55: Pioneer MVH-180UB
[…]
-
Page 56: Pioneer MVH-180UB
[…]
-
Page 57: Pioneer MVH-180UB
[…]
-
Page 58: Pioneer MVH-180UB
[…]
-
Page 59: Pioneer MVH-180UB
[…]
-
Page 60: Pioneer MVH-180UB
[…]
-
Page 61: Pioneer MVH-180UB
[…]
-
Page 62: Pioneer MVH-180UB
[…]
-
Page 63: Pioneer MVH-180UB
[…]
-
Page 64: Pioneer MVH-180UB
[…]
-
Page 65: Pioneer MVH-180UB
[…]
-
Page 66: Pioneer MVH-180UB
[…]
-
Page 67: Pioneer MVH-180UB
[…]
-
Page 68: Pioneer MVH-180UB
[…]
-
Page 69: Pioneer MVH-180UB
[…]
-
Page 70: Pioneer MVH-180UB
[…]
-
Page 71: Pioneer MVH-180UB
[…]
-
Page 72: Pioneer MVH-180UB
[…]
-
Page 73: Pioneer MVH-180UB
[…]
-
Page 74: Pioneer MVH-180UB
[…]
-
Page 75: Pioneer MVH-180UB
[…]
-
Page 76: Pioneer MVH-180UB
[…]
-
Page 77: Pioneer MVH-180UB
[…]
-
Page 78: Pioneer MVH-180UB
[…]
-
Page 79: Pioneer MVH-180UB
[…]
-
Page 80: Pioneer MVH-180UB
[…]
-
Page 81: Pioneer MVH-180UB
[…]
-
Page 82: Pioneer MVH-180UB
[…]
-
Page 83: Pioneer MVH-180UB
[…]
-
Page 84: Pioneer MVH-180UB
[…]
-
Page 85: Pioneer MVH-180UB
[…]
-
Page 86: Pioneer MVH-180UB
[…]
-
Page 87: Pioneer MVH-180UB
[…]
-
Page 88: Pioneer MVH-180UB
[…]
-
Page 89: Pioneer MVH-180UB
[…]
-
Page 90: Pioneer MVH-180UB
[…]
-
Page 91: Pioneer MVH-180UB
[…]
-
Page 92: Pioneer MVH-180UB
[…]
-
Page 93: Pioneer MVH-180UB
[…]
-
Page 94: Pioneer MVH-180UB
[…]
-
Page 95: Pioneer MVH-180UB
[…]
-
Page 96: Pioneer MVH-180UB
[…]
-
Page 97: Pioneer MVH-180UB
[…]
-
Page 98: Pioneer MVH-180UB
[…]
-
Page 99: Pioneer MVH-180UB
[…]
-
Page 100: Pioneer MVH-180UB
[…]
-
Page 101: Pioneer MVH-180UB
[…]
-
Page 102: Pioneer MVH-180UB
[…]
-
Page 103: Pioneer MVH-180UB
[…]
-
Page 104: Pioneer MVH-180UB
[…]
-
Page 105: Pioneer MVH-180UB
[…]
-
Page 106: Pioneer MVH-180UB
[…]
-
Page 107: Pioneer MVH-180UB
[…]
-
Page 108: Pioneer MVH-180UB
[…]
-
Page 109: Pioneer MVH-180UB
[…]
-
Page 110: Pioneer MVH-180UB
[…]
-
Page 111: Pioneer MVH-180UB
[…]
-
Page 112: Pioneer MVH-180UB
[…]
-
Page 113: Pioneer MVH-180UB
[…]
-
Page 114: Pioneer MVH-180UB
[…]
-
Page 115: Pioneer MVH-180UB
[…]
-
Page 116: Pioneer MVH-180UB
[…]
-
Page 117: Pioneer MVH-180UB
[…]
-
Page 118: Pioneer MVH-180UB
[…]
-
Page 119: Pioneer MVH-180UB
[…]
-
Page 120: Pioneer MVH-180UB
[…]
-
Page 121: Pioneer MVH-180UB
[…]
-
Page 122: Pioneer MVH-180UB
[…]
-
Page 123: Pioneer MVH-180UB
[…]
-
Page 124: Pioneer MVH-180UB
[…]
-
Page 125: Pioneer MVH-180UB
[…]
-
Page 126: Pioneer MVH-180UB
[…]
-
Page 127: Pioneer MVH-180UB
[…]
-
Page 128: Pioneer MVH-180UB
[…]
-
Page 129: Pioneer MVH-180UB
[…]
-
Page 130: Pioneer MVH-180UB
[…]
-
Page 131: Pioneer MVH-180UB
[…]
-
Page 132: Pioneer MVH-180UB
[…]
-
Page 133: Pioneer MVH-180UB
[…]
-
Page 134: Pioneer MVH-180UB
[…]
-
Page 135: Pioneer MVH-180UB
[…]
-
Page 136: Pioneer MVH-180UB
[…]
-
Page 137: Pioneer MVH-180UB
[…]
-
Page 138: Pioneer MVH-180UB
[…]
-
Page 139: Pioneer MVH-180UB
[…]
-
Page 140: Pioneer MVH-180UB
[…]
-
Page 141: Pioneer MVH-180UB
[…]
-
Page 142: Pioneer MVH-180UB
[…]
-
Page 143: Pioneer MVH-180UB
[…]
-
Page 144: Pioneer MVH-180UB
[…]
-
Page 145: Pioneer MVH-180UB
[…]
-
Page 146: Pioneer MVH-180UB
[…]
-
Page 147: Pioneer MVH-180UB
[…]
-
Page 148: Pioneer MVH-180UB
[…]
-
Page 149: Pioneer MVH-180UB
[…]
-
Page 150: Pioneer MVH-180UB
[…]
-
Page 151: Pioneer MVH-180UB
[…]
-
Page 152: Pioneer MVH-180UB
[…]
-
Page 153: Pioneer MVH-180UB
[…]
-
Page 154: Pioneer MVH-180UB
[…]
-
Page 155: Pioneer MVH-180UB
[…]
-
Page 156: Pioneer MVH-180UB
[…]
-
Page 157: Pioneer MVH-180UB
[…]
-
Page 158: Pioneer MVH-180UB
[…]
-
Page 159: Pioneer MVH-180UB
[…]
-
Page 160: Pioneer MVH-180UB
[…]
-
Page 161: Pioneer MVH-180UB
[…]
-
Page 162: Pioneer MVH-180UB
[…]
-
Page 163: Pioneer MVH-180UB
[…]
-
Page 164: Pioneer MVH-180UB
[…]
-
Page 165: Pioneer MVH-180UB
[…]
-
Page 166: Pioneer MVH-180UB
[…]
-
Page 167: Pioneer MVH-180UB
[…]
-
Page 168: Pioneer MVH-180UB
[…]
-
Page 169: Pioneer MVH-180UB
[…]
-
Page 170: Pioneer MVH-180UB
[…]
-
Page 171: Pioneer MVH-180UB
[…]
-
Page 172: Pioneer MVH-180UB
[…]
-
Page 173: Pioneer MVH-180UB
[…]
-
Page 174: Pioneer MVH-180UB
[…]
-
Page 175: Pioneer MVH-180UB
[…]
-
Page 176: Pioneer MVH-180UB
[…]
-
Page 177: Pioneer MVH-180UB
[…]
-
Page 178: Pioneer MVH-180UB
[…]
-
Page 179: Pioneer MVH-180UB
[…]
-
Page 180: Pioneer MVH-180UB
[…]
-
Page 181: Pioneer MVH-180UB
[…]
-
Page 182: Pioneer MVH-180UB
[…]
-
Page 183: Pioneer MVH-180UB
[…]
-
Page 184: Pioneer MVH-180UB
[…]
-
Page 185: Pioneer MVH-180UB
[…]
-
Page 186: Pioneer MVH-180UB
[…]
-
Page 187: Pioneer MVH-180UB
[…]
-
Page 188: Pioneer MVH-180UB
[…]
-
Page 189: Pioneer MVH-180UB
[…]
-
Page 190: Pioneer MVH-180UB
[…]
-
Page 191: Pioneer MVH-180UB
[…]
-
Page 192: Pioneer MVH-180UB
[…]
-
Page 193: Pioneer MVH-180UB
[…]
-
Page 194: Pioneer MVH-180UB
[…]
-
Page 195: Pioneer MVH-180UB
[…]
-
Page 196: Pioneer MVH-180UB
[…]
-
Page 197: Pioneer MVH-180UB
[…]
-
Page 198: Pioneer MVH-180UB
[…]
-
Page 199: Pioneer MVH-180UB
[…]
-
Page 200: Pioneer MVH-180UB
[…]
-
Page 201: Pioneer MVH-180UB
[…]
-
Page 202: Pioneer MVH-180UB
[…]
-
Page 203: Pioneer MVH-180UB
[…]
-
Page 204: Pioneer MVH-180UB
[…]