
Поздравляем, Комплектация
Поздравляем!
Вы — владелец прекрасной жлектронной клавиатуры. Yamaha PSR-550 PortaTone
объединяет в себе наиболее современную технологию генератора тона с совершенной
цифровой
электроникой,
обеспечивает
превосходное
максимальное
удовольствие от исполнения. Большой графический дисплей и простой в использовании
интерфейс существенно упрощают использование этого современного инструмента. Для
извлечения максимальных возможностей из PSR-550 мы рекомендуем внимательно
ознакомиться с руководством и опробовать различные описанные возможности. Всегда
держите руководство под рукой для справки.
Комплектация
Пожалуйста, проверьте комплектацию PSR-550:
* Подставка для нот (с. 9)
* Дискета с данными для PSR-S50
руководство пользователя
(Обратитесь к разделам «Прилагающаяся дискета с
данными» на с, 59 и «MIDI на выходы ТО HOST»
Как пользоваться руководством
Как пользоваться руководством
Перед переходом к любой другой части руководства мы настоятельно
рекомендуем ознакомиться сначала с этим разделом. Он покажет вам как
подготовится к использованию вашего нового инструмент PSR-550.
Как только вы настроите PSR-550, вы должны прочитать этот раздел и изучить
страницы,
ознакомления
разнообразием
возможностей и функцией PSR-550,
Этот раздел знакомит с базовыми операциями PSR-550, такими как изменение
значений и настроек и показывает функцию помощи и прямого доступа.
стр. б
в нем перечислены все разделы, возможности, функции в той последовательности,
в которой они встречаются в руководстве.
стр. 10
Этот раздел содержит информацию относительно всех кнопок и регуляторов PSR-
550.
стр. 16
Этот раздел разъясняет индикацию дисплея PSR-550 и ее.. прочтение для
оптимизации функционирования PSR-550.
Перечисляет все функции PSR-550 в соответствии с их иерархической сзруктурой,
позволяя проследить взаимосвязь между различными функциями и быстро найти
нужную информацию.
стр. 123
Содержит различные важные списки, такие как список голосов, текущих сгипей,
эффектов, форматов данных MIDI и схему применения MIDI.
Если PSR-550 функционирует с отклонениями или возникли какие-то проблемы,
обратитесь к этому разделу перед посещением центра обслуживания компании
Yamaha. Наиболее типичные проблемы и их решения приведены здесь наряду с
простыми и понятными способами их решения.
стр. 130
Этот раздел содержит темы, функции, возможности и операции в алфавитном
порядке с указанием соответствующих страниц, что позволяет просто и быстро
получить необходимую информацию.
Иллюстрации и экраны дисплеев приводятся в руководстве только как примеры и могут отличаться от
фактически возникающих на инструменте.____________________________________________________ _________
Источник
Инструкция yamaha psr 520 русский
Уважаемые форумчане!
Мы стараемся сделать форум не только содержательным, но и удобным для поиска информации.
Давайте вместе будем содержать его в информационной чистоте и порядке!
Это не сложно, необходимо придерживаться лишь нескольких простых правил.
1. Перед тем, как что-то писать на форуме, сформулируйте свои мысли — посмотрите на заголовок темы, которую вы открыли, и если при этом ваши умозаключения не совпадают с названием темы — поищите наиболее подходящую тему или раздел.
2. Старайтесь группировать свои мысли в одно сообщение, не надо писать по одной фразе по принципу «лучше сорок раз по разу, чем один раз сорок раз». При этом, если у вас много мыслей или вопросов разного характера, не задавайте их в одной теме. Поищите для каждой отдельной мысли необходимую тему и напишите там. При этом НЕ ДУБЛИРУЙТЕ одно и тоже сообщение в разных темах!
3. Предварительно пролистайте форум хотя бы «О г л а в л е н и е», поищите там подходящие темы в разделах, и когда вы точно поймете, что подходящей темы или раздела на форуме нет, не бойтесь создать новую! При этом название темы должно бы лаконичным и отражать суть возникшего вопроса. При написании сообщений используйте пунктуацию, если с этим проблема — хотя бы разделяйте фразы абзацами. Пишите так, чтобы было понятно другим.
4. Если вы хотите выразить благодарность человеку, написав при этом что-то вроде «Спасибо тебе Вася за совет. сейчас буду изучать!», и не сообщая какой-либо полезной для других участников информации, воспользуйтесь кнопкой «СПАСИБО» внизу сообщения человека, который вам помог. Таким же образом вы можете выразить свою симпатию какому либо сообщению.
5. Итак, запоминаем некоторые важные моменты:
- – свои контактные данные и немного об себе — пишите в теме по контактам в «курилке»;
- – покупка-продажа частного характера и обсуждение интернет-торговли в своем разделе;
- – модели ваших синтезаторов и оборудования, их достоинства и недостатки обсуждаются в разделе «А какой синтезатор у вас. «;
- – ваше творчество, cover-версии и авторские произведения — в разделе «творчество»;
- – для стилей есть свой отдельный раздел:
- Спрашиваем или выкладываем стили — в темах по стилям (для разных синтезаторов есть свои темы). При этом первая часть (Part 1) темы по стилям для синтезаторов Yamaha уже содержит в себе богатый архив стилей и ссылок, откуда вы запросто можете пополнить свою коллекцию, спрашиваем интересующее вас во второй части темы (Part 2).
Для вопросов по созданию и редактированию стилей также существуют отдельные темы; - – аналогично МИДИ-файлы и их коллекции — в теме по миди;
- – пакеты расширений, тембра, мультипэды, ОТС, совместная работа синтезатора и компьютера, поиск нот, азы музыкальной грамоты и проч. — для этого всего также имеются свои разделы и соответствующие темы;
- – файлы небольшого объема (до 200 кб) со стилями и миди, полезные информационные картинки, а так же небольшие архивы, вы можете смело прикреплять к сообщениям (имя файла должно быть набрано латиницей). ;
- – более весящие файлы (более 200 кб) mp3, wav, архивы, коллекции, картинки не несущие полезной информации и уже имеющиеся в интернете, аудио-видео. размещаем на сторонних хранилищах (яндеск-диск, ютуб, savepic.su), а здесь даем на них ссылки;
- – подписывайте свои ссылки в сообщении, указав что вы там разместили;
- При этом вы должны понимать следующее — УДАЛИВ из своего хранилища ФАЙЛ — его ССЫЛКА становится БЕСПОЛЕЗНОЙ и скорее всего, ваше сообщение будет полностью нами тоже удалено со страниц форума! Ни в коем случае не стоит поступать подобным образом. Старайтесь сохранять материалы, ссылки на которые вы публикуете на форуме;
- – свои аватарки перед загрузкой предварительно делайте небольшими по размеру;
- – избегайте «оверквотинга» (избыточного цитирования) — не надо городить трехэтажные цитаты, со полными сообщениями и вложениями. Также не надо цитировать, если ваш ответ следует прямо за вопросом. Научитесь редактировать чужие цитаты, оставляя только краткую суть цитаты. Используйте цитирование только для связки сообщений, которые разорваны логически;
- – если вы хотите уточнить-спросить-предложить что-либо «не для всех», а кому-то лично, не стоит писать об этом в общей теме, вроде «обращайся ко мне» и давать свои контакты. Там где больше двух — говорят вслух. Или делитесь со всеми этой информацией или пишите в личные сообщения (ЛС) «тет-а-тет»;
- – также, если ваши мысли ушли далеко от тематики форума и вы хотите ими поделиться — «перекурите» в «курилке» 🙂 хоть Минздрав и предупреждает — наша «курилка» вашему здоровью не повредит! У нас также есть группа «вконтакте», интерактивный чат на чатоводе и скайп-группа — там у нас бывает многолюдно! 🙂
6. Не ленитесь поискать нужную вам информацию. Все зависит от вашего желания и стремления. Если у вас нет оных, вам уже никто не поможет! Перед тем как задать вопрос по работе вашего инструмента, изучите «Руководство пользователя» хотя бы первых три-пять страниц — это будет огромным прорывом к познанию неизведанного! 🙂 Используйте встроенный поиск на сайте!
7. Не ругайтесь между собой и нецензурно, не выясняйте на страницах форума отношений — в крайнем случае используйте для этого личные сообщения, да и. Лучше вообще не ругайтесь — мы не для этого здесь собрались. Да и нервные клетки не восстанавливаются! 🙂 Высказывайте свое мнение в вежливой форме! Не нужно «с пеной у рта» доказывать свою правоту, пытаясь унизить несогласного с вами оппонента, тем более, что все мы, по своей человеческой природе, склонны к заблуждениям. Администратор и Модератор — полноправные участники форума, и также могут иметь свою точку зрения на обсуждаемые на форуме темы!
8. Ознакомиться с некоторыми нюансами по работе с сайтом, внести какие-то предложения, пожелания, замечания, а так же, если вы вдруг обнаружили неточности или ошибки — пишите в «Раздел предложений» в соответствующие темы. Мы стараемся для вас и сделаем всё, что в наших силах. Так же, если есть необходимость что-то подправить в ваших сообщениях — обращайтесь к Администратору или Модератору. Злостные нарушители этих несложных «Правил» будут ограничены в действиях на форуме и сайте.
Уважайте себя и других, цените свое и чужое время,
оставайтесь логичными и человечными в своих поступках и действиях.
Будьте доброжелательны и вам ответят тем же!
Источник
×
Сейчас вы находитесь в городе Москва
Выберите город, в который Вы хотите осуществить доставку
Доставка в
город Москва
: 1 июля
Основные характеристики
Местонахождение
Lacey, US
Инструкция по эксплуатации Yamaha PSR-520: 102 страницы и защитные обложки! — купить с доставкой в Россию и СНГ
Инструкция по эксплуатации Yamaha PSR-520: 102 страницы и защитные обложки! можно купить в нашем интернет-магазине с доставкой из Lacey, US в Россию и страны СНГ по цене 4290 руб.
Все товары из
категории «Высшее образование и образование для взрослых» доставляются в соответствии с обозначенными правилами в разделе «Доставка».
Если у вас возникли вопросы по товару, оплате, гарантии или доставке до вашего населённого пункта — Закажите обратный звонок!.
Приобретая товар «Yamaha PSR-520 Instruction Manual: 102 Pages & Protective Covers!» через SHOPOZZ, вы можете быть уверенны в том, что получите качественный продукт, предназначенный для продажи в Lacey, US.
Смотрите нас на
Секретные промокоды и доступы к зарубежным распродажам в нашей полезной рассылке
Вы успешно подписаны на рассылку!
- Музыка
- Напитки
- Cancel
Други-музыканты, выручайте!
Позарез нужна мануала на русском языке для синтезатора Yamaha PSR-520.
Вот такого
С меня много пива/водки/чая в любом эквиваленте!
○ ○ ○ ○ ○ ○ ○ ○ ○ ○ ○ ○ ○ ○ ○ ○ Congratulations! ○ ○ ○ ○ ○ ○ ○ ○ ○ ○ ○ ○ ○ ○ ○ ○ ○ You are the proud owner of a fine electronic keyboard. The Yamaha PSR-520 PortaTone combines the most advanced AWM tone generation technology with state-of-the-art digital electronics and features to give you
○ ○ ○ ○ ○ ○ ○ ○ ○ ○ ○ ○ ○ ○ ○ ○ ○ ○ ○ ○ ○ ○ ○ ○ Contents Taking Care of Your PortaTone …………………………………………. 3 Panel Controls 4 The Music Stand ………………………………………………………………. 5 Setting Up 6 Power Supply
○ ○ ○ ○ ○ ○ ○ ○ ○ ○ ○ ○ Taking Care of Your PortaTone ○ ○ ○ ○ ○ ○ ○ ○ ○ ○ ○ Your PortaTone will give you years of playing pleasure if you follow the simple rules given below: ■ Location Do not expose the instrument to the following conditions to avoid deformation, discoloration, or more serious
Panel Controls ■ Top Panel Controls ……………………………………………………….. 1 POWER Switch ……………………………………… page 8 STYLE POP 01 8BEAT POP 02 8 UPBT POP 03 LIGHT POP 04 16BT POP 05 FOLKROCK 06 POP ROCK 07 DETROIT POP 08 UP POP SHFL 09 POP
Panel Controls 49 BIG BAND S 50 B B BALLAD 51 SWING 52 CHARLESTON CONTEMP JAZZ 53 COOL JAZZ 54 JAZZ BALLAD 55 JAZZ WALTZ 56 FUSION LATIN 57 FAST BOSSA 58 SLOW BOSSA 59 POP BOSSA 60 SALSA 61 SAMBA 1 75 TWO STEP 76 C WALTZ 1 77 C WALTZ 2 WORLD MUSIC 78 POLKA1 79 POLKA2 80 ESPAGNOLE 81 TARANTELLA 82
Setting Up This section contains information about setting up your PSR-520 and preparing to play. Be sure to go through this section carefully before using your PSR-520. Power Supply Your PSR-520 will run either from batteries or an optional power adaptor. Follow the instructions below according to
Setting Up Connections ■ The PHONES Jack ………………………………………………………………………………………………………………….. A standard pair of stereo headphones can be plugged in here for private practice or late-night playing. The internal stereo
The Demonstration Once you’ve set up your PSR-520, try listening to the pre-programmed demonstration songs — they’ll give you a good idea of what the PSR-520 can do! A total of 25 demo songs are provided — songs 01 through 17 have been created to demonstrate several of the instrument’s voices,
The Demonstration 3 Press the [DEMO] Button …………………………………………………………………………………………….. Press the [DEMO] button to start demo playback. The PSR-520 SONG function will automatically be selected and the number and name of the first demo
Basic Display Operation The PSR-520 LCD panel is a large multi-function type that simultaneously displays and provides access to a number of important parameters. Basic operation of the display as well as the CURSOR, FUNCTION, MODE, and NUMBER buttons, and the meaning of the icons which appear in
Basic Display Operation REGIST (Registration Memory) Indicates the currently selected REGISTRATION MEMORY number (page 45). REGIST The MODE button to the right of the display selects one of the PSR-520’s four operational modes: NORMAL, SPLIT, SINGLE, and FINGERED. The currently selected mode is
Playing the PSR-520 801 GrandPno VOICE STYLE SONG REGIST MEMORY REGIST MULTI PAD DUAL VOICE TEMPO RHYTHM 1 BASS 118 CHORD 1 10 MEASURE a01 PHRASE ACCOMP MELODY 1 1 MELODY 2 TRANSPOSE PAD ON / OFF SPLIT VOICE HARM/ECHO OVERALL REC VOICE 1 135102117130 REC REC 101101 NORMAL BEAT SPLIT OTS REPEAT
Playing the PSR-520 3 Select a Voice …………………………………………………………………………………………………………………………………. The PSR-520 has 149 voices that can be selected by using either the [–/ NO] and [+/YES] buttons, the number
Playing the PSR-520 ● The Data Dial This is undoubtedly the easiest way to select a voice. Simply rotate the dial clockwise to increment or counter-clockwise to decrement. 4 Play & Adjust Volume • The optimum octave settings (OVERALL function: octave = 0) are set to the keyboard for each voice
Playing the PSR-520 The Split Mode The SPLIT mode lets you play different voices with the left and right hands. You could, for example, play bass with the left hand while playing piano with the right. The right-hand voice is the keyboard voice you select in the normal way (page 12), and the left
Playing the PSR-520 CURSOR 1* – – * 1 2 3 4 5 6 7 8 9 0 –/NO +/ YES Function Description Split Voice The split voice can be changed as required while the number and name of the current split voice appear on the top line of the display. S.Volume Sets the volume of the split voice so you can create
Playing the PSR-520 Touch Response This function turns the touch response of the keyboard ON or OFF. Use the KEYBOARD [TOUCH RESPONSE] button to turn TOUCH RESPONSE ON or OFF as required. The touch-response icon will appear next to “TOUCH” in the display when TOUCH RESPONSE is turned ON. The actual
Playing the PSR-520 Changing the Dual Voice & Related Parameters 1 Select the DUAL VOICE Function …………………………………………………………………… Press the [FUNCTION] button to the left of the display as many times as necessary until the arrowhead in the display
Playing the PSR-520 Function Description Dual Voice The dual voice can be changed as required while the number and name of the current dual voice appear on the top line of the display. The PSR-520 has 143(voice number 01~141 and 150~151) dual voices. Voice numbers 150~151 exclusively can be used as
Playing the PSR-520 Harmony/Echo The harmony effect (01~10) automatically adds appropriate harmony notes to the melody line you play on the keyboard. The harmony effect is derived from the chords you play on the left hand parts. The echo effect (11~22) adds delay-based effects to the right hand
Playing the PSR-520 2 Select a Harmony/Echo Type ………………………………………………………………………………… Use the [–/NO] and [+/YES] buttons, the number buttons or the data dial to select one of the available harmony/echo types (listed below). • If the VOICE SET
Playing the PSR-520 Type Description 15: Tremolo1/8 This type creates 8th-note tremolos. 16: Tremolo1/12 This type creates 8th-note triplet tremolos. 17: Tremolo1/16 This type creates 16th-note tremolos. 18: Tremolo1/32 This type creates 32nd-note tremolos. 19: Trill1/12 This type creates 8th-note
Playing the PSR-520 Transposition This functions allow the overall pitch of the PSR-520 to be transposed up or down by a maximum of one octave in semitone increments. 1 Move the Cursor to the Transpose Value …………………………………………… Use the CURSOR buttons to select the
Digital Effects The PSR-520 provides a variety of Digital Effects-12 Reverb Effects, 9 Chorus Effects and 45 DSP Effects- which are specially tailored and make your performance perfect. 801 ≤Hall1 VOICE STYLE NORMAL BEAT REGIST MEMORY REGIST MULTI PAD DUAL VOICE TEMPO RHYTHM 1 BASS 118 CHORD 1 10
Digital Effects 2 Select the Reverb Type ……………………………………………………………………………………………………. Use the cursor [>] button to enter the Reverb Type function and then select one of the 13 reverb types using the [–/NO] and [+/YES] buttons,
Digital Effects Changing the Chorus Effect Selecting the Chorus Effect Type 1 Select the Chorus Type Function ……………………………………………………………………. Press the [FUNCTION] button to the left of the display as many times as necessary until the arrowhead in the
Digital Effects 3 Exit ………………………………………………………………………………………………………………………………………………………………….. Press the [VOICE] button or select a different function to exit from the DIGITAL EFFECT
Digital Effects Changing the DSP Effect Selecting the DSP Effect Type 1 Select the DSP Type Function ……………………………………………………………………………… Press the [FUNCTION] button to the left of the display as many times as necessary until the arrowhead in
Digital Effects Each DSP effect has its own variation. Press the [DSP VARIATION] button to ON to activate each variation. You can also enter the DSP Type function by pressing and holding the [DSP] button until the arrow jumps to the “DIGITAL EFFECT” position and the current DSP type name appears in
Using Auto Accompaniment The PSR-520 has 100 different accompaniment “styles” that can be used to provide fully-orchestrated or rhythm-only accompaniment. The PSR520’s sophisticated Auto Accompaniment system can provide automated bass and chord backing that is perfectly matched to the selected
Using Auto Accompaniment ● SINGLE FINGER ACCOMPANIMENT Single-finger accompaniment makes it simple to produce beautifully orchestrated accompaniment using major, seventh, minor and minorseventh chords by pressing a minimum number of keys on the left-hand section of the keyboard. The abbreviated
Using Auto Accompaniment ● NORMAL This is the default FINGERED accompaniment mode. The NORMAL mode lets you finger your own chords on the left-hand section of the keyboard (i.e. all keys to the left of and including the split-point key — normally 54) while the PSR-520 supplies appropriately
Using Auto Accompaniment ● BASS This is essentially the same as the NORMAL mode, above, except that the lowest note played in the auto accompaniment section of the keyboard will be played by the bass part rather than the chord root. C C on E C on G ● FULL In this mode the PSR-520 automatically
Using Auto Accompaniment 4 Select a Style ………………………………………………………………………………………………………………………………….. The PSR-520 has 100 styles that can be selected by using either the [–/ NO] and [+/YES] buttons, the number
Using Auto Accompaniment 6 Start the Accompaniment …………………………………………………………………………………………… There are several ways to start the accompaniment: ● Straight start: Press the [START/STOP] button. The rhythm will begin playing immediately
Using Auto Accompaniment Pressing the [SYNC-START/STOP] button alone causes a straight start to occur when the first note or chord is played. Press the [SYNCSTART/STOP] button and then the appropriate [INTRO] and [MAIN] buttons for a synchronized introduction start. The BEAT display will flash at
Using Auto Accompaniment 8 Select the MAIN A and B Sections as Required ………………………. The MAIN A and MAIN B sections can be selected at any time during playback by pressing the corresponding button. Whenever you press the MAIN [A] or [B] button during playback, the PSR-520 will
Using Auto Accompaniment Accompaniment Track Control The PSR-520 has eight accompaniment tracks — RHYTHM 1/2, BASS, CHORD 1/2, PAD, and PHRASE 1/2 — that you can control to modify the “orchestration” and therefore the overall sound of the accompaniment. When the power switch is turned ON or an
Using Auto Accompaniment ■ Large/Small Accompaniment ………………………………………………………………………………… The simplest form of accompaniment track control is provided by the [ACCOMP LARGE/SMALL] button. This button alternately turns the appropriate track (s)
Using Auto Accompaniment ■ Changing Accompaniment Track Voices ……………………………………………… You can change the voice used for each track by moving the cursor buttons to select the voice number of the target track (the voice number will flash), and then using the [–/NO] and
Using Auto Accompaniment Changing the Accompaniment Split Point 1 Select the Accompaniment Split Point Function ……………………. Press the [FUNCTION] button to the left of the display as many times as necessary until the arrowhead in the display appears next to “OVERALL” in the function
Using Auto Accompaniment One Touch Setting One Touch Setting lets you instantly select the appropriate panel settings suitable for the current style. Each style (100 styles) contains four variations. This means that you can freely use 400 different panel settings. The One Touch Setting feature
Registration Memory The PSR-520 Registration Memory feature can be used to memorize 128 complete control-panel setups (32 banks, 4 setups each) that you can recall whenever needed. 801 Bank1 VOICE STYLE NORMAL BEAT REGIST MEMORY REGIST MULTI PAD DUAL VOICE TEMPO RHYTHM 1 BASS 118 CHORD 1 10 MEASURE
Registration Memory 3 Register the Settings ………………………………………………………………………………………………………….. While holding the [MEMORIZE] button, press one of the REGISTRATION MEMORY buttons. Any data that was previously in the selected
Registration Memory Recall the Registered Panel Settings Simply select the appropriate bank as described above, then press the desired REGISTRATION MEMORY button at any time to recall the memorized settings. The corresponding Registration Memory number will appear above “REGIST” in the display, and
Song Recording The PSR-520 SONG TRACKS allows you to record and play back complete songs including chord sequences created using the Auto Accompaniment feature and a melody line you play on the keyboard. The SONG TRACKS include one ACCOMP track and two MELODY tracks. The PSR-520 can retain up to 8
Song Recording 1 Select a SONG Number ………………………………………………………………………………………………….. If necessary, use the [FUNCTION] buttons to select the SONG function, and then the [–/NO] and [+/YES] buttons, the number buttons or the data dial
Song Recording 4 Record ……………………………………………………………………………………………………………………………………………………….. Recording will begin as soon as you play a note on the keyboard or press the SONG [PLAY/STOP] button,
Song Recording Recording Accompaniment With or Without a Melody The SONG ACCOMP track records the following operations and data: • • • • • • • Section changes Style number* (includes cartridge styles) Accompaniment track changes* (track ON/OFF, voice number, volume) Accompaniment volume* Chord
Song Recording the ACCOMP/MELODY Track 3 Engage Record Ready Mode …………………………………………………………………………………………………………….. Press the SONG [REC] button. The [REC] indicator will flash, and “REC” will appear in the ACCOMP and MELODY
Song Recording Play the required chords in the Auto Accompaniment section of the keyboard. If you’ve also selected the MELODY track to be recorded, play the melody on the right-hand section of the keyboard. The MEASURE number on the display will increment as recording progresses. MEASURE 5 Stop
Song Recording Accompaniment and Melody Playback 1 Select a SONG Number ………………………………………………………………………………………………….. If necessary, use the [FUNCTION] buttons to select the SONG function, and then the [–/NO] and [+/YES] buttons,
Song Recording Play from a Specified Measure You can start SONG playback from any specified measure, as long as the specified measure is within the range of measures that has already been recorded: 1 Select the MEASURE Parameter
Song Recording ■ Voice & Volume Rewrite You can rewrite the last recorded voice change in any individual track during playback by using the cursor buttons to select the voice number of the target track (the voice number will flash), and then using the number buttons, the [–/NO] and [+/YES] buttons
The Multi Pads The PSR-520 MULTI PADS can be used to play 84 short pre-recorded rhythmic and melodic sequences, that can be used to add impact and variety to your keyboard performances. Some of the pad phrases simply play back as programmed, while others are “chord match” types which are
The Multi Pads 2 Select a Multi Pad Kit Number …………………………………………………………………………….. Use the [–/NO] and [+/YES] buttons, the number buttons or the data dial to select one of the 21 available multi pad kits. 3 Play the Multi Pad 7 8 9 0 –/NO +/ YES
The Multi Pads Recording the MULTI PADS The MULTI PADS record the following data: • • • • • • • • • • • • • • • Note ON/OFF Velocity Voice number Octave Pan Dual voice ON/OFF, Dual voice (voice number, volume, octave, reverb level, chorus level, pan) Keyboard volume* Reverb Level Chorus Level
The Multi Pads 3 Select a Voice and Other Parameters ……………………………………………………….. Select a voice and related parameters you want to record on the MULTI PADS. You might also want to set a tempo that will be easy to record at. If you select a pitched voice to
The Multi Pads 7 Play the Multi Pads ………………………………………………………………………………………………………………… Tap any of the MULTI PADS. Your recorded data will be played in exactly the same way as the preset data. ● Enter a New Name for the
Using Music Cartridges The PSR-520 features a cartridge slot which accepts pre-programmed Yamaha Music Cartridges containing style, song and/or registration data. One sample Music Cartridge is supplied with the PSR-520. Others are available from your Yamaha dealer. 801 YESTERDY VOICE STYLE SONG
Using Music Cartridges Cartridge Accompaniment Styles The Music Cartridge supplied with the PSR-520 provides an extra 8 accompaniment styles that can be used in the same way as the internal accompaniment styles. Selecting Cartridge Styles 1 Select the Style Function
Using Music Cartridges Cartridge Songs Using Yamaha Music Cartridges (the one supplied with the PSR-520 includes 8 songs, others are available from your Yamaha dealer), the PSR-520 will let you enjoy listening to automated performances, or function as your “private music tutor,” allowing you to
Using Music Cartridges Cartridge Registration Presets The Music Cartridge supplied with the PSR-520 provides 8 banks of preset registration settings (8 banks x 4 registration memories = 32 total) that provide a number of useful registration setups (refer to page 43 for details on the registration
Practice Features The PSR-520 includes two features that can be a great aid in learning to play and practicing on the keyboard. __r MinusMod VOICE STYLE SONG REGIST MEMORY REGIST MULTI PAD DUAL VOICE TEMPO RHYTHM 1 BASS 118 CHORD 1 10 MEASURE a01 PHRASE ACCOMP MELODY 1 1 MELODY 2 TRANSPOSE PAD ON /
Practice Features VOICE STYLE FUNCTION CURSOR __r MinusMod SONG REGIST MEMORY MULTI PAD DUAL VOICE SPLIT VOICE HARM/ECHO OVERALL DIGITAL EFFECT Mode Part Turned Off __r L__ L_r Right hand. 7 8 9 0 –/NO +/YES Left hand. Left and right hands. Repeat Play This function allows you to specify any
Overall Functions Some of the functions in the OVERALL function group have already been described in appropriate sections of this manual. Others will be introduced for the first time in this section. Refer to the chart below for the page numbers on which each function is described. The chart also
Overall Functions To access an OVERALL function press either of the [FUNCTION] buttons to the left of the display as many times as necessary until the arrowhead in the display appears next to “OVERALL” in the function list to the left of the display. Then use the cursor [▲] and [▼] buttons to
Overall Functions ■ Reverb Level ……………………………………………………………………………………………………………………………………. Sets the reverb send level for the voice selected via the VOICE function. The reverb send level determines the
Overall Functions ■ Voice Set ………………………………………………………………………………………………………………………………………………… The VOICE SET feature brings out the best in each individual voice by automatically setting a range of
Overall Functions ■ Minus-one Right/Left-hand Channel ………………………………………………………….. You can practice the specific part (in the Minus One mode) by selecting the demo/cartridge song you want to practice and by assigning the appropriate channel to the desired
Overall Functions MIDI Functions MIDI, the Musical Instrument Digital Interface, is a world-standard communication interface that allows MIDI-compatible musical instruments and equipment to share musical information and control one another. This makes it possible to create “systems” of MIDI
Overall Functions The PSR-520 is capable of receiving the same MIDI data, so a second MIDI keyboard connected to the PSR-520 MIDI IN connector can be used to remotely play the PSR-520 and select voices as required. PSR-520 MIDI IN MIDI OUT MIDI Keyboard ● MIDI Sequence Recording Although the
Overall Functions ■ Keyboard Out ………………………………………………………………………………………………………………………………….. Determines whether keyboard data will or will not be transmitted via the MIDI OUT connector. Keyboard data is
Overall Functions ■ Local Control …………………………………………………………………………………………………………………………………… “Local Control” refers to the fact that, normally, the PSR-520 keyboard controls the internal tone generator,
Overall Functions ■ Bulk Data Send …………………………………………………………………………………………………………………………….. This function causes the contents of the registration, song and multi pad data to be transmitted via the MIDI OUT
Appendix: PSR-520 Function Tree FUNCTION Display VOICE Description GrandPno Selecting Voices …………………………………………………………….. page 12 (Voice Name) STYLE 8BeatPop Selecting Accompaniment Styles ……………………………………… page 33 (Style Name)
Appendix: PSR-520 Function Tree Kybd Vol Changing Keyboard volume …………………………………………………………. page 67 Octave Changing Octave (VOICE function voice and dual voice) …………………. page 67 RevLevel Changing Reverb Send Level (VOICE function voice)
Appendix: About Digital Effect ■ Digital Effect Configuration The PSR-520 features three types of digital effectors: Reverb, Chorus and DSP. Reverb and Chorus effectors are exclusively used for enhancing and varying their respective effect types. On the contrary the DSP effector can be used to
Appendix: About Digital Effect The Digital Effect List No. Effect Type Features REVERB 01~04 Hall1~4 System Concert hall reverb. 05~08 Room1~4 System Small room reverb. 09, 10 Stage1, 2 System Reverb for solo instruments. 11, 12 Plate1, 2 System Simulated steel plate reverb. 13 OFF — No effect.
Appendix: Troubleshooting Something not working as it should? In many cases what appears to be a malfunction can be traced to a simple error that can be remedied immediately. Before assuming that your PSR-520 is faulty, please check the following points. PROBLEM The speakers produce a “pop” sound
Appendix: Troubleshooting / Data Backup & Initialization PROBLEM POSSIBLE CAUSE/SOLUTION The reverb and chorus types can not be changed by changing the registration memory number. ACCOMP FREEZE function is turned ON. The reverb and chorus types are memoried as accompaniment parameter. Press the
Index A AC power adaptor …………………………….. 6 Accomp large/small …………………………. 39 Accomp out (MIDI transmission) ……….. 73 Accompaniment split point ……………….. 41 Accompaniment track (song) ……………. 49 Accompaniment volume
Voice List Panel Voice List MIDI Voice Bank Select Program Number MSB LSB Number Voice Name Number of Notes Used MIDI Voice Bank Select Program Number MSB LSB Number Piano 0 0 0 0 0 0 0 0 0 0 0 0 0 0 0 0 0 0 0 0 0 0 0 0 0 0 0 1 2 3 4 5 6 7 8 9 10 11 12 Grand Piano Bright Piano Honky-tonk Piano
Voice List MIDI Voice Bank Select Program Number MSB LSB Number Voice Name Number of Notes Used MIDI Voice Bank Select Program Number MSB LSB Number Brass 86 87 88 89 90 91 92 93 94 95 96 97 98 0 0 0 0 0 0 0 0 0 0 0 0 0 0 0 0 0 0 0 0 0 0 0 0 0 0 85 86 87 88 89 90 91 92 93 94 95 96 97 99 100 101 102
Voice List GM Voice List MIDI Voice Program Number Number 01 02 03 04 05 06 07 08 09 10 11 12 13 14 15 16 17 18 19 20 21 22 23 24 25 26 27 28 29 30 31 32 33 34 35 36 37 38 39 40 41 42 43 44 Number MIDI Voice of Notes Program Number Used Number Piano 45 44 0 Acoustic Grand Piano 1 46 45 1 Bright
Percussion Kit List * “<——” indicates the content is the same as that of Standard Kit. * The number in parentheses ( ) after the percussion kit name is the MIDI program number. * The corresponding MIDI note numbers for the notes listed in the chart below are actually one octave lower. For example,
Percussion Kit List Note# 25 26 27 28 29 30 31 32 33 34 35 36 37 38 39 40 41 42 43 44 45 46 47 48 49 50 51 52 53 54 55 56 57 58 59 60 61 62 63 64 65 66 67 68 69 70 71 72 73 74 75 76 77 78 79 80 81 82 83 84 85 86 87 88 89 90 91 92 93 94 95 96 Note 146: Analog Kit (25) 147: Jazz Kit (32) 148: Brush
MIDI Implementation Chart [Portable Keyboard] Model: PSR-520 Function Transmitted Default Changed 1~16 CH 1~16 CH 1~16 CH (*1) 1~16 CH (*1) Mode Default Messages Altered Mode 3 X ***************** (*1) X X : True voice 0~127 ***************** 0~127 0~127 Velocity Note on Note off O 9nH, v=1~127 X
MIDI Implementation Chart *1 PSR-520 ordinarily functions as 16 MIDI channel multi-timbral tone generator controlled by MIDI reception data. Panel voices and the other panel settings are not affected by the MIDI message, excepting the followings: MIDI Master Tuning System Exclusive Message for
MIDI Implementation Chart *10 Exclusive The following system exclusive parameters are supported. <GM system ON> F0H, 7EH, 7FH, 09H, 01H, F7H All parameters except MIDI master Tuning and Dsp setting are reset to their default values. Remote Channel setting is canceled. This message requires
MIDI Data Format <Table-1> Parameter Change SYSTEM Address Size (H) (H) 00 00 00 4 01 02 03 Data (H) 0000 — 07FF Parameter Description MASTER TUNE -102.4 — +102.3[cent] 1st bit3-0 m bit15-12 2nd bit3-0 m bit11-8 3rd bit3-0 m bit7-4 4th bit3-0 m bit3-0 0 — 127 04 1 00 — 7F MASTER VOLUME 06 7D 1 1 28
MIDI Data Format Address (H) Size (H) 4A 2 4C 2 4E 2 50 2 52 2 54 2 56 57 58 59 5A 5B 1 1 1 1 1 1 Data (H) 00-7F 00-7F 00-7F 00-7F 00-7F 00-7F 00-7F 00-7F 00-7F 00-7F 00-7F 00-7F 00-7F 01-7F 00-7F 00-7F 00-01 00-01 02 01 70 71 72 73 74 75 1 1 1 1 1 1 00-7F 00-7F 00-7F 00-7F 00-7F 00-7F Parameter
MIDI Data Format <Table-2> Effect map The following types in the boxes can be controlled by the PSR-520 settings. The numbers in the brackets are PSR-520 panel effect numbers. The blank indicates the content is the same as that of 00H. REVERB TYPE LSB MSB 00H 01H 02H 03H 04H 05H : 7FH 00H NO EFFECT
MIDI Data Format <Table-3> Effect Parameter List Only the following parameter numbers are effective. Parameter values consists of 2-bytes. Enter 00H for MSB and appropriate value for LSB. * Parameter number 10 Dry/Wet is effective only when Variation connection is insertion. TYPE MSB(H) 01 02 03 04
MIDI Data Format TYPE MSB(H) 46 47 48 49 4A 4B Type TREMOLO AUTO PAN PHASER DISTORTION OVERDRIVE AMP SIMULATOR Parameter Number 1 2 3 6 7 8 9 14 15 Parameter Value Description LFO Frequency AM Depth PM Depth EQ Low Frequency EQ Low Gain EQ High Frequency EQ High Gain LFO Phase Difference Input Mode
Specifications Keyboards: 61 standard-size keys (C1~C6) with touch response. Display: Large multi-function LCD display Setup: Power: ON/OFF Master Volume: MIN-MAX Control & Ten Keys: CURSOR▲▼< >, FUNCTION▲▼, MODE▼, [0]~[9], [+/YES], [–/NO], Data dial Cartridge Slot Demo: Voice Demo:17 songs Style
Index A Fingered (mode) …………………………….. Fingering mode ………………………………. Freeze (registration memory) ……………. Full (fingered) …………………………………. Function ………………………………………… 30 31 45 33 10 Harmony
SPECIAL MESSAGE SECTION This product utilizes batteries or an external power supply (adapter). DO NOT connect this product to any power supply or adapter other than one described in the manual, on the name plate, or specifically recommended by Yamaha. This product should be used only with the
Limited Warranty 90 DAYS LABOR 1 YEAR PARTS Yamaha Corporation of America, hereafter referred to as Yamaha, warrants to the original consumer of a product included in the categories listed below, that the product will be free of defects in materials and/or workmanship for the periods indicated.
Address List
M.D.G., EMI Division © 1995 Yamaha Corporation VT95500 506POCP5.3-01A0 Printed in Japan

Congratulations!
○○○○○○○○○○○○○○○○○○○○○○○○○○○○○○○○○
You are the proud owner of a fine electronic keyboard. The Yamaha PSR-520 PortaTone
combines the most advanced AWM tone generation technology with state-of-the-art digital
electronics and features to give you stunning sound quality with maximum musical enjoyment.
A new large graphic display and easy-to-use interface also greatly enhance the operability of
this advanced instrument.
In order to make the most of your PortaTone’s features and extensive performance
potential, we urge you to read the manual thoroughly while trying out the various features
described. Keep the manual in a safe place for later reference.
Important Features
● 141 outstanding voices with eight percussion kits.
● A Voice Set function automatically selects appropriate voice parameters whenever a v oice
is selected.
● 100 accompaniment styles, each with independent intro, main A and B , 4 fill-ins, and ending
sections.
● Advanced auto-accompaniment technology gives you fully-orchestrated accompaniment
to back up what you play on the keyboard.
● Large multi-function LCD display panel makes it easy to select and edit parameters.
● One Touch Setting feature instantly pro vides you with four types of registration settings , all
of which match to the selected accompaniment style.
● Digital Effects — Re verb , Chorus and DSP, let y ou freely create a variety of diff erent sonic
environments.
● Minus One, and Repeat functions are ideal for learning new songs and polishing your
keyboard technique.
● Song recording feature lets you record two melody tracks with an accompaniment track.
○○○○○○○○○○○○○○○○○○○○○○○○○○○○○○
● With the Multi Pads, you can play and record a number of short rhythmic and melodic
sequences, to add a spice to your performance.
● Registration Memory saves 128 your favorite panel settings for instant recall when needed.
● Optional Yamaha Music Car tr idges can be plugged in for enjoyable automated perform-
ance, keyboard practice, and extra accompaniment styles.
● MIDI compatibility and a range of MIDI functions make the PSR-520 useful in a range of
advanced MIDI music systems.
● Built-in amplifier and speaker system delivers top-quality sound without the need for
external equipment.
○○○○○○○○○○○○○○○○○○○○○○○○○○○○○○○○○○○○○○○○○○○○○○○○○○○○○○○○○○○○○○○○○
1
○○○○○○○○○○○○○○○○○○○○○○○○
Contents
○○○○○○○○○○○○○○○○○○○○○○○○○○
Taking Care of Your PortaTone …………………………………………. 3
Panel Controls 4
The Music Stand ………………………………………………………………. 5
Setting Up 6
Power Supply …………………………………………………………………… 6
■
Using An Optional AC Power Adaptor …………………………….6
■
Using Batteries …………………………………………………………… 6
Connections …………………………………………………………………….. 7
■
The PHONES Jack ………………………………………………………7
■
SUSTAIN Jack……………………………………………………………. 7
■
AUX OUT R and L+R/L Jack ………………………………………… 7
■
MIDI IN and OUT Connectors ………………………………………. 7
The Demonstration 8
Basic Display Operation 10
Playing the PSR-520 12
Selecting & Playing Voices ……………………………………………… 12
■
Keyboard Percussion ………………………………………………… 14
The Split Mode ……………………………………………………………….. 15
Changing the Split Voice & Related Parameters ………………. 15
Touch Response …………………………………………………………….. 17
Dual Voice………………………………………………………………………. 17
Changing the Dual Voice & Related Parameters………………. 18
Harmony/Echo………………………………………………………………… 20
Selecting a Harmony/Echo Type ……………………………………. 20
Sustain …………………………………………………………………………… 22
Transposition …………………………………………………………………. 23
Pitch Bend ……………………………………………………………………… 23
Digital Effects 24
Using the Digital Effects………………………………………………….. 24
Changing the Reverb Effect…………………………………………….. 24
Selecting the Reverb Effect Type …………………………………… 24
Setting the Reverb Return Level…………………………………….. 25
Changing the Chorus Effect ……………………………………………. 26
Selecting the Chorus Effect Type …………………………………… 26
Setting the Chorus Return Level…………………………………….. 27
Changing the DSP Effect…………………………………………………. 28
Selecting the DSP Effect Type ………………………………………. 28
Setting the DSP Return Level ………………………………………… 29
Using Auto Accompaniment 30
■
The Stop Accompaniment Function …………………………….. 37
Accompaniment Track Control………………………………………… 38
■
Large/Small Accompaniment………………………………………. 39
■
Muting Individual Tracks ……………………………………………..39
■
Changing Accompaniment Track Voices………………………. 40
■
Adjusting Accompaniment Track Volume ………………………40
Changing the Accompaniment Split Point ……………………….. 41
One Touch Setting ………………………………………………………….. 42
Registration Memory 43
Registering the Panel Settings ………………………………………… 43
Recall the Registered Panel Settings……………………………….. 45
The Accomp Freeze Function ………………………………………….. 45
Song Recording 46
Recording a Melody Track ………………………………………………. 46
Recording Accompaniment With or Without a Melody
………….. 49
Accompaniment and Melody Playback…………………………….. 52
Play from a Specified Measure ………………………………………. 53
■
Voice & Volume Rewrite …………………………………………….. 54
■
Clearing the SONG TRACKS ……………………………………… 54
The Multi Pads 55
Playing the MULTI PADS …………………………………………………. 55
Recording the MULTI PADS…………………………………………….. 57
Using Music Cartridges 60
■
Inserting a Music Cartridge…………………………………………. 60
■
Music Cartridge Handling Precautions …………………………. 60
Cartridge Accompaniment Styles ……………………………………. 61
Selecting Cartridge Styles …………………………………………….. 61
Cartridge Songs ……………………………………………………………… 62
Cartridge Song Playback ………………………………………………. 62
Cartridge Registration Presets ………………………………………… 63
Selecting Cartridge Registration …………………………………….. 63
Practice Features 64
The Minus One Mode ………………………………………………………. 64
■
Specifying the Parts To Be Turned On or Off ………………… 64
Repeat Play…………………………………………………………………….. 65
Overall Functions 66
General Functions ………………………………………………………….. 67
■
Keyboard Volume ……………………………………………………… 67
■
Octave …………………………………………………………………….. 67
■
Reverb Level ……………………………………………………………. 68
■
Chorus Level ……………………………………………………………. 68
■
DSP Level………………………………………………………………… 68
■
Pan …………………………………………………………………………. 68
■
Voice Set …………………………………………………………………. 69
■
Accompaniment Volume…………………………………………….. 69
■
Touch Sensitivity ………………………………………………………. 69
■
Minus-one Right/Left-hand Channel …………………………….. 70
■
Pitch Bend Range……………………………………………………… 70
■
Metronome ………………………………………………………………. 70
■
Tuning……………………………………………………………………… 70
MIDI Functions ……………………………………………………………….. 71
■
Remote Channel……………………………………………………….. 72
■
Keyboard Out …………………………………………………………… 73
■
Song Out …………………………………………………………………. 73
■
Accompaniment Out ………………………………………………….. 73
■
Local Control ……………………………………………………………. 74
■
External Clock ………………………………………………………….. 74
■
Initial Data Send ……………………………………………………….. 74
■
Bulk Data Send…………………………………………………………. 75
■
Receiving Bulk Data ………………………………………………….. 75
Appendix
PSR-520 Function Tree ………………………………………………… 76
About Digital Effect ………………………………………………………. 78
Troubleshooting …………………………………………………………… 80
Data Backup & Initialization …………………………………………… 81
■
Data Initialization ………………………………………………………. 81
Index………………………………………………………………………………. 82
Specifications………………………………………………………………. 83
Voice List ……………………………………………………………………. 84
Percussion Kit List ……………………………………………………….. 88
MIDI Implementation Chart ……………………………………………. 90
MIDI Data Format ………………………………………………………… 93
■
GM System Level 1 …………………………………………………… 97
○○○○○○○○○○○○○○○○○○○○○○○○○○○○○○○○○○○○○○○○○○○○○○○○○○○○○○○○○○○○○○○○○
2
○○○○○○○○○○○○ ○○○○○○○○○○○
Your PortaTone will give you years of playing pleasure if you follow the simple rules given below:
Taking Care of Your PortaTone
■ Location
Do not expose the instrument to the following
conditions to avoid deformation, discoloration, or
more serious damage.
● Direct sunlight (e.g. near a window).
● High temperatures (e.g. near a heat source, out-
side, or in a car during the daytime).
● Excessive humidity.
● Excessive dust.
● Strong vibration.
■ Power Supply
● Turn the power switch OFF when the instrument
is not in use.
● An AC adaptor, if used (the PSR-520 runs from
either batteries or an optional AC adaptor),
should be unplugged from the AC outlet if the
instrument is not to be used for an extended pe-
riod of time.
● Unplug the AC adaptor during electric storms.
● Avoid plugging the AC adaptor into the same AC
outlet as appliances with high power consump-
tion, such as electric heaters or ovens. Also avoid
using multi-plug adaptors since these can result
in reduced sound quality, operation errors, and
possibly damage.
■ Turn Power OFF When Making
Connections
● To avoid damage to the instrument and other
devices to which it is connected, turn the power
switches of all related devices OFF prior to con-
necting or disconnecting MIDI cables.
■ Handling and Transport
● Disconnect all cables before moving the instru-
ment.
● Physical shocks caused by dropping, bumping,
or placing heavy objects on the instrument can
result in scratches and more serious damage.
■ Cleaning
● Clean the cabinet and panel with a dry soft cloth.
● A slightly damp cloth may be used to remove
stubborn grime and dirt.
● Never use cleaners such as alcohol or thinner.
● Avoid placing vinyl objects on top of the instru-
ment (vinyl can stick to and discolor the surface).
■ Electrical Interference
● This instrument contains digital circuitry and
may cause interference if placed too close to
radio or television receivers. If this occurs, move
the instrument further away from the affected
equipment.
■ Data Backup
● Internal data (registration memory, user song and
user pad data) will be retained in memory even if
the power switch is turned OFF as long as an AC
power adaptor is connected or batteries are installed.
■ Service and Modification
● The PSR-520 contains no user serviceable parts.
Opening it or tampering with it in anyway can
lead to irreparable damage and possibly electric
shock. Refer all servicing to qualified YAMAHA
personnel.
● Never apply excessive force to the controls, con-
nectors or other parts of the instrument.
● Always unplug cables by gripping the plug
firmly, not by pulling on the cable.
YAMAHA is not responsible for damage caused by improper handling or operation.
○○○○○○○○○○○○○○○○○○○○○○○○○○○○○○○○○○○○○○○○○○○○○○○○○○○○○○○○○○○○○○○○○
3
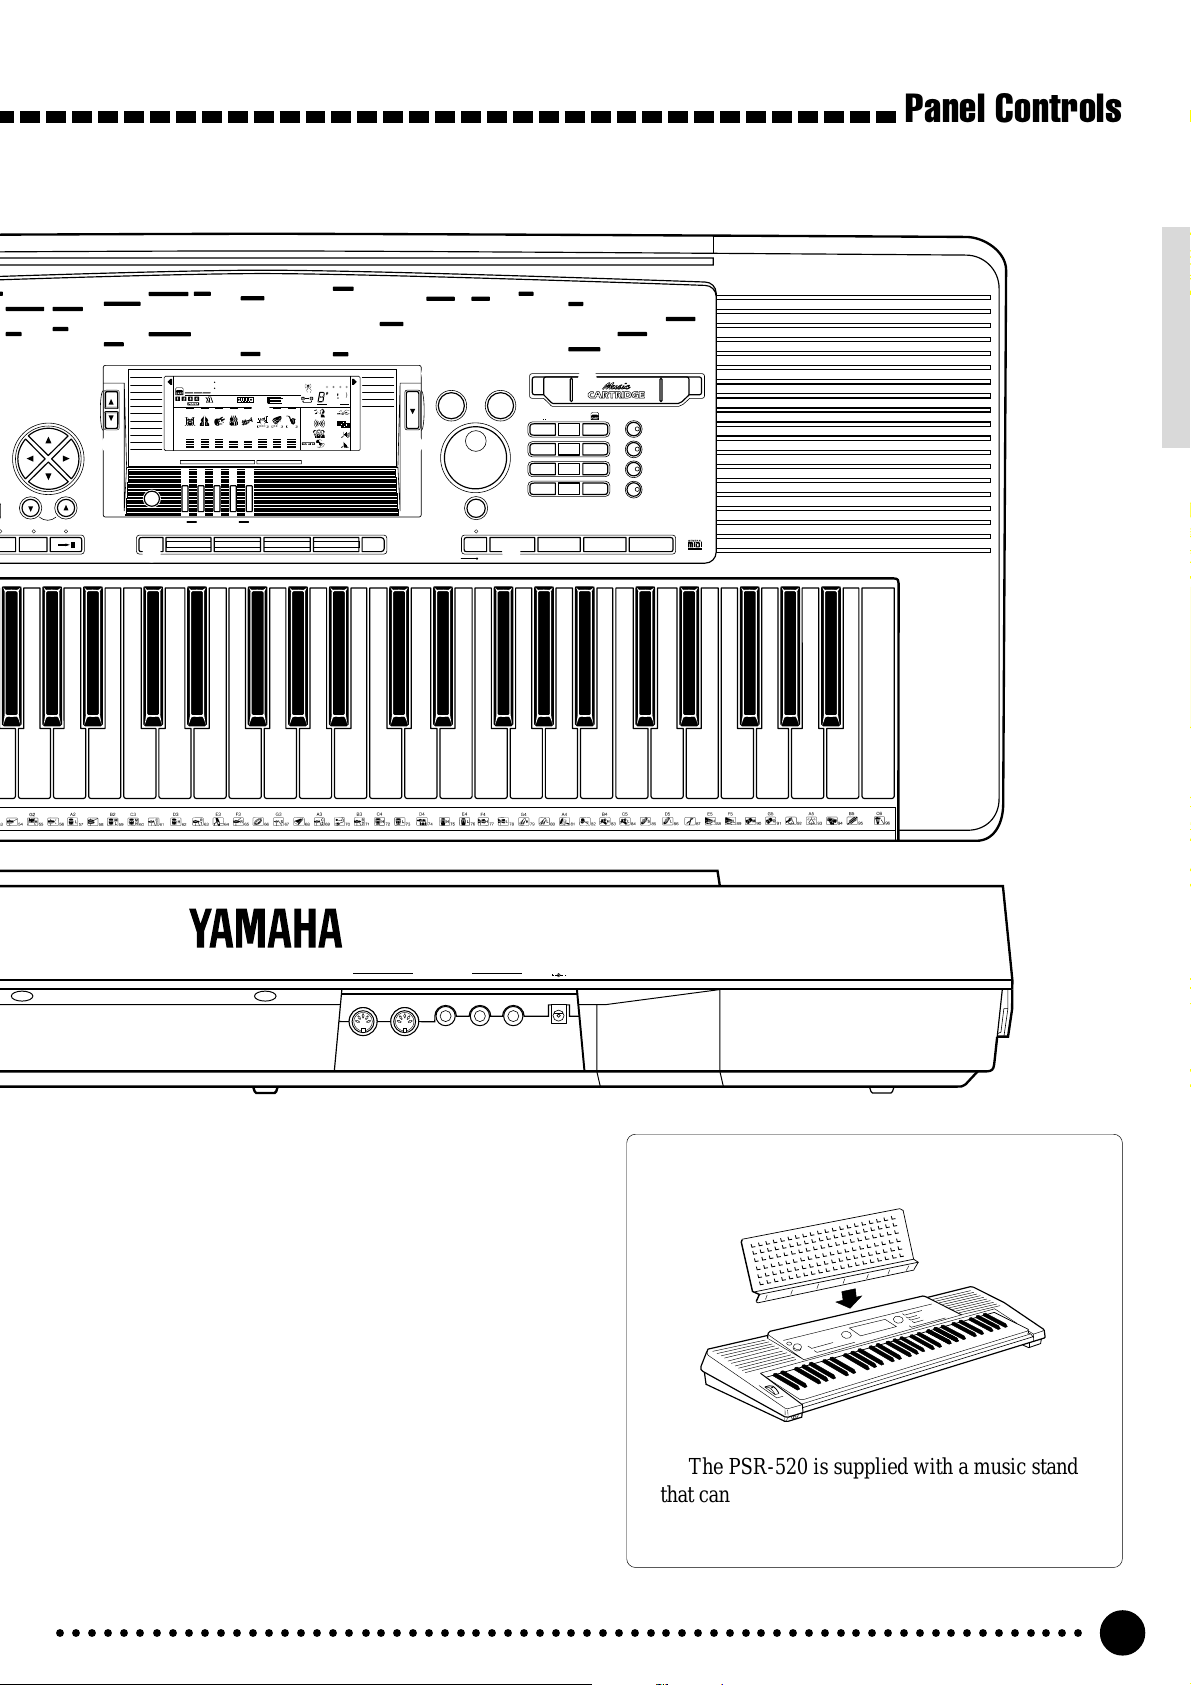
Panel Controls
/
INTRO
START/STOP
SYNC-
START/STOP
REC PLAY/STOP
REPEAT
PLAY
MINUS
ONE
SONG
A
AUTO
ACCOMPANIMENT
REVERB
CHORUS
DSP
DSP
VARIATION
DIGITAL EFFECT
MIN MAX
MASTER
VOLUME
ON / OFF
POWER
PITCH BEND
PHONES
DEMO
PSR-520
1
2
3
4
8
9
q
w
STYLE
POP
01 8BEAT POP
02 8 UPBT POP
03 LIGHT POP
04 16BT POP
05 FOLKROCK
06 POP ROCK
07 DETROIT POP
08 UP POP SHFL
09 POP SHUFFLE
10 POP RHMBA 1
11 POP RHMBA 2
POP BALLAD
12 8BT LIGHT
13 SLOW BALLAD
14 EPIC BALLAD
15 16BT BLD 1
16 16BT BLD 2
17 PNO BALLAD
18 6/8 BLD 1
19 6/8 BLD 2
ROCK
20 ROCK POP
21 ROCK BALLAD
22 LITE RK BLD
23 HARD ROCK
24 ROCK SHUFFL
25 6/8HVY ROCK
26 SLOW ROCK
DANCE
27 TECHNO 1
28 TECHNO 2
29 POP RAP
30 EUROBEAT
31 DANCE POP
DISCO
32 DISCO POP
33 70S DISCO
34 DISCO SOUL
35 DISCO PARTY
36 DISCO TROP
37 POLKA POP
RHYTHM & BLUES
38 R&B
39 SOUL
40 FUNK
41 6/8 BLUES
42 6/8 GOSPEL
43 GOSPEL WLTZ
ROCK & ROLL
44 ROCK&ROLL 1
45 ROCK&ROLL 2
46 BOOGIE
47 TWIST
TRAD JAZZ
48 DIXIELAND
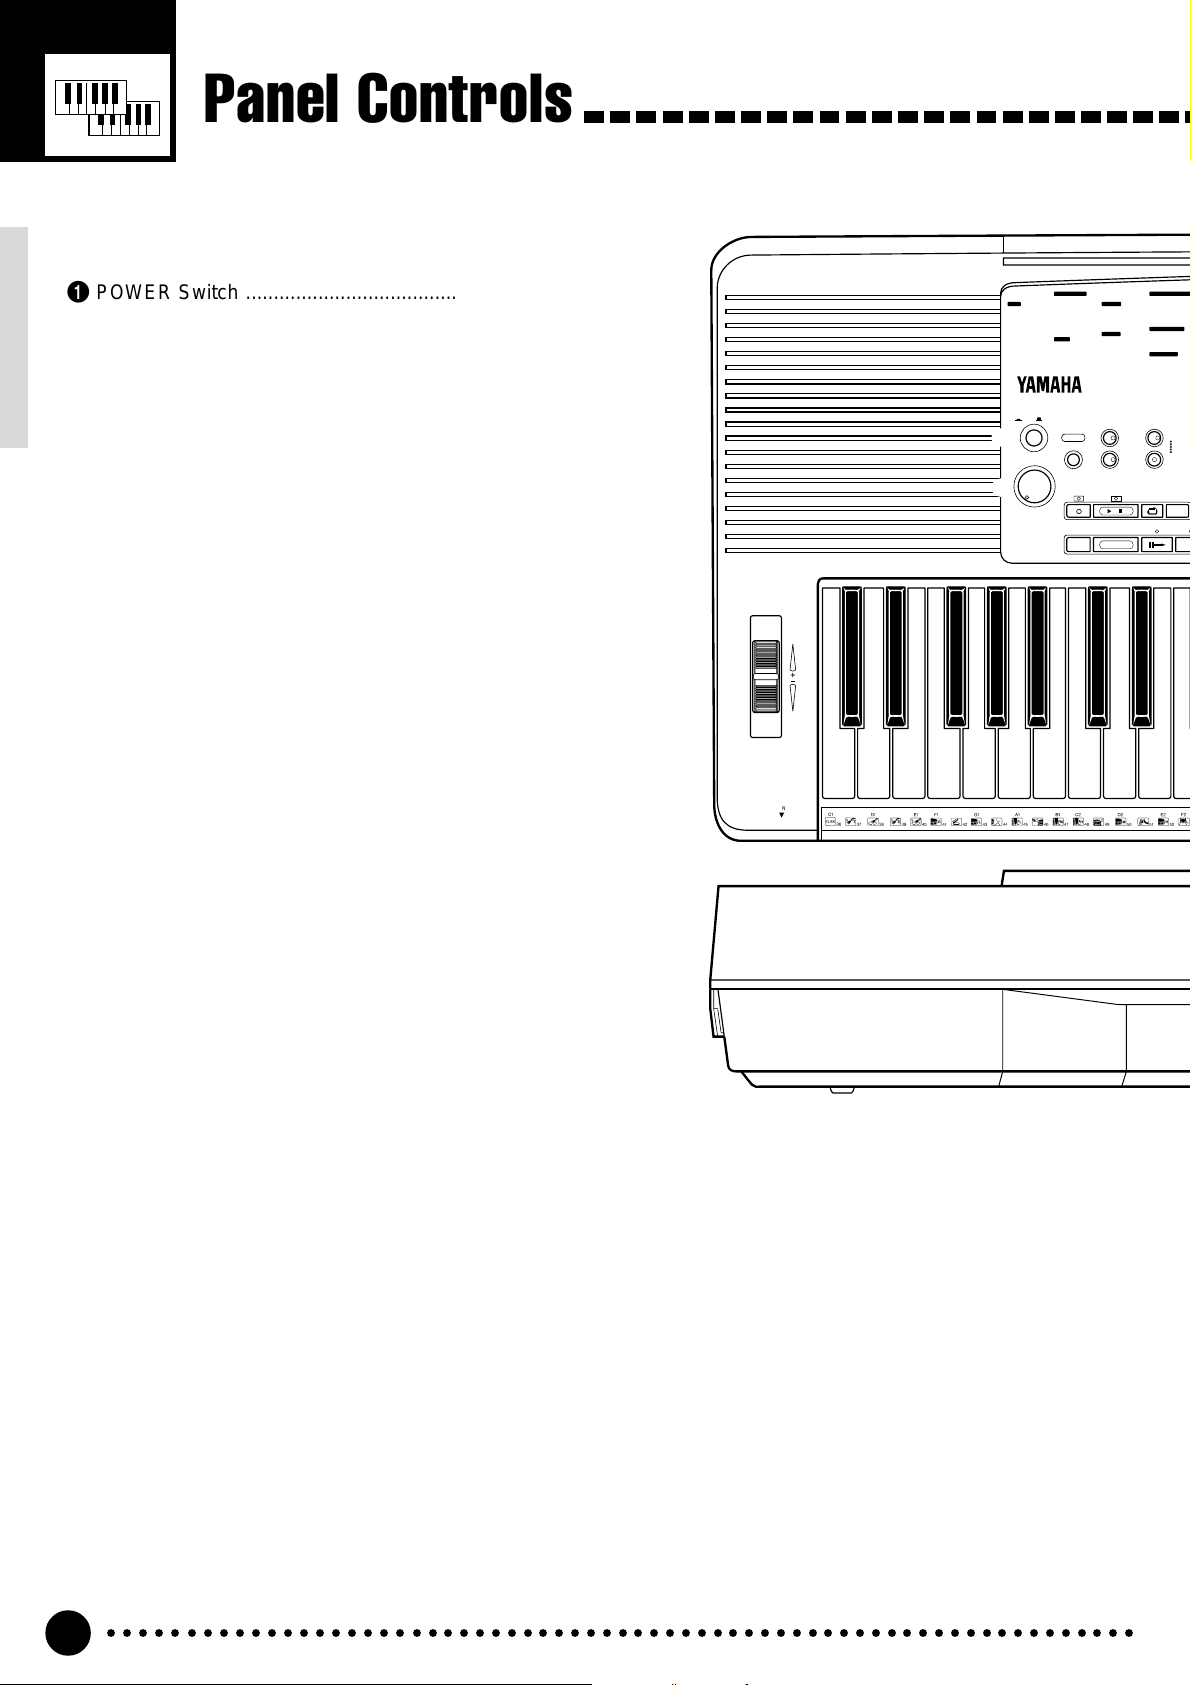
■ Top Panel Controls………………………………………………………..
1 POWER Switch ……………………………………… page 8
2 MASTER VOLUME Control……………………… page 8
3 DEMO Button ………………………………………… page 9
4 DIGITAL EFFECT Section
• REVERB Button………………………………… page 24
• CHORUS Button………………………………… page 24
• DSP Button……………………………………….. page 24
• DSP VARIA TION Button……………………… page 24
5 LCD Panel …………………………………………… page 10
6 Data Dial…………………………………………..page 9, 14
7 Number [0]~[9] and
[+/YES], [–/NO] Buttons …………………….. page 9, 13
8 SONG Section
• REC Button………………………………….. page 47, 50
• PLAY/STOP Button ………………….page 48, 51, 52
• REPEAT PLAY Button ………………………… page 65
• MINUS ONE Button …………………………… page 64
9 AUTO ACCOMPANIMENT Section
• SYNC-START/STOP Button ……………….. page 35
• START/STOP Button……………………..page 35, 37
• INTRO Button……………………………………. page 35
• MAIN A/B Button…………………………..page 35, 37
• ENDING Button…………………………………. page 37
• ACCOMP LARGE/SMALL Button………… page 39
• TRACK ON/OFF Button ……………………… page 39
0 CURSOR s, t, <, > Buttons ………………. page 10
! TEMPO s, t Buttons…………………………… page 34
@ FUNCTION s, t Buttons……………………… page 10
# REGISTRATION MEMORY Section
• MEMORIZE Button ……………………………. page 44
• 1~4 Buttons………………………………….page 44, 45
• ACCOMP FREEZE Button………………….. page 45
$ MODE ▼ Button …………………………………… page 11
% STYLE Button………………………………………. page 33
^ VOICE Button………………………………………. page 12
& ONE TOUCH SETTING Button………………. page 42
* Music CARTRIDGE Slot ……………………….. page 60
( KEYBOARD Section
• TOUCH RESPONSE Button ……………….. page 17
• DUAL VOICE Button ………………………….. page 17
• HARMONY/ECHO Button…………………… page 20
• SUSTAIN Button………………………………… page 22
) MULTI PADS Section
• MULTI PADS 1~4 ………………………….page 56, 58
• REC/END, TERMINA TE Button ……… page 56, 58
q PITCH BEND Wheel …………………………….. page 23
w PHONES Jack……………………………………….. page 7
4
○○○○○○○○○○○○○○○○○○○○○○○○○○○○○○○○○○○○○○○○○○○○○○○○○○○○○○○○○○○○○○○○○
49 BIG BAND
50 B B BALLAD
51 SWING
52 CHARLESTON
CONTEMP JAZZ
53 COOL JAZZ
54 JAZZ BALLAD
55 JAZZ WALTZ
56 FUSION
LATIN
57 FAST BOSSA
58 SLOW BOSSA
59 POP BOSSA
60 SALSA
61 SAMBA 1
AUTO FILL
CURSOR
RESET
B
62 MAMBO
63 SON
64 MERENGUE
65 BOLERO LNTO
CARIBBEAN
66 POP REGGAE
67 REGGAE 16
68 REGGAE 12
C & W
69 BLUEGRASS
70 C ROCK 1
71 C ROCK 2
72 COWBOY BOOG
73 C BALLAD
74 C SHUFFLE
FUNCTION
0
TEMPO
!
ENDINGMAIN
75 TWO STEP
76 C WALTZ 1
77 C WALTZ 2
WORLD MUSIC
78 POLKA1
79 POLKA2
80 ESPAGNOLE
81 TARANTELLA
82 MUSETTE
83 TRD WALTZ 1
84 TRD WALTZ 2
MARCH
85 MARCH 1
86 MARCH 2
87 6/8 MARCH 1
REGIST MEMORY
DUAL VOICE
SPLIT VOICE
HARM
DIGITAL EFFECT
@
ACCOMP LARGE/SMALL TRACK ON/OFF
REGISTRATION
MEMORY
VOICE
88 6/8 MARCH 2
BALLROOM STD
PIANO
89 TANGO ARGN
01 GRAND PIANO
90 FOXTROT
02 BRIGHT PNO
91 JIVE
03 HONKY-TONK
92 QUICKSTEP
04 FUNKY E PNO
93 SLOWFOX
05 DX E PIANO
94 SLOW WALTZ
06 MIDI GRAND
95 VIEN WALTZ
07 HYPER E PNO
BALLROOM LATIN
08 DREAM E PNO
96 CHA CHA
09 BELL E PNO
97 RHUMBA
10 ICE E PIANO
98 SAMBA 2
11 TREM E PNO
99 CONGA
12 HARPSICHORD
00 PASODOBLE
13 HARPSI CPL
VOICE
STYLE
801
SONG
MULTI PAD
/
ECHO
OVERALL
MEMORIZE 1 2 3 4
GrandPno
118 10 a01
TEMPO TRANSPOSE MEASURE REPEAT CHORD
REGIST
RHYTHM BASS CHORD PAD PHRASE ACCOMP MELODY2MELODY
111
ON /
OFF
VOICE
135102117 130 1011011
VOL
ACCOMP TRACK SONG TRACK
#
14 CLAVI
15 WAH CLAVI
16 CELESTA
MALLETS
17 VIBRAPHONE
18 MARIMBA
19 GLOCKEN
20 XYLOPHONE
21 TUBE BELLS
22 TIMPANI
23 STEEL DRUMS
24 DULCIMER
25 MUSIC BOX
26 KALIMBA
ORGAN
27 JAZZ ORGAN 1
5
REC REC REC
28 JAZZ ORGAN 2
29 DRAWBAR ORG
30 FULL ORGAN
31 CLICK ORGAN
32 ROCK ORGAN 1
33 ROCK ORGAN 2
34 16+2 ORGAN
35 16+4 ORGAN
36 CHURCH ORG
37 REED ORGAN
38 MUSETTE
39 TRAD ACCORD
40 SOFT ACCORD
41 TANGO ACCRD
42 BANDONEON
1
BEAT
OTS
REVERB DUAL
CHORUS HARMONY
DSP SUSTAIN
GUITAR
43 CLASSIC GTR
44 FOLK GUITAR
45 12ST GUITAR
46 JAZZ GUITAR
47 OCTAVE GTR
48 HAWAII GTR
49 CLEAN GTR
50 TREMOLO GTR
51 MUTE GUITAR
52 HARMONICS
53 OVRDRV GTR
54 DIST GUITAR
BASS
55 ACC BASS
119
(
6
dim
513
mM
7
augsus4
TOUCHMINUS ONE
Panel Controls
84 VOYAGER
56 FINGER BASS
70 HARP
57 PICK BASS
71 SITAR
58 FRETLESS
ENSEMBLE
59 SLAP BASS
72 STRINGS 1
60 SY BASS 1
73 STRINGS 2
61 SY BASS 2
74 CHAMBER STR
62 TECHNO BASS
75 SYNTH STRS
STRINGS
76 SLOW STRS
63 VIOLIN
77 TREMOLO STR
64 VIOLA
78 VIOLIN+STRS
65 CELLO
79 PIZZ STR
66 CONTRABASS
80 CHOIR
67 BANJO
81 CHOIR AAHS
68 SHAMISEN
82 CHOIR OOHS
69 KOTO
83 SYNTH CHOIR
% ^
NORMAL
SPLIT
SINGLE
)
FINGERED
STYLE VOICE
MODE
$
ACCOMP
FREEZE
&
MULTI PADS
TERMINATE
98 SY BRASS 2
85 ORCH HIT
REED
99 SOPRANO SAX
100 ALTO SAX
101 ALTO SAX BR
102 TENOR SAX
103 TEN SAX BR
104 BARI SAX
105 SAX+CLARNET
106 SAX+TRB
107 OBOE
108 ENG HORN
109 BASSOON
110 CLARINET
111 HARMONICA
112 SHANAI
113 BAGPIPE
PIPE
114 PICCOLO
115 FLUTE
116 PAN FLUTE
117 RECORDER
118 BOTTLE
119 SHAKUHACHI
120 WHISTLE
121 OCARINA
SYNTH LEAD
122 SQUARE LEAD
123 SAWTOOTH LD
BRASS
86 TRUMPET
87 FLUGEL HORN
88 MUTE TRP
89 TROMBONE
90 TRB SECTION
91 FRENCH HORN
92 TUBA
93 BRASS SECT
94 BRASS+SAX
95 BRASS+TRB
96 BRASS+TRP
97 SY BRASS 1
*
**
1
123
6
REC/END
789
+
–
0
/
NO
PRESS AND HOLD FOR A WHILE.
*
ONE TOUCH
SETTING
7
1234
)
/
654
YES
124 VOICE LEAD
125 CRYSTAL
126 BRIGHTNESS
127 SUB AQUA
128 ANALOG LEAD
129 RAIN HOLD
130 70’S LEAD
131 SYNTH CLAVI
SYNTH PAD
132 FANTASIA
133 BELL PAD
134 XENON PAD
135 ANGELS
136 TRANSFORM
KEYBOARD
137 ATMOSPHERE
138 SHINING
139 DARK MOON
140 CYBER PAD
141 SCI-FI
DRUM KITS
142 STANDARD
143 ROOM
144 ROCK
145 ELECTRONIC
146 ANALOG
147 JAZZ
148 BRUSH
149 CLASSIC
TOUCH RESPONSE
DUAL VOICE
HARMONY/ECHO
SUSTAIN
(
MIDI
OUT IN
SUSTAIN
AUX OUT
R L+R/L
DC IN 10-12V
e r t y
■ Rear Panel Controls………………………………………………………
The Music Stand
e
MIDI OUT and IN Connectors ………………..
r SUSTAIN Ja ck ……………………………………….. page 7
t
AUX OUT R, L+R/L Jacks……………………………
y DC IN 10-12V Jack …………………………………. page 6
page 7, 71
page 7
The PSR-520 is supplied with a music stand
that can be attached to the instrument by inserting
it into the slot at the rear of the control panel.
○○○○○○○○○○○○○○○○○○○○○○○○○○○○○○○○○○○○○○○○○○○○○○○○○○○○○○○○○○○○○○○○○
5
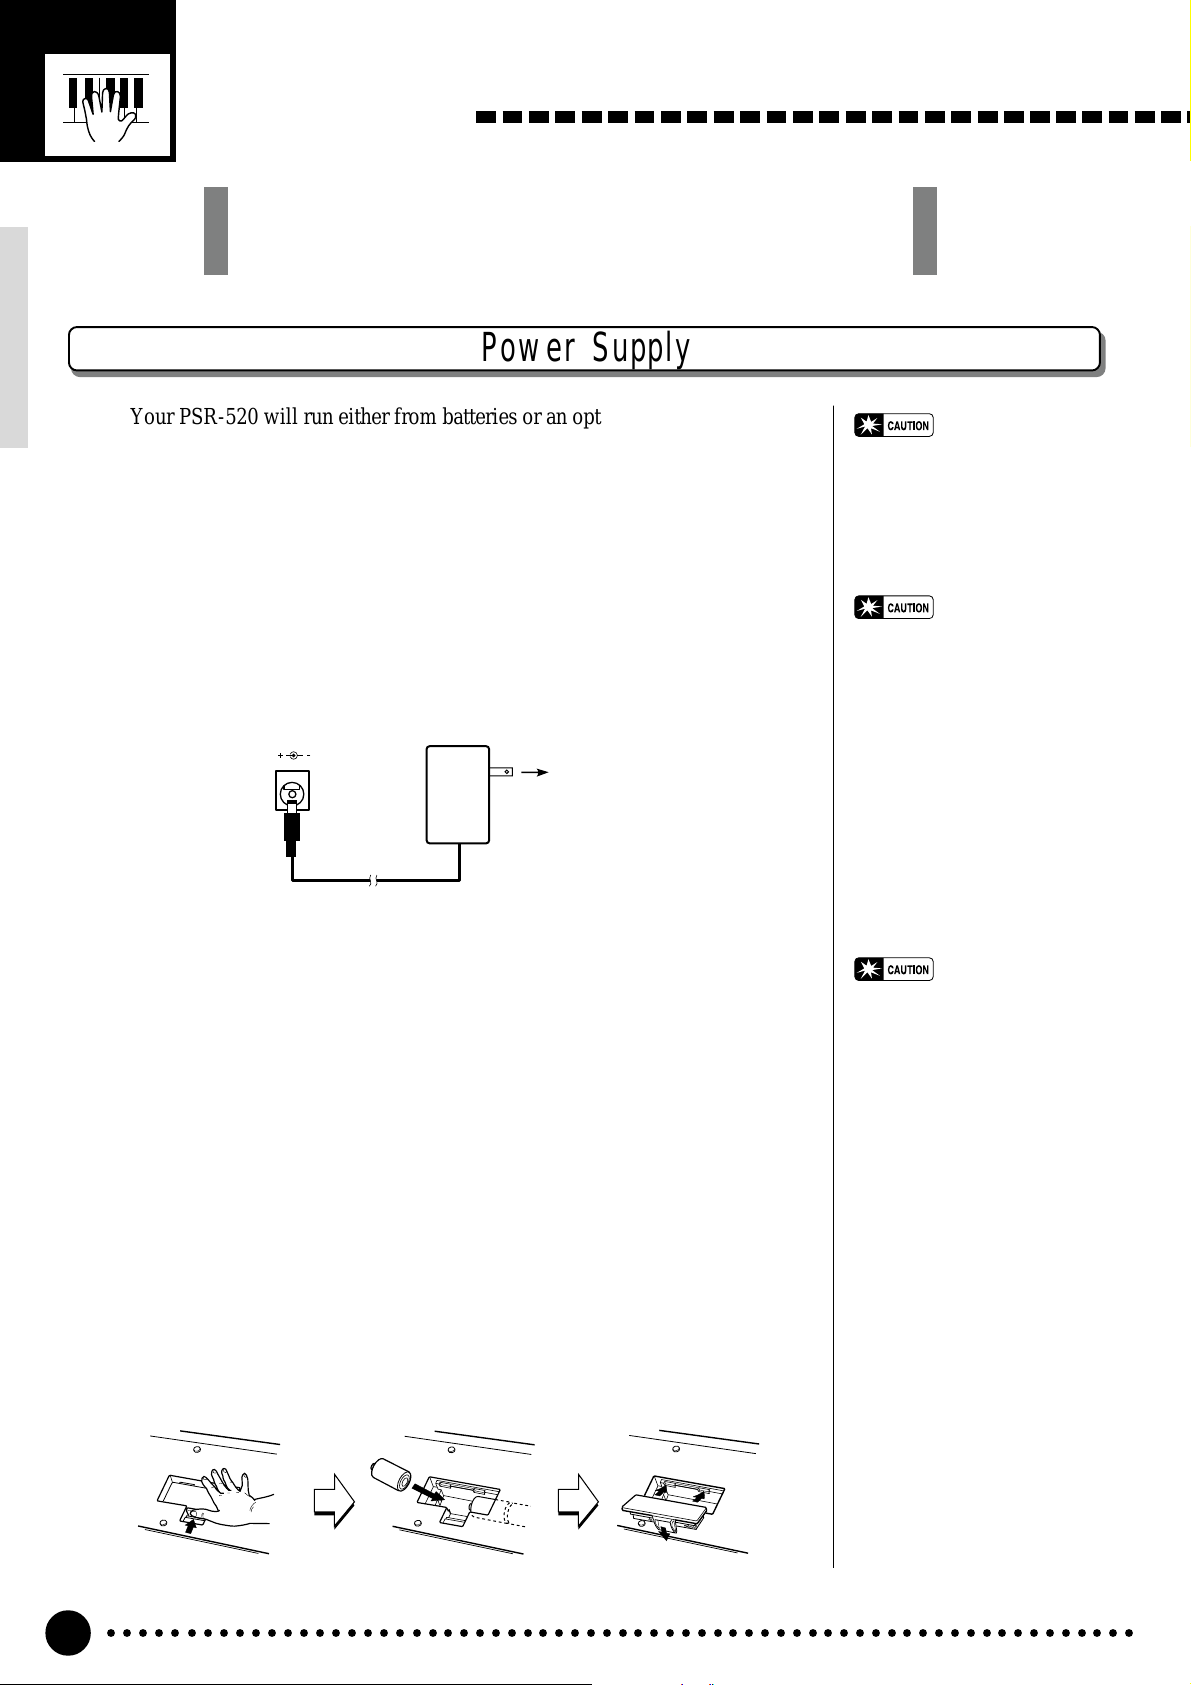
Setting Up
This section contains information about setting up your PSR-520
and preparing to play. Be sure to go through this section carefully
before using your PSR-520.
Power Supply
Your PSR-520 will run either from batteries or an optional power adaptor.
Follow the instructions below according to the power source you intend to use.
■ Using An Optional AC Power Adaptor……………………………………………………..
Plug the DC output cable from an optional Yamaha PA-5, PA-5B, or PA-
5C AC Power Adaptor into the DC IN jack on the rear panel of the PSR520, then plug the Power Adaptor (or the AC cable of the Power Adaptor)
into a convenient wall AC power socket. The internal batteries are automatically disconnected when an AC Power Adaptor is used.
DC IN 10-12V
PA-5,
PA-5B,
or
PA-5C
AC power socket
• Never interrupt the power
supply (e.g. remove the batteries or unplug the AC adaptor)
during any PSR-520 record
operation! Doing so can result
in a loss of data.
• Use ONLY a Yamaha PA-5, PA-
5B, or PA-5C AC Power Adaptor to power your instrument
from the AC mains. The use of
other adaptors may result in
irreparable damage to both the
adaptor and the PSR-520.
■ Using Batteries……………………………………………………………………………………………………………………………..
For battery operation the PSR-520 requires six 1.5V SUM-1, “D” size,
R-20 or equivalent batteries.
When the batteries need to be replaced “Btry Low” will appear on the
display. Also the volume may be reduced, the sound may be distorted, and
other problems may occur . When this happens, turn the power OFF and either replace the batteries or connect an AC adaptor.
Replace the batteries as follows:
ZOpen the battery compartment cover located on the instrument’s bottom
panel.
XInsert the six new batteries, being careful to follow the polarity markings
on the inside of the compartment.
CReplace the compartment cover, making sure that it locks firmly in place.
• When the batteries run down,
replace them with a complete
set of six new batteries.
NEVER mix old and new batteries.
• Do not use different kinds of
batteries (e.g. alkaline and
manganese) at the same time.
• To prevent possible damage
due to battery leakage, remove
the batteries from the instrument if it is not to be used for
an extended period of time.
○○○○○○○○○○○○○○○○○○○○○○○○○○○○○○○○○○○○○○○○○○○○○○○○○○○○○○○○○○○○○○○○○
6
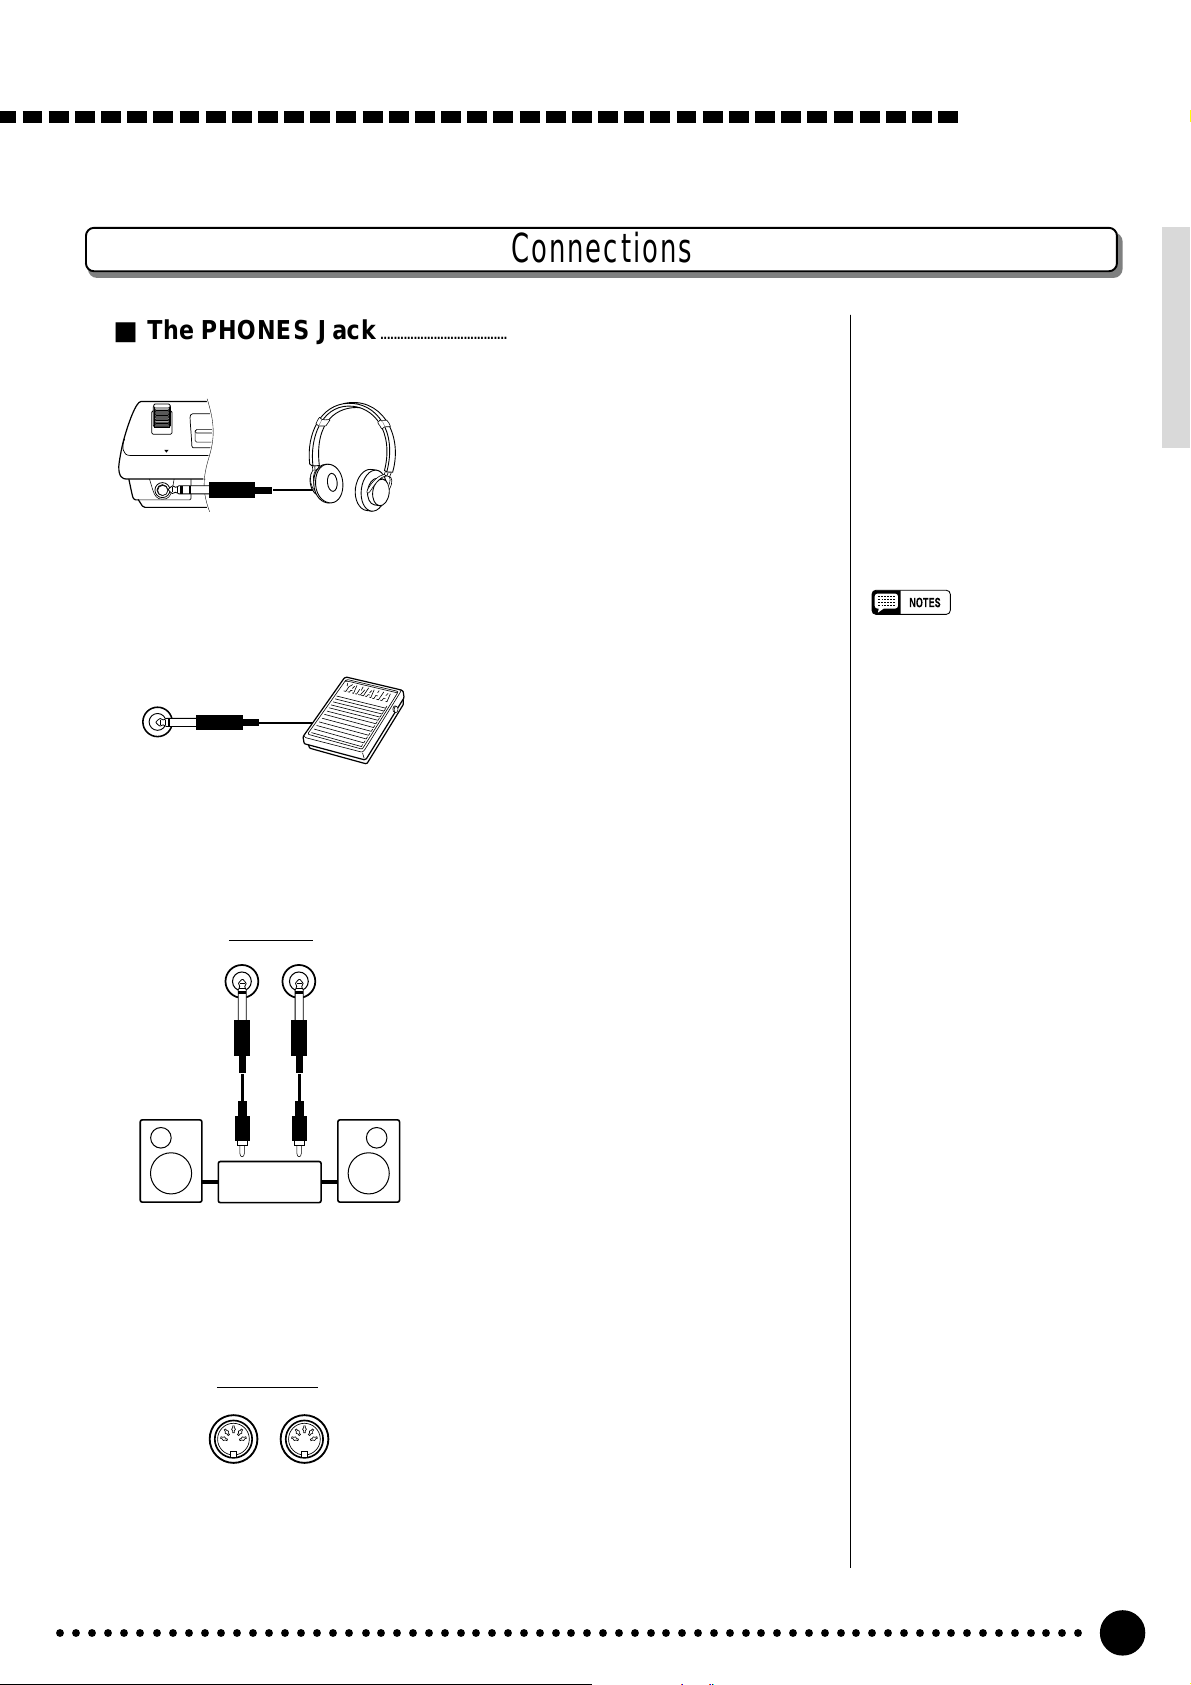
Connections
■ The PHONES Jack…………………………………………………………………………………………………………………..
A standard pair of stereo headphones
can be plugged in here for private prac-
PHONES
■ SUSTAIN Jack…………………………………………………………………………………………………………………………………
tice or late-night playing. The internal
stereo speaker system is automatically
shut off when a pair of headphones is
plugged into the PHONES jack.
Setting Up
An optional Yamaha FC4 or FC5
footswitch can be plugged into the rear-
SUSTAIN
panel SUSTAIN jack for sustain control.
The footswitch functions like the damper
pedal on a piano — press for sustain,
release for normal sound.
■ AUX OUT R and L+R/L Jack……………………………………………………………………………………..
The AUX OUT R and L+R/L jacks
AUX OUT
R L+R/L
Stereo
System
deliver the output of the PSR-520 for
connection to an external amplifier, mixing console, PA system, or recording
equipment. If you will be connecting the
PSR-520 to a monophonic sound system, use only the L+R/L jack. When a
plug is inserted into the L+R/L jack
only, the left- and right-channel signals
are combined and delivered via the
L+R/L jack so you don’t lose any of the
instrument’s sound.
• Be sure that you do not press the
pedal while turning the power
ON. If you do, the ON/OFF status
of the footswitch will be reversed.
■ MIDI IN and OUT Connectors…………………………………………………………………………………
The MIDI IN connector receives
MIDI data from an external MIDI device
MIDI
OUT IN
○○○○○○○○○○○○○○○○○○○○○○○○○○○○○○○○○○○○○○○○○○○○○○○○○○○○○○○○○○○○○○○○○
(such as a MIDI sequencer) which can
be used to control the PSR-520. The
MIDI OUT connector transmits MIDI
data generated by the PSR-520 (e.g. note
and velocity data produced by playing
the keyboard). More details on MIDI are
provided on page 71.
7
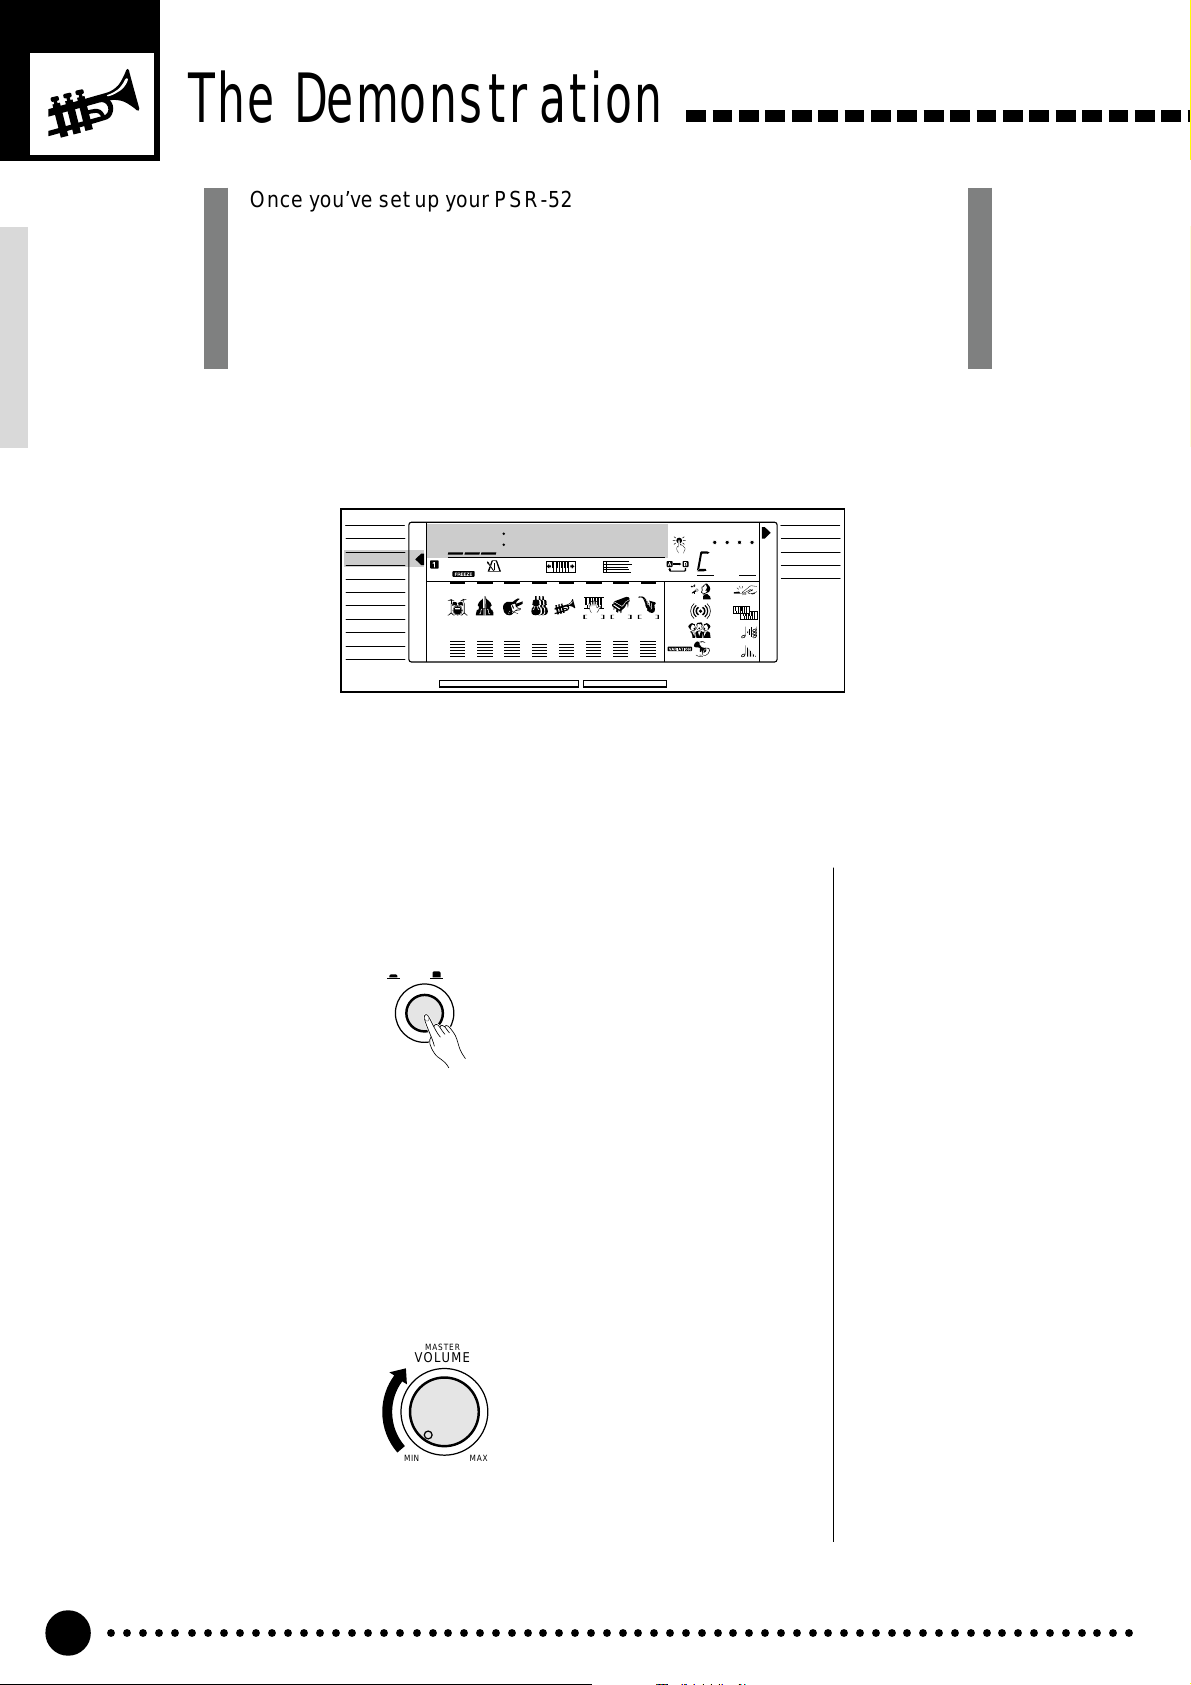
The Demonstration
Once you’ve set up your PSR-520, try listening to the pre-programmed
demonstration songs — they’ll give you a good idea of what the PSR-520
can do! A total of 25 demo songs are provided — songs 01 through 17
have been created to demonstrate several of the instrument’s voices,
while songs 18 through 25 demonstrate a range of accompaniment
styles.
VOICE
STYLE
SONG
REGIST MEMORY
MULTI PAD
DUAL VOICE
SPLIT VOICE
HARM
/
ECHO
OVERALL
DIGIT AL EFFECT
Switch ON……………………………………………………………………………………………………………………………………………..
1
801
REGIST
RHYTHM BASS CHORD PAD PHRASE ACCOMP MELODY
111
ON /
OFF
VOICE
VOL
WahClavi
118 10 a01
TEMPO TRANSPOSE MEASURE REPEAT CHORD
135102117130 1011011
ACCOMP TRACK SONG TRACK
MELODY
REC REC REC
1
OTS
2
REVERB DUAL
CHORUS HARMONY
DSP SUSTAIN
BEAT
TOUCHMINUS ONE
Turn the power ON by pressing the [POWER] switch.
POWER
ON / OFF
NORMAL
SPLIT
SINGLE
FINGERED
Set an Initial Volume Level…………………………………………………………………………………………
2
Turn the [MASTER VOLUME] control up (clockwise) about a quarterturn from its minimum position. You can re-adjust the [MASTER VOL-
UME] control for the most comfortable overall volume level after playback
begins.
MASTER
VOLUME
MIN MAX
○○○○○○○○○○○○○○○○○○○○○○○○○○○○○○○○○○○○○○○○○○○○○○○○○○○○○○○○○○○○○○○○○
8

Press the [DEMO] Button……………………………………………………………………………………………..
3
Press the [DEMO] button to start demo playback. The PSR-520 SONG
function will automatically be selected and the number and name of the first
demo song will appear on the top line of the display and the SONG [PLAY/
STOP] indicator will light. The demo will begin playing automatically. The
demo songs will play in sequence, and the sequence will repeat until
stopped.
DEMO
801
Skip to the Beginning Of a Different Demo Song…………………..
4
WahClavi
While the demonstration is playing you can select any of the 25 demo
songs by using the [–/NO] and [+/YES] buttons, the number buttons or the
data dial. Playback will skip to the beginning of the selected song.
The Demonstration
• You can play along on the PSR520 keyboard while the demonstration is playing.
• The volume bars of the song
tracks at the bottom of the display will move in response to the
data in each track while the
demo plays.
• About the demo songs created
by the PSR-520 internal accompaniment styles:
* Chord names will appear on
the display and the volume
bars of the accomp tracks will
move in response to the data
in each track, while the demo
plays.
* Harmony effect (see page 20)
can be applied when playing
along with the chord progression of the song.
VOICE
FUNCTION
Exit When Done……………………………………………………………………………………………………………………………
5
STYLE
SONG
REGIST MEMORY
MULTI PAD
DUAL VOICE
SPLIT VOICE
HARM
/
ECHO
OVERALL
DIGITAL EFFECT
801
WahClavi
**
1
– –
123
654
789
–
+
/NO
/YES
0
Press the [DEMO] button, the SONG [PLAY/STOP] button, or the
AUTO ACCOMP ANIMENT [START/STOP] button to stop demo play-
back, then press the [VOICE] button to exit from the SONG function and
return to the normal play-mode display when you’ve finished playing the
demo songs.
DEMO
• When you stop the demo songs
played in sequence and start
again by pressing the [PLAY/
STOP] button, the selected song
will play and stop automatically
when the selected song playback
has ended.
○○○○○○○○○○○○○○○○○○○○○○○○○○○○○○○○○○○○○○○○○○○○○○○○○○○○○○○○○○○○○○○○○
9
Basic Display Operation
The PSR-520 LCD panel is a large multi-function type that simultaneously
displays and provides access to a number of important parameters. Basic
operation of the display as well as the CURSOR, FUNCTION, MODE, and
NUMBER buttons, and the meaning of the icons which appear in the
display, are summarized briefly below.
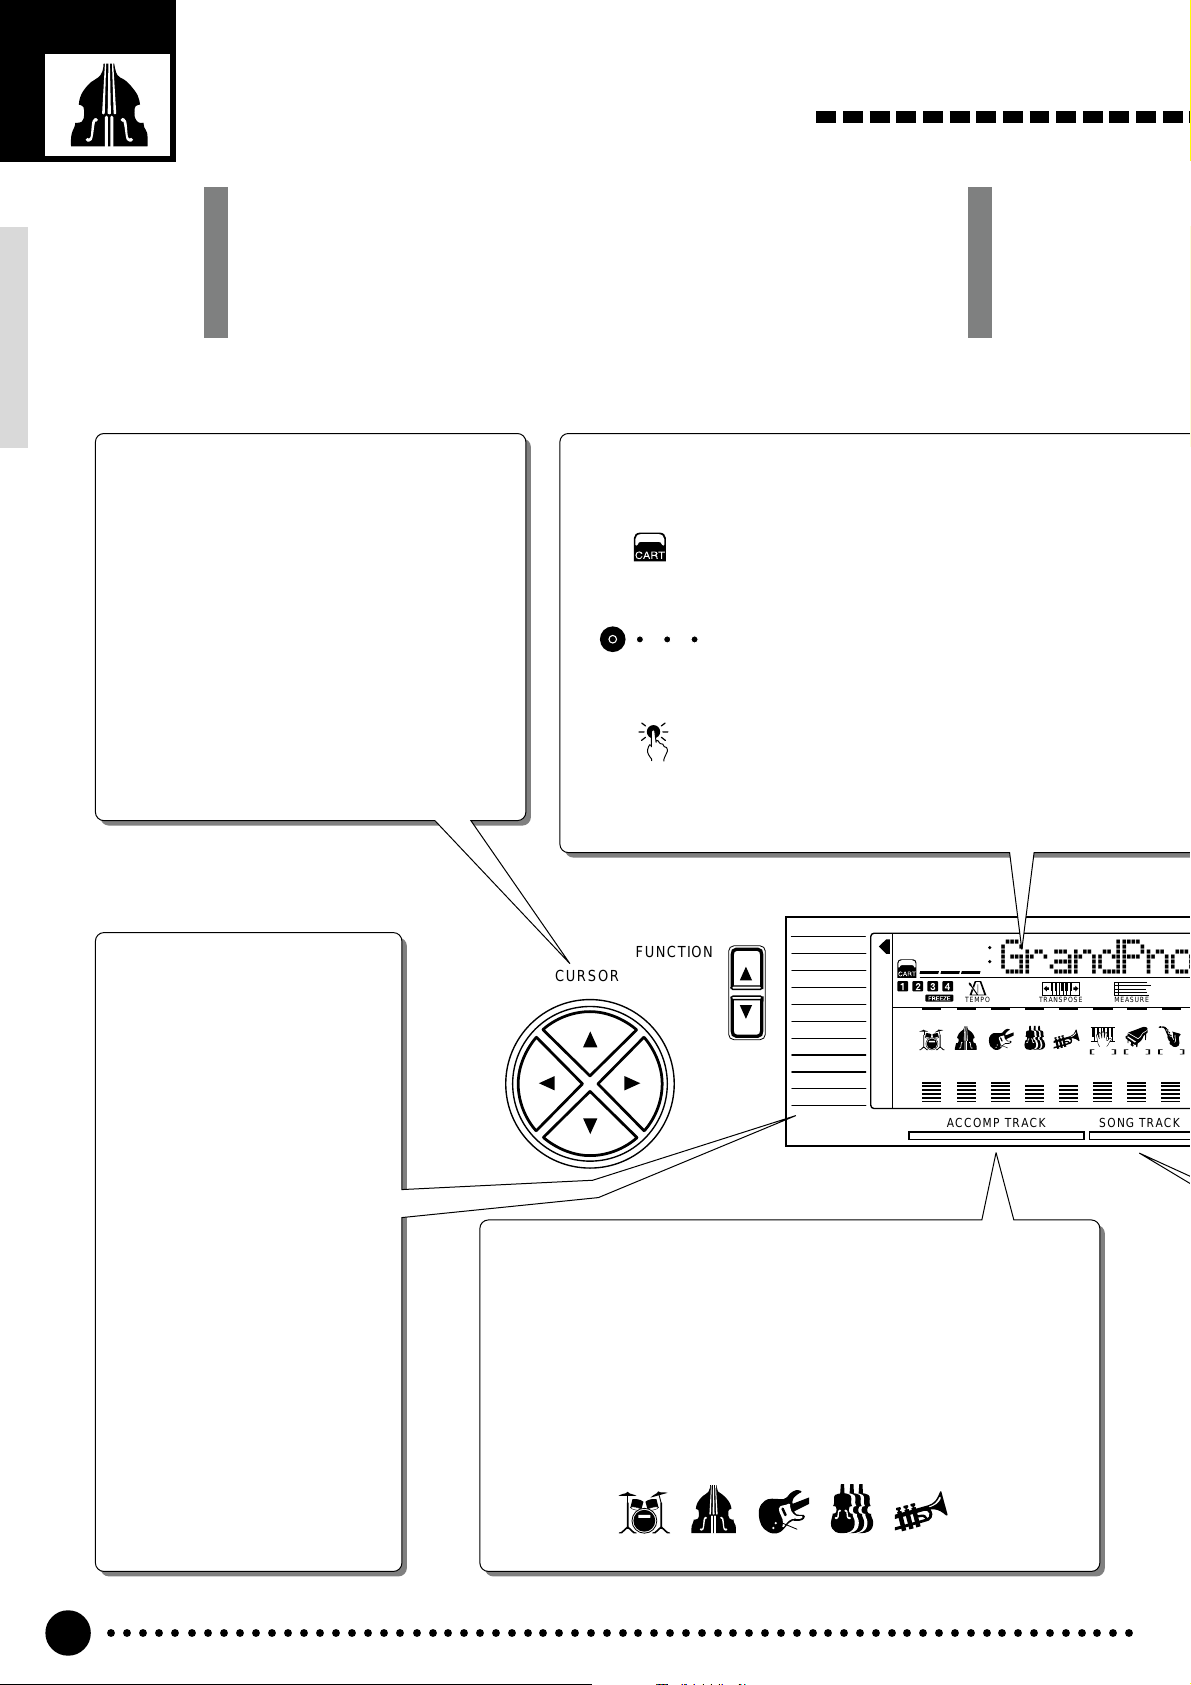
The Cursor Buttons
The CURSOR buttons are used to select the
various parameters which appear in the display. Depending on the selected parameter,
the “cursor” may appear as an underline, or
the selected icon or value may simply flash.
Each CURSOR button moves the cursor in the
corresponding direction. The [▲] and [▼]
CURSOR buttons are also used to select functions within the function groups selected by the
FUNCTION buttons in some cases.
The Functions
The PSR-520 has a range of
functions selected via the
FUNCTION [▲] and [▼]
buttons — e.g. voice selection, style selection, song
number selection, etc. The
currently selected function is
indicated by an arrow in the
display next to the function
list printed immediately to the
left of the display. All of the
listed functions can be selected by pressing either the
FUNCTION [▲] or [▼] button
as many times as necessary
until the arrow in the display
appears next to the name of
the desired function.
Parameter Icons
CART (Cartridge)
Appears when a Music Cartridge song, style, or
registration memory is selected (page 60).
BEAT
Flashes at the current tempo and indicates the
BEAT
current beat during accompaniment and song
playback. (page 36)
OTS (One Touch Setting)
OTS
Appears when the ONE TOUCH SETTING feature is engaged (page 42).
FUNCTION
CURSOR
VOICE
STYLE
SONG
REGIST MEMORY
MULTI PAD
DUAL VOICE
SPLIT VOICE
/
ECHO
HARM
OVERALL
DIGITAL EFFECT
801
REGIST
RHYTHM BASS CHORD PAD PHRASE ACCOMP MELODY
111
ON /
OFF
VOICE
VOL
GrandPn
118 10 a01
TEMPO TRANSPOSE MEASURE
135102117130 1011011
ACCOMP TRACK SONG TRACK
Accompaniment Track Parameters & Icons
The PSR-520 has 8 accompaniment tracks (RHYTHM1/2, BASS,
CHORD1/2, PAD, and PHRASE1/2), each with ON/OFF, voice number,
and volume parameters that can be set as required (page 38). The
icons, drums for RHYTHM1 and 2, an acoustic applied bass for BASS,
an electric guitar for CHORD1 and 2, violins for PAD, a trumpet for
PHRASE 1 and 2, will appear when the respective track is ON.
RHYTHM BASS CHORD PAD PHRASE
111
MELODY
REC REC REC
2
1
○○○○○○○○○○○○○○○○○○○○○○○○○○○○○○○○○○○○○○○○○○○○○○○○○○○○○○○○○○○○○○○○○
10
Basic Display Operation
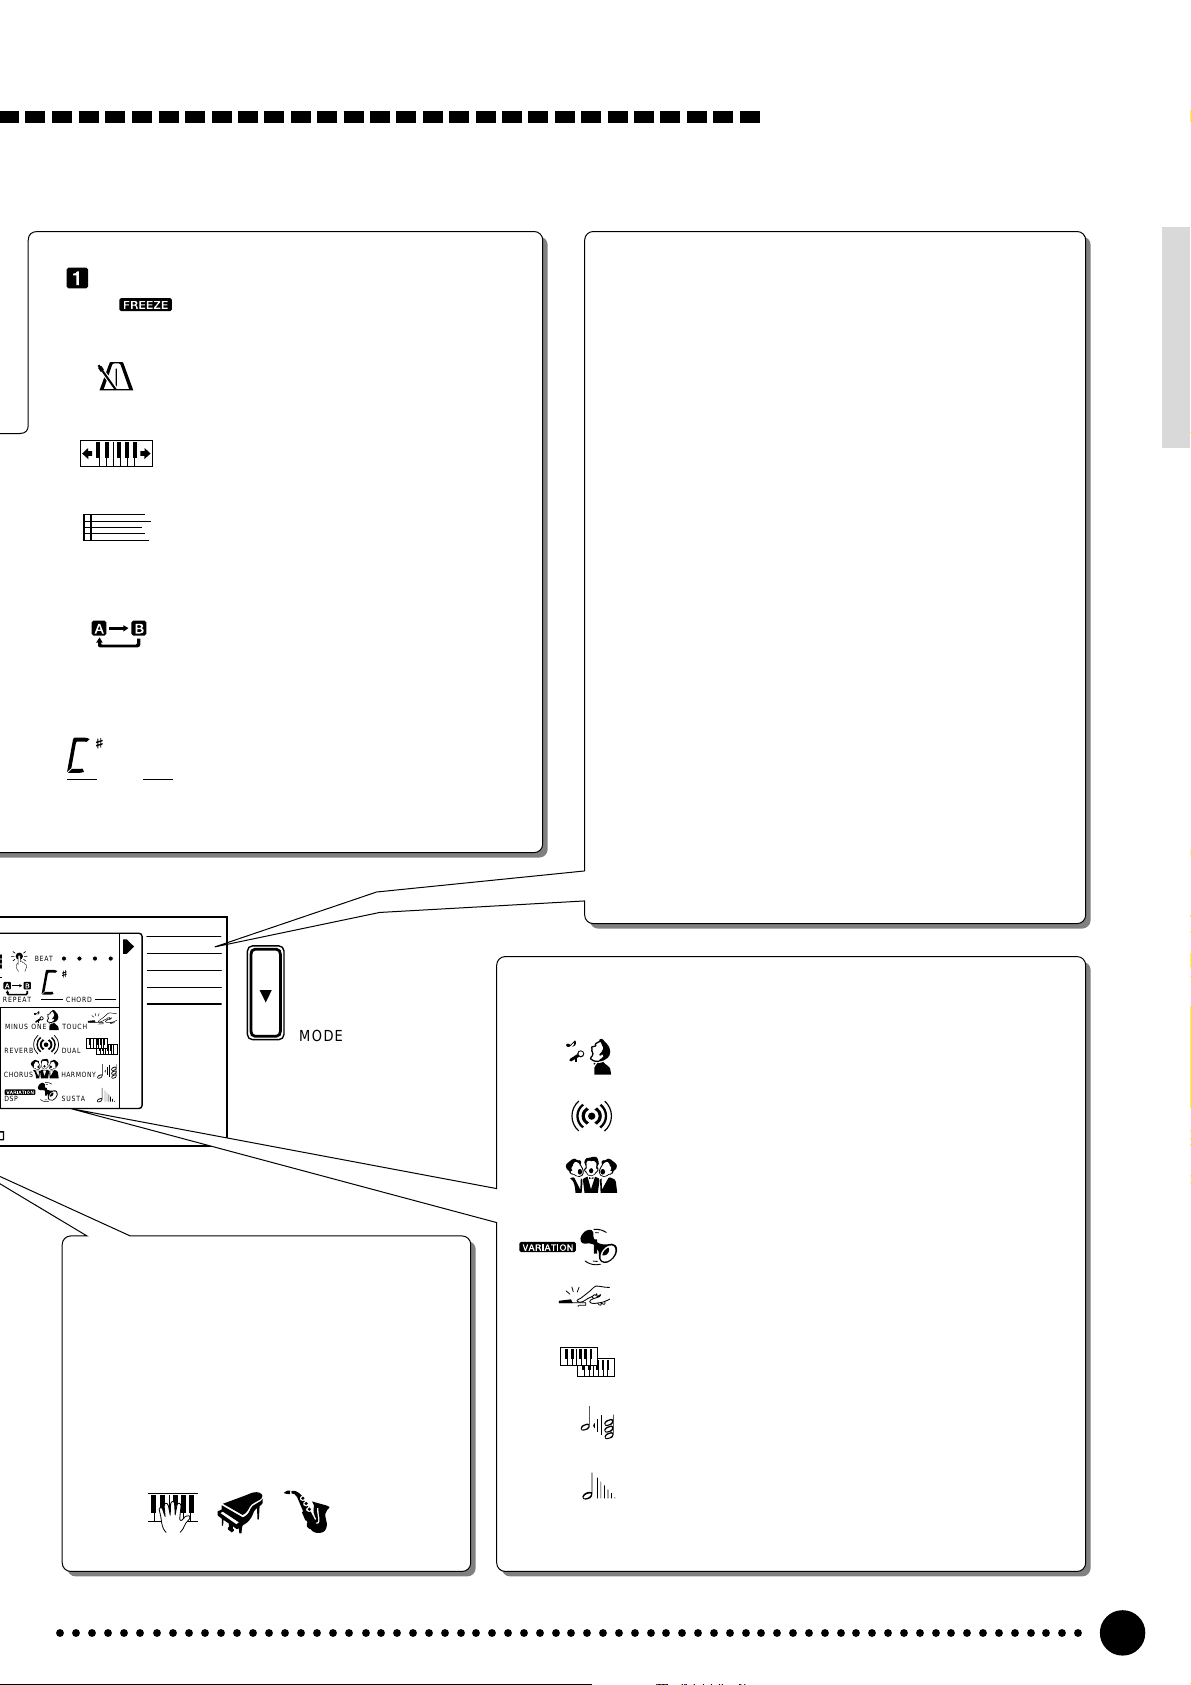
REGIST
TEMPO
TRANSPOSE
MEASURE
REPEAT
m
CHORD
REGIST (Registration Memory)
Indicates the currently selected REGISTRATION MEMORY number (page 45).
TEMPO
Shows the current tempo of accompaniment/song playback (page 34).
TRANSPOSE
The current transpose value (page 23).
MEASURE
Indicates the current measure number
during song recording and playback
(page 53).
REPEAT
Indicates the “A” and “B” repeat points
when programming a repeat section.
(page 65)
CHORD
Indicates the current chord name during
accompaniment/ song playback
(page36)
The Modes
The MODE button to the right of the display selects one
of the PSR-520’s four operational modes: NORMAL,
SPLIT, SINGLE, and FINGERED. The currently selected mode is indicated by an arrow in the display next
to the mode list printed immediately to the right of the
display. All of the listed modes can be selected by
pressing the MODE button as many times as necessary
until the arrow in the display appears next to the name
of the desired mode.
NORMAL: The normal play mode (page 12).
SPLIT: The split-keyboard mode in which different
voices can be played by the left and right
hands (page 15).
SINGLE: The single-finger accompaniment mode
which allows fully-orchestrated accompaniment to be produced by specifying
chords using only one, two or three fingers
(page 31).
FINGERED: The fingered accompaniment mode in
which fully-orchestrated accompaniment is
produced according to chords you play on
the keyboard (page 31).
BEAT
OTS
m
REPEAT CHORD
TOUCHMINUS ONE
REVERB DUAL
CHORUS HARMONY
DSP SUSTAIN
NORMAL
SPLIT
SINGLE
FINGERED
MODE
Song Track Parameters & Icons
Like the accompaniment tracks, each of the 3
song tracks has ON/OFF, voice number
(MELODY tracks), and volume parameters
that can be set as required (page 46). Each
track has its own icon which appears when
the track is ON.
ACCOMP MELODY1MELODY
2
Feature On/Off Icons
MINUS ONE
MINUS ONE
REVERB
CHORUS
DSP
TOUCH
DUAL
HARMONY
SUSTAIN
Appears when the MINUS ONE feature is ON (page 64).
REVERB
Appears when the REVERB EFFECT is ON (page 24).
CHORUS
Appears when the CHORUS EFFECT is ON (page 24).
DSP
Appears when the DSP EFFECT is ON (page 24).
TOUCH (Touch Response)
Appears when the TOUCH RESPONSE is ON (page 17).
DUAL (Dual Voice)
Appears when the DUAL VOICE feature is ON (page 17).
HARMONY
Appears when the HARMONY/ECHO is ON (page 20).
SUSTAIN
Appears when the SUSTAIN is ON (page 22).
○○○○○○○○○○○○○○○○○○○○○○○○○○○○○○○○○○○○○○○○○○○○○○○○○○○○○○○○○○○○○○○○○
11
Playing the PSR-520
VOICE
STYLE
SONG
REGIST MEMORY
MULTI PAD
DUAL VOICE
SPLIT VOICE
HARM
/
ECHO
OVERALL
DIGIT AL EFFECT
801
REGIST
RHYTHM BASS CHORD PAD PHRASE ACCOMP MELODY
111
ON /
OFF
VOICE
VOL
GrandPno
118 10 a01
TEMPO TRANSPOSE MEASURE REPEAT CHORD
135102117130 1011011
ACCOMP TRACK SONG TRACK
MELODY
REC REC REC
1
OTS
2
REVERB DUAL
CHORUS HARMONY
DSP SUSTAIN
BEAT
TOUCHMINUS ONE
NORMAL
SPLIT
SINGLE
FINGERED
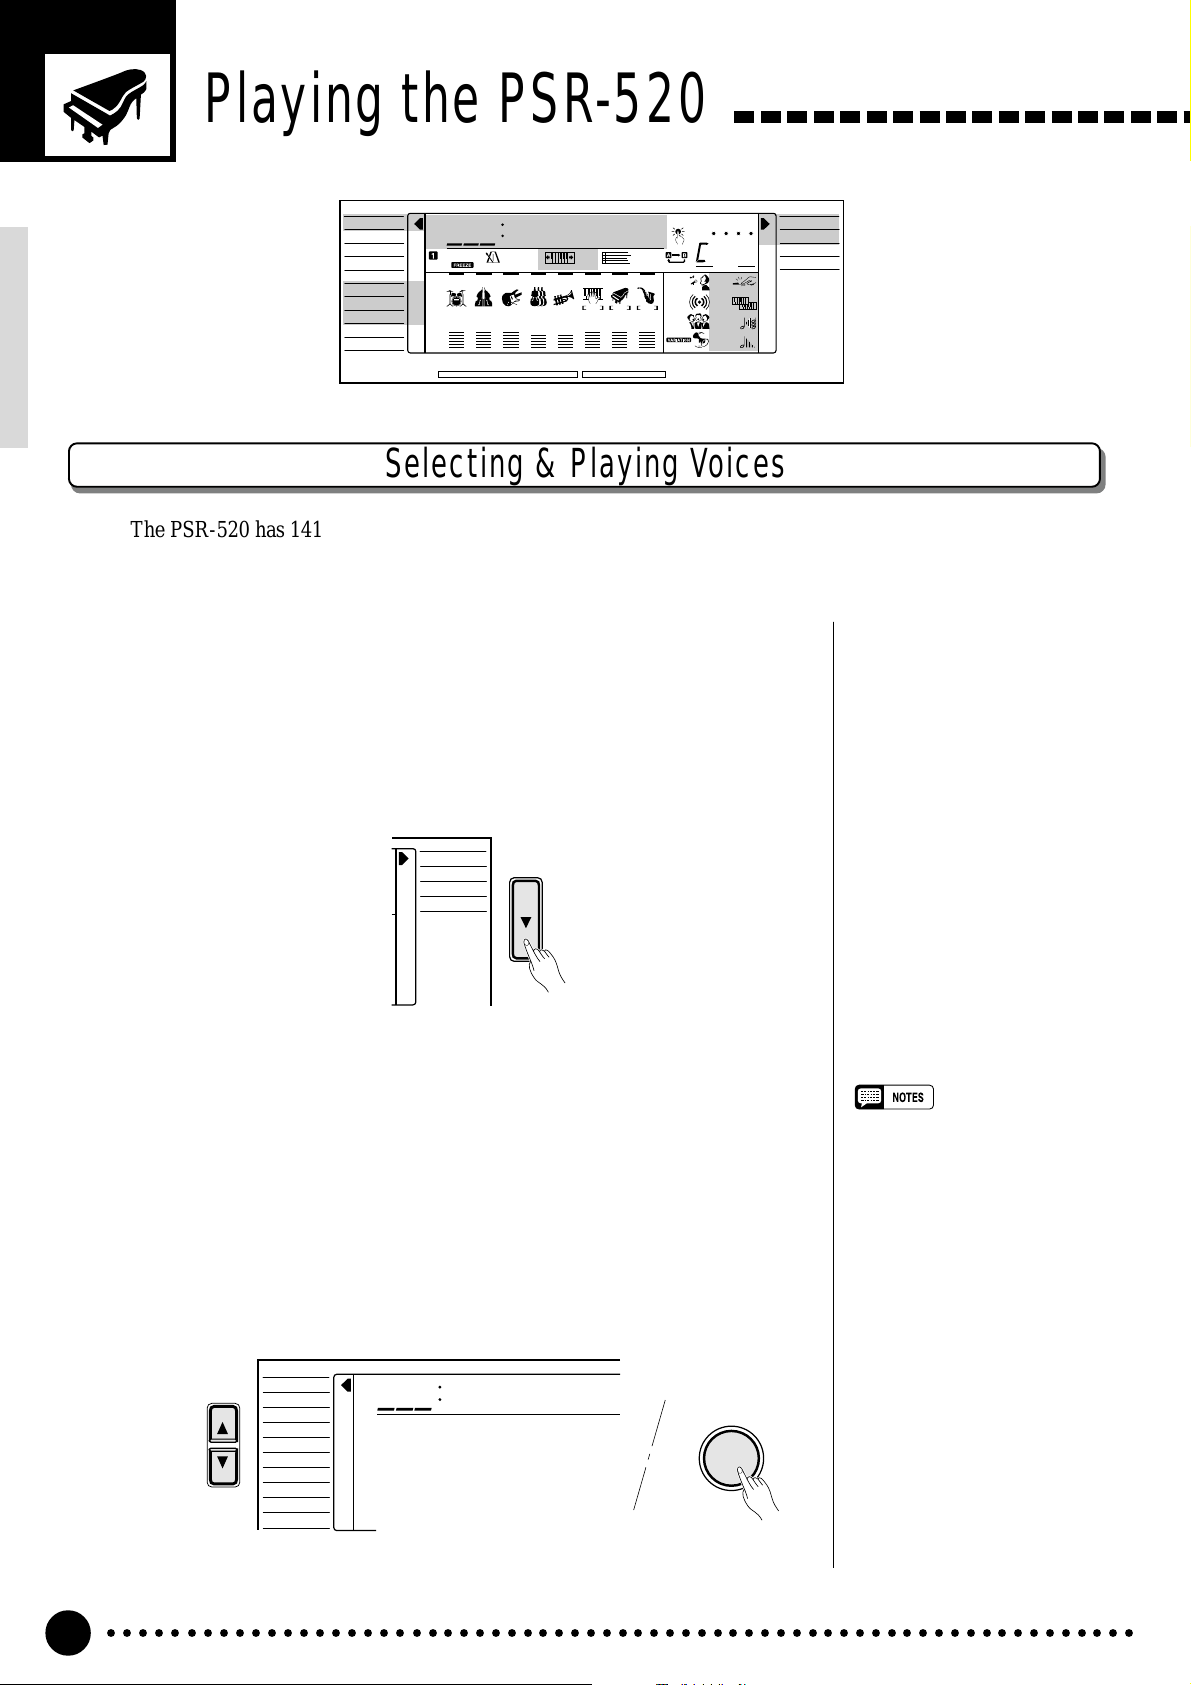
Selecting & Playing Voices
The PSR-520 has 141 outstanding “pitched” voices (voice numbers 01 through 141) and 8 percussion kits
(numbers 142 through 149) that you can select and play on the keyboard.
Select the NORMAL Mode…………………………………………………………………………………………..
1
If you want to play a single voice over the entire range of the PSR-520
keyboard, you’ll need to select the NORMAL mode. To do this, press the
[MODE] button to the right of the display as many times as necessary until
the arrow in the display appears next to “NORMAL” in the mode list to the
right of the display. The other modes will be described later in this manual.
NORMAL
SPLIT
SINGLE
FINGERED
Select the VOICE Function………………………………………………………………………………………..
2
Before you select a voice to play, the PSR-520 voice function must be
selected. The simplest way to do this is to press the [VOICE] button. This
immediately selects the VOICE function no matter what function was previously selected.
An alternative method is to press the [FUNCTION] button to the left of
the display as many times as necessary until the arrowhead in the display
appears next to “VOICE” in the function list to the left of the display.
VOICE
FUNCTION
STYLE
SONG
REGIST MEMORY
MULTI PAD
DUAL VOICE
SPLIT VOICE
HARM
/
ECHO
OVERALL
DIGITAL EFFECT
801
GrandPno
VOICE
•“Kybd Vol” function (see page
67) in the OVERALL function
group can be quickly selected by
pressing and holding the [VOICE]
button.
○○○○○○○○○○○○○○○○○○○○○○○○○○○○○○○○○○○○○○○○○○○○○○○○○○○○○○○○○○○○○○○○○
12

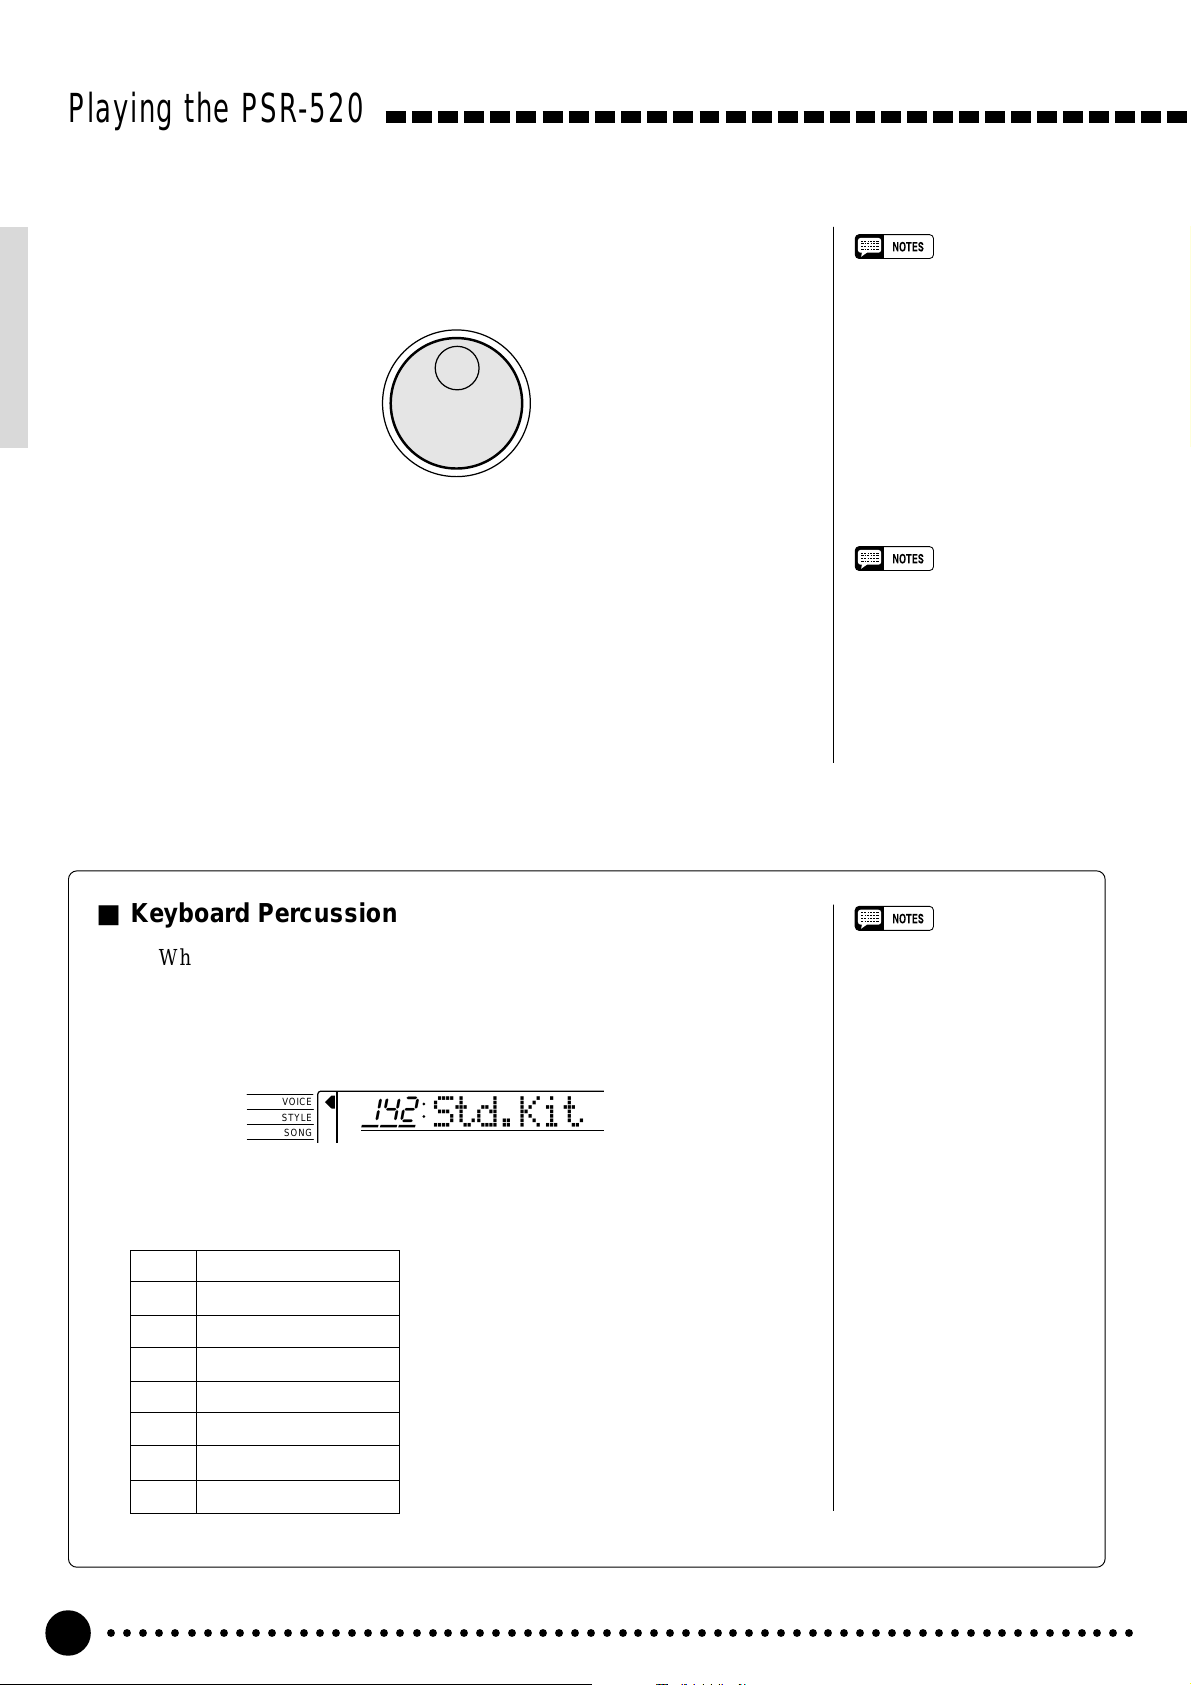
Select a Voice ………………………………………………………………………………………………………………………………….
3
The PSR-520 has 149 voices that can be selected by using either the [–/
NO] and [+/YES] buttons, the number buttons or the data dial. The voices
are listed in the VOICE list printed at the top of the instrument’s control
panel. The number and name of the currently selected voice appears on the
top line of the display panel while the VOICE function is selected.
● The [–/NO] and [+/YES] Buttons
When the VOICE function is selected these buttons step up or down
through the PSR-520’s voices. Press either button briefly to step to the
next voice in the corresponding direction, or hold the button to scroll
rapidly through the voices in the corresponding direction.
789
–
+
/NO
/YES
0
Playing the PSR-520
• Voice numbers 150~151 exclusively can be used as the dual
voice — see page 19.
● The Number Buttons
The number buttons can be used to directly enter the number of the desired voice, thereby immediately selecting that voice without having to
step through a number of other voices.
Two-digit voice numbers (i.e. “01” through “99”) are selected simply by
entering the two digits in sequence — e.g. to select voice number “57”,
briefly press the [5] buttons and then the [7] button.
**
1
– –
123
654
789
–
+
/NO
/YES
0
Three-digit voice numbers (i.e. “100” through “149”) are entered by first
pressing and holding the [1] button until “1” appears in the hundreds
position on the display, then press the remaining two digits in sequence.
**
1
– –
VOICE
STYLE
SONG
102
GrandPno
123
654
• Whenever you select a new
voice, the appropriate voicerelated parameters for that voice
will be set automatically. This is
the PSR-520 Voice Set function.
The Voice Set function can be
turned OFF if not required —
page 69.
• The stereo pan position of the
voice can be set via the “Pan”
function in the OVERALL function group — see page 68.
789
–
+
/NO
/YES
0
○○○○○○○○○○○○○○○○○○○○○○○○○○○○○○○○○○○○○○○○○○○○○○○○○○○○○○○○○○○○○○○○○
13
Playing the PSR-520
● The Data Dial
This is undoubtedly the easiest way to select a voice. Simply rotate the
dial clockwise to increment or counter-clockwise to decrement.
Play & Adjust Volume………………………………………………………………………………………………………….
4
You can now play the selected voice on the PSR-520 keyboard. Use the
[MASTER VOLUME] control to adjust the overall volume level.
• The optimum octave settings
(OVERALL function: octave = 0)
are set to the keyboard for each
voice (except for keyboard percussion).
• The keyboard volume can be
adjusted independently from the
accompaniment volume via the
“Kybd Vol” function in the OVERALL function group — see page
67. “Kybd Vol” function can be
quickly selected by pressing and
holding the [VOICE] button.
■ Keyboard Percussion
When one of the eight PERCUSSION KIT voices are selected — voice
numbers 142 through 149 — you can play drums and percussion instruments on the keyboard. The drums and percussion instruments played by the
various keys are marked by symbols below the keys.
VOICE
STYLE
SONG
● The Percussion Kits
142 Standard Kit
143 Room Kit
144 Rock Kit
145 Electronic Kit
146 Analog Kit
147 Jazz Kit
148 Brush Kit
149 Classic Kit
142
Std.Kit
• The Harmony/Echo and Dual
functions (pages 20 and 17)
cannot be turned ON while a
keyboard percussion voice is
selected, and will automatically
be turned OFF if a keyboard
percussion voice is selected
while they are ON.
• The TRANSPOSE parameter
(page 23) has no effect on the
keyboard percussion voices.
• See page 88 for a complete
listing of the keyboard percussion drum instrument assignments.
○○○○○○○○○○○○○○○○○○○○○○○○○○○○○○○○○○○○○○○○○○○○○○○○○○○○○○○○○○○○○○○○○
14
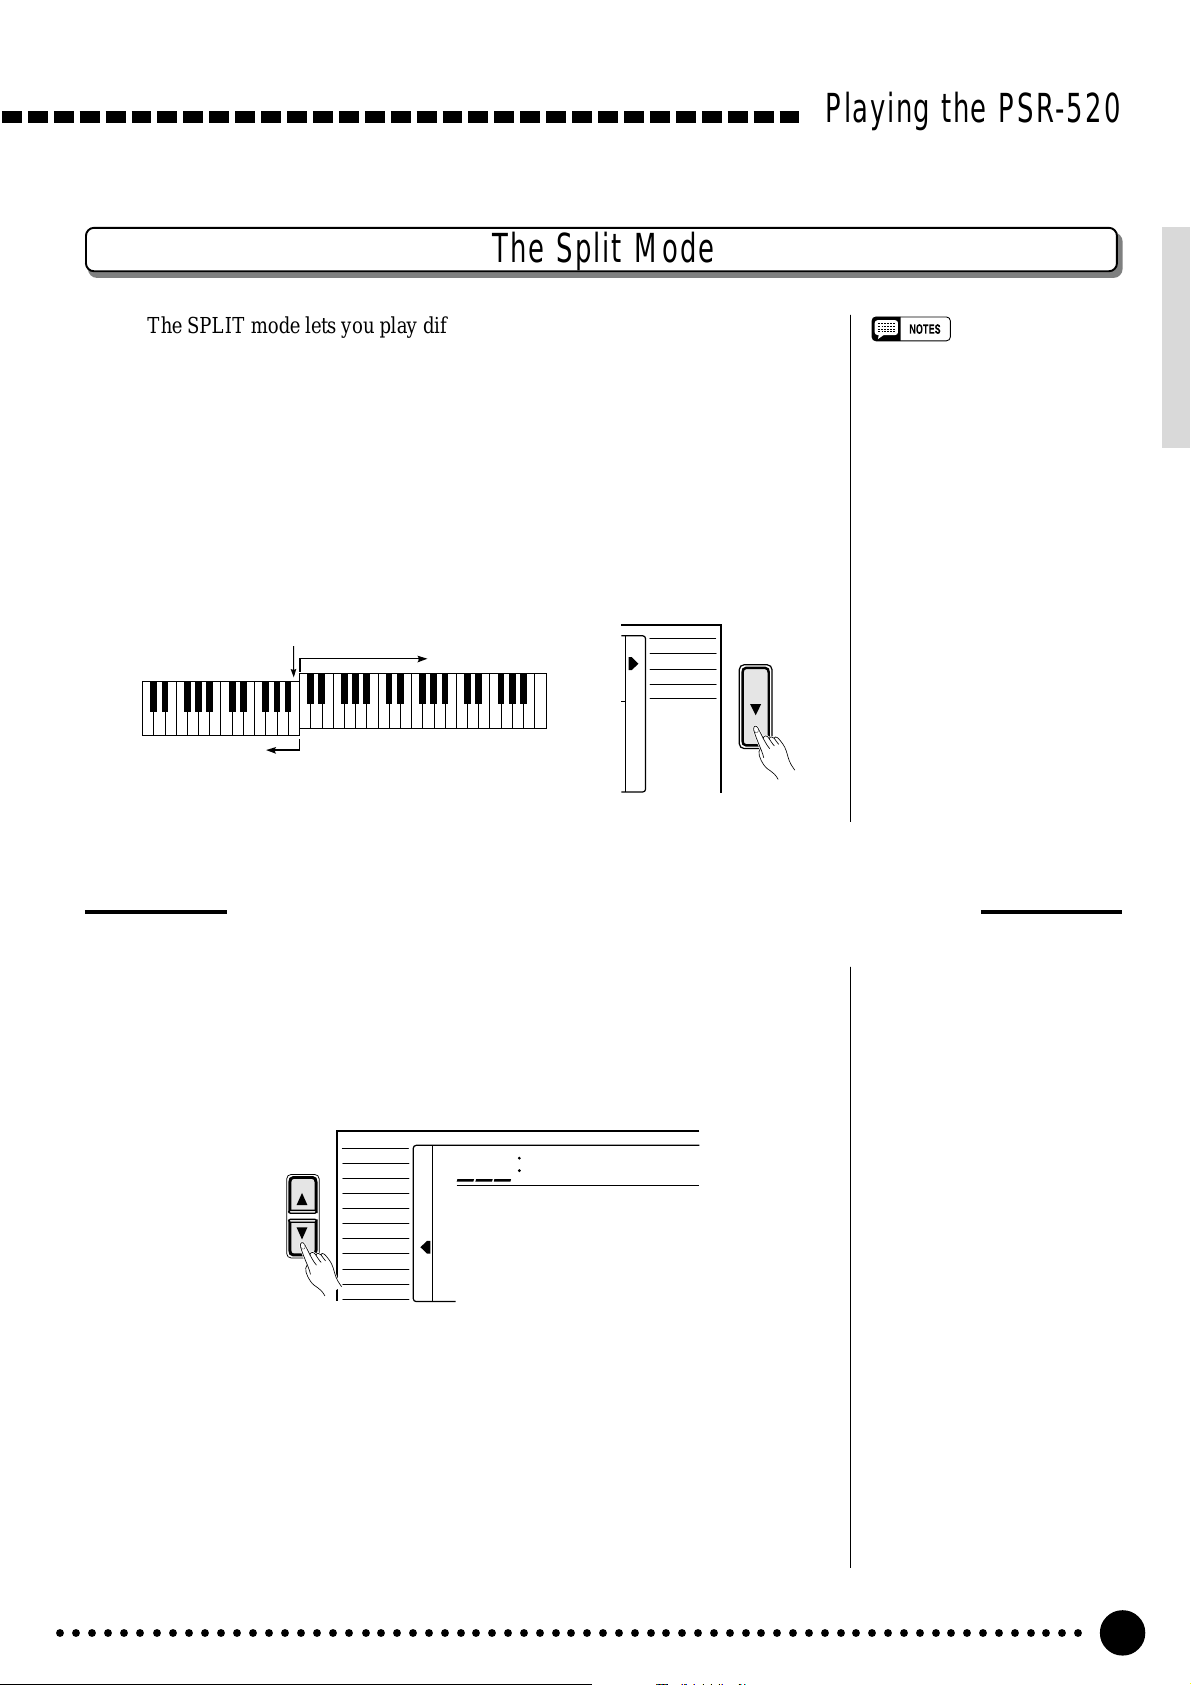
The Split Mode
The SPLIT mode lets you play different voices with the left and right hands.
You could, for example, play bass with the left hand while playing piano with
the right. The right-hand voice is the keyboard voice you select in the normal
way (page 12), and the left hand voice is selected via the SPLIT VOICE function, described below. The “split point” is initially set at B2 (note number 59),
but it can be set at any key on the keyboard.
The SPLIT mode is engaged by pressing the [MODE] button so that the
arrow in the display appears next to “SPLIT” in the mode list to the right of the
display.
Playing the PSR-520
• The SPLIT mode and DUAL
VOICE feature (page 17) can be
used together. In this case the
dual voice plays simultaneously
with the right-hand voice only.
Split Point
Split Voice
Voice selected via
the VOICE function
NORMAL
SPLIT
SINGLE
FINGERED
Changing the Split Voice & Related Parameters
Select the SPLIT VOICE Function…………………………………………………………………..
1
Press the [FUNCTION] button to the left of the display as many times
as necessary until the arrowhead in the display appears next to “SPLIT
VOICE” in the function list to the left of the display.
VOICE
FUNCTION
STYLE
SONG
REGIST MEMORY
MULTI PAD
DUAL VOICE
SPLIT VOICE
HARM
/
ECHO
OVERALL
DIGITAL EFFECT
855
Aco.Bass
Select the Function and Set As Required…………………………………………..
2
Use the cursor [▲] and [▼] buttons to select the desired function, and
then the [–/NO] and [+/YES] buttons, the number buttons or the data dial to
set as required (the name of the selected function and its current setting appear on the top line of the display).
○○○○○○○○○○○○○○○○○○○○○○○○○○○○○○○○○○○○○○○○○○○○○○○○○○○○○○○○○○○○○○○○○
15
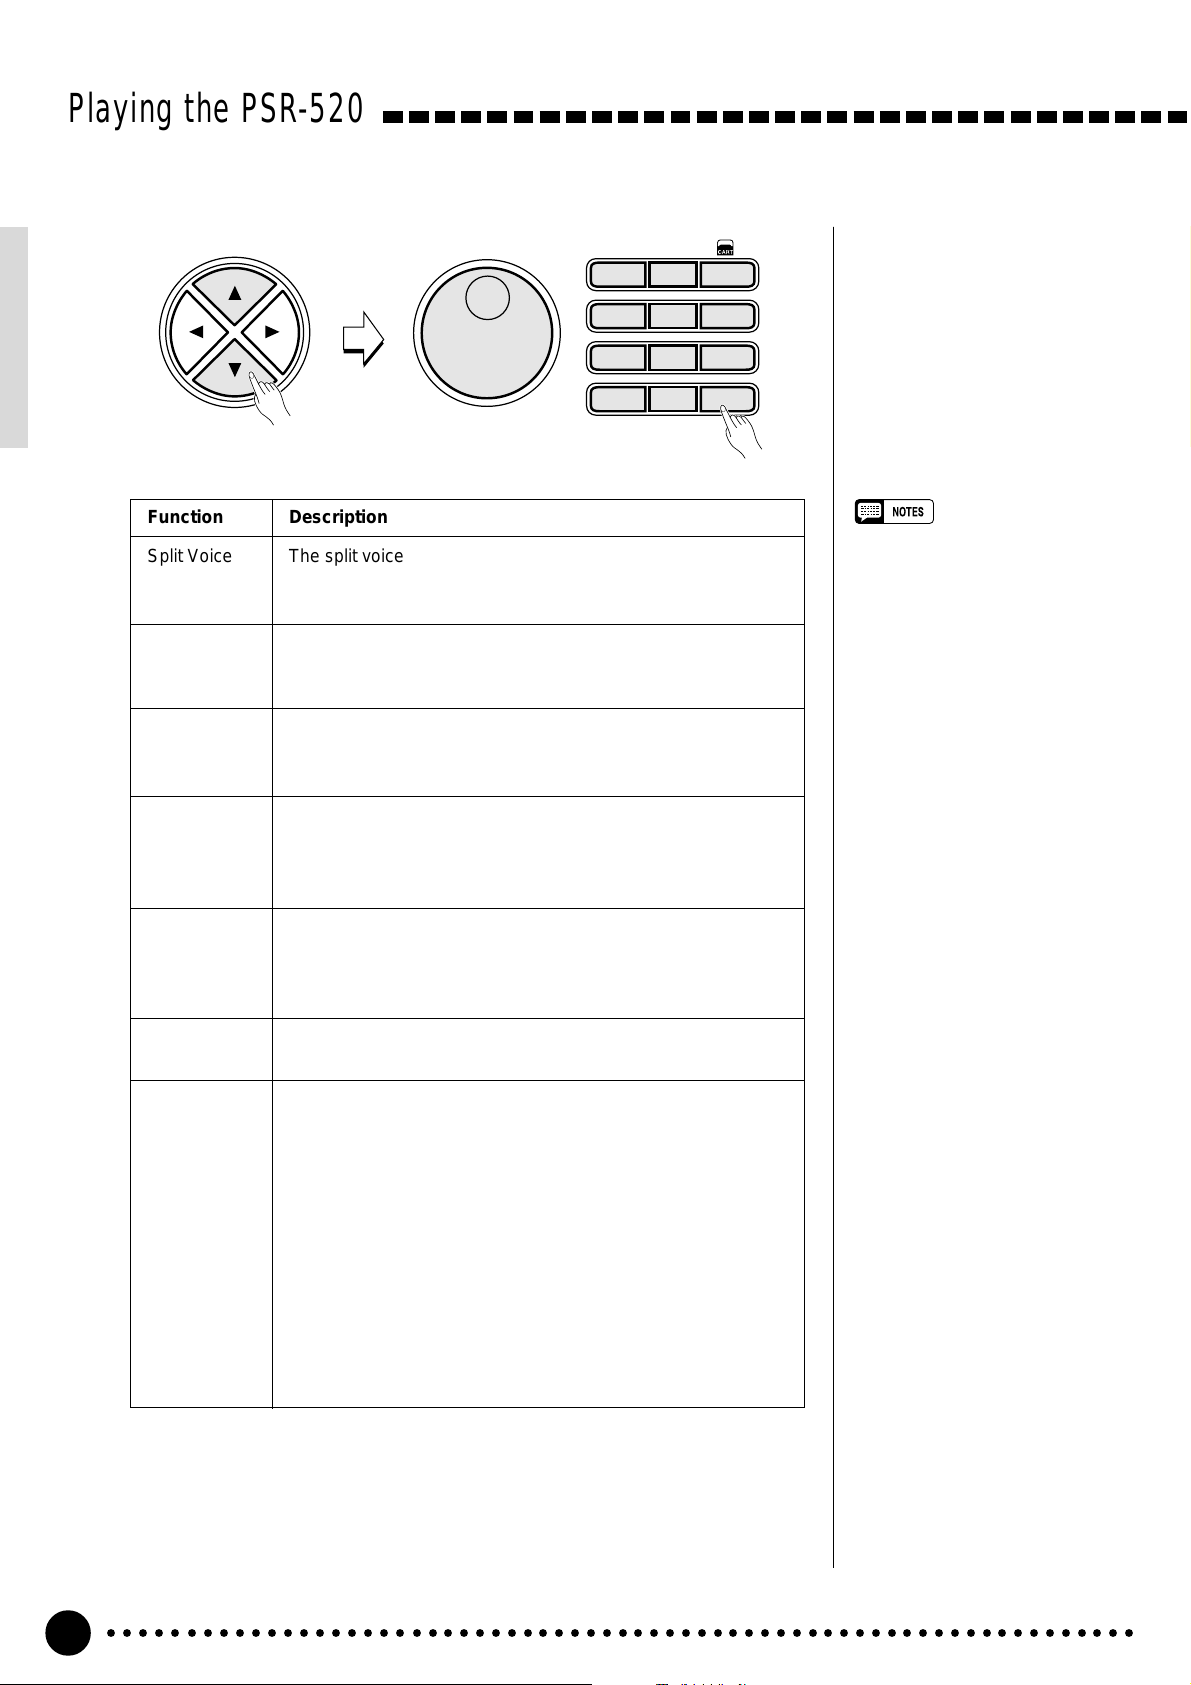
Playing the PSR-520
CURSOR
Function Description
Split Voice The split voice can be changed as required while the number
and name of the current split voice appear on the top line of
the display.
**
1
– –
123
654
789
–
+
/NO
/YES
0
S.Volume Sets the volume of the split voice so you can create the opti-
mum blend with the right-hand voice. The volume range is
from “00” (no sound) to “127” (maximum split voice volume).
S.Octave Shifts the pitch of the split voice up or down one or two oc-
taves. “–1” is down one octave, “–2” is down two octaves; “+1”
and “+2” are up one and two octaves, respectively.
S.RevLvl Sets the reverb send level for the split voice. The reverb send
level determines the amount of signals input to the reverb
effect. The level range is from “00” (no effect) to “127” (maximum effect).
S.ChoLvl Sets the chorus send level for the split voice. The chorus send
level determines the amount of signals input to the chorus
effect. The level range is from “00” (no effect) to “127” (maximum effect).
• If the Voice Set function is ON
(page 69), the Split Voice parameters will change automatically
whenever a different keyboard
voice is selected.
• The selected Split Voice parameter can be reset to its default
value by simultaneously pressing
the [–/NO] and [+/YES] buttons.
• Negative values with “S.Octave”
and “S.Pan” parameters can be
entered by pressing the number
buttons while holding the [–/NO]
button.
• Reverb return level and chorus
return level can be changed via
the “RevRtnLv” and “ChoRtnLv”
function in the DIGITAL EFFECT
function — see pages 25 and 27.
S.Pan Positions the split voice in the stereo sound field. The pan
range is from “–7” to “+7”. “–7” is full left and “+7” is full right.
S.Split Sets the keyboard split point — i.e. the key that separates the
left- and right-hand voices (the split-point key is included in the
left-hand section of the keyboard). Simply press the key you
want to assign as the split point. The key number of the key
you press will appear to the left of “S.Split” on the top line of
the display. You can also use the [–/NO] and [+/YES] buttons,
the number buttons or the data dial to enter the split point key
number. The lowest key on the keyboard (C1) is key number
“36”, middle C (C3) is “60”, and the highest key (C6) is 96. The
split point can be set at any key number from 00 through 127,
allowing the split point to be set outside the range of the PSR520 keyboard for MIDI applications. The default split point is
59 (B2).
Exit…………………………………………………………………………………………………………………………………………………………………..
3
Press the [VOICE] button or select a different function to exit from the
SPLIT VOICE function.
○○○○○○○○○○○○○○○○○○○○○○○○○○○○○○○○○○○○○○○○○○○○○○○○○○○○○○○○○○○○○○○○○
16
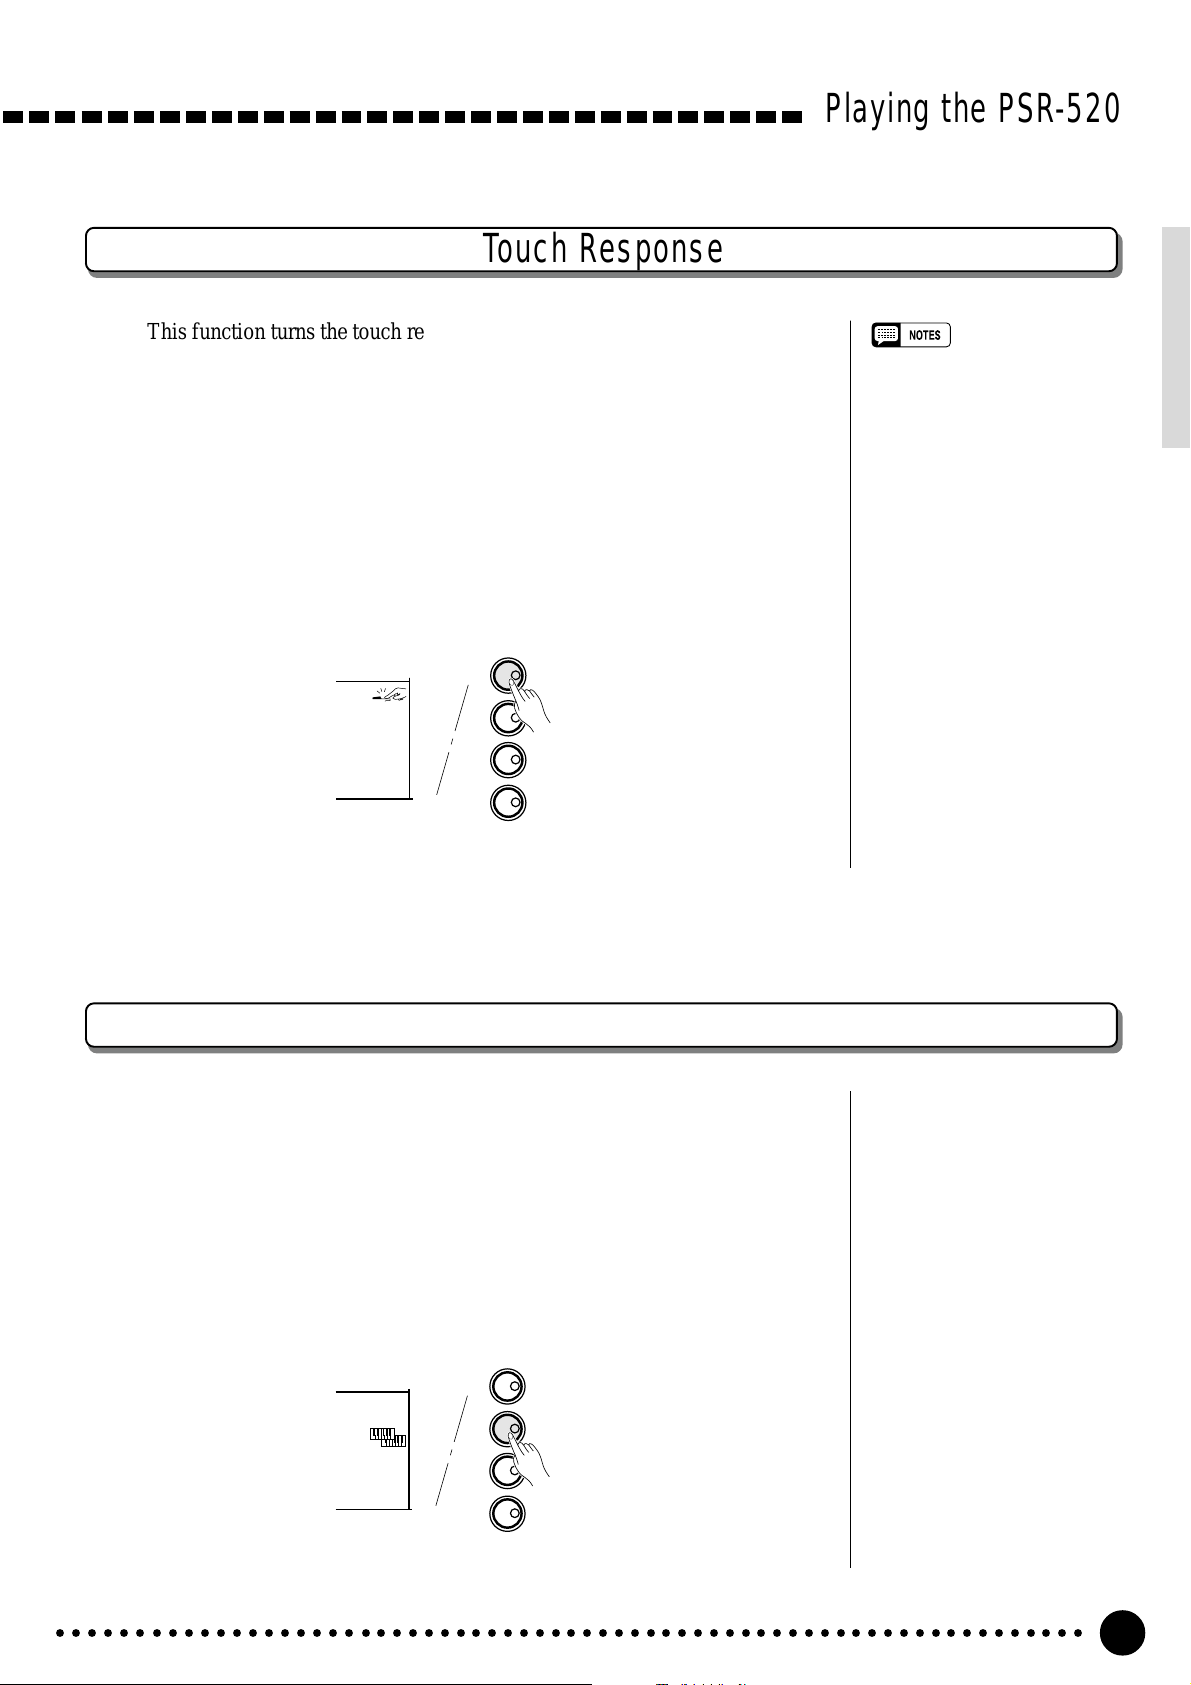
Touch Response
This function turns the touch response of the keyboard ON or OFF. Use the
KEYBOARD [TOUCH RESPONSE] button to turn TOUCH RESPONSE ON
or OFF as required. The touch-response icon will appear next to “TOUCH” in
the display when TOUCH RESPONSE is turned ON. The actual touch response sensitivity of the keyboard can be adjusted via the “TouchSns” function
in the OVERALL function group (page 69). When OFF (i.e. when the touchresponse icon is not showing) the same volume is produced no matter how hard
you play on the keyboard. Touch response can be turned OFF to produce a
more realistic effect with voices that normally do not have touch response: e.g.
organ and harpsichord.
KEYBOARD
TOUCH RESPONSE
TOUCH
DUAL
HARMONY
SUSTAIN
DUAL VOICE
HARMONY/ECHO
SUSTAIN
Playing the PSR-520
• Touch Response is turned ON
whenever the power switch is
turned ON.
• The “TouchSns” function in the
OVERALL function group can be
quickly selected by pressing and
holding the [TOUCH RESPONSE] button.
Dual Voice
When the DUAL VOICE feature is engaged you can play two voices simultaneously across the entire keyboard — the keyboard voice you select in the
normal way (page 12), and a “dual” voice selected via the DUAL VOICE function.
The DUAL VOICE feature is turned ON and OFF by pressing the [DUAL
VOICE] button. The dual-voice icon (overlapping keyboards) will appear next
to “DUAL” in the display when DUAL VOICE is turned ON.
KEYBOARD
TOUCH RESPONSE
TOUCH
DUAL
HARMONY
SUSTAIN
DUAL VOICE
HARMONY/ECHO
SUSTAIN
○○○○○○○○○○○○○○○○○○○○○○○○○○○○○○○○○○○○○○○○○○○○○○○○○○○○○○○○○○○○○○○○○
17
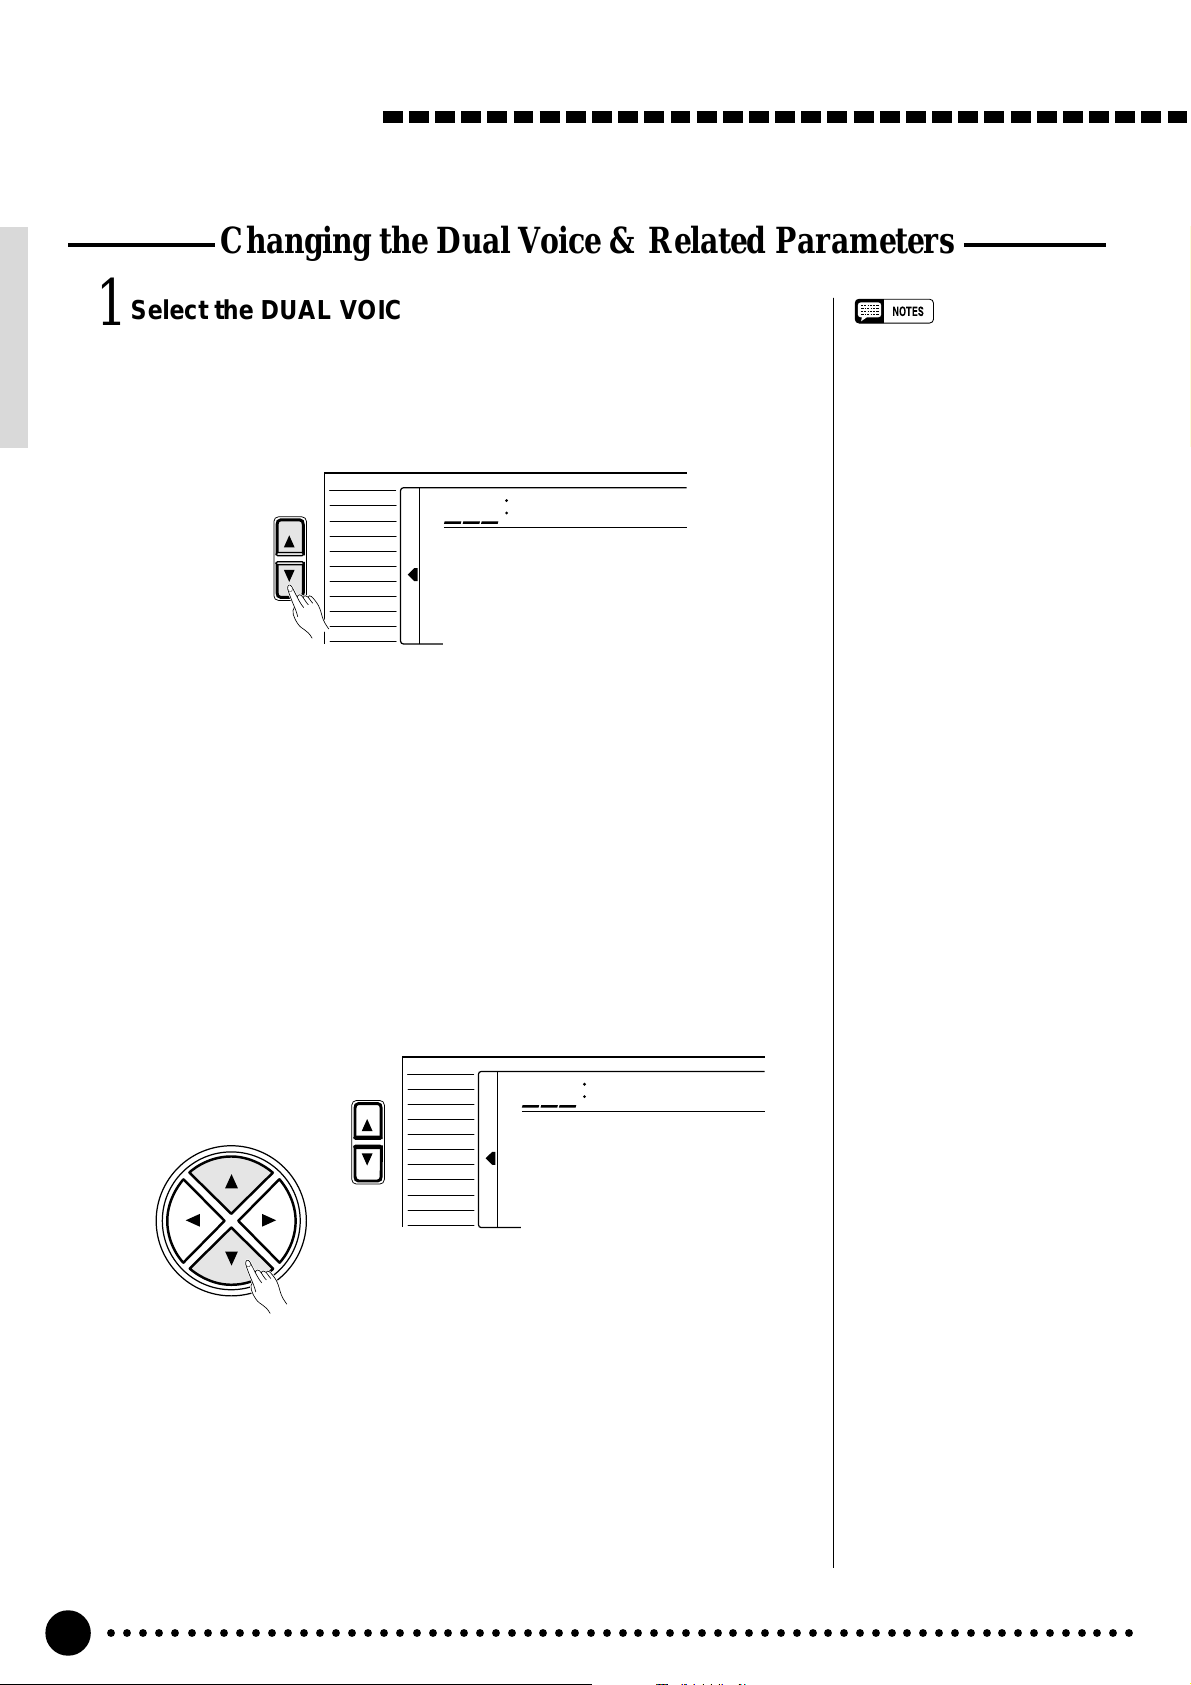
Playing the PSR-520
Changing the Dual Voice & Related Parameters
Select the DUAL VOICE Function……………………………………………………………………
1
Press the [FUNCTION] button to the left of the display as many times
as necessary until the arrowhead in the display appears next to “DUAL
VOICE” in the function list to the left of the display.
FUNCTION
REGIST MEMORY
MULTI PAD
DUAL VOICE
SPLIT VOICE
HARM
DIGITAL EFFECT
VOICE
STYLE
SONG
/
ECHO
OVERALL
873
•“DUAL VOICE” function can be
quickly selected by pressing and
holding the [DUAL VOICE] button.
Strings2
Select the Function and Set As Required…………………………………………..
2
Use the cursor [▲] and [▼] buttons to select the desired function, and
then the [–/NO] and [+/YES] buttons, the number buttons or the data dial to
set as required (the name of the selected function and its current setting appear on the top line of the display).
VOICE
CURSOR
FUNCTION
STYLE
SONG
REGIST MEMORY
MULTI PAD
DUAL VOICE
SPLIT VOICE
HARM
/
ECHO
OVERALL
DIGITAL EFFECT
100
D.Volume
○○○○○○○○○○○○○○○○○○○○○○○○○○○○○○○○○○○○○○○○○○○○○○○○○○○○○○○○○○○○○○○○○
18

Playing the PSR-520
Function Description
Dual Voice The dual voice can be changed as required while the
number and name of the current dual voice appear on the
top line of the display.
The PSR-520 has 143(voice number 01~141 and
150~151) dual voices. Voice numbers 150~151 exclu-
sively can be used as the dual voice.
D.Volume Sets the volume of the dual voice so you can create the
optimum blend with the main keyboard voice. The volume
range is from “00” (no sound) to “127” (maximum dual
voice volume).
D.Octave Shifts the pitch of the dual voice up or down one or two
octaves. “–1” is down one octave, “–2” is down two octaves; “+1” and “+2” are up one and two octaves, respectively. The original octave of the dual voice is determined
by the “Octave” function in the OVERALL function group
— page 67.
D.RevLvl Sets the reverb send level for the dual voice. The reverb
send level determines the amount of signals input to the
reverb effect. The level range is “00” (no effect) to “127”
(maximum effect).
D.ChoLvl Sets the chorus send level for the dual voice. The chorus
send level determines the amount of signals input to the
chorus effect. The level range is “00” (no effect) to “127”
(maximum effect).
• If the Voice Set function is ON
(page 69), the Dual Voice parameters will change automatically
whenever a different voice is
selected via the VOICE function.
• Keyboard percussion voices
cannot be used as the dual
voice.
• The selected Dual Voice parameter can be reset to its default
value by simultaneously pressing
the [–/NO] and [+/YES] buttons.
• The octave of the main and dual
voices can be changed via the
“Octave” function in the OVERALL function group — page 67.
• Negative values with “D.Octave”
and “D.Pan” parameters can be
entered by pressing the number
buttons while holding the [–/NO]
button.
• Reverb return level and chorus
return level can be changed via
the “RevRtnLv” and “ChoRtnLv”
functions, respectively, in the
DIGITAL EFFECT function —
see pages 25 and 27.
D.Pan Positions the dual voice in the stereo sound field. The pan
range is from “–7” to +”7″. “–7” is full left and “+7” is full
right.
Exit…………………………………………………………………………………………………………………………………………………………………..
3
Press the [VOICE] button or select a different function to exit from the
DUAL VOICE function.
○○○○○○○○○○○○○○○○○○○○○○○○○○○○○○○○○○○○○○○○○○○○○○○○○○○○○○○○○○○○○○○○○
19
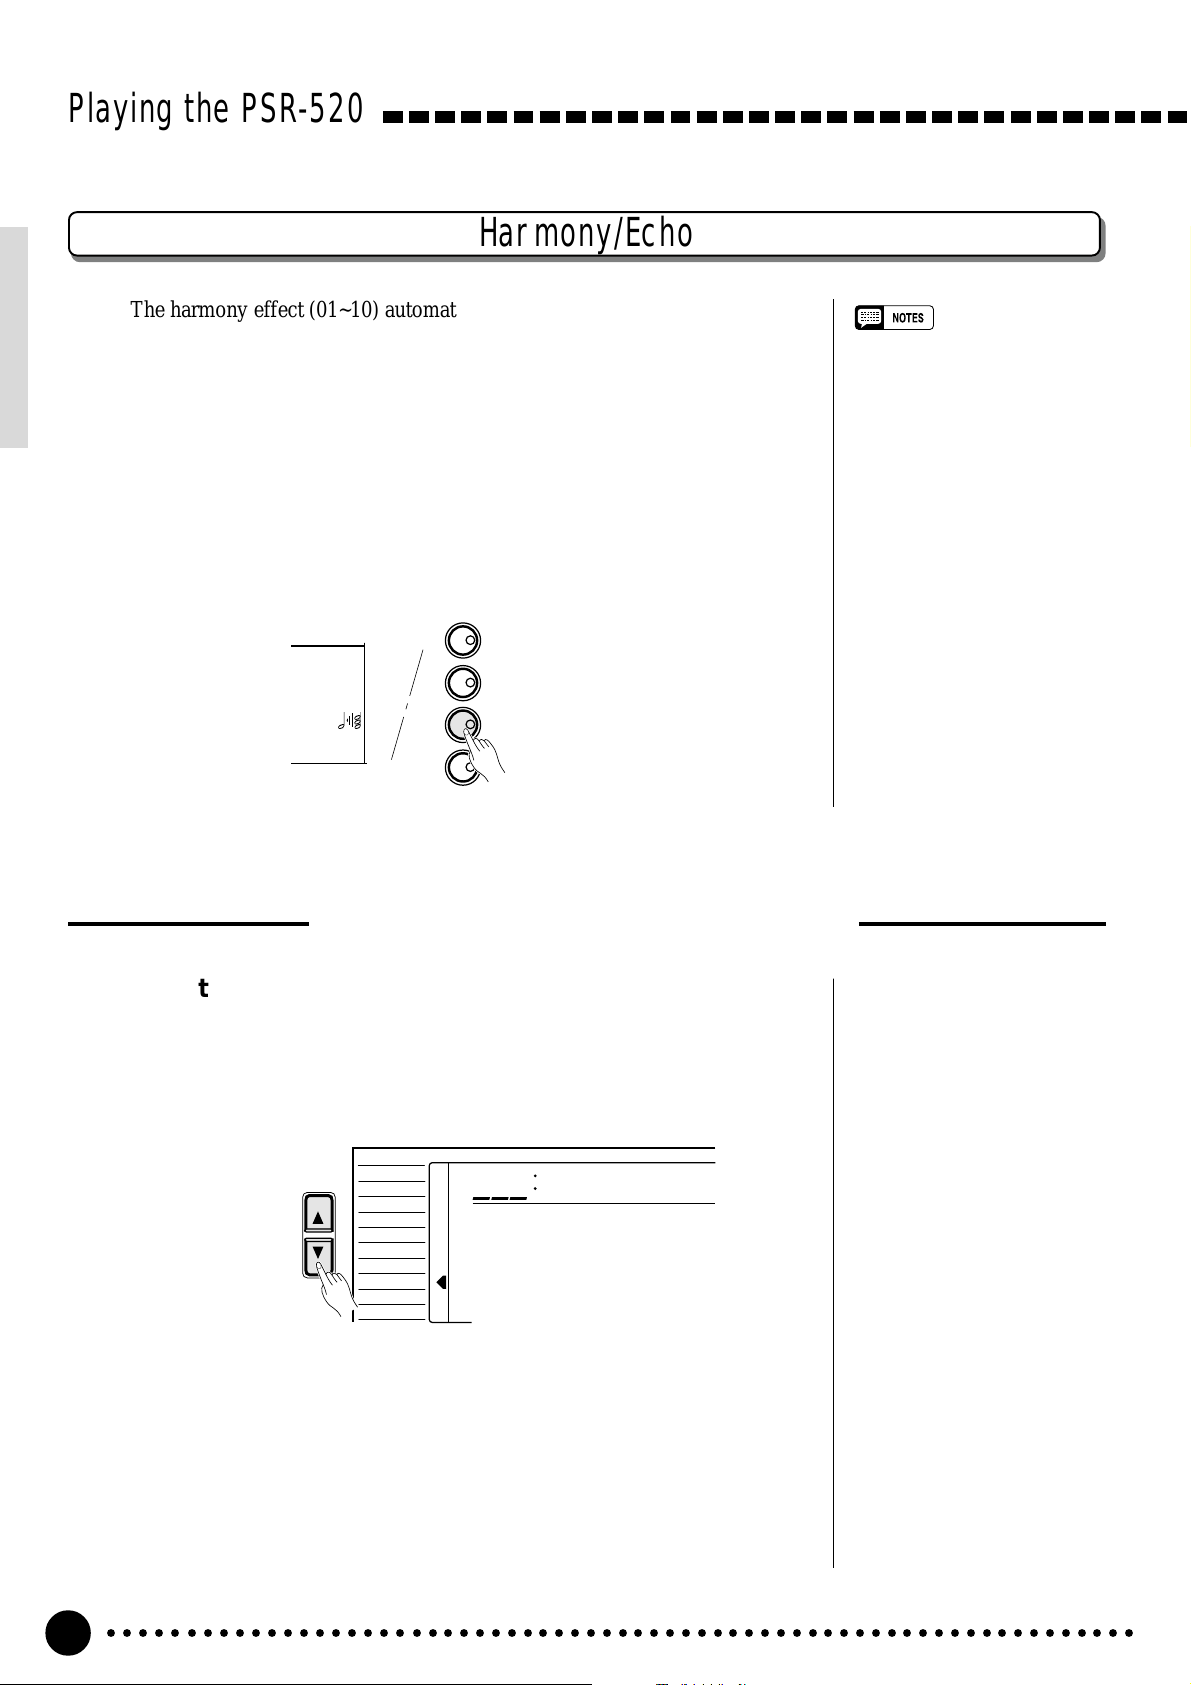
Playing the PSR-520
Harmony/Echo
The harmony effect (01~10) automatically adds appropriate harmony notes
to the melody line you play on the keyboard. The harmony effect is derived
from the chords you play on the left hand parts.
The echo effect (11~22) adds delay-based effects to the right hand melody
parts.
Press the [HARMONY/ECHO] button to turn the HARMONY/ECHO
effect ON or OFF. When HARMONY/ECHO is turned ON, the harmony icon
will appear next to “HARMONY” in the display.
KEYBOARD
TOUCH RESPONSE
TOUCH
DUAL
HARMONY
SUSTAIN
DUAL VOICE
HARMONY/ECHO
SUSTAIN
• Harmony/Echo effect can not be
turned ON when a keyboard
percussion kit is selected for the
Voice.
• Harmony can not be used when
the Auto Accompaniment Chord
Cancel function (page 32) is in
use.
• Harmony does not apply in the
NORMAL mode.
• Harmony can be used in the
SPLIT mode as well as in the
SINGLE and FINGERED modes.
• The Harmony/Echo effect can
not be turned ON when the FINGERED FULL mode (page 33) is
in use and will automatically be
turned OFF when the FINGERED
FULL mode is selected.
Selecting a Harmony/Echo Type
Select the Harmony/Echo Function……………………………………………………………..
1
Press the [FUNCTION] button to the left of the display as many times
as necessary until the arrowhead in the display appears next to “HARM/
ECHO” in the function list to the left of the display.
VOICE
FUNCTION
STYLE
SONG
REGIST MEMORY
MULTI PAD
DUAL VOICE
SPLIT VOICE
HARM
/
ECHO
OVERALL
DIGITAL EFFECT
You can also enter the HARM/ECHO function by pressing and holding
the [HARMONY/ECHO] button until the arrow jumps to the “HARM/
ECHO” position and the current harmony/echo name appears in the display.
805
Block
○○○○○○○○○○○○○○○○○○○○○○○○○○○○○○○○○○○○○○○○○○○○○○○○○○○○○○○○○○○○○○○○○
20
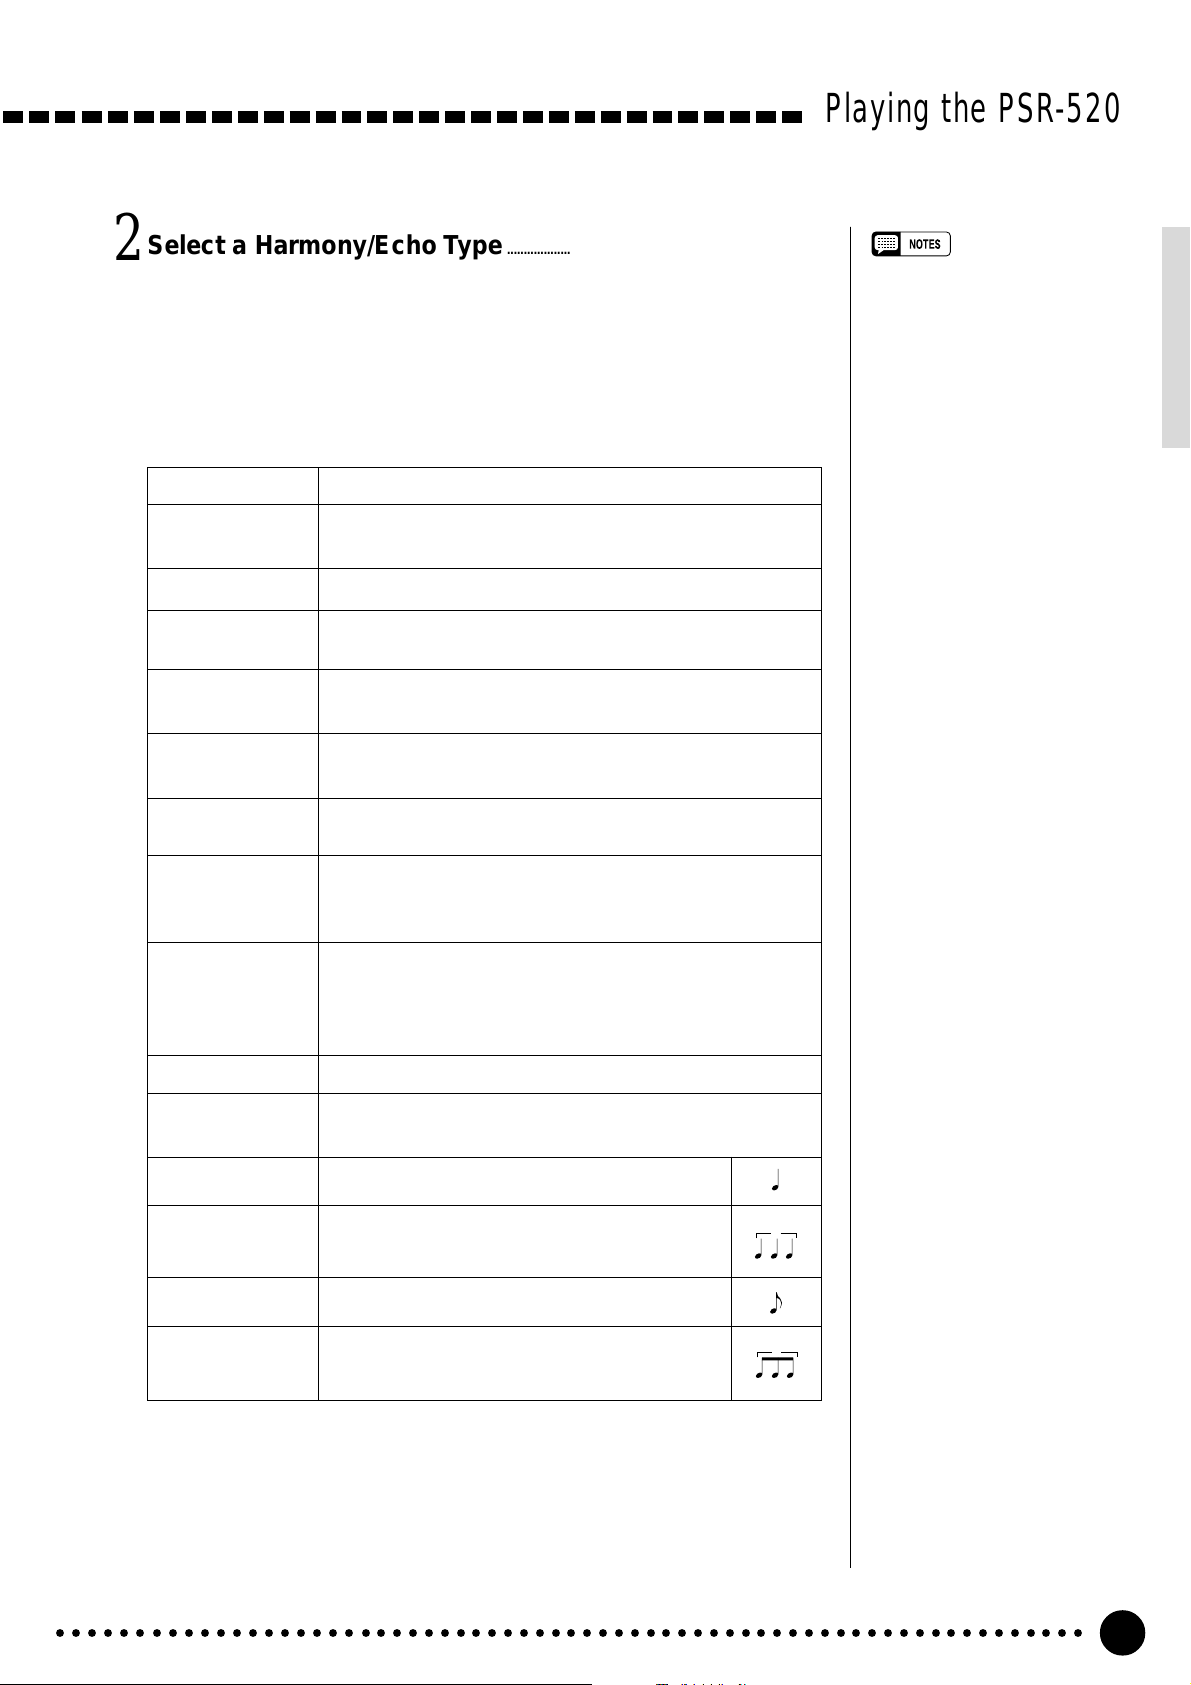
Select a Harmony/Echo Type…………………………………………………………………………………
2
Use the [–/NO] and [+/YES] buttons, the number buttons or the data dial
to select one of the available harmony/echo types (listed below).
● The Harmony (01~10) / Echo (11~22) Types
Type Description
01: Duet This harmony type produces a duophonic melody with the
second voice below the melody line.
02: 1+5 A parallel voice is produced a fifth above the melody voice.
03: Country Similar to Duet, but the second voice is above the melody
line.
04: Trio This harmony type generates two voices in addition to the
melody voice.
Playing the PSR-520
• If the VOICE SET function is ON
(page 69), the harmony/echo
type will change automatically
whenever a different voice is
selected via the VOICE function.
• The harmony/echo type can be
reset to its default by simultaneously pressing the [–/NO] and [+/
YES] buttons.
05: Block Three or four notes are added to the melody to produce
four or five-note chords.
06: 4WayClose1 Three harmony notes are generated to produce a four-note
chord.
07: 4WayClose2 Similar to the preceding type, but depending on the chords
played this type will sometimes produce a more colorful
sound.
08: 4WayOpen Four-note chords with open voice (large intervals between
the notes). The result is a very “open” sound. Since the
harmony notes can be as much as two octaves below the
melody, avoid playing in the lower registers.
09: Octave One note is added an octave below the melody.
10: Strum The notes and assignments are the same as in the Block
type, but the notes are arpeggiated.
11: Echo1/4 This type creates quarter-note delayed repeats.
12: Echo1/6 This type creates quarter-note triplet delayed
repeats.
13: Echo1/8 This type creates 8th-note delayed repeats.
3
14: Echo1/12 This type creates 8th-note triplet delayed
repeats.
○○○○○○○○○○○○○○○○○○○○○○○○○○○○○○○○○○○○○○○○○○○○○○○○○○○○○○○○○○○○○○○○○
3
21
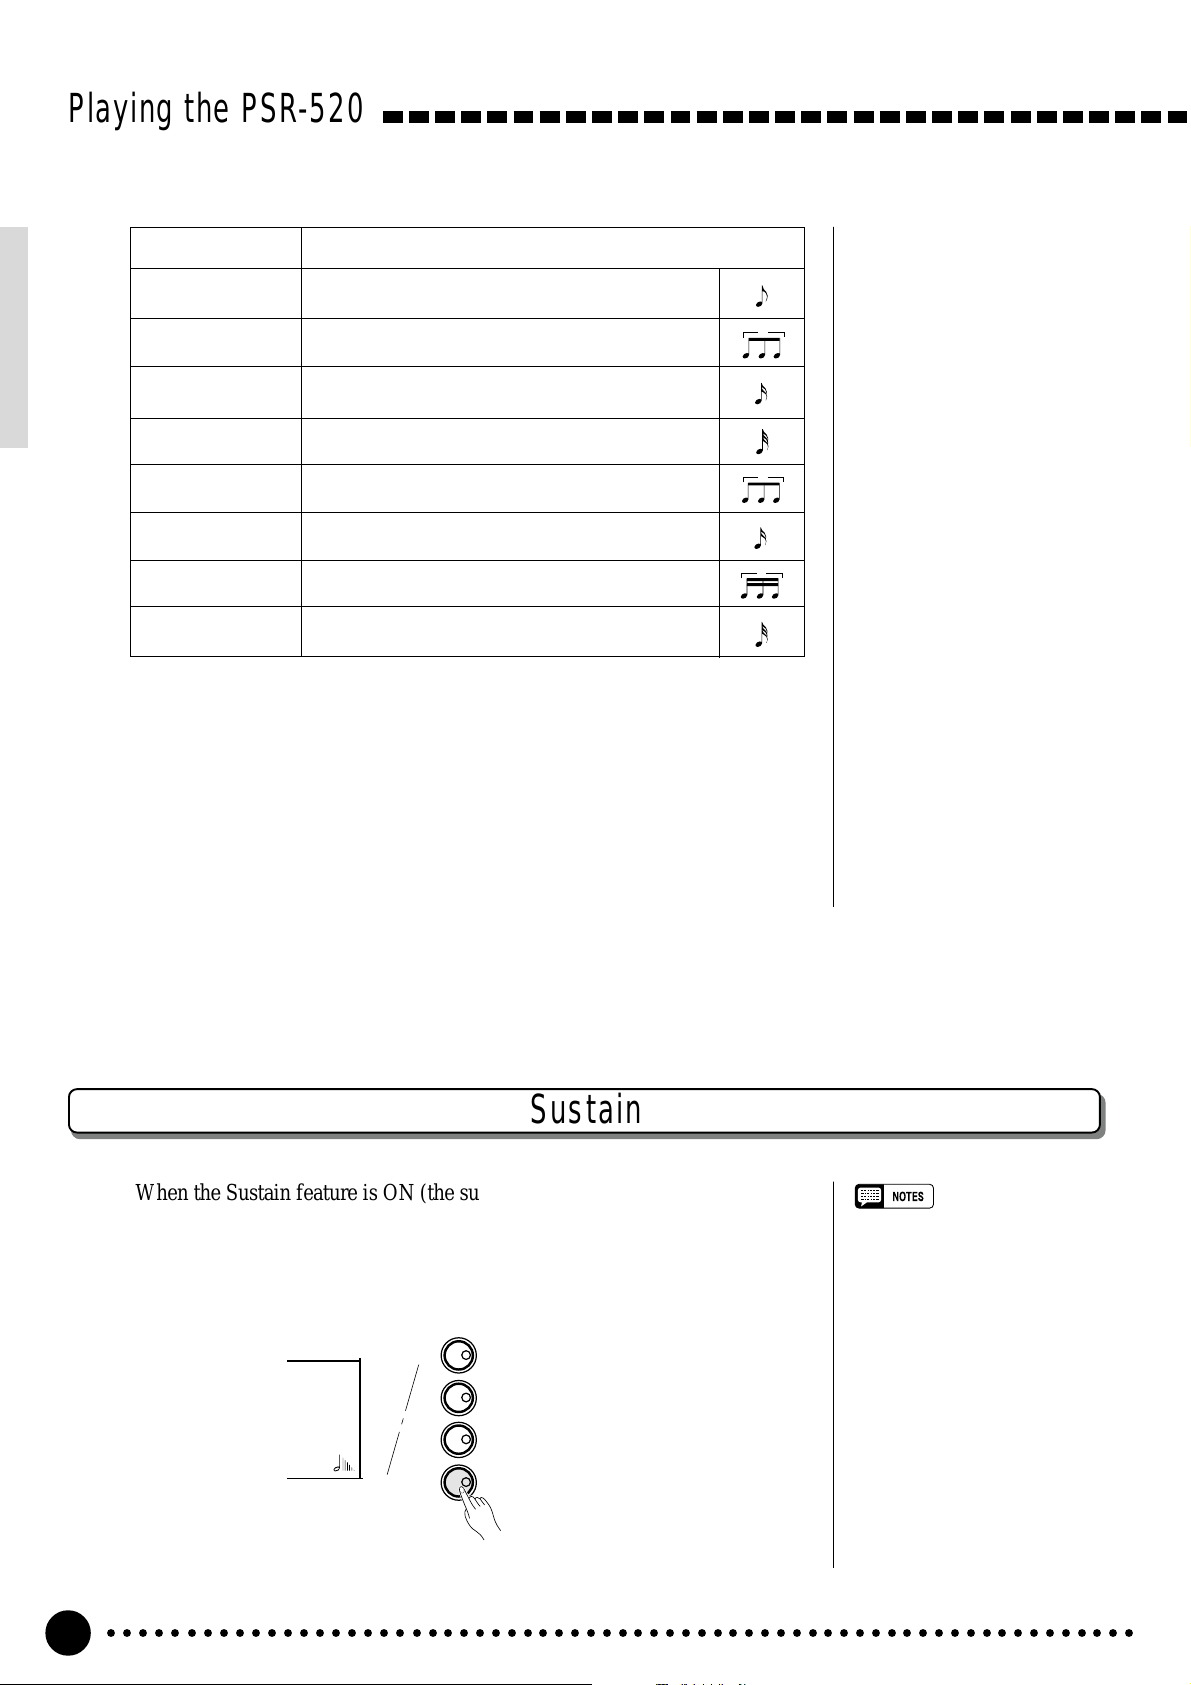
Playing the PSR-520
Type Description
15: Tremolo1/8 This type creates 8th-note tremolos.
16: Tremolo1/12 This type creates 8th-note triplet tremolos.
17: Tremolo1/16 This type creates 16th-note tremolos.
18: Tremolo1/32 This type creates 32nd-note tremolos.
19: Trill1/12 This type creates 8th-note triplet trilled repeats.
20: Trill1/16 This type creates 16th-note trilled repeats.
21: Trill1/24 This type creates 16th-note triplet trilled repeats.
22: Trill1/32 This type creates 32nd-note trilled repeats.
Exit…………………………………………………………………………………………………………………………………………………………………..
3
Press the [VOICE] button or select a different function to exit from the
HARM/ECHO function.
3
3
3
Sustain
When the Sustain feature is ON (the sustain icon will appear next to “SUS-
TAIN” in the display), all notes played on the keyboard have a longer sustain.
Press the [SUSTAIN] button to turn the SUSTAIN effect ON or OFF.
KEYBOARD
TOUCH RESPONSE
TOUCH
DUAL
HARMONY
SUSTAIN
○○○○○○○○○○○○○○○○○○○○○○○○○○○○○○○○○○○○○○○○○○○○○○○○○○○○○○○○○○○○○○○○○
22
DUAL VOICE
HARMONY/ECHO
SUSTAIN
• Sustain does not apply to some
voices.
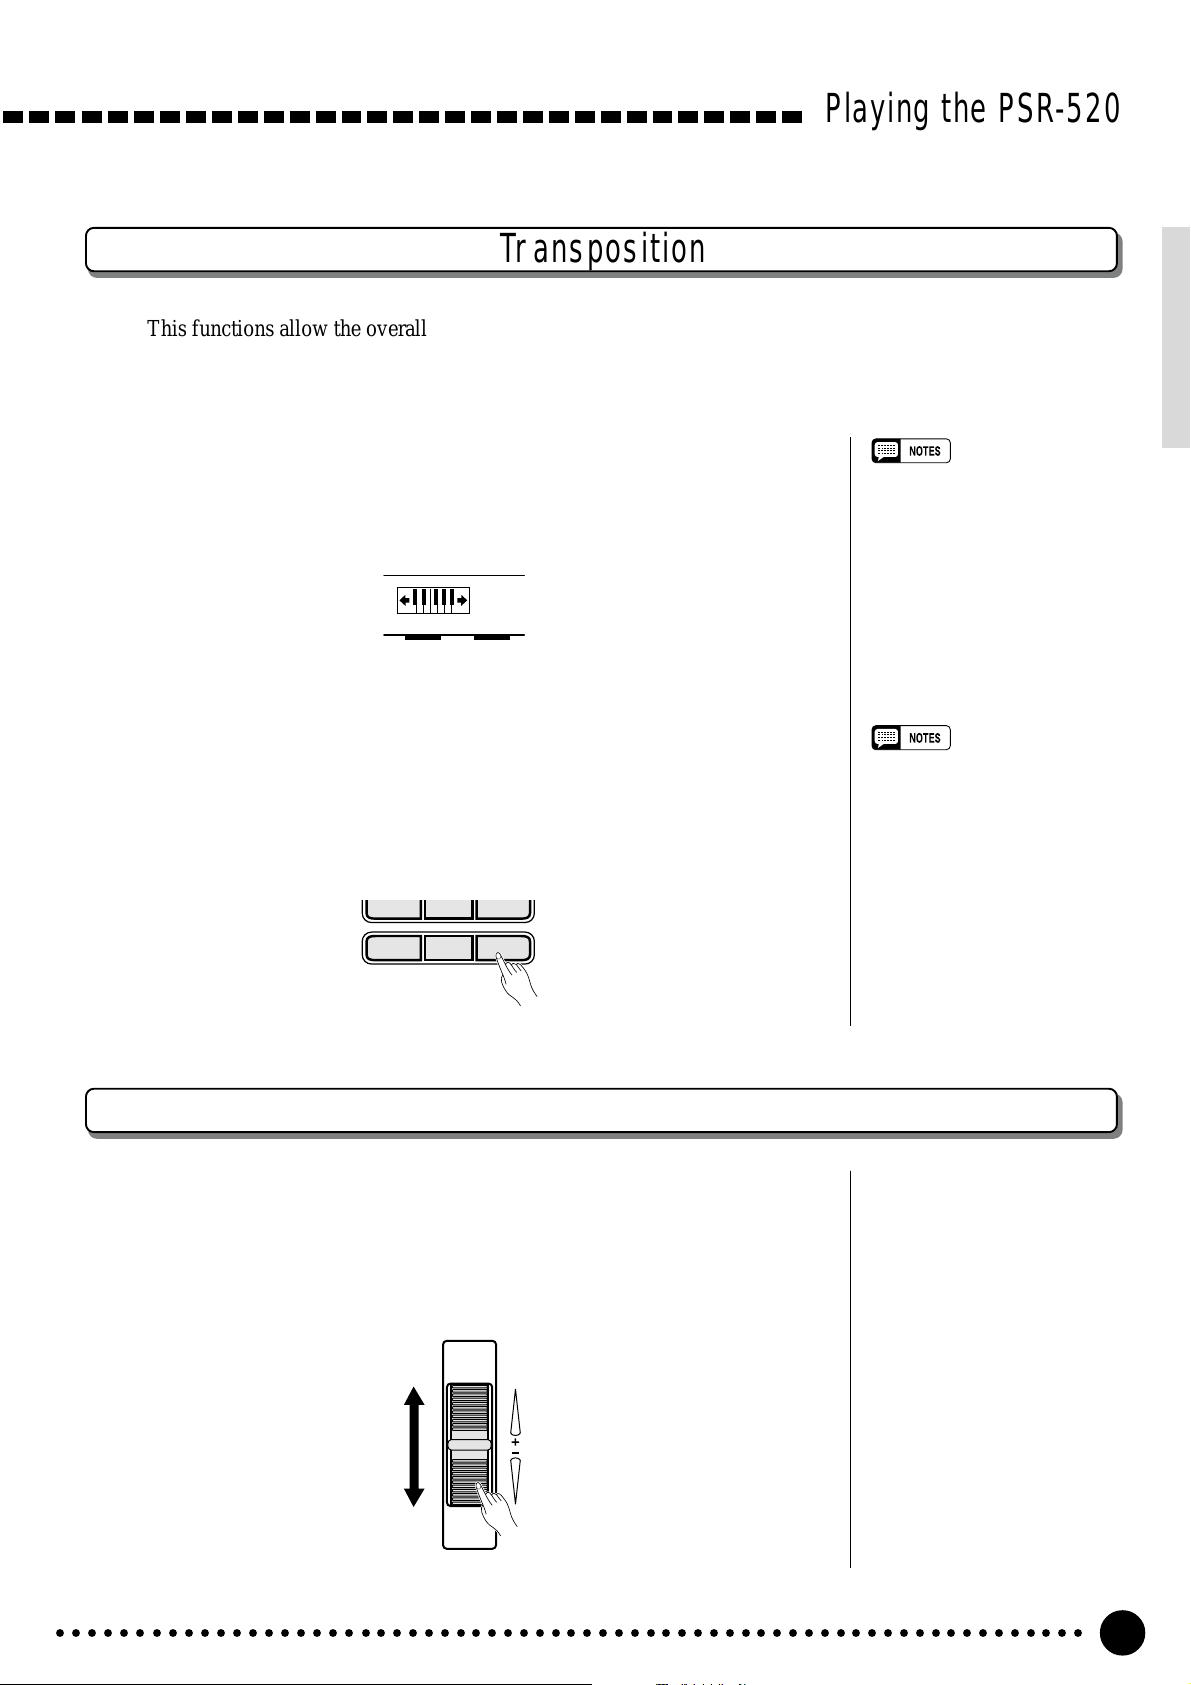
Playing the PSR-520
Transposition
This functions allow the overall pitch of the PSR-520 to be transposed up or down by a maximum of one
octave in semitone increments.
Move the Cursor to the Transpose Value……………………………………………
1
Use the CURSOR buttons to select the number to the right of the key-
board icon labelled “TRANSPOSE” on the display (the number will flash
when selected).
TRANSPOSE
0
• Press the [–/NO] and [+/YES]
buttons simultaneously to instantly reset the transpose value
to “0”.
• The new transpose value will
apply from the next note played.
Set the Transposition As Required……………………………………………………………….
2
Use the [–/NO] and [+/YES] buttons, the number buttons or the data dial
to set the desired degree of transposition. The transpose range is from –12 to
+12, allowing a maximum upward or downward transposition of 1-octave.
A setting of “0” produces the normal pitch.
789
–
/NO
+/YES
0
Pitch Bend
The PITCH BEND wheel to the left of the keyboard allows the pitch of
notes played on the keyboard to be bend up or down — roll the wheel away from
you to bend up, and toward you to bend down.
The actual pitch bend range can be adjusted via the “PBRange” function in
the OVERALL function group (page 70).
• Negative values can be entered
by pressing the number buttons
while holding the [–/NO] button.
PITCH BEND
○○○○○○○○○○○○○○○○○○○○○○○○○○○○○○○○○○○○○○○○○○○○○○○○○○○○○○○○○○○○○○○○○
23
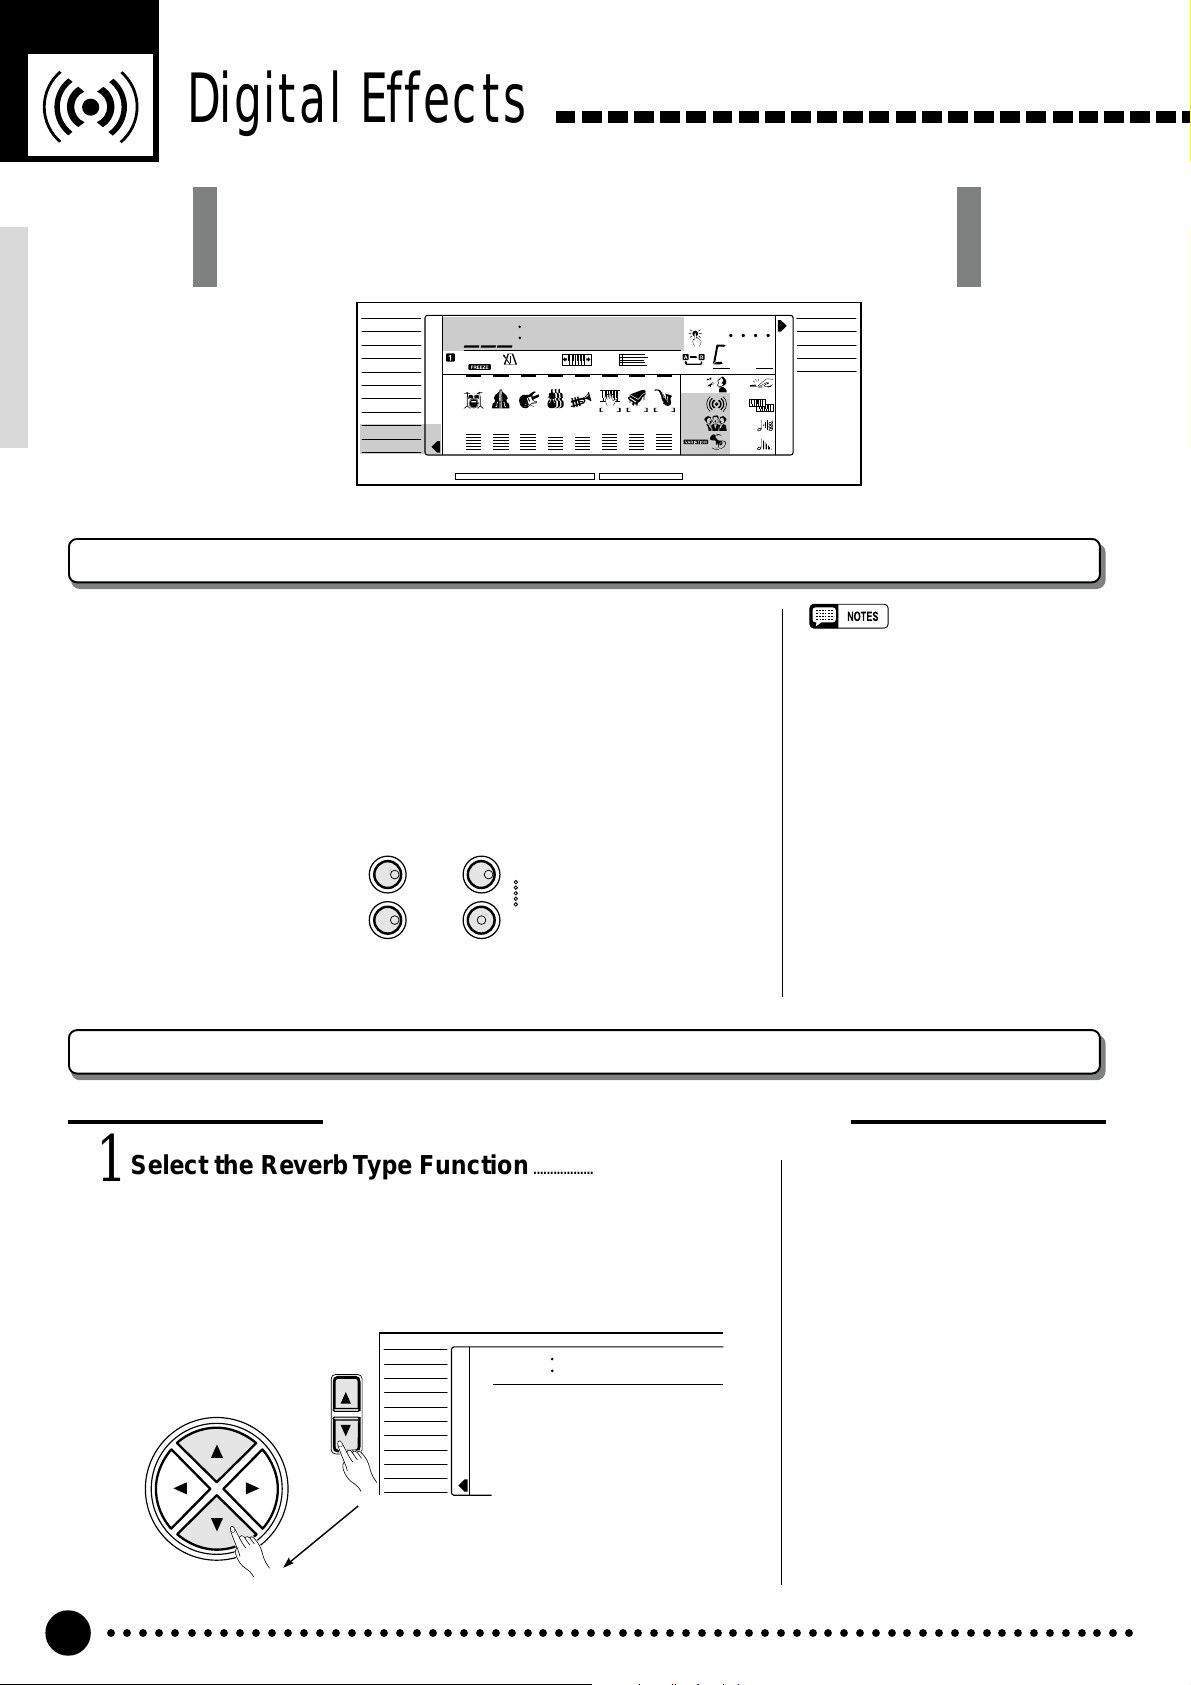
Digital Effects
The PSR-520 provides a variety of Digital Effects-12 Reverb Effects, 9
Chorus Effects and 45 DSP Effects- which are specially tailored and make
your performance perfect.
VOICE
STYLE
SONG
REGIST MEMORY
MULTI PAD
DUAL VOICE
SPLIT VOICE
HARM
/
ECHO
OVERALL
DIGIT AL EFFECT
801
≤Hall1
118 10 a01
TEMPO TRANSPOSE MEASURE REPEAT CHORD
REGIST
RHYTHM BASS CHORD PAD PHRASE ACCOMP MELODY
111
ON /
OFF
VOICE
135102117130 1011011
VOL
ACCOMP TRACK SONG TRACK
MELODY
REC REC REC
1
OTS
2
REVERB DUAL
CHORUS HARMONY
DSP SUSTAIN
BEAT
TOUCHMINUS ONE
Using the Digital Effects
The PSR-520 has three types of digital effects — Reverb, Chorus
and DSP— that can be turned ON or OFF by pressing the [REVERB]
button, [CHORUS] button and [DSP] button respectively. DSP effect
has a set of variations which can be accessed by using the [DSP VARI-
ATION] button (ON/OFF). Each icon will appear in the display when
the effects are turned ON.
DIGITAL EFFECT
REVERB
DSP
NORMAL
SPLIT
SINGLE
FINGERED
• Pressing the [REVERB], [CHORUS] or
[DSP] button turns ON/OFF the respective effect for the VOICE function voice.
• If the Voice Set function (page 69) is
ON, the Reverb/Chorus/DSP VARIATION ON/OFF status will automatically
be determined, while DSP will be
turned ON whenever a different voice is
selected via the VOICE function.
CHORUS
DSP
VARIATION
Changing the Reverb Effect
Selecting the Reverb Effect Type
Select the Reverb Type Function………………………………………………………….
1
Press the [FUNCTION] button to the left of the display as many
times as necessary until the arrowhead in the display appears next to
“DIGITAL EFFECT” in the function list to the left of the display, and
use the cursor [▲] and [▼] buttons to select the Reverb Type function,
“Reverb m”.
VOICE
CURSOR
FUNCTION
STYLE
SONG
REGIST MEMORY
MULTI PAD
DUAL VOICE
SPLIT VOICE
/
ECHO
HARM
OVERALL
DIGIT AL EFFECT
Reverb ≥
○○○○○○○○○○○○○○○○○○○○○○○○○○○○○○○○○○○○○○○○○○○○○○○○○○○○○○○○○○○○○○○○○
24
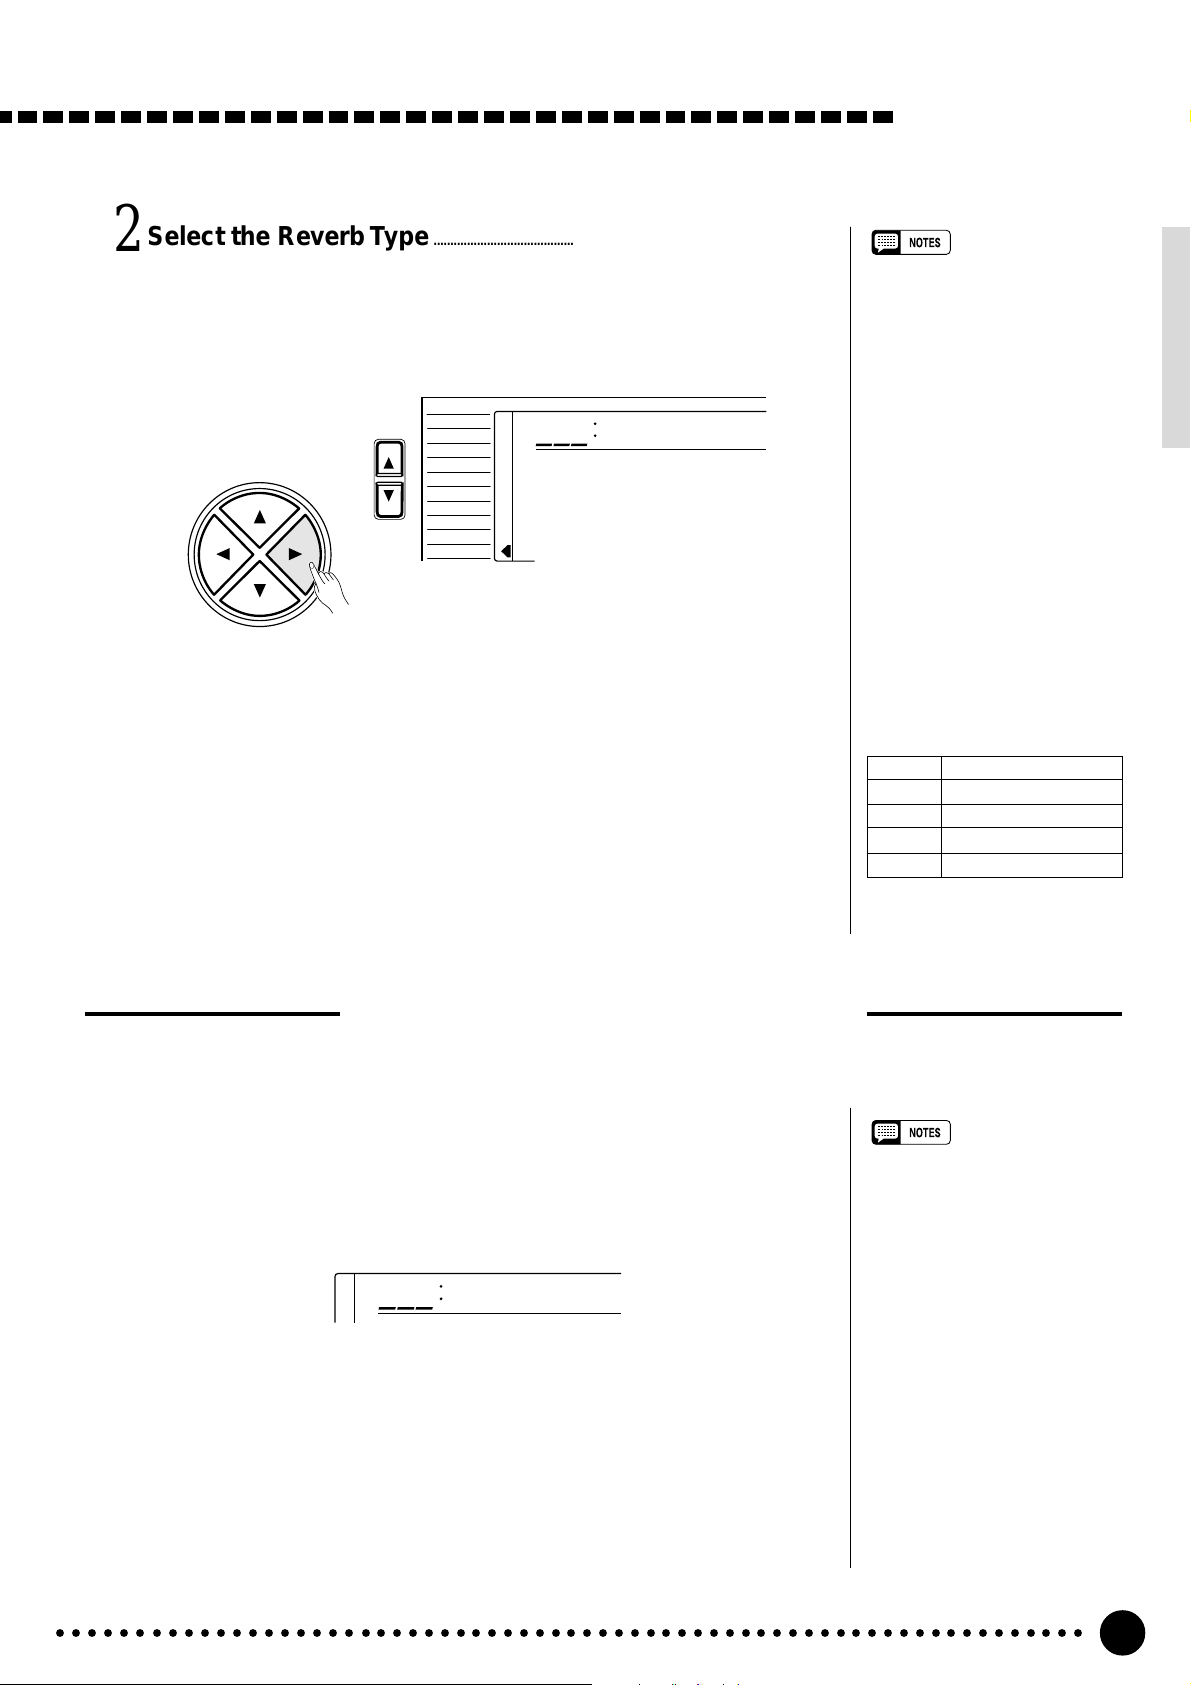
Select the Reverb Type…………………………………………………………………………………………………….
2
Use the cursor [>] button to enter the Reverb Type function and then
select one of the 13 reverb types using the [–/NO] and [+/YES] buttons, the
number buttons or the data dial. The name of the selected reverb type appears on the top line of the display.
VOICE
CURSOR
FUNCTION
STYLE
SONG
REGIST MEMORY
MULTI PAD
DUAL VOICE
SPLIT VOICE
HARM
/
ECHO
OVERALL
DIGIT AL EFFECT
101
≤Hall1
You can also enter the Reverb Type function by pressing and holding the
[REVERB] button until the arrow jumps to the “DIGITAL EFFECT” position and the current reverb type name appears in the display.
Exit…………………………………………………………………………………………………………………………………………………………………..
3
Press the [VOICE] button or select a different function to exit from the
DIGITAL EFFECT function.
Digital Effects
• See page 79 for a complete
listing of the reverb types.
• The reverb type can be reset to
its default by simultaneously
pressing the [–/NO] and [+/YES]
buttons.
• You can return to the previous
display, “Reverbm”, by pressing
the cursor [<] button, and
choose the CHORUS or DSP
effect.
• The Reverb type will change
automatically whenever a different style is selected.
• If you want to disable the reverb
effect for all the data excepting
VOICE function voice, select
OFF in the Type selection.
The Reverb Types
01~04 Hall 1~4
05~08 Room 1~4
09, 10 Stage 1, 2
11, 12 Plate 1, 2
13 OFF
Setting the Reverb Return Level
The reverb return level determines the amount of “wet” (affected) signals output to the amplifier.
Select the Reverb Return Level Function…………………………………………..
1
Press the [FUNCTION] button to the left of the display as many times
as necessary until the arrowhead in the display appears next to “DIGITAL
EFFECT” in the function list to the left of the display, and use the cursor
[▲] and [▼] buttons to select the Reverb Return Level function.
164
Set the Reverb Return Level……………………………………………………………………………………
2
RevRtnLv
Use the [–/NO] and [+/YES] buttons, the number buttons or the data dial
to set the desired reverb return level. The range is from “00” to “127”.
Exit…………………………………………………………………………………………………………………………………………………………………..
3
Press the [VOICE] button or select a different function to exit from the
DIGITAL EFFECT function.
• See page 78 for more details on
the Digital Effects.
• The reverb return level designated here affects the entire
setting, while the reverb send
level can be applied to the voice
selected via the VOICE function,
the split voice and the dual voice
separately via the “RevLevel” in
the OVERALL function group, the
“S.RevLvl” in the SPLIT VOICE
function and the “D.RevLvl” in the
DUAL VOICE function (see
pages 68, 16 and 19).
• The default reverb return level =
64 can be recalled instantly by
pressing both the [–/NO] and [+/
YES] buttons simultaneously.
○○○○○○○○○○○○○○○○○○○○○○○○○○○○○○○○○○○○○○○○○○○○○○○○○○○○○○○○○○○○○○○○○
25
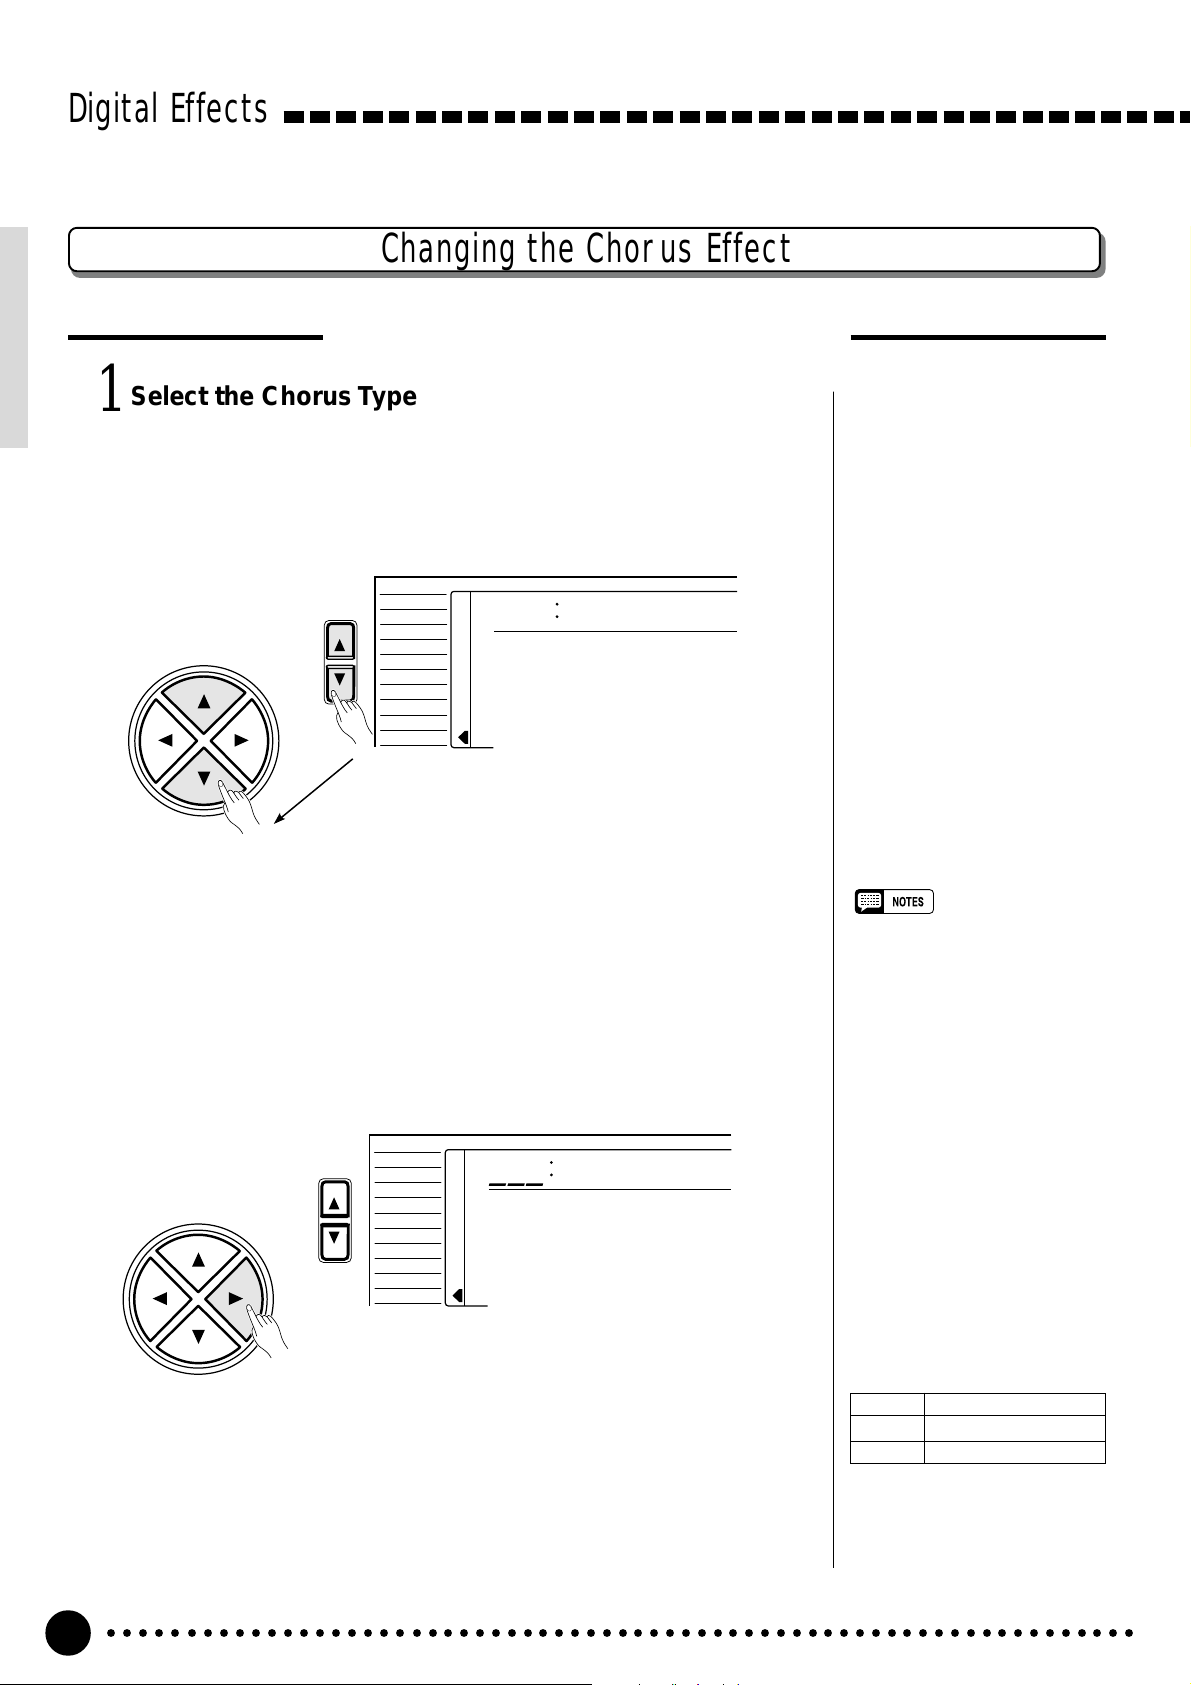
Digital Effects
Select the Chorus Type Function…………………………………………………………………….
1
Press the [FUNCTION] button to the left of the display as many times
as necessary until the arrowhead in the display appears next to “DIGITAL
EFFECT” in the function list to the left of the display, and use the cursor
[▲] and [▼] buttons to select the Chorus Type function, “Chorus m”.
CURSOR
FUNCTION
Changing the Chorus Effect
Selecting the Chorus Effect Type
VOICE
STYLE
SONG
REGIST MEMORY
MULTI PAD
DUAL VOICE
SPLIT VOICE
HARM
/
ECHO
OVERALL
DIGITAL EFFECT
Chorus ≥
Select the Chorus Type……………………………………………………………………………………………………
2
Use the cursor [>] button to enter the Chorus Type function and then
select one of the 10 chorus types using the [–/NO] and [+/YES] buttons, the
number buttons or the data dial. The name of the selected chorus type appears on the top line of the display.
VOICE
CURSOR
FUNCTION
STYLE
SONG
REGIST MEMORY
MULTI PAD
DUAL VOICE
SPLIT VOICE
/
ECHO
HARM
OVERALL
DIGITAL EFFECT
101
≤Chorus1
You can also enter the Chorus Type function by pressing and holding the
[CHORUS] button until the arrow jumps to the “DIGITAL EFFECT” position and the current chorus type name appears in the display.
• See page 79 for a complete
listing of the chorus types.
• The chorus type will change
automatically whenever a different style is selected.
• You can return to the previous
display, “Chorusm”, by pressing
the cursor [<] button, and
choose the REVERB or DSP
effect.
• The chorus type can be reset to
its default by simultaneously
pressing the [–/NO] and [+/YES]
buttons.
• If you want to disable the chorus
effect for all the data excepting
VOICE function voice, select
OFF in the Type selection.
The Chorus Types
01~05 Chorus 1~5
06~09 Flanger 1~4
10 OFF
○○○○○○○○○○○○○○○○○○○○○○○○○○○○○○○○○○○○○○○○○○○○○○○○○○○○○○○○○○○○○○○○○
26
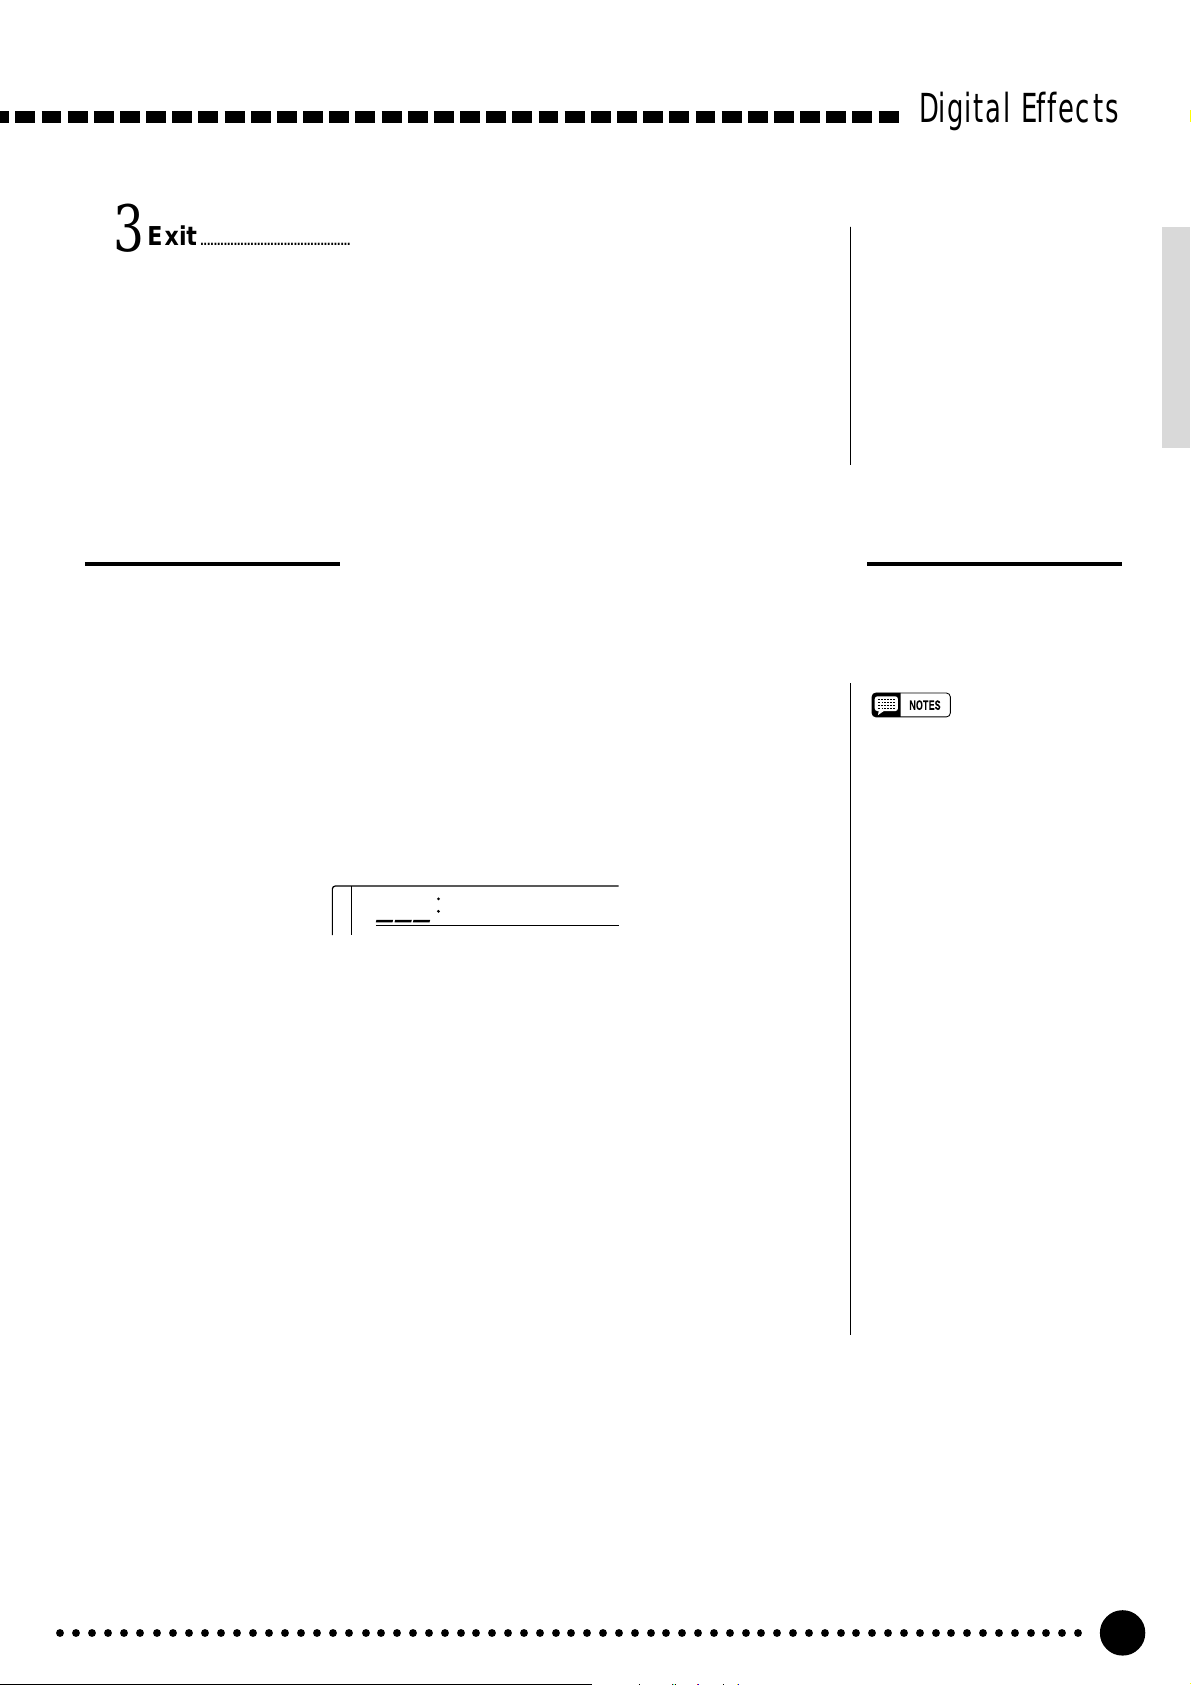
Exit…………………………………………………………………………………………………………………………………………………………………..
3
Press the [VOICE] button or select a different function to exit from the
DIGITAL EFFECT function.
Setting the Chorus Return Level
The chorus return level determines the amount of “wet” (affected) signals output to the amplifier.
Select the Chorus Return Level Function………………………………………….
1
Digital Effects
Press the [FUNCTION] button to the left of the display as many times
as necessary until the arrowhead in the display appears next to “DIGITAL
EFFECT” in the function list to the left of the display, and use the cursor
[▲] and [▼] buttons to select the Chorus Return Level function.
164
Set the Chorus Return Level…………………………………………………………………………………..
2
Use the [–/NO] and [+/YES] buttons, the number buttons or the data dial
to set the desired chorus return level. The range is from “00” to “127”.
Exit…………………………………………………………………………………………………………………………………………………………………..
3
Press the [VOICE] button or select a different function to exit from the
DIGITAL EFFECT function.
ChoRtnLv
• See page 78 for more details on
the Digital Effects.
• The chorus return level desig-
nated here affects the entire
setting, while the chorus send
level can be applied to the voice
selected via the VOICE function,
the split voice and the dual voice
separately via the “ChoLevel” in
the OVERALL function group, the
“S.ChoLvl” in the SPLIT VOICE
function and the “D.ChoLvl” in
the DUAL VOICE function (see
pages 68, 16 and 19).
• The default chorus return level =
64 can be recalled instantly by
pressing both the [–/NO] and [+/
YES] buttons simultaneously.
○○○○○○○○○○○○○○○○○○○○○○○○○○○○○○○○○○○○○○○○○○○○○○○○○○○○○○○○○○○○○○○○○
27
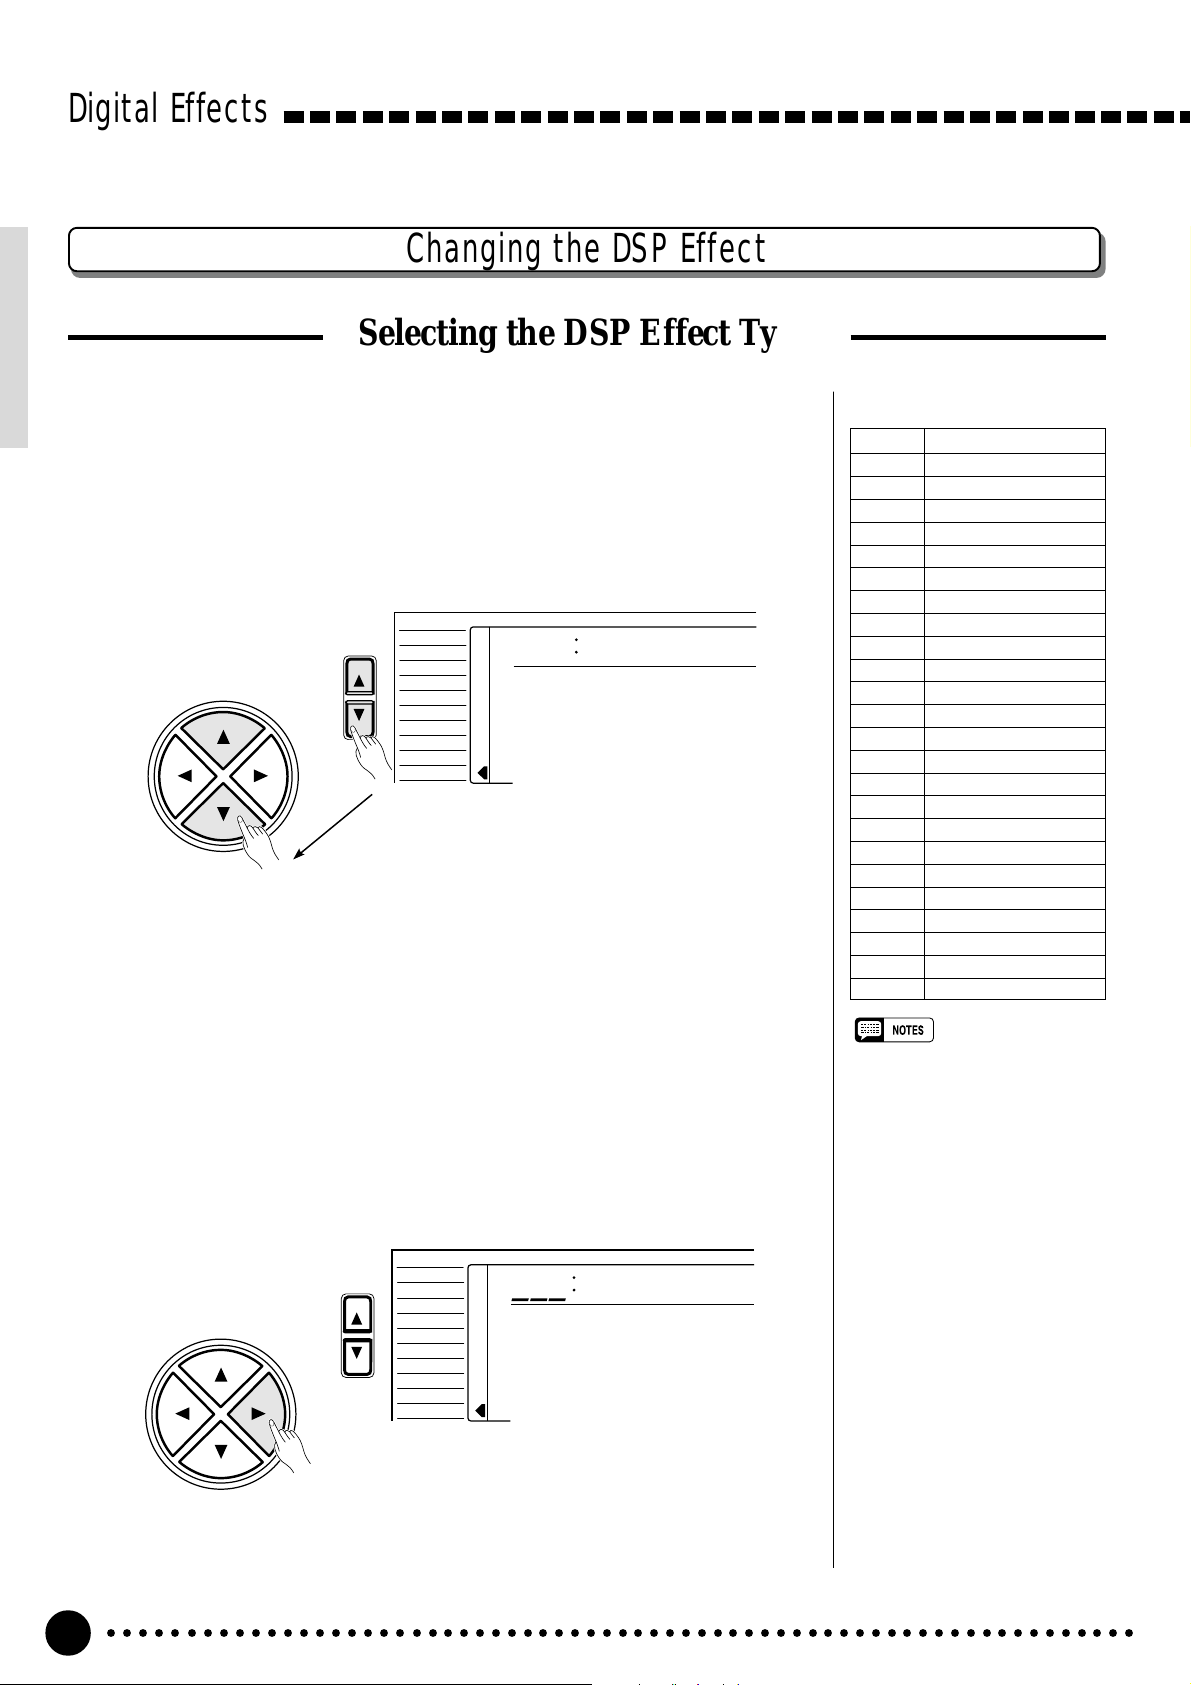
Digital Effects
Changing the DSP Effect
Selecting the DSP Effect Type
Select the DSP Type Function………………………………………………………………………………
1
Press the [FUNCTION] button to the left of the display as many times
as necessary until the arrowhead in the display appears next to “DIGITAL
EFFECT” in the function list to the left of the display, and use the cursor
[▲] and [▼] buttons to select the DSP Type function, “Dsp m”.
VOICE
CURSOR
FUNCTION
STYLE
SONG
REGIST MEMORY
MULTI PAD
DUAL VOICE
SPLIT VOICE
HARM
/
ECHO
OVERALL
DIGITAL EFFECT
Dsp ≥
The DSP Types
01~04 Hall 1~4
05~08 Room 1~4
09, 10 Stage 1, 2
11, 12 Plate 1, 2
13, 14 Early Reflection 1, 2
15 Gate Reverb
16 Reverse Gate
17~21 Chorus 1~5
22~25 Flanger 1~4
26 Symphonic
27 Phaser
28~32 Rotary Speaker 1~5
33, 34 Tremolo 1, 2
35 Guitar Tremolo
36 Auto Pan
37 Auto Wah
38 Delay L, C, R
39 Delay L, R
40 Echo
41 Cross Delay
42 Distortion Hard
43 Distortion Soft
44 EQ Disco
45 EQ Telephone
46 OFF
• See page 79 for a complete
Select the DSP Type………………………………………………………………………………………………………………
2
Use the cursor [>] button to enter theDSP Type function and then select
one of the 46 DSP types using the [–/NO] and [+/YES] buttons, the number
buttons or the data dial. The name of the selected DSP type appears on the
top line of the display.
VOICE
CURSOR
○○○○○○○○○○○○○○○○○○○○○○○○○○○○○○○○○○○○○○○○○○○○○○○○○○○○○○○○○○○○○○○○○
28
FUNCTION
STYLE
SONG
REGIST MEMORY
MULTI PAD
DUAL VOICE
SPLIT VOICE
/
ECHO
HARM
OVERALL
DIGITAL EFFECT
110
≤Stage2
listing of the DSP types.
• The DSP type can be reset to its
default by simultaneously pressing the [–/NO] and [+/YES] buttons.
• If the Voice Set function is ON
(page 69) the DSP type will
change automatically whenever a
different voice is selected via the
VOICE function.
• When the Rotary Speaker 1~5 is
selected, the [DSP VARIATION]
button (ON/OFF) will switch the
speed of the rotating speaker
between fast (ON) and slow
(OFF).
• You can return to the previous
display, “Dspm”, by pressing the
cursor [<] button, and choose
the REVERB or CHORUS effect.
• If you want to disable the DSP
effect for all the data excepting
VOICE function voice, select
OFF in the Type selection.
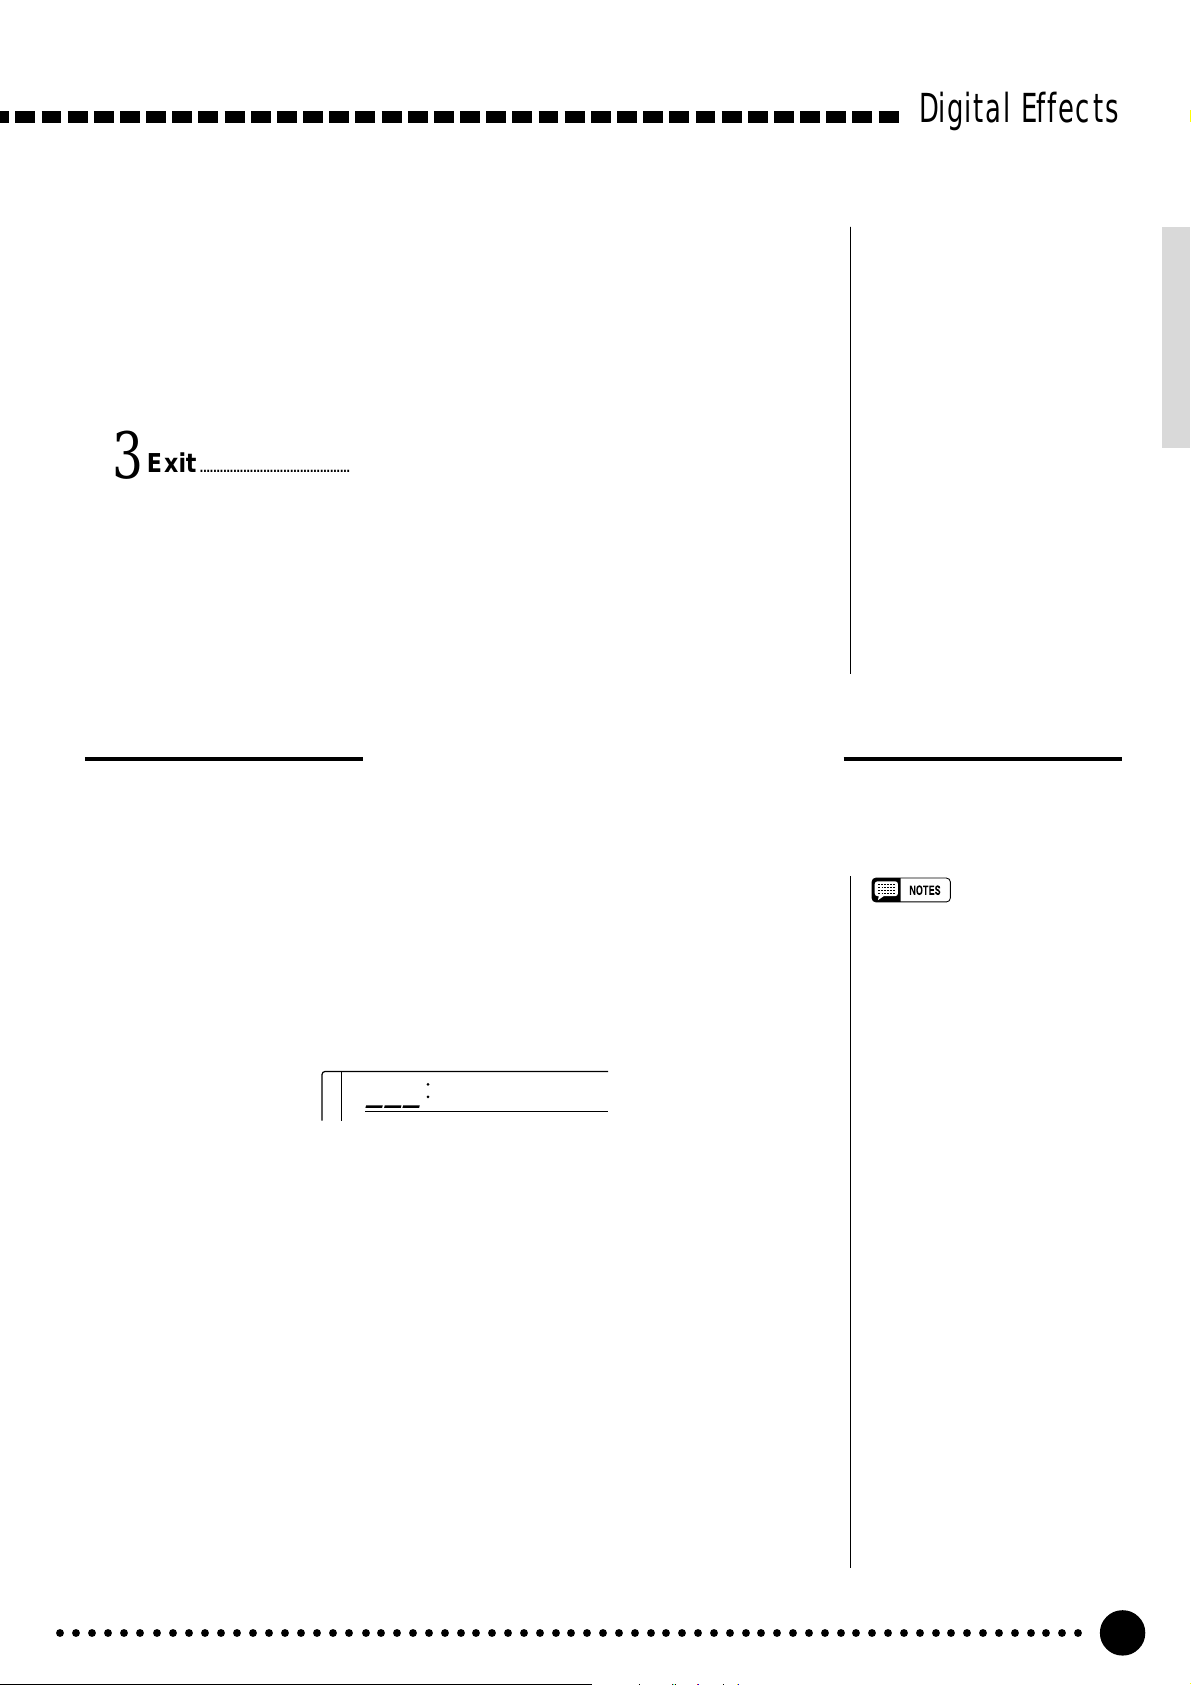
Each DSP effect has its own variation. Press the [DSP VARIATION]
button to ON to activate each variation.
You can also enter the DSP Type function by pressing and holding the
[DSP] button until the arrow jumps to the “DIGITAL EFFECT” position
and the current DSP type name appears in the display.
Exit…………………………………………………………………………………………………………………………………………………………………..
3
Press the [VOICE] button or select a different function to exit from the
DIGITAL EFFECT function.
Digital Effects
Setting the DSP Return Level
The DSP return level determines the amount of “wet” (affected) signals output to the amplifier.
Select the DSP Return Level Function……………………………………………………
1
Press the [FUNCTION] button to the left of the display as many times
as necessary until the arrowhead in the display appears next to “DIGITAL
EFFECT” in the function list to the left of the display, and use the cursor
[▲] and [▼] buttons to select the DSP Return Level function.
164
Set the DSP Return Level…………………………………………………………………………………………….
2
Use the [–/NO] and [+/YES] buttons, the number buttons or the data dial
to set the desired DSP return level. The range is from “00” to “127”. The
DSP send level can be adjusted via the “DspLevel” function in the OVERALL function group-see page 68.
DspRtnLv
• See page 78 for more details on
the Digital Effects.
• The DSP return level can not be
changed for the insertion DSP
types (see page 78). In this case,
“- — -” will appear on the display.
• The default DSP return level = 64
can be recalled instantly by
pressing both the [–/NO] and [+/
YES] buttons simultaneously.
Exit…………………………………………………………………………………………………………………………………………………………………..
3
Press the [VOICE] button or select a different function to exit from the
DIGITAL EFFECT function.
○○○○○○○○○○○○○○○○○○○○○○○○○○○○○○○○○○○○○○○○○○○○○○○○○○○○○○○○○○○○○○○○○
29
Loading…